How to use the address book
Remember when we used address books to store phone numbers? Our team has adapted this once-familiar tool for bot users. Now you can save crypto wallets, bank cards, and UID (the user's internal address in the bot) in your personal address book directly in the bot.
The address book in 001kBOT saves you time and simplifies sending funds to already saved "contacts". You no longer need to enter details for every transaction – just add entries to the address book and send payments in a couple of clicks.
Note: To use the address book, you must enable 2FA. Read more about 2FA in our guide
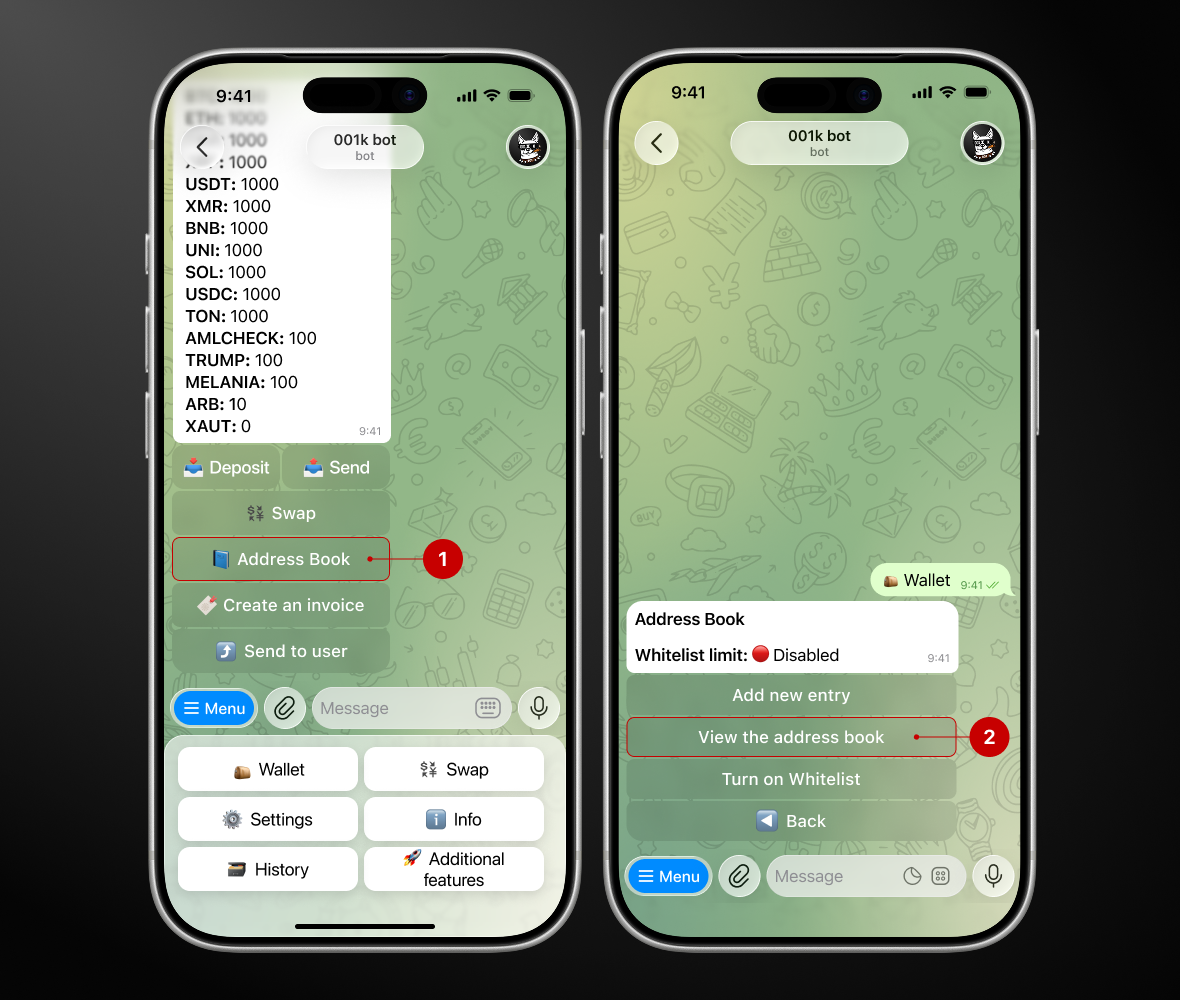
Step 1. Open the bot → Wallet → Address Book
.png)
Step 2. Check out the available features
Three buttons will appear in front of you:
📍 Adding a new entry — a cryptocurrency wallet, bank card, or UID.
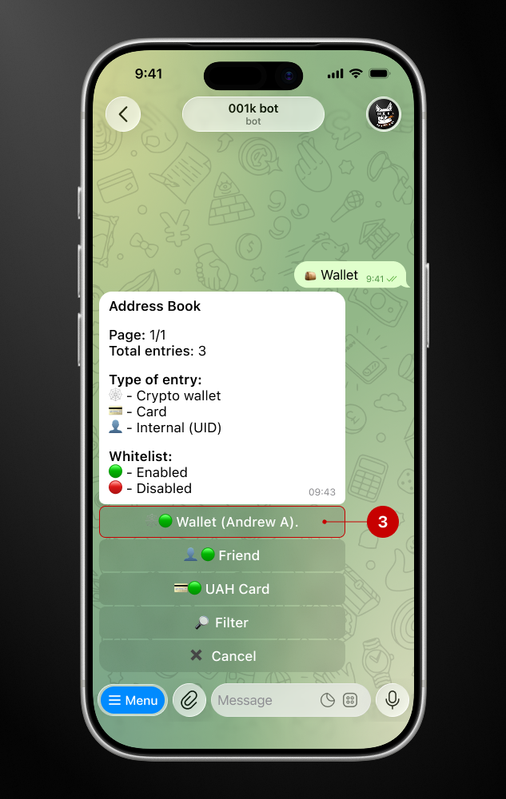
📍 View address book — view and delete previously saved entries.
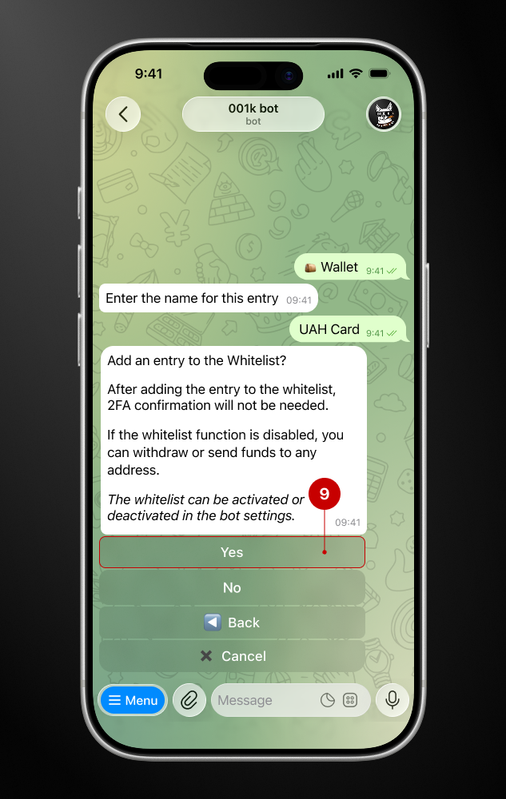
📍 Enable/disable whitelist — this is an additional layer of security.
If the whitelist feature is disabled, you can send funds to any address.
If whitelist is enabled, you can only send funds to addresses saved in your address book with the whitelist tag.
Now, let's see how to add entry.
👝 Cryptocurrency wallet
Step 3.1.1. Click on the “Add a new entry” → “Crypto wallet”
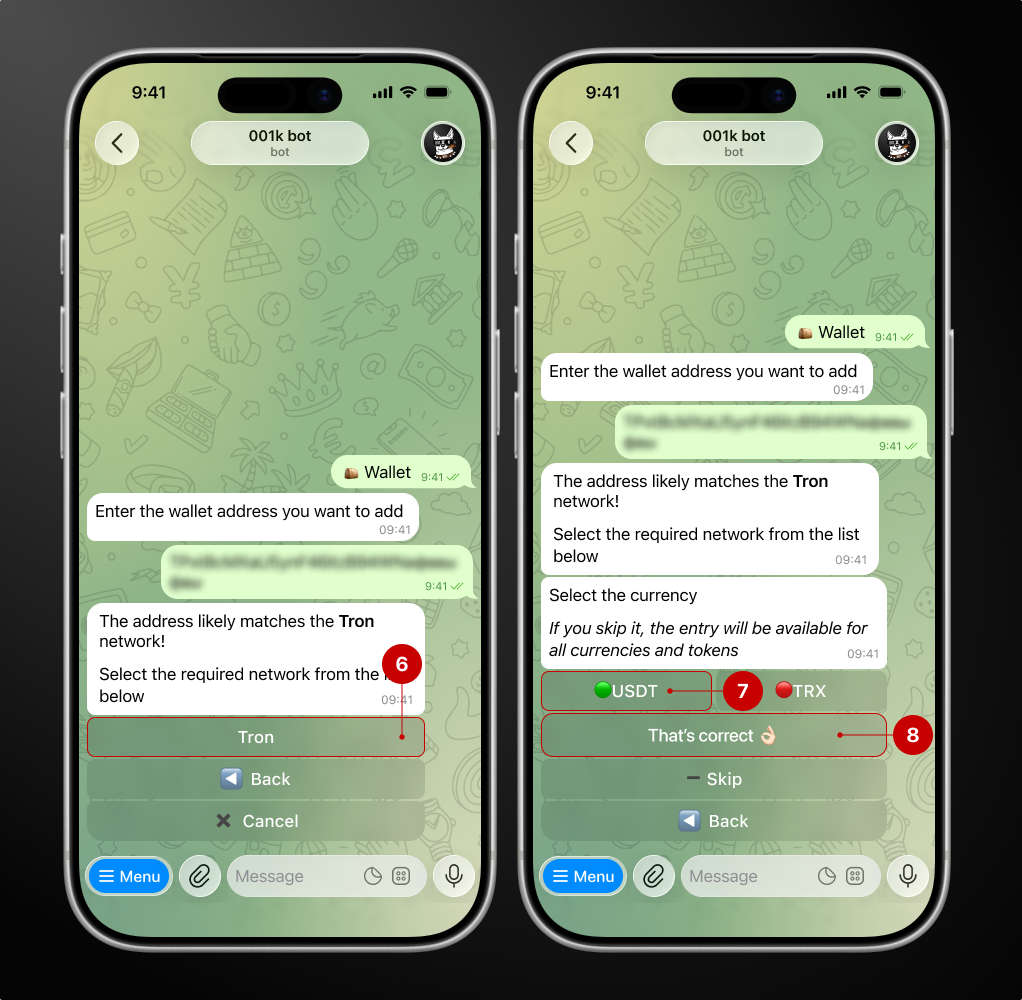
Then enter manually (5) or paste the previously copied address.
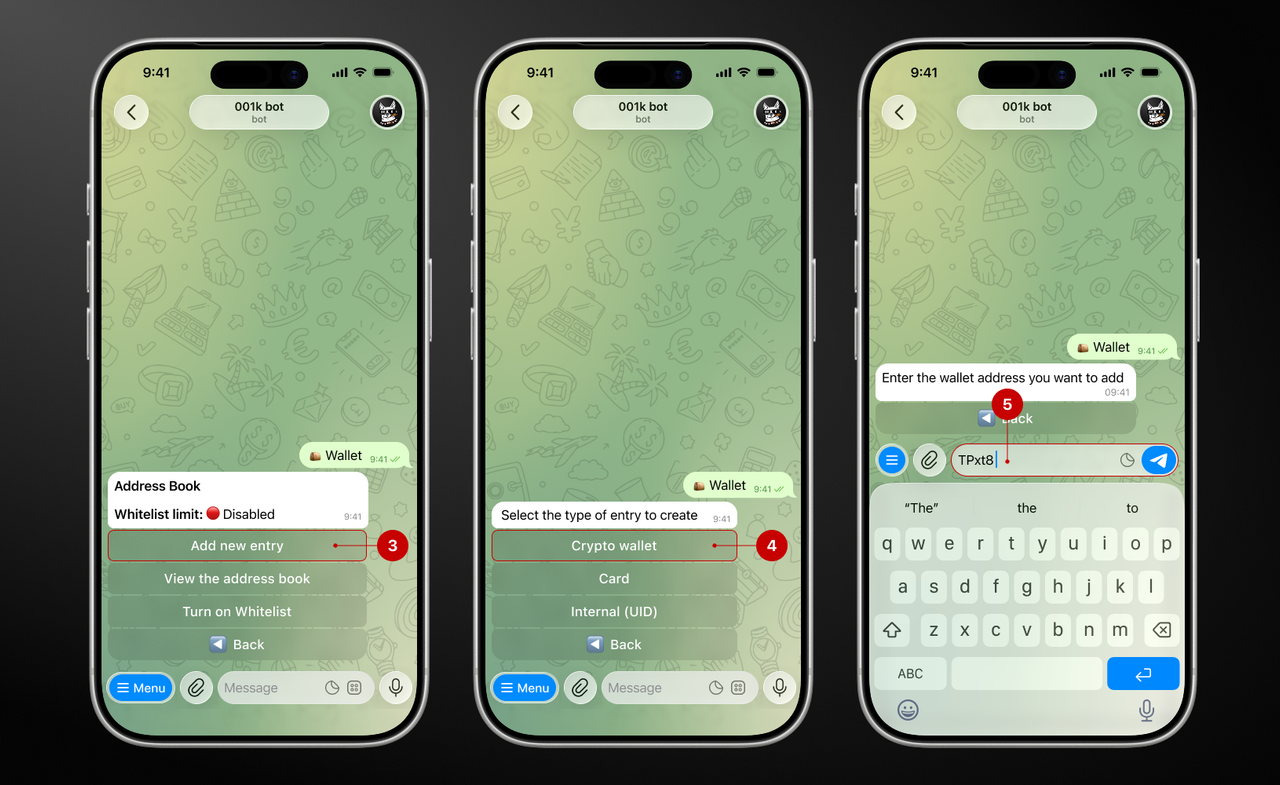
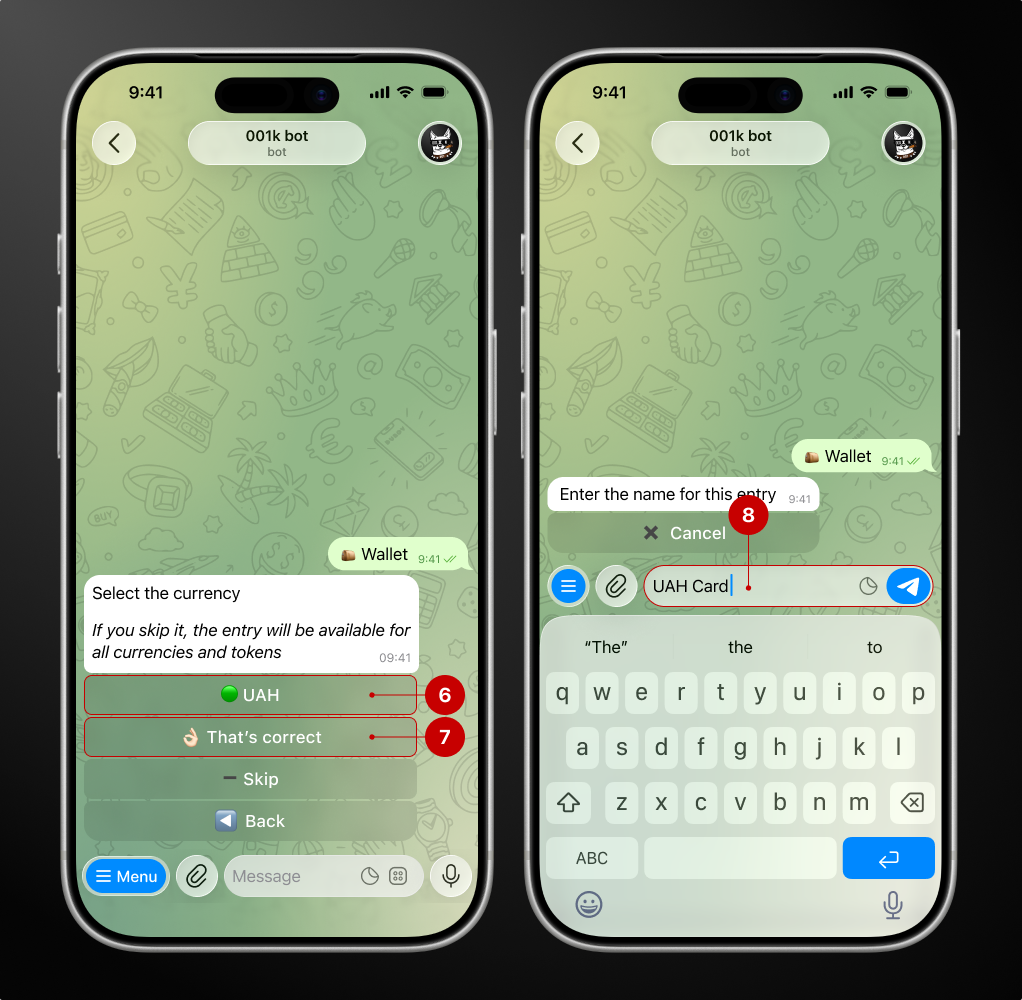
Step 3.1.2. Select the network and currency
There are three options:
1) Select only one currency that you usually withdraw to this wallet;
2) Select two or more currencies available on this network (only two are available on the network we selected, but others may have more);
3) Skip selection — the bot will automatically add all available tokens in the network.
We want to keep one currency, so select USDT (7) and click “That's correct” (8).
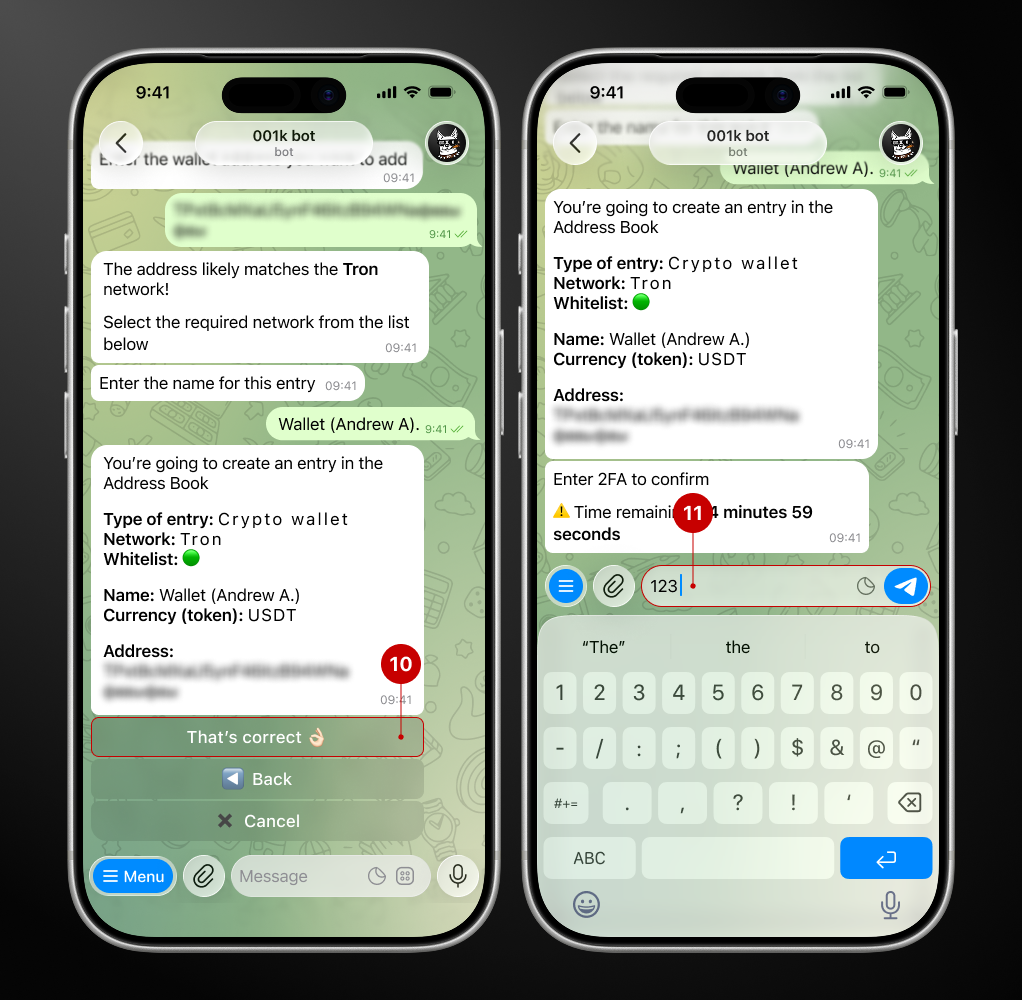
Step 3.1.3. Enter a name for the entry
For example, you can write the name of the currency, network, or other wallet designation that you can easily remember.
Step 3.1.4. Add to the Whitelist (optional)
At this stage, the bot will ask for your approval to add the address to its whitelist. In our case, we want to add the entry to the whitelist, so we click on the “Yes” button (9).
.png)
Step 3.1.5. Confirm adding the entry
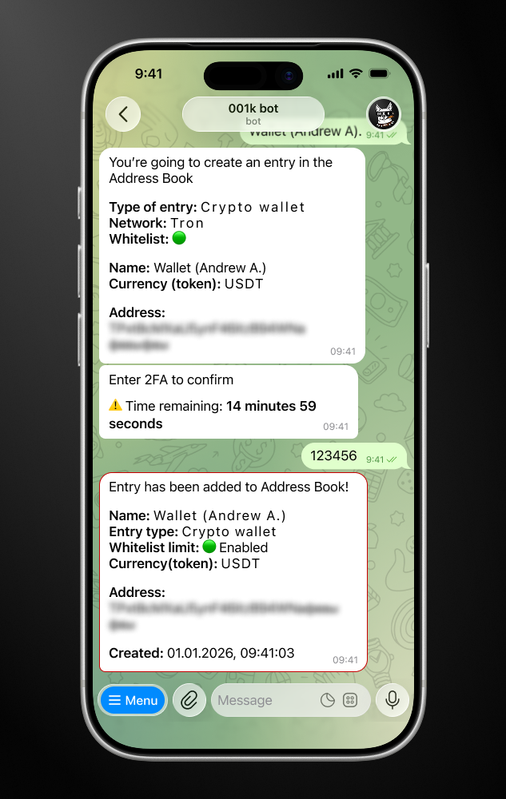
The last step is to check the details. If everything is correct and you have not found any errors, press “That's correct” (10).
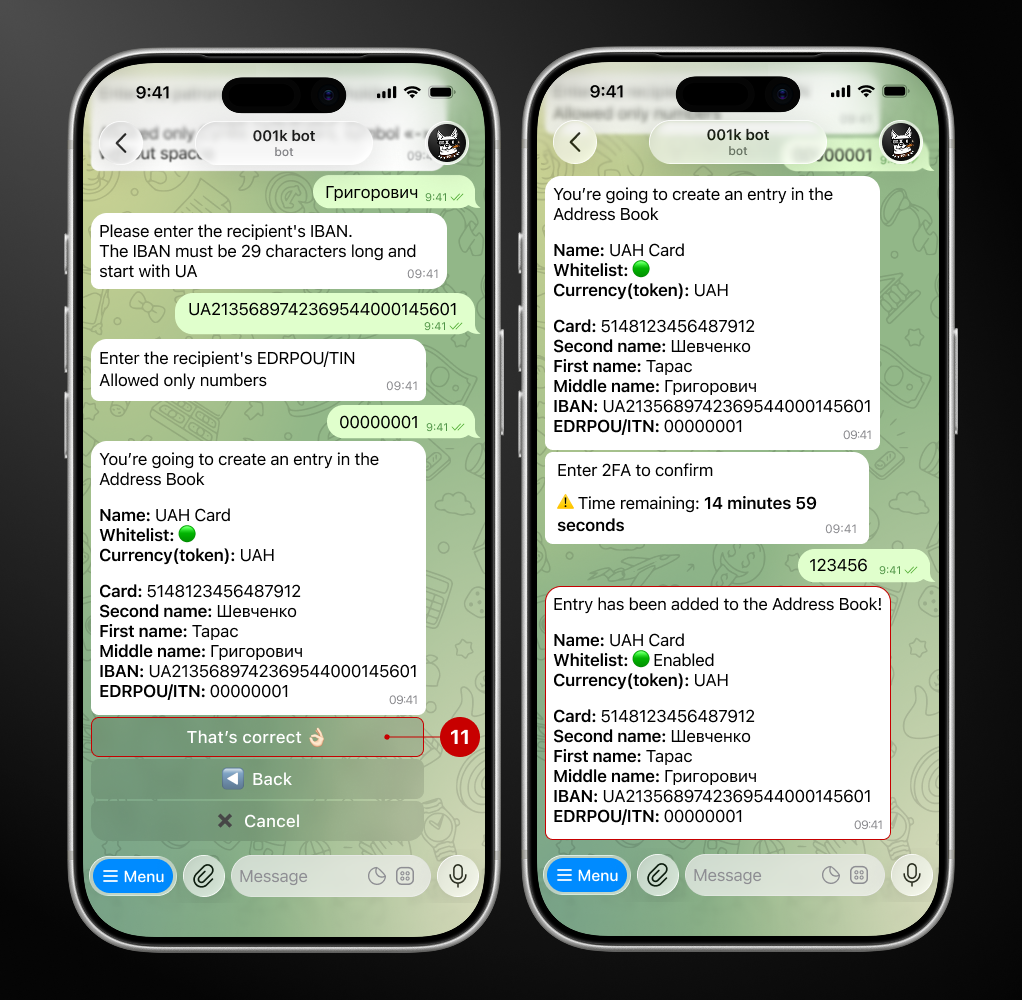
Because 2FA is enabled, confirm the action with a code from your authenticator app (11).
Done! Here's your first saved “contact.”
👤 Internal address (UID)
Step 3.2.1. Click on the “Add new entry” → “Internal (UID)”
Then name the entry (5).
.png)
Step 3.2.2. Adding to the Whitelist (optional)

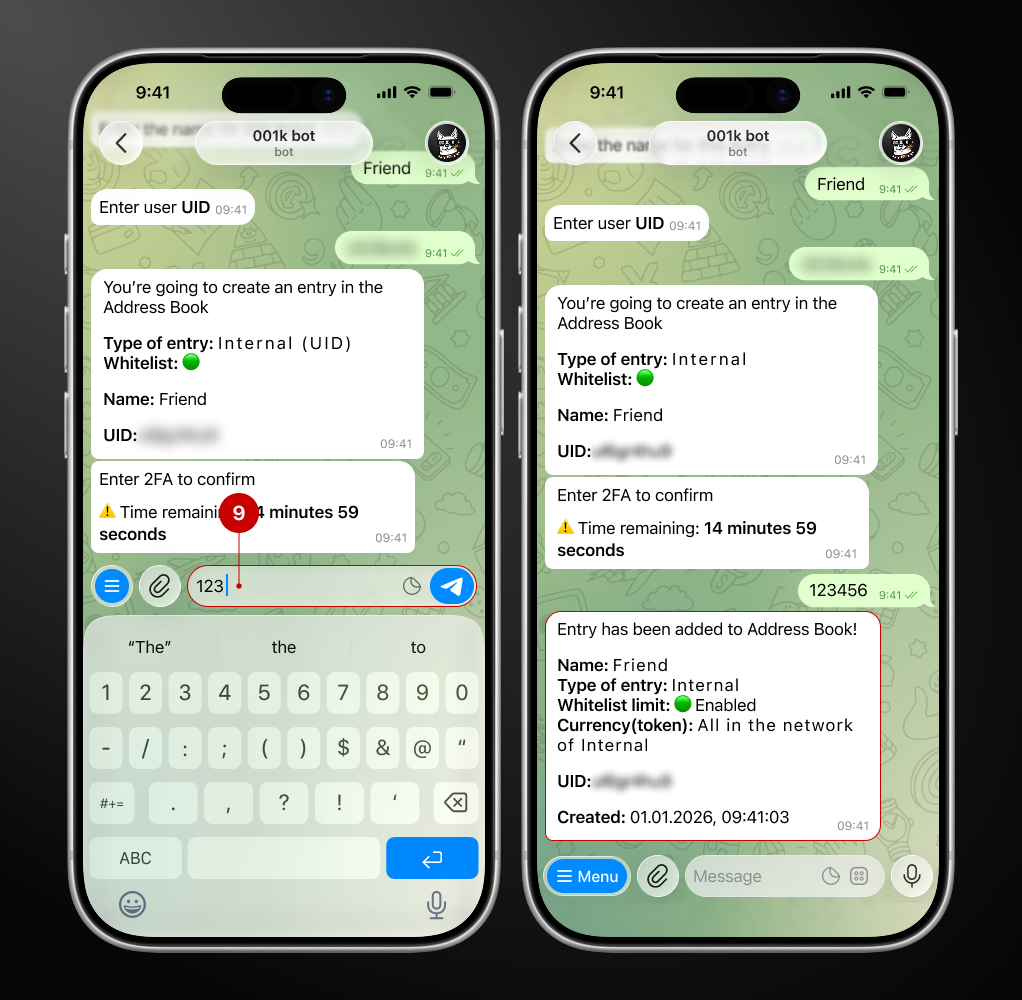
Step 3.2.3. Enter the UID of the user you want to add and confirm
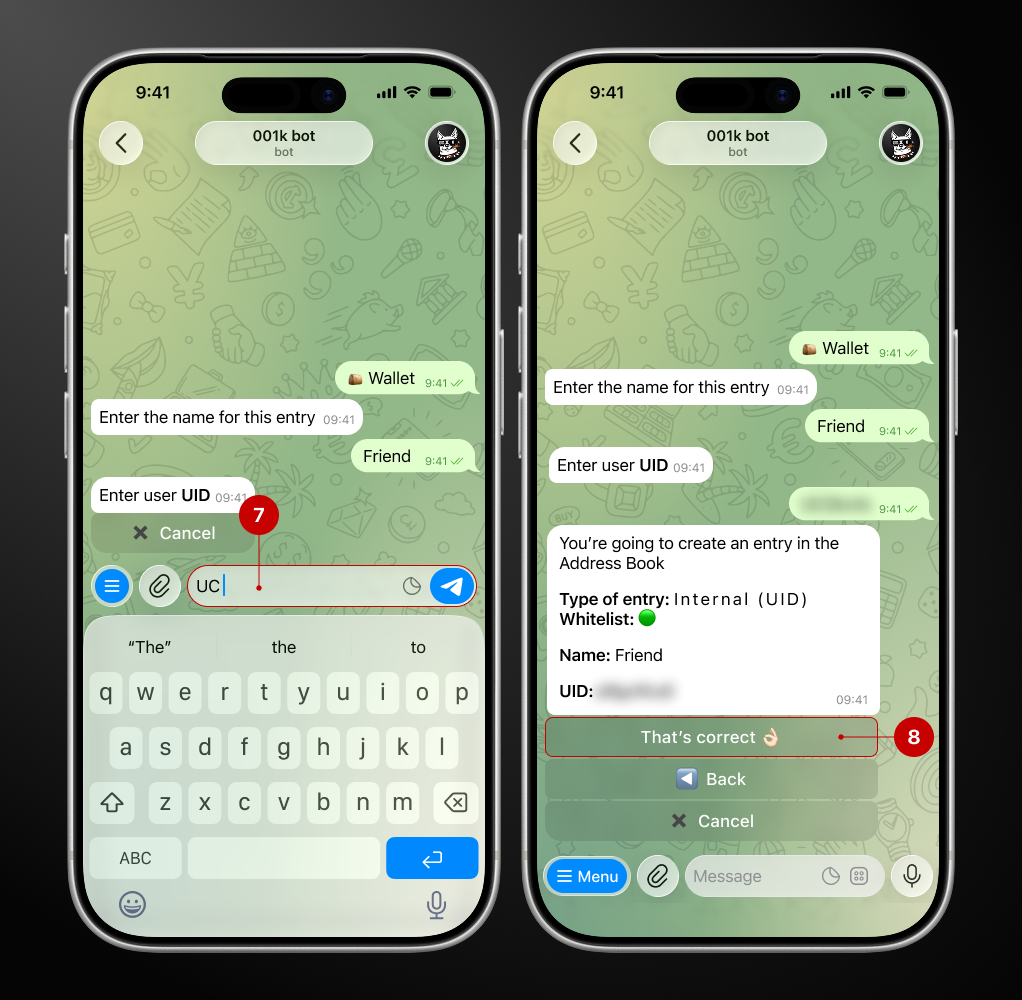
Check the data and confirm the addition of the entry using the code from the authenticator app (9).
💳 Bank card
Step 3.3.1. Click on the “Add a new entry” → “Bank card”
.png)
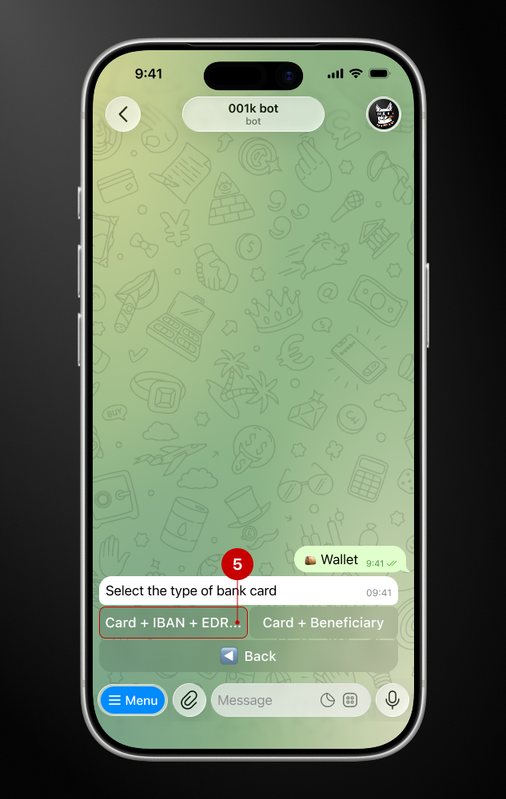
Step 3.3.2 Select the type of the card
Step 3.3.3 Select the currency and name the entry
Step 3.3.4 Adding to the Whitelist (optional)
Step 3.3.5. Enter the card number
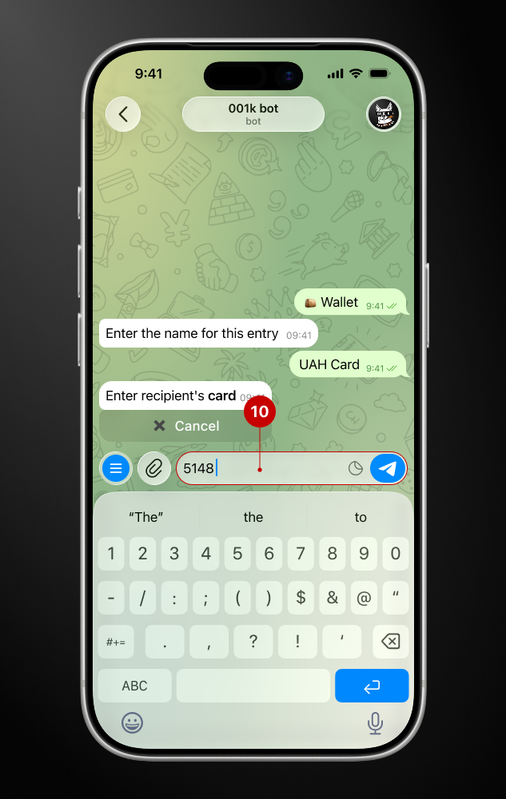
At this stage, you will also need: the cardholder's full name, IBAN, and EDRPOU/IPN. The data is requested in steps. Follow the bot's instructions and carefully check the information you have entered.
Step 3.3.6. Confirm adding an entry
🗑 How to delete entry from the address book?
Step 1. Open “Address Book” → “View Address Book”
Step 2. Select the entry type you want to delete
Step 3. Click “Delete” and confirm the action by clicking “That's correct”
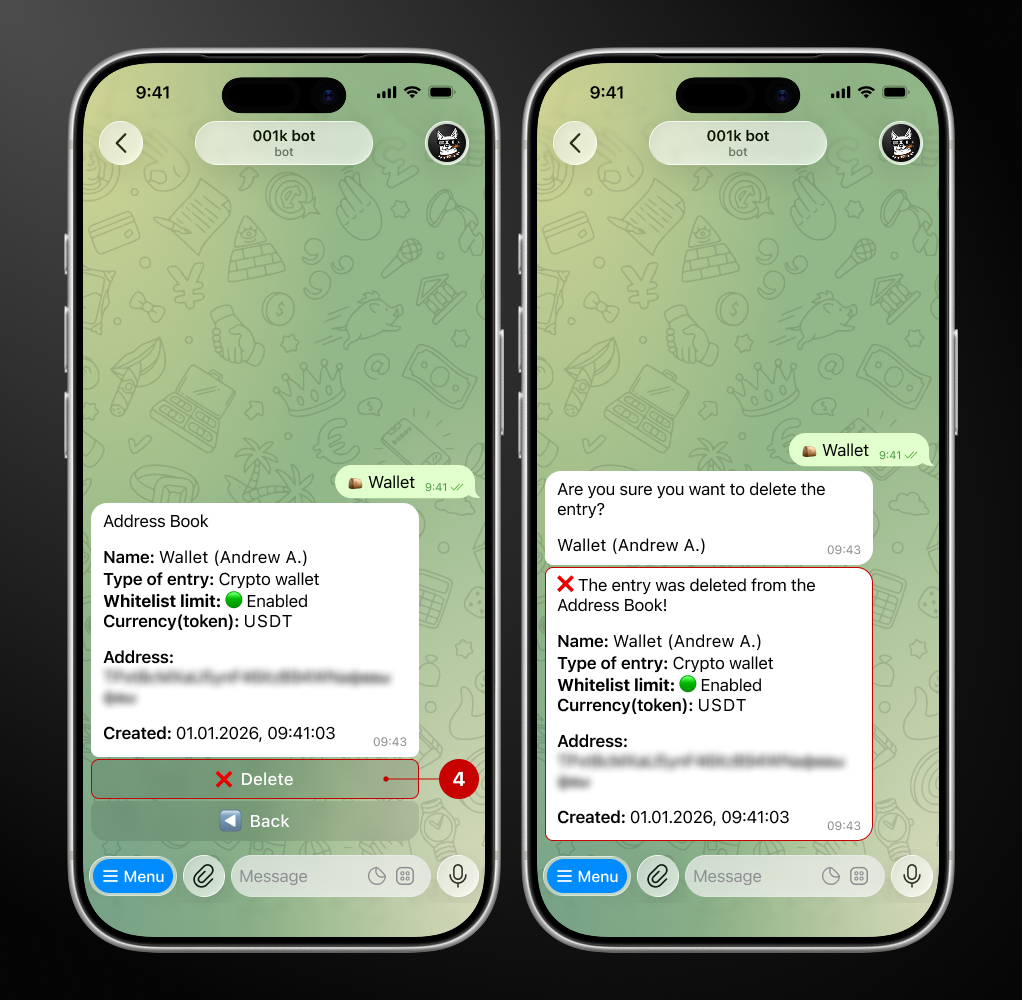
Done! The entry has been successfully deleted from the address book🙂