Modular-ShopBot Guide
ModularBotThis guide aims to inform our users on how to configure and manage everything necessary to use the ModularBot Shopbot management system.
Index
• Catalog
• Rewards
• Coupons
• Settings
Catalog
A shop's inevitable starting point is the creation and management of its own products. In fact, on this page it is possible to create, search, modify and delete the products we want to sell with our shopbot.
Product creation

The catalog page presents a table that allows you to carry out product management operations
So let's start from creation:

Pressing the "Add" button on the top left of the table will open the section where you can add the product properties to be created.
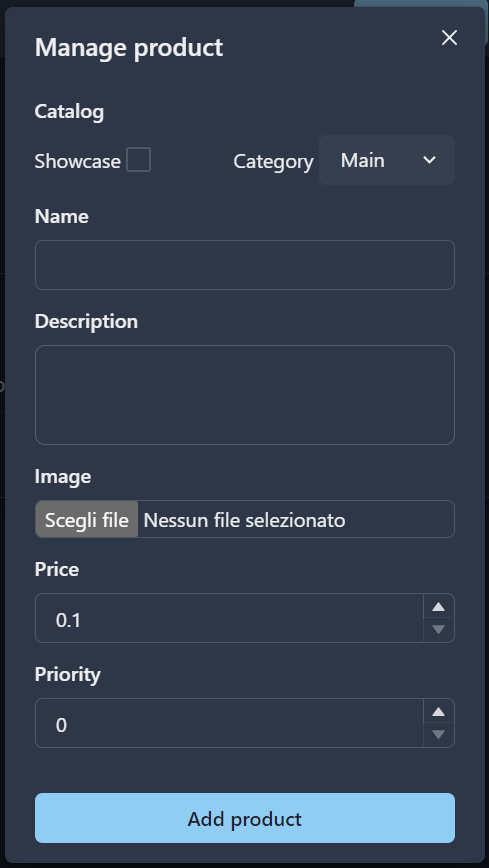
In the first part we can decide whether the product will be added to the "Showcase" or not. The Showcase is a special page of our shop that will only be present if at least one product belongs to it. The Showcase, when present, is the first page of the catalog that will appear to customers when they open the store.
Together with the Showcase we can choose which category our product will belong to.
Initially there is only one standard category, which can be modified on the appropriate page.
Subsequently name, description, price and priority of our product must be entered. Priority is a value that indicates the importance of a product compared to others; the higher it is, the sooner that product will appear on its catalog page.
Finally it will be necessary to add a preview image representing our product. This image will be displayed for our customers in the store catalog.
The chosen image must have a size no greater than 10 MB and must have a format between the following: "jpeg", "jpg", "png". Furthermore, the sum of pixels in height and width must not exceed 10000.
Once we press "Add product", we will be redirected to the specific product page, where we can set its Reward, i.e. what the customer will receive after purchase.
Product management
After creating a product, we will have the possibility to modify its properties and/or delete it.

By pressing on the pencil icon, we can change the properties of the product.
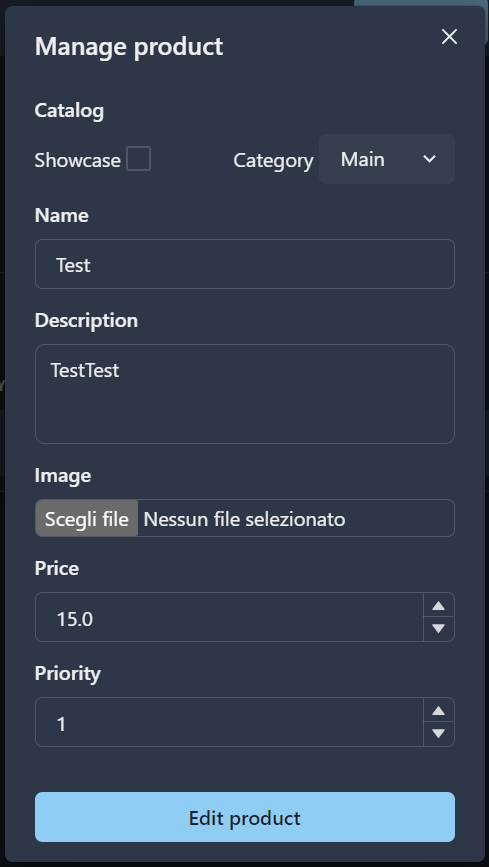
ATTENTION: if you change the price of a product and a customer has already added it to the cart, the amount to be paid will be the one before the change.
Products removal
To delete a product, press the trash can icon and confirm your choice:
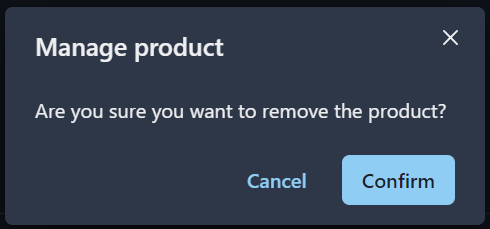
Before doing so, however, it is advisable to make it Invisible and wait at least a day.
To make it Invisible, simply press on the pencil icon and select the "Invisible" category from those available.

In fact, an Invisible product will not appear in the customer catalog and consequently cannot be added to the cart.
In any case, if we try to delete a product present in at least one of the customers' carts, the management system will give an error, therefore preventing us from removing it.

Product details
By pressing the info icon we can view the description and image of the added product:

Finally, by pressing on the trophy icon we will be redirected to the product reward page.

Rewards
The Reward of a product is what we actually want to sell to customers, such as a photo or video, a secret code, or access to a Telegram channel/group.
The customer will receive the reward after completing the purchase of the related product.
There are three types of Rewards:
ATTENTION: it is not recommended to change the type of reward and in general to modify its content. Instead, we recommend creating a new product to which you can assign the new reward, and then deleting the old one following this procedure.
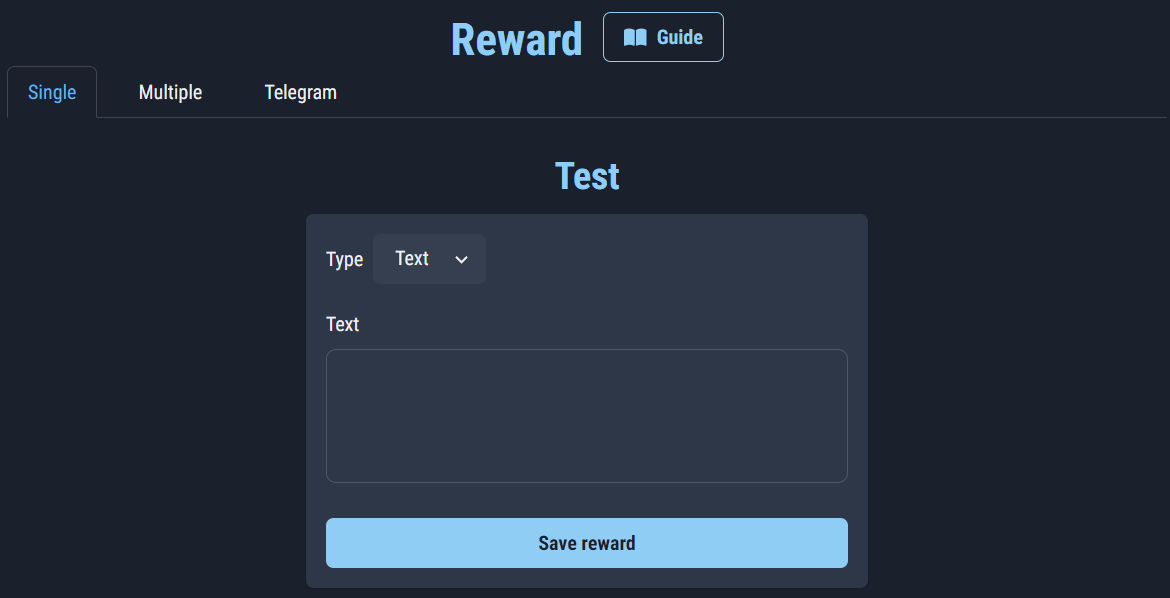
Single
The Single Reward consists of adding a text and/or media via the management system which will be automatically sent to the customer once the purchase is completed.
It is further divided into four options
- Text: a message that will be delivered to the customer.
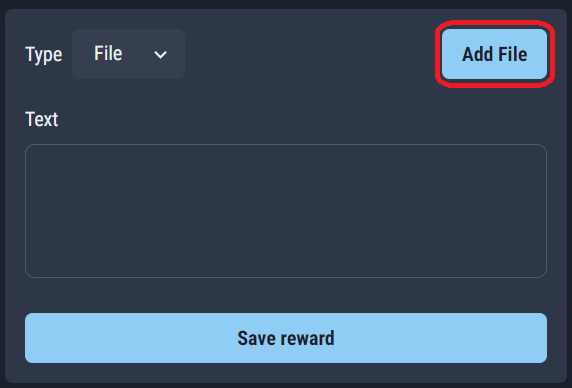
- Image: it is possible to insert an image and/or a caption (text) following these instructions: the chosen image must have a size no greater than 10 MB and must have a format between the following: "jpeg", "jpg" , "png". Furthermore, the sum of pixels in height and width must not exceed 10000.
If the image you want to send does not fit the specifications above, you can send it as a File - File: any file type
- Video: any type of video
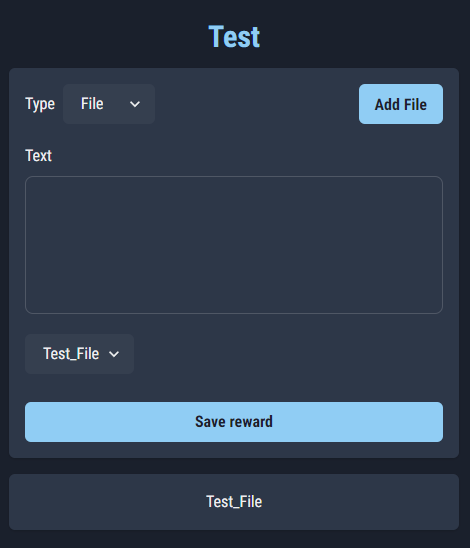
As regards File and Video cases, it will be necessary to send such media to a specific section of the bot accessible by pressing the button indicated below:
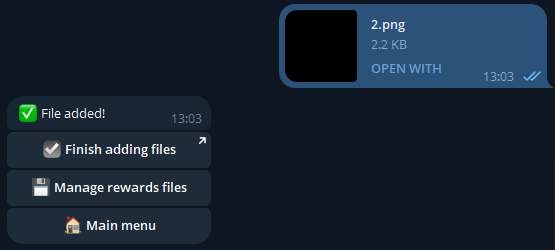
Once you arrive at the bot you will need to press "Start" and follow the procedure. After sending the file, simply press "Finish adding file" to return to the management system and verify that the file has been associated with our reward:
Multiple
Multiple Reward can be used to sell groups of unique codes associated with something, such as a gift card or discount code.
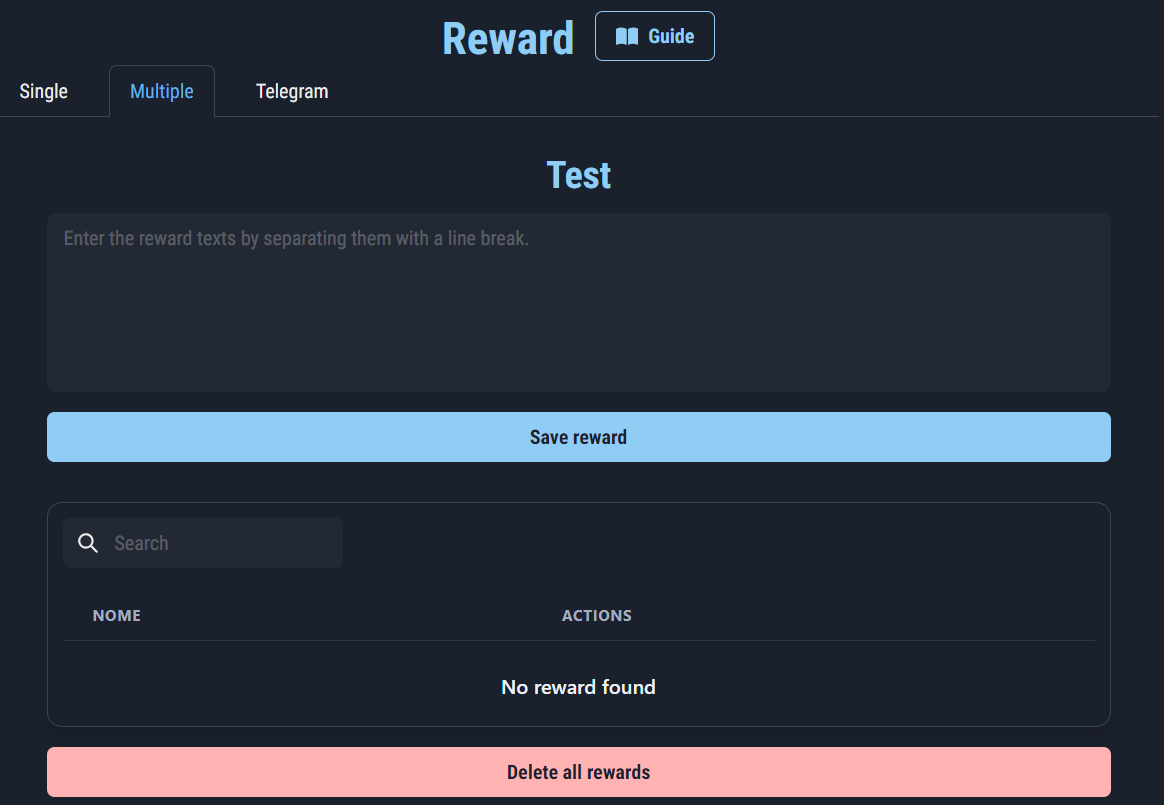
To add a list of codes, simply paste it into the appropriate area, separating each of them with a newline.
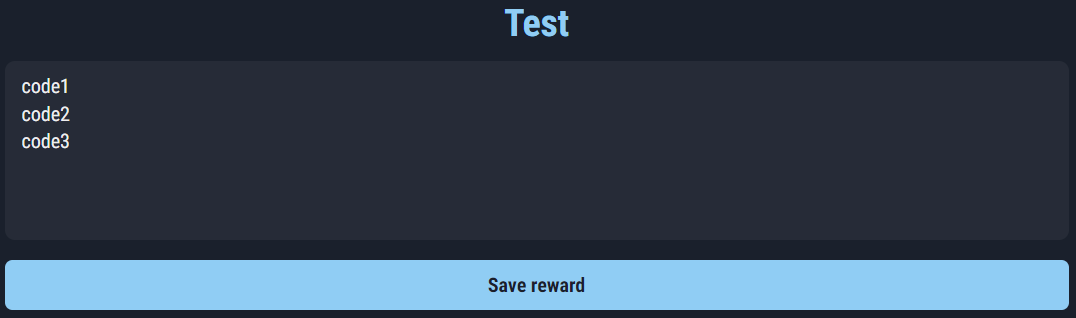
Once you press "Save reward", we will be able to verify the correct insertion using the table below:
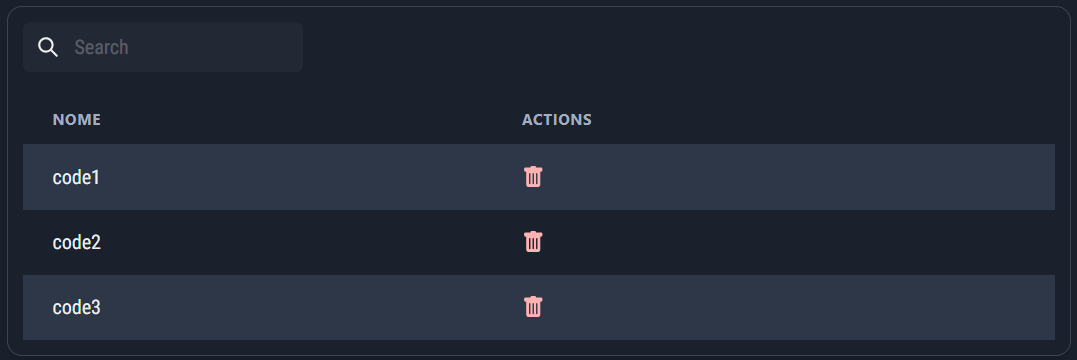
To add new codes, simply repeat the procedure just described.

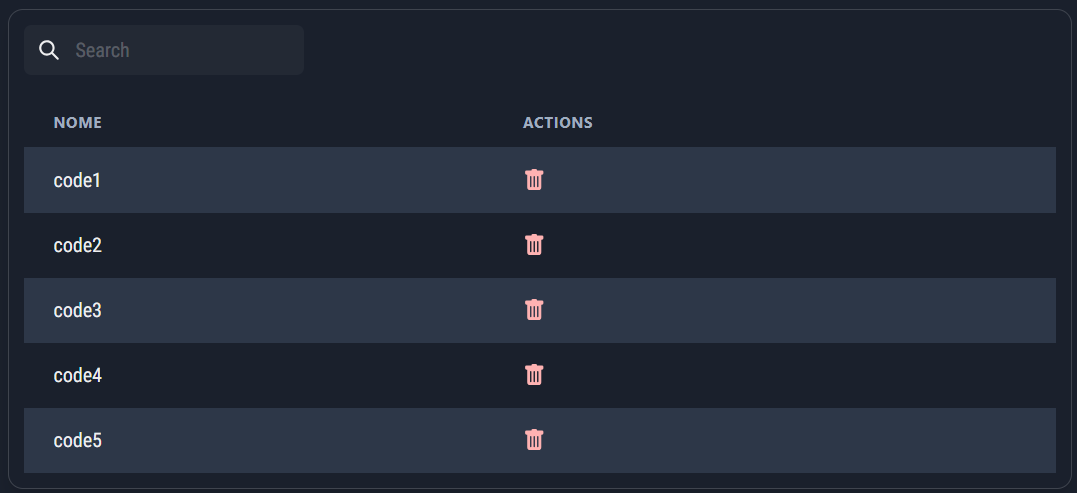
Finally, it is possible to delete a specific code by searching for it using the search bar, or delete them all using the appropriate button.
Telegram
Telegram Reward can be used to sell customers access to a Telegram Group or Channel.
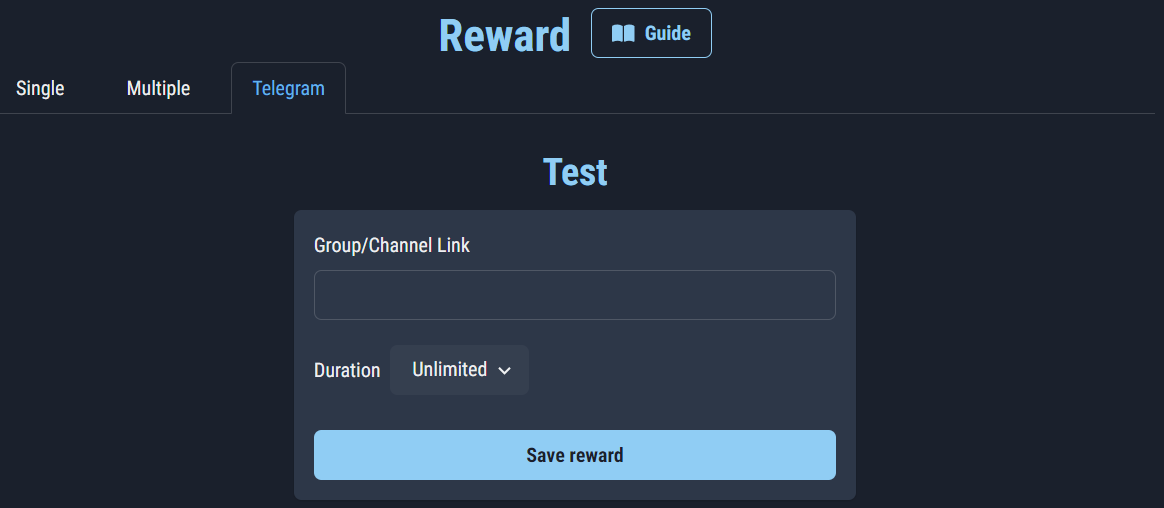
Before recovering the chat link it is important that the bot has been added to it and that it has default permissions.
To retrieve the link, simply press or hold on any message in the chat and select "Copy link".
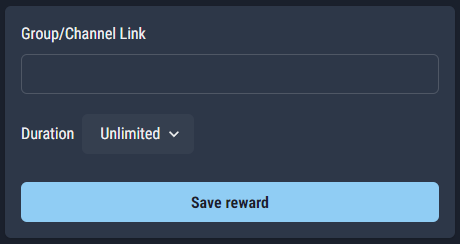
Once you have entered the link you will be able to choose the duration of access to the chat:
- Unlimited
- Timed
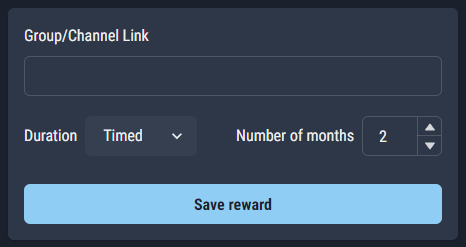
If the Timed duration is selected, it will also be necessary to select the number of months relating to the chat access time. When the time expires the user will be warned that they must regain access, otherwise they will be expelled and will not be able to access it again.
Categories
A category corresponds to a page in our store catalog. When there are at least two categories in the shop, or we have at least one product in the Showcase, the user will see the category selection menu.
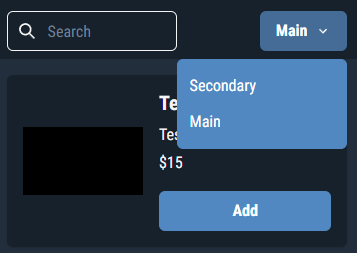
By default we find one called "Main", of which we can change the name and/or priority. The priority of a category corresponds to its level of importance compared to the others. In fact, the higher the priority, the sooner the category will appear in the selection menu.
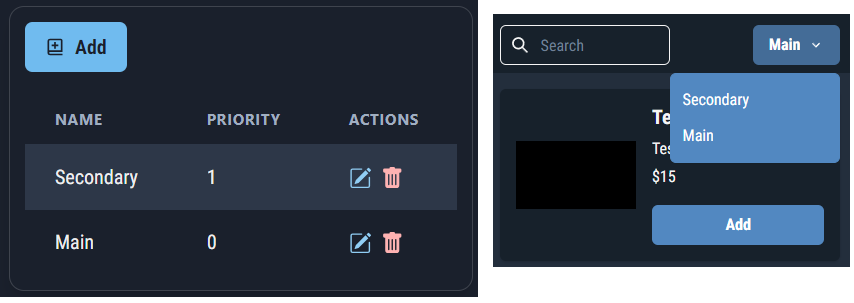
Additionally, if there is no Showcase, the highest priority category will be the front page of our store.
Coupons
A Coupon is a code that customers can use to receive a discount on the total price of the cart.

There are two discount methods for coupons:
- Percentage
- Value
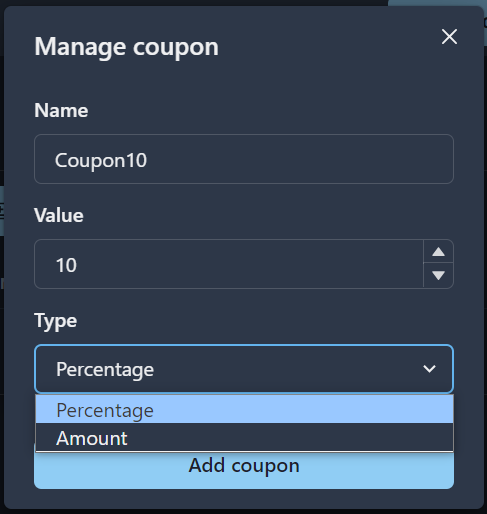
For example, by entering 10 as the Coupon value, a discount of 10% on the cart total will be applied with the first method and €10 with the second.
Furthermore, two other parameters can be configured:
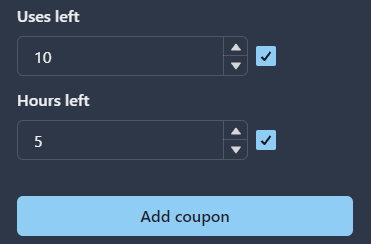
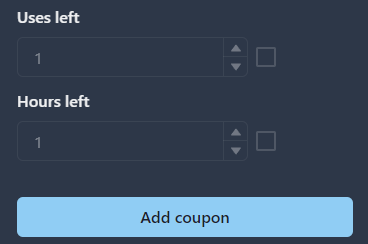
The first parameter indicates how many times a coupon can be used by our customers.
The second indicates the number of hours in which the coupon, starting from its creation, will be usable by our customers.
If we want the coupon to have unlimited uses and unlimited duration, it will be sufficient to leave the two fields disabled:
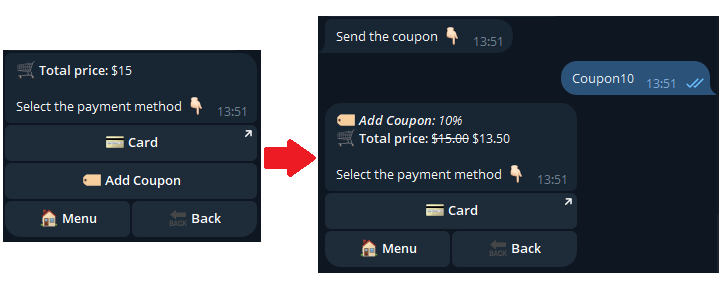
At this point a customer who wants to use the Coupon can enter the code "Coupon10" at the time of payment:
Settings
Generals
In the general settings we find the option to decide what the currency of our shop will be (for example the euro).
We can also configure the number of hours for the cart and payment to expire:
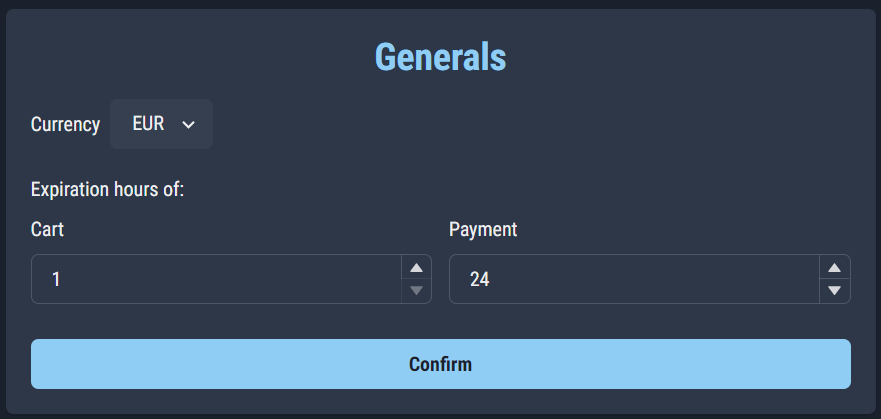
Cart expiration is the number of hours after which the cart expires and is deleted. Hour counting begins after the customer's last interaction with the cart.
Payment expiration corresponds to how many hours a user has available to pay, after having been given the instructions to proceed.
Make the shop visible
To make our shop visible to customers, you need to create a button in the bot that allows you to launch it.
Attention: before making the shop visible you must have enabled at least one payment method (for Crypto and Telegram the Real token must have been entered)
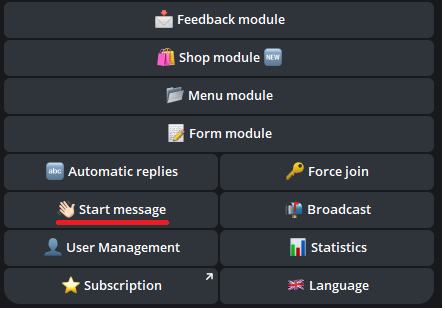
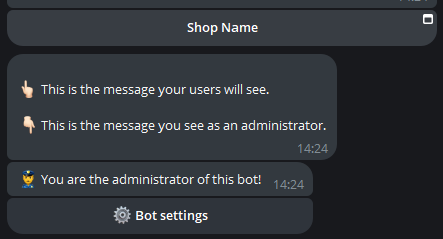
After pressing on "Start message" in the configuration menu of our bot, we press on "Buttons":
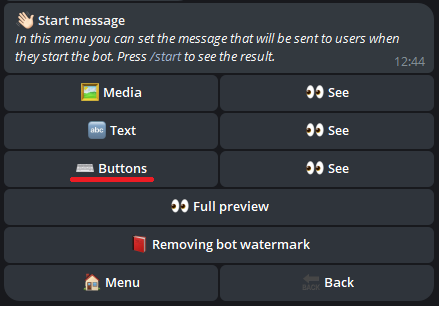
We then send the wording Shop name - shop to the bot (replace "Shop name" with your shop name):
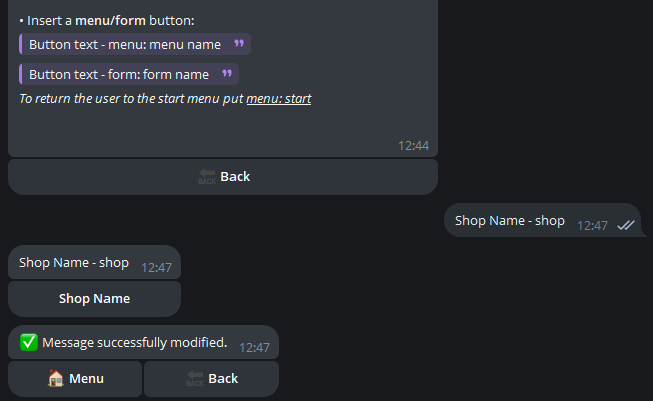
Finally, by typing the /start command it will be possible to check whether the button has been created correctly: