Lifehacks #2 in @MenuBuilderBot
Lifehack #2: user groups in bots

User groups in bots: Admin can add user to the group (assign the group to the user) and adopt bot behaviuor to different groups.
Русский перевод, который любезно предоставлен переводчиком Яндекса, здесь.
To apply user groups you need:
- Numeric user variable (1$)
You can use any existing unneeded numeric variable if you already have some. - Button conditions (2$)
One-time purchase for the whole bot. - (Optional) Fix course change button (2$)
Needed for group purchasing automation.
Steps to set bot behaviour for user groups:
1. Purchase and create a numeric variable. Name it, for example, "group".
You can use any existing unneeded numeric variable if you already have some.
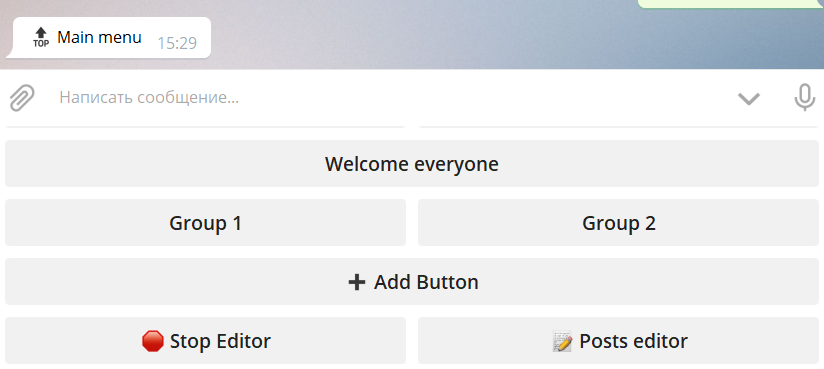
2. Create three buttons
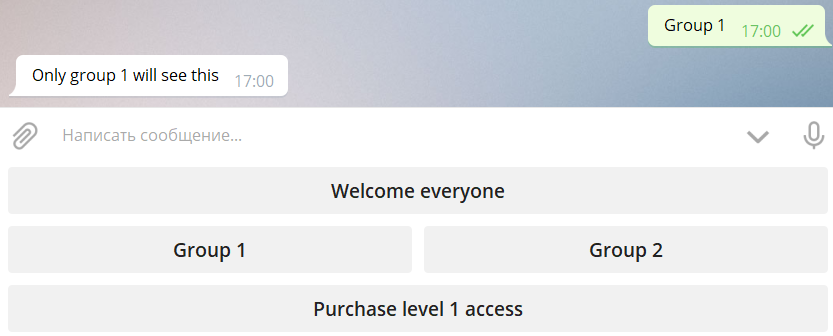
2.1 One for common access menu, for example: "Welcome everyone"
2.2 One for the first-level group, for example: "Group 1"
2.3 One for the second-level group, for example: "Group 2"
3. Add some test messages
3.1. Go to "Welcome everyone" and add messge like "Everyone is welcome here"
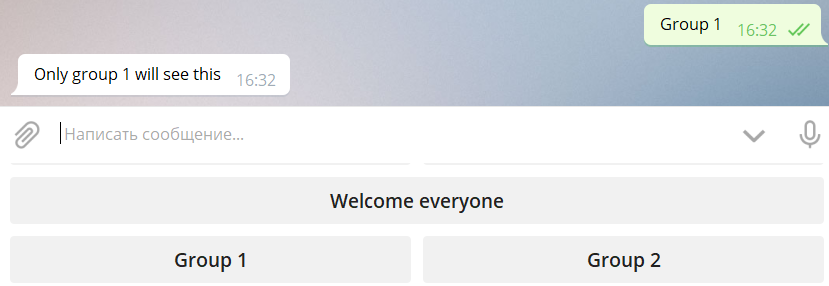
3.2. Go to "Group 1" and add messge like "Only group 1 will see this"
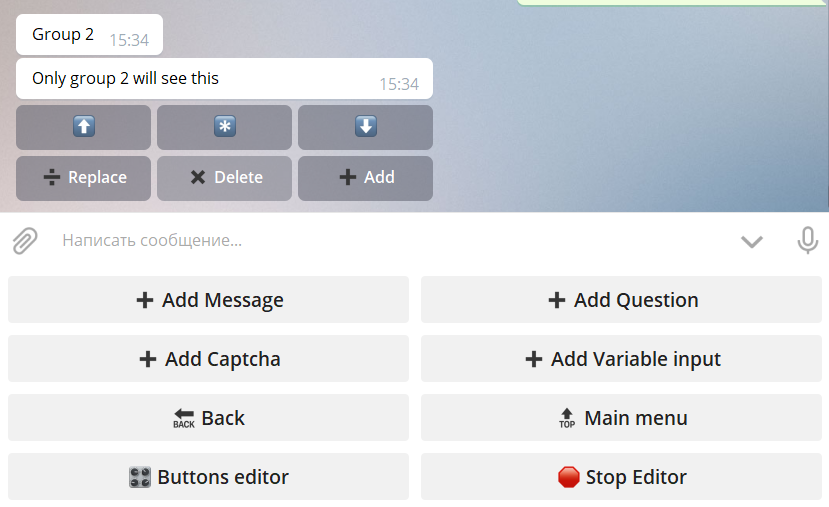
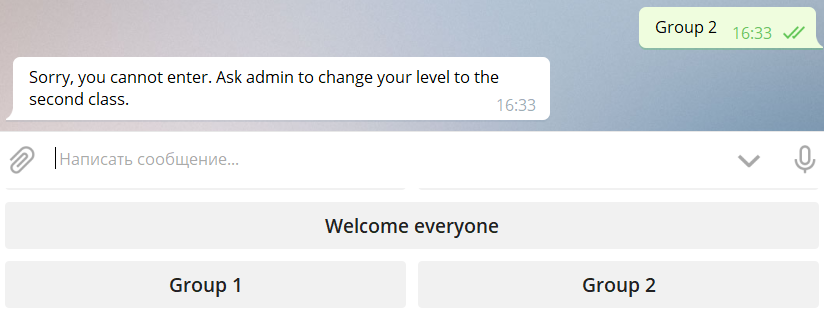
3.3. Go to "Group 2" and add messge like "Only group 2 will see this"
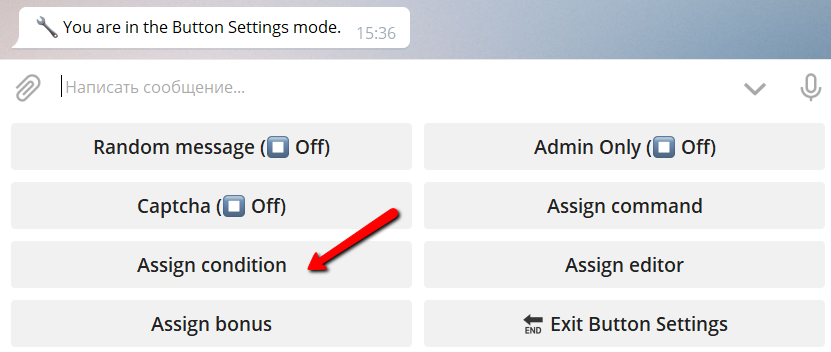
4. Select "Group 1" and go to it's properties
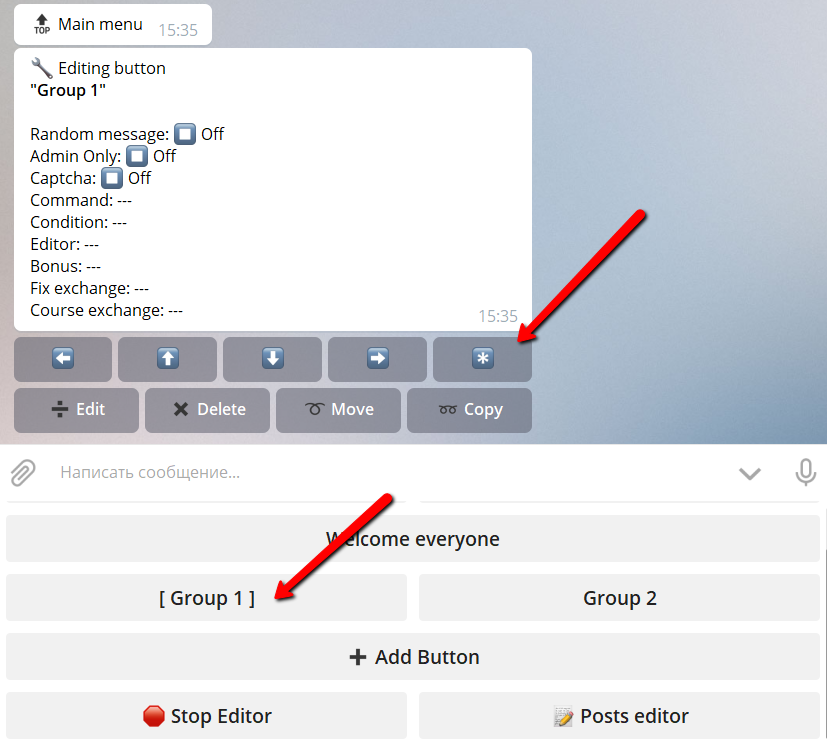
5. Press "Assign condition"
You will not see this button if you did not purchase button conditions!
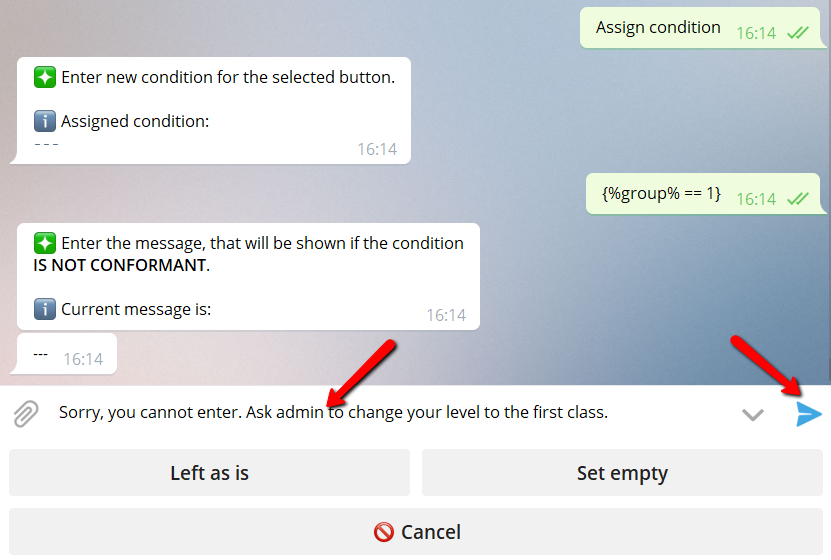
6. Put there the following condition
{%group% == 1}
The %group% should be replaced with your variable name if it differs.
The 1 should be replaced with the group number you want to.
Note! If you want users with group2 to have access to this menu also, you can choose other condition:
- {(%group% == 1) or (%group% == 2)}
only users from group1 or group2 will have access - {%group% >= 1}
all users with the group1 or higher will have access
7. Put any message you want to show to user if he has no access to this menu.
Like this:
"Sorry, you cannot enter. Ask admin to change your level to the first class."
8. Exit button settings
9. Set the condition for the button "Group 2"
{%group% == 2}
Now you are done with setting bot behaviour for user groups.
How to manage user groups:
1. By default, all your users will have group 0.
2. Use var commands to manipulate user groups:
2.1 To know what group user have:
/varget group userid/usercode
(replace userid/usercode with exact user id or user code)
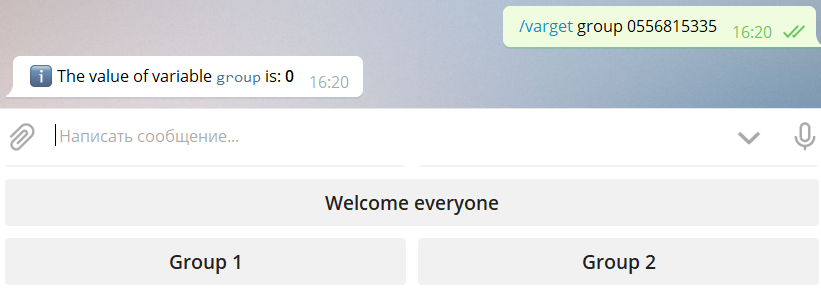
The user have the group 0. When he try to access "Group 1" menu he'll fail:

2.2 To set group for user:
/varset group userid/usercode 1
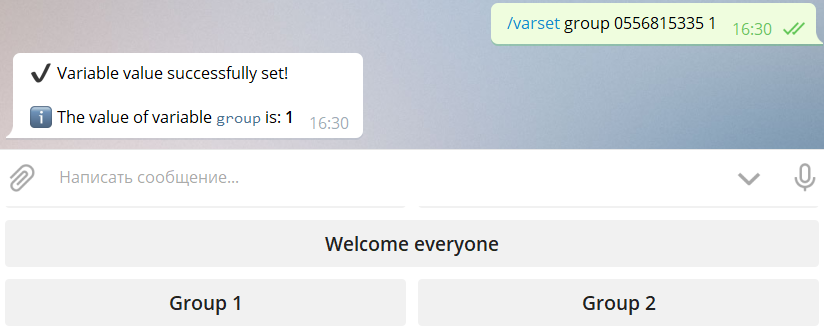
Now the user have the group 1. He can access "Group 1":
And cannot access "Group 2":
How to automate access purchasing:
1. Purchase the "Fixed exchange" button.
You can use any existing unneeded if you already have some.
2. Add button, for example, "Purchase level 1 access".
Go to button settings.
3. Set condition to button:
{%group% < 1}
With the fail message like:
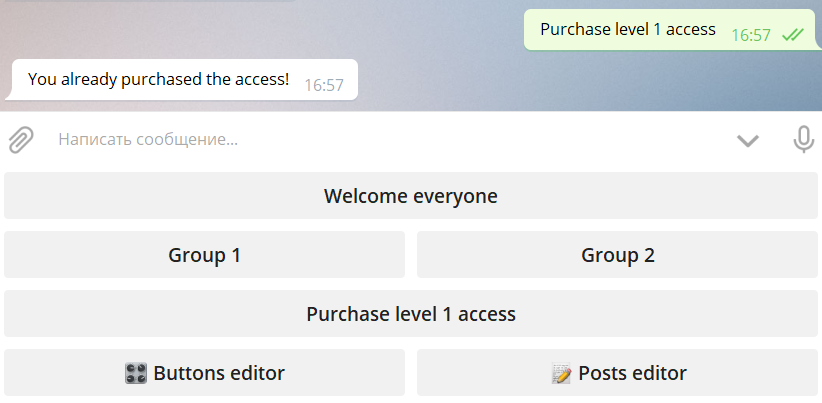
"You already purchased the access!"
This will save users from double purchases.
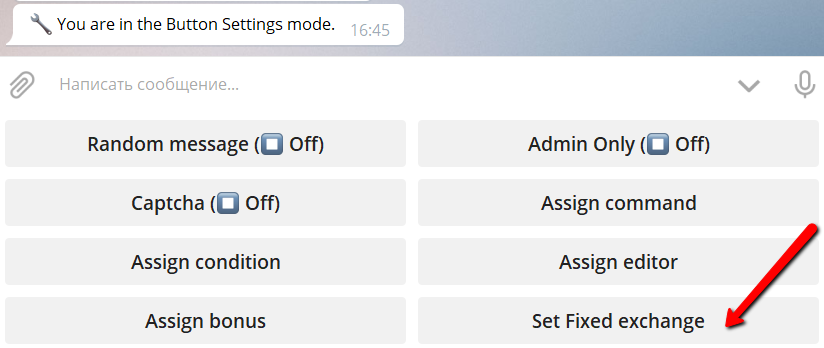
4. Press "Assign Fixed exchange" button:
You will not see this button if you did not purchase Fixed exchange buttons!
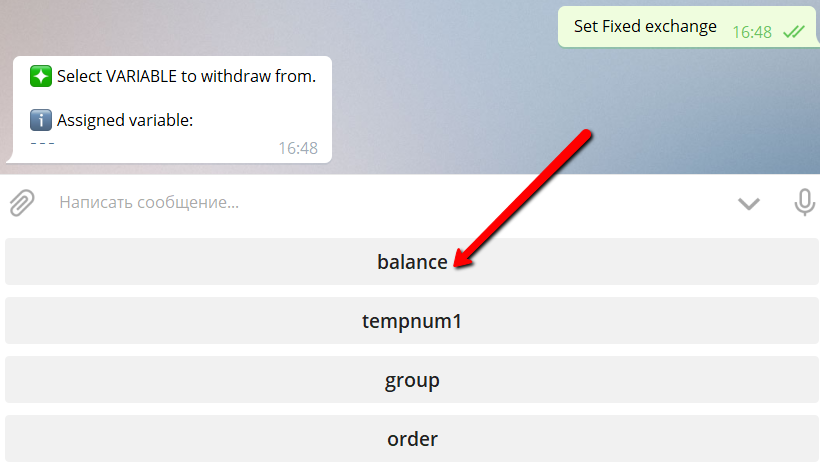
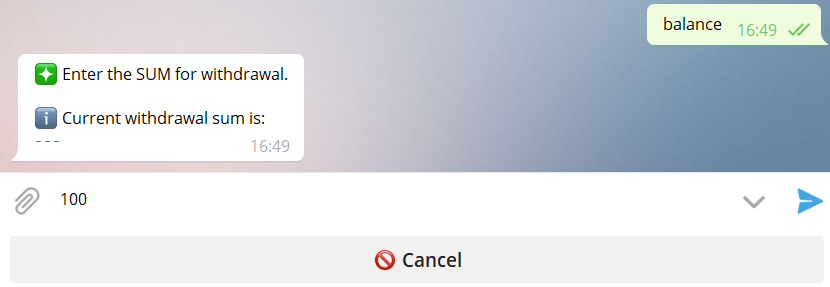
4.1 Select "balance" variable from the list:
(or other variable where user money are stored in your bot)
4.2 Enter the price for group 1 access:
This sum wil be withdrawn from the user balance.
4.3 Select "group" variable from the list:
(or the one you are using for groups)
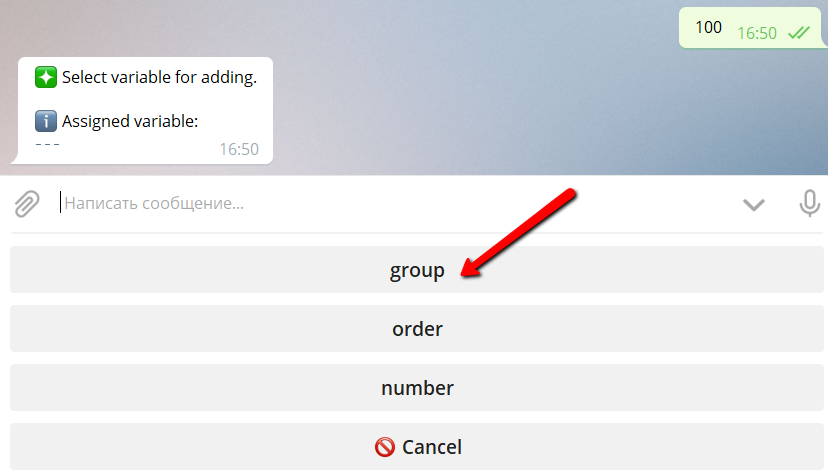
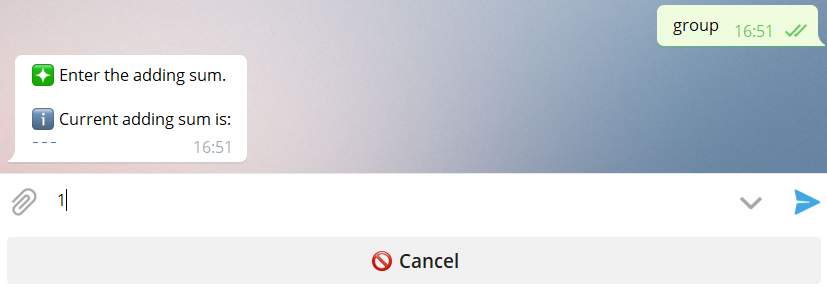
4.4 Set the value to 1:
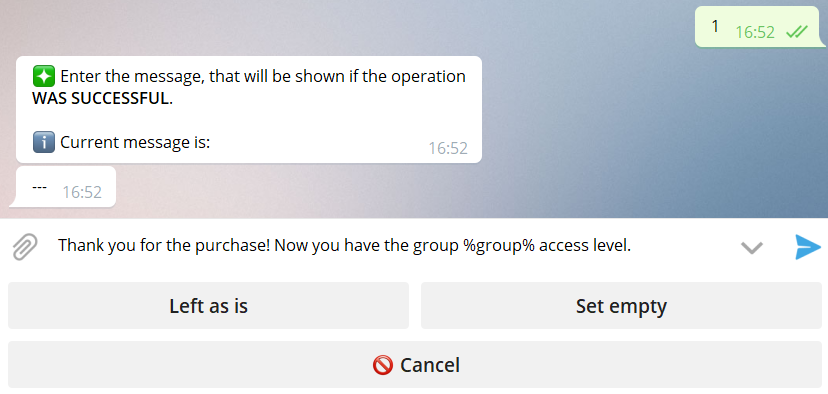
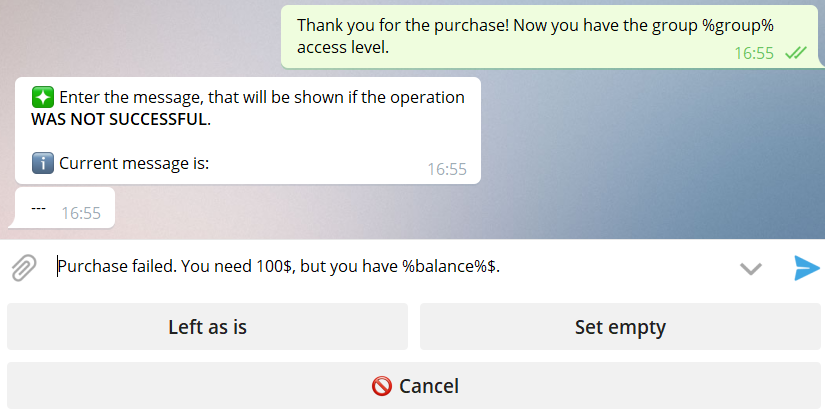
4.5 Enter the message for successfull purchase. For example:
Thank you for the purchase! Now you have the group %group% access level.
(As you can see, you can use %group% macros to show the new value).
4.6 Enter the message for failed purchase. For example:
Purchase failed. You need 100$, but you have %balance%$.
(As you can see, you can use %balance% macros to show the user balance).
4.7 Exit button settings
You are done with group 1 access purchase button.
If user already have group 1 he'll see:
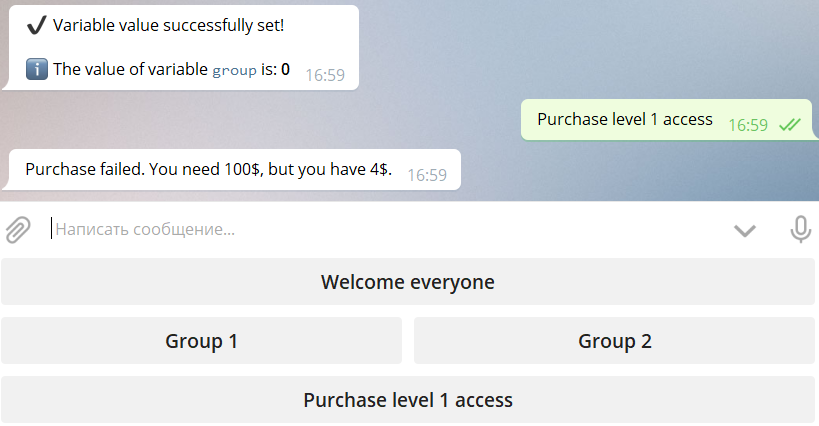
If user have group 0 and not enough money he'll see:
If user have enought money he'll see:
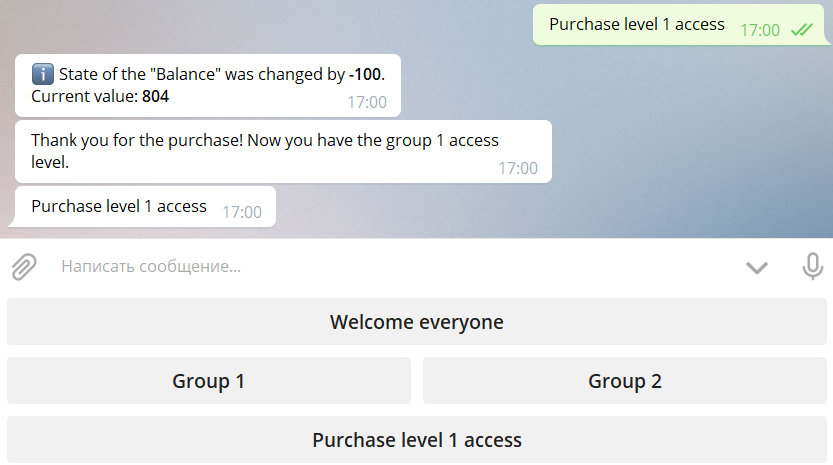
And now he'll have group 1 and can access "Group 1" button.