Life-Hack #4: Dynamically hiding and showing buttons in @MenuBuilderbot
MegaHubTelegram
This Life-Hack allows you to create menus, whose buttons will appear and disappear dynamically for each user, depending on the state of user's individual variables.
📜 The translation of this materials into your native language can be automatically done using the Google translator. Follow the link and select the desired language in the title:
https://translate.googleusercontent.com/translate_c?depth=1&sl=en&tl=es&u=https://telegra.ph/LifeHack--4-Hiding-and-showing-buttons-in-MenuBuilderbot-EN-04-30
Life-Hack - involves the use of existing functionality in non-obvious and rather ingenious ways, creating functions in your bot, that were not originally built by the constructors’s developers.
In this section, we publish various options and turnkey solutions for what can be created using the capabilities that are already available in the @MenuBuilderBot constructor.
When creating such manuals, it is assumed that you, to one degree or another, are already familiar with the basic functions of the constructor and the basic mechanisms for working with it. If in the process of studying the presented material your basic knowledge is not enough, we advise you to study the basics before continuing.

⬛ To create dynamically appearing and disappearing buttons you need:
1. Inline button
2. Numeric variable ($1)
You can use any existing unneeded numeric variable if you already have some.
3. Two regular buttons
4. The extension "invisible buttons"
One-time purchase for the whole bot.
5. Conditions on the buttons ($1)
One-time purchase for the whole bot.
Optional, but preferable
◾ The purchase of Extensions can be done in your bot. For that go to your bot:
☞ 🔐Admin | 🧩Extensions

⬛ The steps you need to take to create disappearing and appearing menu buttons are:
Suppose we need to create two different menus (with different buttons and messages): for the User and for the Guest without registration. At the same time, we want the same button to show a different menu depending on the registration status (state of a particular variable).
In other words, we want to create a functionality where, for the user, certain buttons are disappear and appear again, depending on the state of the user status reflected in some variable.
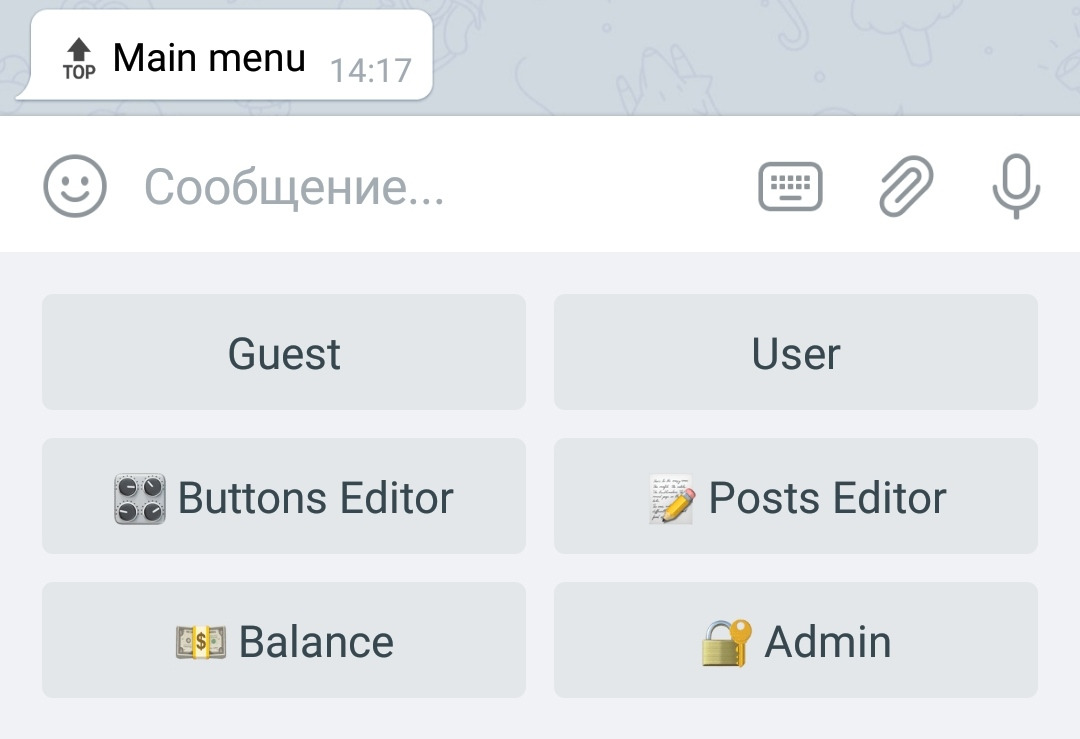
1. Create two regular buttons in the lower menu.
The first is called "guest"
The second is "user"
In the first button, you will eventually create a menu that will be displayed to the guest without registration. In the second button, respectively, you will have a menu for a user who has already registered. Now for an example, let's just add the appropriate posts.
Button 1. “This is the guest menu”
Button 2. “This is the user menu”
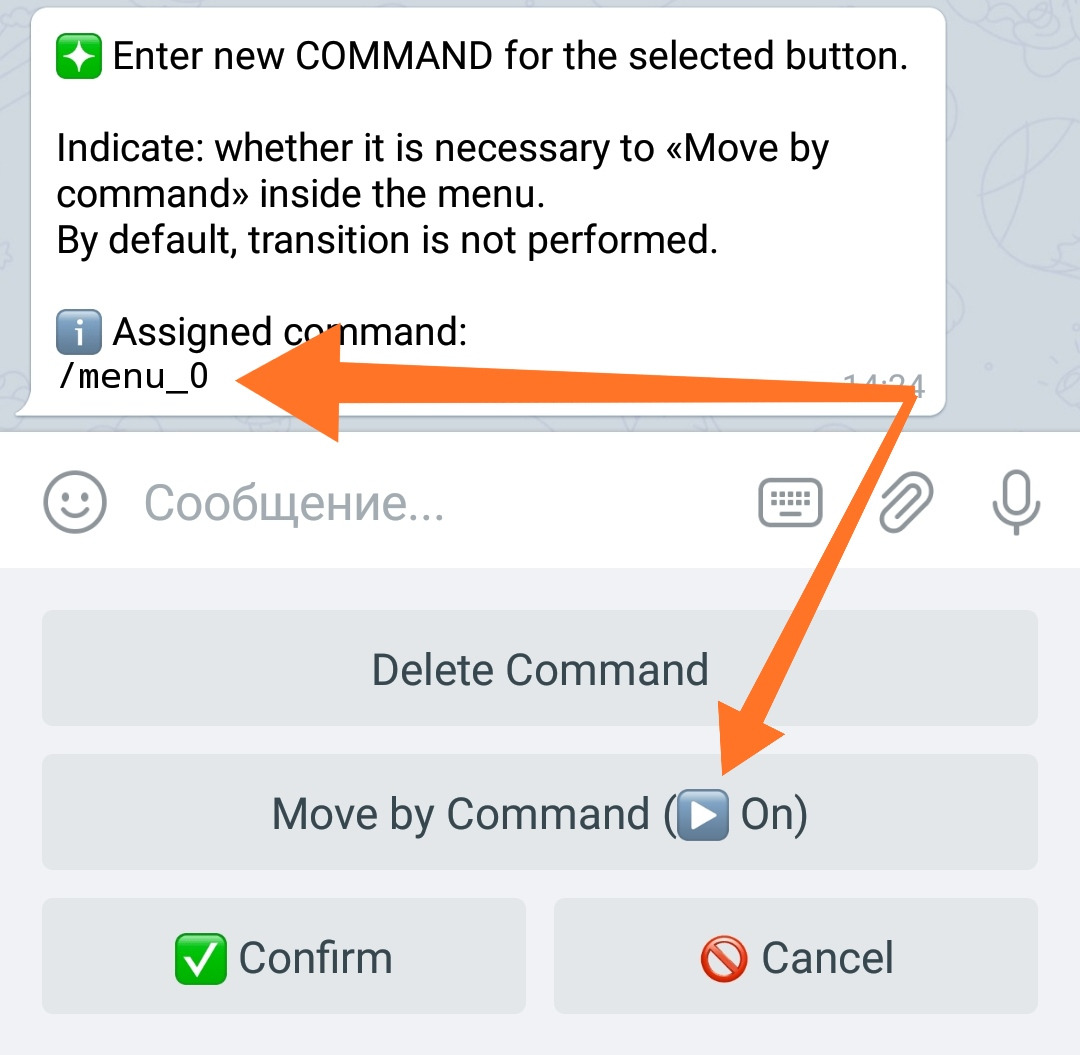
2. After the buttons were created, they need to added with commands:
The following command shall be added to the Button “guest”:
mark the option "move by command."
The second button “user” we added with command:
switch the option "move by command" as well.
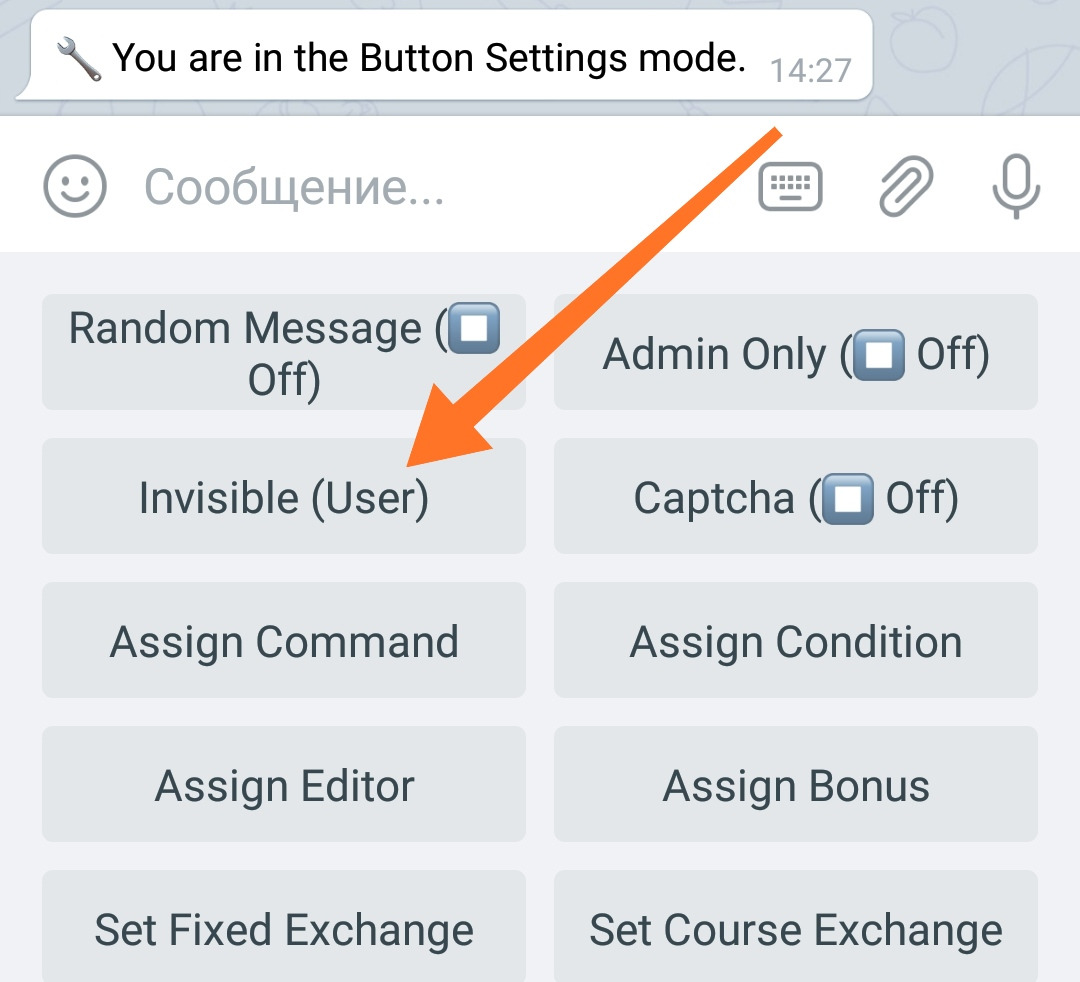
3. After that, we make both buttons “invisible” to users.
You should already have purchased the "Invisible Buttons" extension.
It's time to set up the variable.
4. Create a Numeric Variable and name it:
You can use any existing unneeded numeric variable if you already have some.
This variable will conditionally store “registration” information as a number.
To create a variable, go to your bot:
🔐Admin | 🗄Variables | 📙Numeric
We like to remind you that the default value of a Numeric Variable is 0 (zero). This is important for our example. An unregistered user (since his variable has never changed, it will always have 0 (zero) in it.
Note this for yourself at this point, why it is important will become clear a little later.
5. Create a message.
After setting the variable, in the Main Menu (or in any other necessary place of your project) create a Message with an explanation for users. For example, with the following text:
6. To this message you need to add an inline button in the "Command" mode.
This button will take you to the corresponding lower menu.
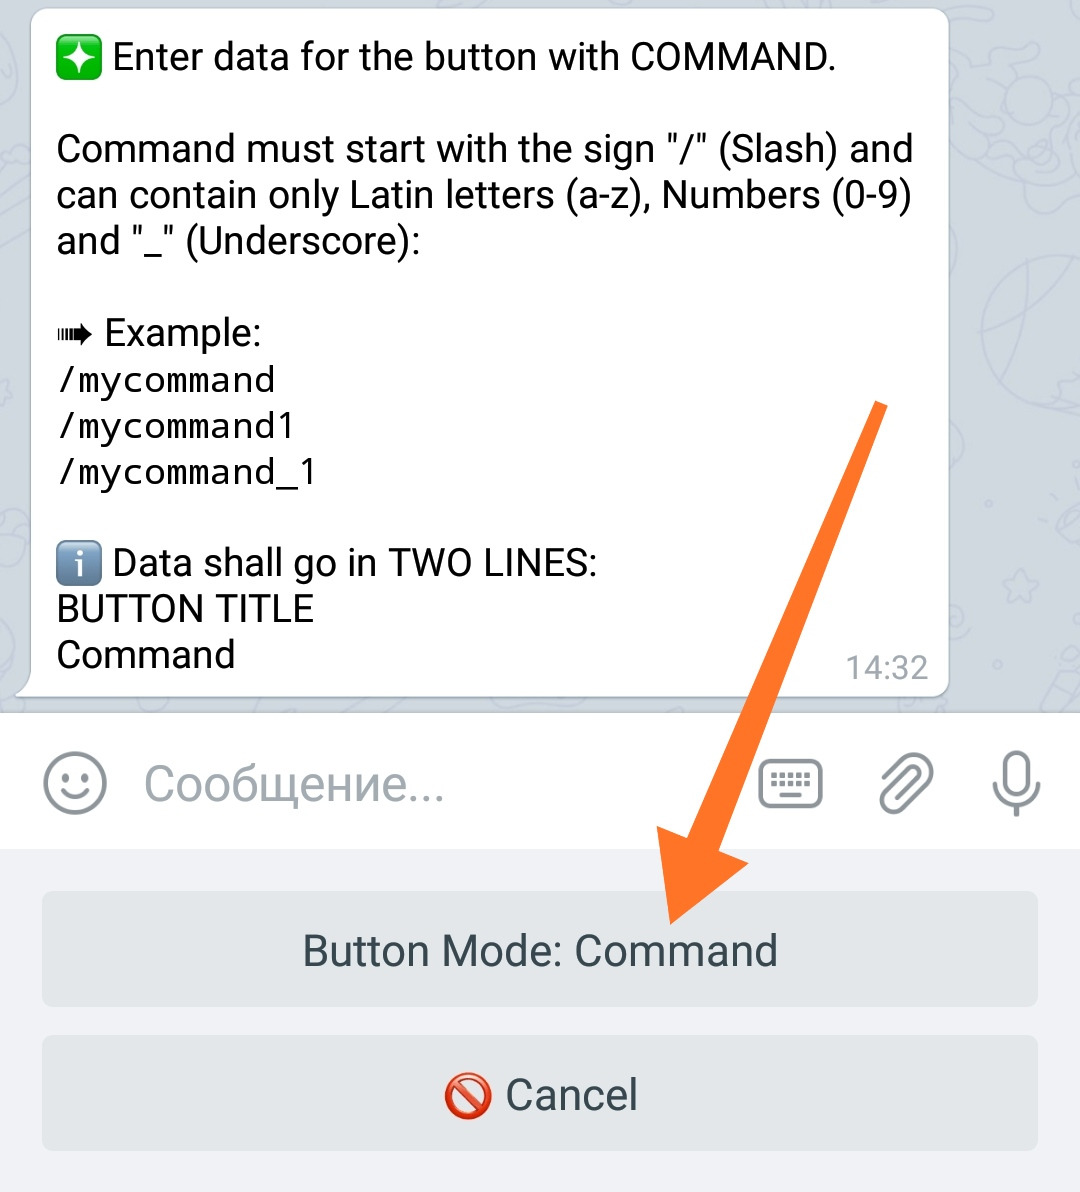
Select the "command" mode and to create the button by sending to the bot 2 following lines:
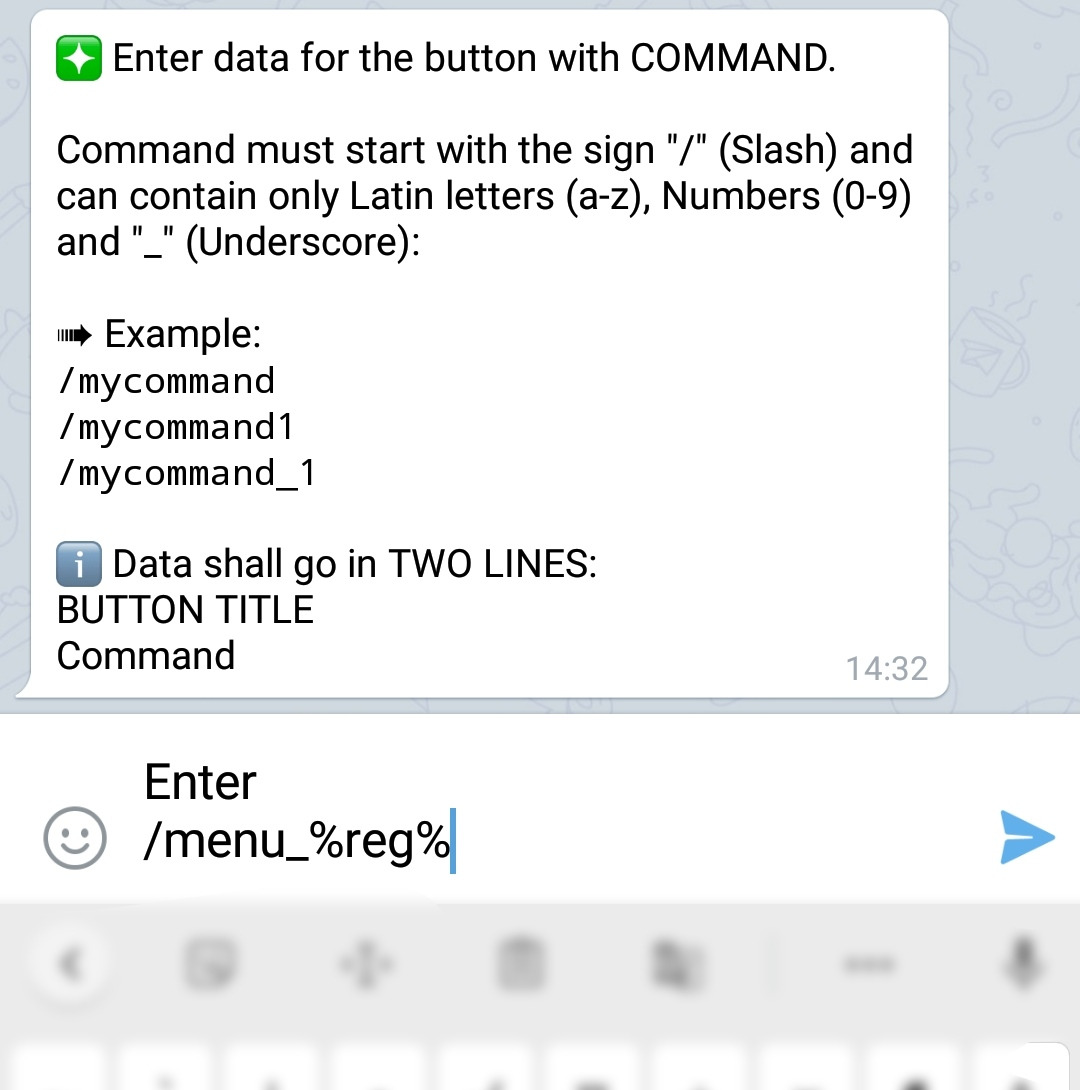
In this example, we have created an inline button with a command that contains a Variable’s Macros. While displaying this message with the button to the user, the macros in command will be replaced with a value of the corresponding Variable. Thus, the command in the button varies, depending on what value that variable has.
As we remember, the default value in the variable will be 0 (zero), so the command will look like this:
And this is exactly the command to be moved to the “Guest” button we have created earlier in the lower menu. The “guest” is a new person in the bot and the default value of 0 (zero) will fit perfectly in this case.
In order to get to the registered “Users” section, the value of the variable must be equal to 1 (one). Then, after substituting the macros value, the inline button command will look like this:
And this is the command of our second button of the lower menu: the "User" button.
How you will assign the value to the variable is not important, it can be a direct automatic purchase of registration by the user himself, any other action in which the value of the variable becomes equal to 1 or manual change of the value by the Admin.
7. Adding condition.
In any case if the variable is equal to 1 (one) your user will be transferred to the “registered” section of your menu. The only thing we recommend is to protect your “registered user” section with condition such as:
Just to make sure that nobody sneak in illegally.
⬛ Additional Information.
Materials that you may need when working with this Life-Hack
◾ Creating Messages and Buttons:
https://link.medium.com/3KZMeBKUL0
◾ Managing commands:
https://telegra.ph/How-to-manage-Commands-in-MenuBuilderBot-EN-02-26
◾ Inline buttons:
https://telegra.ph/How-to-manage-Inline-URL-Buttons-in-MenuBuilderBot-09-29
◾ Conditions:
https://telegra.ph/Conditions-in-MenuBuilderBot-06-11