How QnA chat works in @MenuBuilderBot
MegaHubTelegram
This guide is devoted to the description of the functionality and principles of the QnA chat in the bot constructor @MenuBuilderBot. An advanced tool for generating feedback in your bot. Now can work in groups too!
📜 The translation of this materials into your native language can be automatically done using the Google translator. Follow the link and select the desired language in the title:
https://translate.googleusercontent.com/translate_c?depth=1&sl=ru&tl=es&u=https://telegra.ph/How-QnA-chat-works-in-MenuBuilderBot-EN-10-18
Q&A chat, in its original concept, is an original development of @MenuBuilderBot and a unique mode for communication between the Bot Admin and its users inside the Menu Bot itself! It allowed admin not to create a separate "support bot" for rare dialogues. In addition, admin could now determine how long he would like to communicate with the given user - he could stop the dialog at any time without banning the actual user. We (and probably you) have never seen such thing in Telegram.
Q&A Chat - was not originally designed for simultaneous, full-fledged communication with a large number of users. It was supposed to be used only in order to clarify the necessary points and/or to find out the user's contacts for full communication. We believed, same as we actually believe now, that Menu Bots are not the best place for a full-fledged chat. You don't want to receive messages from 1k users randomly while using your bot's menu. ) In order not to "fence gardens" with Bans and Mutes, we then came up with this system of quick answers.
However, over time, the original concept of QnA Chat has evolved. Largely due to requests from community members, and QnA chat functionality can now be used in groups. Admins of your bot, being in groups, can now receive responses from "Feedback Forms" that are created in the bot, as well as respond to bot's users directly from the group - keeping the entire history of negotiations. In addition, a separate group can be assigned to EACH feedback form in your bot! At the moment, QnA chat is a powerful tool for creating feedback and organizing a support service in your Menu Bot, created on the constructor @MenuBuilderBot. The functionality will get further development and acquire a new features.
⬛ Table of Content
• Ability to answer in a group
• Setting up a form for working with a group
• Additional bot finctionality in a group
• Commands for forms of QnA chat when working in groups

⬛ How QnA Chat Works
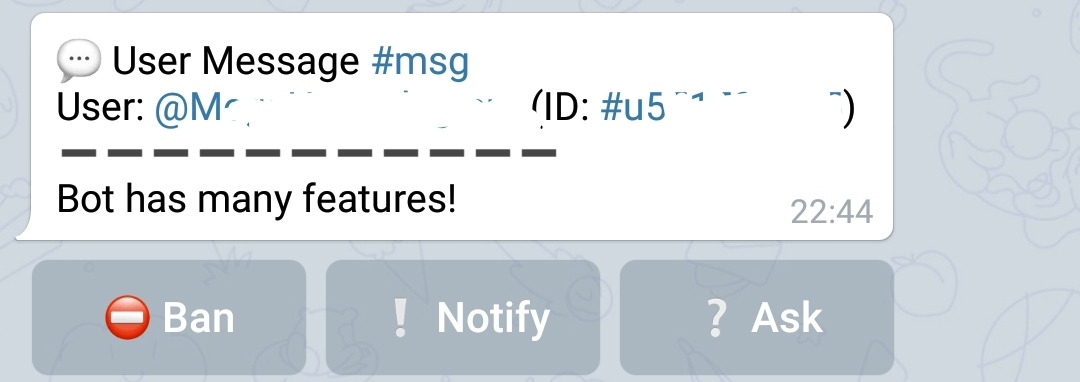
Within the @MenuBuilderBot menu structure, the administrator can create Questions for Users. After the user fills out the form, the Administrators will receive a response directly to the bot (see below for how to receive responses in the group). This response now contains three buttons: Ask, Notify, and Ban.
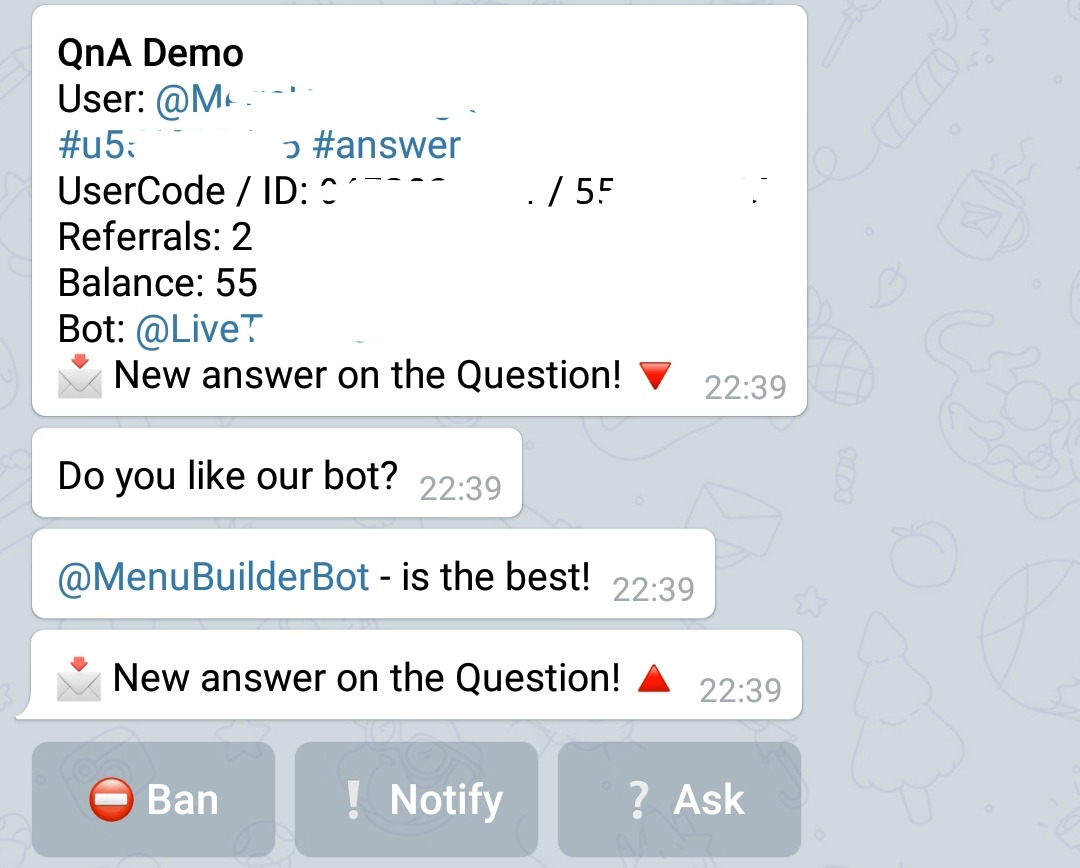
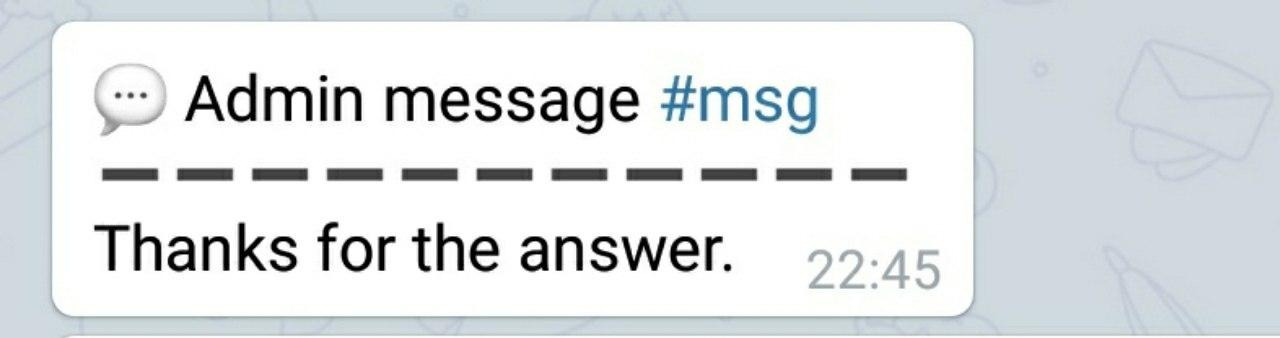
The admin by clicking on one of these buttons (except "Ban") can write a message...
...and it will be sent directly to the chat between the user and the bot!
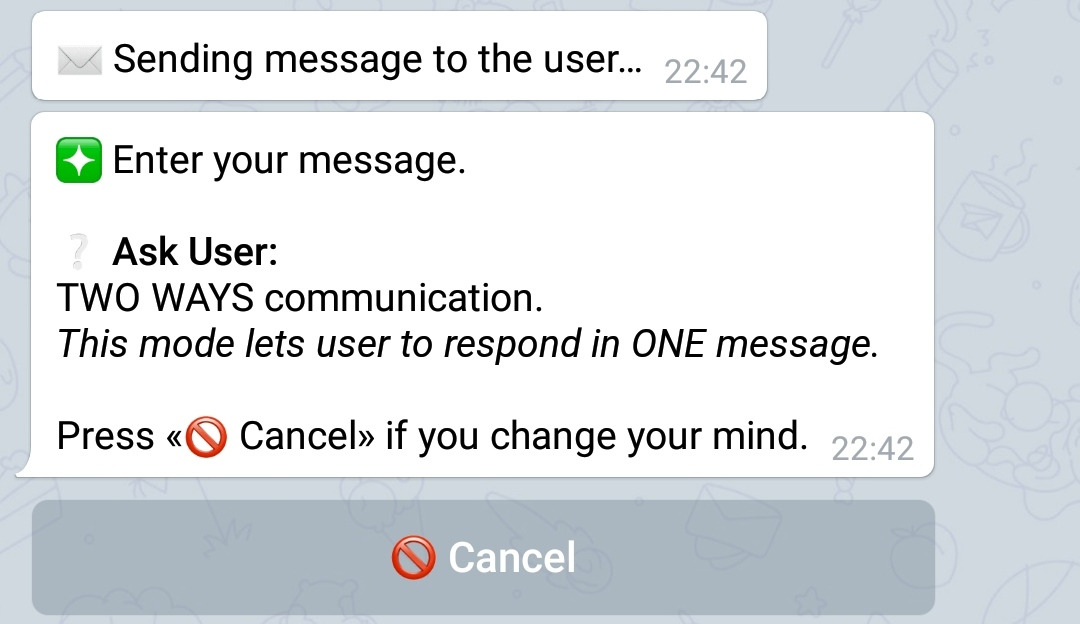
Ask or Notify
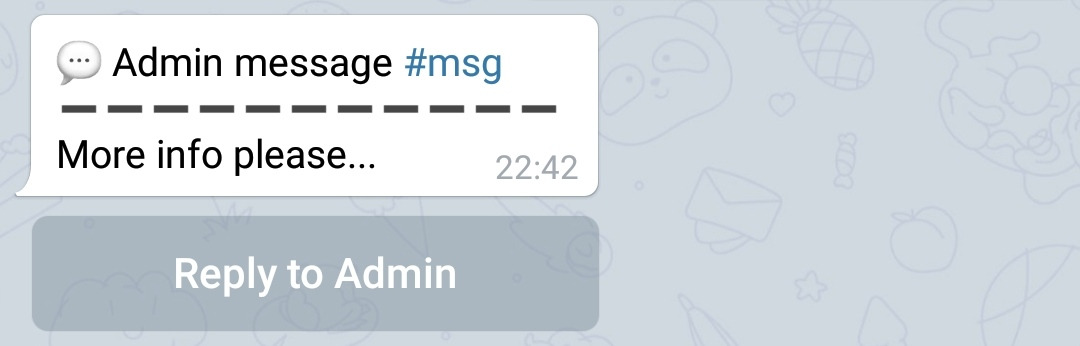
"Ask" is a two-way communication button. In this mode, bot's user can reply to the administrator with one message. The message received by the user will contain a "Reply" button.
User can click it and send one message back to the Administrator. The administrator will receive this message in his bot's chat:
The administrator can continue the dialogue if he wants by using the appropriate button in last or the original message.
The "Notify" button is a one-way message. In this mode, bot's user will receive a message without the "Reply" button and will no longer be able to reply to the administrator:
The administrator can use this button to notify the User one-way or to end the dialogue if he thinks he is no longer need the user's answers.
Life-hack :)
Both - Form replies and Q&A chat replies contain two #Hashtags:
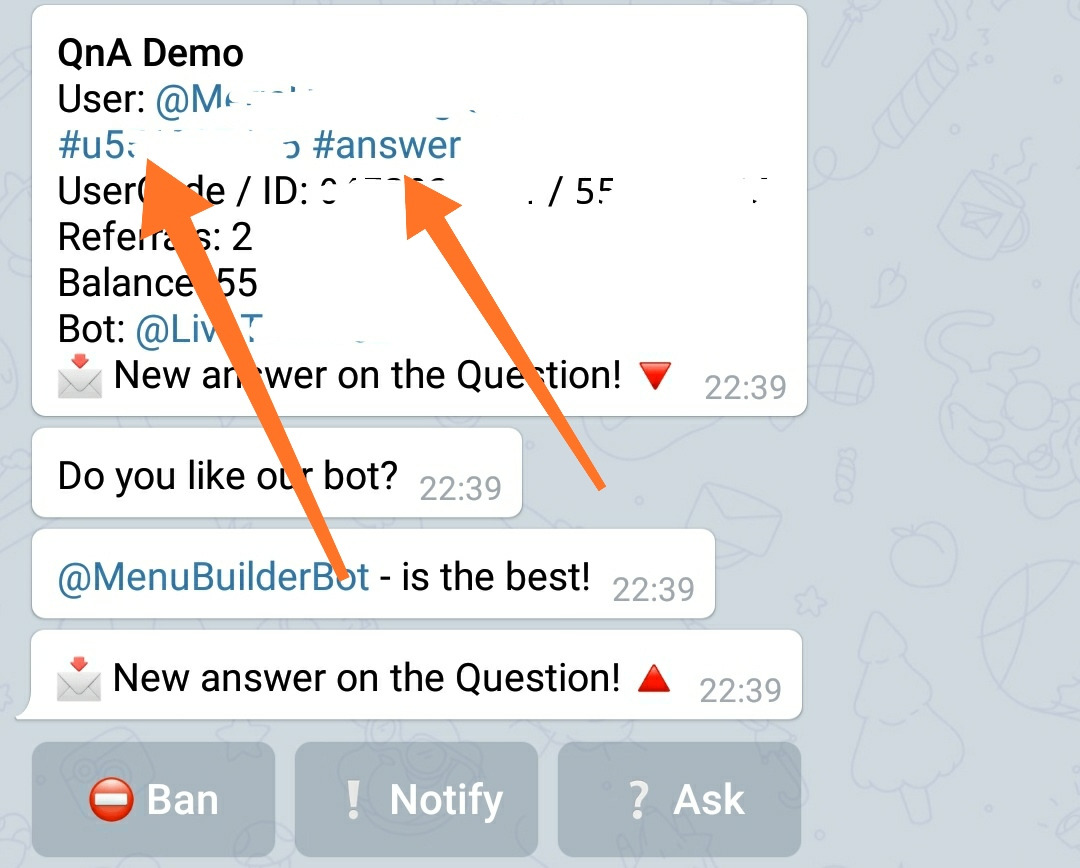
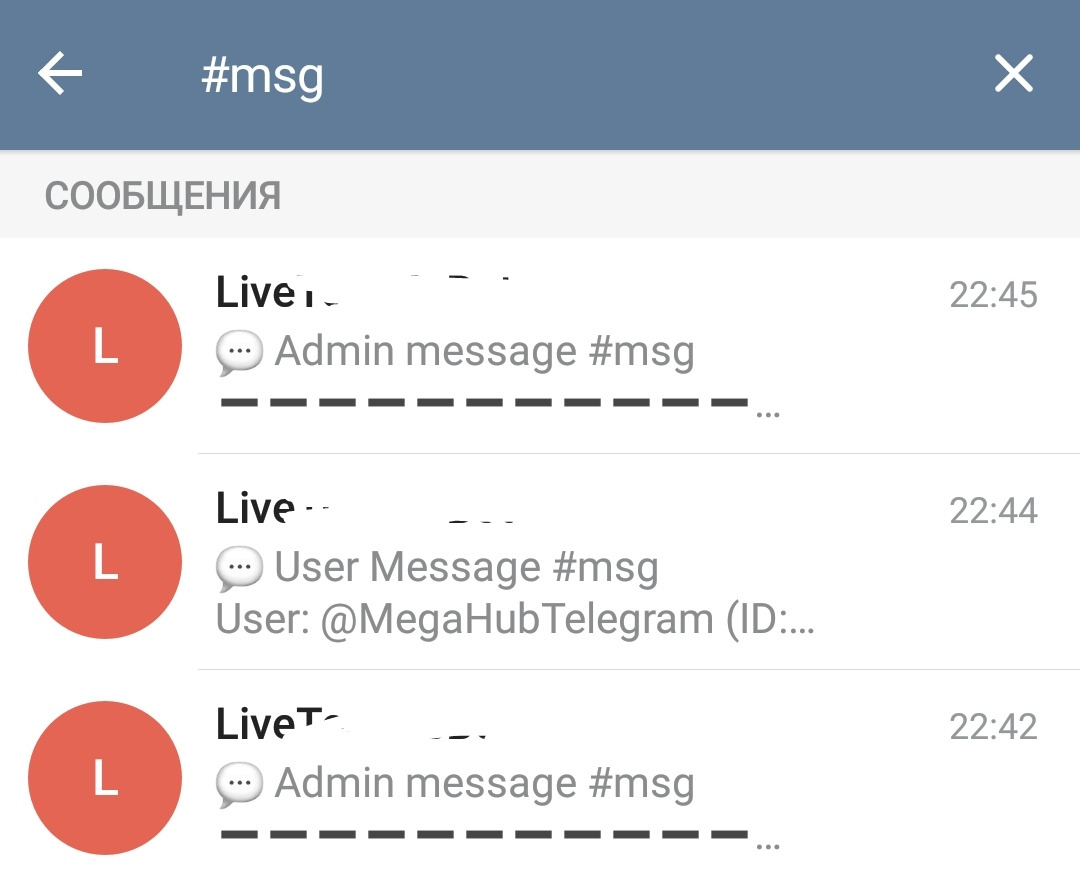
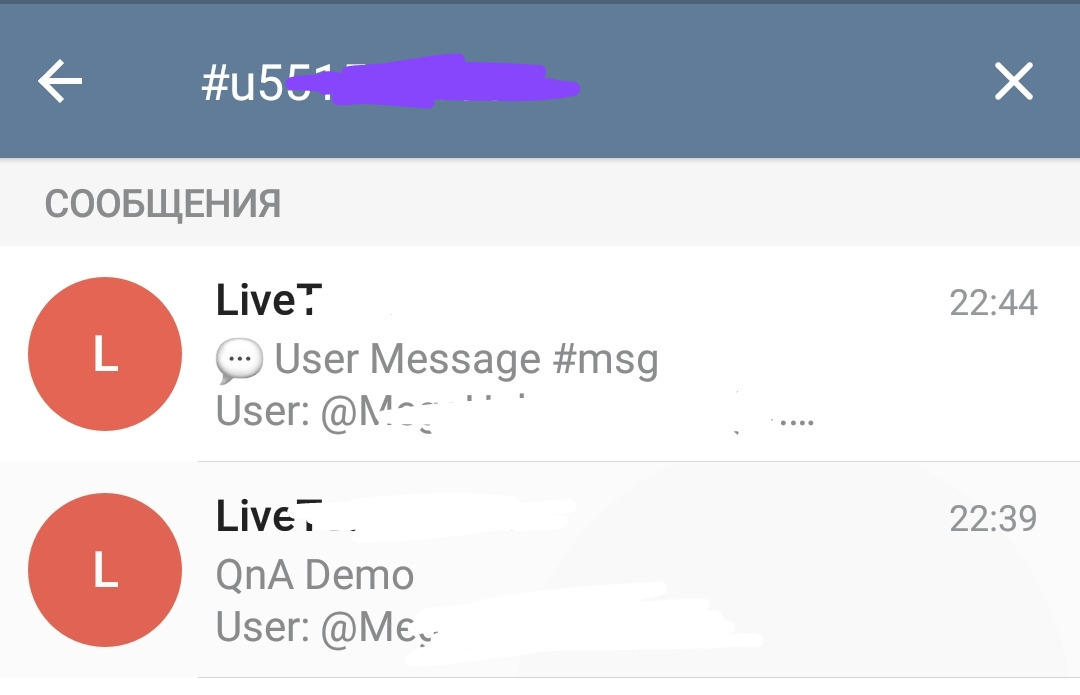
1. The hashtag #answer (in the headers of the forms) and #msg (in the headers of the Q&A chat) allows the administrator to search through forms and messages:
2. The hashtag #uXXXXX in the headers of form messages and Q&A chat allows the administrator to search for all other data (forms and messages) from a given user.
Ban button
In QnA chat, it is possible to ban unwanted or intrusive users, which will make it impossible for them to write any QnA chat forms in this bot. To do this, instead of answering, simply click the "Ban" button under the message from this user.
❗IMPORTANT: A ban in QnA chat forms does not deprive the user from the ability of using the bot itself - it only deprives the user from the ability to write to the forms. To completely ban a user in a bot, use the "Total Ban User" extension.
To connect, go to your bot:
☞ 🔐Admin | 🧩Extensions | 📂Bot Defense
To unban a user, send a command to the bot with the user ID (or user_code):
❗IMPORTANT: ID of the banned user and the command for unbanning are shown in the message immediately after the user has been banned. Save these messages if you plan to unban the user later.
This is a description of the basic principles of the QnA chat, keeping in mind that you receiving answers directly to the bot's chat. Based on these mechanics, you can create more complex feedback forms or forms of receiving data from the user. All this can be found in a separate "Brief introduction to feedback and forms".
⬛ QnA chat in groups
As we said above, the updated QnA chat can now work in groups, the mechanics of its work in this case are in many ways close to the similar bots for organizing an indirect feedback or support. The users' responses are sent to the group with the help of the bot, and the administrators in the group have the opportunity to communicate with users by "replying" their messages as to regular chat messages. Despite the general similarity of the mechanic, QnA chat, being part of the Bot Menu, has a number of features, as well as a huge number of advantages in this regard! In addition, QnA chat will continue to evolve with new features and capabilities.
Adding a bot to a group
In order for your, already created bot with the menu, to be able to send messages to the group, you need to add it there. Since your bot created on @MenuBuilderBot constructor it can perform various functions in groups (sending reports on advertising payments, reports on auto payments, checking a subscription to a certain group or channel, and now accepting Form data and Communication), information on how to add your bot in the group we have taken out a separate guide. Therefore, to get started, go to "How to set up bots for working in groups" and add your bot to the group where you planing to receive answers or communicate with users.
❗IMPORTANT: After the bot is added to the group it MUST be activated - enabled (✅) in
☞ 🔐Admin | 🧫Channels and Groups | My Groups
You have probably already read how to activate (enable) a group in the guide: "How to set up bots for working in groups".
As soon as you have at least one group connected and active, you will be able to configure the forwarding of user's responses in the settings of the buttons with Forms.
Ability to respond in a group
In the settings of each group
☞ 🔐Admin | 🧫Channels and Groups | My Groups
there is a section "Forms". Inside this section, at the moment, there is only one setting: "Answer in Group". This setting switches the modes in which the group will work and determines - whether the admins, presented in the group will be able to communicate with users directly from the group - "replying" user's messages.
Thus, in the group, you can both fully communicate with subscribers, and organize a one-way communication in which the group will only receive messages from the bot, which will allow administrators to communicate safely with each other without worrying that unnecessary data will be accidentally sent to the users.
IMPORTANT: Triggers can be used to respond to QnA chat forms in a group. Read about how to add them in the group guide.
IMPORTANT: Button messages created to work with triggers can contain their own inline buttons. If such a message with inline buttons, by a trigger, send into a group, then an inline button with a command (unlike the others) will not be shown in the group. However, if the trigger is used in response to the user's message from the QnA chat form (and, accordingly, the trigger message will be sent to the bot instead of the gropup), then in such a message the inline button with the command WILL be shown and the user will be able to use it like a regular inline button in the bot. This can create interesting mechanics.
Your bot sends responses only from the Admins of the group, it does not matter whether the "Admin of the Group" is the actual admin in the bot itself. The bot updates the list of "Group's Admins" once in every 24 hours. Therefore, if the responses of newly added admins are not forwarded to users, you need to force the update of the list of admins with the command:
by sending it to the group's chat.
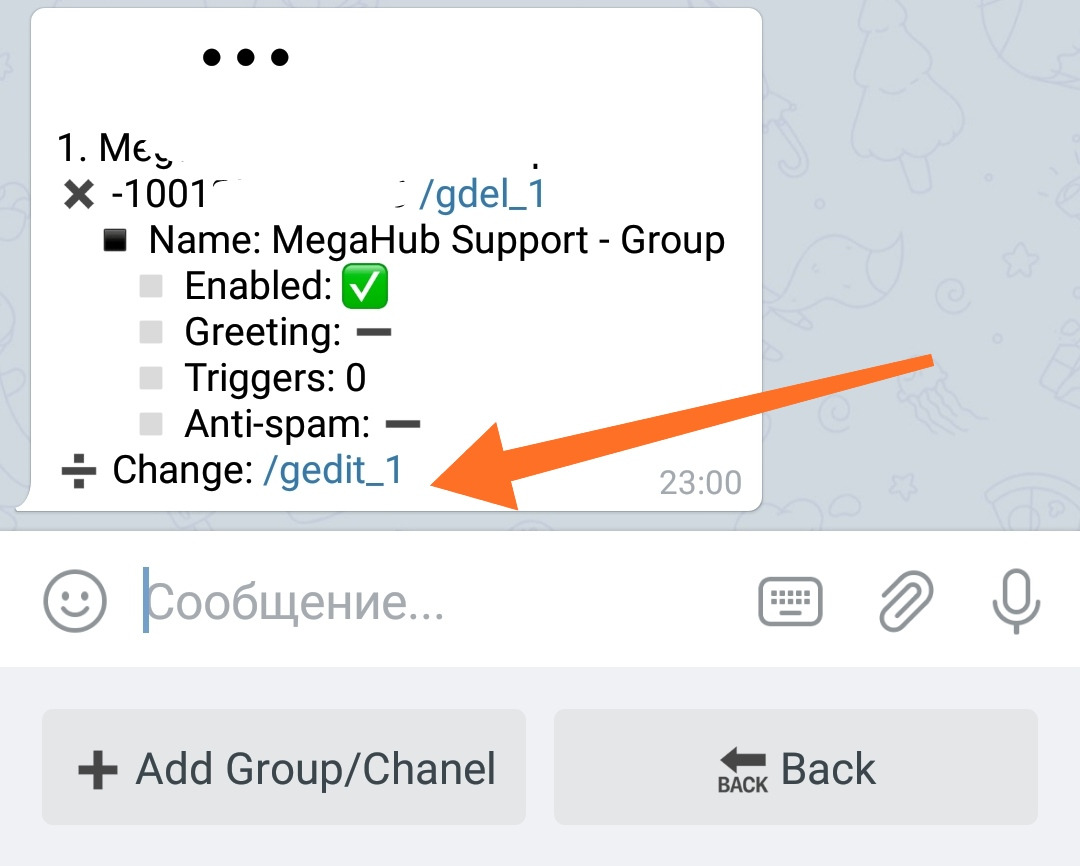
To switch the group operation mode, go to your bot:
☞ 🔐Admin | 🧫Channels and Groups | My Groups
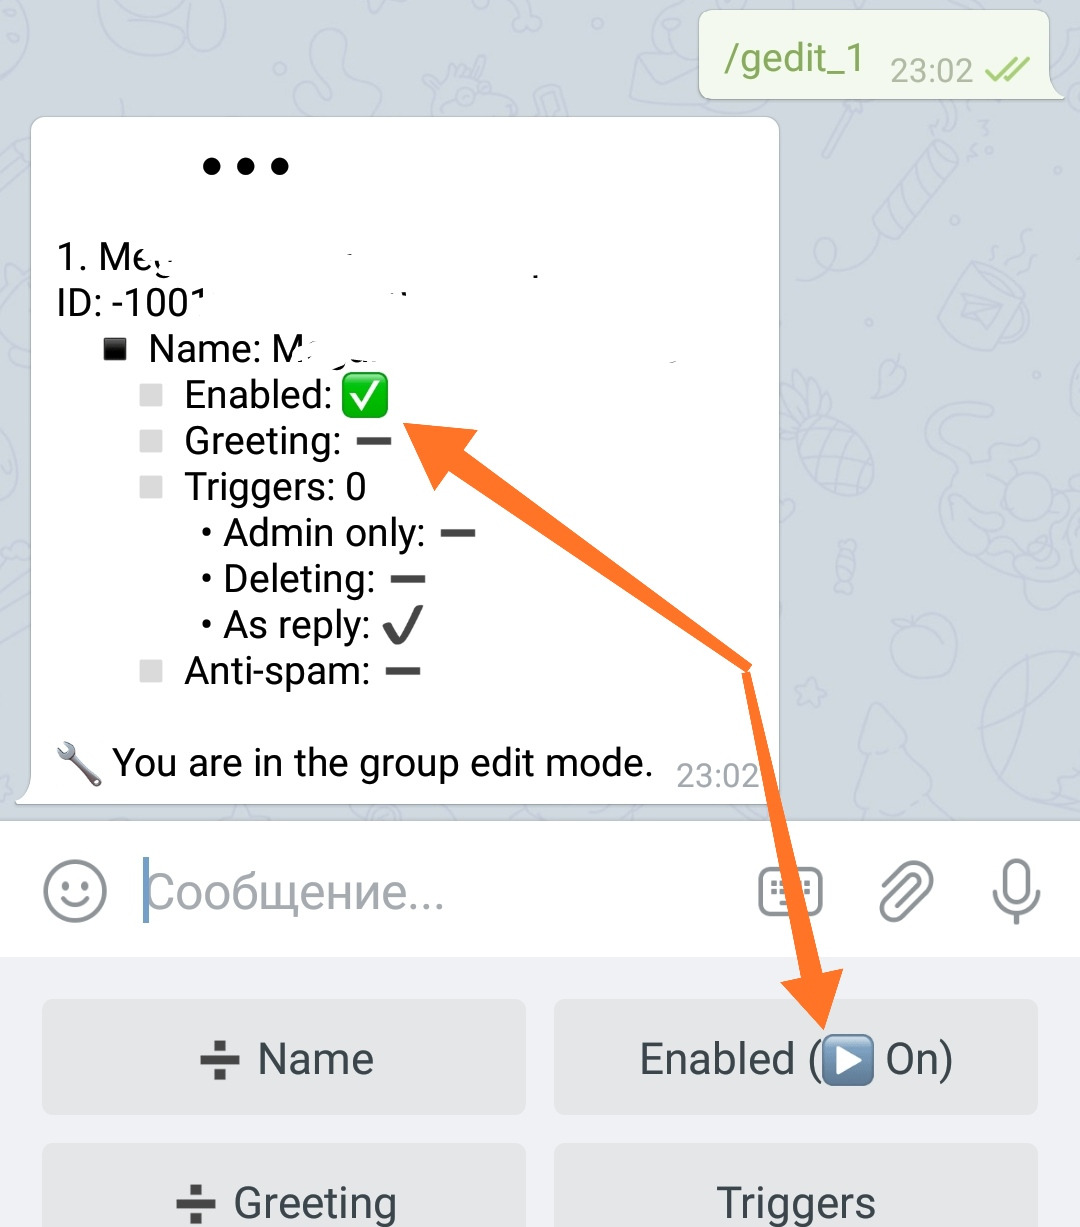
Press the /gedit command for the group you want,
Go to the "Forms" section
Press "Answer in Group" (▶️ On/⏹ Off)
The setting status is displayed on the button itself.
Setting up a Form for working with a group
Each Form in your bot can be assigned with its own separate group, where this Form will send messages received from the user. At the same time, messages from differet Forms can be send to one group. This will allow you to structure the incoming information as flexibly as possible and comfortably work with it!
❗IMPORTANT: Do not forget that your bot must be added as an ADMIN to the group where you like to receive messages of a particular form.
Create a new Form in your bot. How to do this is written above - at the beginning of this document (you can read about more complex types of forms in "Brief introduction to feedback and forms"). Any Form in your bot, one way or another, is represented by a button. In order to configure the Form for working in a group, you need to go to the settings of this button.
To do this, turn on the Buttons Editor mode by pressing:
"🎛 Buttons Editor", then go to the settings of the button itself by pressing the inline button with an asterisk (✱). Once in the settings menu of the button itself, go to "Form Settings".
❗ ATTENTION: if you do not have any Activated group, then you WILL NOT SEE this setting! Above, we have written about how to activate the group.
Set Group
First of all, specify the group where your bot will forward all messages of this Form. To do this, click "Set Group". The bot will present you with a list of available, active groups. Select the desired one by clicking on its button in the lower menu.
❗ IMPORTANT: If a bot is added to a group, but the group itself is not activated, such group will not be in this list. Above, we have written about how to activate the group.
Header
Modes: Off ⏹️, On ▶️
The setting determines whether you need to forward the header of the Form, of the message that is forwarded. This is the same header with user data that you get when working with QnA chat messages inside the bot itself.
Footer
Modes: Off ⏹️, On ▶️
The setting determines whether the footer of each form should be sent to the group. This is the same Form's footer you get when working with QnA in the bot itself. Mostly needed for better visual structuring of the received data in the body of the chat itself.
Send Questions
Modes: Off ⏹️, On ▶️
The setting determines whether you want the actual questions of the form, to be send to the group, or just the user's answers themselves.
Answer as «Forward»
Modes: Off ⏹️, On ▶️
The setting allows the bot to "forward" the user's original message while keeping the link to his account.
Add Tags
Modes: ⏹ Off, UserID, UserCode
When enabled, the user's Telegram ID or MenuBuilder's UserCode will be added to the message, depending on the selected mode. The current state of the setting is indicated on the button itself.
❗ ATTENTION: This setting stops working when the "Answer as «Forward»" mode is enabled. Because when you directly forwarding message from a user, it is impossible to make any changes to its text in attempt to insert some additional data such as UserID or UserCode in this case.
❗IMPORTANT: When forms work in a group and "send as forward" option is enabled, in case if the user account is hidden during forwarding, a record about this message will be saved on our server. The forced # hashtag is no longer added (as it used to be for hidden accounts), it will be added though, if corresponding setting is enabled. If the admin in the group replies to such a message, then the information about the hidden user will be taken from that save.
Information about a pair of message-user is stored for a week, after which it will no longer be possible to reply to such a message. Therefore, if you think that you will need to communicate with a user with a hidden account, use the !id command to save the hidden user ID in the group's history (see blow for more info).
Additional bot functionality in a group
Ability to use Triggers.
If you have added Triggers for groups in your bot, you can use them when answering questions of users that came from QnA chat forms. In this case, the user will receive not the trigger itself, but the message associated with it. The bot will show the message you sent in the group's chat. To respond with a trigger, select "Reply" to the desired message and directly send the trigger.
INFO: Small Life-Hack. Triggers can be created in the form of commands, and if you add such a trigger-command to a message, then you neeed to type it manually, but send it by pressing it in the message.
Analogue of the "Notify" function - the user will not be able to answer.
The Menu-bot is primarily intended for using the menu, not for the dialogues with the admin. In order for the user to be able to respond to the Admin, an inline "Reply to Admin" button is added, on the user's side, to each Admin's message. Clicking on this button allows the user to reply to the Admin's messages.
If the Admin response message text begins with a "." Dot, then on the user's side the "Reply to Admin" button is not generated and user loses the ability to respond. This function is analogous to the "Notify" function used in communicating by QnA chat in the bot.
Commands for forms of QnA chat when working in groups
For convenience of working with forms of QnA chat in groups we have adde few commands.
Letting you to find out the ID of the user with a hidden account in a group - if send this command in reply to his message.
Will FOREVER prohibit this user from writing in your bot QnA forms. Use carefully.
User will be notified.
Will TEMPORARILY (for XX days) restrict the user's right to write in your bot forms.
User will be notified.
For example:
!mute 10
Will mute the user for 10 days.
IMPORTANT: the maximum time limit for !mute in forms is 30 days. The bot will show an error if it is exceeded.
Will TEMPORARILY (for the specified period z) restrict the user's right to write in your bot forms.
User will be notified.
You can add modifiers to a numeric parameter
d - day
w - week
m - month
For example:
!mute 2w
Will mute for 2 weeks (14 days)
IMPORTANT: the maximum time limit for !mute in forms is 30 days. The bot will show an error if it is exceeded.
WILL ADD COMMENT to the message regarding the mute. Command !mute supports comments. After the mute time, you can specify additional text.
User will be notified.
For example:
!mute 7d flood and spam
In this case, in response to the message indicated by the mute, the following message will be displayed:
"Read only 7 days (up to xx.xx.xxx) flood and spam"
The language of the message will depend on the menu language set in your bot.
IMPORTANT: the maximum time limit for !mute in forms is 30 days. The bot will show an error if it is exceeded.
REMOVES temporary and permanent mutes.
User will be notified.
INFO: Or a familiar command /unban in the bot. The !ban / !unban commands are also applicable, they do the same and were added for convenience.
Allows you to reply in a group on behalf of a bot.
Send this Trigger with the necassary text, as a reply to a message from the user in the group. The bot will delete your message and reply to the user on its own behalf.
For example:
!reply text
Will send "text" on behalf of the bot as a reply to the user's message.
You can as well send messages to the group on behalf of a bot without a specific addressee. To do this, just begin your message with this Trigger.