Brief introduction to feedback and forms in @MenuBuilderBot
MegaHubTelegram
The feedback and forms function allows administrators of bots created using @MenuBuilderBot to ask users a various questions and receive their answers. Text data can be stored in variables.
Feedback is naturally integrated into the menu creation functionality. The primary feedback tool is the "Question".
📜 The translation of this materials into your native language can be automatically done using the Google translator. Follow the link and select the desired language in the title:
https://translate.googleusercontent.com/translate_c?depth=1&sl=en&tl=es&u=https://telegra.ph/Brief-introduction-to-feedback-and-forms-in-MenuBuilderBot-EN-05-08
This is the new version of this Manual, follow this link for the older and simplified Tutorial version.

⬛ Features and Question Types
Question Types
(Main)
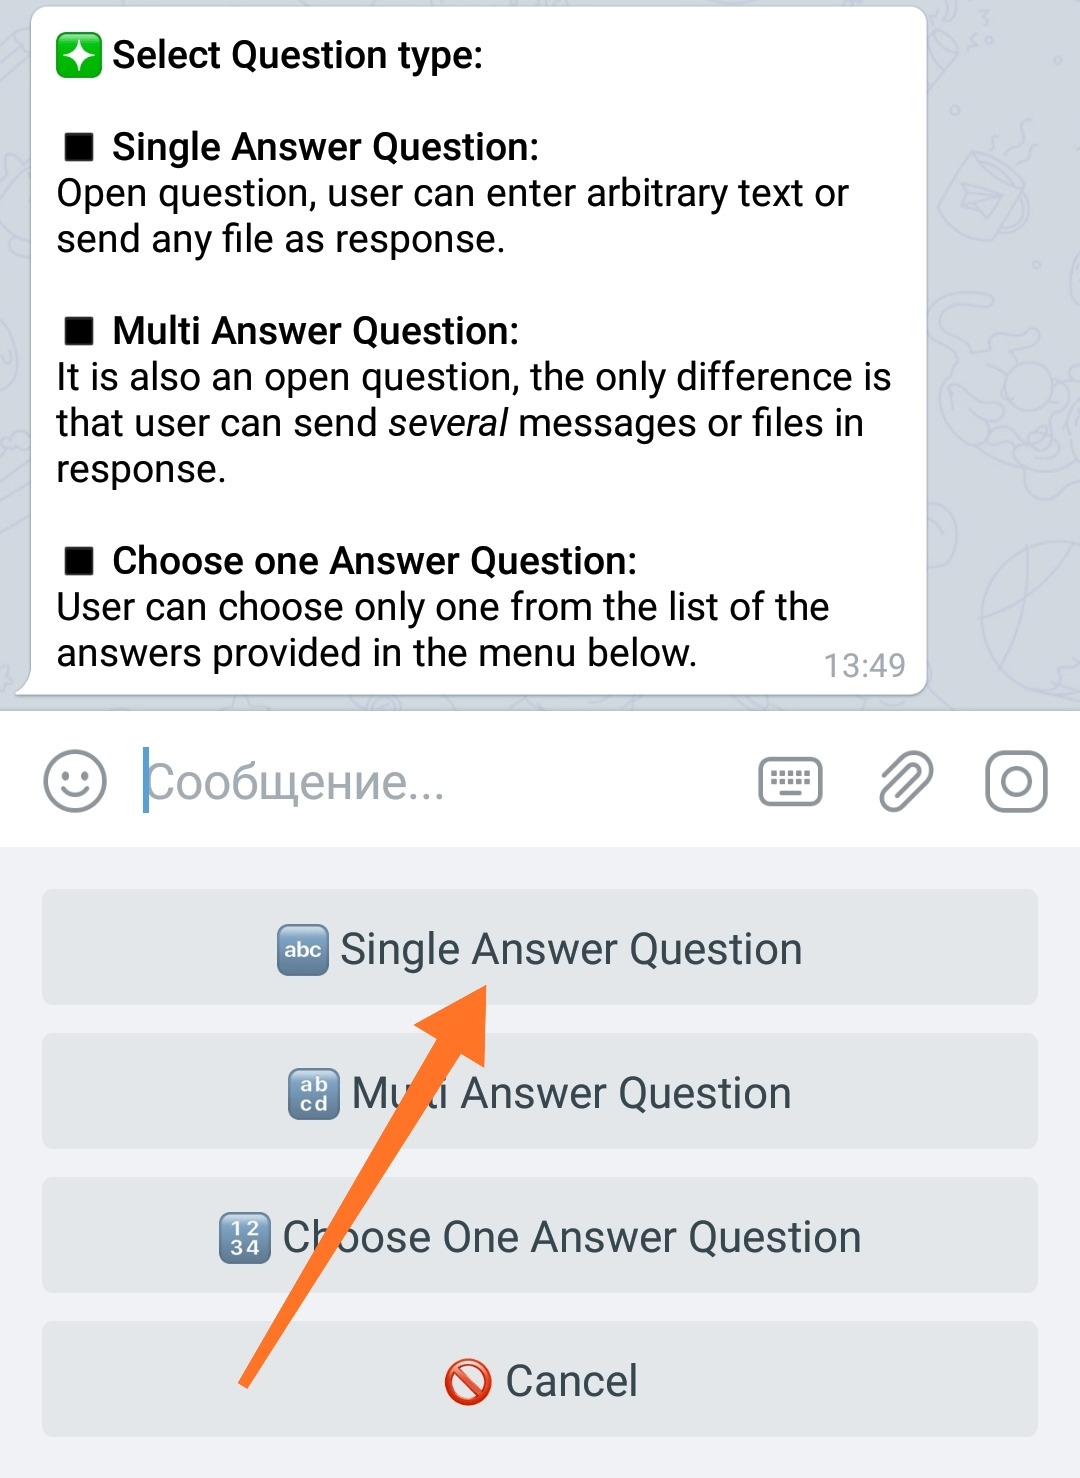
At the time of writing, there are three types of questions in Main functionality and three in Extended:
1 Question with a single answer.
The user can and should give his answer in one message.
2 Question with a multi answer.
The user can reply with any number of messages (one message is enough).
3 A question with a choice of one option.
The user can and should give an answer by selecting it from the list of possible options proposed by the administrator.
All response messages can be as diverse as possible: using markdown, links, attached photo, document or media file.
(Extended)
The types of questions presented below are an extension of the main functionality. To connect, go to your bot:
☞ 🔐Admin | 🧩Extensions | 📂Forms
4 Request Contact
Allows your user to send his phone number to the bot.
5 Request Location
Allows your user to send his location data to the bot.
6 Roll the Dice
Allows your user to generate a random number by sending a special Telegram sticker to the bot. See the list of available stickers and their features:
Generates a value between 1 and 6: 🎲 🎯 🎳
Generates a value from 1 to 5: 🏀 ⚽️
Generates a value between 1 and 64: 🎰
Features
User input of a variable.
Allows you to save the user's response in a Text Variable, with the possibility of subsequently displaying this content to the user or simply view its contents in the Export file (see "Additional Information" at the end of the document).
ATTENTION: All questions are available except for a question with a multi-answer.
Invisible Message
The function allows you to add invisible messages to the form and it is an extension of the functionality of the "Invisible Buttons" function. To connect, go to your bot:
☞ 🔐Admin | 🧩Extensions | 📂Buttons
Hidden messages are not visible to the user when filling out the form, but they are sent to the bot or to the form group along with his responses.
To switch the message to invisible mode, go to the "📝 Post Editor" add a regular message when creating a form, then in the message settings by clicking the button with an asterisk [*] (in the same place where inline buttons are configured) enable this setting by clicking the "Invisible" button.
Hidden messages are not visible to anyone, except in the Post Editor mode.
Hidden messages are indicated by an eye icon 👁🗨 (which is incorrectly displayed in the Telegraph).
⬛ How to create a simple feedback form.
1. Create a button and open the "Post Editor", as usual.
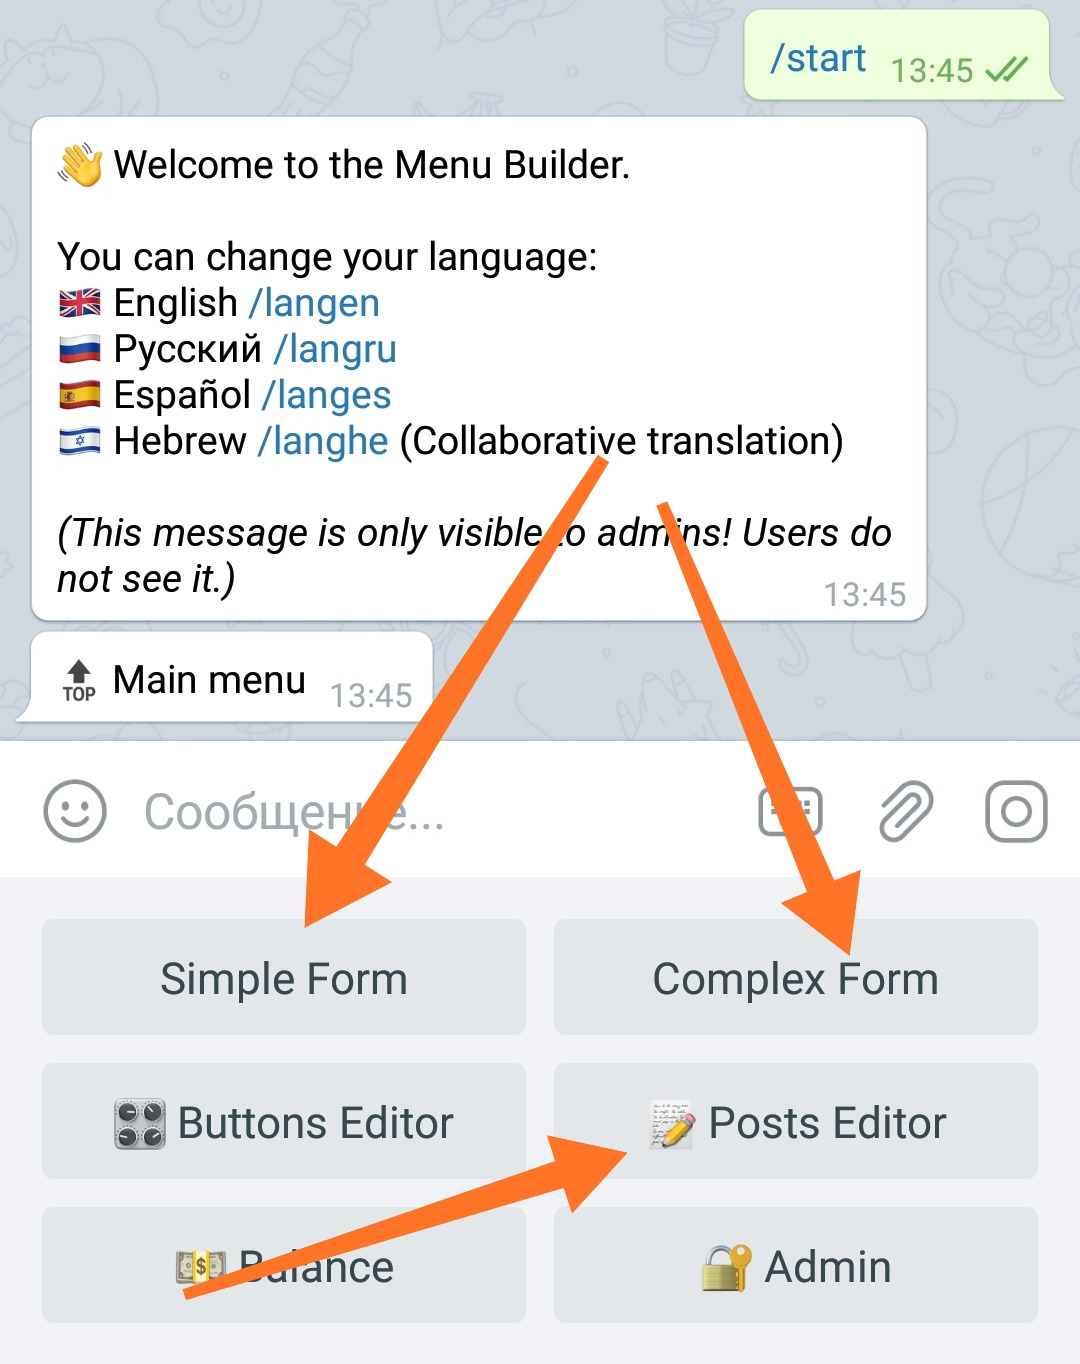
2. Go inside the created button and click "Add Question".

3. Select the type of question you want.
4. Enter the question text in the same way as you do when creating a regular message.

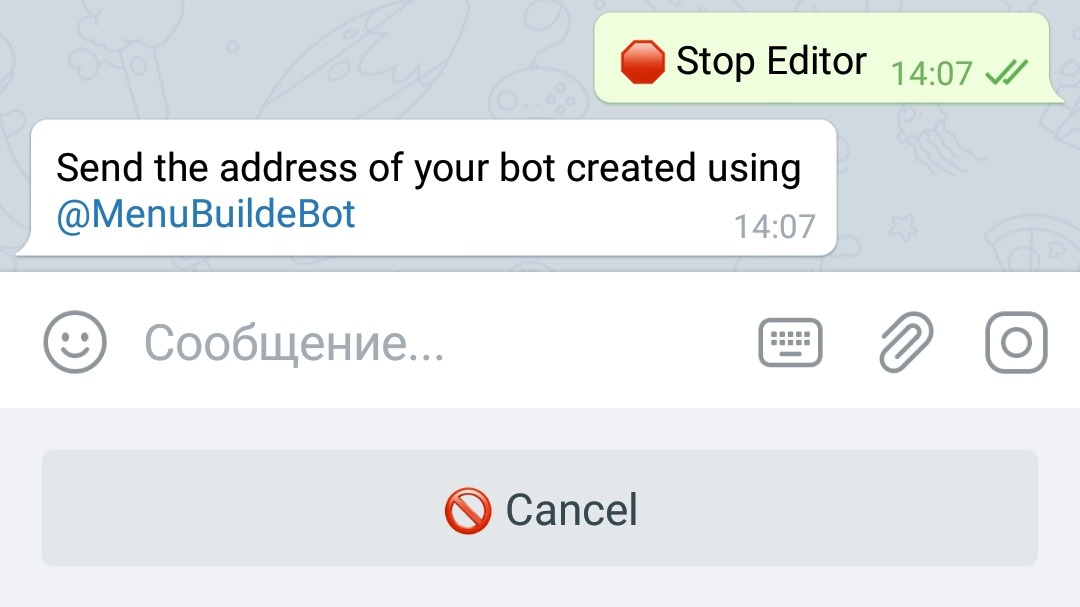
Send a message to the bot and you're done.
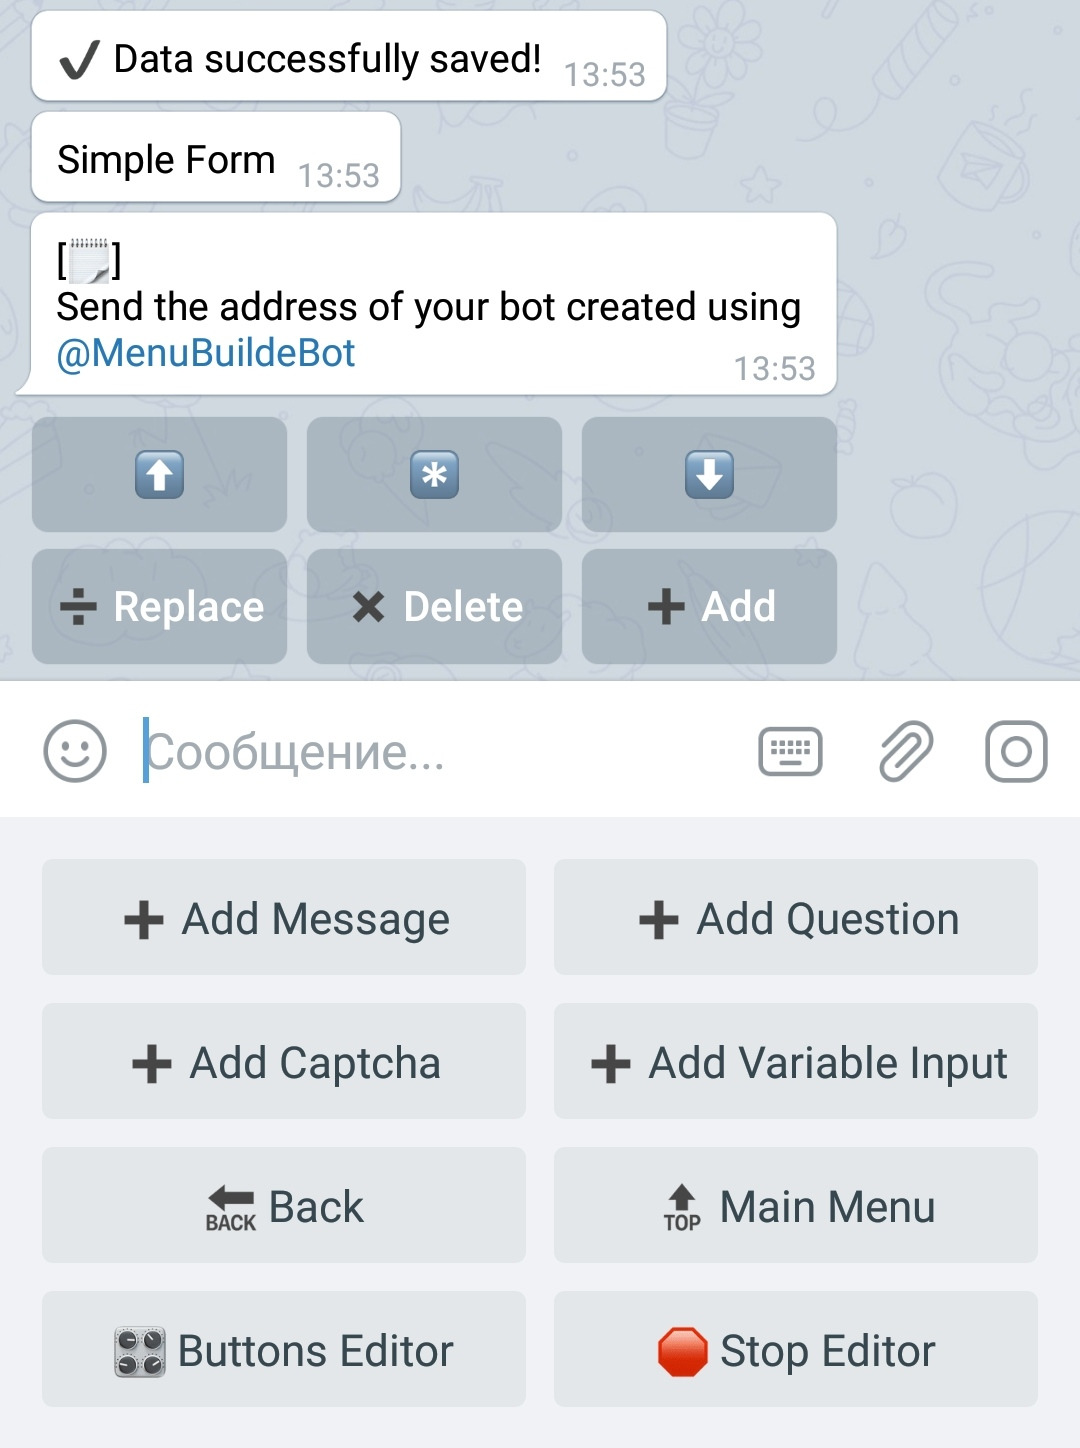
When the user clicks the button, he will see a question, and the bot will wait for his answer.
If the user clicks "Cancel", then he will be redirected to the previous screen, if he sends a message, he will be directed forward (in case if there are still questions or messages in the menu).
⬛ How admin receiving answers.
After the user completes the form (in the simplest case, if the user has sent a response), all bot administrators will be aware of this fact.
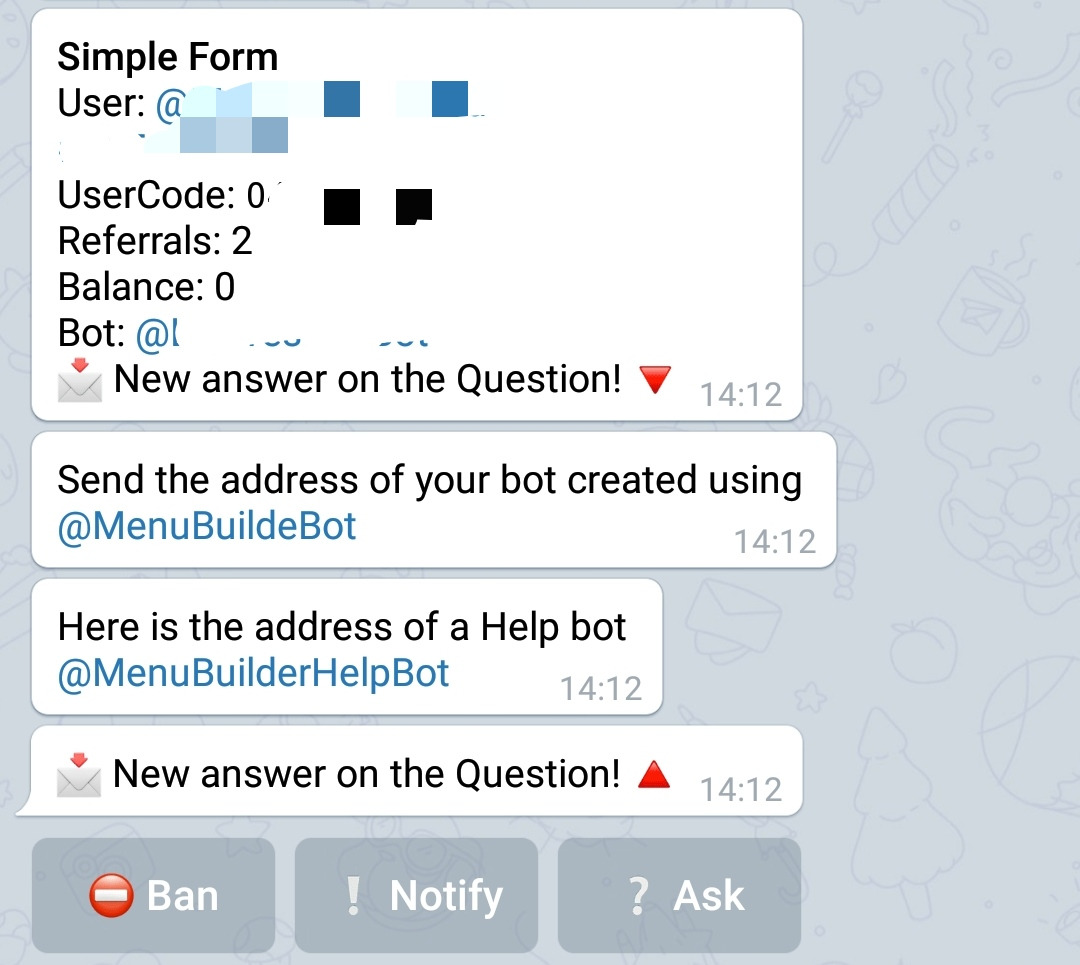
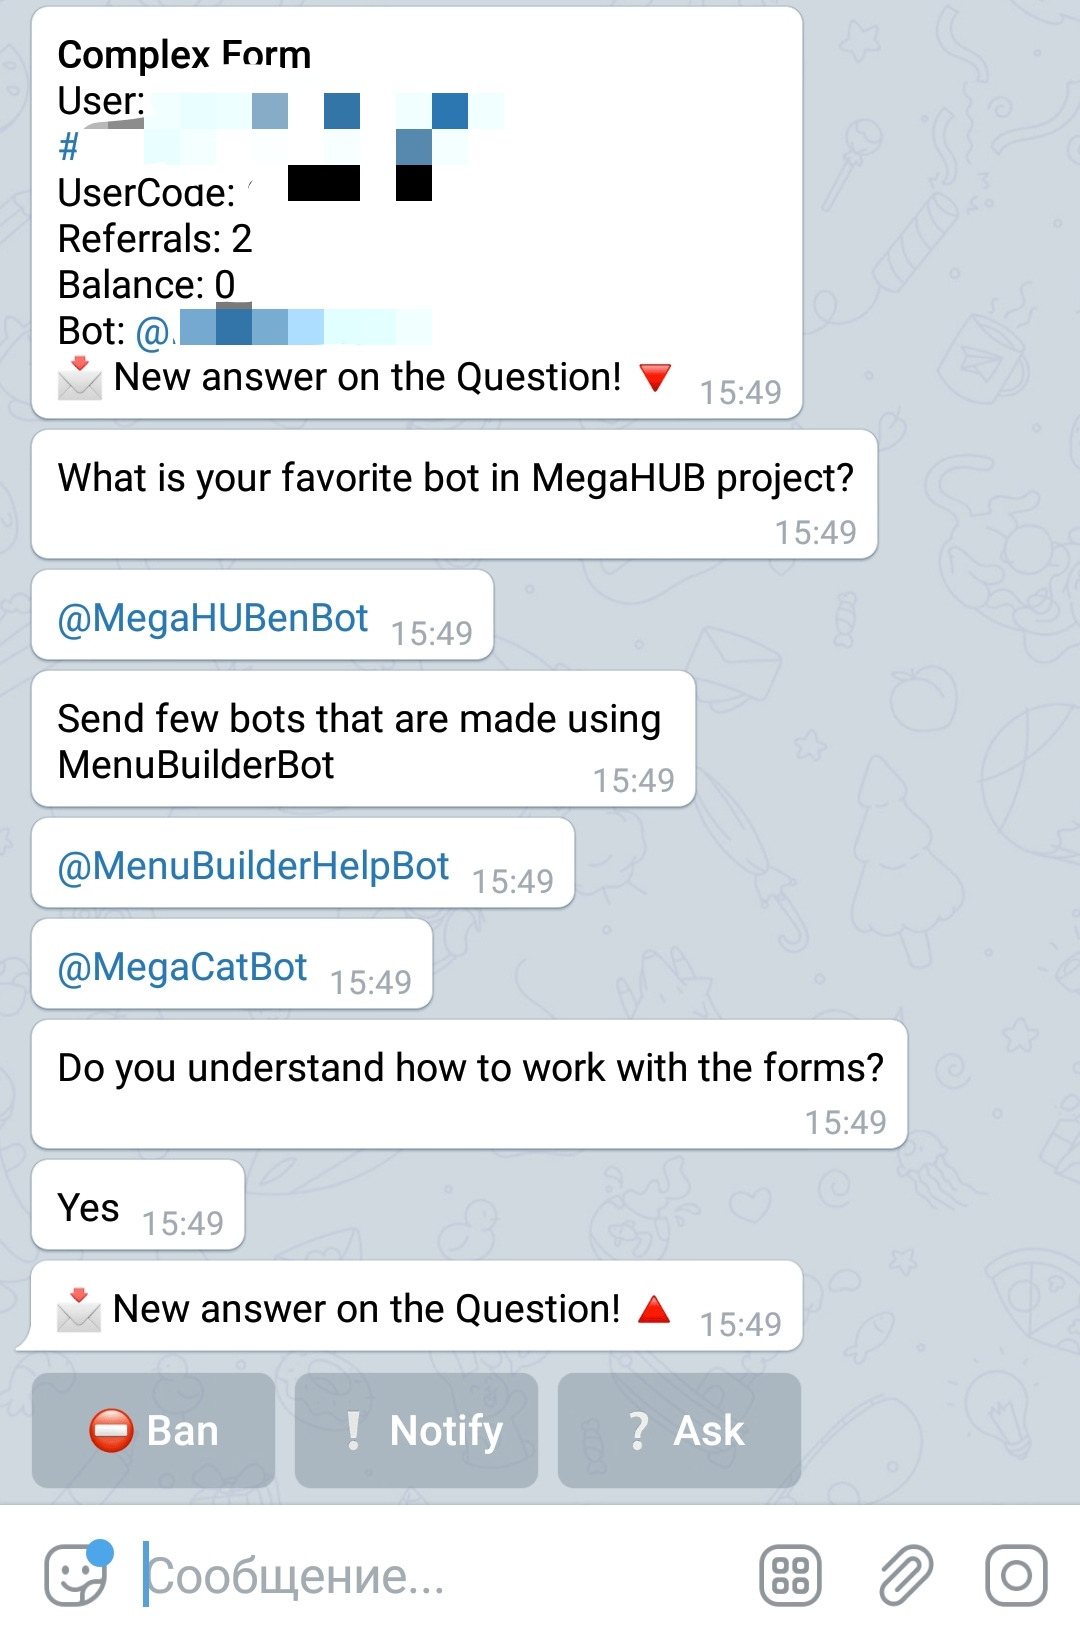
The message will contain:
● The name of the form (this is the name of the button where you placed the question).
● The question of form itself.
● User's answers to each question (or all answers from a question with a multi-answer).
● The number of user's referrals (optionally activated via the bot's admin panel).
● User balance
● The address of the bot itself
The “Ban”, “Notify” and “Ask” buttons will be added to the response signature.
These buttons allow you to ban the user which will not allow him to use the forms in this bot anymore, in addition, the user can be "notified" in this case, the user will receive a message, but he will not be able to answer, and the user can be "asked", this will allow him to answer admin's question. Thus, the administrator can control the amount of communication with a specific user, having the ability to stop it at any time.
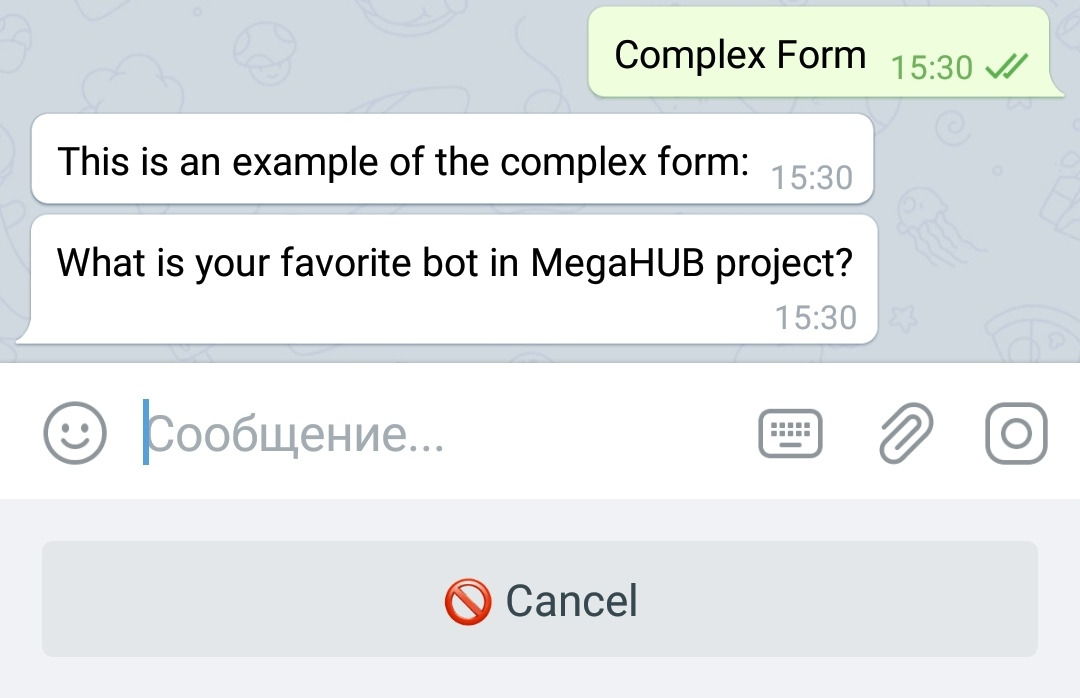
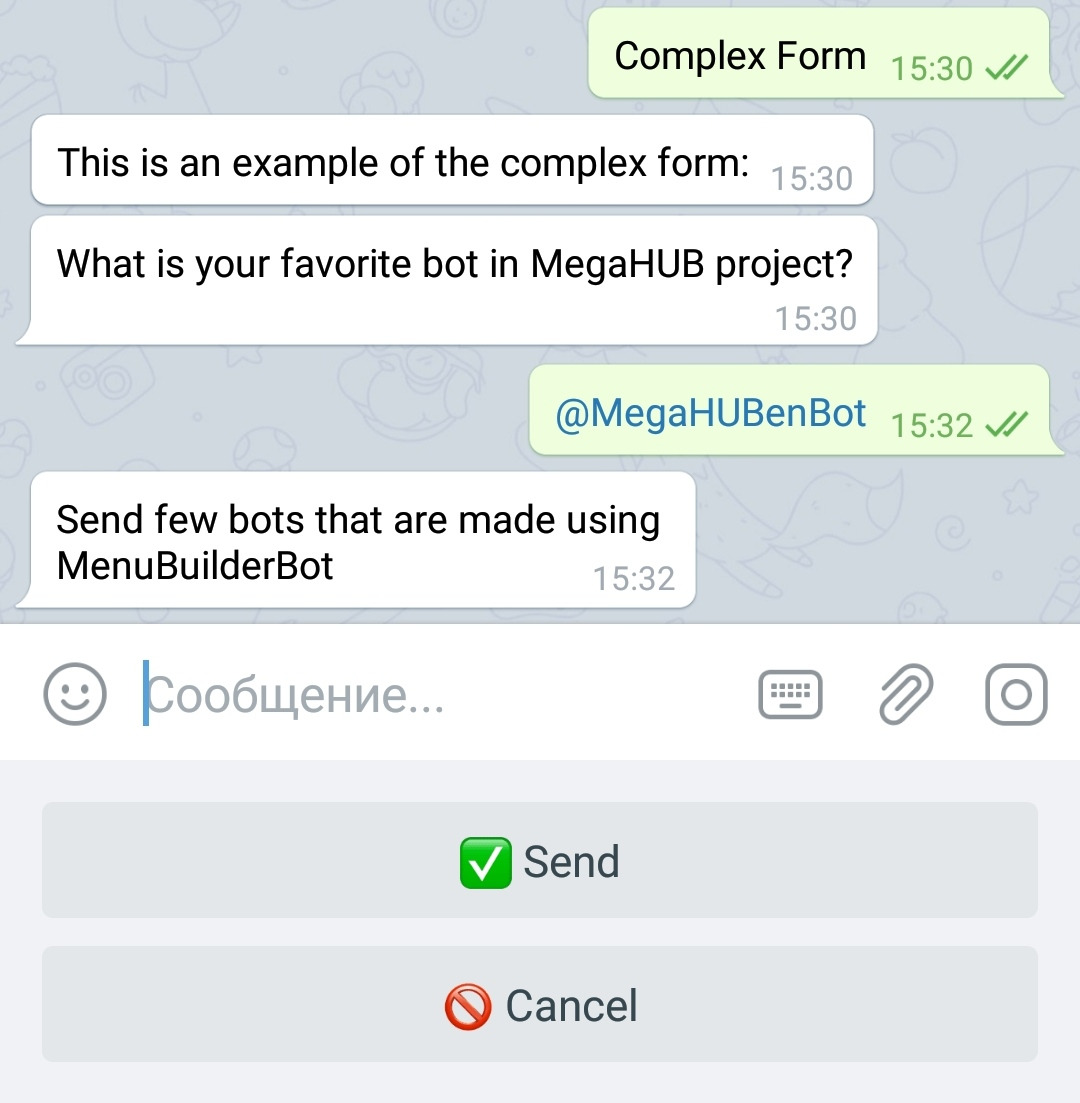
⬛ How to create a complex form.
Creating a complex form is not difficult: such forms are just a combination of messages, questions of various types and buttons.
For example, you can add an introductory message, then one or more questions and then a thank-you message (not requiring an answer). In addition, buttons leading deeper into the menu can follow the form.
It may all look like this:
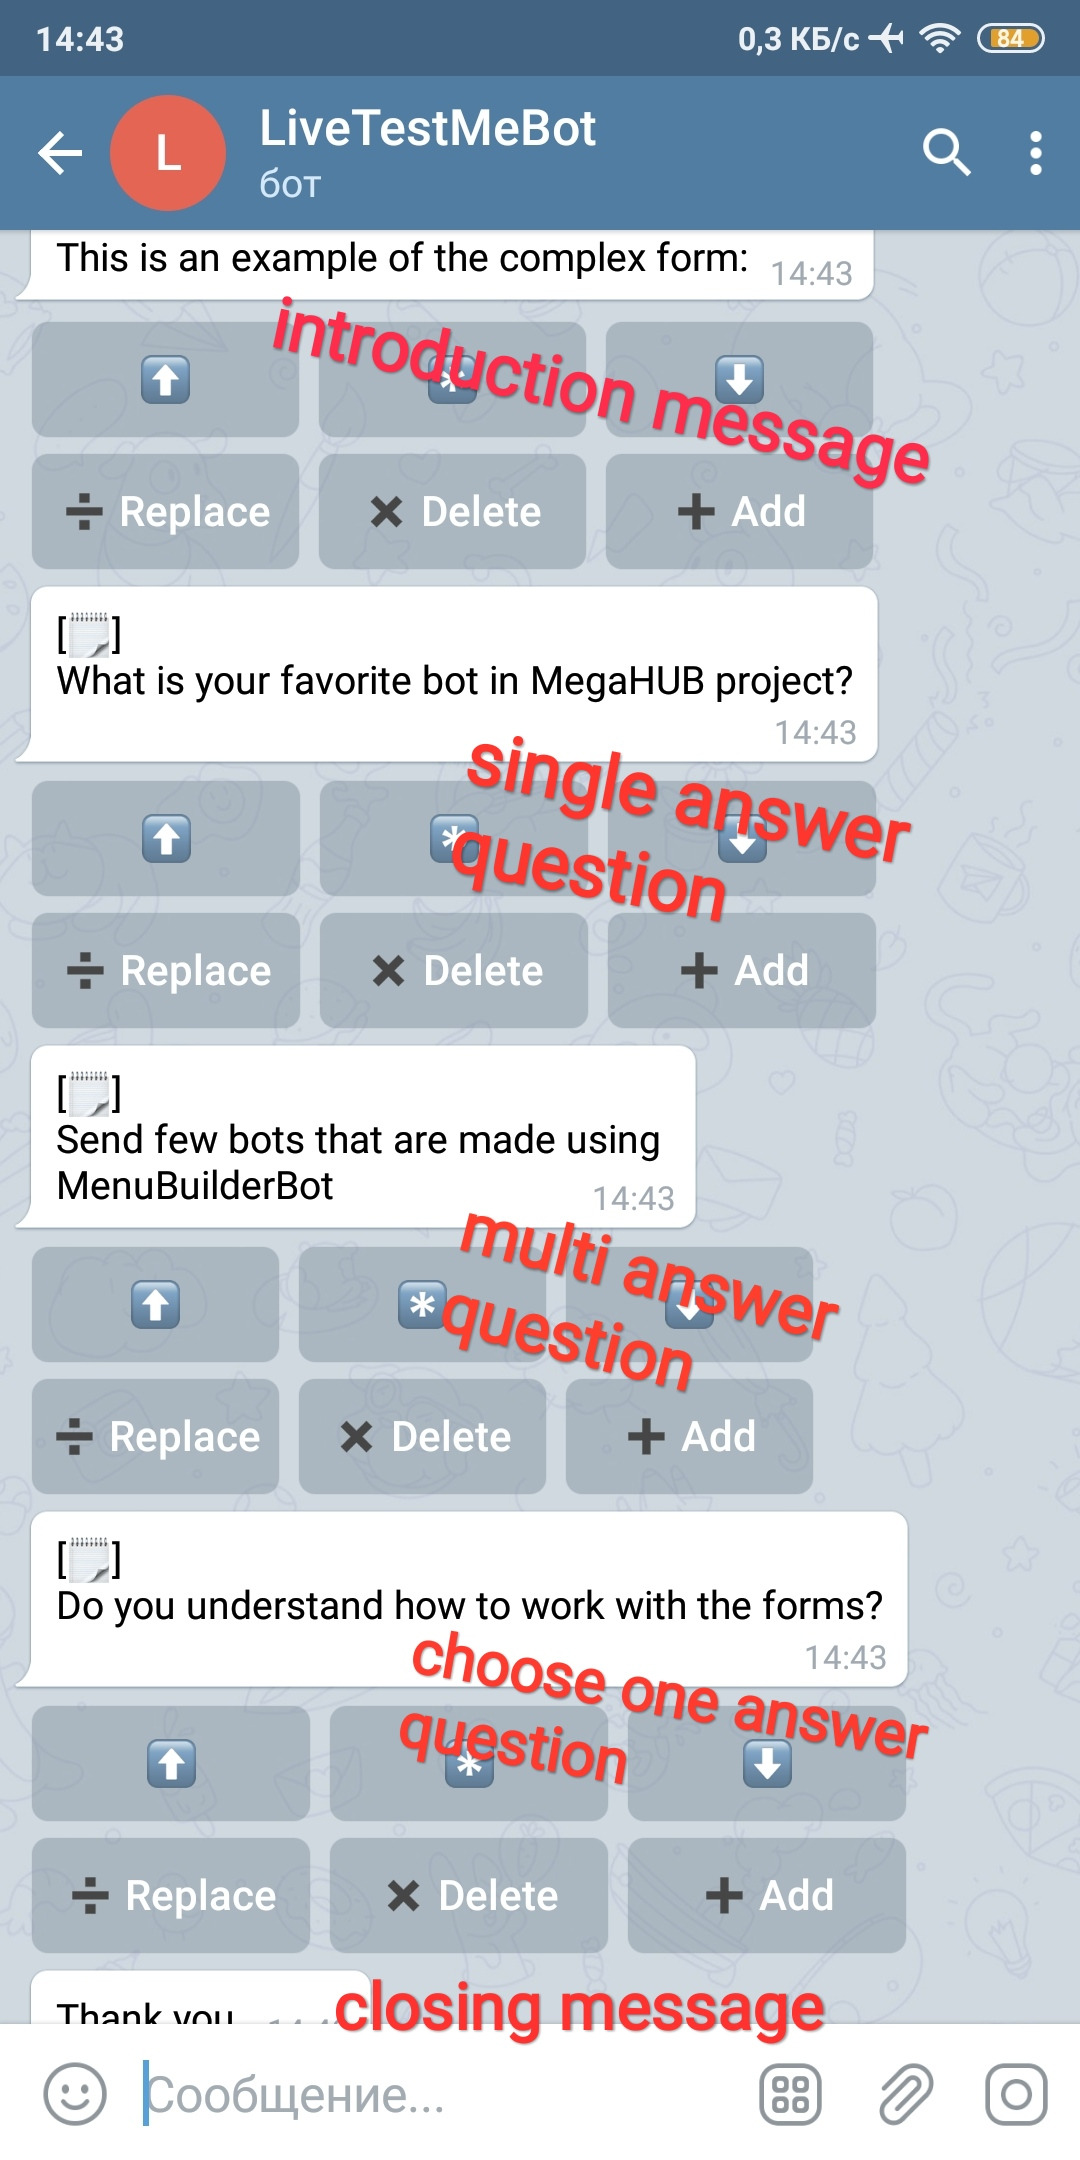
What will the user see?
Introductory message and first single question.
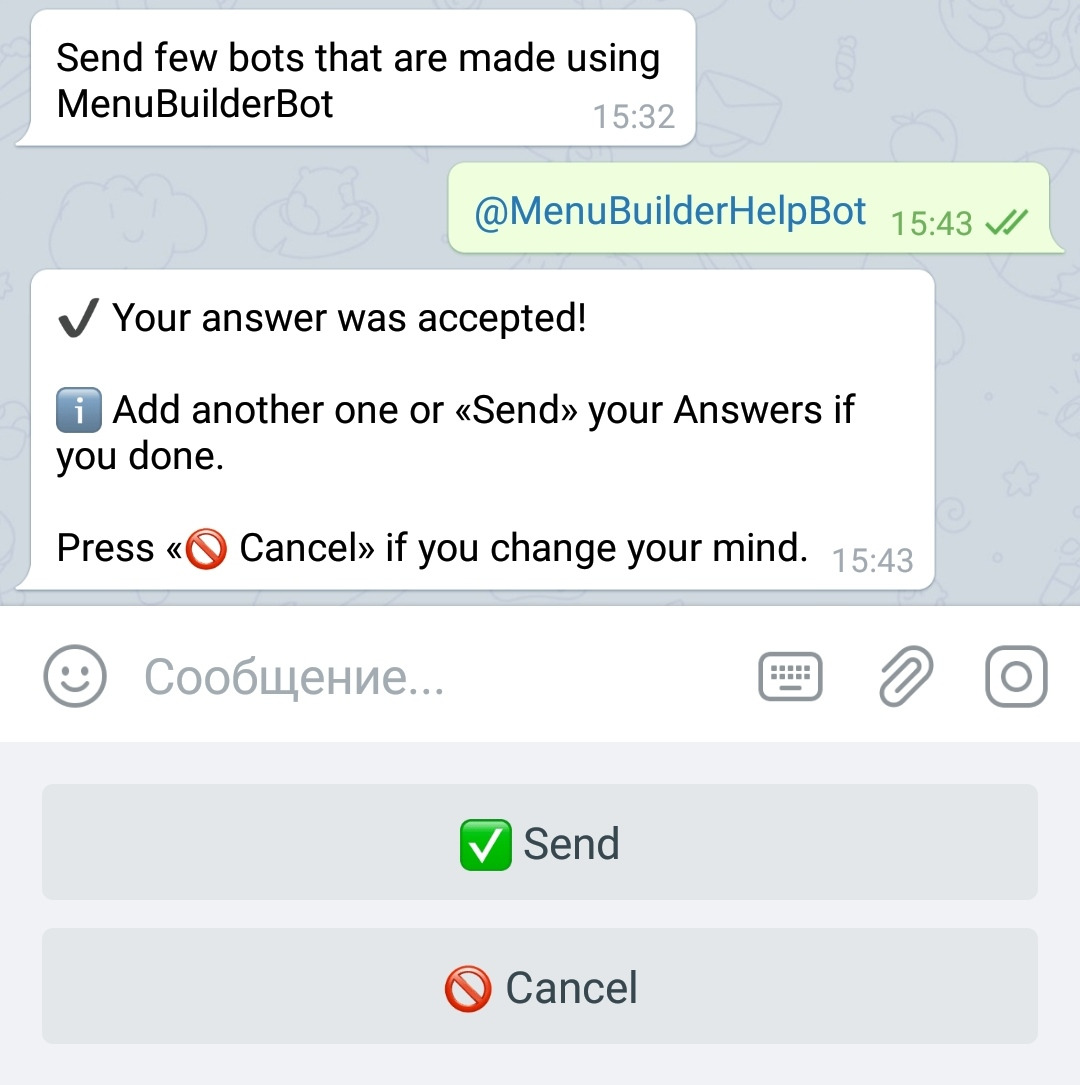
The next question is with a multi-answer.
After the answer he will receive the following question. As you can see, the "Submit" button has appeared. The bot will accept answers until the user clicks it.
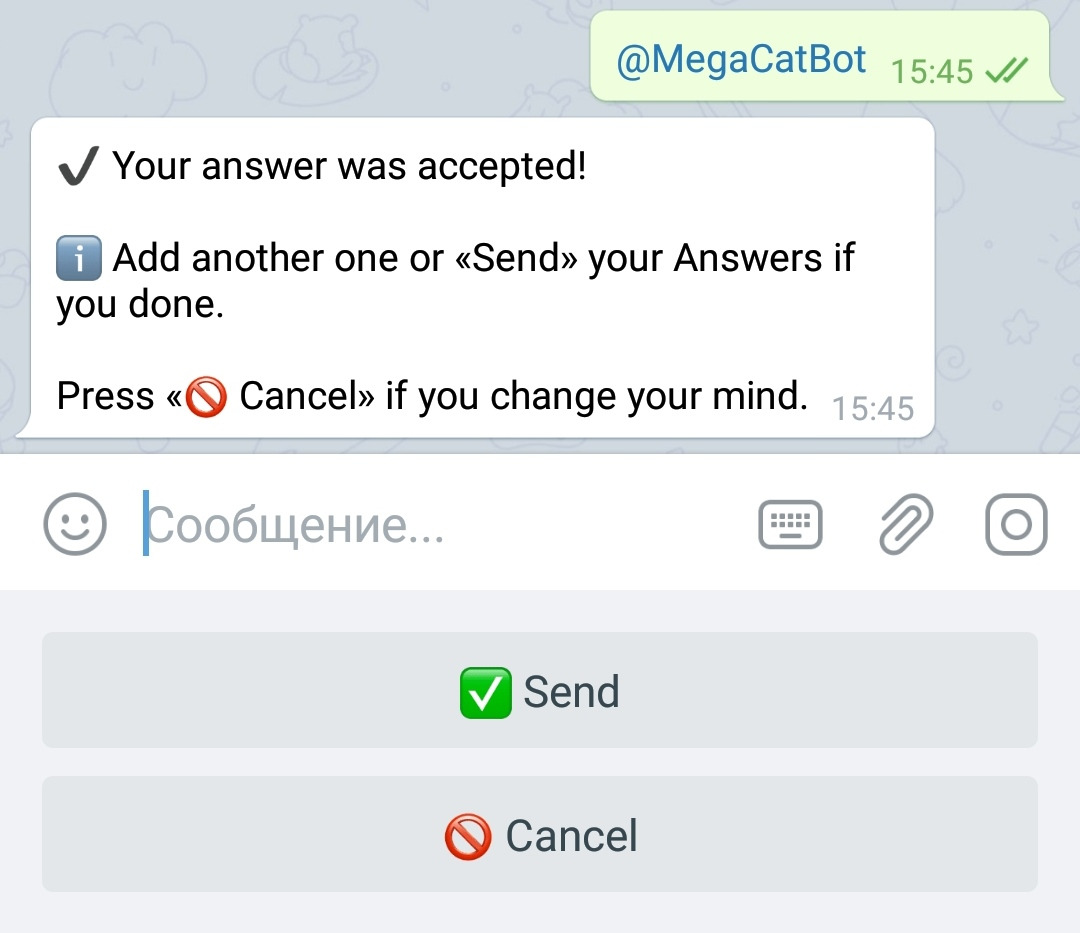
The first response of the user.
The second response from the user.
The user sends the answers to the second question and receives the third, in the answer there are only options indicated by the admin.
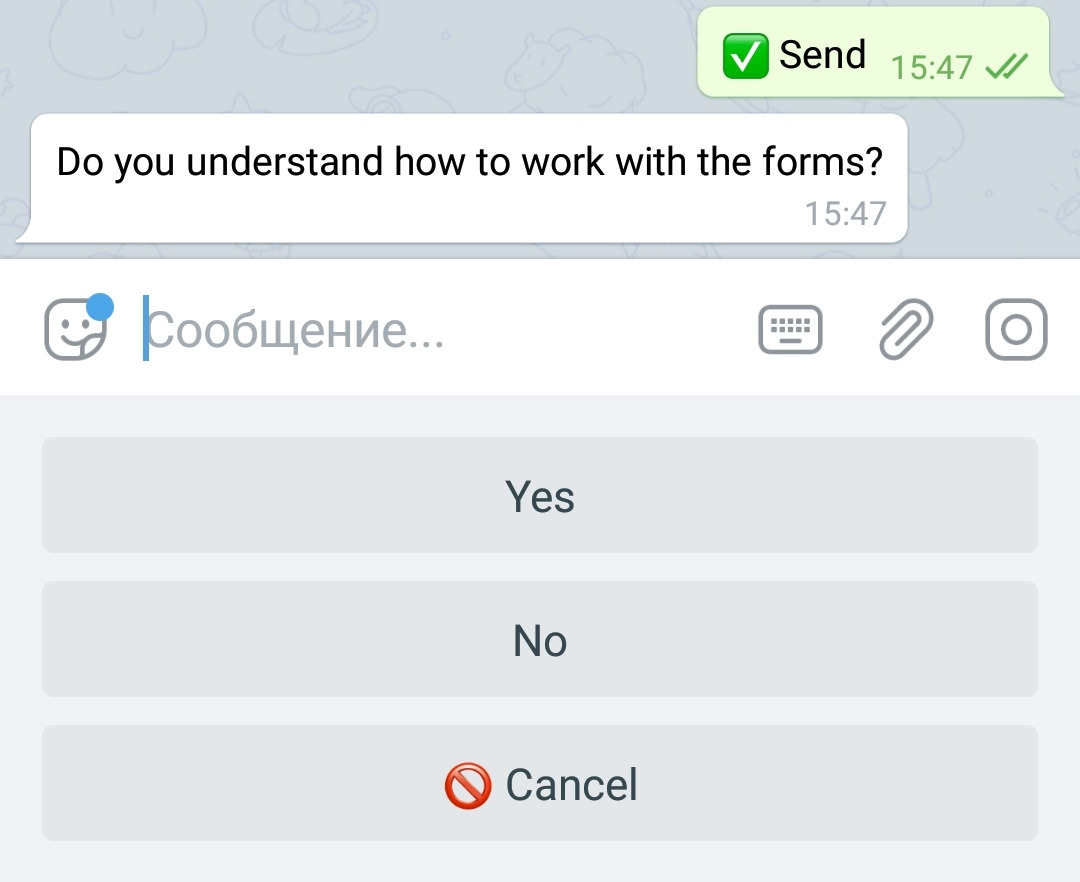
After selecting one of the proposed answer options, the user will have access to the underlying buttons and menus.
Admins, in turn, will receive all the responses from this user in their bot.
⬛ Variable user input
To create a form that allows you to save user data in a variable, you need the variable itself:
You can add an additional variable to your bot by going:
☞ 🔐Admin | 🧩Extensions | 📂Variables | Additional variables
If you already have an unnecessary text variable - you can use it.
As well as to create the rest of the forms you need:
1. Go to the "Post Editor" and select "Add Variable Input":
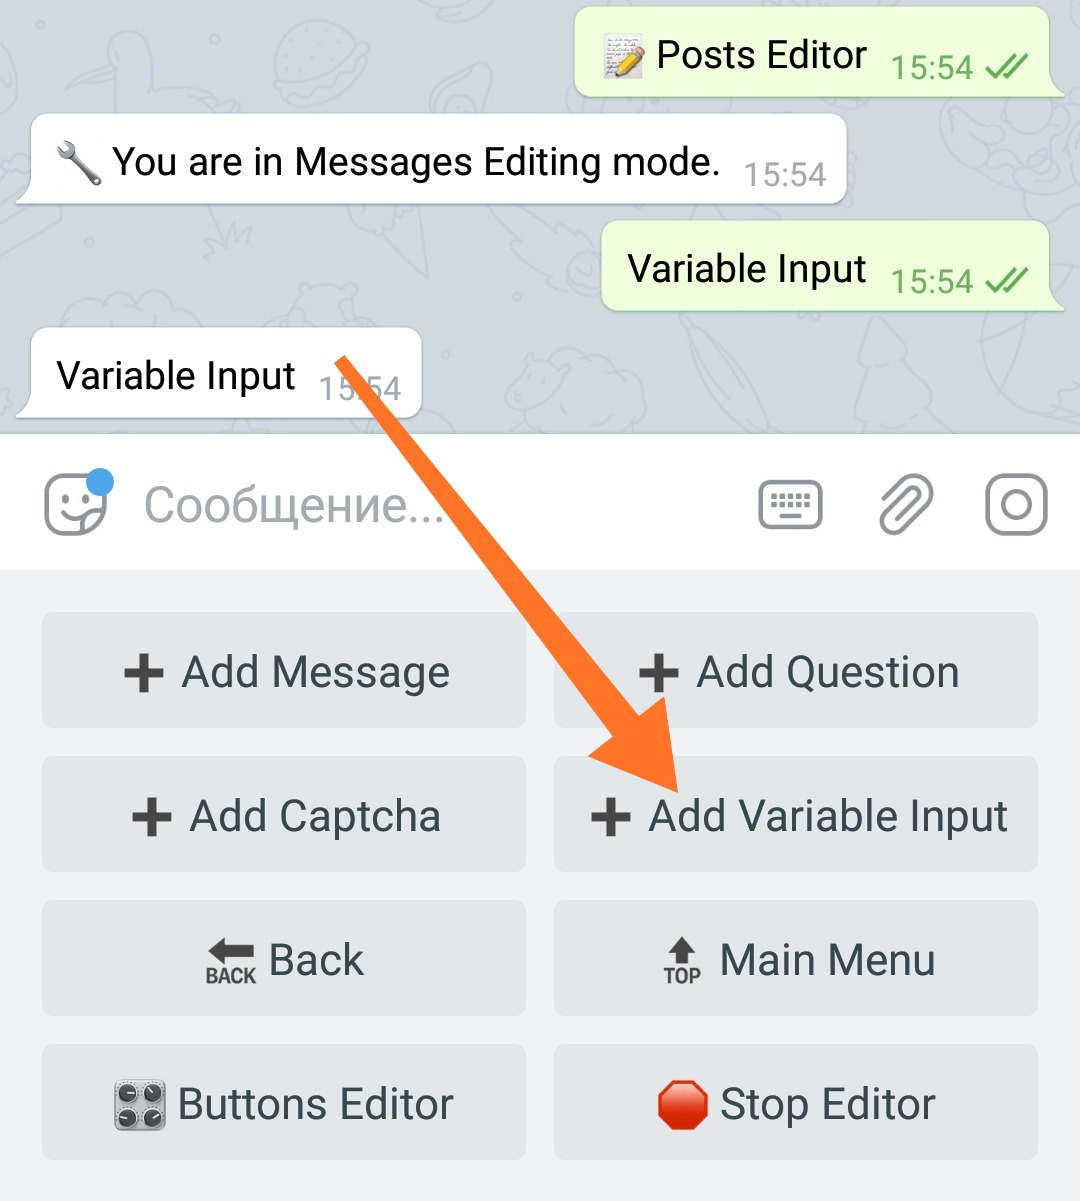
After which you will be asked to select a variable for storing data.
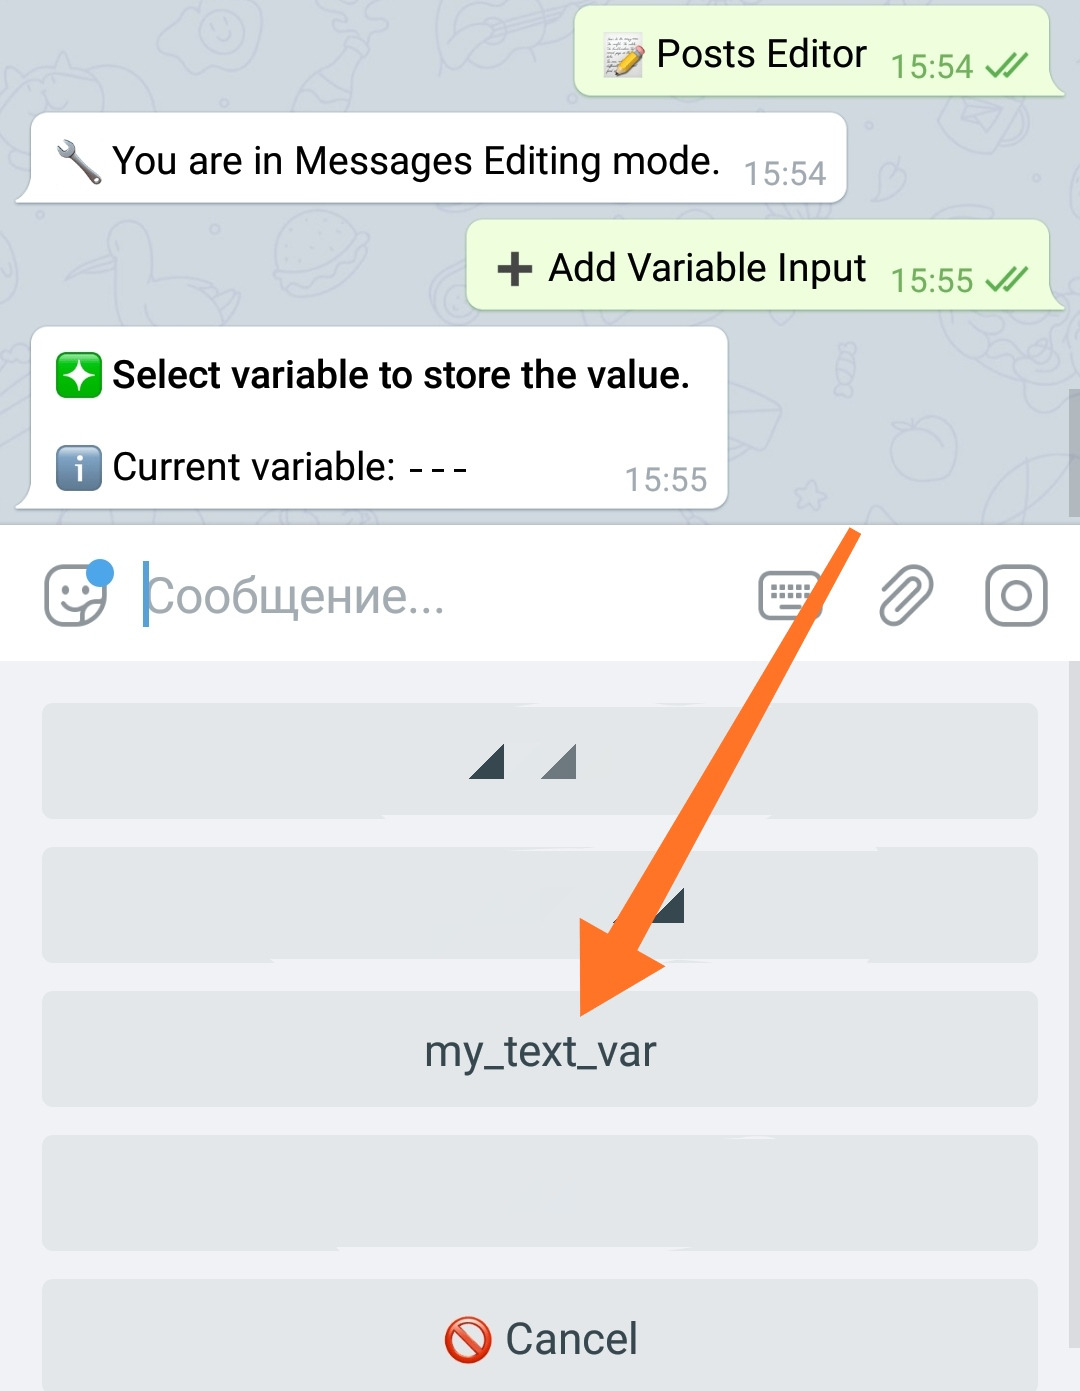
2. Select the variable you need from the list in the lower menu:
3. Select the Type of Question.
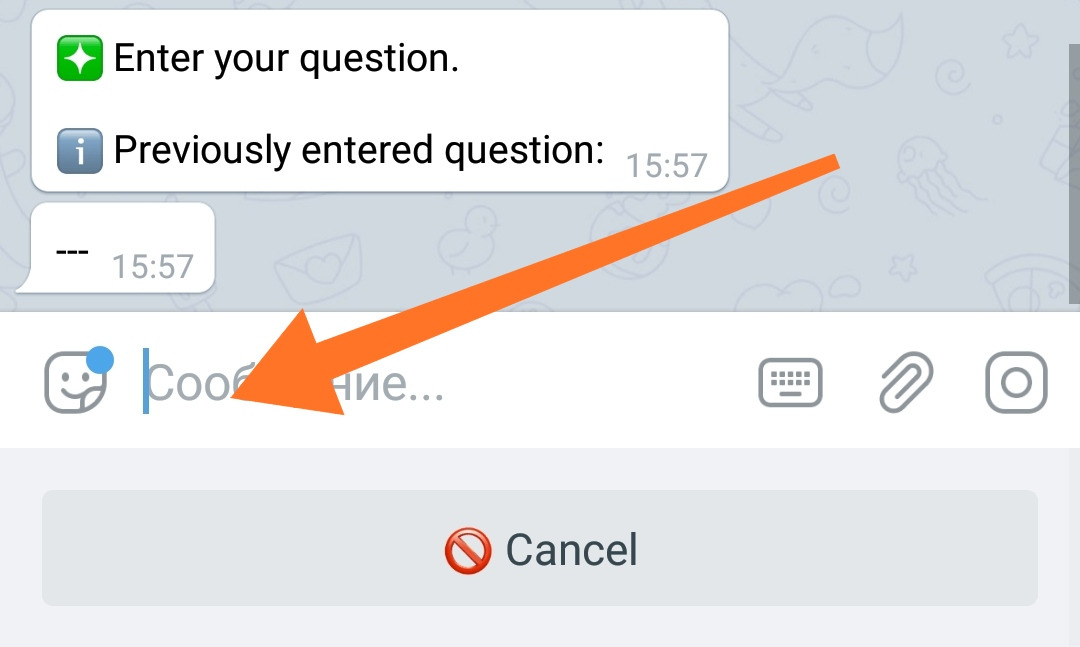
IMPORTANT: The question options presented for selection will depend on which type of variable you have selected earlier. It should be noted that it is impossible to write tect data into a numeric variable and, accordingly, questions operating with such data will be absent.
4. After selecting the Type of Question, the bot will offer to enter a question for the user about what information he needs to send in order to save it in a variable and send it to the bot:
After sending the question, a variable input form will be created.
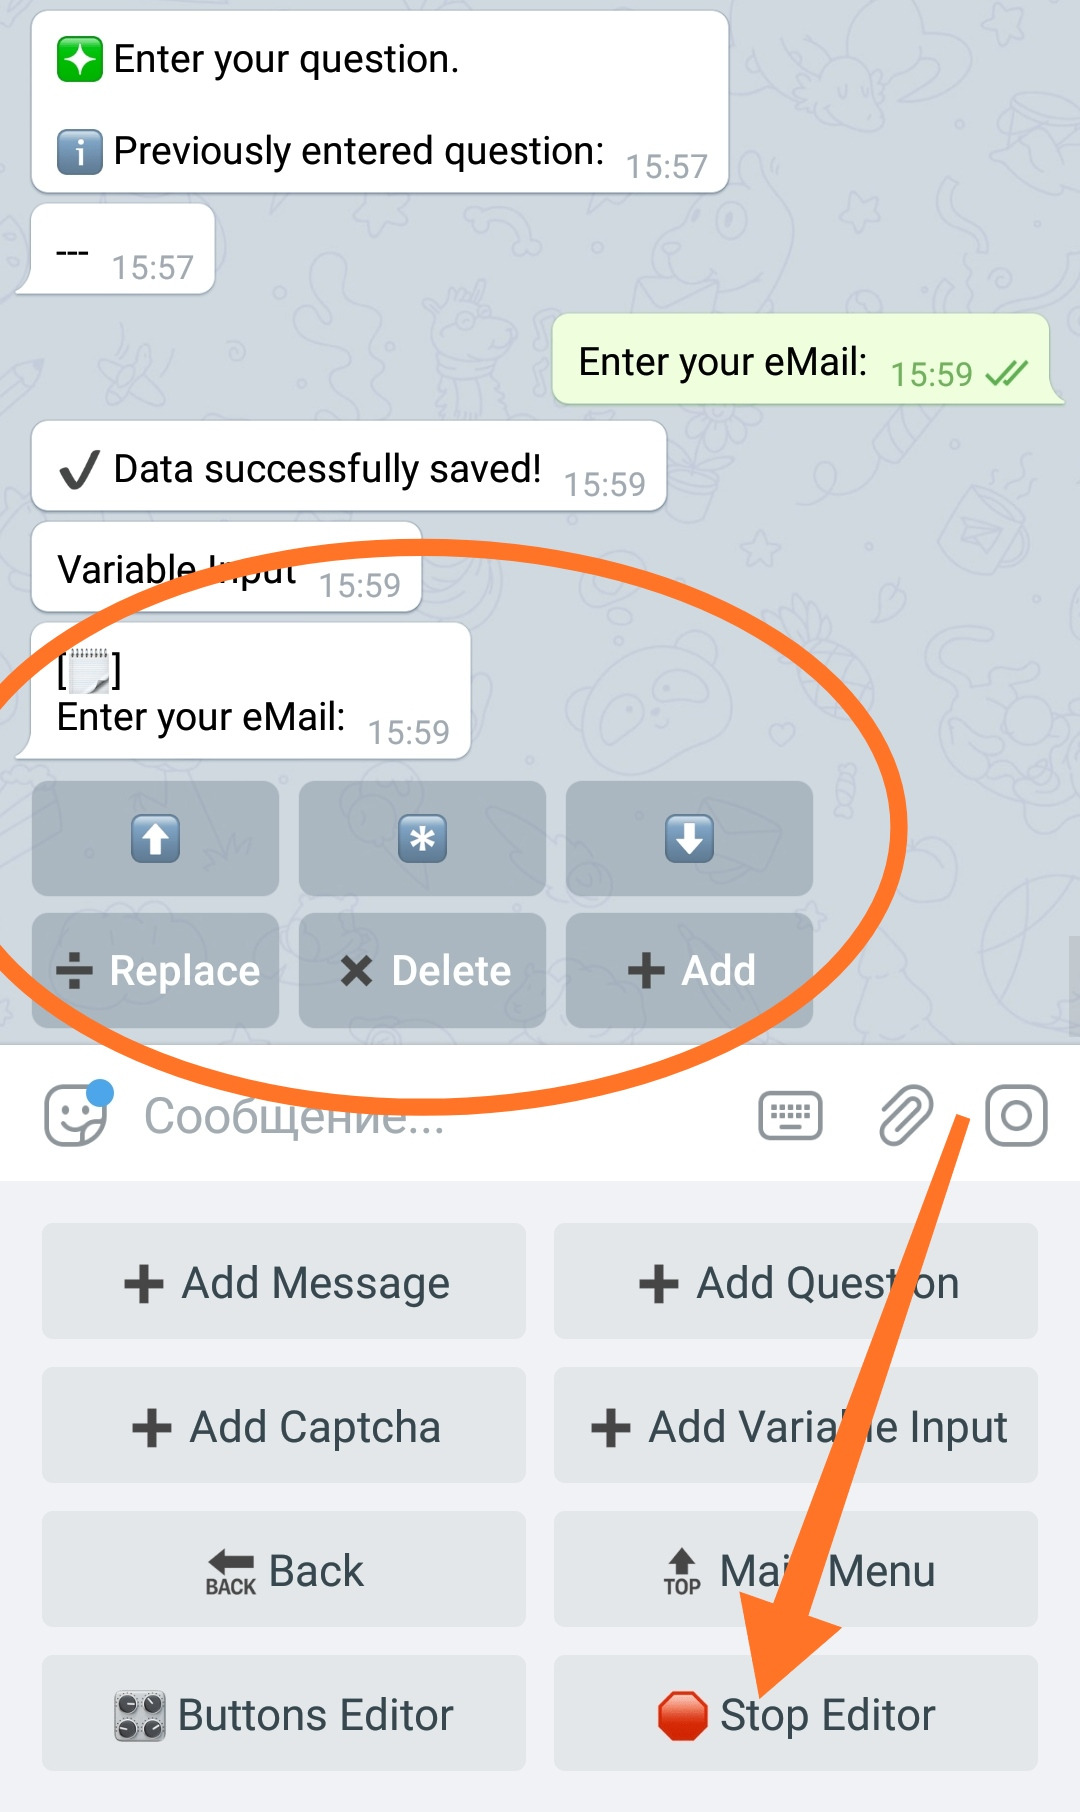
You can exit the editor or continue to add questions if you need a complex form, the creation of which was described above.

⬛ Additional Information
◾ Variable data of all users (whoever has it) can be exported to a .CSV file.
To add this feature, go to your bot:
☞ 🔐Admin | 🧩Extensions | 📂 Logs and Data | Export User Data
In way way, you can collect user data such as eMail, Address, etc.
More details in the help bot:
https://t.me/MenuBuilderHelpBot?start=m10097