How to create a live streamer bot for streaming videos
Navaneeth R
ഒരു സ്ട്രീമർ ബോട്ട് നിങ്ങളുടെ ഗ്രൂപ്പിന്/ചാനലിന് വേണ്ടി എങ്ങനെ നിർമ്മിക്കുവാൻ കഴിയും എന്ന് നോക്കാം...
Special thanks to Subin P S bro for working a full day for this live streamer bot.
Requirements for using
- A Telegram bot
- A Telegram account for streaming in Video Chat
- Heroku account
Requirements for Bot creation
- Bot Token
- API ID and API hash
- Session String
- Sign up to Heroku
- Give admin permissions
- Get a MongoDB database
1. Bot Token
ആദ്യമായി, @Botfather ബോട്ടിൽ നിന്ന് ഒരു ബോട്ട് create ചെയ്തിട്ട്, അതിൻ്റെ API Token കോപ്പി ചെയ്തു വെക്കുക.
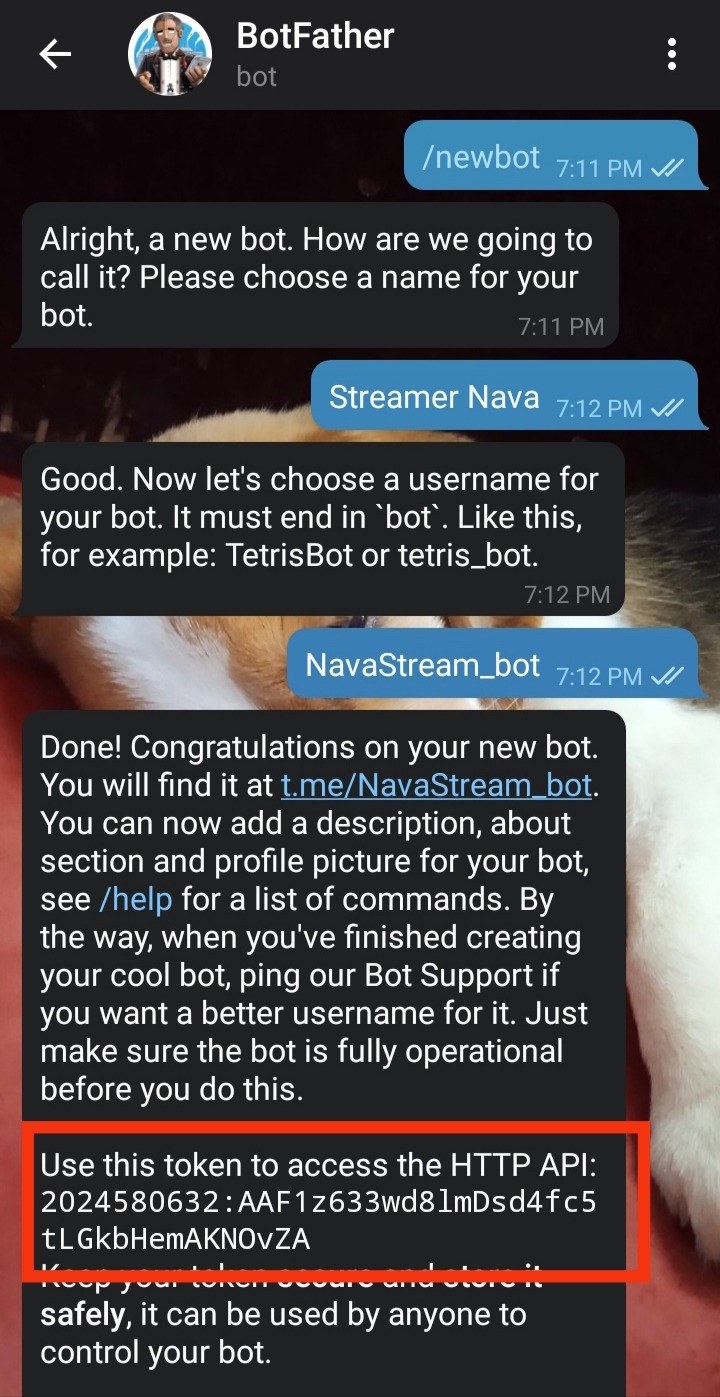
പിന്നീട് നിങ്ങൾക്ക് അത് എപ്പോൾ വേണമെങ്കിലും /mybots, /token എന്നീ കമാൻഡുകൾ ഉപയോഗിച്ച് എടുക്കാവുന്നതാണ്.
2. API ID and API hash
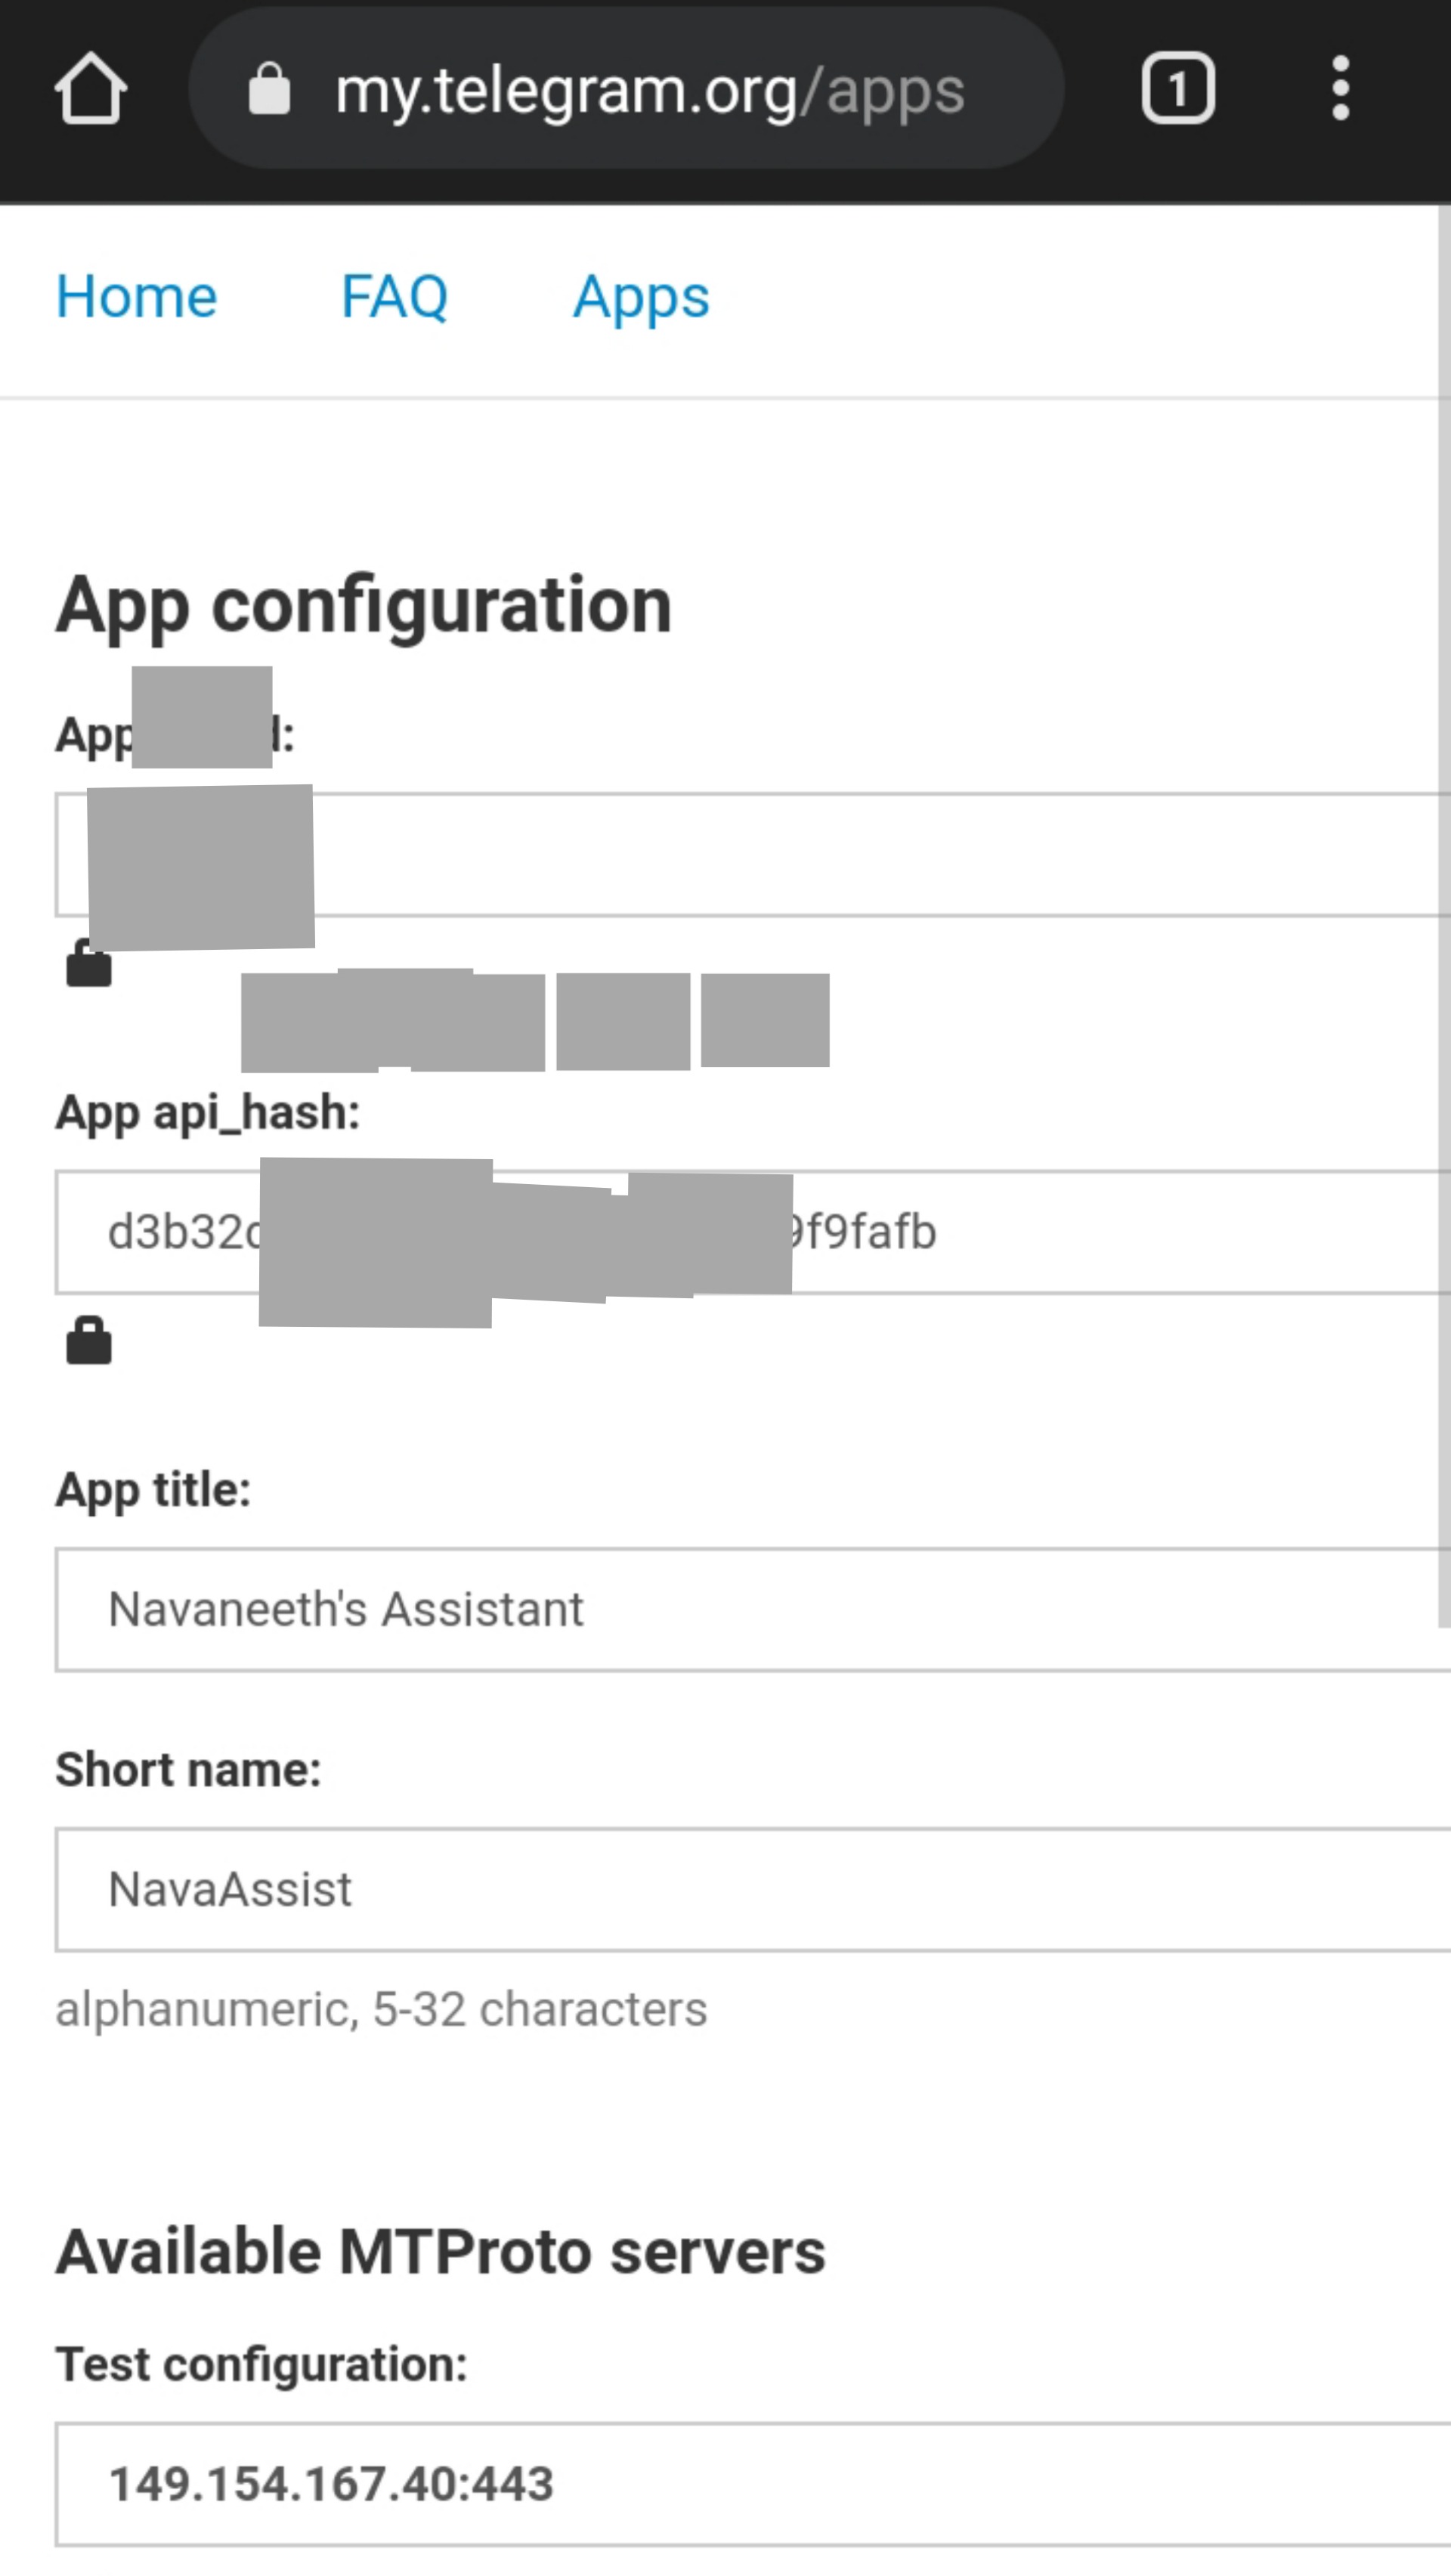
ഇനി, സ്ട്രീം ചെയ്യുവാൻ ഉദ്ദേശിക്കുന്ന അക്കൗണ്ട് ഉപയോഗിച്ച് my.telegram.org വെബിൽ ലോഗിൻ ചെയ്ത ശേഷം, API ID, API hash തുടങ്ങിയവ കോപ്പി ചെയ്തു സൂക്ഷിക്കുക. Do not share it with anyone.
3. Session String
ഇനി, repl.it/@subinps/getStringName എന്ന ലിങ്ക് ഓപ്പൺ ചെയ്ത്, API ID, API hash, stream ചെയ്യാൻ ഉദ്ദേശിക്കുന്ന അക്കൗണ്ടിൻ്റെ ഫോൺ നമ്പർ എന്നിവ കൊടുക്കുക.
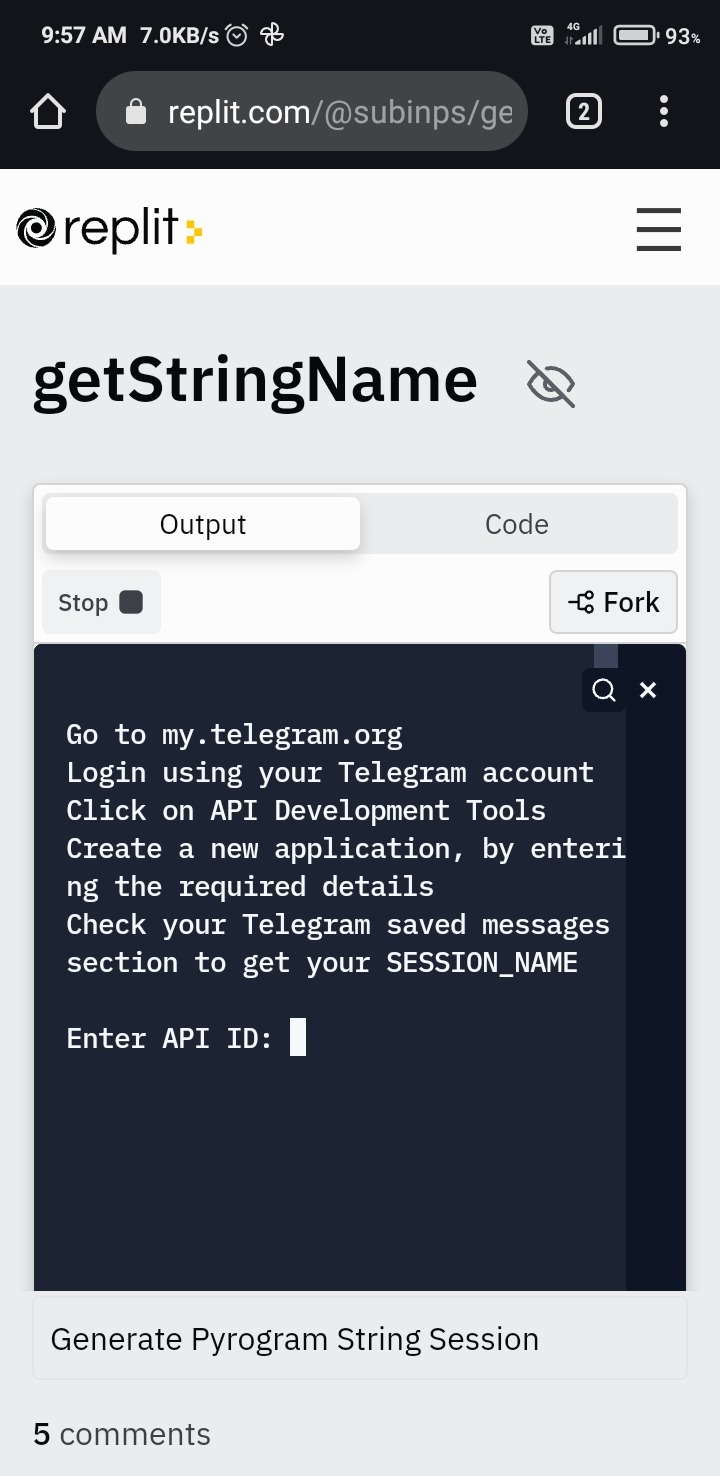
String session stream ചെയ്യാൻ ഉദ്ദേശിക്കുന്ന അക്കൗണ്ടിൻ്റെ Saved Messages-ലാണ് കിടക്കുക. അത് കോപ്പി ചെയ്തു സൂക്ഷിക്കുക. Do not share it with anyone.
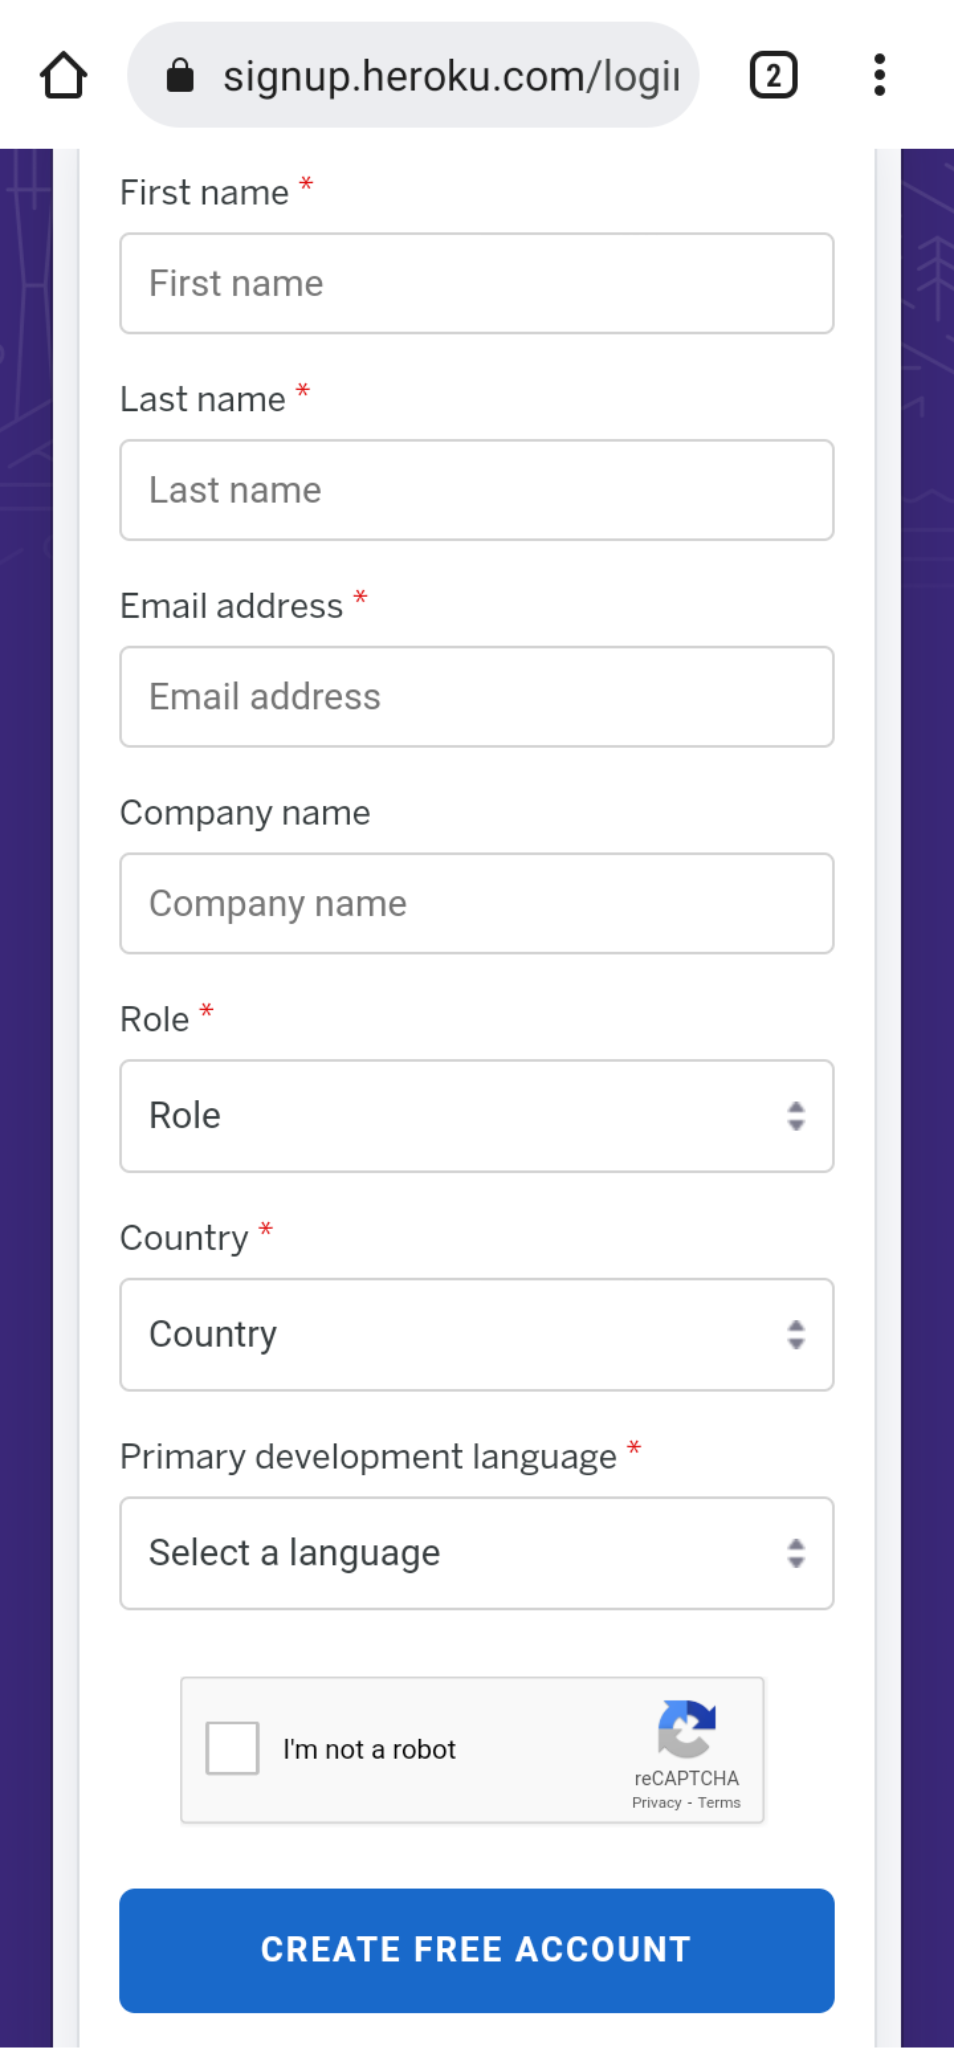
4. Sign up to Heroku
Heroku-ൽ sign up ചെയ്യുക.
Link: https://id.heroku.com/login
5. Give admin permissions
ഇനി ടെലിഗ്രാം ഓപ്പൺ ചെയ്ത് stream ചെയ്യുവാൻ ഉദ്ദേശിക്കുന്ന ഗ്രൂപ്പിലേക്ക്/ചാനലിലേക്ക് streamer യൂസർബോട്ടും streamer ബോട്ടും add ചെയ്ത് അഡ്മിൻ അനുമതികൾ നൽകുക.
- Manage Video Chats
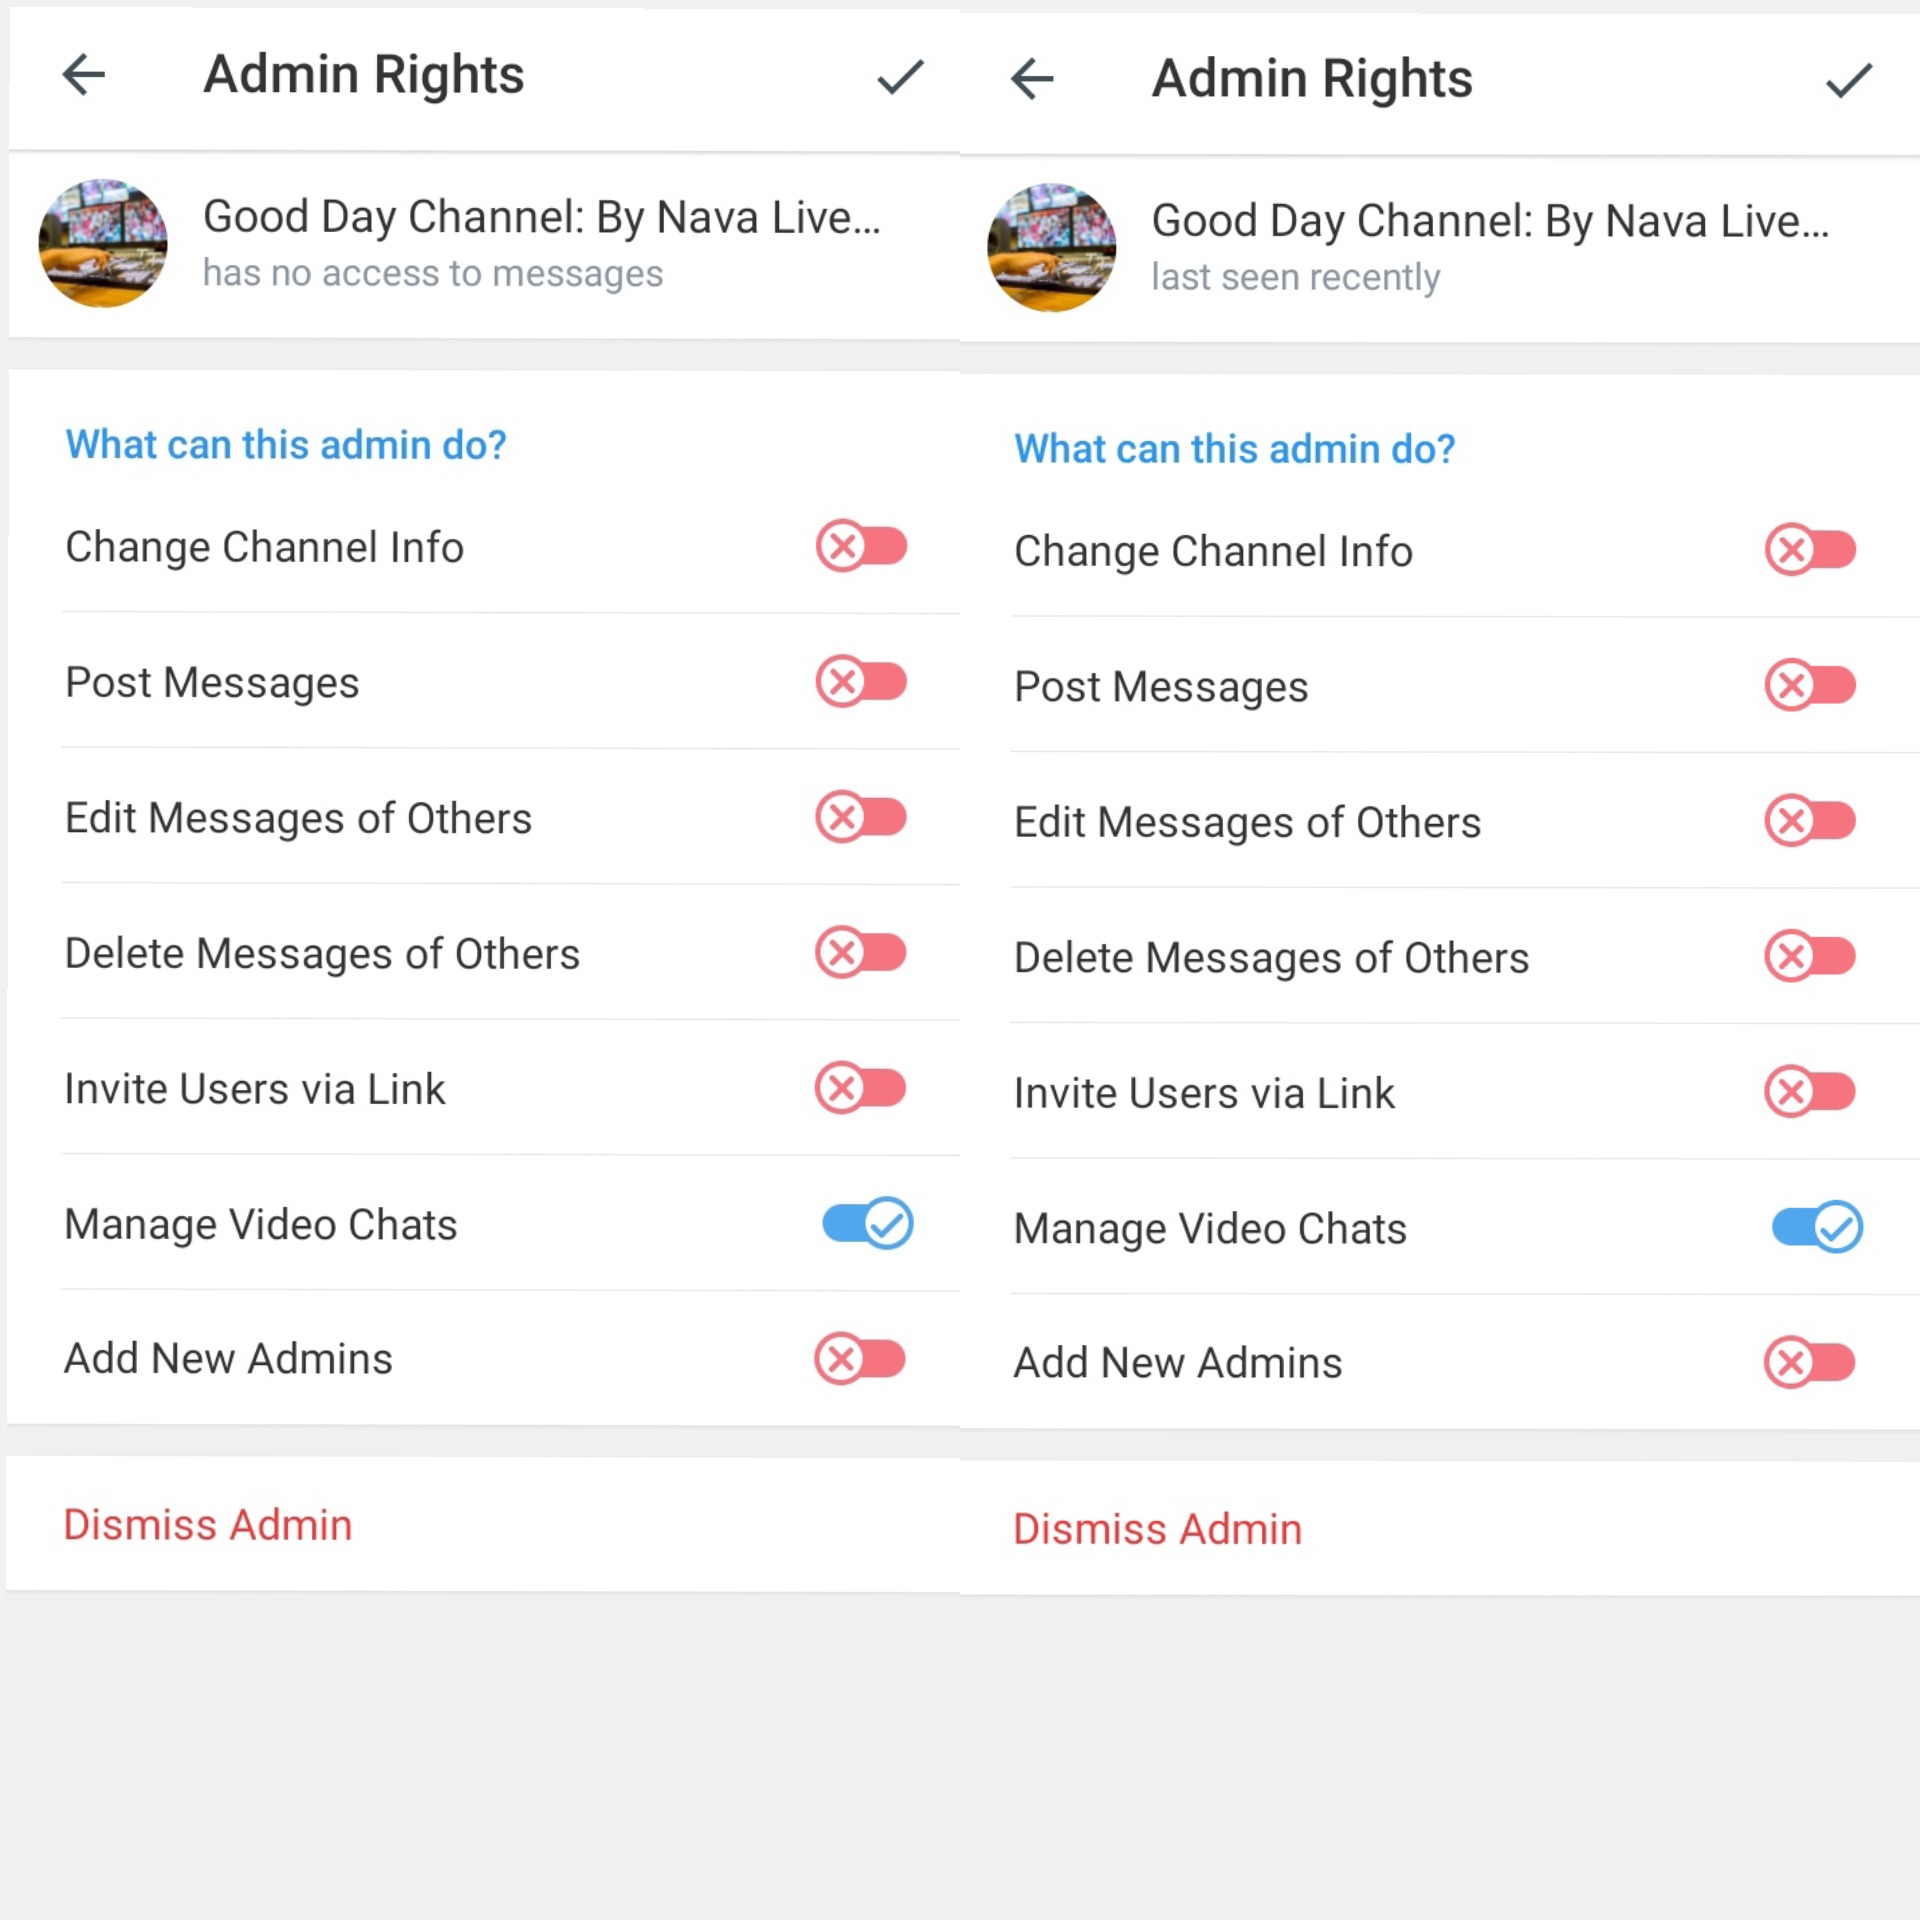
ഇനി, stream ചെയ്യുവാൻ ഉദ്ദേശിക്കുന്ന ഗ്രൂപ്പിൻ്റെ/ചാനലിൻ്റെ ID കൂടി ഒന്ന് കോപ്പി ചെയ്തു വെക്കുക.
(Example: -10012659279424)
6. Get a MongoDB database
ഒരു MongoDB Database എടുക്കുന്നതിനെ പറ്റി കൂടുതൽ അറിയാൻ, ഈ വീഡിയോ കാണുക.
Source: Userge OffTopic
ഒരു MongoDB Database required അല്ലെങ്കിലും, ഇടുന്നത് നല്ലതാണ്. ഇല്ലെങ്കിൽ, ബോട്ടിൻ്റെ ചില functions (Example: /record) ഒന്നും നല്ല രീതിയിൽ experience ചെയ്യാൻ പറ്റില്ല.
Deployment
ഇനി ബോട്ട് Heroku-ലേക്ക് deploy ചെയ്യുക.
Link: https://heroku.com/deploy?template=https://github.com/subinps/VCPlayerBot
Deploy മെനുവിലെ required ആയിട്ടുള്ള variables എല്ലാം fill ചെയ്ത് ശേഷം, Deploy app ബട്ടൺ അമർത്തുക.

Deploy ചെയ്ത് കഴിയുമ്പോൾ, Manage app ഓപ്പൺ ചെയ്ത്, Dyno Type toggle ചെയ്ത് Worker (/bin /bash /start.sh) ഓൺ ചെയ്യുക. ചാനലിൽ/ഗ്രൂപ്പിൽ വീഡിയോ ചാറ്റ്/ലൈവ് സ്ട്രീം തുടങ്ങുന്നത് കാണാം.
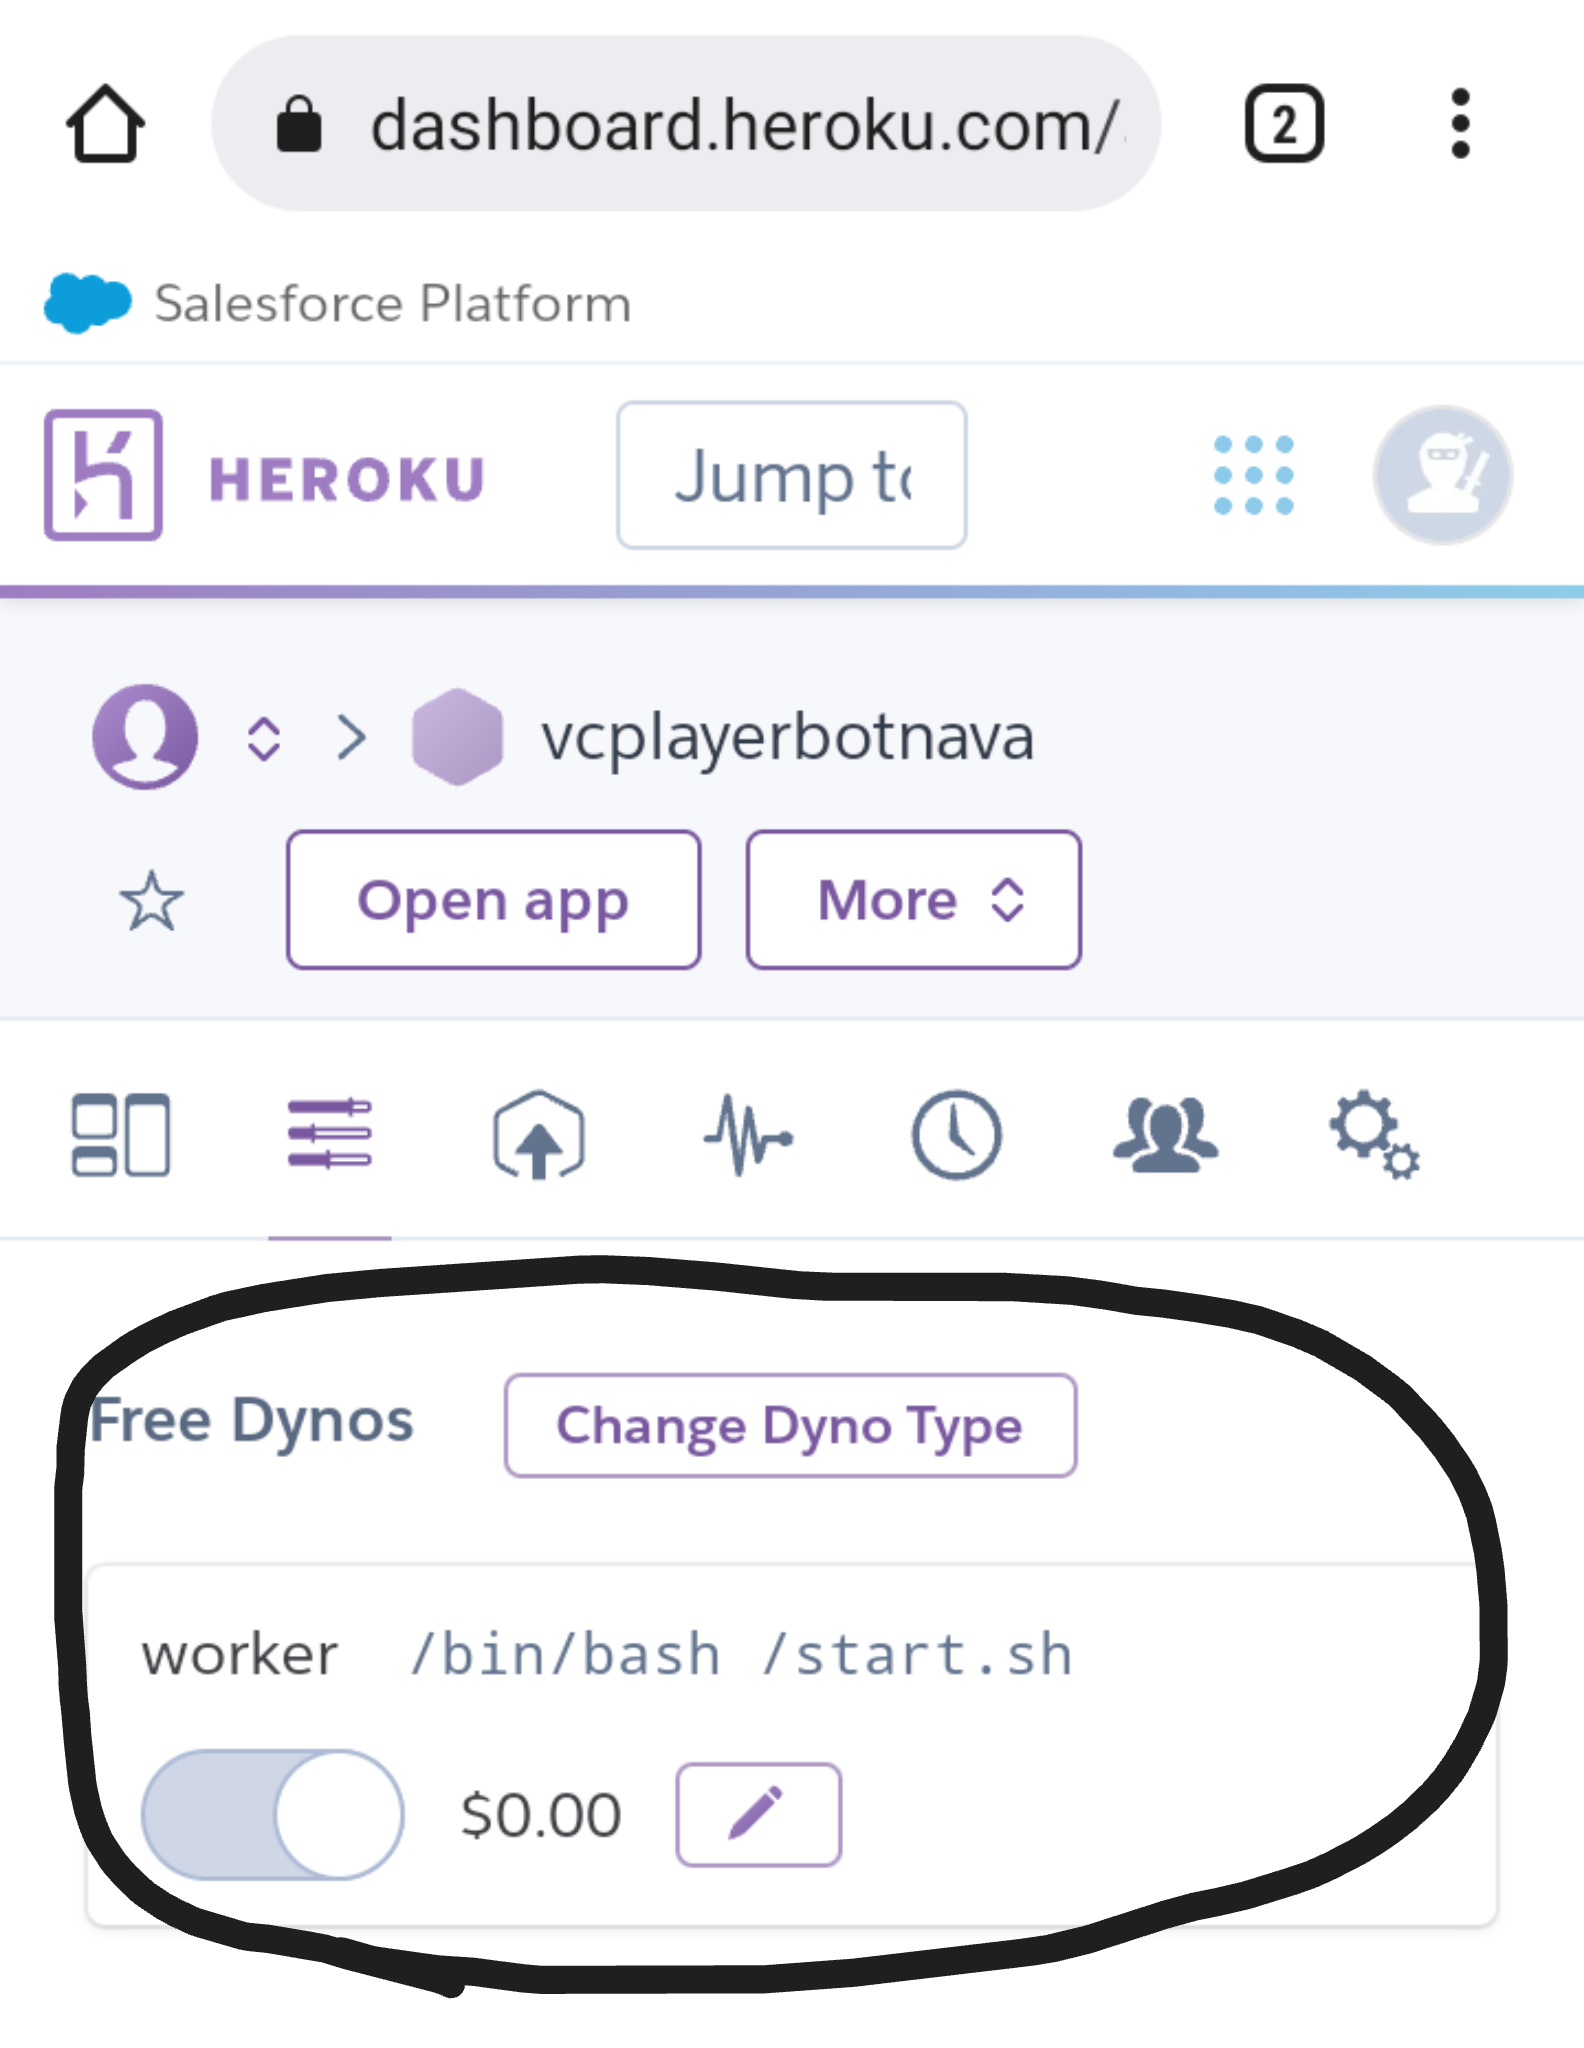
ഇനി ബോട്ട് ഓപ്പൺ ചെയ്ത് /start കമാൻഡ് കൊടുത്താൽ, ബാക്കി കാര്യങ്ങൾ manage ചെയ്യാം.
ബോട്ടിൻ്റെ Commands അറിയുവാൻ /help കമാൻഡ് കൊടുക്കുക.
നന്ദി... ❤️
NB: Some of the photos and texts given in this article is given with the author permission of Deonnn and their DeonWrites channel. Because, they told about this in our channel's discussion group. And, we have replaced the photos and texts with our own photos and texts.