What is API and how it works
In the crypto world, automation has long been a necessity. It allows you to reduce manual actions, work more quickly with transactions, and conveniently integrate different services. This is exactly what APIs are used for.
An API (Application Programming Interface) is a tool that allows you to connect third-party services and interact with functionality directly, without manual work through the interface.
Want to create an API key? Follow the instructions below.
Note: Before connecting to the API, ensure 2FA is enabled. This is important for security — without two-factor authentication, the API key will not be generated. Read more about 2FA in our guide.
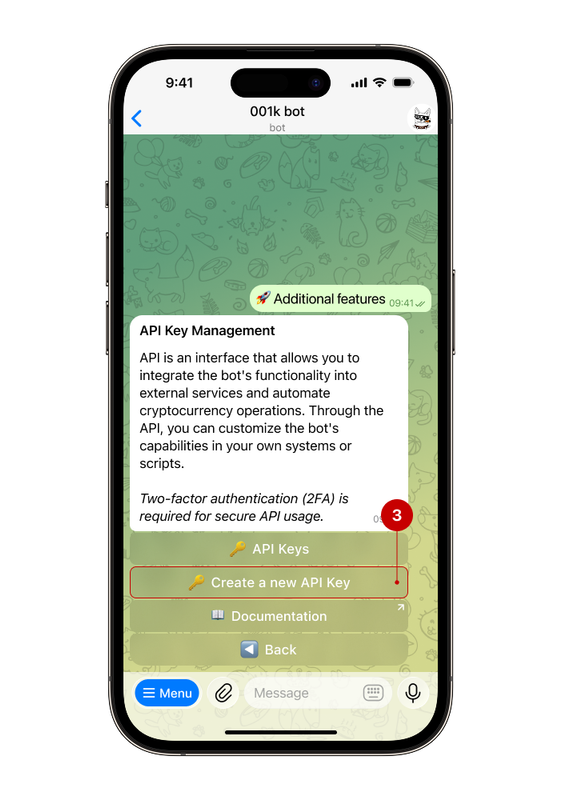
Step 1. In the bot menu, go to the “Additional Features” → “API Access”
.png)
Note: If you do not have the “API access” button, contact technical support to request this feature.
Step 2. Click “Create New API Key”
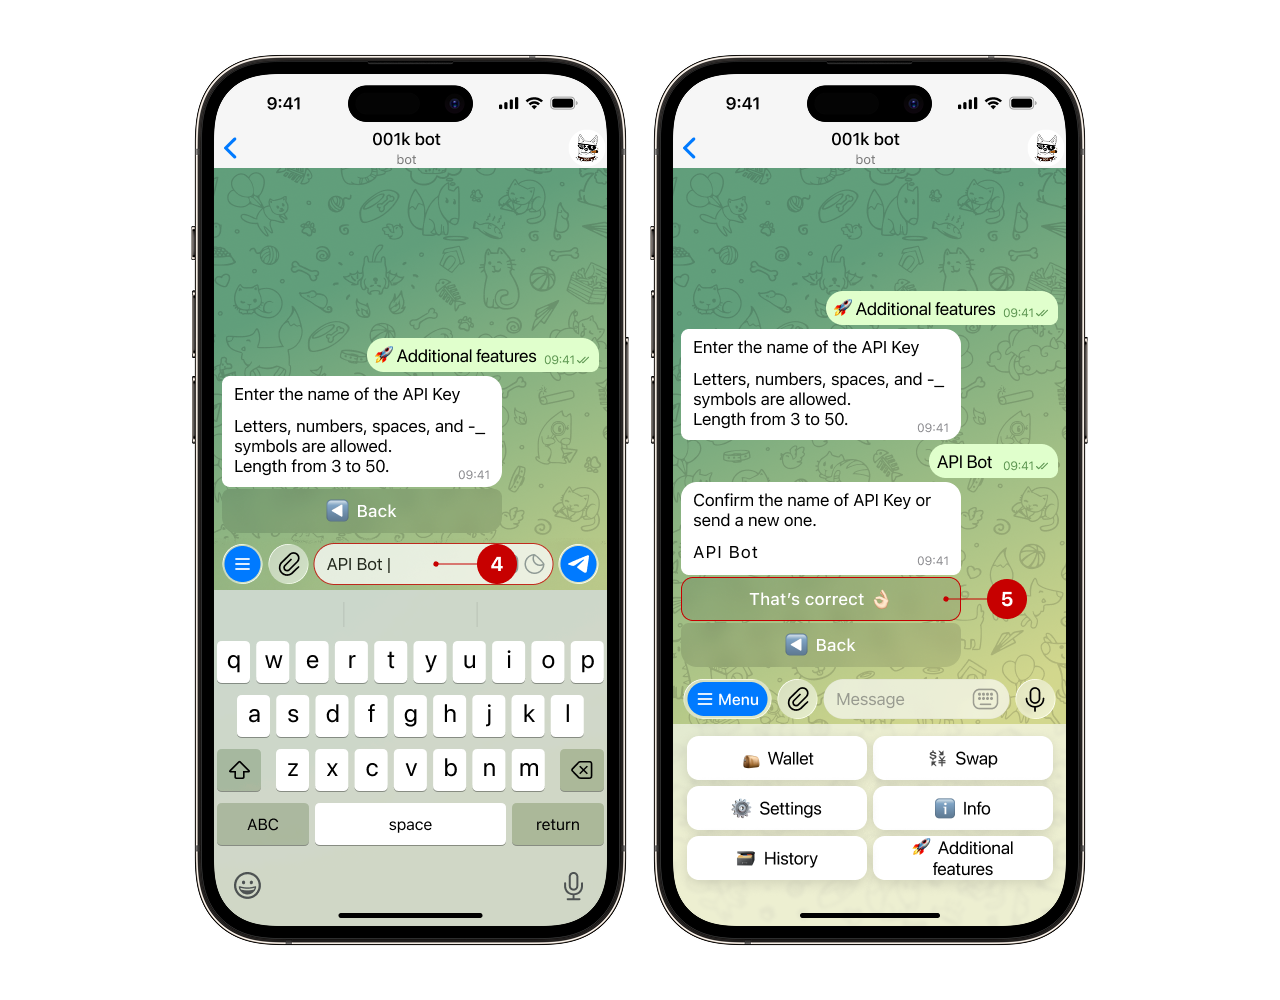
Step 3. Name the key
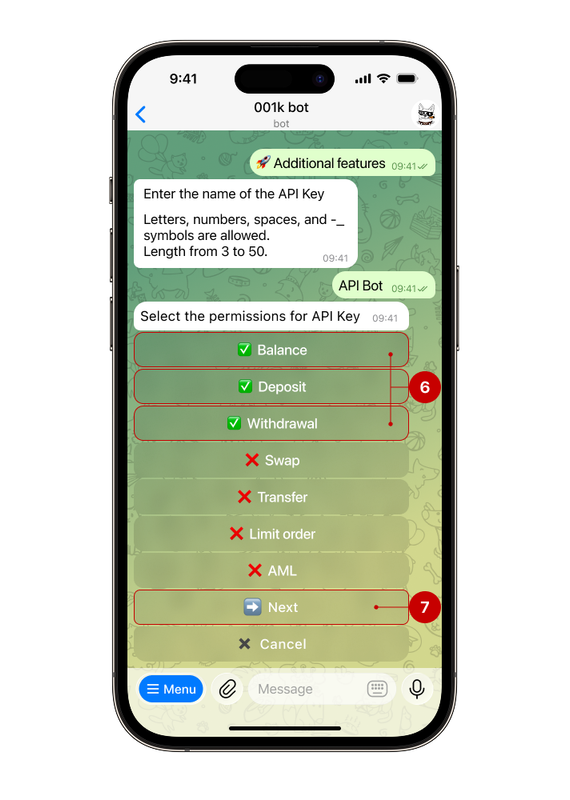
Step 4. Set what is allowed for this key
Select the necessary actions from the list (you can choose several). For example:
▪️Exchange — allows initiating currency exchanges (for example, USDT → XRP)
▪️Withdrawal — enables sending funds from your balance to external addresses
▪️Transfers — allows transferring funds between accounts inside the bot
▪️Balance — the API will be able to request information about your balances in different currencies
Note: Only select the permissions you actually need. This helps maintain control and keep your account secure.
For example, let's grant permissions for balance, deposit, and withdrawal (6), then click the “Next” button (7).
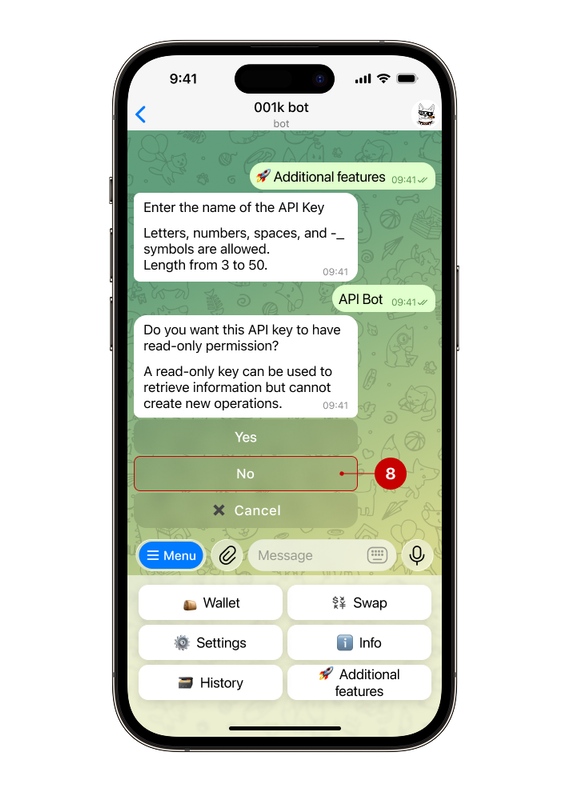
The bot will then ask whether the API key should operate in “Read-only” mode.
- If you select “Yes”, the key will only have access to view information. Creating transactions, such as transfers or withdrawals, will not be available.
- If you select “No”, the API key will be able to perform operations in accordance with the previously granted permissions.
In this example, we select “No” (8) so that the API key has full functionality within the permitted actions scope.
Step 5. Add IP addresses
Click “Allow all IPs” (9) if you don’t want to restrict access and confirm your choice.
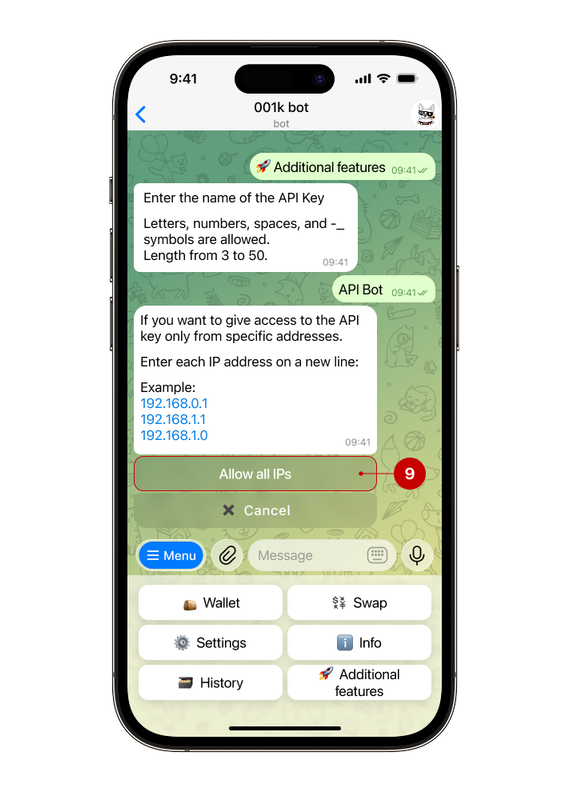
Note: The bot supports both IPv4 and IPv6 address formats; either can be used.
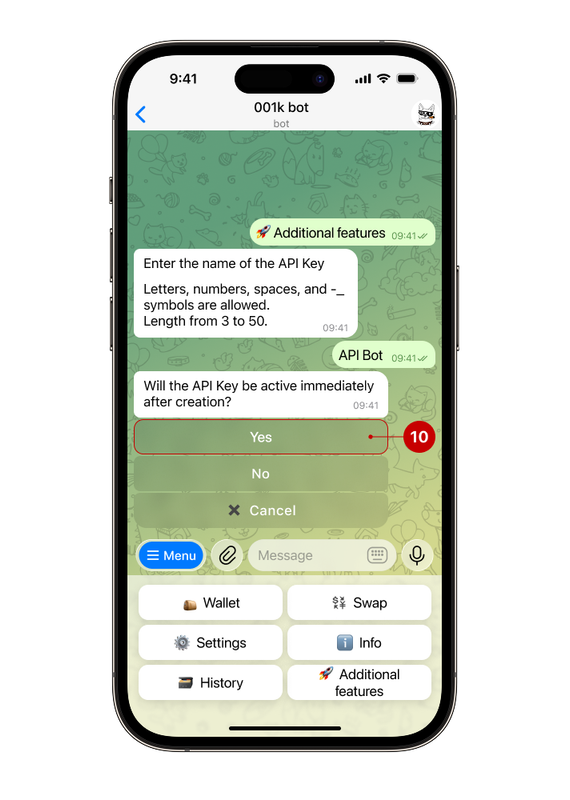
Step 6. Choose whether the key will be active immediately after creation
- If you select “Yes”, the key will become active immediately and will be ready for use.
- If you select “No”, the key will be created inactive. If necessary, you can activate it later in the “API keys” section.
Let’s make the key active, so click “Yes” (10).
Step 7. Confirm API key creation
If 2FA is enabled, the bot will request additional confirmation for this operation.
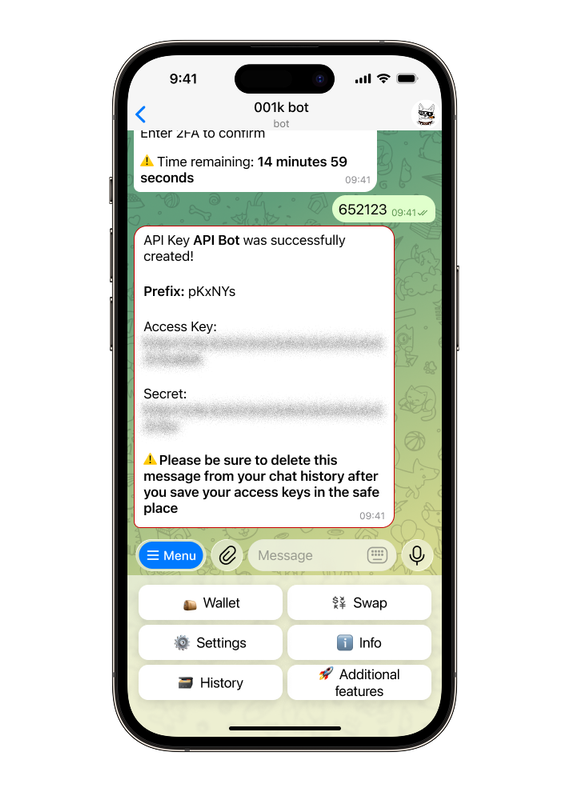
Important: After the API key is created, the bot will send it in a message. For security reasons, delete this message manually. If you don’t, the bot will remind you in 30 minutes.
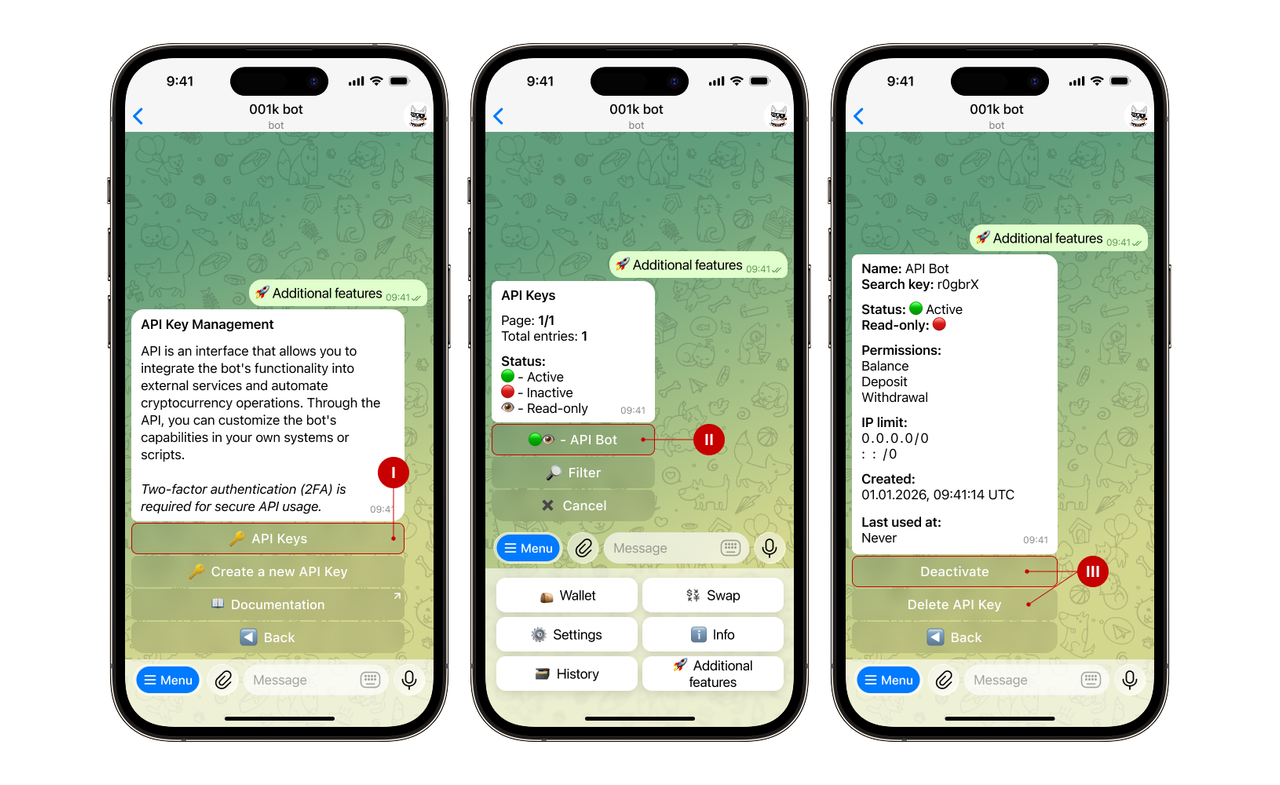
👀 Can I change the API key settings after its creation?
Currently, API key editing options are limited. Once you have created a key, you can:
- deactivate it;
- delete the key completely.
To do this, go to the “API keys” section and select the desired key to change its status or delete it.
If you need other settings, create a new API key with the desired parameters.