How to use Escrow Bot.
Escrow Bot
Follow Escrow Bot on Social media
Guide to using this secure environment to seal your transactions.
Introduction
Escrow Bot is a telegram bot that ensures a safe exchange of goods and services. This bot's design is user friendly with very responsive customer support. With Escrow Bot, you can buy goods and services with cryptocurrencies without the fear of theft or flaws.
This bot currently supports the following cryptocurrencies; Bitcoin, Litecoin, and Ethereum.
How to use the Escrow Bot
First of all, discuss the service or good you want to exchange with the other party
(Buyer or Seller). After discussing with the opposite party, either of you can begin the EscrowBot.
To improve usability, the short guide below will walk you through all the steps to a successful transaction:
1. Click the ‘start’ button to begin the bot.
To begin Escrow click (Start Escrow)
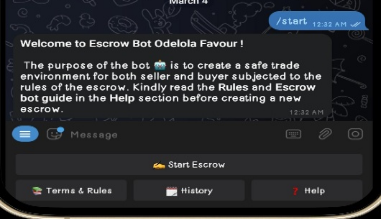
• You must read and accept the terms and rules to continue the process.
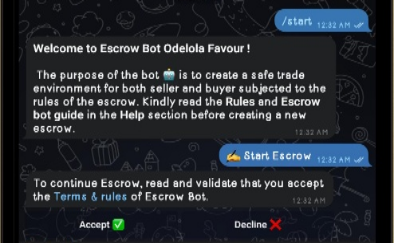
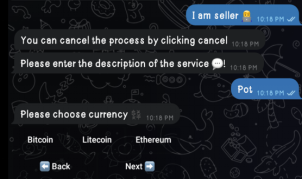
2. After accepting the rules, state if you are a buyer or seller by choosing from the options that appear.

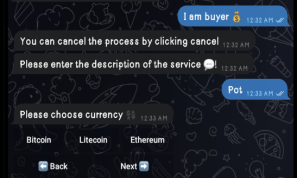
3. After choosing if you are a buyer or seller, click ‘start’ to fill in description about your goods or service. At this point, you have to state what service/good you are using the escrow for e.g., pot

4. Afterwards, select a cryptocurrency option you want to make your sale with and click next. Due to high gas fees in other cryptocurrencies, Bitcoin and Litecoin are the most preferable.
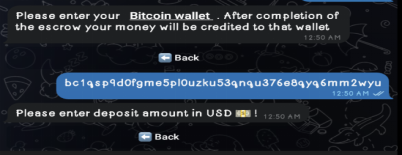
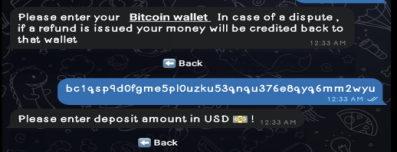
5. Then, as a seller, enter the Bitcoin address you'll be using to receive payment and as a buyer, enter the Bitcoin address you'll be using to receive a refund. So, if there is a dispute and you are issued a refund or payment, it is sent to your wallet address.


6. After entering the address, enter the cost or the amount you are depositing for the transaction in USD (United States Dollar).
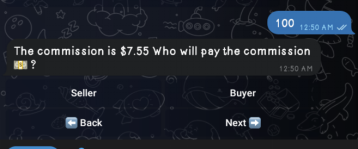
7. After entering the cost or amount of transaction click the Enter/send button, then a message appears with options to choose which party will pay the commission for the transaction.
8. After selecting, the bot will display all the information entered earlier for you to crosscheck. There are options to either start over or create an invoice.
Click on the 'create an invoice for payment' button to continue the process.
Yet, if the details entered earlier were wrong, the ‘start over’ option will give you a chance to refill it.
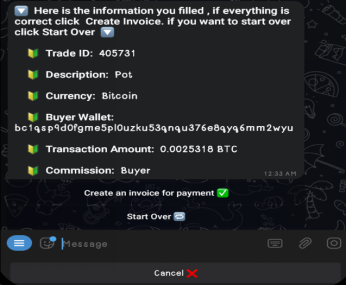
9. At this stage, there are two cases.
Case 1 Buyer (if the escrow was started by the buyer): After choosing the invoice option, the bot creates an invoice containing the crypto address to pay to
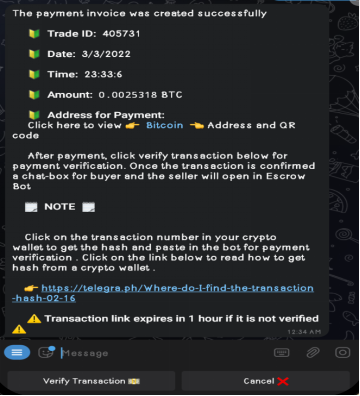
Case 2 Seller (if the seller started the escrow): After the seller chooses the invoice option, a link will be generated which will be shared with the buyer.
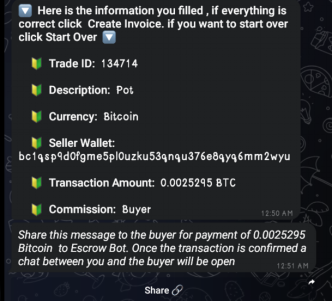
For case 1 Buyer, the buyer has to pay the amount required in the invoice and then click ‘verify transaction’. The buyer can verify the payment by sending the hash of the transaction from the wallet.
Click Here to know how to get the hash from your crypto wallet.
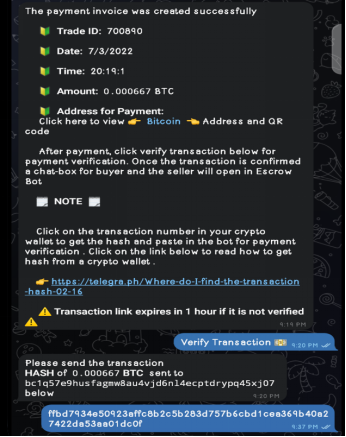
For case 2 Seller, after the seller has sent the link to the buyer, the buyer has to click the link and either accept or decline the request.
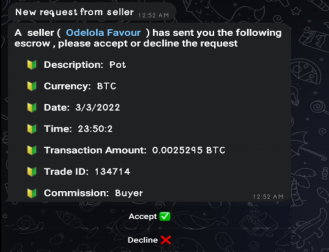
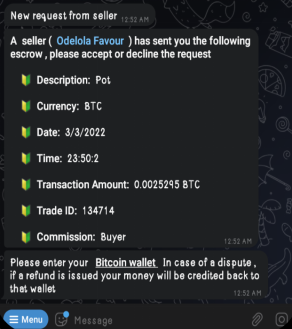
The buyer will first be requested to send his bitcoin address in case of a dispute. Then, he has to repeat the same steps as case 1 Buyer above.
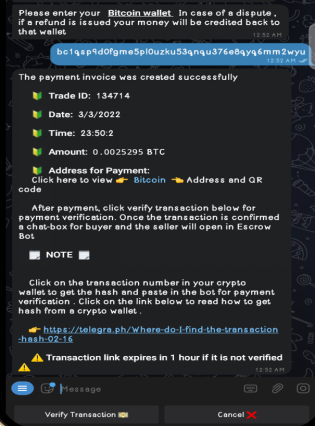
10. After the buyer has done the verification, the bot confirms it and displays two options for the buyer. The options are ‘buy login’ and ‘buy others’.
Buy login involves purchasing services that are related to logins e.g., server login, pdf login, RDP login, etc.
Buy others entails purchasing services non-related to login services. The services include pdf, scans, information, eBooks, etc.
The buyer is the only one who can make this choice and there are rules which protect the buyer and/or seller.
The rules are made available when the buyer selects a buy option. They can also be read from the bot’s ‘terms and rules’ segment.
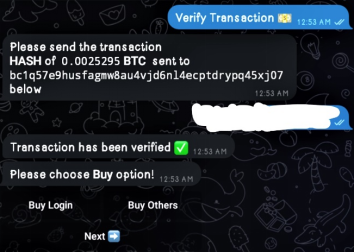
11. When the buyer picks a buy option, the transaction is marked as verified and a chat opens for the buyer and seller within the bot.

However, if the buyer started the escrow, the buyer will have to share the link to the seller’s inbox to open a chat within the escrow.

After the buyer has made a choice or shared the link, the buyer/seller can now send messages in the bot, reflecting in the other party’s perspective. Along with this, the rules guiding the purchase/sale will be displayed immediately after the chat opens.
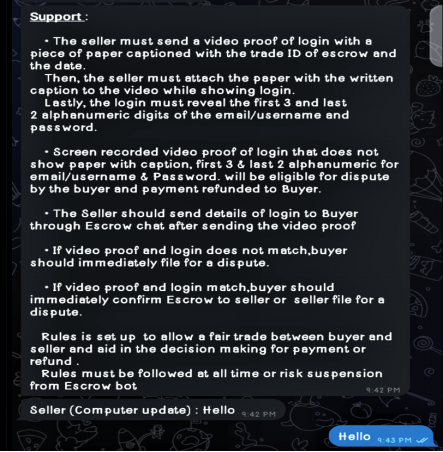
12. Now, the buyer can discuss with the seller in the bot and complete the trade.
After the trade, the buyer can confirm the escrow.
This is done by Clicking ‘Escrow details’ in the menu and choosing the ‘confirm escrow’ option.
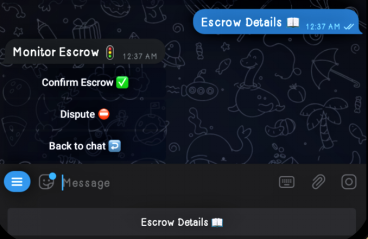
If there’s an issue with the transaction, the buyer or seller can select the ‘dispute’ option.
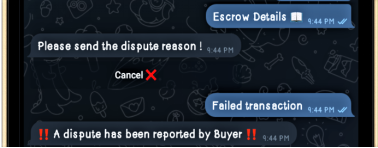
When either of the party picks the ‘dispute’ option, the bot will request the reason for the dispute. Then, the bot sends a notification to both factions informing them when the ‘Support has joined the chat’.
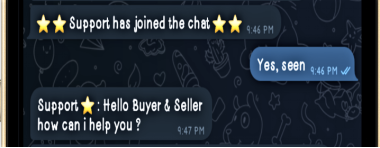
Afterwards, the support resolves the dispute and the payment is awarded to the winner of the dispute. When the dispute is resolved, the chat between the two parties closes.
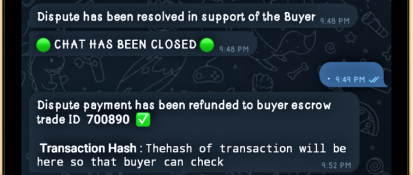
After the escrow is confirmed, the bot displays a message describing the completion of the transaction.
Then, a message requesting donations for the maintenance and development of the bot is displayed.

The two parties (the buyer or seller) are free to decide to donate towards the maintenance of the bot.
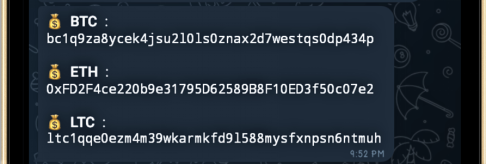
If either of the parties choose to donate by clicking ‘yes’, the addresses for the donations are displayed.
