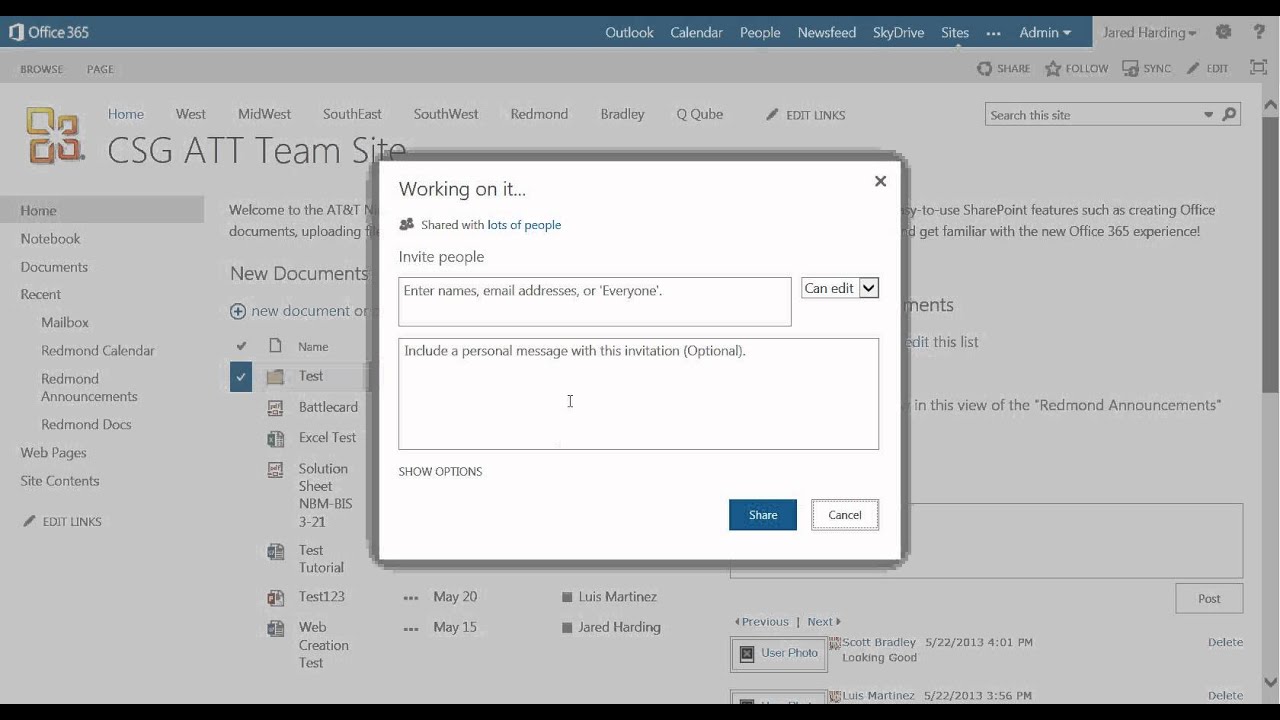
Xxx Share Site Setting
👉🏻👉🏻👉🏻 ALL INFORMATION CLICK HERE 👈🏻👈🏻👈🏻
SharePoint in Microsoft 365 SharePoint admin center More... Less
SharePoint administrators can create hub sites in SharePoint in Microsoft 365. To create a hub site, a SharePoint admin changes an existing site to a hub site.
A hub site links together sites based on a project, department, division, region, and so on. Associating a site with a hub site makes it easier to discover related content, news, and site activity across all associated sites. Getting the most value from hub sites requires some initial planning.
Consistent branding across a collection of associated sites.
Increased visibility to collections of related content.
Enhanced search and navigation capabilities for content relevant to specific groups of people.
Note: To perform these steps, you must be the site collection admin.
Choose a site design for associated sites.
Approving site-association requests.
Add the Highlighted Content web part.
The hub name and logo appear in the hub site navigation bar and lets others identify the hub when connecting sites.
Make your edits and Save your changes.
Note: You can hide the hub site name as long as you have selected a logo
To ensure content can be easily discovered, customize the navigation of your hub site. Consider using a mega menu to increase content visibility.
To add a new menu link or header, hover in between menu topics until you see the plus sign.
To edit, move, and remove nav links, select the ellipsis.
Make your edits and Save your changes.
All sites associated with the hub site inherit the hub site theme.
Select the look you want. A preview of the theme appears.
To apply the theme to your site, select Save.
If the theme for the site that was converted to a hub site was never changed from the default theme assigned by SharePoint at the time it was created, the sites associated with the hub site do not inherit the hub site theme.
Classic experience SharePoint sites that are associated with a hub site retain their original theme.
Changes made to the theme may not appear right away.
Choose a site design for associated sites
Associated sites are the individual sites that are connected to the hub site. If made available by your admin, select a site design to apply to all associated sites. The site design automatically applies to sites that join the hub site in the future.
From the dropdown list, select the site design you want applied.
Note: Your admin manages site design options.
Enable hub permissions to sync site permissions to increases access to all sites in the hub. Hub permissions apply to individuals, Office 365 Groups, or security groups, as visitors on associated sites.
For now, when you share the hub with others, they can only be added as a visitor
Hub sites can have up to 10 visitors when synced with associated sites. The 10 visitors can be individuals or Microsoft 365 Groups. It's recommended to use Microsoft 365 Groups or security groups.
Associated site owners are not required to sync site permissions with hub permissions in order to associate to the hub. This enables sites that contain sensitive information to remain associated to the hub but not shared with everyone.
Existing site permissions will not change when permissions sync with hub permissions.
Updating hub permissions can take up to 4 hours to reflect on associated sites once they have been visited.
When an associated site leaves the hub, the hub permissions are removed from the site.
Viewers will see content, news, and site activity differently on each site associated to the hub based on the permissions set by the site owner.
Set up your hub to sync permissions with associated sites:
Select Settings followed by Site Permissions
Switch the toggle to ON to automatically sync hub site permissions with sites that associate to the hub.
5. Then, to give access to this hub site, enter the names of individuals or groups.
To ensure organizational coherence and to protect sensitive content, manage sites associated to hub sites through a standard approval process. Creating approval flows ensure new site associations meet a standard set of criteria determined by the hub site owner before joining the hub site.
After your admin has created a hub, site collection admins for the hub can create and manage site association approval flows in Hub site information.
Go to the hub site and select Settings , and then click Hub site settings.
Toggle the Require approval for associated sites to join.
To create the approval flow, select Create flow.
Confirm the approved site additions come from one or more of the hub site owners.
To complete and implement the new flow, select Create flow.
View flow details and manage previously created flows in Hub site settings.
Note: There are no approval flows for sites leaving hub sites.
Go to the hub site, select Settings , and then select Hub site settings.
Toggle the Require approval for associated sites to join.
After you toggle this setting, new sites will not require approval to be associated with this hub site. Your approval flow will not be deleted.
View flow details and manage previously created flows in Hub site settings.
When you turn off an approval flow, the approval flow is not automatically deleted.
Go to the hub site, and in the left hand corner of the Microsoft 365 navigation bar, select the App launcher icon.
To navigate to the Power Automate website, select the Power Automate app. If you do not find the Power Automate app, select Explore all your Apps, and then scroll through the list and locate it.
To view all previously created and active flows, select My flows.
Select the approval flow, and then select Delete.
After the flow is deleted, it is deleted permanently from the flow in Power Automate.
To see news from associated sites, Add the News web part to the homepage.
In the news web part, select "sites across the hub" as the source. You can choose which associated sites display news on the hub site home page, and viewers will only see news for sites they have access to.
To see activity on associated sites, Add the sites web part to the homepage.
Add the Highlighted Content web part
To dynamically display content from a document library, a site, a site collection, or all sites, Add the highlighted content web part.
A subscription to make the most of your time
Great! Any other feedback? The more you tell us, the more we can help. How can we improve? The more you tell us, the more we can help.
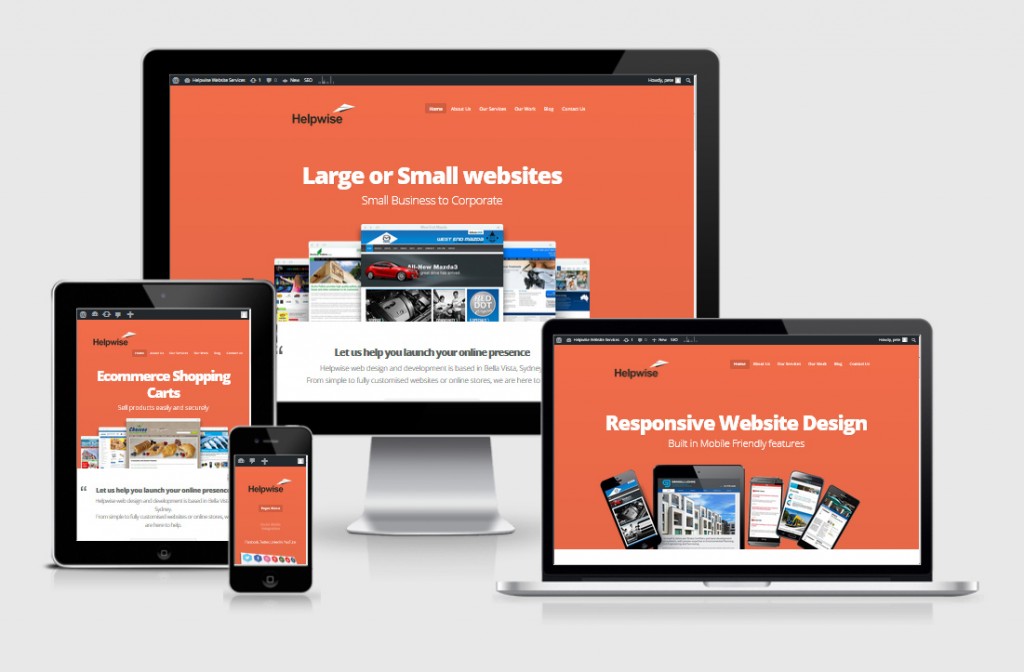
Change the look of your SharePoint site
SharePoint in Microsoft 365 Office for business Office 365 Small Business Microsoft 365 admin SharePoint Server 2019 SharePoint Server 2016 SharePoint Foundation 2013 Office 365 operated by 21Vianet - Small Business Admin SharePoint Server 2013 Enterprise Office 365 operated by 21Vianet SharePoint in Microsoft 365 Small Business SharePoint operated by 21Vianet More... Less
You can quickly and easily customize the look of your SharePoint site to reflect your professional style and brand. The options available to you depend on the version of SharePoint you're using.
Note: To change the look, you need site owner or design permissions on the site.
Change the look settings are located under Settings in the top right corner of your SharePoint site. For team sites, you can change the theme and header. On communication sites, you can also change the layout of your navigation and add a footer to your site.
You can choose one of the default SharePoint themes and customize it as needed, choose a company theme with approved branding for your company, or use one of the classic experience designs. To create and upload a company theme, see SharePoint site theming.
Some functionality is introduced gradually to organizations that have opted in to the Targeted Release program. This means that you may not yet see this feature or it may look different than what is described in the help articles.
For additional ways to customize your site, see Customize your SharePoint site.
On your site, click Settings and then click Change the look > Theme.
Note: If you don’t see Change the look on the Settings menu, you may not have permission to manage this option. For more information, see Understanding permission levels in SharePoint or ask your administrator.
Select the look you want. You'll see a preview of what your site looks like with the selected theme applied. Click Save to apply it to your site or, if you don't like what you see and want to revert back to what you had in the beginning, click Cancel instead.
Your administrator may have set site theming to show only a list of company-approved themes. If so, you won't see any of the default SharePoint themes.
If you're updating the theme on a subsite or your administrator has sites set to the classic experience, follow the instructions in the Classic experience designs section .
To customize the colors of one of the default SharePoint themes, select the theme and then click Customize.
Choose the main color and accent color you want, and then click Save to apply it to your site. The list of main colors and accent colors varies depending on the default SharePoint theme you choose to customize.
Note: Currently, you can't change the background color for your site using this setting. SharePoint administrators can make changes to company-approved themes as described in SharePoint theming.
On your site, click Settings and then click Change the look > Header.
If you don’t see Change the look on the Settings menu, you may not have permission to manage this option. For more information, see Understanding permission levels in SharePoint or ask your administrator.
The minimal and extended header layouts will be temporarily removed from the Change the look panel for GCC, GCC High, DoD, Gallatin, and Sovereign clouds customers. Sites using the minimal header will automatically transition to the compact header and sites using the extended header layout will automatically transition to the standard header.
Choose a layout: (Compact layout is the default for all Modern sites):
Minimal layout: Reduced height with all content in a single line including small site logo, site title, site navigation, and site actions and labels.
Compact layout: A larger height layout that uses the full size site logo while keeping content on a single line.
Standard layout: A layout with the full size site logo and content split onto 2 lines.
Extended layout: Our largest layout with content split into 2 content areas with site logo, site title, and an optional background image separate from the other contents below.
In the Background section, select a theme color to change the background color of your site header. Select Extended header to determine the focal point for the background image.
In the Display section, do the following:
Select the Toggle to set the visibility of your site title;
Select Change to add a site logo thumbnail (must be a square logo for default use in experiences that require a square aspect ratio);
Select Change to add a site logo (can be rectangular in aspect ratio.
If using Extended layout, select Site logo alignment.
On your site, click Settings and then click Change the look > Navigation.
Note: If you don’t see Change the look on the Settings menu, you may not have permission to manage this option. For more information, see Understanding permission levels in SharePoint or ask your administrator.
Select one of the following options:
The megamenu style is only available on SharePoint hub sites associated with Microsoft Teams or on communication sites.
Megamenu is not supported on sites with the classic publishing feature(s) turned on.
Links added to the 3rd level when using the megamenu style will display as a single vertical list only.
On your site, click Settings and then click Change the look > Footer.
If you don’t see Change the look on the Settings menu, you may not have permission to manage this option. For more information, see Understanding permission levels in SharePoint or ask your administrator.
The site footer feature is only available on communication site pages. They are not available for list pages, library pages, or other pages on your site.
Toggle the Footer visibility switch to On to add a footer to your site.
Simple layout: Display one level of links and labels, up to eight columns wide.
Extended layout: Display two level of links and labels, up to eight columns wide.
3. Select Upload to add your logo image to the footer. The image is automatically resized.
4. To add a name for your footer, enter a Display name.
6. Select Save to save your changes.
After you've added a footer to your site you can add a links or labels to the footer. Select Edit in the footer on the left hand side of the menu labels and links.
For details about adding or editing links and labels, see Customize the navigation on your SharePoint site. You can add one level of up to eight links or labels.
If your administrator has sites set to the classic experience, or you're changing the theme of a subsite, follow these steps to change the color, background, and font of your SharePoint site:
On your site, click Settings and then click Change the look.
Click View classic settings or Classic change the look options. If you're already in the classic experience, skip this step.
Choose a look from among the choices. Don’t worry if you don’t like the color or the image exactly, you can change that in the next step.
To add or change the background image, choose Change to upload an image of your own, or drag an image from your computer onto the thumbnail image above the Change command.
To change the color scheme, click the arrow next to Colors and select another color scheme.
To change the layout, click the arrow next to Site layout and select another layout, which controls the position of the navigation links, search box, and so on.
To change the fonts, click the arrow next to Fonts and select another font.
Note: You can change the font type style, but you can't change the size.
When you’re ready to see a full-sized preview of how your changes look when applied to your site content, click Try it out. The changes are not yet visible to other site users.
Note: If you don't like what you see and want to revert back to what you had in the beginning, click Start over or you can click your site logo to exit Change the look and go back to the home page of your site.
If you like what you see in the preview, click Yes, keep it. If not, click No, not quite there and try something else.
You can choose one of the default SharePoint themes and customize it as needed, choose a company theme with approved branding for your company, or use one of the classic experience designs. To create and upload a company theme, see SharePoint site theming.
Some functionality is introduced gradually to organizations that have opted in to the Targeted Release program. This means that you may not yet see this feature or it may look different than what is described in the help articles.
For additional ways to customize your site, see Customize your SharePoint site.
On your site, click Settings and then click Change the look > Theme.
Note: If you don’t see Change the look on the Settings menu, you may not have permission to manage this option. For more information, see Understanding permission levels in SharePoint or ask your administrator.
Select the look you want. You'll see a preview of what your site looks like with the selected theme applied. Click Save to apply it to your site or, if you don't like what you see and want to revert back to what you had in the beginning, click Cancel instead.
Your administrator may have set site theming to show only a list of company-approved themes. If so, you won't see any of the default SharePoint themes.
If you're updating the theme on a subsite or your administrator has sites set to the classic experience, follow the instructions in the Classic experience designs section .
To customize the colors of one of the default SharePoint themes, select the theme and then click Customize.
Choose the main color and accent color you want, and then click Save to apply it to your site. You can also select whether or not a grey (Neutral), light (Soft) or dark (Strong) version of the main color is applied to the header of your site or you can keep the default white header background. The list of main colors and accent colors varies depending on the default SharePoint theme you choose to customize.
Note: Currently, you can't change the background color for your site using this setting. SharePoint administrators can make changes to company-approved themes as described in SharePoint theming.
If your administrator has sites set to the classic experience, or you're changing the theme of a subsite, follow these steps to change the color, background, and font of your SharePoint site:
On your site, click Settings and then click Change the look.
Click View classic settings or Classic change the look options. If you're already in the classic experience, skip this step.
Choose a look from among the choices. Don’t worry if you don’t like the color or the image exactly, you can change that in the next step.
To add or change the background image, click Change to upload an image of your own, or drag an image from your computer onto the thumbnail image above the Change command.
To change the color scheme, click the arrow next to Colors and select another color scheme.
To change the layout, click the arrow next to Site layout and select another layout, which controls the position of the navigation links, search box, and so on.
To change the fonts, click the arrow next to Fonts and select another font.
Note: You can change the font type style, but you can't change the size.
When you’re ready to see a full-sized preview of how your changes look when applied to your site content, click Try it out. The changes are not yet visible to other site users.
Note: If you don't like what you see and want to revert back to what you had in the beginning, click Start over or you can click your site logo to exit Change the look and go back to the home page of your site.
If you like what you see in the preview, click Yes, keep it. If not, click No, not quite there and try something else.
On your site, click Settings , and click Change the look.
You can also click Settings , click Site settings and then under the Look and Feel heading, click Change the look.
If the Get started with your site tiles are on your home page, you can click the What’s your style? tile.
If you don’t see Change the look on the Settings menu or on the Site Settings page, you may not have permission to manage this option. For more information, see Understanding permission levels in SharePoint or ask your administrator.
Choose another look from among the choices. Don’t worry if you don’t like the c
Teens Com Video Anal
School 13 Sex
Teens Lesbian Games
Podgladivanie Za Mom Sex Com
Rule34 Xxx Five Nights At Freddy S
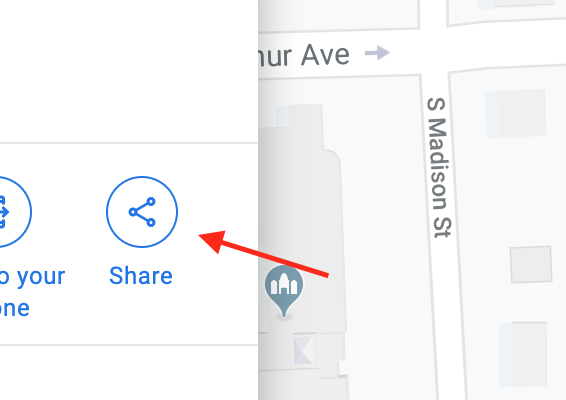
Manage sharing settings - SharePoint in Microsoft 365 ...
Share a site - Office Support
Set up your SharePoint hub site - SharePoint
Change the look of your SharePoint site - Office Support
Set up your SharePoint site with lists and libraries ...
Data sharing settings - Analytics Help
Setting Sharing Permissions for Google Docs and Google Sites
Watch My Wife With Another Man: CONAN.XXX @ Team Coco
"Configure team site libraries to sync automatically ...
Yandex
Xxx Share Site Setting