What is Gravity Forms?
Gravity Forms is a premium WordPress plugin that lets you create forms to place on your website. With this plugin, you can add contact forms, quizzes, and surveys to your website with ease. It is popular for features like conditional formatting, which automatically shows or hides certain questions based on users' answers to previous questions, and routing, which directs form submissions to email addresses specified in the contents in the form submission.
Gravity Forms has been around for more than a decade, and it has become a trusted, go-to name in the WordPress form plugin space. In this post, we’ll learn how to install Gravity Forms on your website and get the most from its features.
How to Use Gravity Forms
- Download Gravity Forms.
- Upload the Gravity Forms plugin to WordPress.
- Install and activate the plugin.
- Add the license key.
- Configure general plugin settings.
- Create a form.
- Add the form to your site.
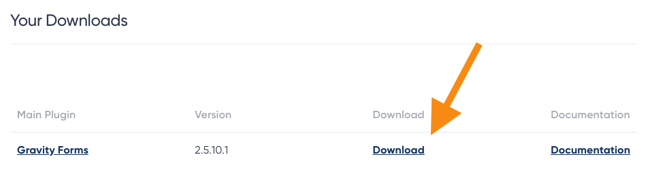
1. Download Gravity Forms.
After purchasing a Gravity Forms annual license, you will be able to download the plugin as a .zip file. Save this .zip file to your desktop.
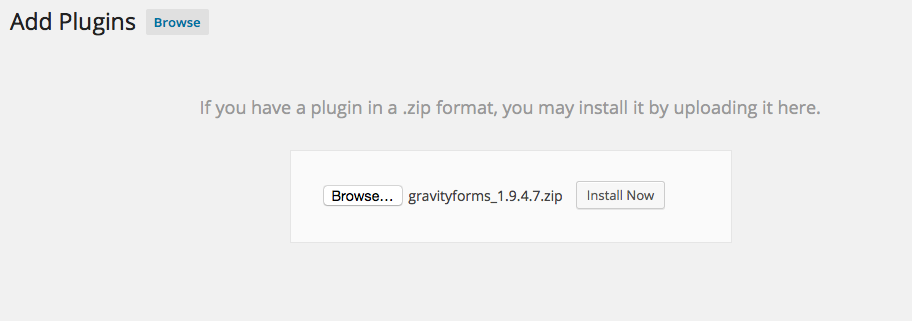
2. Upload the Gravity Forms plugin to WordPress.
In your WordPress dashboard, select Plugins > Add New. Click Upload Plugin, then locate the Gravity Forms .zip file on your computer to upload.
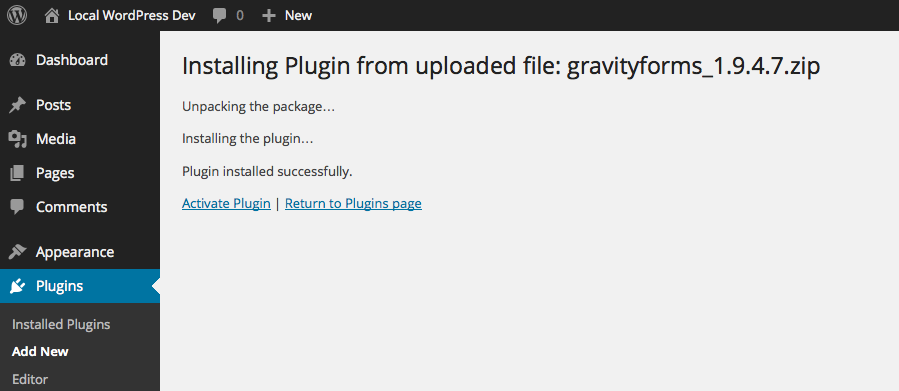
3. Install and activate the plugin.
After you have uploaded the .zip file, select Install Now then Activate Plugin.
4. Add the license key.
Gravity Forms provides a license key upon purchase that grants access to the full plugin functionality, including support, automatic updates, and add-ons. To find your license key, log into your account on the Gravity Forms website and select Your Licenses.
Copy the license key, then return to your WordPress dashboard. In your dashboard, choose Forms > Settings. Under the general Settings tab, paste in your key in the Support License Key section, then click Save Settings at the bottom of the page.

5. Configure general plugin settings.
Once your key has been validated, you can configure several general plugin settings on the same page.
These settings include preferred currency for payments, error logging, and automatic background updates. Automatic background updates are convenient, as they ensure your installation of Gravity Forms is the latest, safest version.
Toggle these settings to your liking, then click Save Settings at the bottom of the page.

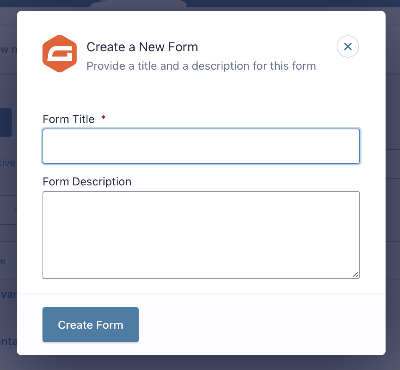
6. Create a form.
Once you've successfully installed the plugin and chosen your settings, you’re ready to create your first form.
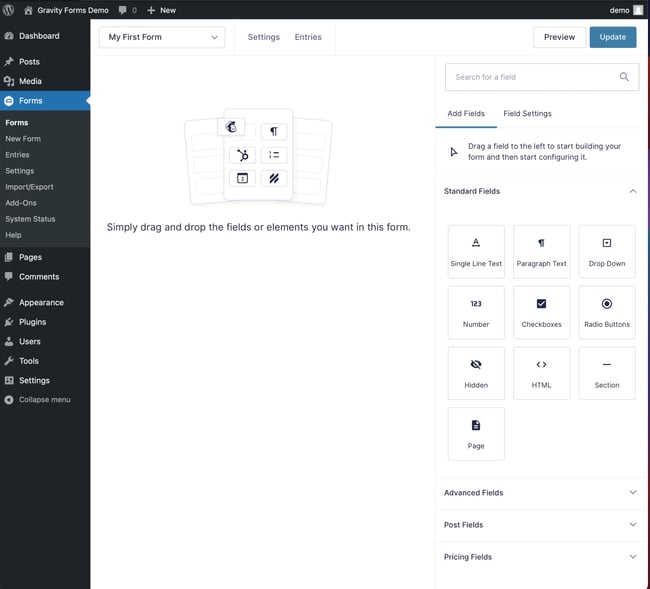
In your dashboard, choose Forms > New Form. From here, you'll add a title and optional description to your form.
Then, you'll enter the form editor, where you can use the drag-and-drop builder, fields, and customization tools to create the form you want.
7. Add the form to your site.
When your first form is complete, you can add it to your website. Navigate to Pages on your WordPress dashboard, then either select Add New or choose an existing page.
In the page editor, there is an Add Form button above the visual editor. Selecting this button reveals a drop-down menu with your forms. Select the form you just created and click Insert Form.

Click Update for the page, then visit your website to view the new form on the page.