User Guide
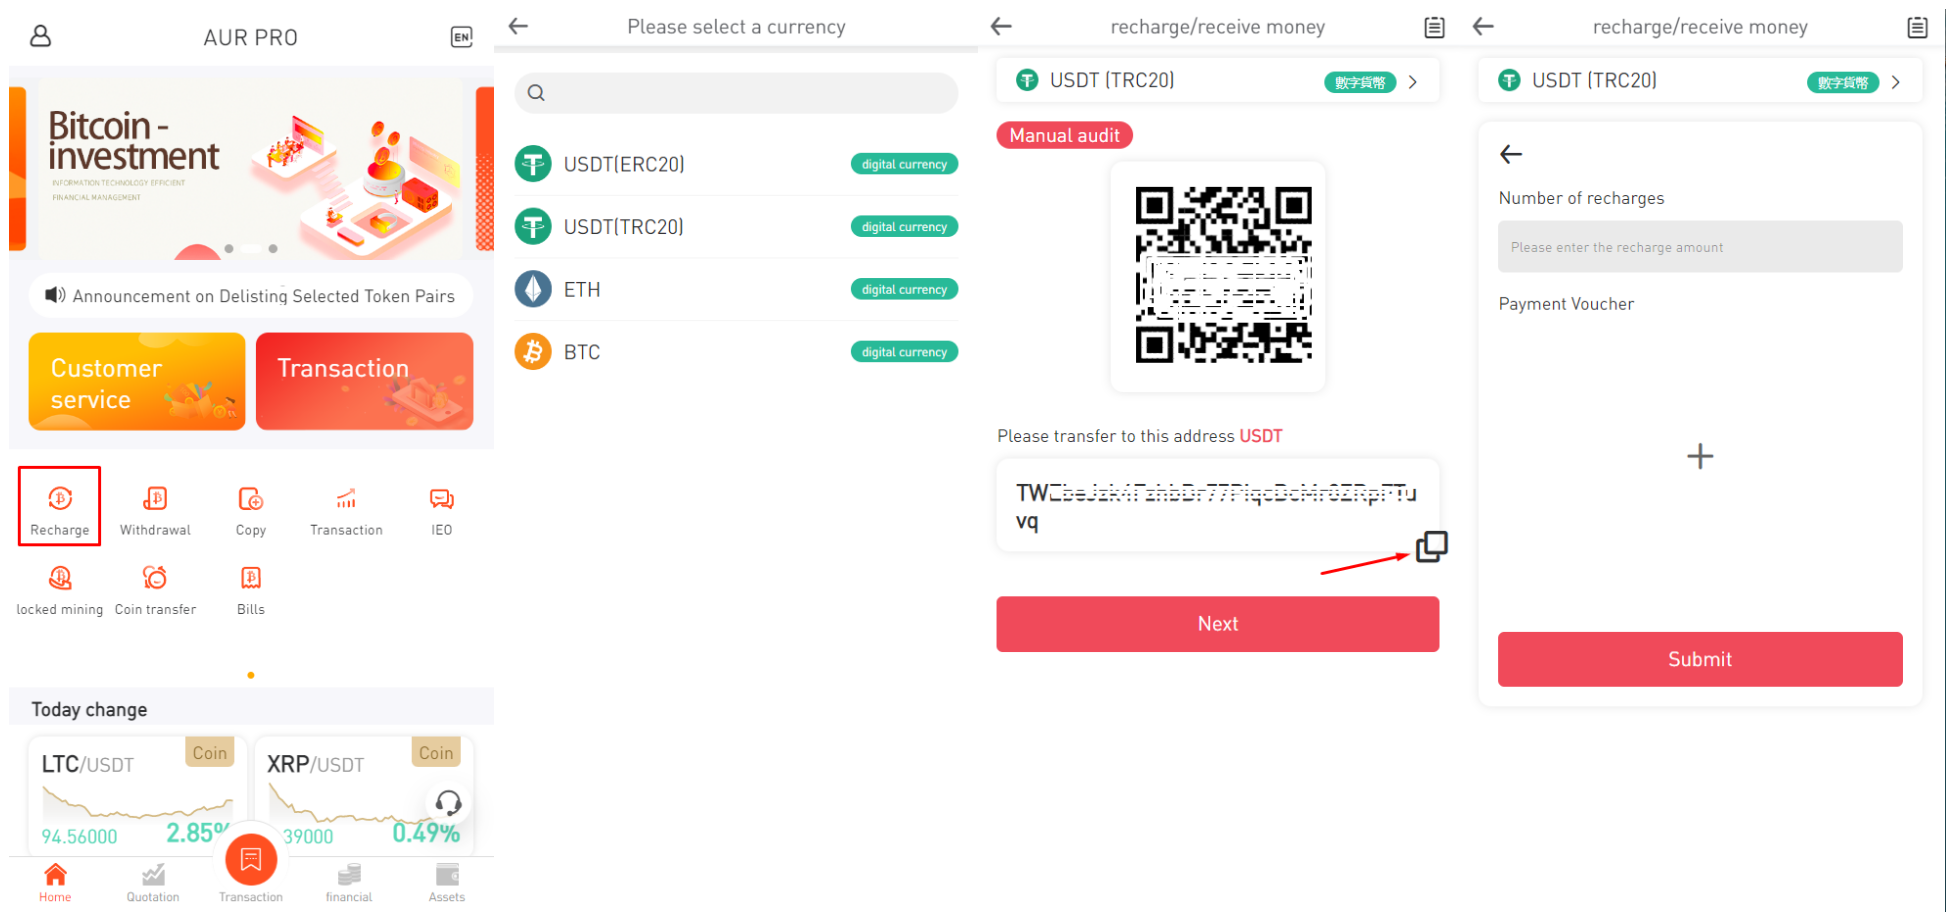
Aur pro1. Recharge
(1) Click Recharge on the home page
(2) Select the recharge type
(3) Copy the recharge address or scan the QR code to your encrypted wallet to send encrypted assets
(4) Enter the actual recharge amount, click "+" to upload the recharge voucher, and wait for relevant personnel to review
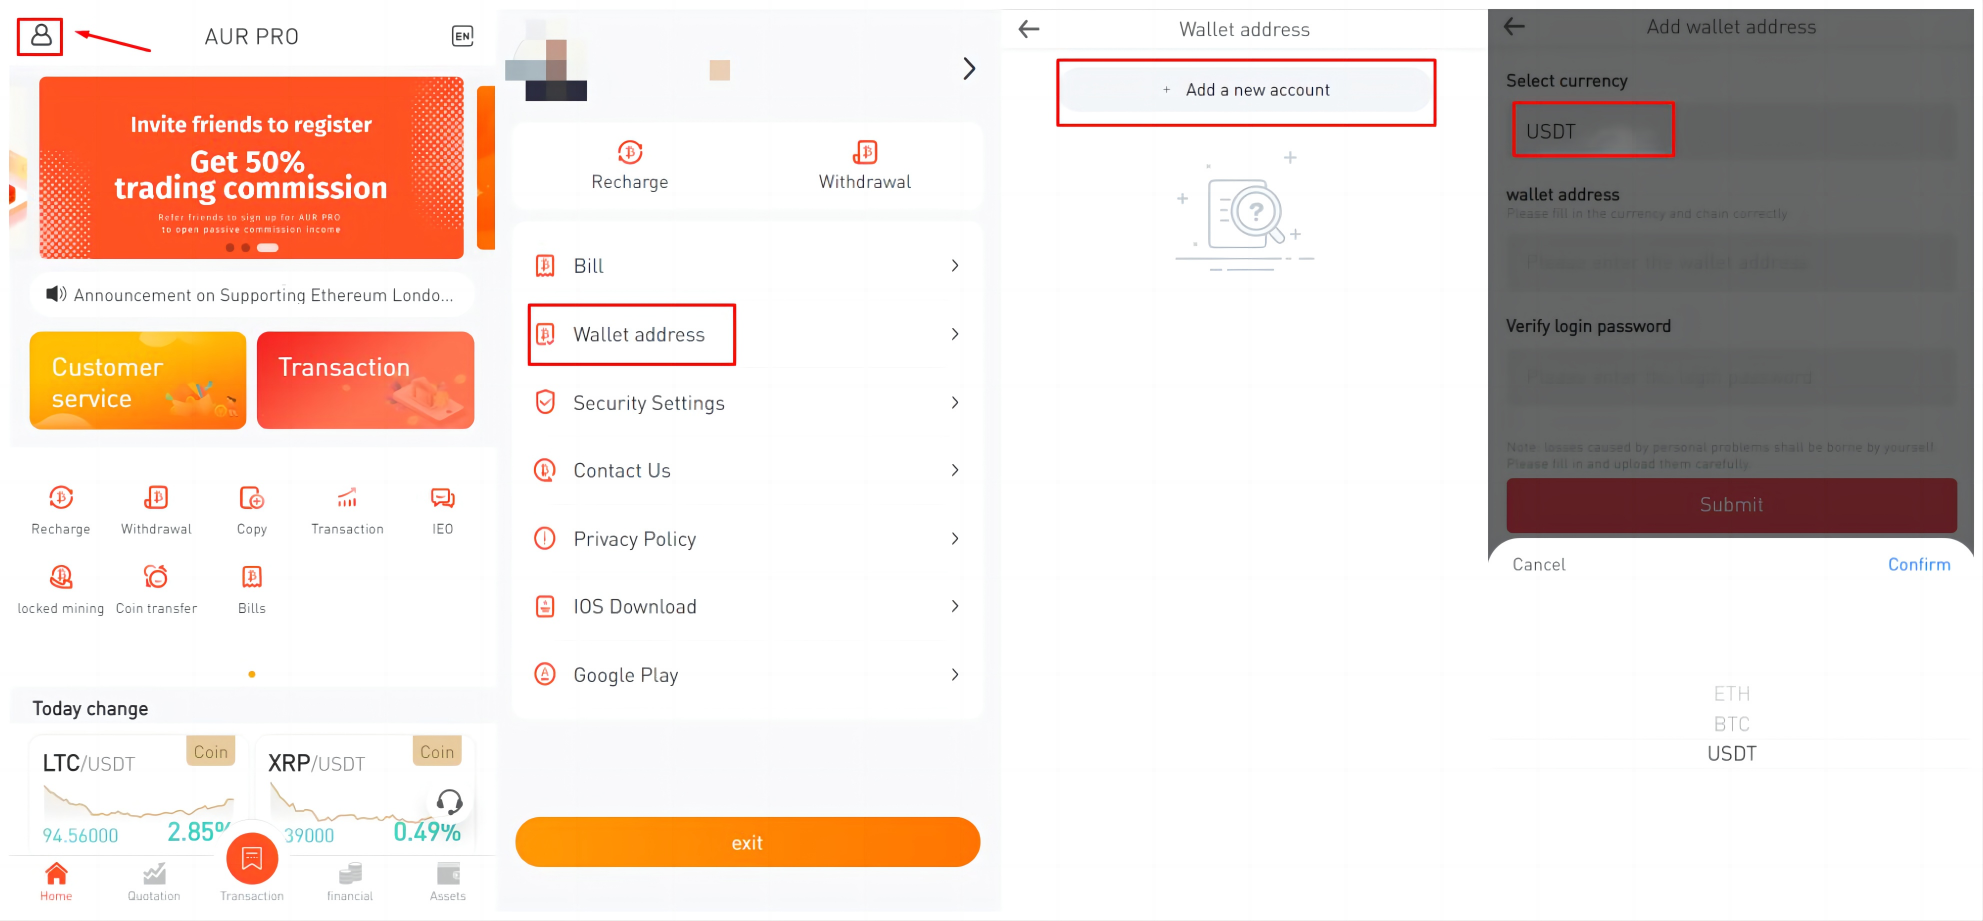
2. Bind withdrawal address
(1) Click Personal Information on the upper left of the home page
(2) Click on the withdrawal address
(3) Add your wallet address
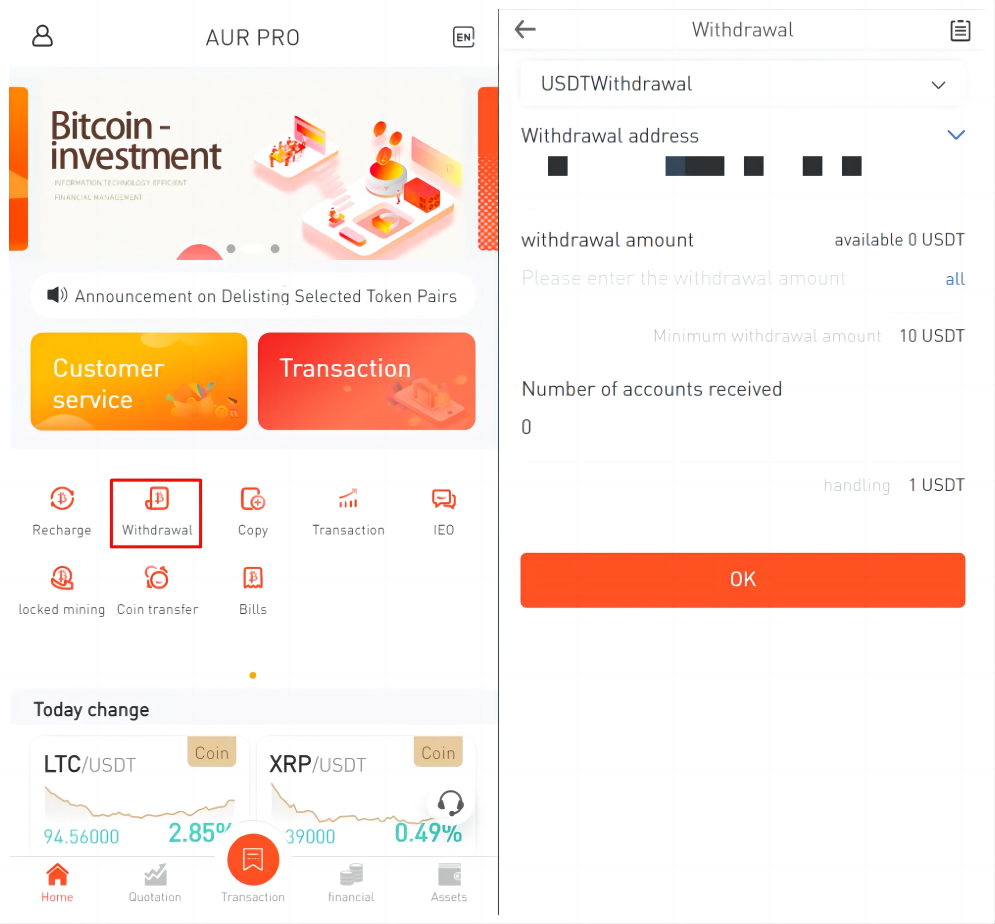
3. Withdrawal
(1) Click Withdraw on the home page
(2) Click the drop-down box to select the withdrawal address
(3) Enter the withdrawal amount and wait for relevant personnel to review
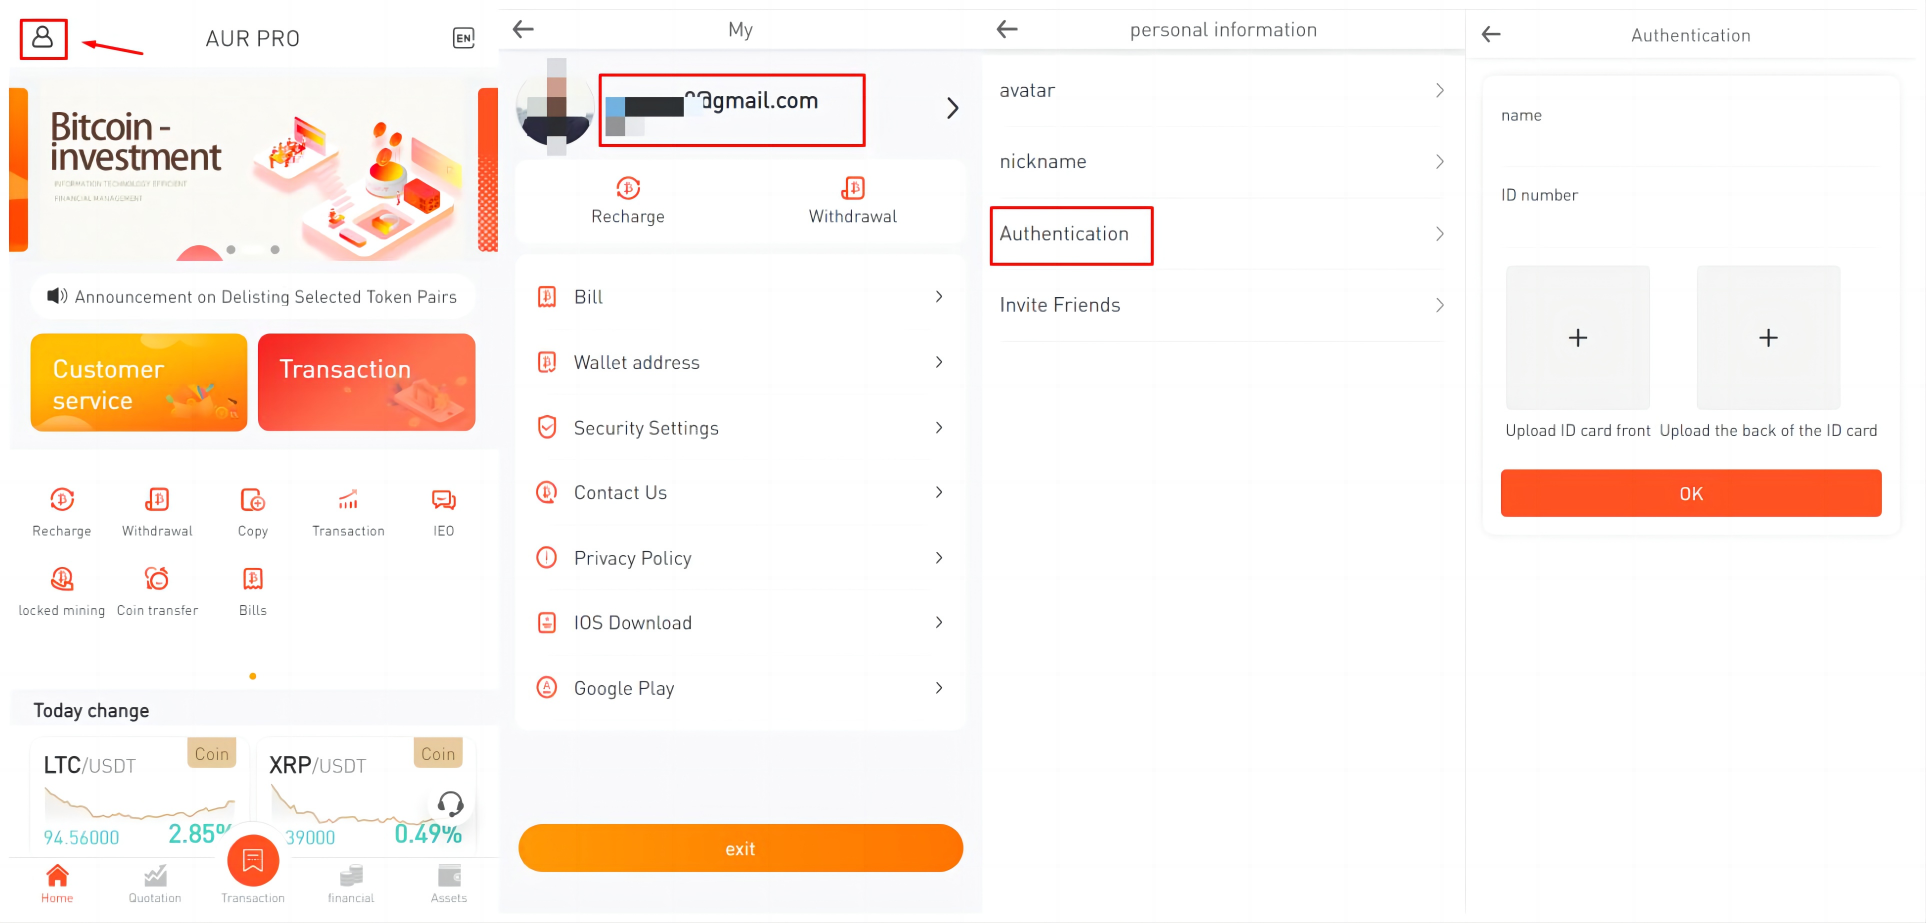
4. Authentication
(1) Click Personal Information on the upper left of the homepage
(2) Click Email to enter account settings
(3) Click Authentication
(4) Enter relevant personal information, select your ID photo from the phone photo album and upload it, and wait for relevant personnel to review
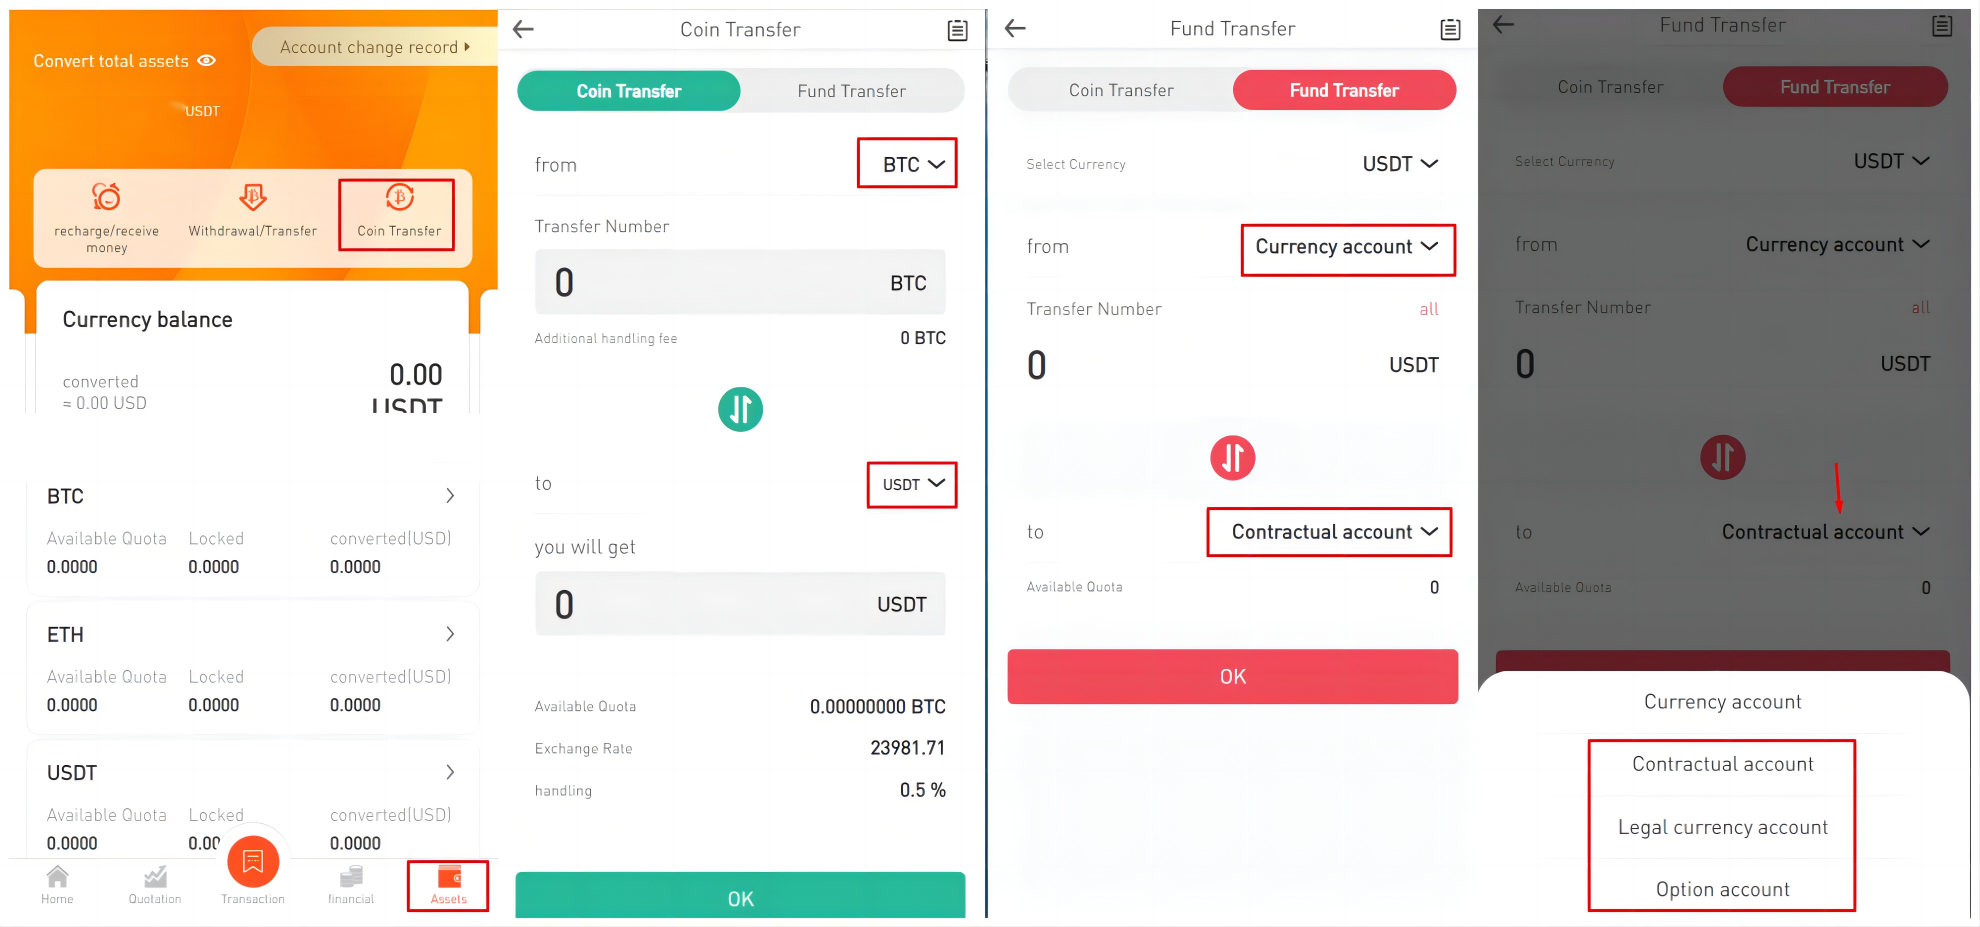
5. Transfer
(1) Click Assets on the homepage, click Coin Transfer
(2) Coin transfer, converting an existing coin into another coin
(3) Fund transfer, transfer funds to other accounts
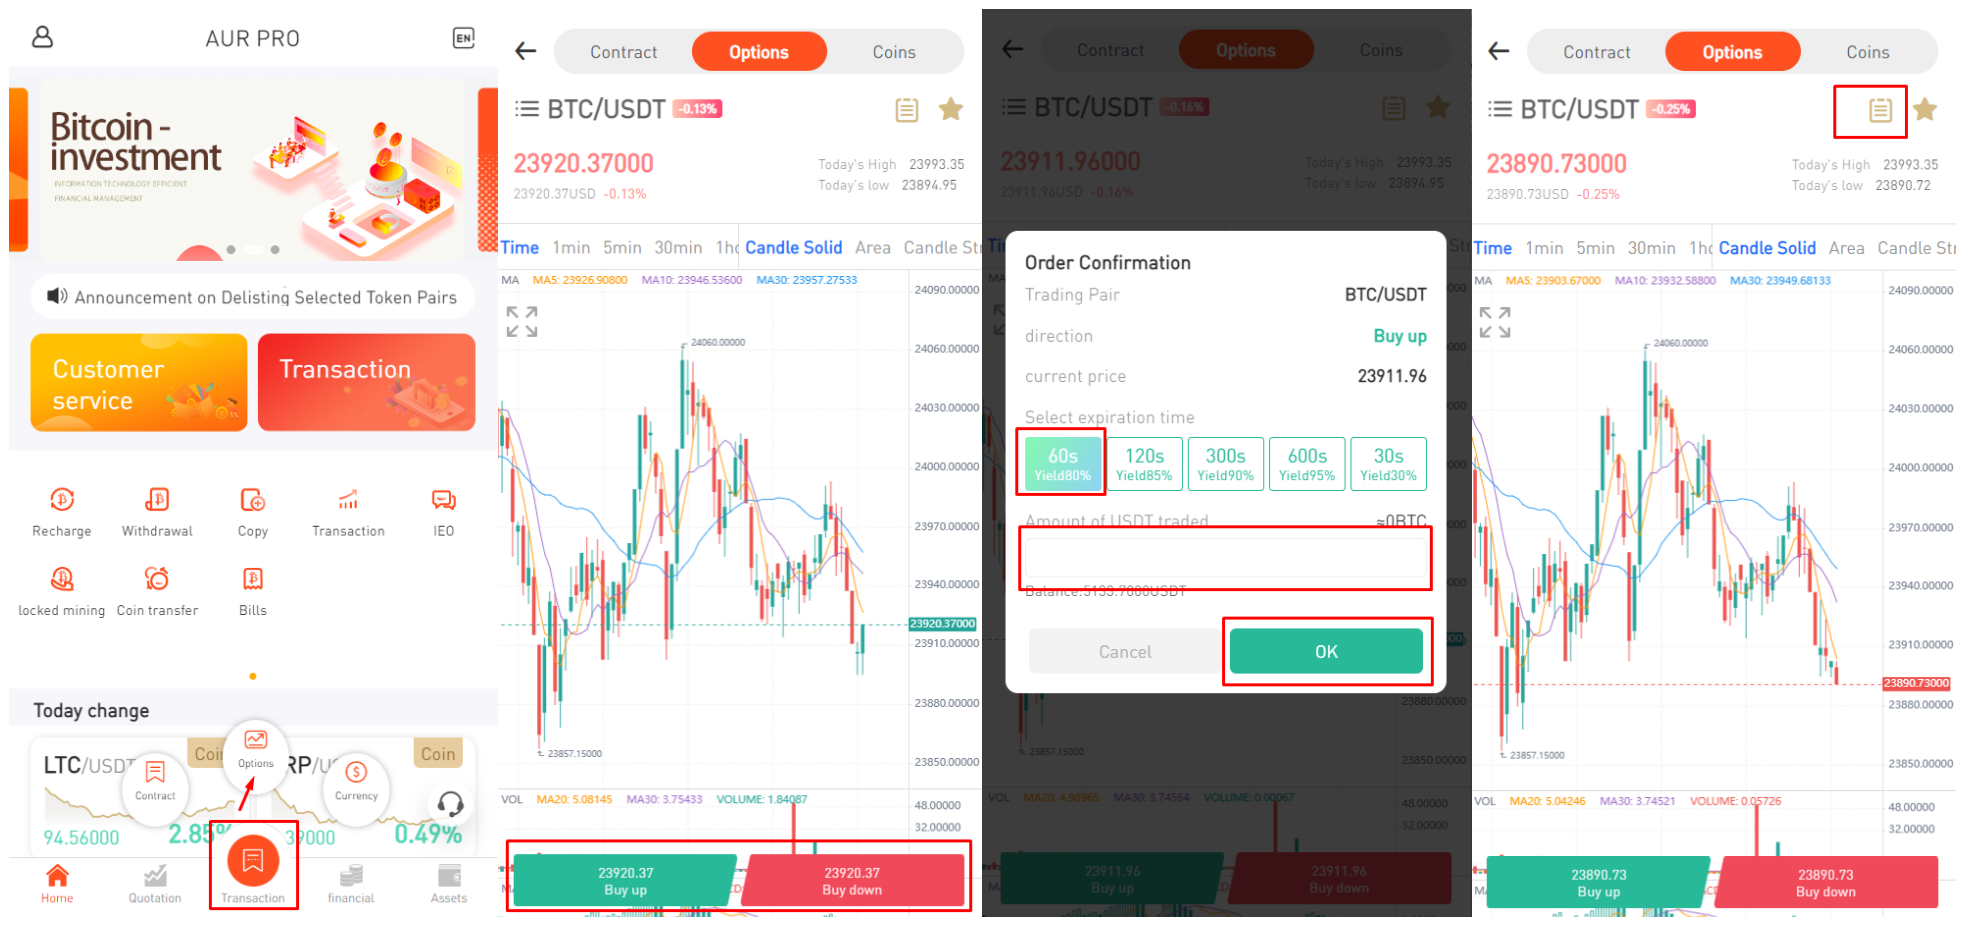
6. Transaction
(1) Click Transaction on the homepage
(2) Select transaction mode
(3) Select the transaction pair, transaction direction, cycle, and input transaction quantity
(4) View history