Tutorial: Automate PyQt testing with PyAutoGUI
John Dalbey 2025-02-10In this tutorial, you will learn how to automate testing of a PyQt application using PyAutoGui. A particular focus will be on how to launch the graphical application with different test configurations, how to trigger operations on the GUI and how to capture console output for subsequent verification.
The tutorial presents two Python programs. The first program, the application under test (AUT) is a PyQt application called ColorChanger.
The second program is the test automator written using PyAutoGui commands.
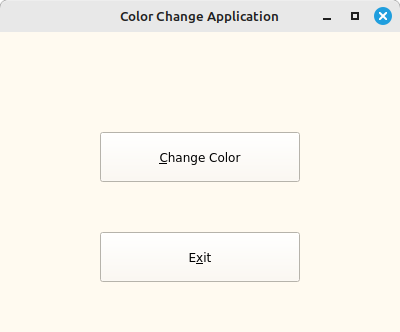
ColorChanger is our demo PyQt application that has these features:
- Takes a command-line argument for a desired color (e.g.,
-c blue). - Creates a window with a button that changes the background color (initially white) to the specified color.
- Prints a message to the console when the button is clicked (e.g.,
"Color changed to blue"). - Supports an Alt+C keyboard shortcut to trigger the button press.
- In addition, the window displays an "Exit" button that terminates the application when clicked.
Part 1: PyQt5 Application Code - ColorChanger
Here's the implementation of ColorChanger in Python using PyQt.
import sys
from PyQt5.QtWidgets import QApplication, QMainWindow, QPushButton
class ColorChanger(QMainWindow):
def __init__(self, desired_color):
super().__init__()
self.desired_color = desired_color
self.initUI()
def initUI(self):
self.setWindowTitle("Color Change Application")
self.setGeometry(100, 100, 400, 300) # Fixed size and position
# Button set with Alt+C shortcut
self.button = QPushButton("&Change Color", self)
self.button.setGeometry(100, 100, 200, 50)
self.button.clicked.connect(self.change_color)
# Assign Alt+X to trigger the sys.exit()
quit_button = QPushButton("E&xit", self)
quit_button.setGeometry(100, 200, 200, 50)
quit_button.clicked.connect(sys.exit)
# Set the initial background color to white
self.setStyleSheet("background-color: floralwhite;")
def change_color(self):
# Change the background color to the desired color
self.setStyleSheet(f"background-color: {self.desired_color};")
print(f"Color changed to {self.desired_color}")
def main():
# Parse command line arguments to get the desired color
desired_color = "blue" # Default to blue if no argument is given
if len(sys.argv) > 1:
for i, arg in enumerate(sys.argv):
if arg == "-c" and i + 1 < len(sys.argv):
desired_color = sys.argv[i + 1]
# Run the Qt application
app = QApplication(sys.argv)
window = ColorChanger(desired_color)
window.show()
sys.exit(app.exec_())
if __name__ == "__main__":
main()
Key Features of This Code:
- Command-Line Argument: The application takes a
-cargument to specify the color. If not provided, it defaults to blue. This represents a mechanism by which the application can be run with different system configurations. - PyQt widgets: The application uses PyQt widgets to create a graphical display.
- Buttons and Shortcuts: The window has a "Change Color" button, and Alt+C is set as a shortcut key to trigger the button press. In addition there is an "Exit" button with Alt+X as the shortcut key.
- Output to Console: When the button is clicked, it prints a message
Color changed to blueto the console. This represents how the application state can be logged for subsequent verification.
Part 2: PyAutoGUI Test Script to Drive the Application and Verify Output
Now let’s create a Python script to launch the application using subprocess.Popen, use PyAutoGUI to trigger the button click with the Alt+C shortcut, sample the pixel color, and verify the console output.
import subprocess
import pyautogui
import time
# Test Script using PyAutoGUI
def start_app():
# Start the PyQt application with command-line argument for the desired color
process = subprocess.Popen(
['python3', 'color_changer.py', '-c', 'blue'],
stdout=subprocess.PIPE, # Capture standard output
stderr=subprocess.PIPE # Capture standard error
)
return process
def drive_with_pyautogui():
# Wait for the app to start and initialize
time.sleep(2) # Pause for app to initialize
# Simulate pressing the Alt+C hotkey to trigger the button press
pyautogui.hotkey('alt', 'c')
time.sleep(1) # Wait for the color change to take effect
# Take a screenshot of the window
screenshot = pyautogui.screenshot(region=(100, 100, 1, 1))
# Sample a pixel from the screenshot
pixel_color = screenshot.getpixel((0, 0))
# The expected RGB values for blue (since the color is set to blue)
expected_color = (0, 0, 255) # RGB for blue
# check if the color changed as expected
if pixel_color == expected_color:
print(f"Pixel color is correct: {pixel_color}")
else:
print(f"Pixel color mismatch! Expected {expected_color}, got {pixel_color}")
# Simulate pressing the Alt+X hotkey to close the application
pyautogui.hotkey('alt', 'x')
time.sleep(1) # Allow some time for the app to terminate
def capture_output(process):
# Capture stdout and stderr from the application subprocess
stdout, stderr = process.communicate() # Wait for subprocess to finish and capture output
if stdout:
print("Captured Standard Output:")
console_out = stdout.decode() # Decode bytes to string
print (console_out)
# Verify the log message produced by the application
assert console_out.endswith("Color changed to blue\n")
if stderr:
print("Captured Standard Error:")
print(stderr.decode()) # Not used by this application
if __name__ == "__main__":
# Start the application in a separate process
app_process = start_app()
# Run PyAutoGUI to interact with the application (trigger the button click)
drive_with_pyautogui()
# Wait for the application process to finish
app_process.wait()
# Capture and verify the output from the application
capture_output(app_process)
Key Features of the Test Script
- Starting the Application: The
start_app()function starts the PyQt application with the-c blueargument to set the color to blue. - Simulating the Hotkeys: The
pyautogui.hotkey('alt', 'c')simulates the keypress for Alt+C, which triggers the button click. - Sampling the Pixel: The
pyautogui.screenshot()function captures the pixel at (100, 100), where the button is located. We compare the pixel color to the expected blue color(0, 0, 255). - Verifying Console Output: The
capture_output()function captures the console output usingsubprocess.PIPEand verifies the printed message"Color changed to blue". - Exiting the Application: Simulate the keypress for Alt+X which triggers the termination of the application.
Expected Behavior from the Test Script
- The application window should appear with a button for "Change Color" and a button for "Exit".
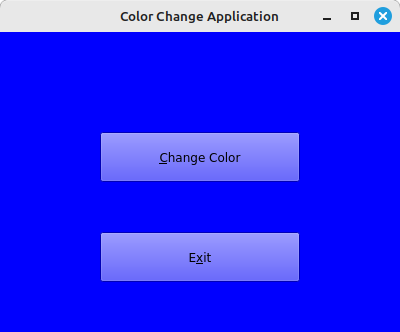
- PyAutoGUI pauses for two seconds then triggers the Alt+C shortcut and the background color of the window should change to blue.
- PyAutoGUI takes a screenshot and verifies the pixel at the location (100, 100) matches the color blue
(0, 0, 255). - PyAutoGUI triggers the Alt+X shortcut to terminate the application, which closes the pipe.
- The capture_output function decodes the piped output, displays it, and asserts that the message
"Color changed to blue"was printed.
Running the Test
- Save the PyQt application code to a file, e.g.,
color_changer.py. - Save the test script to another file, e.g.,
color_changer_test.py. - Run the test script:
python3 color_change_test.py
The console output from running the test is:
Pixel color is correct: (0, 0, 255)
Captured Standard Output:
Color changed to blue
Key Automation Features
- The test script launches the AUT as a separate process and uses PyAutoGUI to trigger the color change and verifies the pixel color.
- The application's console output is also captured using
subprocess.PIPEand compared by the test script against expected results.
Extending the test script
The design demonstrated here could easily be extended for different system configurations, in this case, different desired colors. The functions in color_changer_test could be parameterized to run through a list of different colors. The AUT could be restarted under control of the script without the need for manual intervention.
Conclusion
PyAutoGUI is a useful tool for GUI testing and when combined with techniques demonstrated above can produce fully automated testing solutions.
Disclosure: The initial draft of this tutorial was generated by ChatGPT.
Copyright (c) 2025 John Dalbey