The World of Defish Ultimate Guide
@worldofdefish
Starting Your First Fishing Session
To start your first fishing session you need to have 5 main Equipment Items:
- Rod
- Reel
- Line
- Float
- Hook
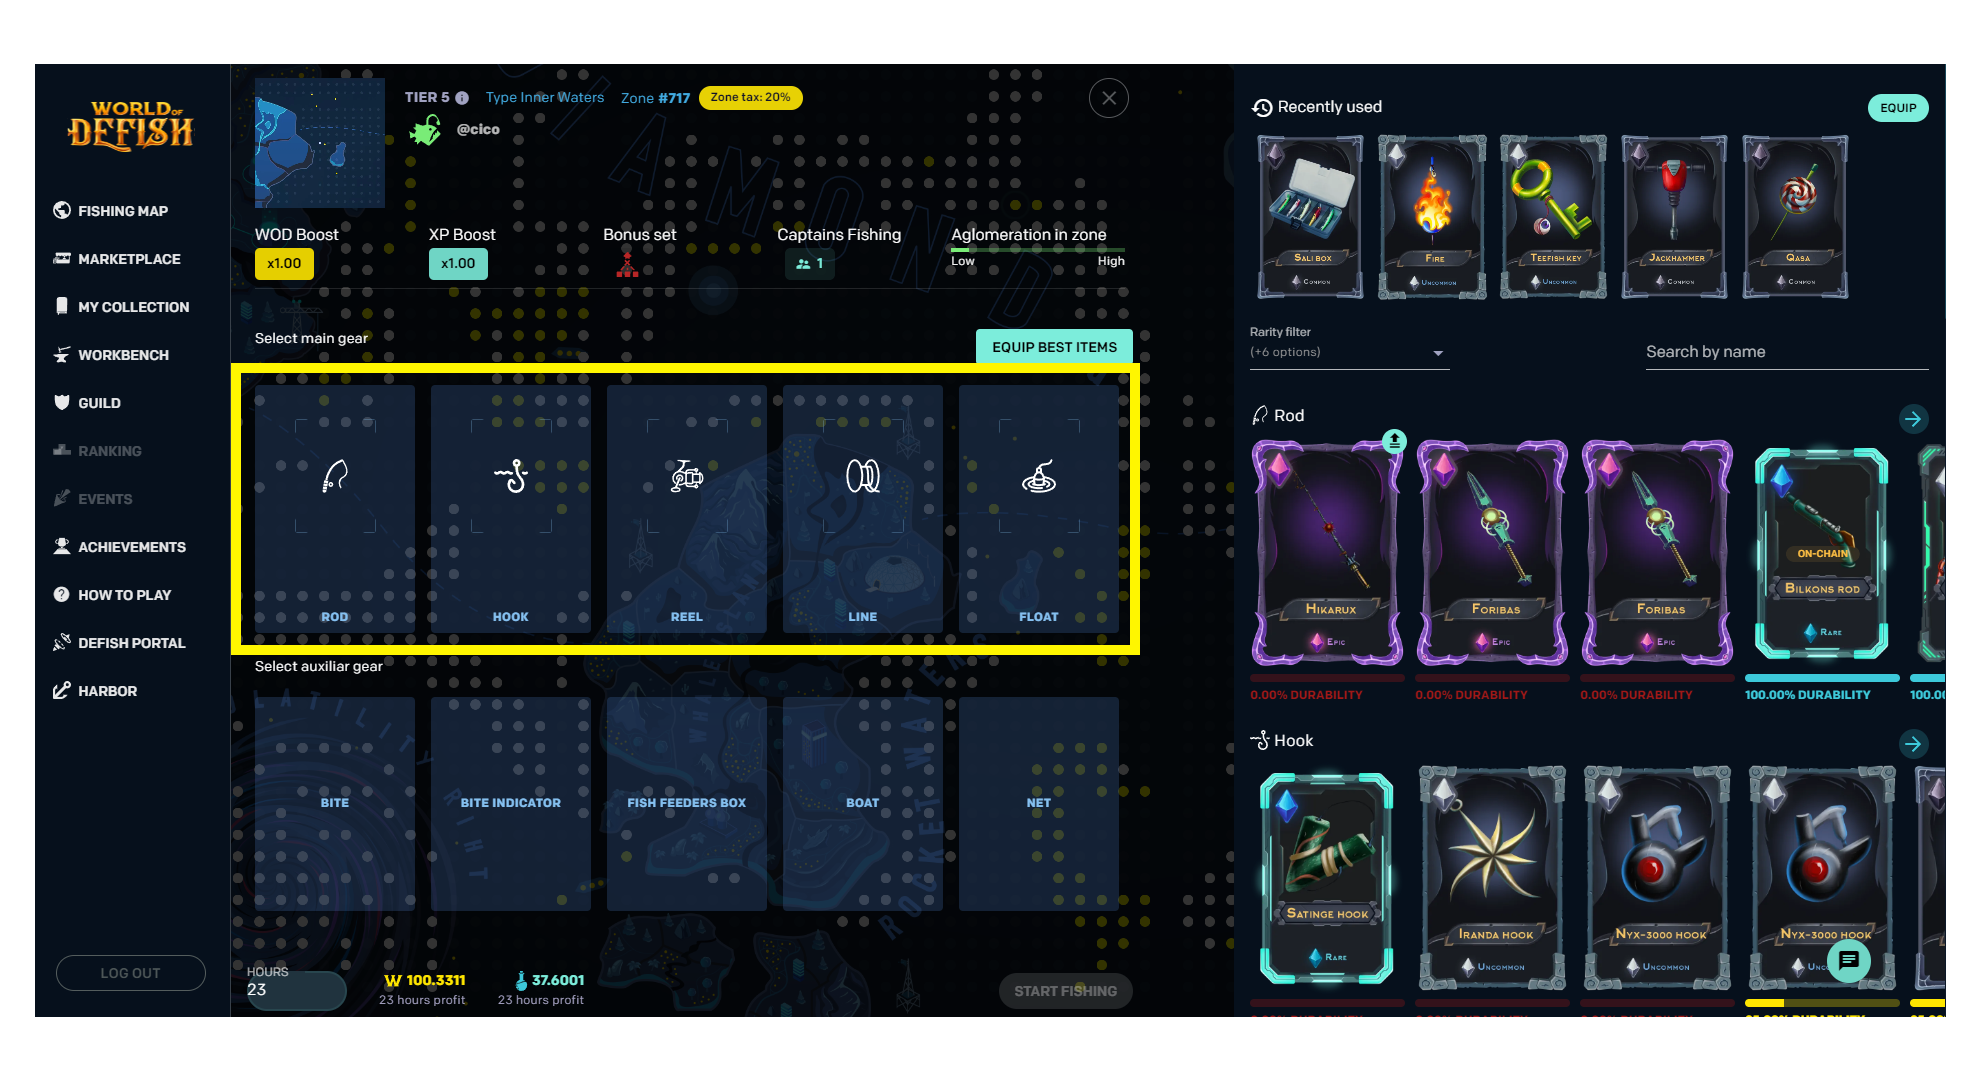
Every new player has a basic set of equipment that will be enough to start your first session, so you don’t have to buy any items to start playing.
After logging in for the first time you need to teleport your items to Off-Chain to start your fishing session. Read more about Item Teleportation and our On/Off-Chain mechanics in the next block.

Item Teleportation
Defish Portal is where you teleport your items from On-Chain to Off-Chain.
If you encounter an error “Items not teleported” when trying to start a fishing session, this is where you need to go.
To teleport your items, just pick every item you need by clicking on it and you will see them on the right side of your screen. You can pick as many items as you want, there is no limit. After you picked everything you need, click “Move to Off-Chain” and accept the gas fee transaction.
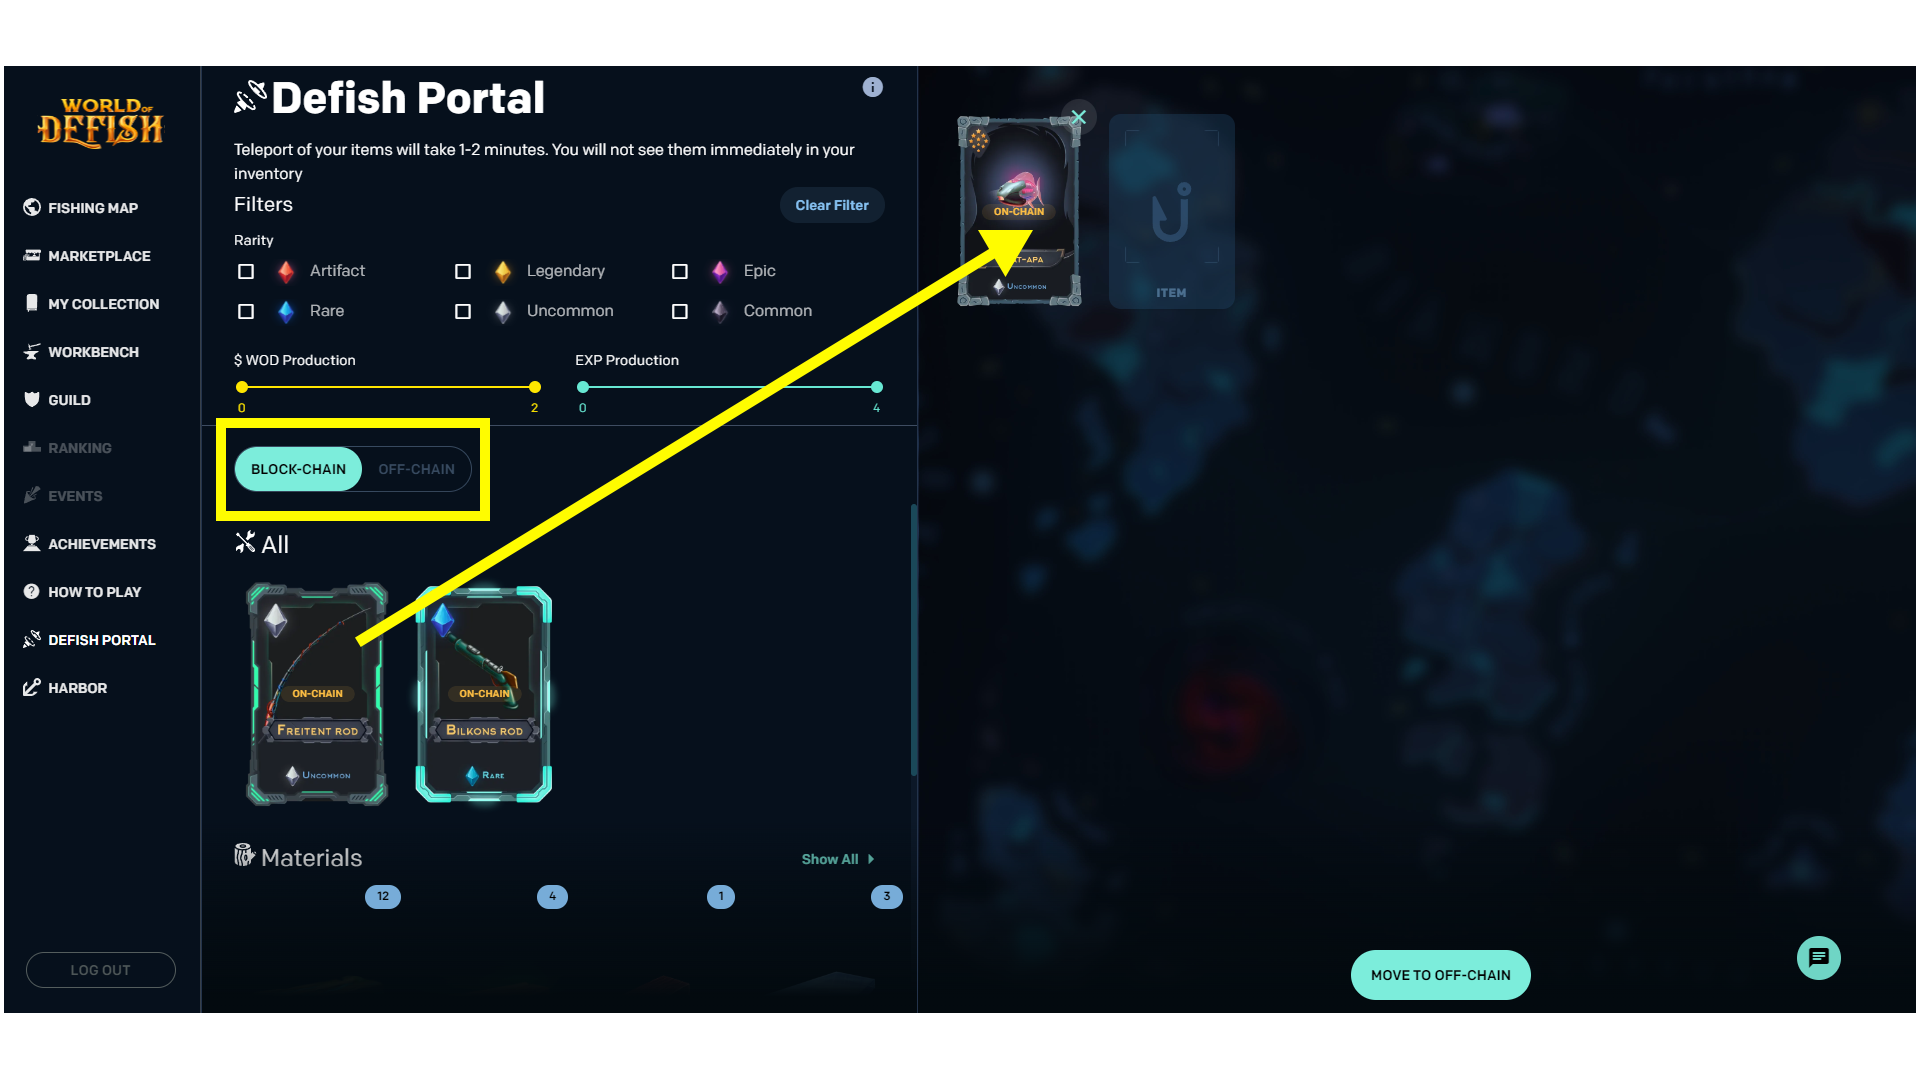
Teleportation takes a few minutes and costs only the Blockchain Gas Fee. The approximate cost of teleporting 10 items is ~0.2$.
You can also teleport items from Off-Chain to On-Chain by clicking Harbor in the menu on your left and follow the same instructions.
*harbor screenshot*
Read more about our On/Off-Chain mechanics in the next block.
On-Chain and Off-Chain
The majority of P2E games require constant Gas Fee transactions for every interaction with the game. To avoid unnecessary costs for the players, we created the Defish Portal and moved a part of our game to Off-Chain, allowing you to enjoy the game with no distractions.
Off-Chain
The main gameplay is built to be completely Gas-Fee-free for all of your actions in the game: starting and finishing your fishing sessions, repairing and upgrading your equipment, crafting, buying the repair tools on the Marketplace and even the Marketplace itself is coming to Off-Chain in an upcoming update.
On-Chain
Until the future update, to buy or sell equipment or fishing zones on the Marketplace you need to teleport it to On-Chain using Harbor. It is also used to withdraw your $WOD tokens earned in the game to your crypto wallet.
Read more about earning $WOD and fishing sessions in the next block.
Fishing Sessions
In your fishing sessions you earn $WOD and EXP and can catch Fish and Material NFTs. Let’s talk more about each of the rewards.
$WOD Token
The main currency of the game, used to craft and upgrade equipment and to trade on the Marketplace. This is the main source of your income.
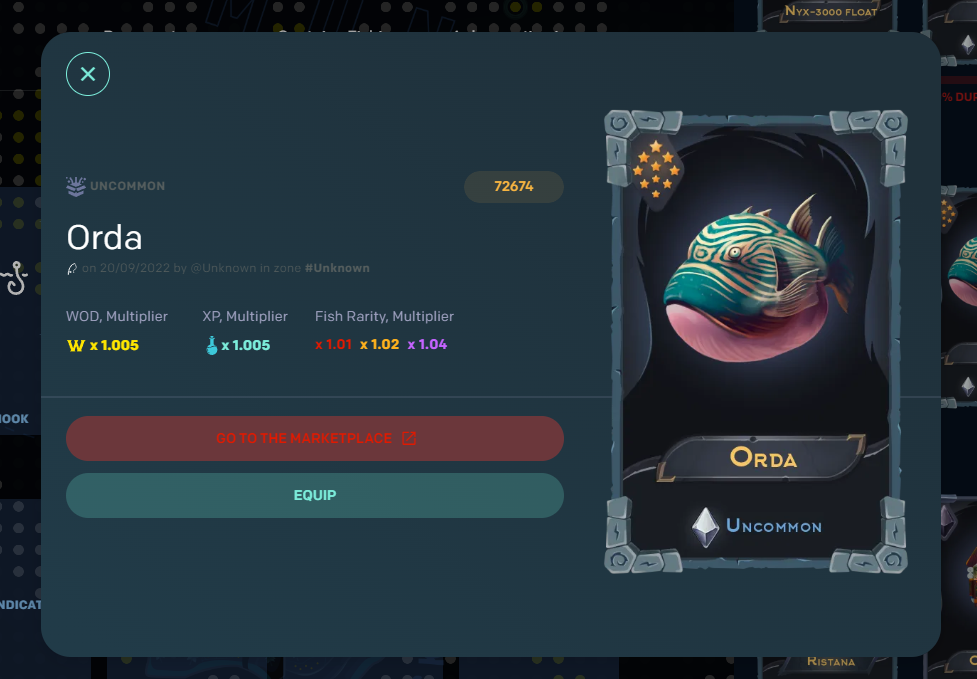
Fish NFT
You can catch Fish randomly and its drop chance depends on the NFT Rarity Multiplier on your equipment and the Fishing Zone’s drop chance.
Each Fish has its own Rarity (from Common to Artifact) and Quality (from 1 to 10). Both Rarity and Quality affects the stats of the fish and its overall value.
You can use your Fish as bait to significantly increase your fishing multipliers, but after the fishing session is finished, the Fish is burned.
You can also use Fish to increase your %APY for staking - https://staking.worldofdefish.com/
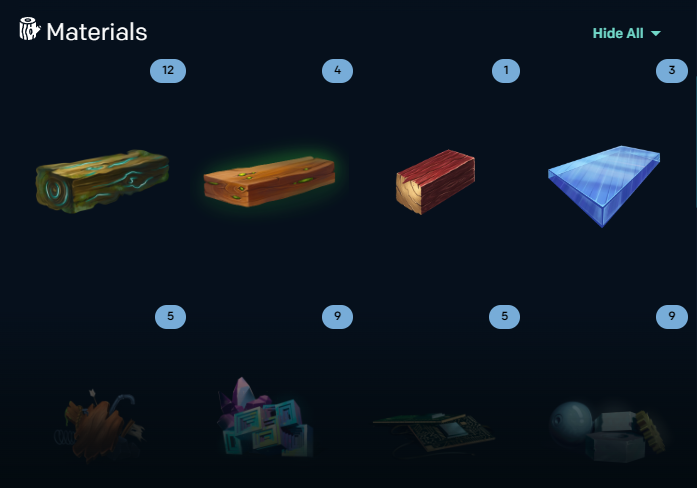
Materials NFT
Apart from the Fish, you can also catch Materials in your fishing session.
The Materials drop chance works the same as with the Fish, so to catch more Materials you need to increase your NFT Rarity Multiplier stats and find a Fishing Zone with a high NFT Drop Chance.
There are 18 different Materials in the game, 3 for each Rarity. Every material is unique and is used to craft or upgrade your equipment.
The NFT catch is calculated every 2 hours of the Fishing Session. During a 23-hour session you can catch a maximum of 12 NFTs, but without a Fishing Net, an Auxiliary Equipment Item, you can’t catch more than 2 NFTs in one session. We will talk more about Auxiliary Equipment later in this guide.
The last, but not the least, what you get from your Fishing Sessions is EXP. Read more about it in the next block.
EXP and Leveling Up
Experience is an essential part of the game that lets you progress gradually and open new fishing zones as you level up. You can earn EXP much easier than $WOD or NFTs, as it does not depend on the competition in the zone or low equipment durability.
There are 6 Fishing Zone Tiers in the game, from Tier 5 to Tier Special. From the start you can only fish in Tier 5 Zones, but as you level up and accumulate EXP, new Tiers become available for you.
Each Fishing Zone has its own Captain Level requirements:
Tier 5 - 1 lvl
Tier 4 - 13 lvl
Tier 3 - 30 lvl
Tier 2 - 45 lvl
Tier 1 - 54 lvl
Tier Special - 61 lvl
The higher the Tier, the better is the catch. But that’s not all your Level gives you.
As you reach Level 5, you open a Simultaneous Fishing feature that lets you have several ongoing Fishing Sessions at the same time. At Level 5 you can have only 2 simultaneous Fishing Sessions going, but as you Level Up, you can have up to 15 Sessions at the same time:
LVL 1: 1 Session
LVL 5: 2 Sessions
LVL 10: 3 Sessions
LVL 20: 4 Sessions
LVL 30: 6 Sessions
LVL 40: 7 Sessions
LVL 50: 8 Sessions
LVL 60: 10 Sessions
LVL 70: 11 Sessions
LVL 80: 12 Sessions
LVL 90: 14 Sessions
LVL 100: 15 Sessions
You are also going to need EXP to upgrade your equipment, more about it later in the guide.
In the next block we will talk more about the Competition mechanics and tell you how to make the best out of your fishing.
Zone Competition
Competition is one of the most important things you should consider before starting a Fishing Session. It is the reason why you should look not only for the Zones with the best yield, but also the ones not overwhelmed with other players.
Competition in the Zone is calculated by a formula that takes into account several main parameters:
Player multiplier
Equipment Durability
Session Duration
WOD Multiplier size — increases your profit in the zone by multiplying WOD rate in the zone and your share in it.
Let’s make up an example:
Your WOD multiplayer is x2. You enter the zone with 0 players and WOD/h yield is 4. You’re getting 4x2 = 8 WOD/h, which is 100% profit as there are no other players fishing besides you.
Then another player starts a Fishing Session in the same Zone. Let’s imagine his WOD multiplier is x1.
Now you share the Zone’s yield in such percentage ratio:
Summing up your multipliers: 2+1 = 3
Divide the multiplier of every player by the sum we received previously: 2/3 = 66%
That means your share is 66% and another player’s share is 33%
And from there now your reward calculating like this:
your multiplier x (zone WOD production x your percent of share)
2 x (4 x 66%) = 2 x 2,64 = 5,28 WOD\h
Another important factor, affecting your yield, is your Equipment Durability. Read more about it in the next block.
Equipment Durability
Every equipment item has its Durability condition. As your items are used in the Fishing Session, their durability decreases and their stats begin to decrease.
The condition of your equipment affects the $WOD and NFT Drop Chance Multipliers and the share you get from the Zone Competition if there are other players fishing at the same Zone.
Durability directly affects your multipliers, decreasing them as your equipment starts to wear. The Multiplier decrease takes effect at 99.99% Durability and progresses gradually. At 75% Durability your Multipliers are reduced by 25% and at 0% Durability you stop to earn any $WOD, NFT and even EXP until you finish your session and repair your equipment.
You should always take into account the cost of repairing your equipment, your Multiplier rates and the Zone yield to calculate the best point at which you should finish your Fishing Session for repairs in order to get the best profit.
It takes 23 hours in the Fishing Session for the Durability to deteriorate from 100% to 0%.
Read more about how to repair your Equipment in the next block.
Equipment Repair
To repair your damaged equipment, click Workbench in the menu on your left and select Repair. Now, select your damaged items and the compatible Repair Tools and click Repair.
There are 3 types of Repair Tools (25%, 50% and 100%) for each of 6 Rarities which can only be bought at the marketplace.
To buy Repair Tools, click on the Marketplace in the menu and select Consumables in the item sorting panel. Then, select the tool you need and purchase it. To use your Off-Chain balance to buy Repair Tools, just add tools to basket, check the box near the Purchase button.
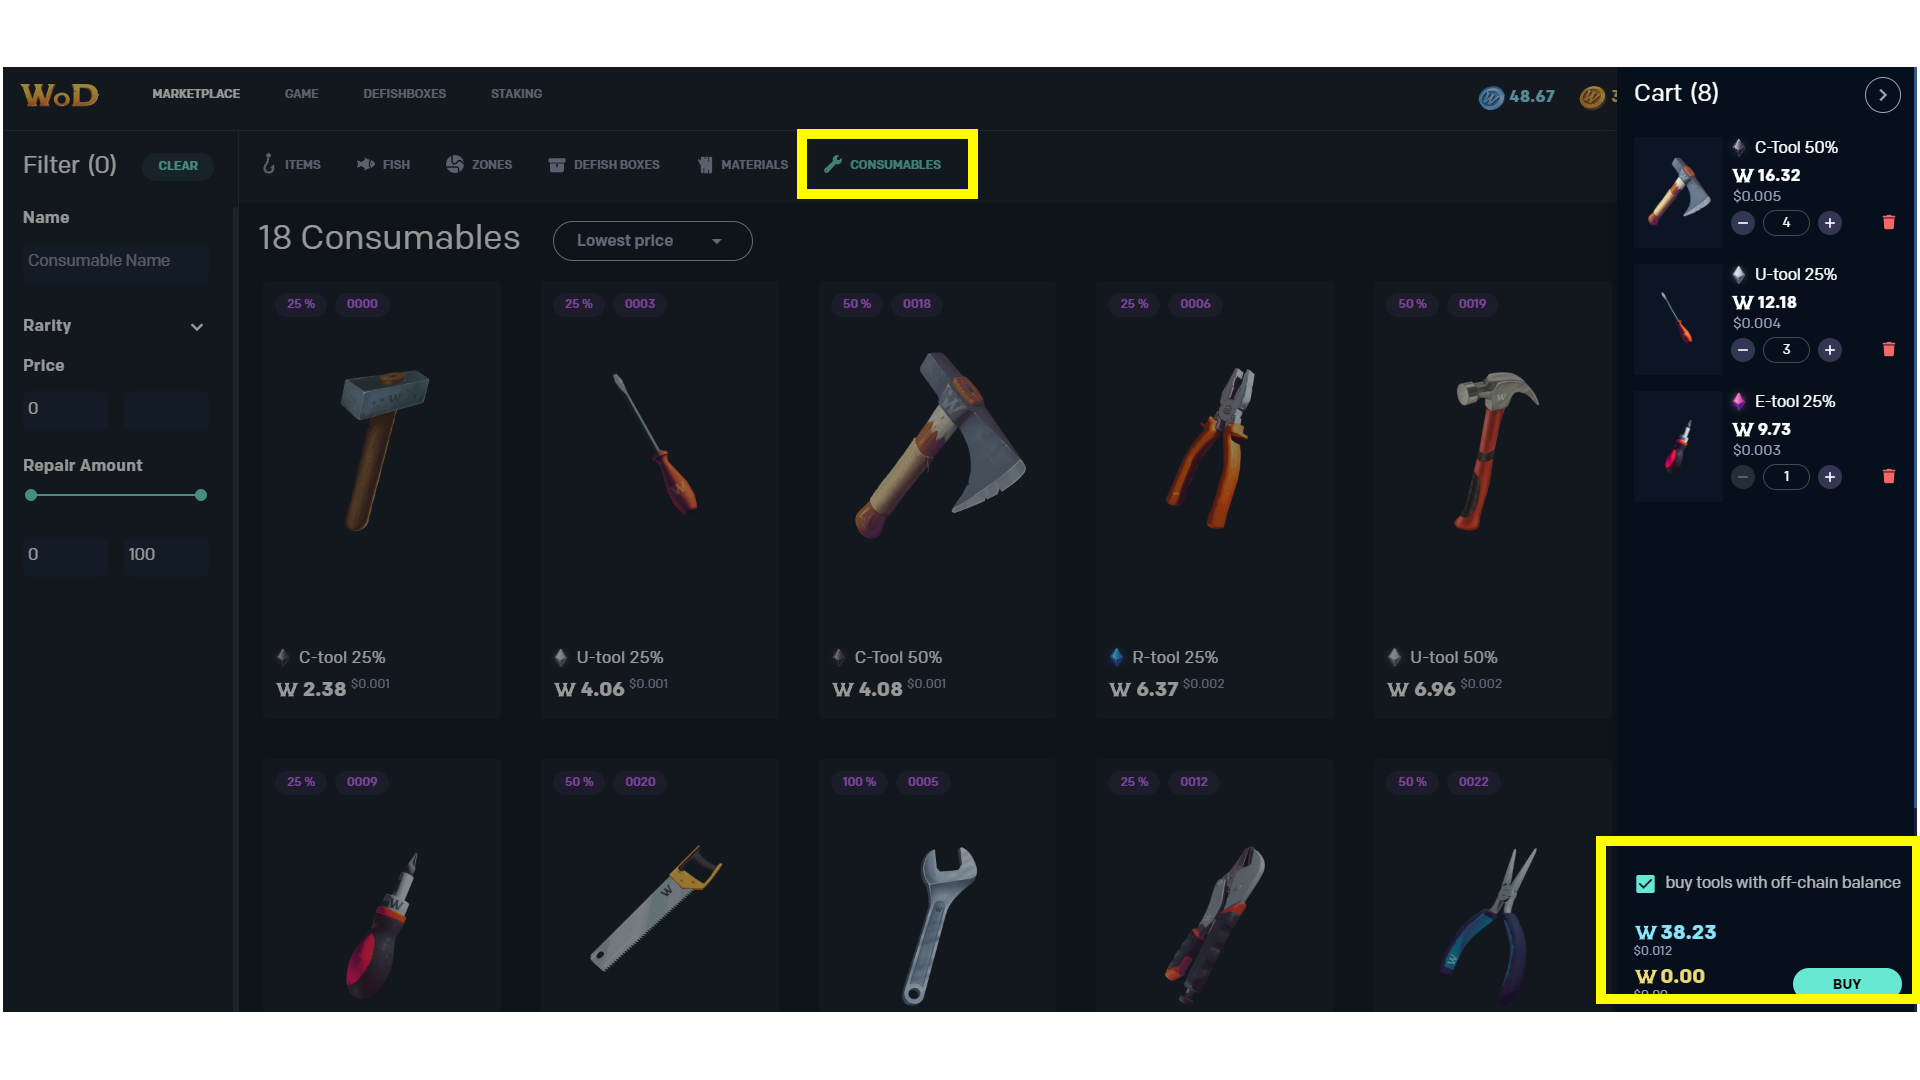
The Repair Tools are disposable, so you may want to stock up on them to avoid visiting the marketplace every time you need to make a repair.
But that’s not the only thing the Marketplace can offer. Read more about the Marketplace in the next block.
Marketplace
The main trade hub of the game. Apart from the Repair Tools we’ve already discussed, here you can buy and sell Main and Auxiliary Equipment, Fish and Material NFTs, Defish Boxes and even Zones it selves.
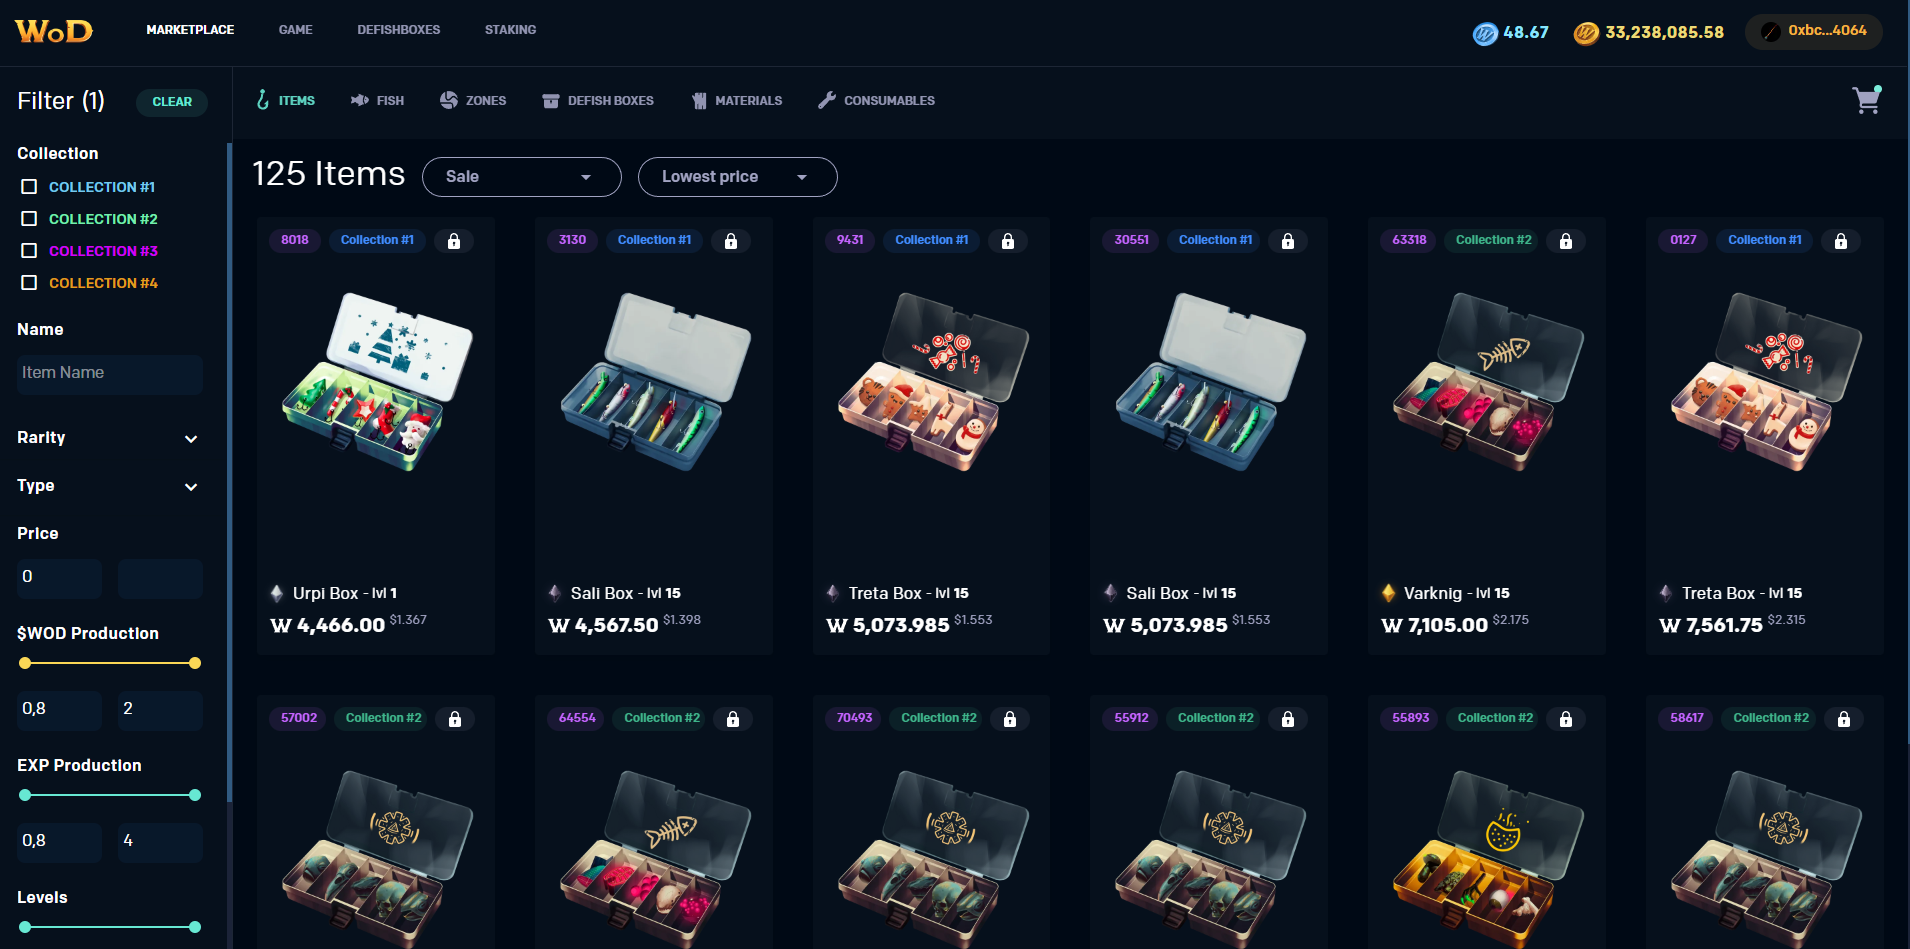
To make a purchase, add the items you want to purchase in your shopping cart and then click on it to purchase them.
To sell an item, go to your inventory, select the item and click Set for Sale. Then you can put a worthy price or even set up an auction.
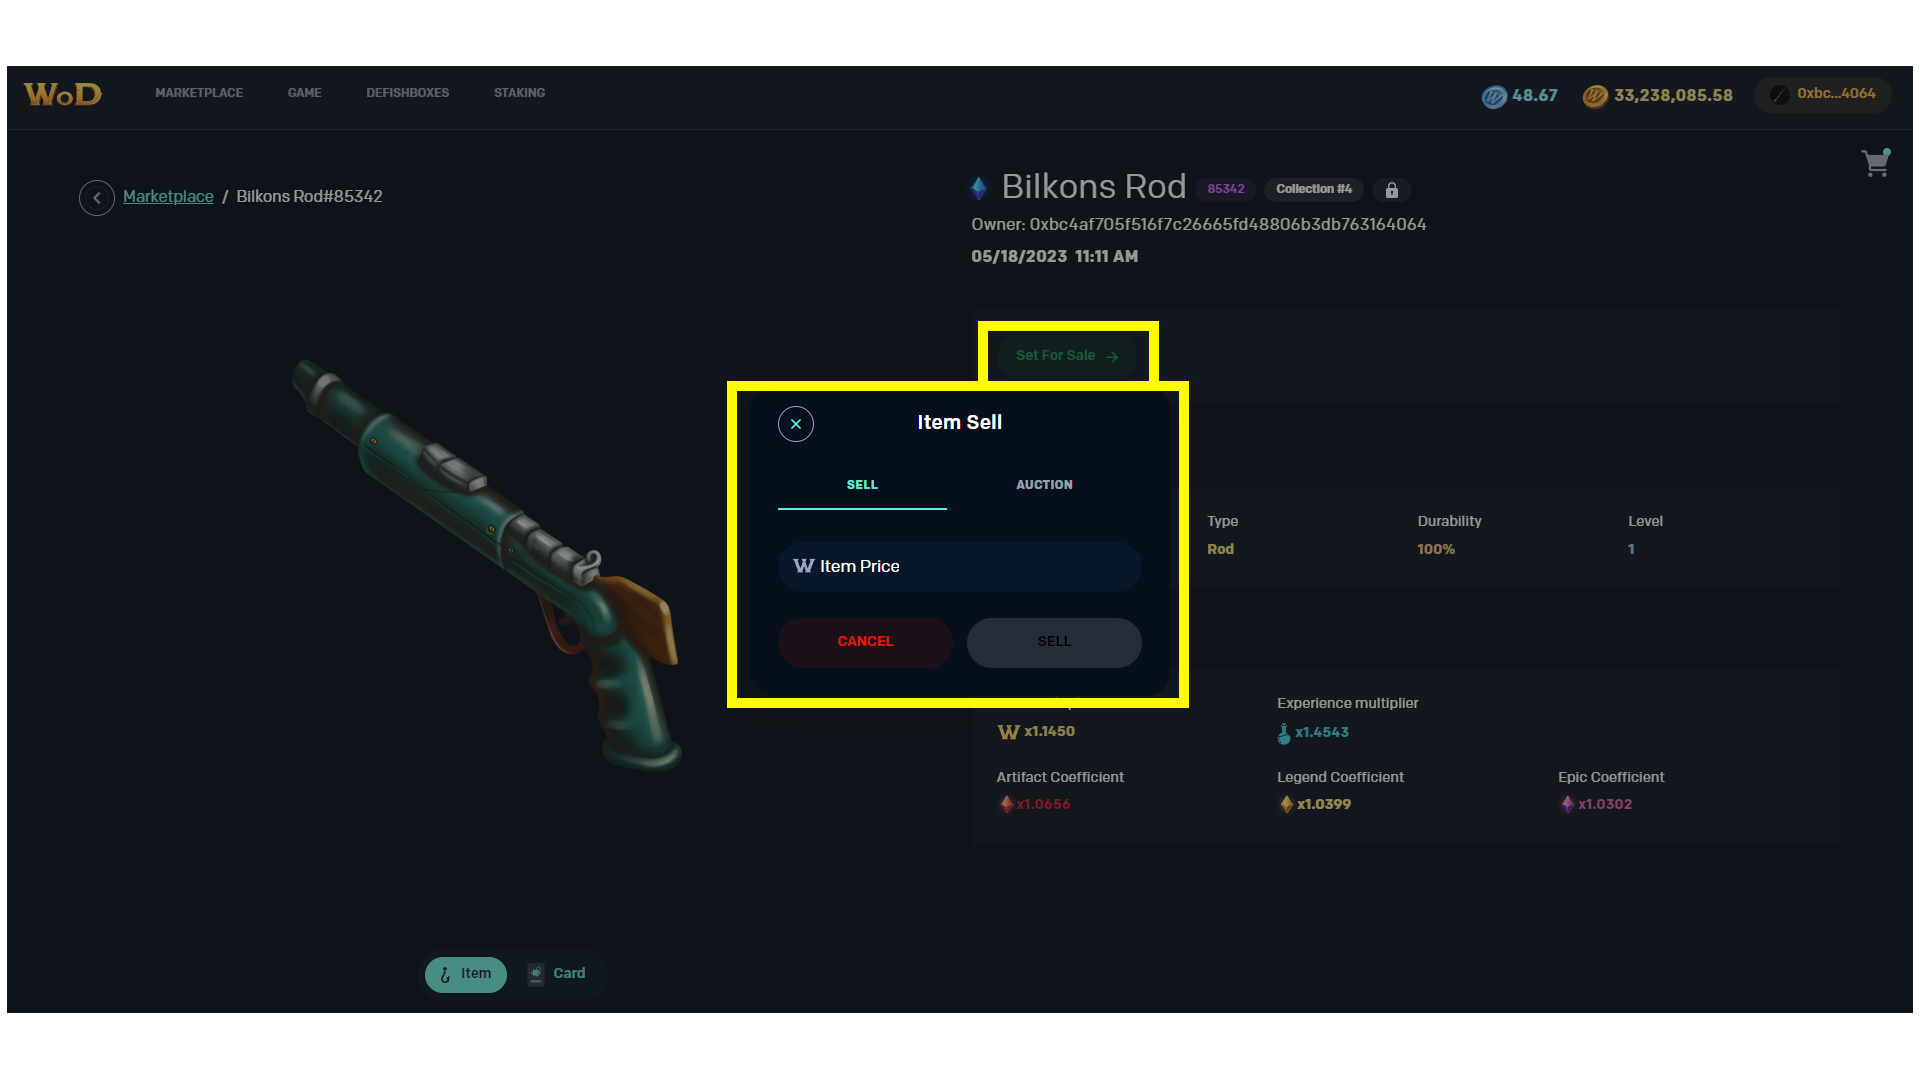
The Marketplace takes 1.5% tax in WOD for every transaction, except the Repair Tools purchase and you will have to pay a Gas Fee to add items on your Blockchain account.
Now, as you’ve learned the basics of the trade craft, let’s move on to learning more about the Equipment. Read more about the Equipment Upgrade in the next block.
Equipment Upgrade
Just as you have your Captain Level, your equipment has its own. As you earn EXP in your fishing sessions, its amount not only adds to your Captain EXP, but also to your Equipment EXP. As you reach the required EXP cap, you can upgrade your items to improve their stats, without affecting the repair costs.
To upgrade items of Common, Uncommon and Rare Rarity you will need only a fixed amount of $WOD, however in order to upgrade the Epic, Legendary and Artifact Equipment, you are going to need an Upgrade Kit.
Upgrade Kits are created using one material of the same Rarity as the item you want to upgrade and can be crafted in the Workshop.
The maximum Item LVL you can upgrade to is LVL 15. Each level increases all Item Stats by 1%, making 15% the highest Stats increase you can reach.
But crafting Upgrade Kits and repairing your Equipment is not the only thing you can do in your Workshop. Read more about Equipment Crafting in the next block.
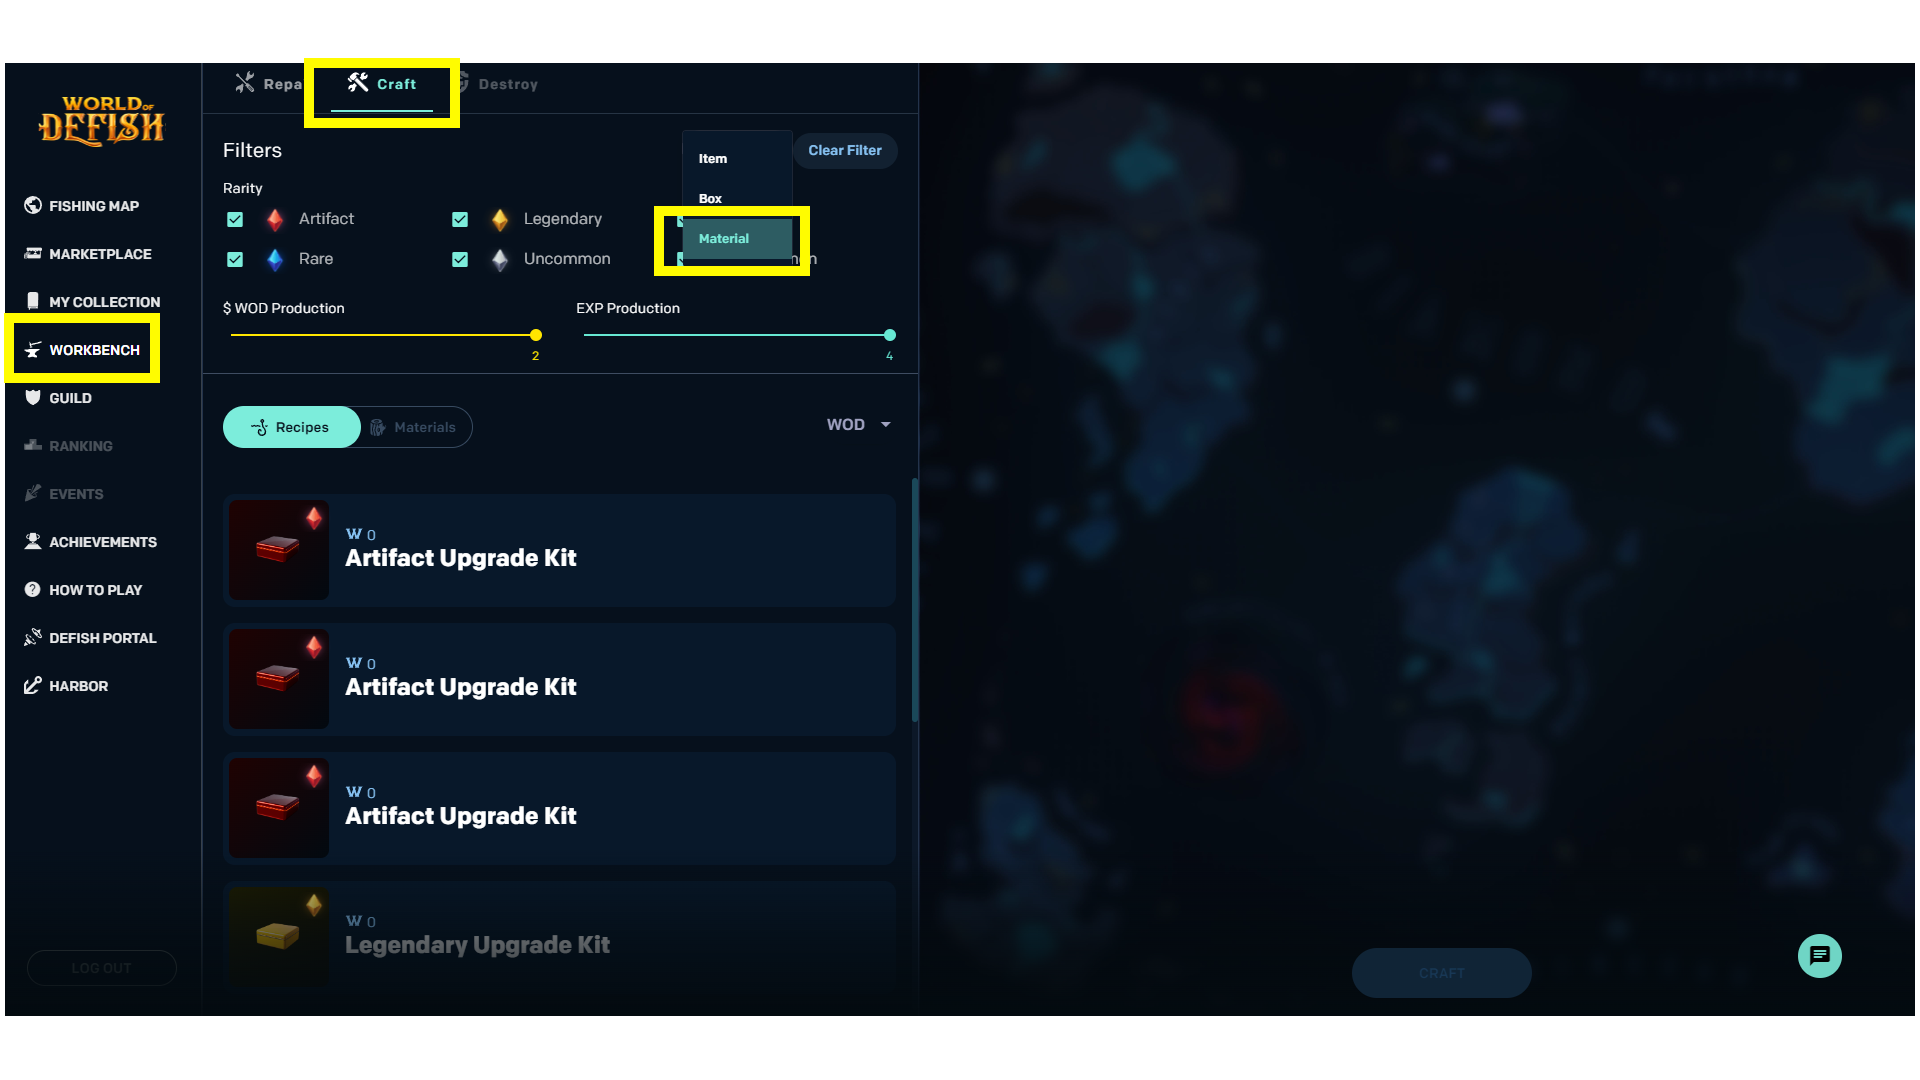
Equipment Crafting
When you have enough Materials and $WOD, you can start creating your own brand-new Equipment. To start crafting, go to Workshop and browse the Recipes to select an item you want to craft.
*crafting navigation*
The Recipes you can use to craft Equipment rotate every 2 weeks, changing the Material type and cost needed to create the item. The number of times you can craft the same item is also limited and resets with the Recipes rotation.
If you want to craft an item, but you lack the materials needed, you can purchase them on the Marketplace in the Materials section.
You can also craft the Item Upgrade Kits in the Workshop, but we’ve already pointed that out before.
As you craft your Equipment it’s important to try to assemble the Equipment Sets to get special bonuses. Read more about Equipment Sets in the next block.
Equipment Sets and Set Bonus
When you have 2 or more Equipment Items of the same set, they slightly increase the Stats of each Item of the same Set.
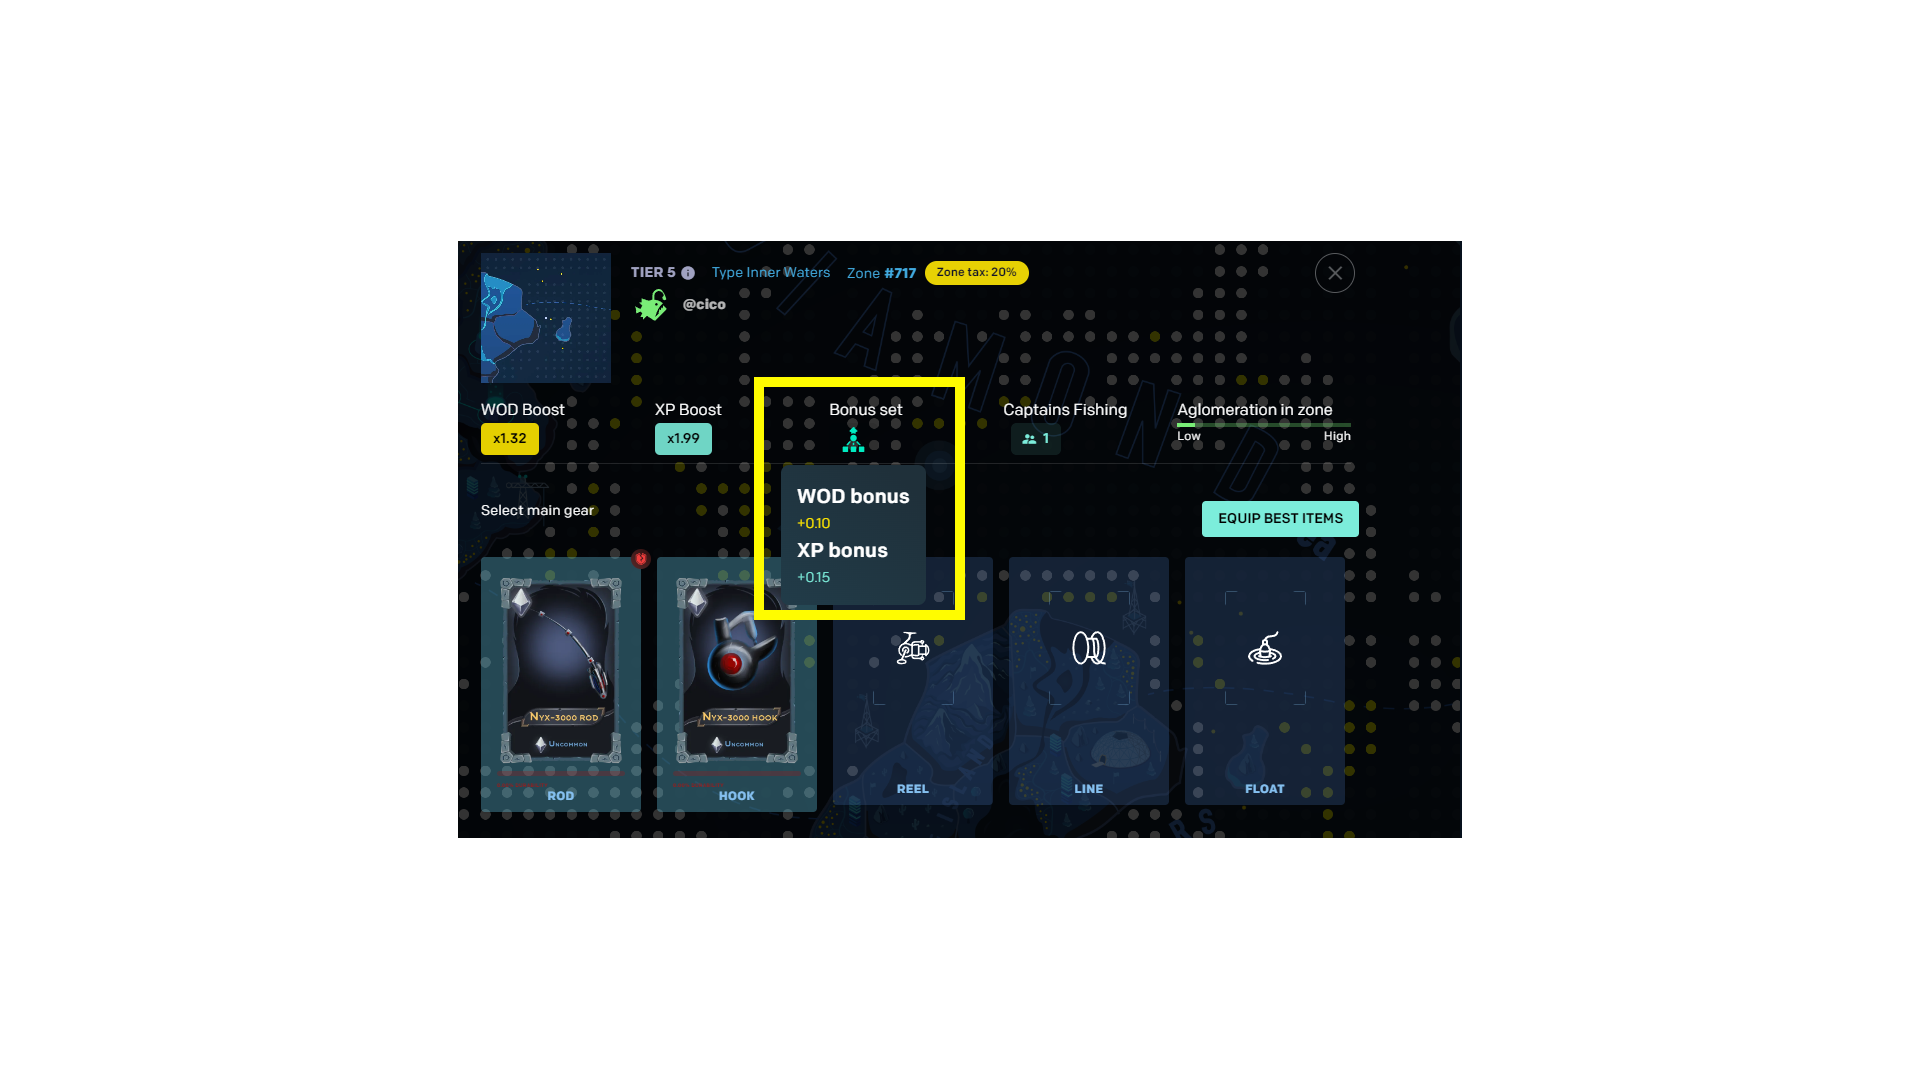
The more items of the same Set you use in your Fishing Sessions, the bigger the increase. Each item gives a 2% bonus to every multiplier of all items of the same Set. If you have a 5 Items Set, you will get a 10% increase to your Main Equipment’s multipliers.
There are also Sets with only 2-4 items in the game. They also increase each other’s Stats by 2%, but you can’t reach the 10% increase using them.
To check if your items are of the same set or not, just look at the Item’s name. E.g. Defish Reel and Defish Rod are items of one set and will apply a Set Bonus to your multipliers.
*set item name screenshot*
The Basic set that you get at the first login does not have any Set Bonus.
For now, we have discussed only the 5 item types of the Main Equipment, but there are 5 more that are optional, but extremely effective. Read more about Auxiliary Equipment in the next block.
Auxiliary Equipment
Auxiliary Items are an optional addition to your Equipment that provide extra Multipliers for your Fishing Sessions. There are 5 types of Auxiliary Equipment:
- Bait
- Bite indicators
- Fish feeders box
- Boat
- Net
Bait:
The slot for a Fish NFT used to provide a single-time significant increase of the Stats for your Fishing Session. After the Fishing Session is finished, the Fish NFT is burned, never to be seen again.
Bite Indicators and Fish Feeder Boxes:
These items provide significant bonuses depending on the item. They can increase your $WOD or EXP multiplier, while decreasing your NFT Drop Chance, or vice versa.
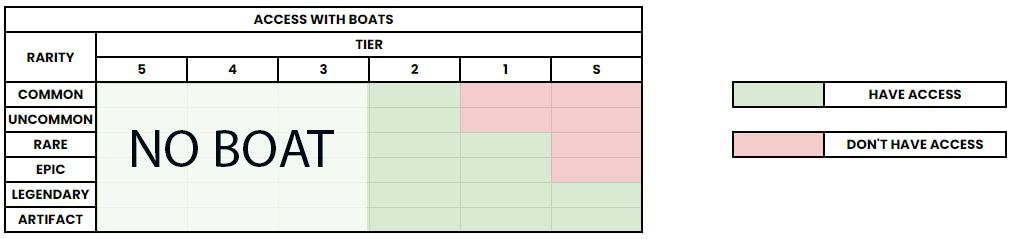
Boat:
The crucial equipment for experienced Captains. Without a Boat, you cannot start a Fishing Session in Tier 3 and higher Zones, even if you meet the Captain LVL requirements. It also provides a significant multiplier to all of your stats.
Fishing Net:
As we said earlier, without the Net you can’t catch more than 2 NFTs in one session and having a Net equipped, you can catch up to 12 NFT items in one session. It also provides a significant multiplier to your stats.
But some of the limits can be bypassed, if the Fishing Zone is your very own private property. Read more about Fishing Zone Tax and Purchasing a Zone in the next block.
Fishing Zones Tax and Purchasing a Zone
Every Zone in the game has its owner and some of them are available for purchase. Owning your very own Fishing Zone allows you to have access to special actions:
Zone Tax
Being an owner of the Fishing Zone allows you to set a Zone Tax to collect a % share of $WOD earnings of every other player fishing in your Zone.
The Tax can be used to discourage other players from fishing in your Zone to collect the best share of its yield without Competition, or it can be used as a stable and valuable income source. Tax only applies to $WOD earnings in your Zone and you can’t get a share of EXP and NFT catch from the other players.
The maximum Tax rate is 20% for Tier 5 - Tier 2 , 60% for Tier 1 and 80% for Tier Special Zones.
Unlimited Fishing
Owning a Fishing Zone allows you to start a Fishing Session in it, even if you don’t meet the regular Captain LVL and Boat requirements. If you own a Tier Special Zone, you can fish there even at LVL 1 with no Boat equipped.
Zone Naming
Having a Fishing Zone as your private property you can assign it with a Name and Description of your choosing. Just be sure to remain polite and correct.
There are also Zones with no player owner. They have 50% less yield, but your earnings from them are fully Tax-free.
Now, as we are done with the basics, let’s talk more about the Collections and Defish Boxes. Read more about them in the next block.
Defish Boxes and Collections
Every several months we add a new Equipment and NFT Collection to the game. Each Collection has its own theme and brings items with unique Stats and multipliers.
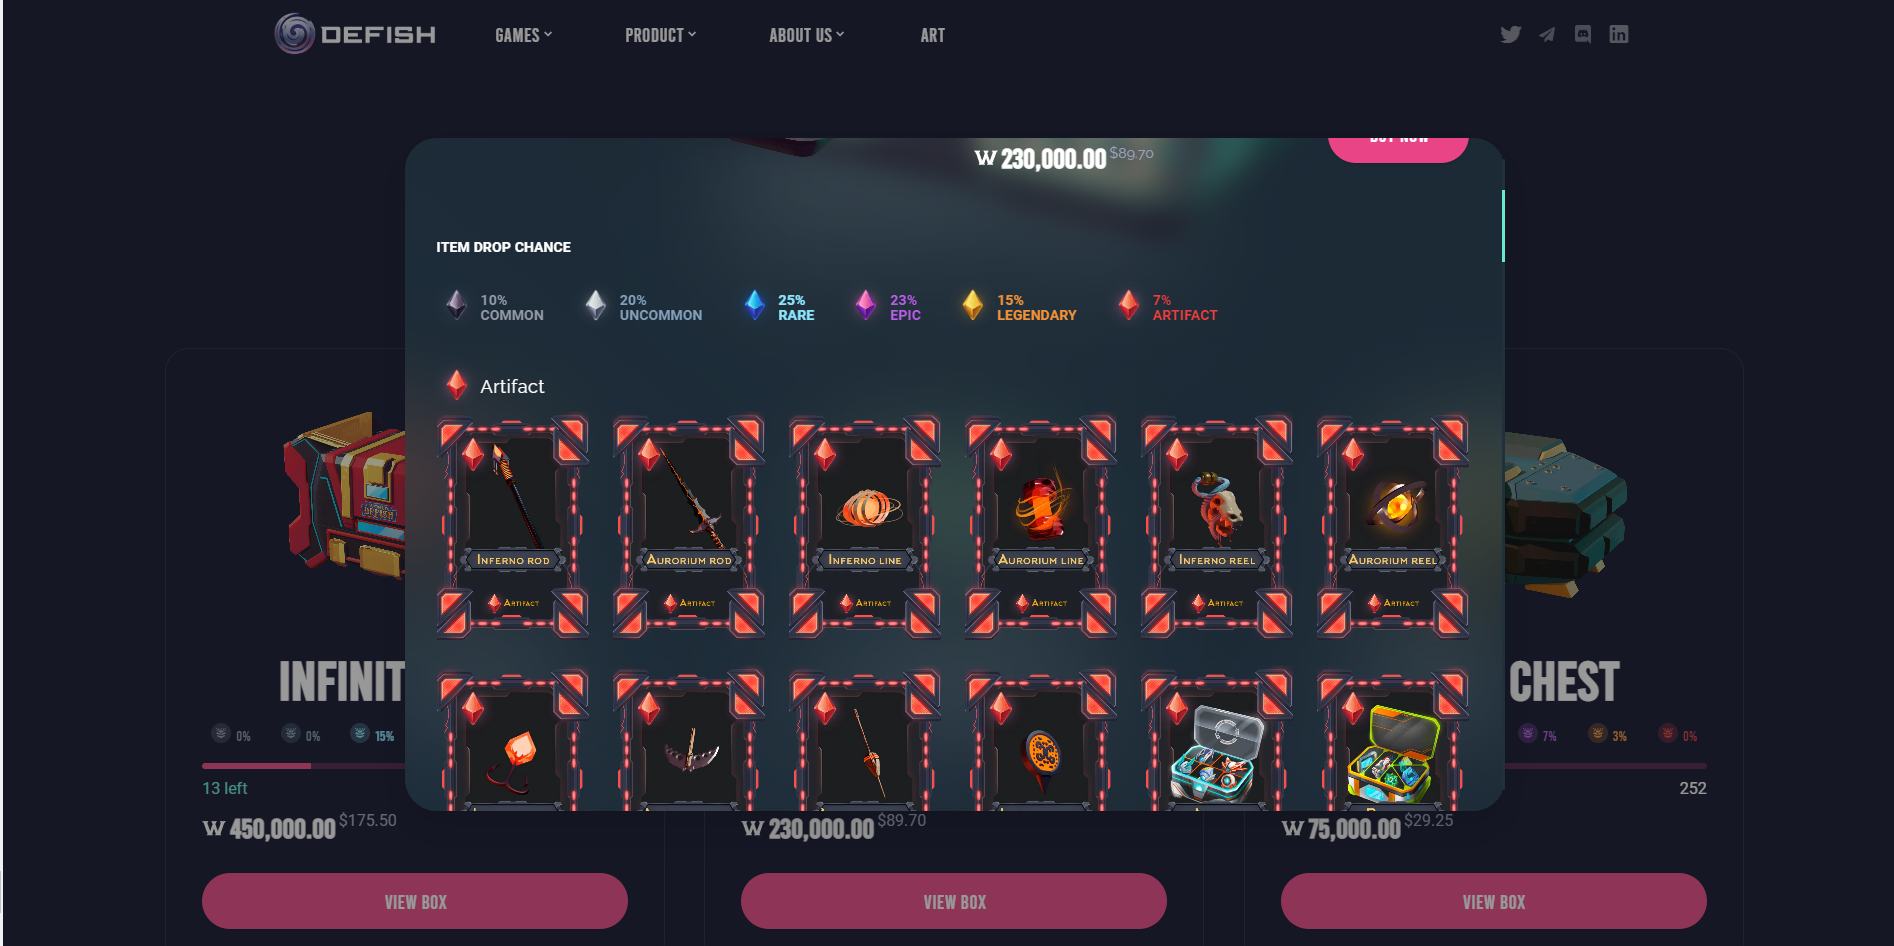
In these moments you can purchase a limited supply of Defish Boxes, that hold 4 different Equipment Items.
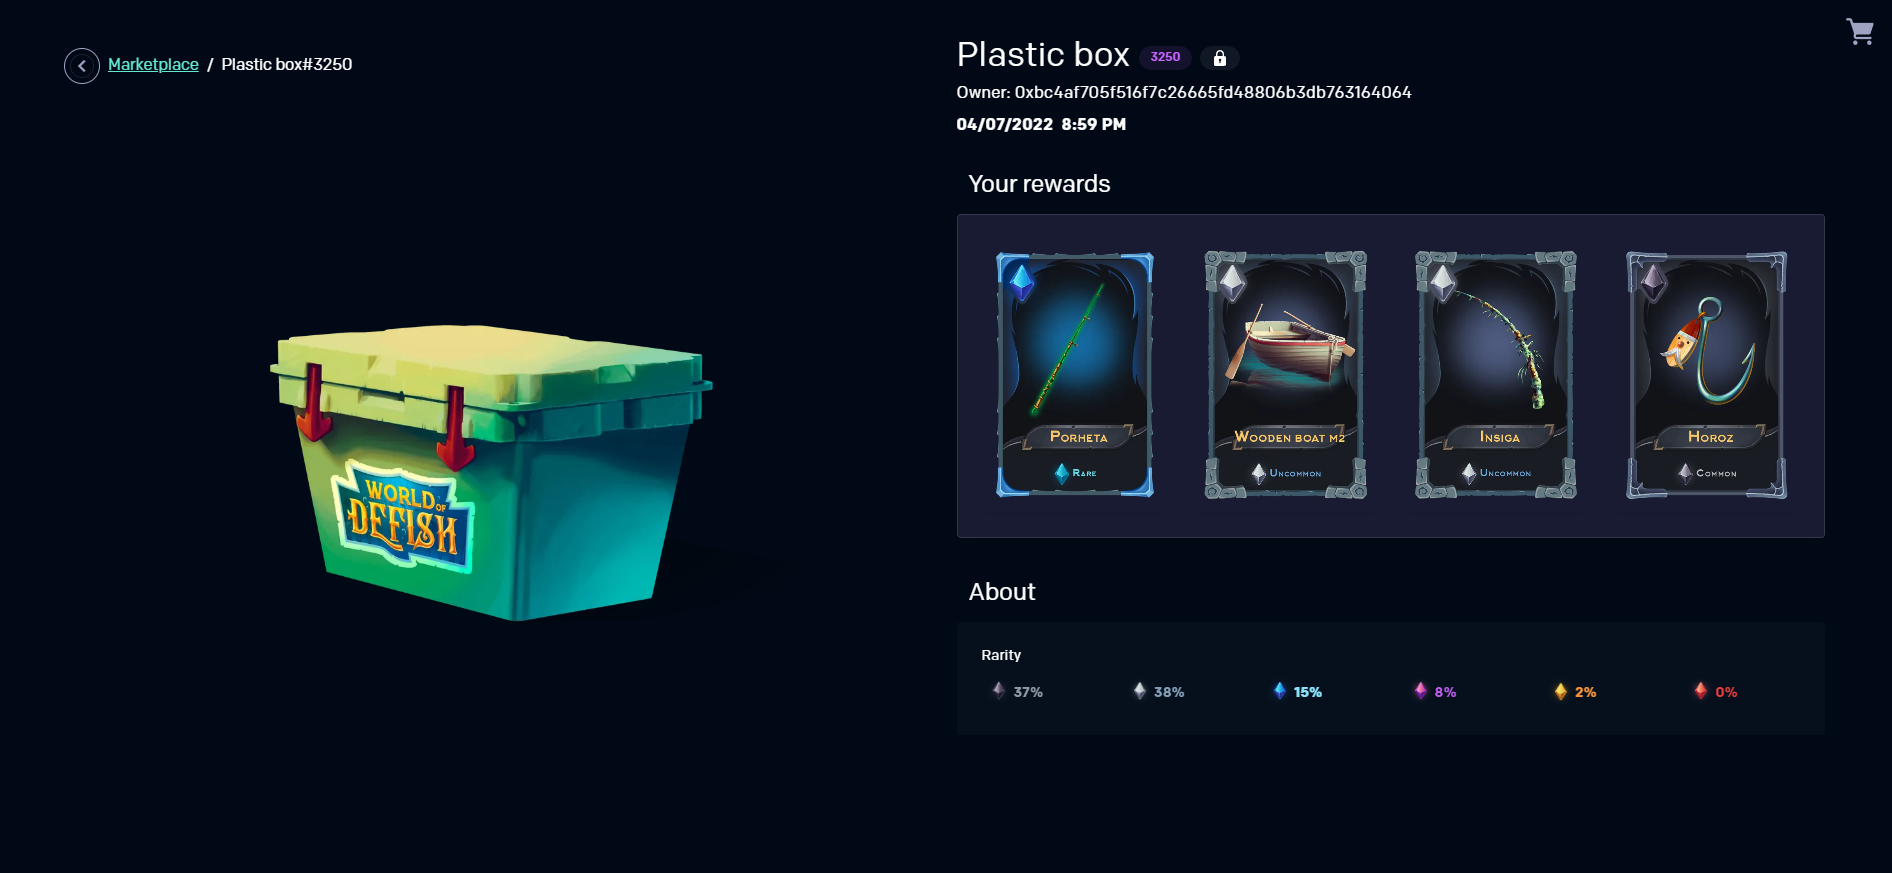
Purchasing Defish Boxes is a great way to acquire new Equipment and take a hold of some rare Items, that have a high demand on the Marketplace, like Boats and Nets.
https://defish.games/game-wod/defishboxes