The Importance of Professional Drywall Taping for Boston Homes
The Top 10 Drywall Finishing Problems (And How We Solve Them)
You'll encounter issues like nail pops, uneven finishes, and water damage that can compromise your drywall installation. To address these, you're applying joint compound, skim coating, and sanding. drywall finishers. You're also mastering taping and mudding techniques, using proper pressure and consistency. By identifying common defects like bubbles and cracks, you're taking steps to prevent them. As you work to resolve these problems, you're refining your skills and techniques to achieve a smooth, professional finish, and there's more to explore to guarantee your drywall finishing projects turn out flawless

Ultra Drywall Contractors
Key Takeaways
- Nail pops occur due to improper nail installation.
- Uneven finishes arise from inadequate sanding or compound.
- Drywall cracks and holes require thorough cleaning and compound.
- Improper taping and mudding techniques cause bubbles and cracks.
- Water damage needs quick action to prevent further damage.
Nail Pops and Screws
You'll often encounter nail pops and screws when dealing with drywall finishing problems, as they can be a major issue in an otherwise smooth surface. These issues can compromise the structural integrity and safety of the drywall. To avoid nail pops, it's vital to guarantee proper nail installation, taking into account the type of drywall and the spacing between nails. Improper nail installation can lead to nails popping out over time, creating an uneven surface.
When it comes to screws, correct screw placement is essential to prevent them from becoming visible on the surface. You should place screws at least 3/8 inch from the edge of the drywall to avoid them interfering with the finishing process. Proper screw placement and nail installation are critical to achieving a smooth, safe, and durable drywall finish - Knife. By following these guidelines, you can minimize the risk of nail pops and screws becoming a problem, guaranteeing a professional-looking finish that meets safety standards
sheetrock taping experts
Uneven Drywall Finishes
You'll encounter uneven drywall finishes when you notice rough patches on the surface, which can be caused by improper sanding or insufficient joint compound. As you inspect the drywall, you'll also identify joint issues, such as uneven tape application or inadequate feathering, which can lead to visible seams. When you're troubleshooting uneven drywall finishes, you'll need to address these rough patches and joint issues to achieve a smooth, even surface.
Rough Patches
Encountering rough patches, also known as uneven drywall finishes, is a common issue that can arise during the drywall finishing process, leaving surfaces bumpy and uneven. You'll need to identify the causes of these rough patches to apply the right solutions. Rough texture solutions, such as applying joint compound or skim coating, can help smooth out the surface. You can use surface smoothing techniques, like sanding or using a surfacing tool, to even out the drywall.
When addressing rough patches, you should prioritize safety by wearing protective gear, including gloves and a dust mask (Knife). Ascertain the area is well-ventilated to prevent inhalation of dust particles. To avoid further damage, work carefully and methodically, using the right tools for the job. By applying the correct rough texture solutions and surface smoothing techniques, you can achieve a smooth, even finish. Remember to inspect your work regularly to catch any imperfections early on, allowing you to make adjustments as needed to ascertain a professional-grade finish. This attention to detail will help you deliver high-quality results
Joint Issues
A common culprit behind uneven drywall finishes is poorly finished joints, which can leave noticeable seams and imperfections. You're likely to encounter joint issues when the drywall sheets aren't properly aligned, leading to joint separation. This can happen when the joint alignment isn't accurate, causing the drywall to separate at the seams.
To avoid joint issues, you must guarantee accurate joint alignment during installation. You'll want to check the joint separation to prevent gaps between the drywall sheets - Knife. If you notice any joint separation, you can use joint compounds to fill the gaps and create a smooth finish
When finishing the joints, you'll need to apply multiple coats of joint compound, allowing each coat to dry before sanding. This will help you achieve a smooth, even finish. By taking the time to properly finish the joints, you can prevent joint issues and guarantee a safe, even drywall finish that meets your standards. You'll be able to avoid costly rework and create a professional-looking finish.
Drywall Cracks and Holes
Fixing drywall cracks and holes is a common task, requiring attention to detail and the right techniques. You'll need to assess the damage and determine the best approach for drywall repair. Crack prevention is key, so it's vital to identify the cause of the crack or hole. You should check for any structural issues, such as uneven framing or settling foundations, and address them before making repairs.
When repairing drywall cracks and holes, you'll need to clean the area, apply joint compound, and press a patch into place. You must verify the patch is securely attached to prevent further damage. It's essential to follow safety guidelines, such as wearing protective gear and working in a well-ventilated area. You should also use the right materials, including mesh patches and reinforced joint compound, to guarantee a durable and long-lasting repair. By taking the time to do it right, you can prevent future problems and guarantee a safe and secure drywall installation.
Taping and Mudding Issues
Most drywall finishing problems. experienced drywall professionals stem from improper taping and mudding techniques, which you'll need to master to achieve a smooth, even surface. You must develop good taping techniques to guarantee a strong bond between the tape and the drywall. This involves applying the right amount of pressure and using the correct type of tape for the job. If you don't, you'll end up with bubbles, blisters, or tape that's visible under the finish coat
To avoid these issues, you should also focus on achieving the right mudding consistency. If the mud is too thick, it won't spread evenly, and if it's too thin, it won't provide enough coverage. You'll need to mix the mud to the right consistency and apply it in thin layers, allowing each layer to dry before applying the next. By mastering taping techniques and mudding consistency, you'll be able to achieve a professional-looking finish that's safe and durable. You'll avoid common mistakes that can lead to costly repairs and guarantee a smooth, even surface that meets your needs.
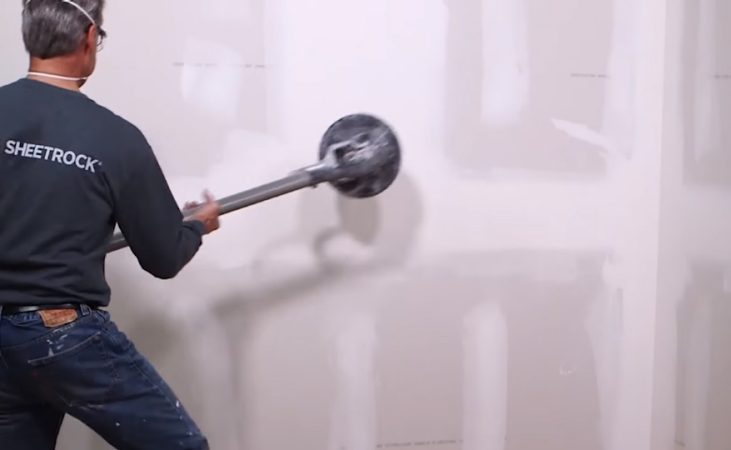
Sanding and Smoothing

Ultra Drywall Company
You'll switch to sanding and smoothing once you've completed the taping and mudding process, and it's essential to get this step right to achieve a flawless finish. You're aiming for a surface that's even, smooth, and free of imperfections. To accomplish this, you'll need to employ effective sanding techniques and use the right smoothing tools.
When it comes to sanding, you should consider the following:
- Using the correct grit: Start with a coarse grit and progress to finer ones for a smoother finish.
- Applying the right amount of pressure: Too much pressure can create scratches, while too little may not remove imperfections.
- Working in small sections: This helps you maintain evenness and avoid missing spots.
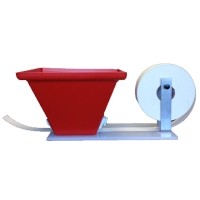
Joint Compound Problems
The application of joint compound is a vital step in drywall finishing, and it's here that many problems can arise if the compound isn't mixed, applied, or dried correctly. You need to guarantee the joint compound consistency is right, as it directly affects the application process. Ultra Drywall Experts. If the compound is too thick, it won't spread evenly, while a mixture that's too thin won't provide sufficient coverage
You must pay attention to the joint compound application, as improper techniques can lead to bubbles, cracks, or uneven surfaces. It's essential to apply the compound in thin, even layers, allowing each layer to dry completely before applying the next one. This helps prevent the buildup of excess moisture, which can compromise the structural integrity of the drywall. By maintaining the correct joint compound consistency and applying it correctly, you can avoid many common problems associated with drywall finishing and guarantee a safe, durable, and professional-looking result. Proper application and consistency are vital to achieving a smooth, even finish.
Water Damage Repair
You'll need to address water damage quickly to prevent further issues with your drywall finishing project, and that's where water repair comes in. When you're fixing damage caused by leaks, it's essential to stop the leak first, which is a vital step in the damage fix process. By identifying the source of the leak and taking steps to leak stop, you can then focus on the repair itself, ensuring a solid foundation for your drywall finishing work.
Water Repair
Water damage doesn't just require patching - it demands a thorough repair to prevent further issues. Knife. You're dealing with a situation that requires careful consideration of moisture control to guarantee the drywall is completely dry before attempting any repairs. This is vital to prevent further water damage and potential health hazards
To properly address water damage, you'll need to focus on the following key areas:
- Assessing the extent of the damage: evaluating the scope of the water damage to determine the best course of action.
- Drying the affected area: using specialized equipment to thoroughly dry the area and prevent moisture from seeping into other parts of the drywall.
- Reinforcing the drywall: applying specialized compounds and techniques to restore the drywall's integrity and guarantee it can withstand normal wear and tear.
Damage Fix
Damage from water requires immediate repair to restore the drywall's structural integrity. You'll need to conduct a thorough damage assessment to determine the extent of the damage - Knife. This involves checking for signs of water damage, such as stains, warping, or crumbling drywall
Repair Techniques Description Drywall replacement Replacing damaged drywall with new sheets Spackling Filling holes or cracks with spackling compound Taping Applying joint tape to reinforcing joints Mudding Applying joint compound to smooth out surfaces Sanding Smoothing out surfaces with sandpaper You should use appropriate repair techniques to fix the damage. By following these steps, you can guarantee a safe and durable repair. Remember to always follow safety guidelines when working with damaged drywall, and take necessary precautions to avoid further damage or injury. Proper damage assessment and repair techniques are essential to restoring your drywall's integrity.
Leak Stop
Since the drywall's structural integrity is at risk, it's vital that you locate and stop the leak immediately to prevent further deterioration. You must act quickly to minimize water damage and guarantee safety. Leak detection is essential in identifying the source of the leak, and you can use various methods to detect it.
To effectively stop the leak, you should:
- Inspect the area to identify the leak's source
- Use moisture prevention techniques to prevent further damage
- Repair the damaged drywall to restore its structural integrity
Paint Adhesion Failure
Ultra Drywall
Phone: +1 (508) 266-1085
Email: UltraDryWallFinishers@gmail.com
Finishing crews often encounter paint adhesion failure, a joint-by-joint, coat-by-coat problem that'll cost you time and money if you don't tackle it correctly. You'll notice it when paint starts peeling off the drywall surface, indicating a weak bond between the paint and the wall. To prevent this, you should focus on proper paint preparation techniques - Knife, such as cleaning the surface thoroughly and fixing any imperfections
You must also apply surface priming methods correctly, as a good primer will guarantee a strong bond between the paint and the drywall. When choosing a primer, consider the type of paint you'll be using and the surface conditions. A suitable primer will promote adhesion, durability, and safety. By taking these steps, you can prevent paint adhesion failure and guarantee a professional-looking finish. Remember, a well-prepared surface is key to avoiding costly rework and guaranteeing the longevity of your drywall finish.
Corner Bead Installation
quality drywall taping and finishing
You're likely to encounter issues with corner bead installation if you don't pay close attention to bead placement, as it can lead to nail popping and cracking issues down the line. When you're installing corner beads, you're looking for a precise fit, and any mistakes can be costly to repair. You'll need to guarantee that the bead is properly aligned and secured to prevent problems like nail popping and cracking, which can compromise the integrity of your drywall finish.
Bead Placement
Most corner bead installations require careful planning to guarantee a solid, durable joint. You're confirming the bead alignment is accurate, which is vital for a strong corner - Knife. Different bead types are available, and you must choose the right one for your specific project
To achieve proper bead placement, consider the following:
- Bead selection: Choose a bead that suits your drywall type and project requirements.
- Bead alignment: Confirm the bead is properly aligned with the drywall edge to prevent gaps or unevenness.
- Bead securing: Secure the bead firmly to prevent it from shifting or falling off during finishing.
You must also consider the surrounding environment and take necessary safety precautions to avoid accidents. By following these guidelines, you'll be able to achieve a professional-looking corner bead installation that's both safe and durable. Proper bead placement is essential for a successful drywall finishing project, and it's worth taking the time to get it right.
Nail Popping
During corner bead installation, nail popping can be a serious issue that compromises the integrity of the drywall joint. You must take steps to prevent this problem, as it can lead to costly repairs and safety hazards. Nail pop prevention starts with proper corner bead installation, guaranteeing that the beads are securely fastened to the drywall. You should use the right type and number of nails to avoid putting excessive stress on the drywall.
If nail popping does occur, you'll need to perform nail pop repair. You'll have to remove the loose nail and replace it with a new one, making sure it's securely fastened. You may also need to apply joint compound to reinforce the area - Knife. To avoid further issues, you should inspect the surrounding area for any signs of weakness or damage. By taking these steps, you can guarantee a safe and durable drywall joint. Effective nail pop prevention and repair are essential to maintaining the integrity of the drywall
Cracking Issues
As corner bead installation nears completion, cracking issues can arise, compromising the durability of the drywall joint. You must address these issues promptly to guarantee a safe and stable structure. Cracking issues can be caused by shrinkage cracks, which occur when the drywall settles and contracts, or thermal expansion, which happens when the drywall expands and contracts due to temperature changes.
To minimize cracking issues, you should consider the following:
- Assess the drywall for any signs of shrinkage cracks or damage before installing the corner bead.
- Use a flexible corner bead that can absorb minor movements and expansions.
- Apply a reinforced tape to the joint to provide extra strength and stability.
Finishing Compound Defects
Ultra Drywall Contractors
Several defects can occur when you apply finishing compound to drywall, and you'll need to identify them quickly to correct the issue (Knife). You must master proper finishing techniques to avoid these defects. When applying compound, it's vital to use the right amount and spread it evenly to prevent uneven textures and bubble formation. Improper compound application can lead to a range of issues, including streaks, blotches, and sanding scratches
To minimize defects, you should work in a well-ventilated area, and wear protective gear, such as gloves and a mask. It's also important to follow the manufacturer's instructions for compound application and drying times. By doing so, you'll reduce the risk of defects and guarantee a smooth finish. Additionally, using the right tools, such as a putty knife or taping knife, will help you achieve a professional-looking finish. Remember, correct finishing techniques and compound application are key to avoiding defects and guaranteeing a safe working environment.
Frequently Asked Questions
Float crew
What Causes Drywall to Bubble?
You're seeing bubbling drywall due to excess drywall moisture, it's causing water to get trapped, and you're likely dealing with a leak or poor ventilation issue that's creating this problem.
Can Drywall Be Stained?
You can prevent drywall staining by sealing it, and proper drywall maintenance helps, but you shouldn't use it in areas prone to excessive moisture, which can lead to staining and damage. (Knife)
Is Drywall Fireproof?
You'll find 45% of homes have drywall, and when you're installing it, you're utilizing its fire resistant properties, which aren't entirely fireproof, to enhance safety in drywall installation.
How Thick Is Drywall?
You're checking drywall thickness, which varies by drywall types, typically ranging from 1/4 inch to 5/8 inch, depending on the application and required fire-resistance rating, you'll choose wisely.
Can Drywall Be Recycled?

affordable drywall services
You'll find 80% of drywall waste is recyclable, so you're practicing drywall recycling with eco-friendly disposal, reducing landfill waste considerably by recycling it. (Knife)
Conclusion
You've seen it before - a small nail pop can be like a ripple in a pond, causing bigger issues down the line. Just as a single drop can disturb the water's surface, one mistake can throw off an entire drywall finish, affecting 70% of a project's overall quality. Catching these problems early saves time and headaches.