The Complete Guide to Upgrading Third Gen Camaro Headlights to LED
MorsunThe third-generation Chevrolet Camaro, produced from 1982 to 1992, remains a beloved icon of American muscle. Yet for all its angular charm and performance potential, one aspect that has not aged well is its lighting system. The factory sealed-beam 3rd gen Camaro headlights, now decades old, produce dim, yellowed illumination that compromises nighttime safety. Upgrading to modern LED technology transforms your third gen's visibility, reliability, and appearance, bringing this classic firmly into the 21st century. This guide covers everything you need to know, from understanding your options to the installation process and critical supporting upgrades.
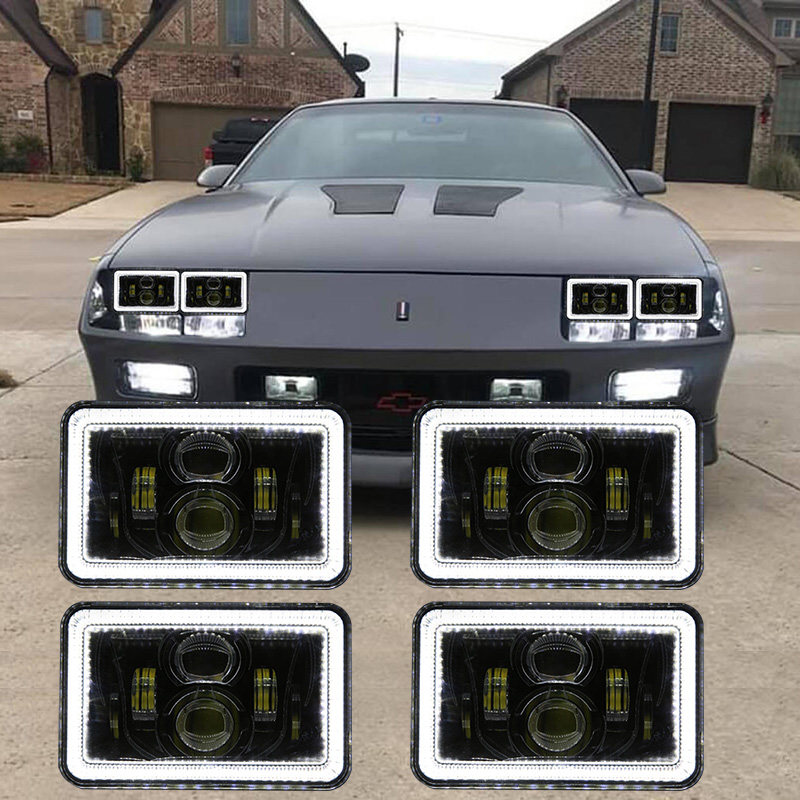
Understanding the Third Gen's Lighting System
Third-gen Camaros use a four-headlight setup consisting of two outer low/high beam combination lights and two inner high-beam-only lights, all in the standard 4x6-inch sealed beam format . The factory system routes power through a long, complex circuit—from the battery, through the firewall, to the headlight switch, back through the firewall, and finally to the lights themselves, all using relatively thin 16-gauge wiring . This lengthy path results in significant voltage drop, meaning your headlights rarely receive full battery voltage even under ideal conditions. Add decades of corrosion at connection points, and you have a recipe for dangerously dim lighting.
Stage I: Foundation Maintenance Before Upgrading
Before investing in expensive LED components, address the basics. The single biggest cause of poor headlight performance is low voltage reaching the bulbs . Start by cleaning your battery terminals and cable ends, removing any corrosion with a baking soda solution or terminal cleaner, and applying a thin film of petroleum jelly to prevent future buildup .
Next, inspect each headlight connection. Disconnect the wiring at each lamp, clean the terminals with electrical contact cleaner or fine sandpaper, and ensure the metal prongs on the headlights themselves are free of corrosion . While you're at it, examine the headlight lenses for cracks, pitting, or moisture intrusion—any damage scatters light and reduces output . If your current lenses are severely degraded, replacement is necessary regardless of your upgrade path.
For the technically inclined, measuring voltage drop with a multimeter can quantify your system's health. With headlights on, compare battery voltage to the voltage actually reaching the bulb terminals. If you're losing more than a volt through the factory wiring, even the best LEDs will underperform .
Upgrade Options: From Conversion Housings to Full LED Assemblies
Halogen Conversion Housings
The most basic upgrade path involves replacing the original sealed beams with conversion housings that accept replaceable halogen bulbs. Products like those from United Pacific feature real glass lenses for clarity and durability, and use standard 9007 halogen bulbs that can later be upgraded to LED or HID . These mount just like original headlights, though some may require enlarging the opening in the back of the headlight bucket for clearance . This approach offers flexibility and immediate improvement over 30-year-old sealed beams.
Complete LED Replacement Assemblies
For the ultimate in performance and modern appearance, complete 4x6-inch LED headlight assemblies are the way to go. These units integrate LED chips, reflectors or projectors, and lenses into a single sealed housing. Options range from budget-friendly Chinese imports on eBay starting around $56 for a set of four, featuring 6000K color temperature, IP68 waterproofing, and die-cast aluminum housings . Premium offerings from brands like Holley RetroBright deliver plug-and-play compatibility, better visibility, and six times longer life than halogens .
For those seeking distinctive styling, Oracle Lighting offers 4x6 sealed beam halo headlight assemblies with glass lenses and composite reflector housings . The Starbuck Innovative Designs kit from Hawks Motorsports takes customization further, incorporating built-in white DRL-style parking lights and amber turn signals into the upper portion of each 4x6 LED housing, with the lower 60% handling regular high/low beam functions . This eliminates the need for separate parking light assemblies and gives the front end a clean, integrated look.
Important Note on Fitment: Some aftermarket LED assemblies may require modifications to the factory headlight buckets. The back opening often needs to be enlarged to accommodate deeper housings, rubber dust boots, or wiring for halo features . This is typically done with a die grinder or rotary tool and requires patience to avoid damaging the buckets.
Stage II: The Critical Wiring Upgrade—Adding Relays
Regardless of which LED assemblies you choose, the single most effective supporting modification is installing a headlight relay harness. This bypasses the factory's inadequate wiring by using the original circuits only as triggers for heavy-duty relays, which then draw power directly from the battery through thick 10 or 12-gauge wire .
A relay harness ensures your LEDs receive full voltage, maximizing their brightness and consistency. It also takes load off the aging headlight switch and beam selector, preventing a common failure point . Many enthusiasts build their own harnesses using 10-gauge wire in red, blue, and black, along with standard automotive relays . Pre-made harnesses are also available from suppliers like Painless Performance .
Installation Considerations and Tips
When installing new headlights in your third gen, several practical considerations apply:
Bucket Modifications: As mentioned, many aftermarket LED assemblies require opening up the rear of the headlight buckets for clearance. This is a one-time modification but should be done carefully .
Wiring for Auxiliary Features: If your new lights include halo rings or integrated turn signals, you'll need to tap into existing circuits. Halos can be wired to your parking lights or to a separate switch inside the cab, allowing independent control at shows . For the Starbuck kit with integrated white DRLs and amber turns, you'll need to connect to the parking light and turn signal wires found just below the headlights at the factory turn signal plug .
Polarity and Connections: Some owners report that on third-gen Camaros, the low beams may not function initially after installing LED conversions. The fix is simple: flip the headlight socket 180 degrees in its connector to correct polarity .
Aiming Is Essential: After installation, proper aiming is non-negotiable. Even the best LEDs are useless if pointed at the sky or ground. Use the "wall and 25 feet" method: park on level ground, mark headlight centers on a wall, back up to 25 feet, and adjust so the bright spots fall slightly below your reference marks .
Upgrading your third-gen Camaro to LED headlights is one of the most rewarding modifications you can undertake. The combination of modern LED technology—whether through complete assemblies or conversion housings—with a properly installed relay harness transforms nighttime driving from a stressful experience into a confident one. Your classic Camaro will not only look sharper with its modernized front-end appearance but will genuinely perform as a safe, reliable vehicle for today's roads. Take the time to do the job right, addressing wiring and connections methodically, and your third gen will reward you with brilliant illumination for years to come.