MASQ Node in Windows 10 - Testing!
KauriHeroTesting and Building is Ramping up in the Community! We are so proud of the volunteers joining our testing squad!
Special thanks again to Stew!
Now testing in Windows doesn't require TNT - it simply requires:
- a freeware archiver software like WinZip or WinRAR
- two Command Prompts (cmd.exe) open (with elevated privilege)
- the latest Windows binary built from source
- little bit of typing ;)
Downloading MASQ Node Binaries
Using your favorite browser, head to the build source under GitHub masq-results which is run by the MASQ Tech Lead Dan Wiebe and team:
https://github.com/masq-results/MASQ-results
Scroll down and you will see a list of Results in the Readee frame.
You want to download the latest Windows version.
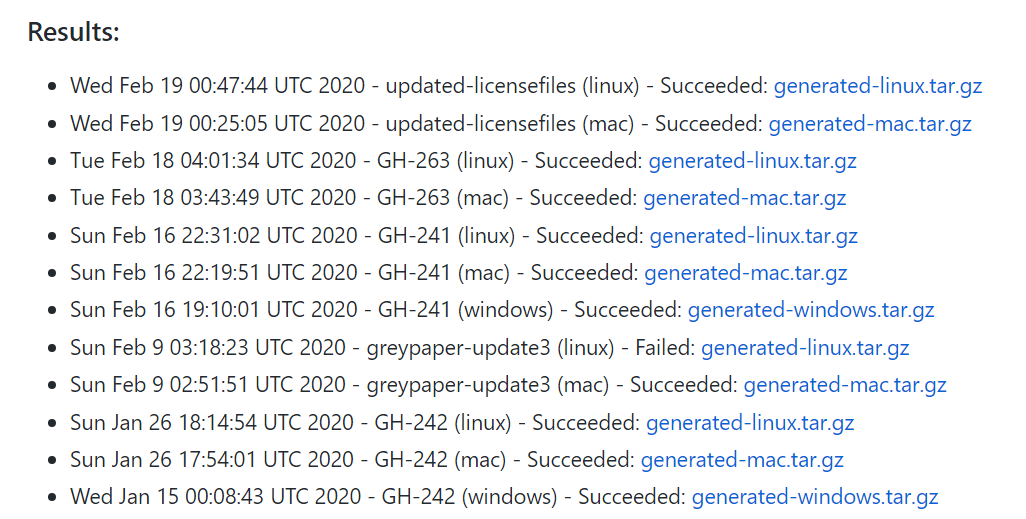
MAKE SURE YOU CHECK FOR THE LATEST VERSION AND USE THAT, OR THE ONE PREFIXED WITH THE VERSION WE ARE TESTING
In this guide example we want to download and test the one labelled:
GH-241 (windows)
Once you have identified the correct version, click on it and wait for the download to complete.
This will save into the default folder for your Downloads from your browser - find this file and open it (hopefully it will simply open with your default archiver software - if you don't have one, go and download WinRAR or similar)
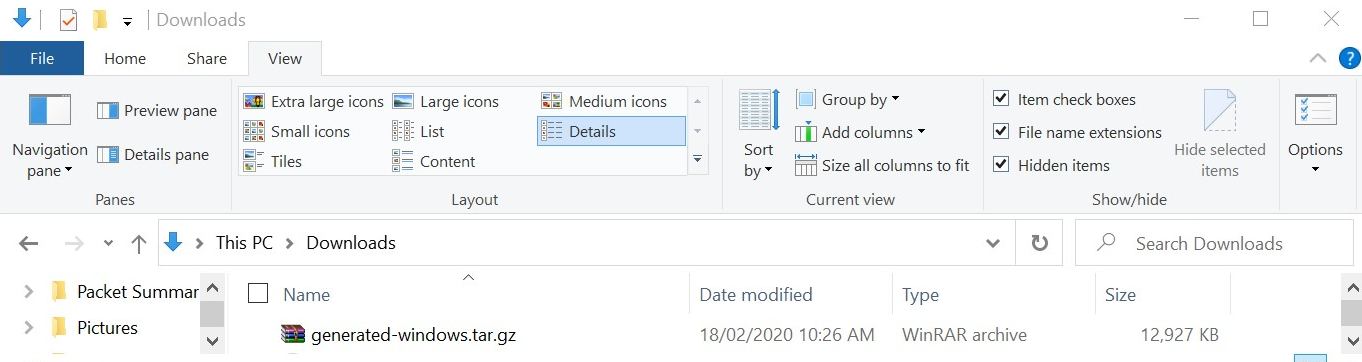
Click the "Extract" button and navigate to where you want to save the 'generated' folder that is in the tar file (tarball files are essentially the same as a ZIP or RAR file)
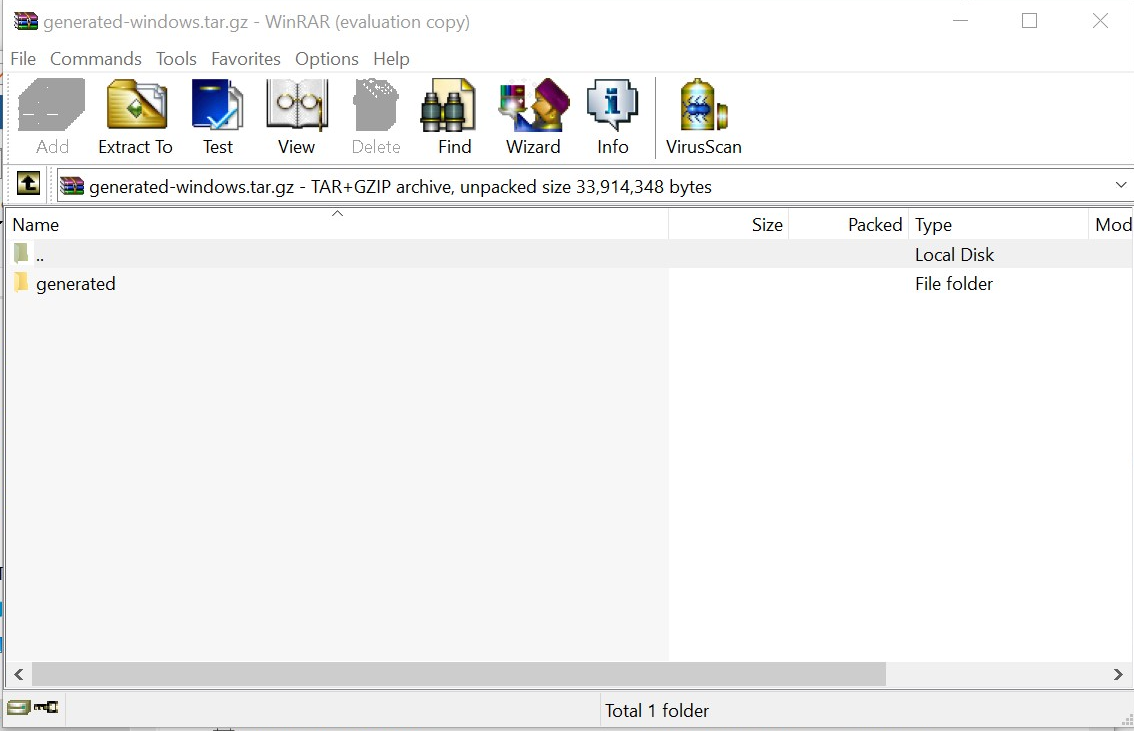
IMPORTANT TO NOTE THE FILEPATH OF THE FOLDER YOU ARE SAVING:
c:\Users\<username>\Downloads\generated
(just an example)
You can also right-click in the Explorer window of the folder and check the filepath in "Properties"
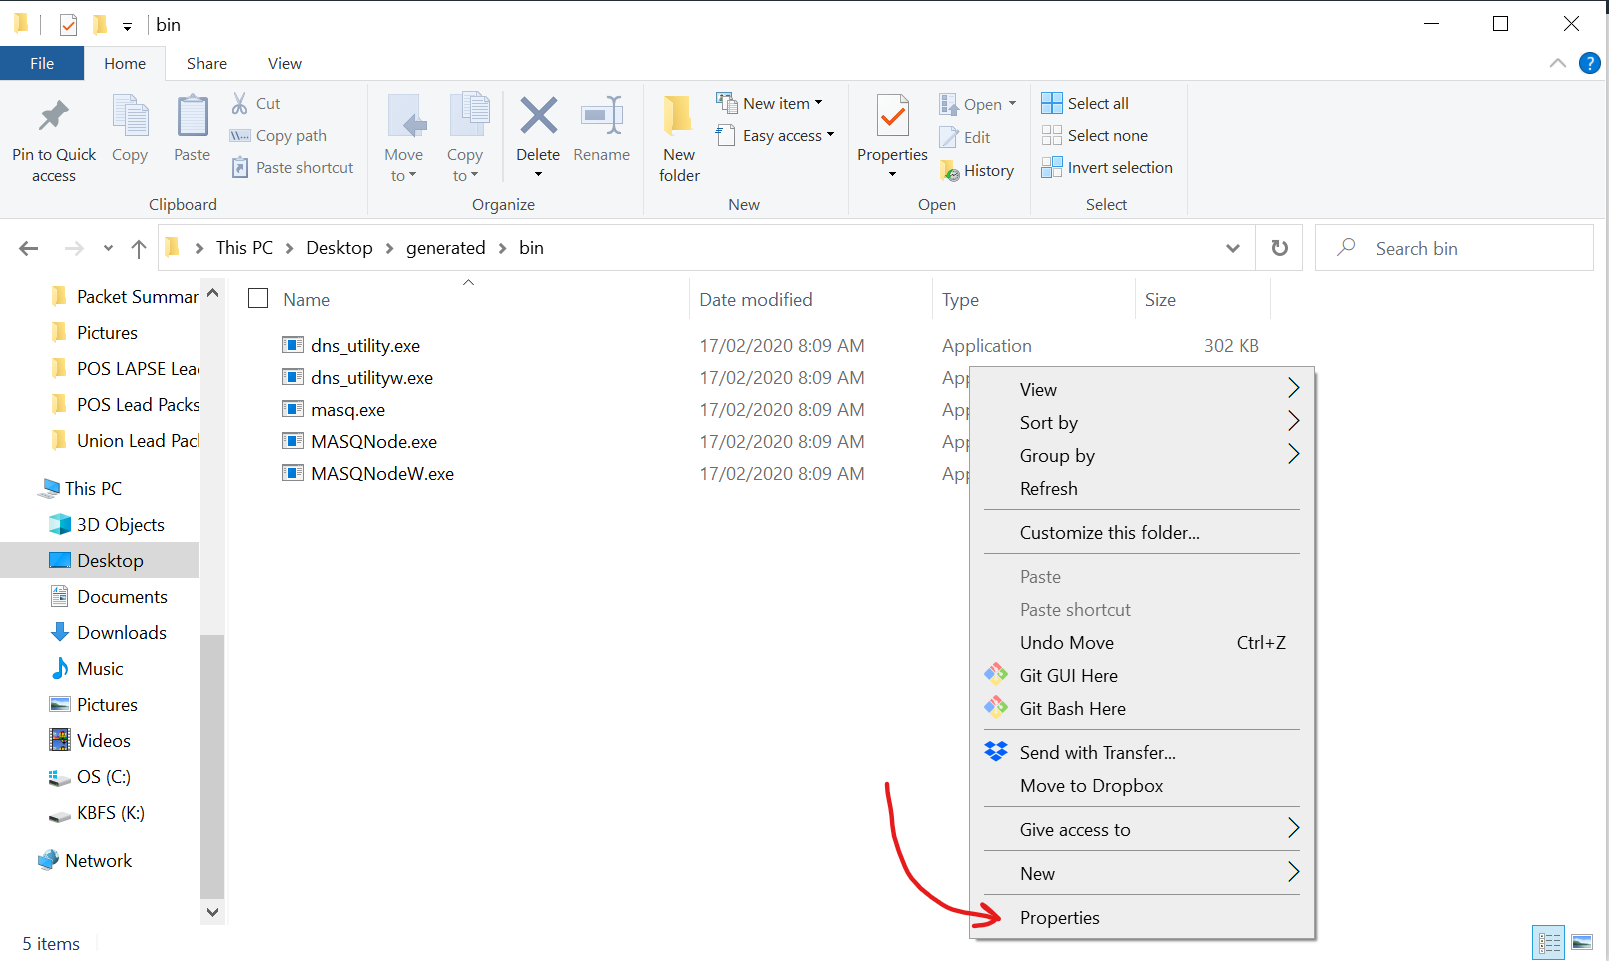
Open the new “generated” folder and then “bin”
You will see 5 files - MASQNode.exe is the one we will run from command line
(Don't double click on it and expect the magic to happen quite yet!)
Command Prompts
Now we need to open a Command Prompt in Windows, but in elevated permissions just to ensure that our commands will run without and user privilege errors (this requirement will go away in future versions)
Easiest way to do this is to press the 'Windows Key', then type cmd. The Windows bar search will show the CMD command prompt icon, which you must right-click and then select "Run as Administrator"
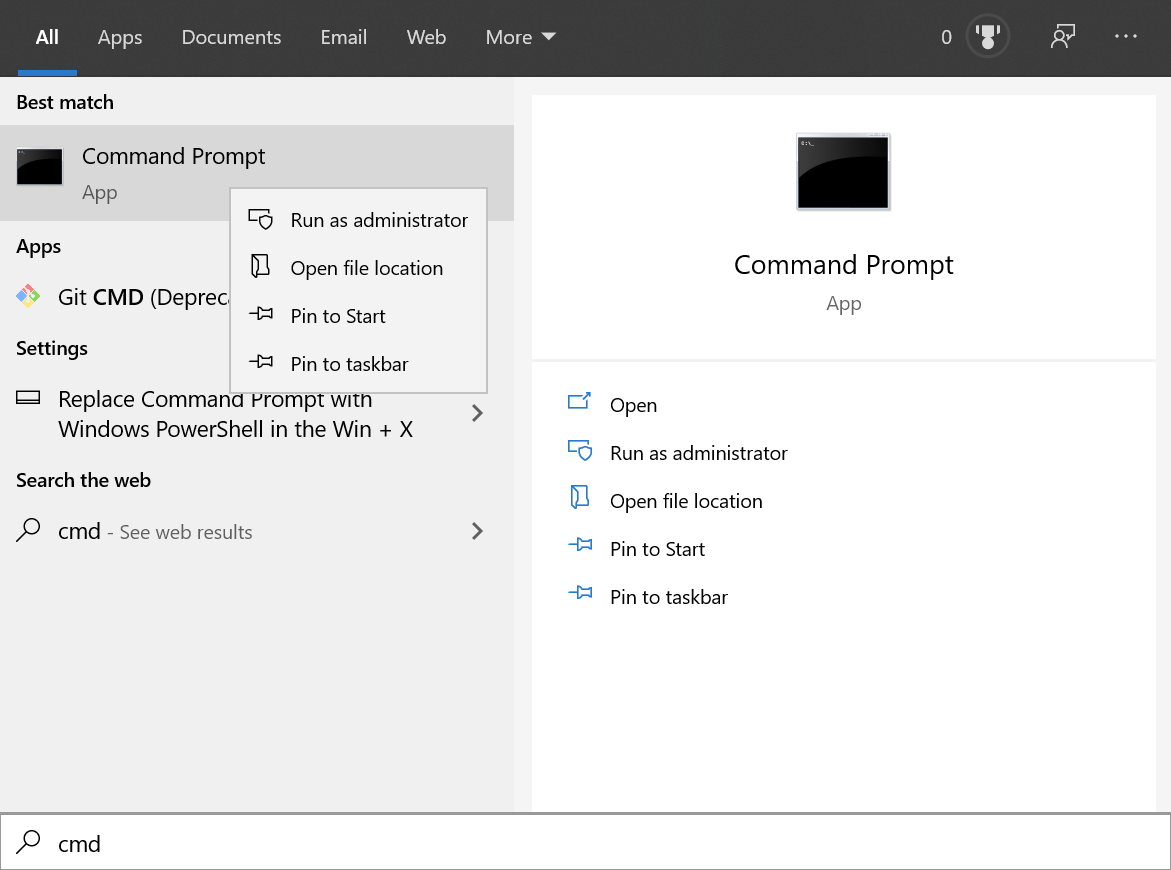
If you have a security prompt that comes on screen, click "yes" to proceed
Do this twice so you now have two Command Prompt windows open on your screen!
Running MASQ Node Daemon and Node
In the first Command Prompt window, first type this command:
cd\
Then type the path where you saved your 'generated' folder, and include \bin at the end
eg:
c:\Users\<username>\Downloads\generated\bin
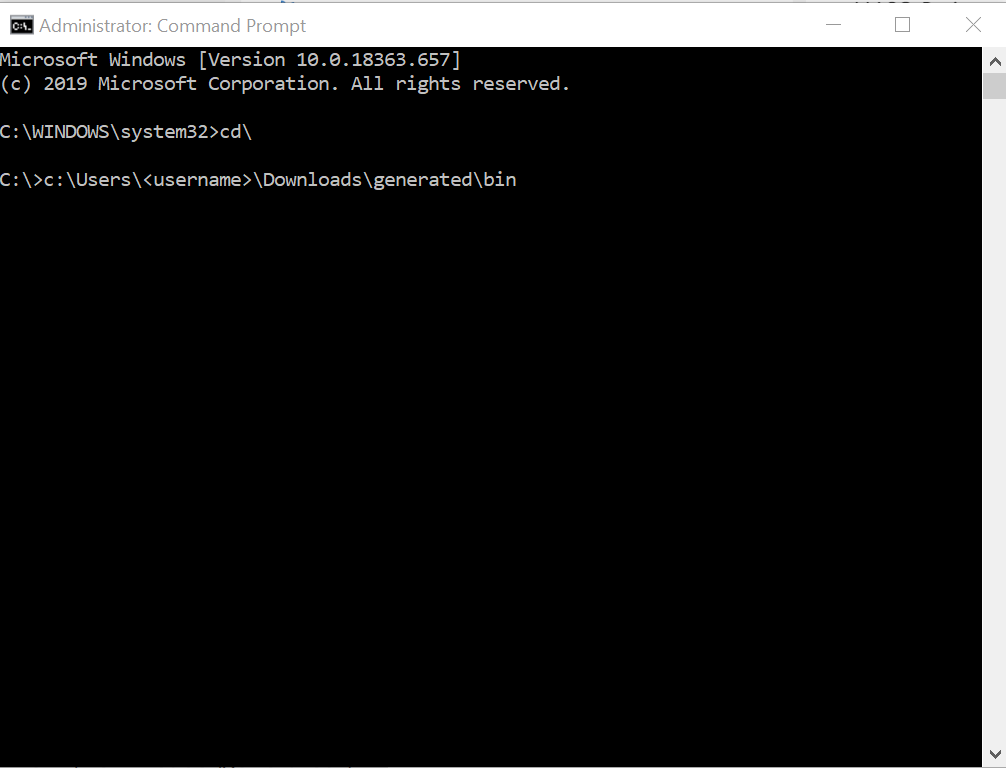
The next command will initialize the MASQNode Daemon process to run in background:
MASQNode --initialization
Now you have the Daemon running as a background Windows process waiting for commands to start, stop or interact with a running Node instance.
For reference sake, we will call this first Command Prompt the "Daemon Window"
In the second Command Prompt window, you will run the Node itself and try various commands.
We will call this second window the "Node Window" for reference
As with the Daemon Window we have open, clear the working directory and navigate to where you saved the binaries:
cd\
c:\Users\<username>\Downloads\generated\bin
Then type:
masq setup
This will output the current setup configuration for the Node that is currently saved.
You will see it appear is columns with NAME and VALUE containing a number of default settings.
NAME VALUE
chain mainnet
data-directory c:/Users/<Username>/AppData/MASQ/mainnet
dns-servers 1.1.1.1
ui-port 5333
Using the 'masq start' command, will attempt to run Node using the current setup that is stored locally.
Let's try this once before changing some settings:
Type
masq start
You will see connection and status messages running across the "Daemon Window" as you do these command.
This will fail as we have not specified any settings of where to connect our Node to!
All these items can be configured before you start Node with the 'masq start' command
To change any parameters, you need to type the inputs in a specific format - there are instructions on GiHub but we will go through a few here.
The settings are changed in this format:
masq setup --<NAME of parameter> <VALUE of parameter>
Here is an example we will use:
masq setup --neighborhood-mode zero-hop
This will change the neighborhood-mode to zero-hop mode and allow us to test running Node
You can change several settings at once as well by just typing more with a space in between, preceded by 'masq setup'
Eg
masq setup --neighborhood-mode zero-hop --chain ropsten
Let's type
masq setup
Again to see our newly changed settings
Now that we have changed neighborhood-mode to zero-hop, let's run Node and see if it works in your Windows environment
Type
masq start
Hopefully it will run!
Press Ctrl + C in your "Node Window" to stop the instance running
OR
'masq shutdown' will shutdown a current instance of Node that is running (the Daemon will stay a running background process and you will see more output messages in the "Daemon Window")
We are adding more to flesh out this guide, so bear with us! 😉
