Sfm Porn Tutorial

⚡ 👉🏻👉🏻👉🏻 INFORMATION AVAILABLE CLICK HERE 👈🏻👈🏻👈🏻
I was asked to write a short tutorial about jiggle bones so here goes. As usual I do not claim to be a master of the craft and shit I say may well be wrong. All opinions are just that and there are very probably tricks and techniques I don’t know about to making better of use of jiggle manipulations. I try to present these tutorials from the view of how I felt trying to learn the basics of how these features work and that is what they are designed to cover.
Note that due to the nature of the topic this DMX will be of less help than the motion ones, because a lot of the information covered cannot be contained in a single dmx and is overwritten in the course of the tutorial; this one is of the final animation with baked jiggle bones + manual animation.
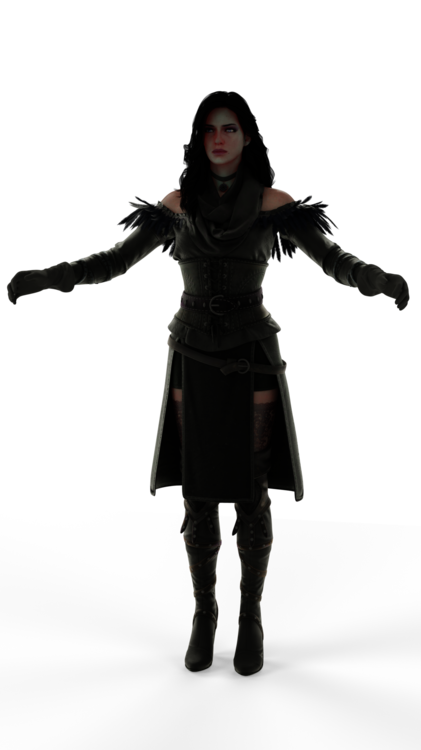
Helping us out today will be Elizabeth from Bioshock since she has the attributes we need. She was made by LordAardvark and can be downloaded from SFMLab here.
Jiggle bones refer to procedural bones in the model that will have their physics (how they move in the engine) determined by SFM itself. Not all models have jiggle bones, and if they don’t have them then there is nothing you can do about that other than de-compile the model, add them in a modelling program like blender and recompile it.
Because SFM wants to decide how these bones should move you cannot, to start with, modify them yourself. Because of this they are invisible on the model when you load it, you cannot see them or manipulate them. For our purposes (read: porn) the two places we see jiggles the most are breasts and butts and often hair is jiggled as well.
The amount of jiggle you will see is in response to the movement the model is performing. For example here we see Elizabeth turning from side to side slowly; not much shakin going on there.
If we make the movement more extreme, we see more jiggle.
That doesn’t look comfortable, she is probably in for some major back issues later in life.
By default we do nothing to make this jiggle happen, it is entirely determined by SFM itself.
It is worth noting at this point that LordAardvark has done us a solid and Elizabeth has both normal breast bones and breast jiggle bones. This lets us move her breasts without having to bake her jiggle bones. However this is not common and for this tutorial we are mostly focusing on the jiggle bones and how they move, so we will ignore her added bones until the end.
You may have already heard the term “baking procedural bones” or “baking the model” used before, if not it is the term used to describe “locking” the motion of our jiggle bones. Basically every time you play your animation in SFM, the program rebuilds the procedural motion of the jiggle bones fresh (this is similar to how locking works, but that’s for another time). But we will often reach a point where we don’t want SFM to build the motion anymore.
For example if we are making a loop we often want to bake the procedural bones to lock the motion so our loop loop’s cleanly. We also often want to bake procedural bones so we can make changes to the bones ourselves, for example we may not want a breast to jiggle around if it is being held.
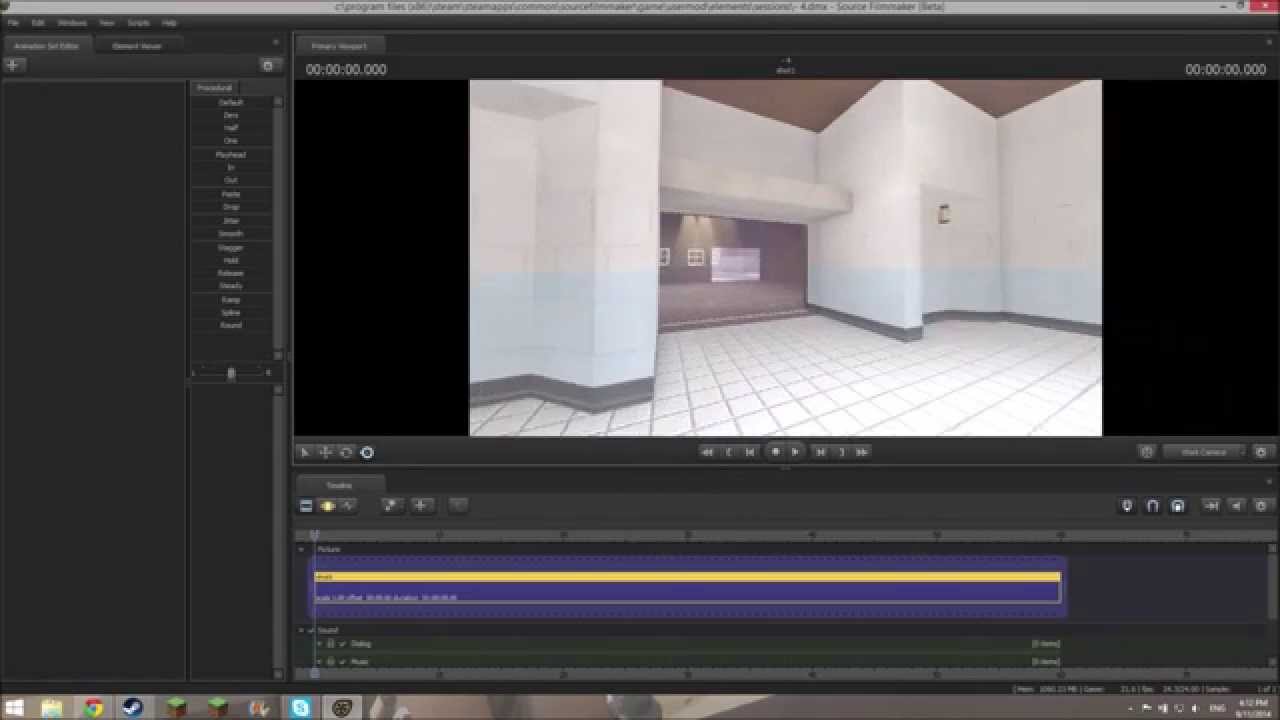
To do this we need to right click on the model in the Animation Set Editor, select utilities and click on “Bake procedural bones”
This will lock the current motion of the jiggle bones, and even if we were to add more motion to our model, the jiggles will no longer change.
Because SFM is no longer rebuilding the motion all the time baking also tells SFM to return control of the models jiggle bones to us. We can now see our jiggle bones in our models bones list (they are usually called something_jiggle or jiggle_something, but not always) and are usually in the models “Unkown” tab.
Here we see Elizabeth’s breast and butt jiggle bones that have become visible after baking our model. We can now select our bones and manipulate them. If we select the bones and look at our graph editor we can see that the bones already have motion associated with them. This is the motion SFM has generated itself pre-bake.
Note: When we bake bones we will often see this initial extreme motion for the bone, located at the last place we started the animation before baking. Take the initial Elizabeth turning gif. If I had not baked the jiggles, or started it at the 0 second, I may get this initial wild bounce.
This happens because SFM needs to know what happened before in order to work out where the bone should move to and the start of our animation has no “before” to reference. SFM responds like any true computer program and has a minor freak out trying to determine the motion. This can manifest in our animations as an extreme initial bounce in our jiggle bones if we forget to account for this problem. Once we bake our bones we can see this initial motion in our graph:
This is part of why we want to bake our motion before we render our scenes. One good way to avoid this is to always leave 2 seconds or so at the start of your animation. This provides a buffer for the jiggle bone to “calm down” before our animation begins.
It is important to note that we are not doomed if we bake our bones and then want to re-enable our jiggle. At any time we can turn our jiggle bones back on by right clicking our model, going to utilities and selecting “Re-enable jiggle bones”. Once this is done we are returning control of the bones to SFM, so we will see that our jiggle bones will have vanished from our model bones list. Additionally it is important to remember that when you re-enable the procedural bones any changes you had made, or animations you had done that used the jiggle bones will be lost as SFM will rewrite their motion again.
As a final point to remember we cannot enable and disable jiggle bones individually. For this reason it is usual to make modifications to jiggle bones the last thing you do.
One point is that once we have our jiggle bones baked and can access them, we can use a feature of key framing to change the base line of our jiggle. You may have noticed that when animating if a bone only has one key frame, that key frame will change the entire line for that bone on our graph. This makes sense because without a reference point to move between (i.e. other key frames) SFM can only assume we mean that position to be constant. We can use this to our advantage with jiggle bone motion. If we provide a single key frame to the graph we can move the whole motion line to a new base point while keeping our motion.
Here we see our start line and with the jiggle bone selected. As expected the red line (Y axis) is the one with all the motion in it.
If we key frame and move on the red axis we can see the whole line moves with it, changing the root reference point for the jiggle.
The result in this instance, since we changed the base position of the right breast, will be wonky boobs in our animation, but wonky boobs with bounce..
We can use this trick to keep our motion while adjusting the base position, for example if she is on her back and with cans like that they would roll out to the side rather than point straight up. Another place this comes in very handy is adjusting hair. Often jiggled hair is multi boned and while we want jiggle we also want to be able to adjust its relative position, e.g. a pony tail always points to the ground. By using this type of technique we can change the root position of one bone while keeping our motion.
Lastly we have a situation where we use multiple key frames. By its nature (you can tell because of the way it is) SFM has no real reference point when it creates jiggles. When we use a single key frame we can adjust the root point of the whole line, but SFM still doesn’t really know where in the world each position is. We use key frames to provide key points the motion needs to pass through, but the animation is really just moving point to point between key frames. When combined with jiggles this means that when we specify key frame points to pass through, SFM simply overwrites our jiggle motion; because we just told SFM to go from point to point and that takes precedence over existing movement. This means if we key frame our motion we lose our jiggle.
So now we have a reasonable idea of how jiggles work, how SFM is generating the motion, how we can override that motion, how we can change the relative position and what happens when we key frame our jiggle.
In general we want to let SFM do the jiggles on its own and bake them just before we render, that way we have the most up to date lines. Otherwise we run the risk of having added new motion that should have been accounted for after we bake. We can also use a combination of these aspects to do some neat things in our animations. For example if Elizabeth is holding one breast we don’t want that to bounce, while we want the other side to roam free.
Here we see that when we just lock her hand to her right breast we get our basic motion, but her breasts just bounce around.
We can use what we know now to fix this up. We baked our jiggles to lock motion, so we can now just go to the Unknown tab, and find the jiggle bones for Elizabeth’s right breast. Since she is holding her breast we don’t want this motion. We cant use a single key frame since that would just adjust the line, but by providing a point to point motion that is flat, we can remove all the jiggle. So here we just put a key frame at the start of our animation and copy it at the end, zeroing out the jiggle lines.
We can see we have zeroed out all our jiggle, and now when we render out our animation we have no motion in the right breast while keeping our left.
Remember here that we can still animate further, for example with Elizabeth LordAardvark has provided bones we can manipulate as well (even without these bones once we bake a models jiggles we can manipulate them directly).
In this last example, we locked her hand to her right breast and added some motion of our own to her right breast using her R Breast.root bone, since in reality her hand wouldn’t be stuck in place. Then just at the end, after all of our adjustments are done, we unlock her hand to split her breast and hand motion, move her hand away and add a little bit of manual bounce of our own. A rough version of this can be seen below.
Hopefully this has helped to answer some questions you may have had about jiggle bones. I am happy to answer any questions you have and if I have made any glaring mistakes feel free to let me know and I will make corrections. I am not sure what the next one will be but if you got this far maybe these are helping, so its a choice between Locking or fine tuning and finishing up our simple Tracer animation.
This is the second part of the tutorial I posted the other day and is where I actually wanted to finish the first one, but it was a bit massive so I split it up. Probably the last tutorial for a bit, back to sexxors.
In this tutorial we will look at taking the blocked animation from the first tutorial and making Tracers reactions less robotic and mismatched. As I mentioned, all tutorial 1 dealt with was blocking our animation and there are lots of things we can do to make it look better. One of the main things is to make it so Tracer seems to react to what’s happening, rather than just moving in sequence.
If you want to follow along I have included a link to the result of tutorial 1, a Source Filmmaker .dmx containing the 3 key frame loop, you can then open this file in SFM:
In order to use this dmx you will need to have the necessary models:
With those installed you should be able to load the scene and see our blocked loop animation. It can also be viewed here.
At the end of the tutorial you can also find dmx for the loop created in this tutorial; you will need the same assets (Tracer / Francis and Barbells room pack)
So to briefly recap our process we first load and pose our models, picking a neutral starting point (the back end of a thrust is usually a good one). Next we determine our loop length and pose our models at the new point in time on our graph editor timeline. We can then copy our start key frames to a later point in our time line, in this case 1.6 seconds, to get our loop. Again remember we were only interested in the rough motion.
However now that we have that we want to make it look better! Currently it is very robotic, they move in perfect sequence and that always looks wrong to our eyes. There is also the fact the rest of their body’s don’t move at all. So the first thing we want to do is have Tracer react properly to Francis’ motion and the best way to do that is to have her not mover until some force would have made her move; in this case Francis. To make this easier we will make our loop cover more than one cycle. This gives us another sequence to play with, and allows us to go past the time frame of the single loop (even if we never actually use it) while still being able to see our motion.
To do this we will simply copy and paste our entire loop, see the image below:
1. Expand \ Select our rig body for both models, put our play head at the 1.6 second key frame.
2. Now select all our key frames at 0 seconds then hold shift and select our frames at 1.6 seconds, selecting all of our current frames. Next we want to ctrl-c \ ctrl-v to copy and paste our key frames. Remember that SFM will generally paste from the location of the play head. Notice that because our start and end frames are the same, we shouldn’t see any actual change in our models position.
3. Lastly you may recall in our first tutorial when we added key frames we got some weird motion, and we may get that again. So to ensure we don’t we want to select all our body key frames across both our loops, at 5 points in the time line, and click on spline to even out our curves.
You should now have a nice smooth transition through two loop cycles, albeit not very natural looking.
An aside: Many animations you see are built off this idea. A core loop is built and edited, then variation is added to make it appear more natural. But nearly all SFM porn animations come from this idea of a repeated base loop.
One of the other benefits is we now have a copy of our loop, and we can break and play with one of the loops without ruining our earlier work. And that is very useful, because it is exactly what we are going to do.
So what we want to do is make Tracer react at the point when Francis first hits her, essentially his hips push hers forward, while at the moment she starts moving immediately. While we could just guess where that happens with our two loops we can mess with the first one to make it a bit easier.
Select Traver’s RigBody, and copy her key frames at time 0. Now paste those frames over the frames at the 1.6 second mark. This will essentially remove Tracers animation from our first loop cycle. While we are here lets spline again just to make sure she doesn’t move during this first loop by selecting all her key frames and pressing the spline button.
Now we don’t need to guess, we can scrub through our timeline and see the point where Francis’ hips push into hers.
Here we can see it happens at around 0.45 seconds. Again this is not an exact science, there may be reasons to have the point of impact later or sooner (maybe she is moving with him rather than waiting?) so play around.
Now we have the point where we want to have Tracer start to move forward, how do we set that position? Well we already have; it is her starting point. The change we are making is having her forward motion be from 0.45 – 1.6 rather than 0 – 1.6. So we can easily set this up by simply copying our key frames from 0 to 0.45.
Now we are just need to put Tracers motion back in. Lucky we have that second loop! Select Tracers key frames from the middle of the second loop, at approx. 2.4 seconds, and copy them over the frames at ~1.6 seconds. Now I bet you know what we do next. That’s right, select them all and spline!
Now we are getting closer, and our loop should look something like this.
We still have a couple problems though, firstly it only applies to our first cycle. But our other problem is she doesn’t move much before he bumps into her. If you splined you will see a little bit of motion, because spline is trying to make the transition to her forward motion smooth, but she is still pretty immobile, and we really want to fix that.
An aside: You may have noticed now that spline comes up a lot. If you look at one bone in the graph editor (say Tracers rig_spine_1) you will notice it consists of some lines. There are 6 in total, but in our animation only one moves, so you probably see it as 2, a blue line and a wavy red one (if you have made your own animation and moved the spine differently you may see more, or if you haven’t moved that spine you will just see a flat line). You may also make the connection between the colors shown when the rotation / movement circle is up, and realize that the red rotation is the one that moves the most. The red line is a representation of that movement, and as you can see it is a nice smooth line with no sharp peaks or valleys. You may also notice a black dot at each of our key frames. Each of the tangent buttons changes how SFM draws the line between those points. Were we to select a key frame and choose the first button, Linear tangent, we would see the way the line reaches the key frame change and become much sharper. This would make the change in direction more sudden. While each tangent mode has its place, we nearly always want to have our motion be smooth, and spline is the one that attempts to smooth out the points, making the transitions between each key frame fluid. While we won’t be going into tangents in greater detail in this tutorial it is useful information. For now the understanding that “spline smooth’s things out” is enough.
So now we have probably our most complicated idea. We need to use the space in our second loop, because we want tracer to be moving backwards until she is moving forwards, and that means that her backward motion needs to continue across our two loops. This isn’t as hard as it sounds.
We know where our second loop starts, and it starts in the same way as our first loop did. We also know where we want our Tracer motion to start, so we need to bring these 2 things together.
Here we have the first half of our first loop (1), and at a distance in from the start we have our new moving point for Tracers motion (2). What we want to do is replicate this in our second loop (3) and get our current new start point into it (4).
Since we want these 2 points to be the same, we can actually do this pretty easily. Just put your play head at the start of the SECOND loop (approx. 1.5 seconds). Now select both our 0 second key frames and our new key frames at 0.45 (2). Next we copy with ctrl-c, and paste with ctrl-v. Again remember that SFM pastes at the play head. We should now have a timeline
Undertale Red Porn
Porn Anime Shmel
Contortionist Anime Tube Porn
Cardanian Cam Porn
Daughter While Mom Porn
SFM Porn tutorial. A basic animation. – KawaiiDetective ...
+18 SFM Animating/Posing - Tutorials & Guides - LoversLab
SFM Porn tutorial: Jigglebones – KawaiiDetective Enthusiast
SFM Porn Tutorial 2. Reactive motion. – KawaiiDetective ...
How do I learn to make SFM Porn? : SourcePornMaker
SFM Porn Tutorial 3. Detailing and Rendering a loop ...
Tutorials – KawaiiDetective Enthusiast
SFM animation tutorial part 1 - Getting Started - Porn3dx
New to SFM looking for advice/help : SourcePornMaker
SFM Compile - SFM 3D Porn Clips - R34 Animation
Sfm Porn Tutorial


(mh%3dQBH7X5nqq78zwlpW)4.jpg)