Running Stable Diffusion with ControlNet on CLORE.AI: A Step-by-Step Guide
Will
In the ever-evolving landscape of digital computing and AI, the demand for robust and scalable GPU solutions is paramount. Enter CLORE.AI – a cutting-edge platform that effortlessly marries the realms of GPU leasing and cryptocurrency. Its standout features, including cost-effective GPU leasing, a pay-as-you-go model, and the promise of impeccable security, position it as an industry front-runner. Now, let's delve into the seamless process of running stable diffusion with ControlNet on a server you've rented from CLORE.AI.
1.Choose a Server
I recommend selecting one with a 4090 card to ensure faster processing. The prices are competitive – 650 clore per day is approximately $14, but you'll likely need just 30 minutes for all the tasks, costing around 30 cents.
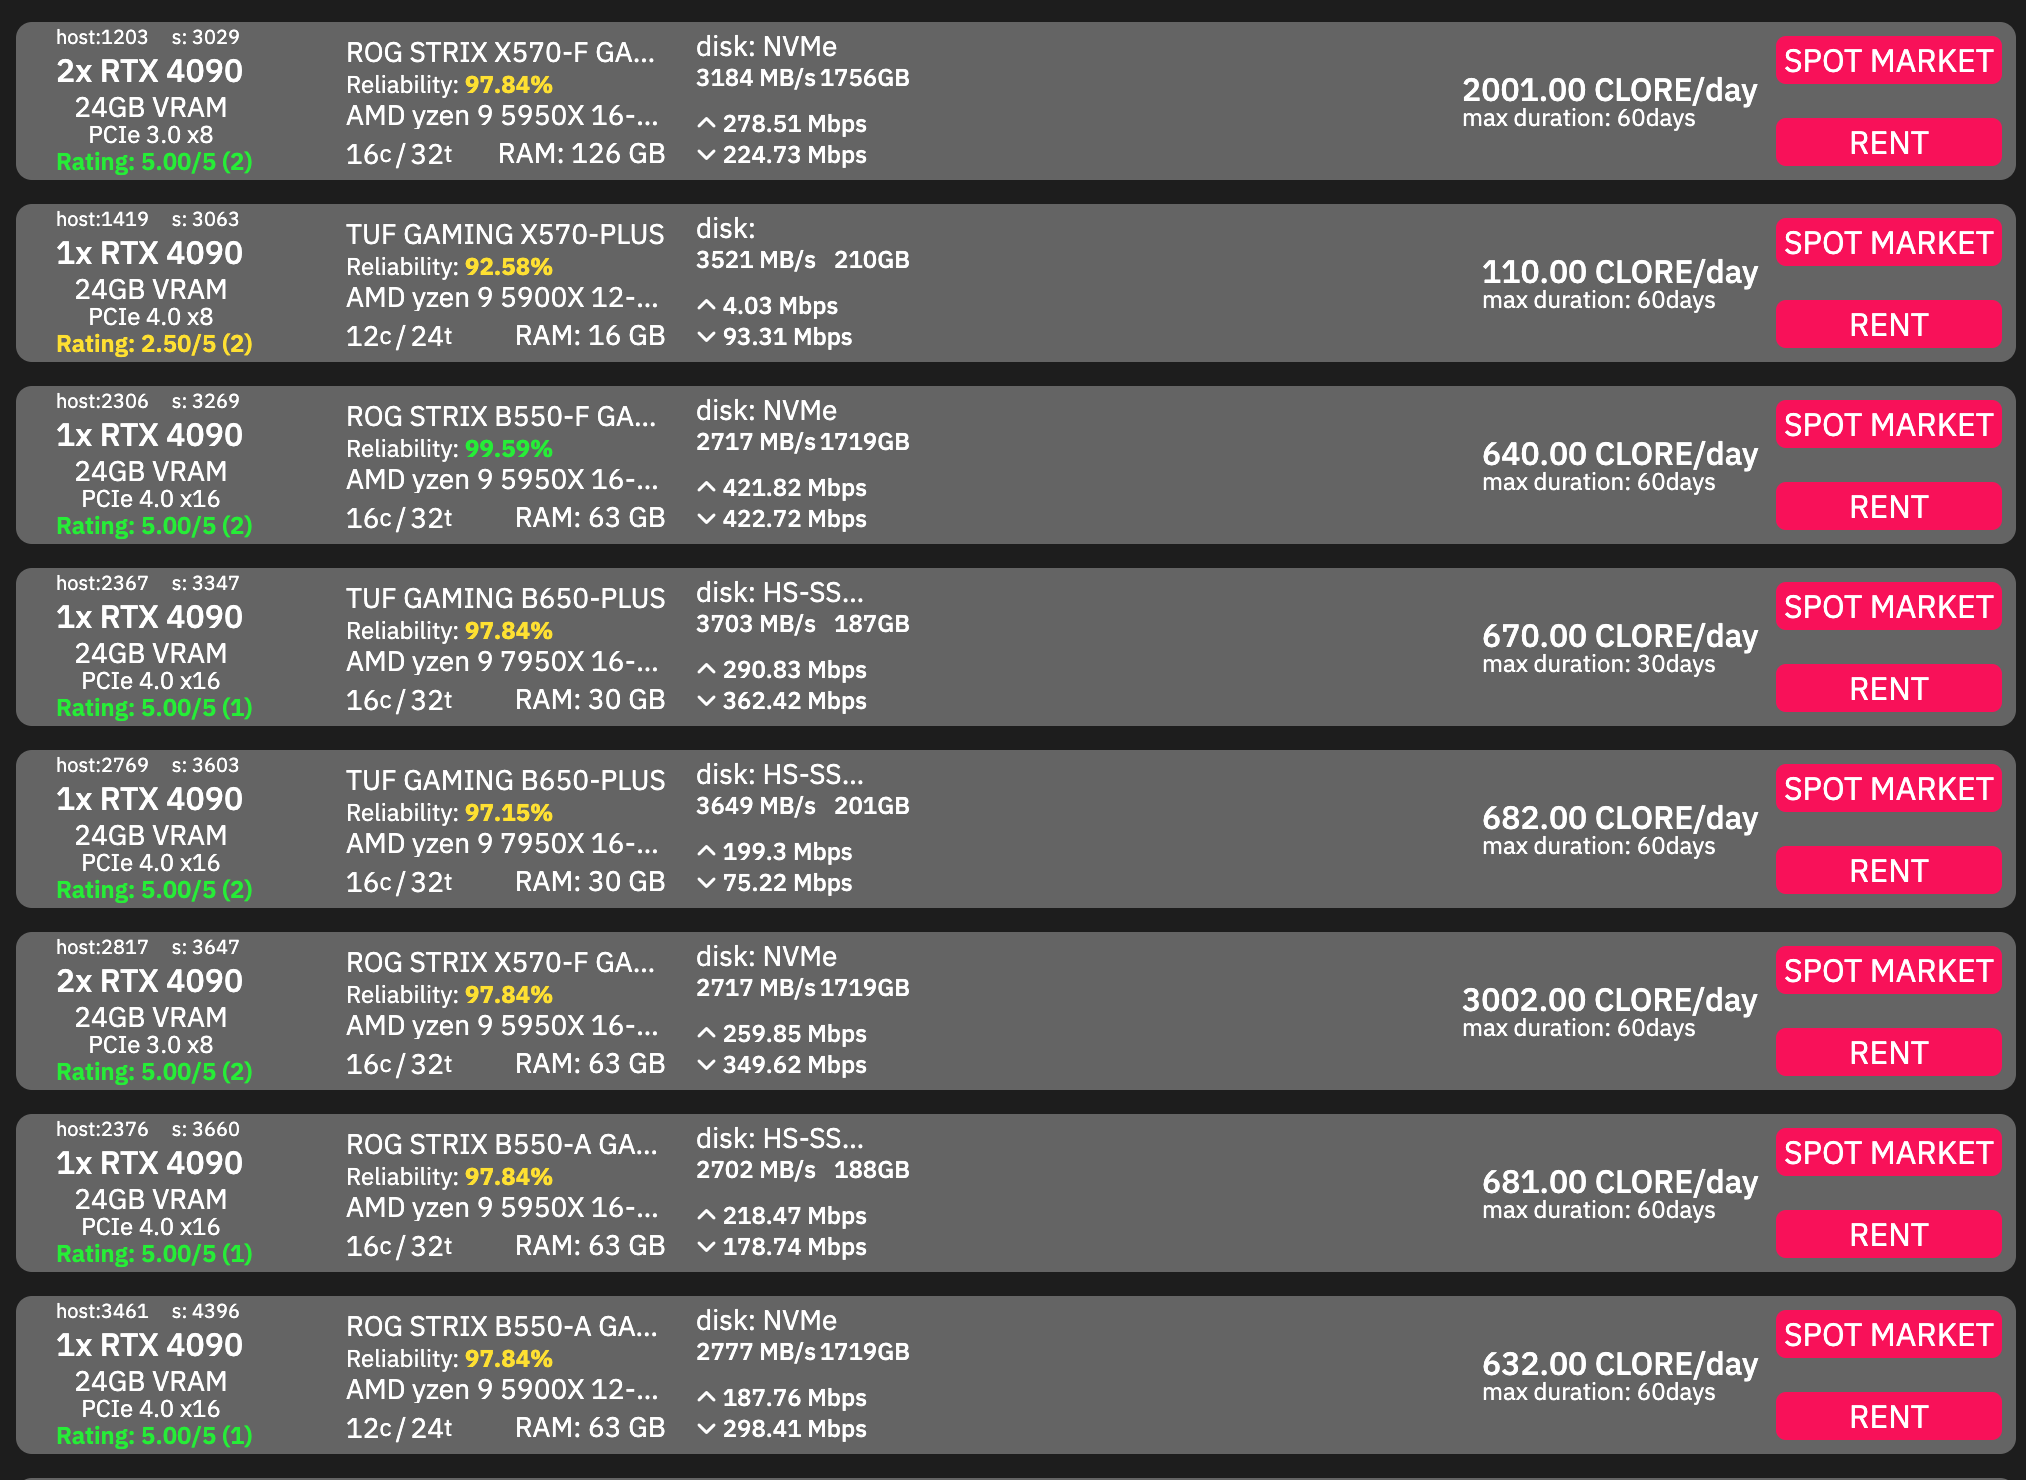
2.Access Stable Diffusion WebUI
Once you've selected your server, click on "stable diffusion webui".
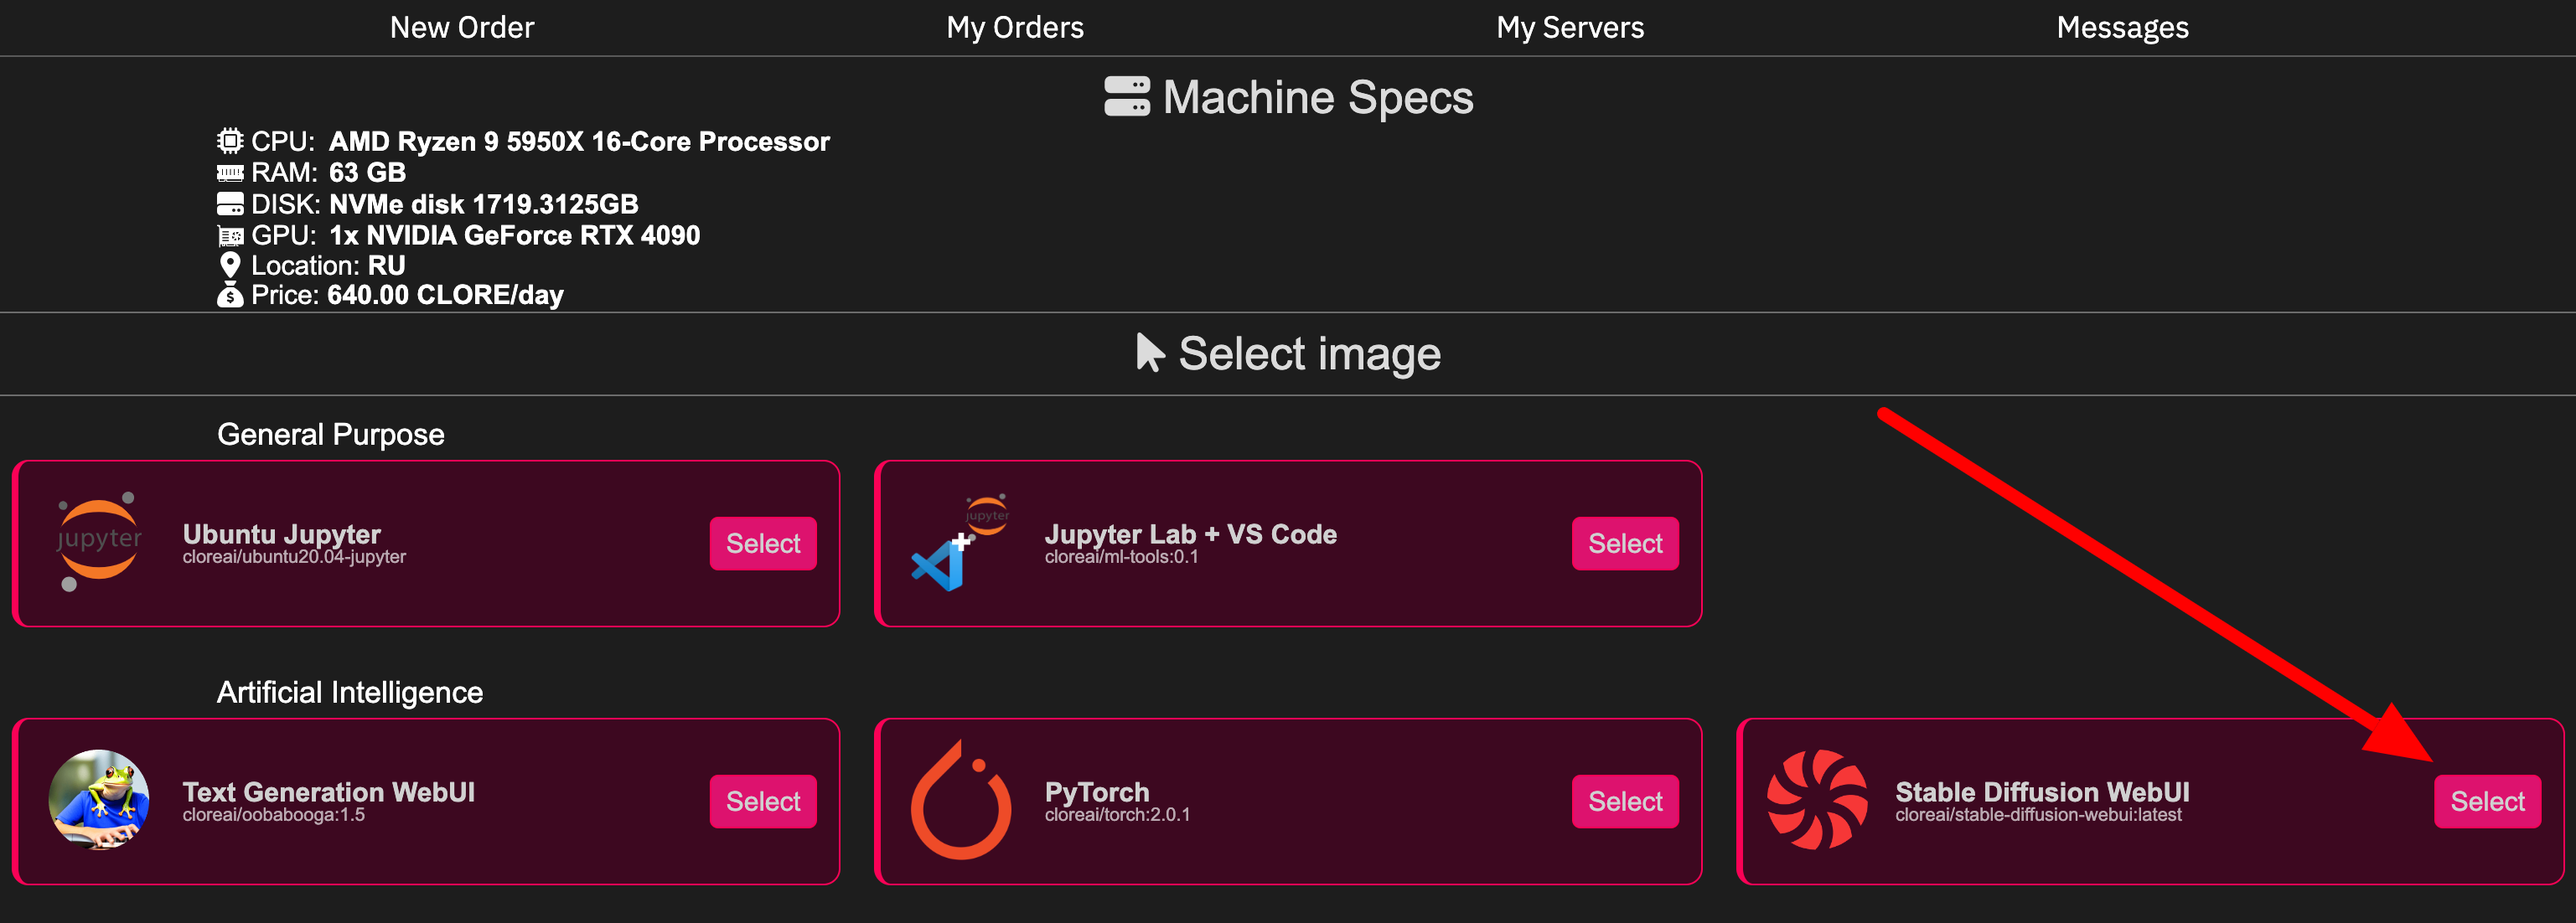
3.View Your Orders
Click on the provided link to view your recent orders: https://clore.ai/marketplace#myorders
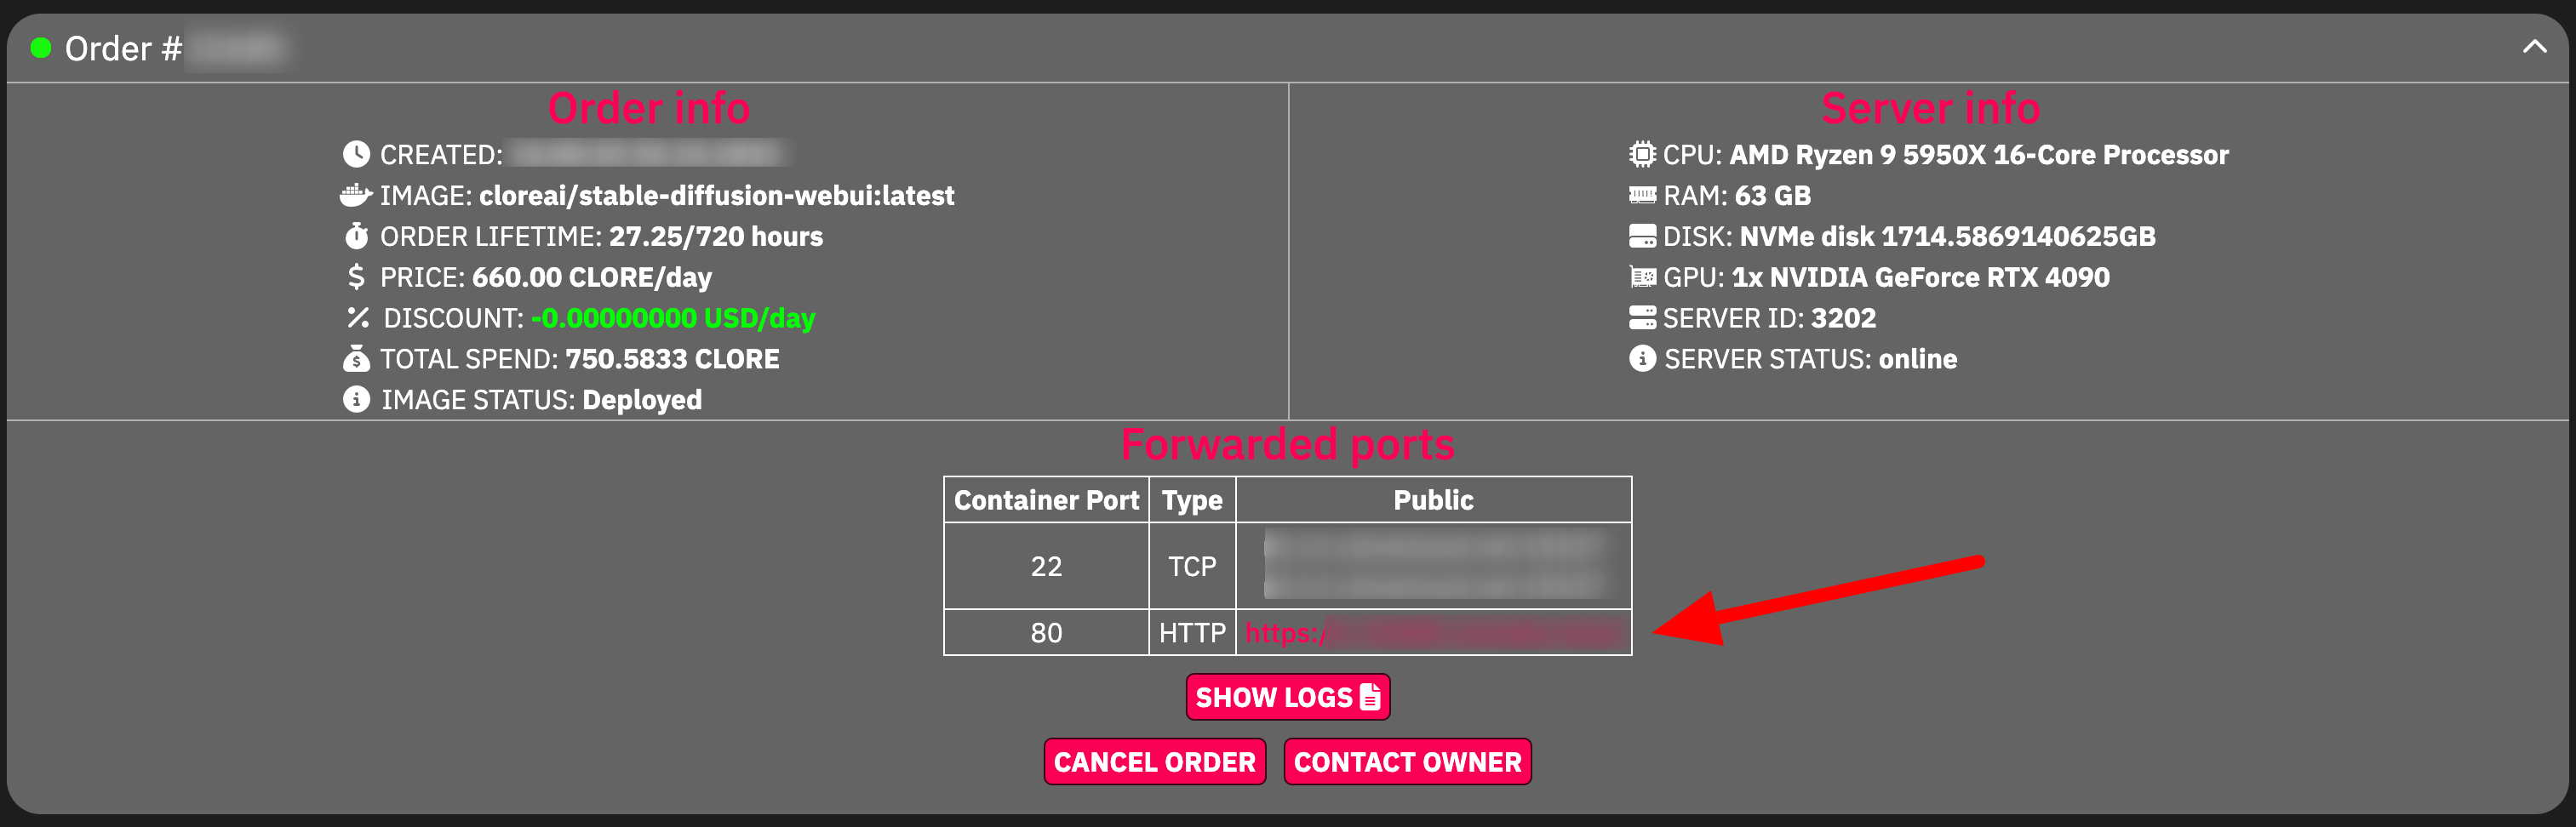
4.Access Stable Diffusion WebUI Again
What's great about Clore is that it already has a Web UI set up for you, eliminating the need for manual installations.
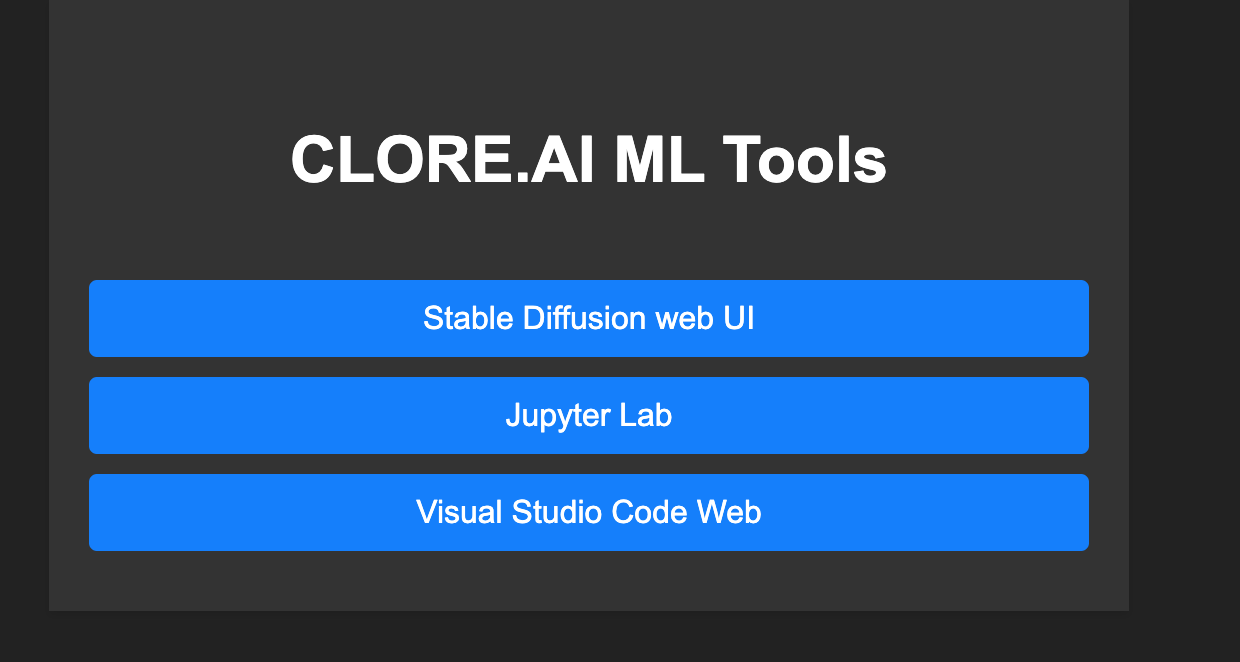
5. Open the Stable Diffusion Control Panel
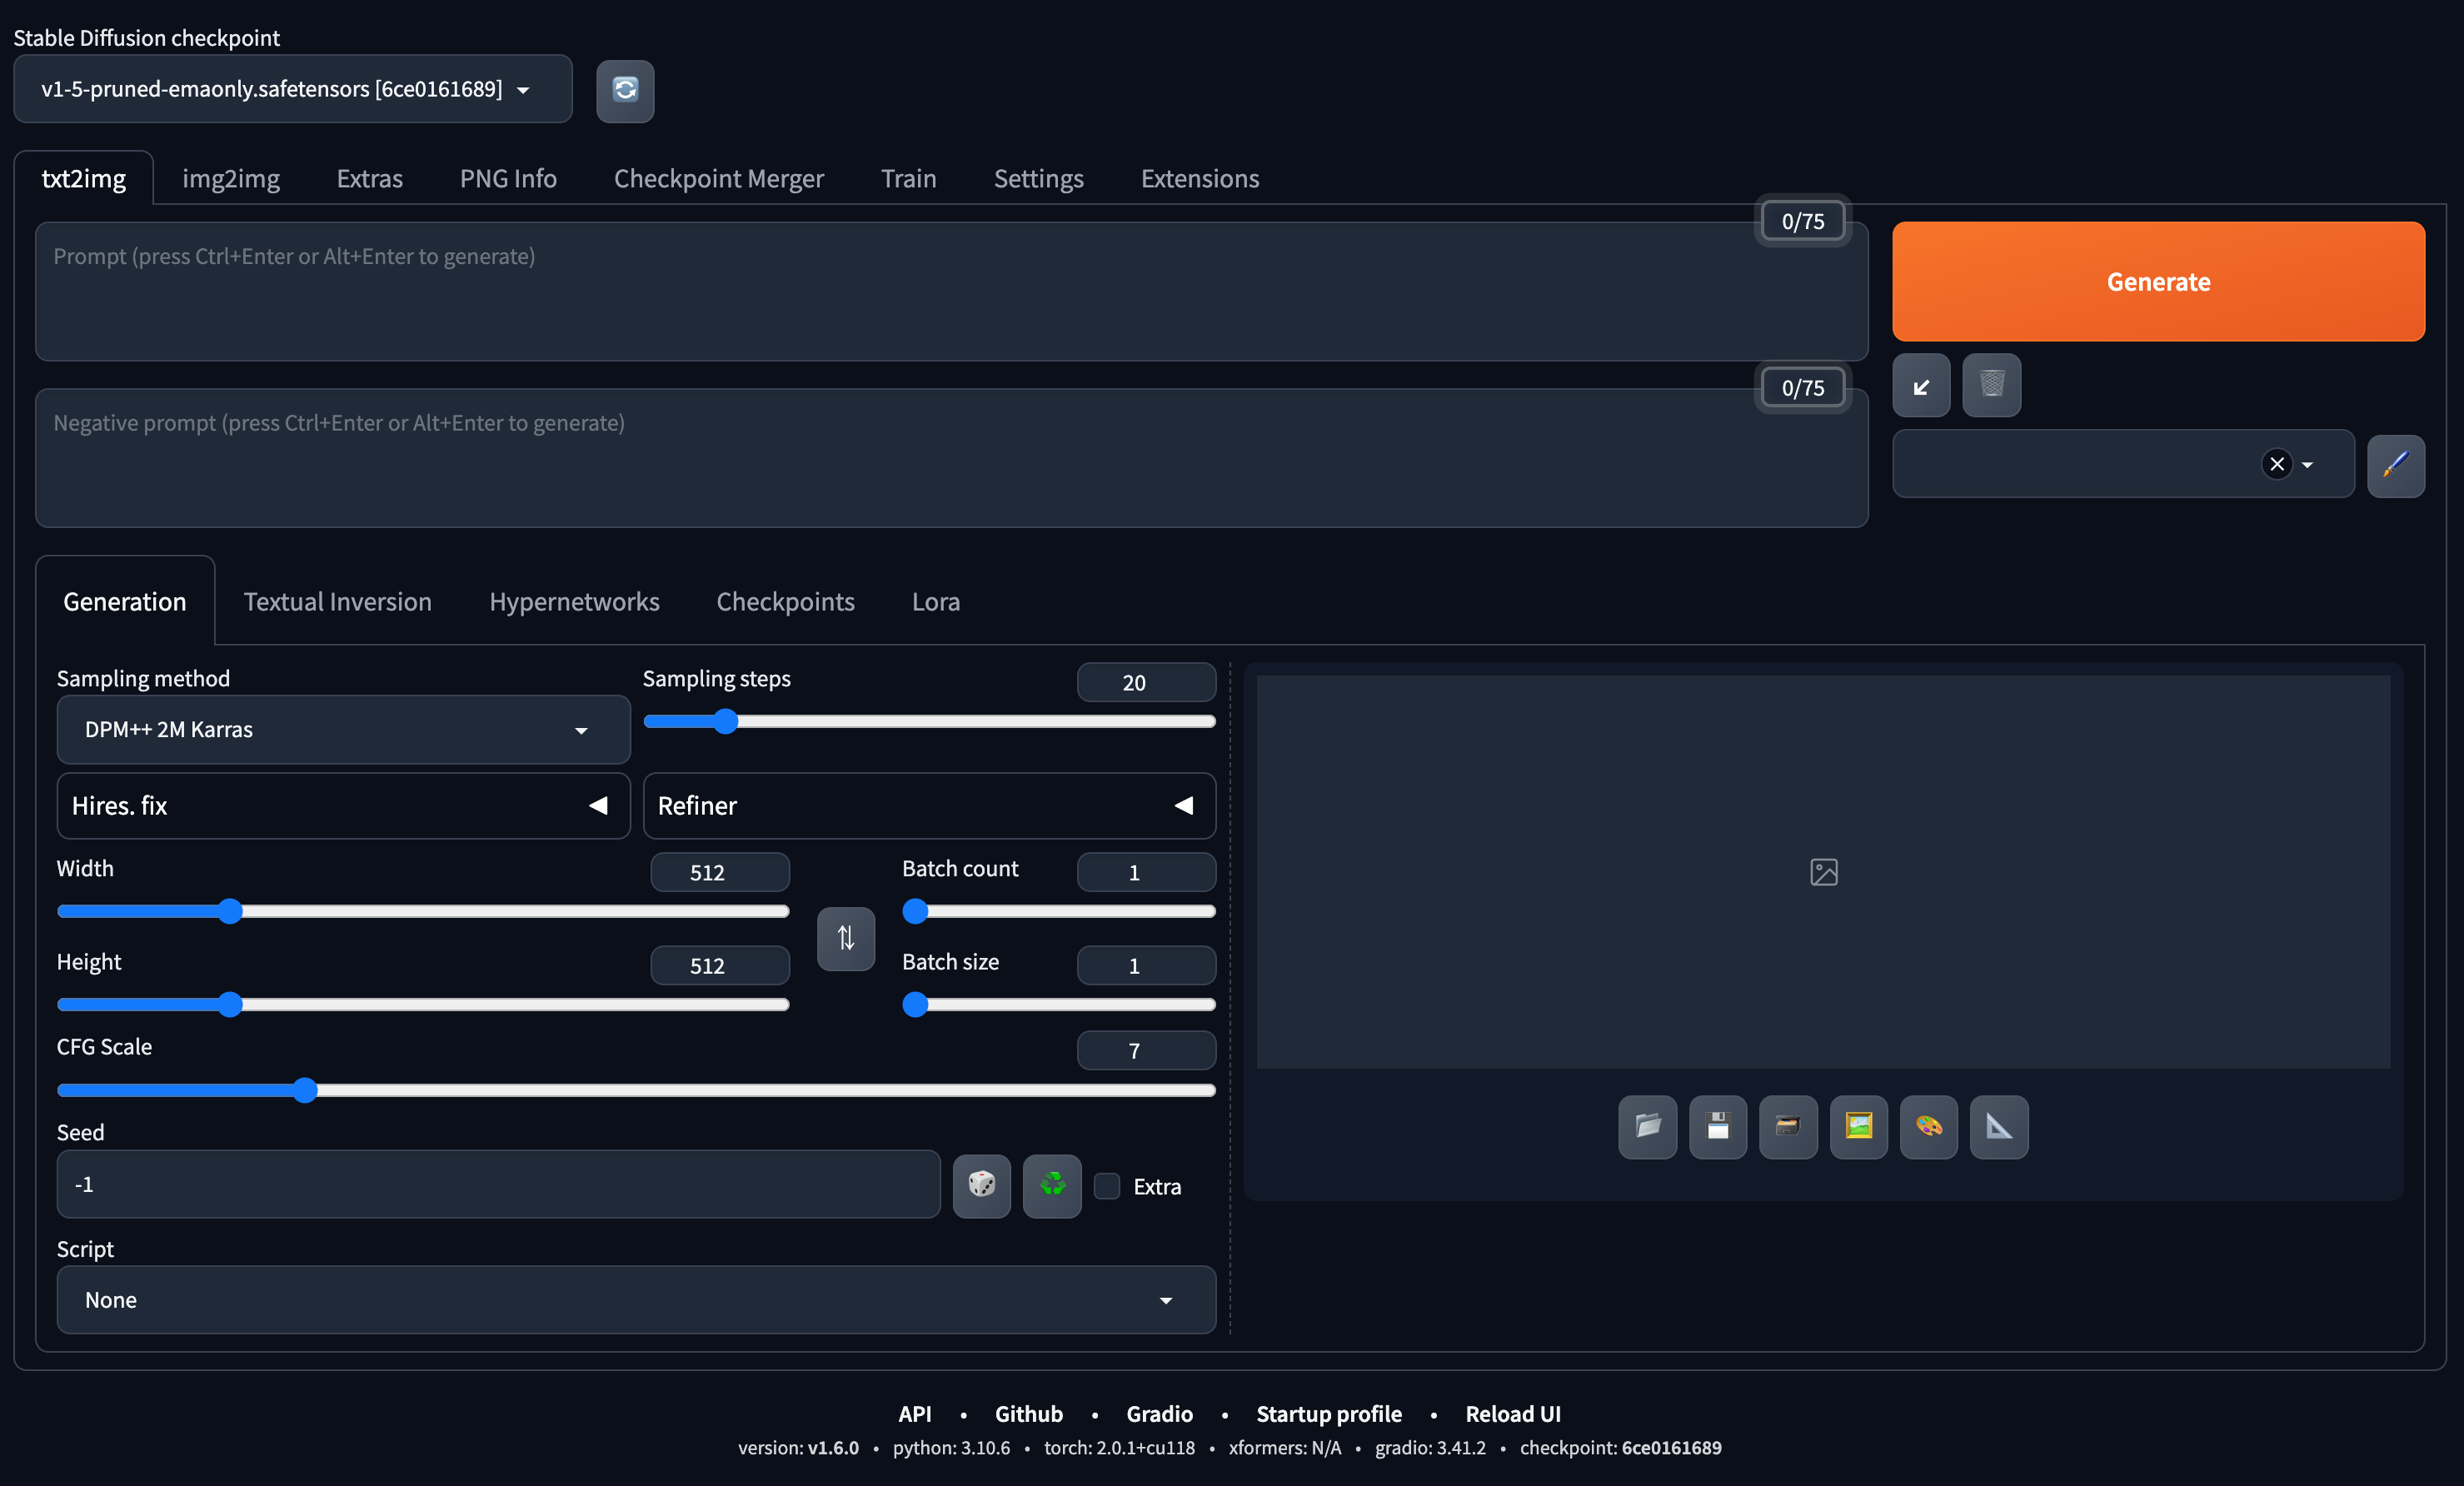
At this point, you should see the Stable Diffusion control panel interface.
6.Install Extensions
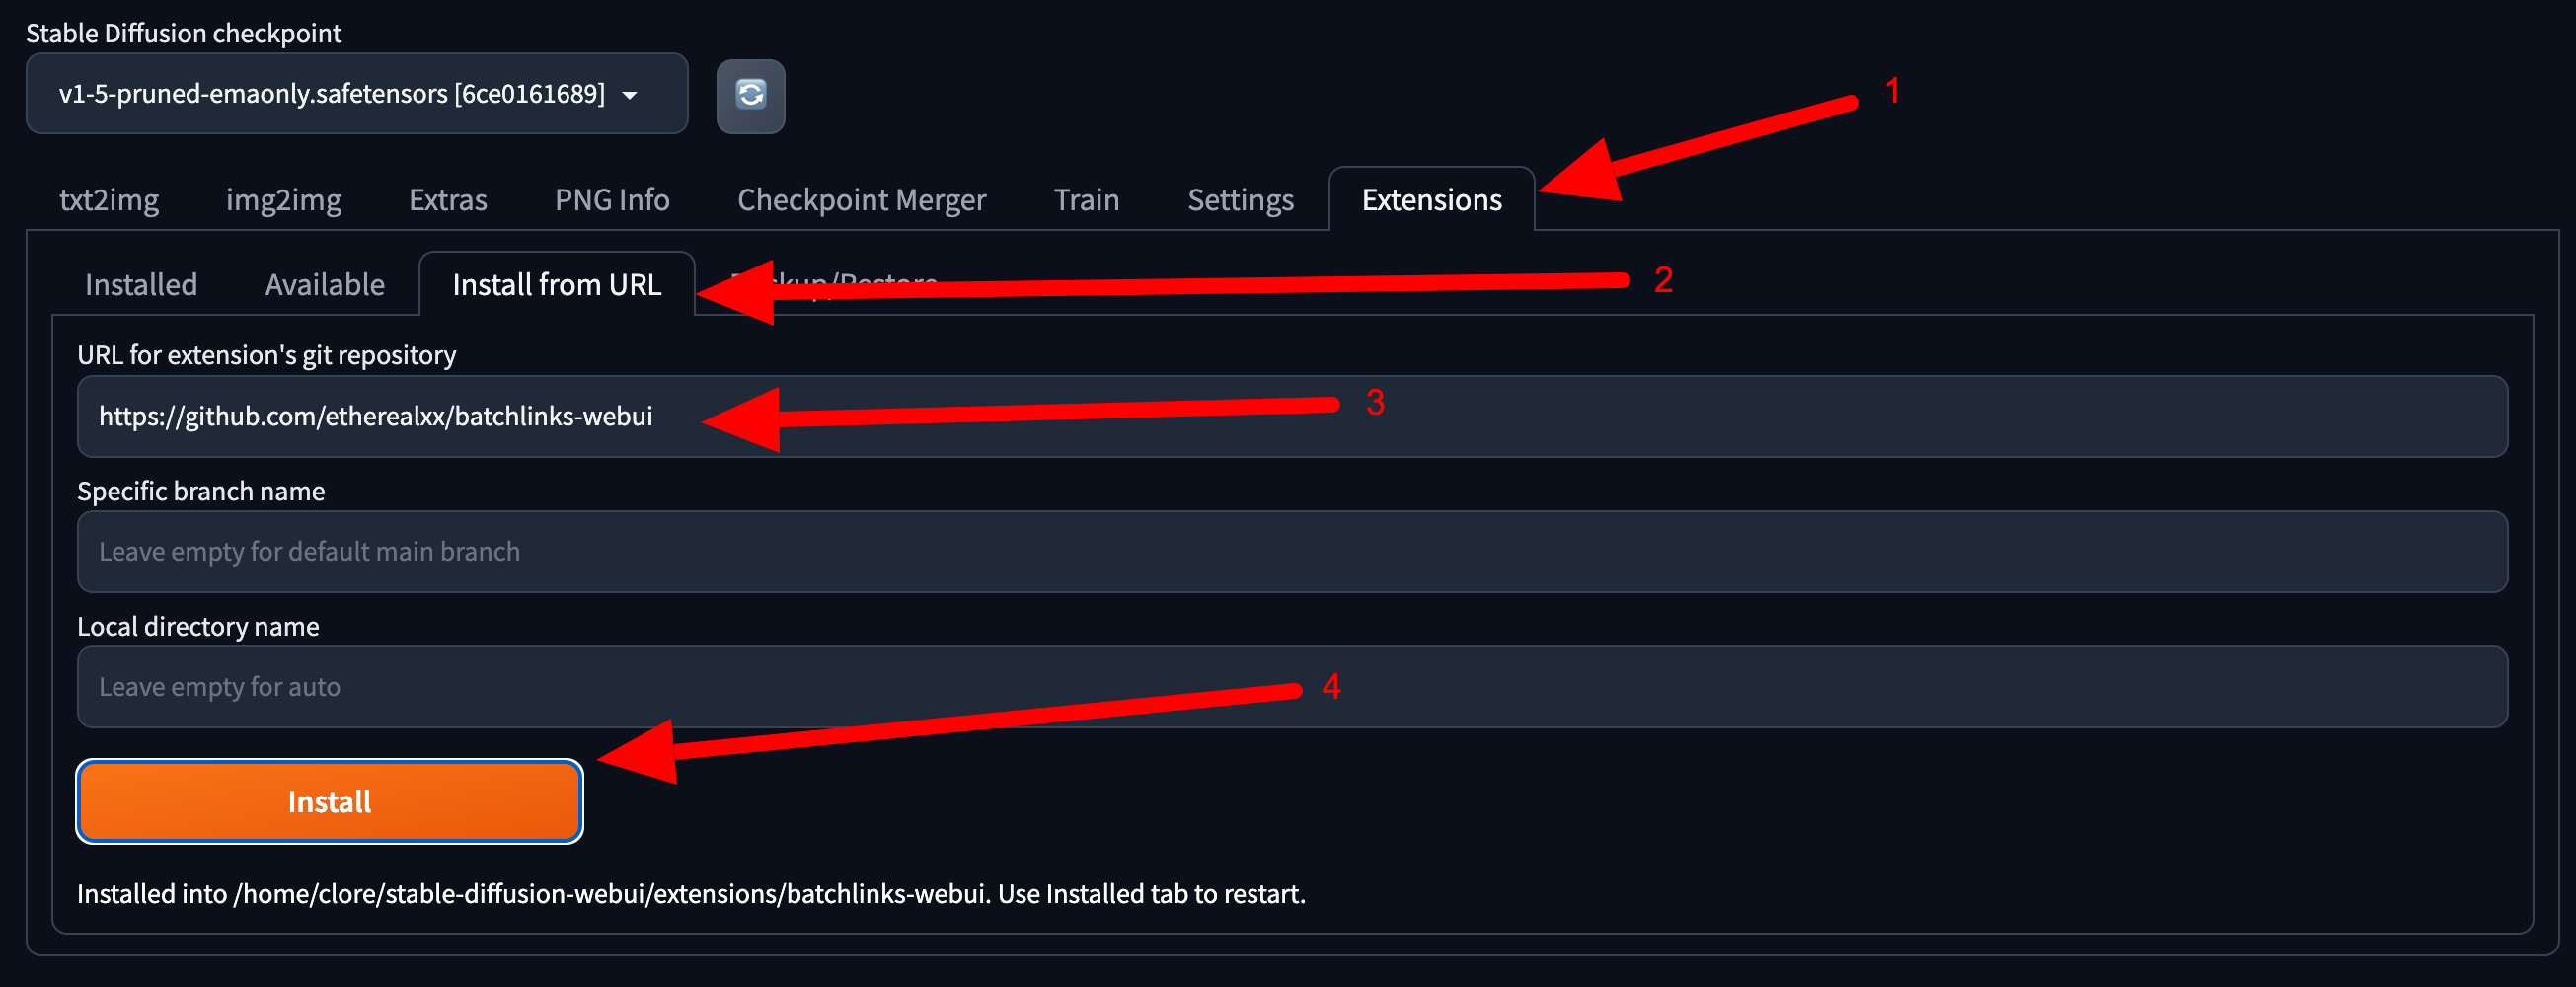
You'll need to install two extensions: controlnet and batchlinkers webui. The first one enables you to produce stunning images, while the latter facilitates rapid downloading of available models. Follow the steps outlined in the provided screenshot: Navigate to extensions, choose 'install from URL', input the first link, hit install, and then repeat for the second link. Here are the necessary URLs:
https://github.com/Mikubill/sd-webui-controlnet.git
https://github.com/etherealxx/batchlinks-webui
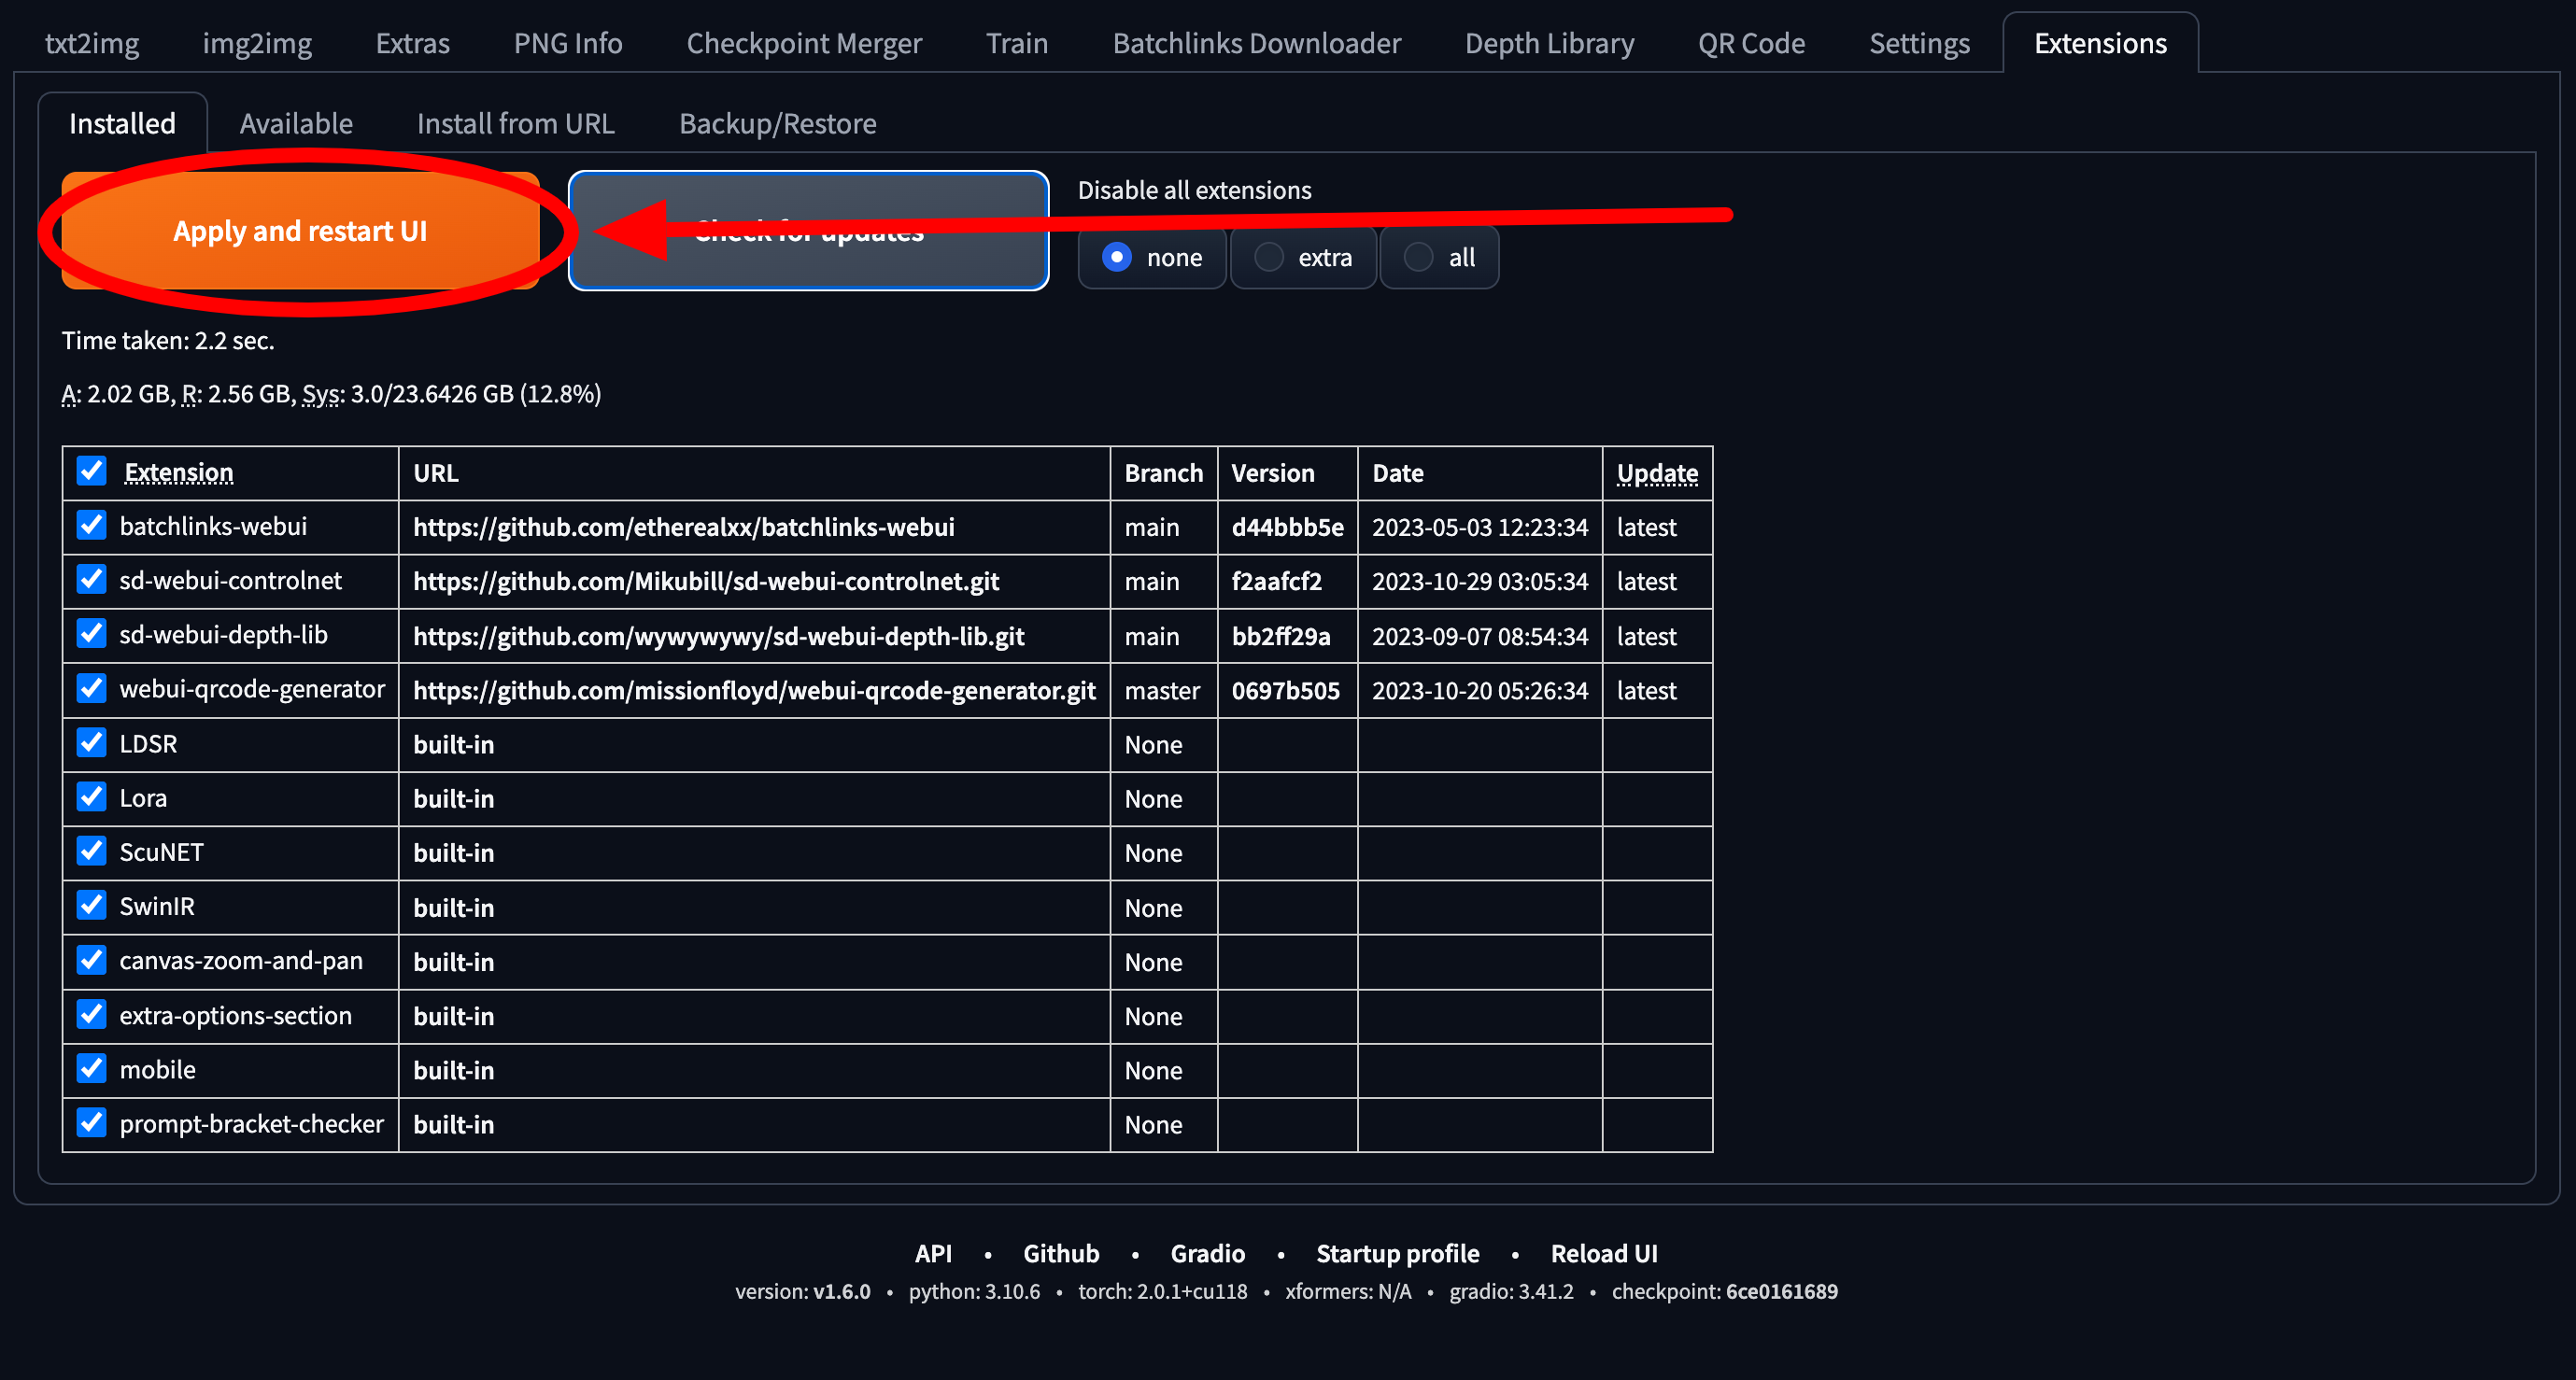
7.Restart the UI
Ensure you restart the UI for your changes to take effect.
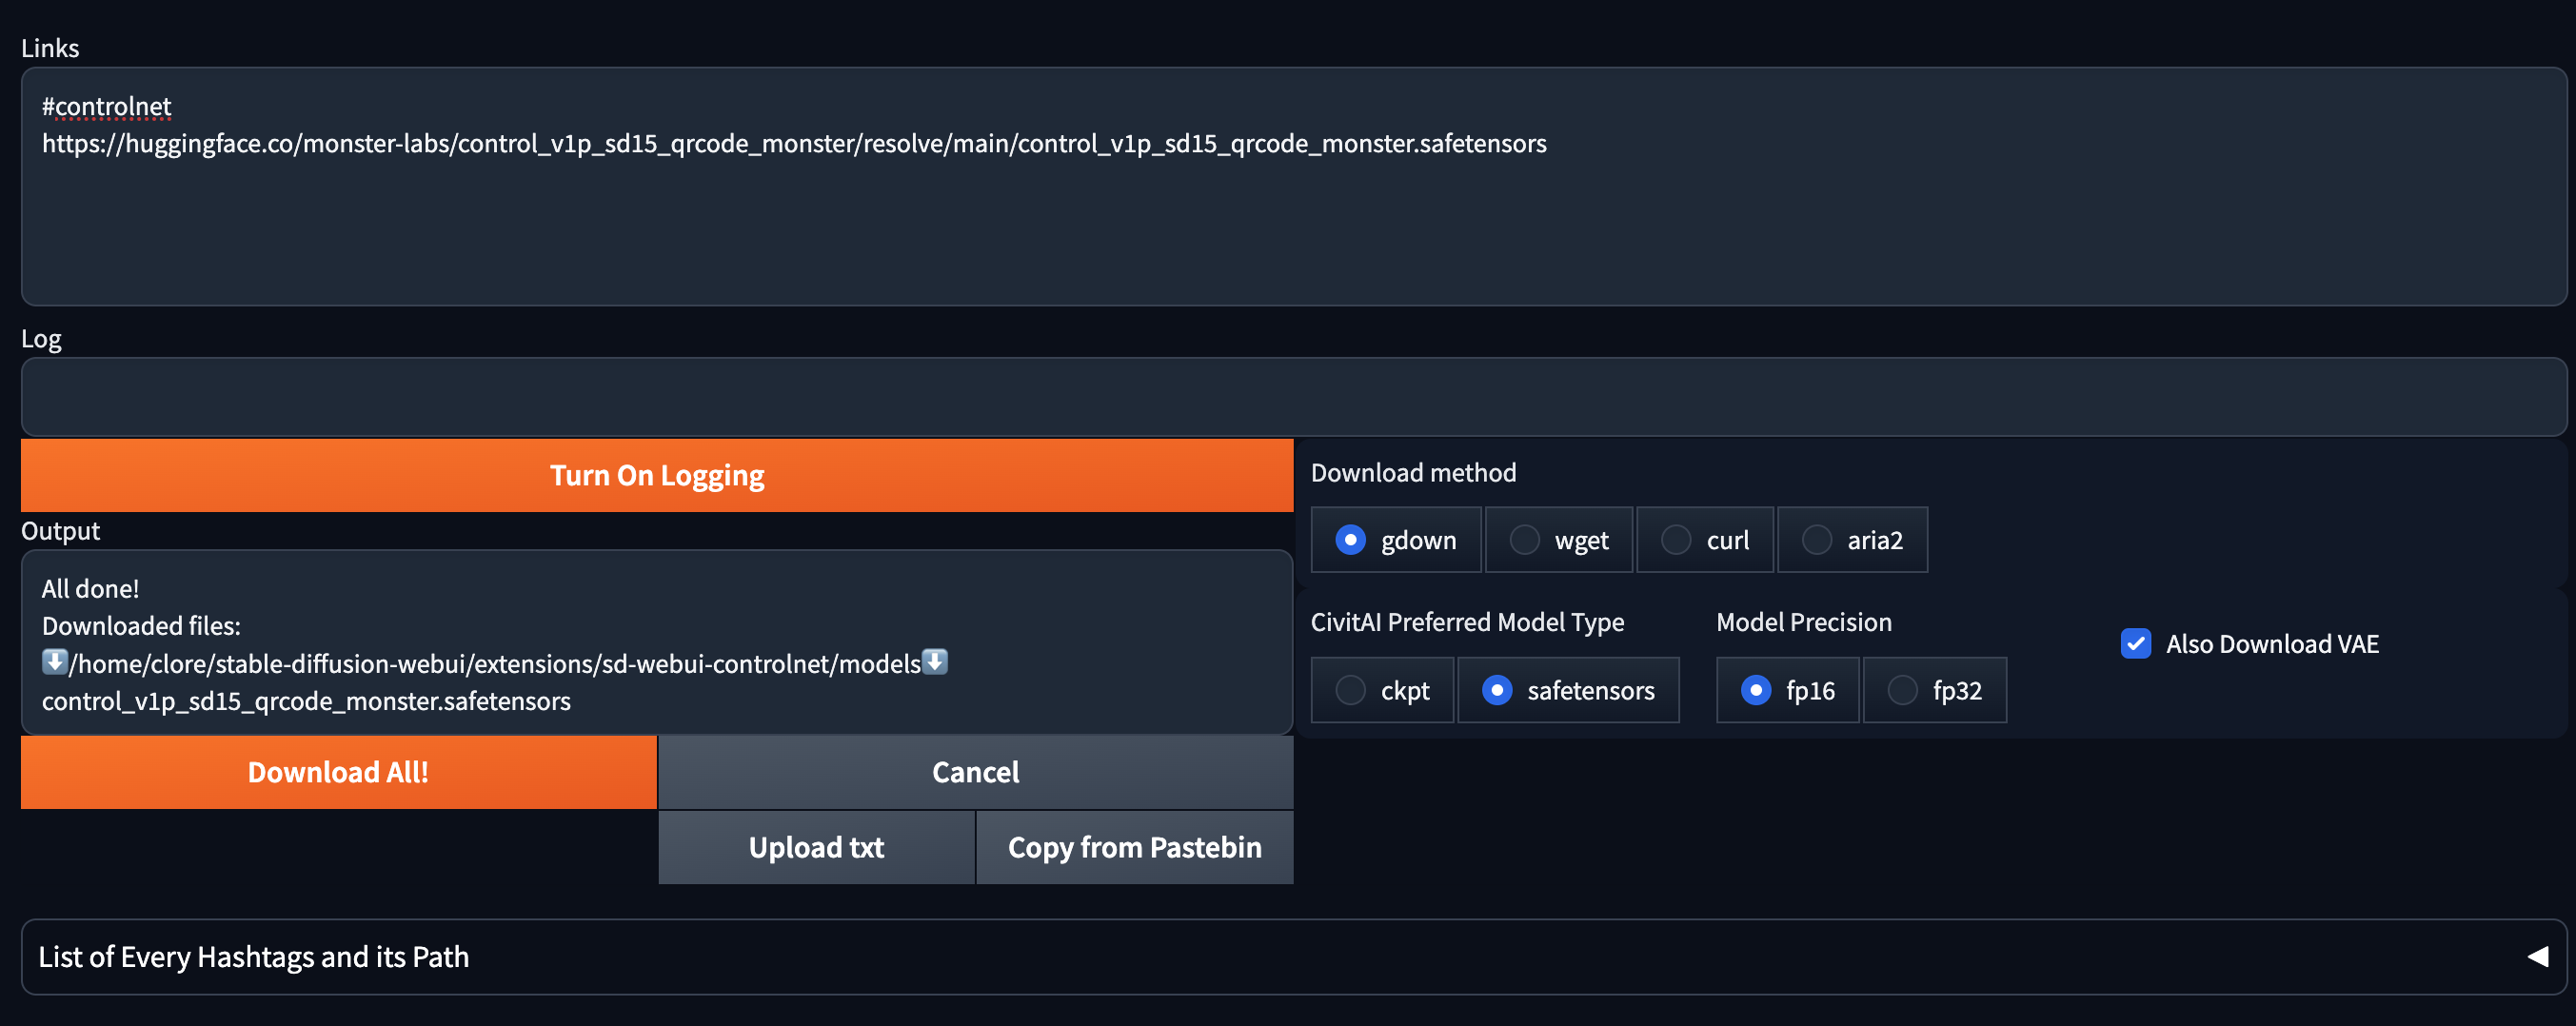
8. Add Model to Controlnet
Although I previously suggested an extension that allows for bulk model installations (simplifying future operations), we'll only require one model for now
9. Set Your Prompt
Simply input your prompt and adjust the settings as depicted in the provided screenshots.
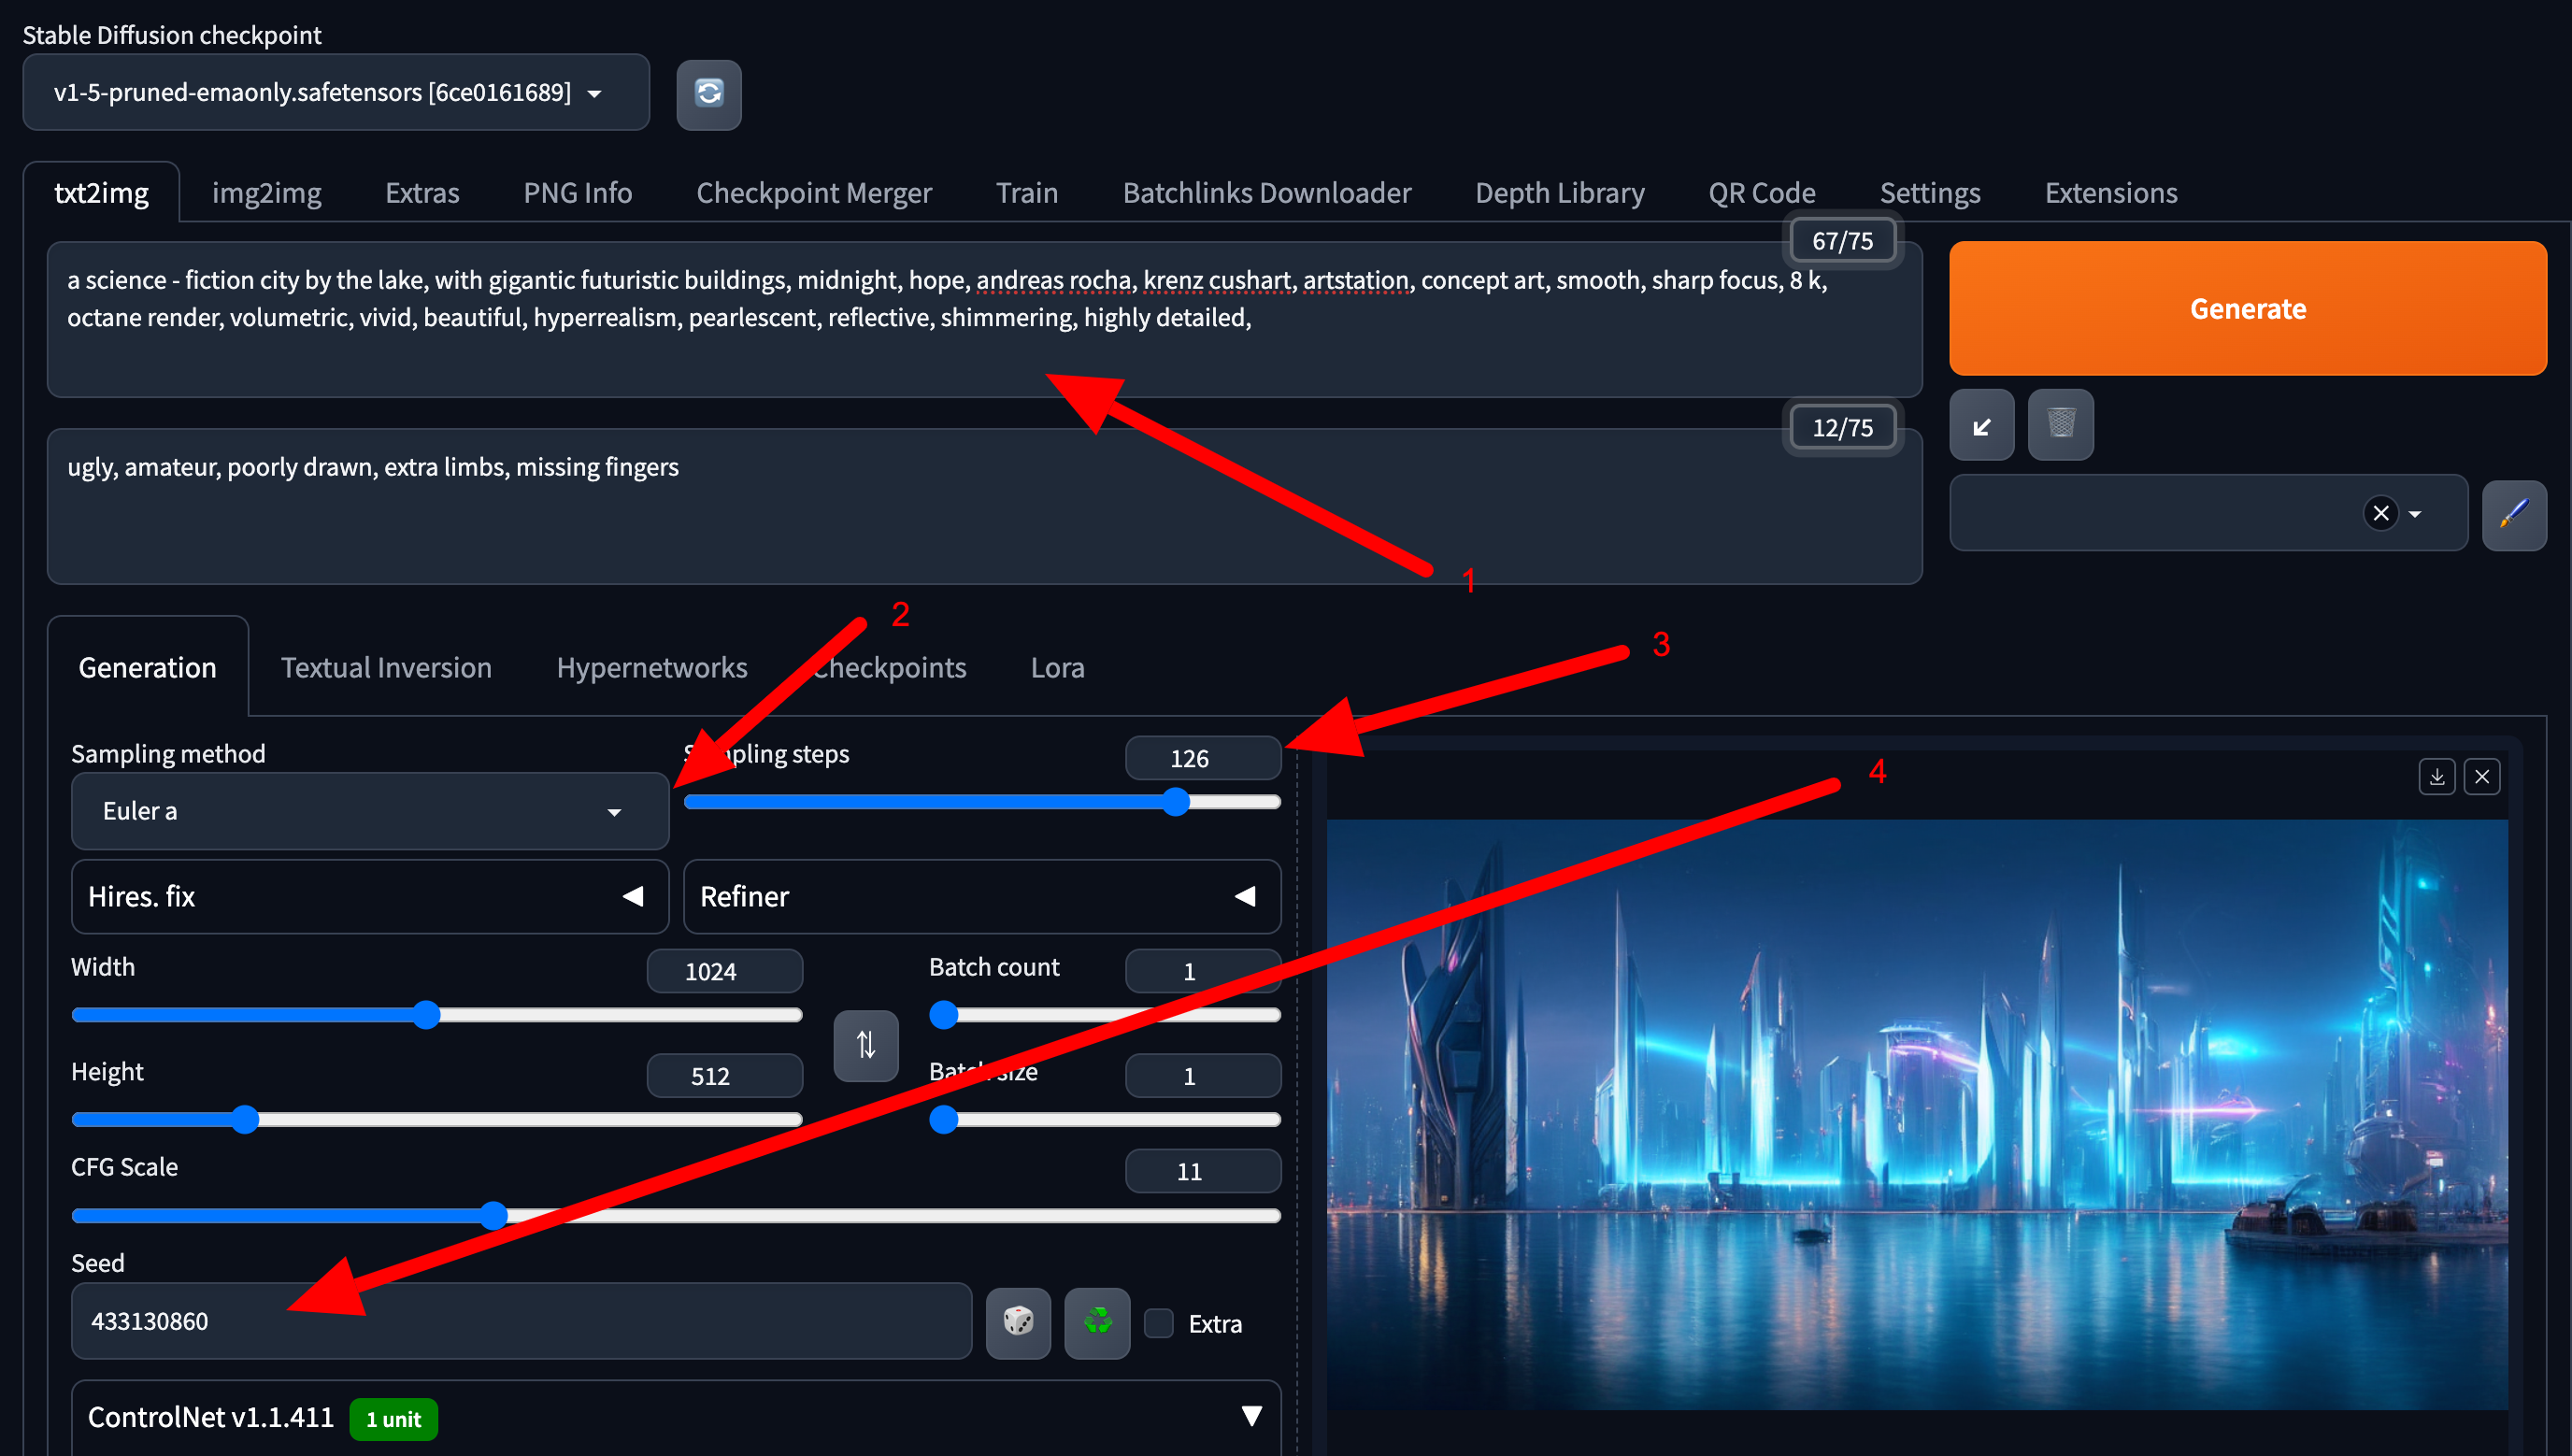
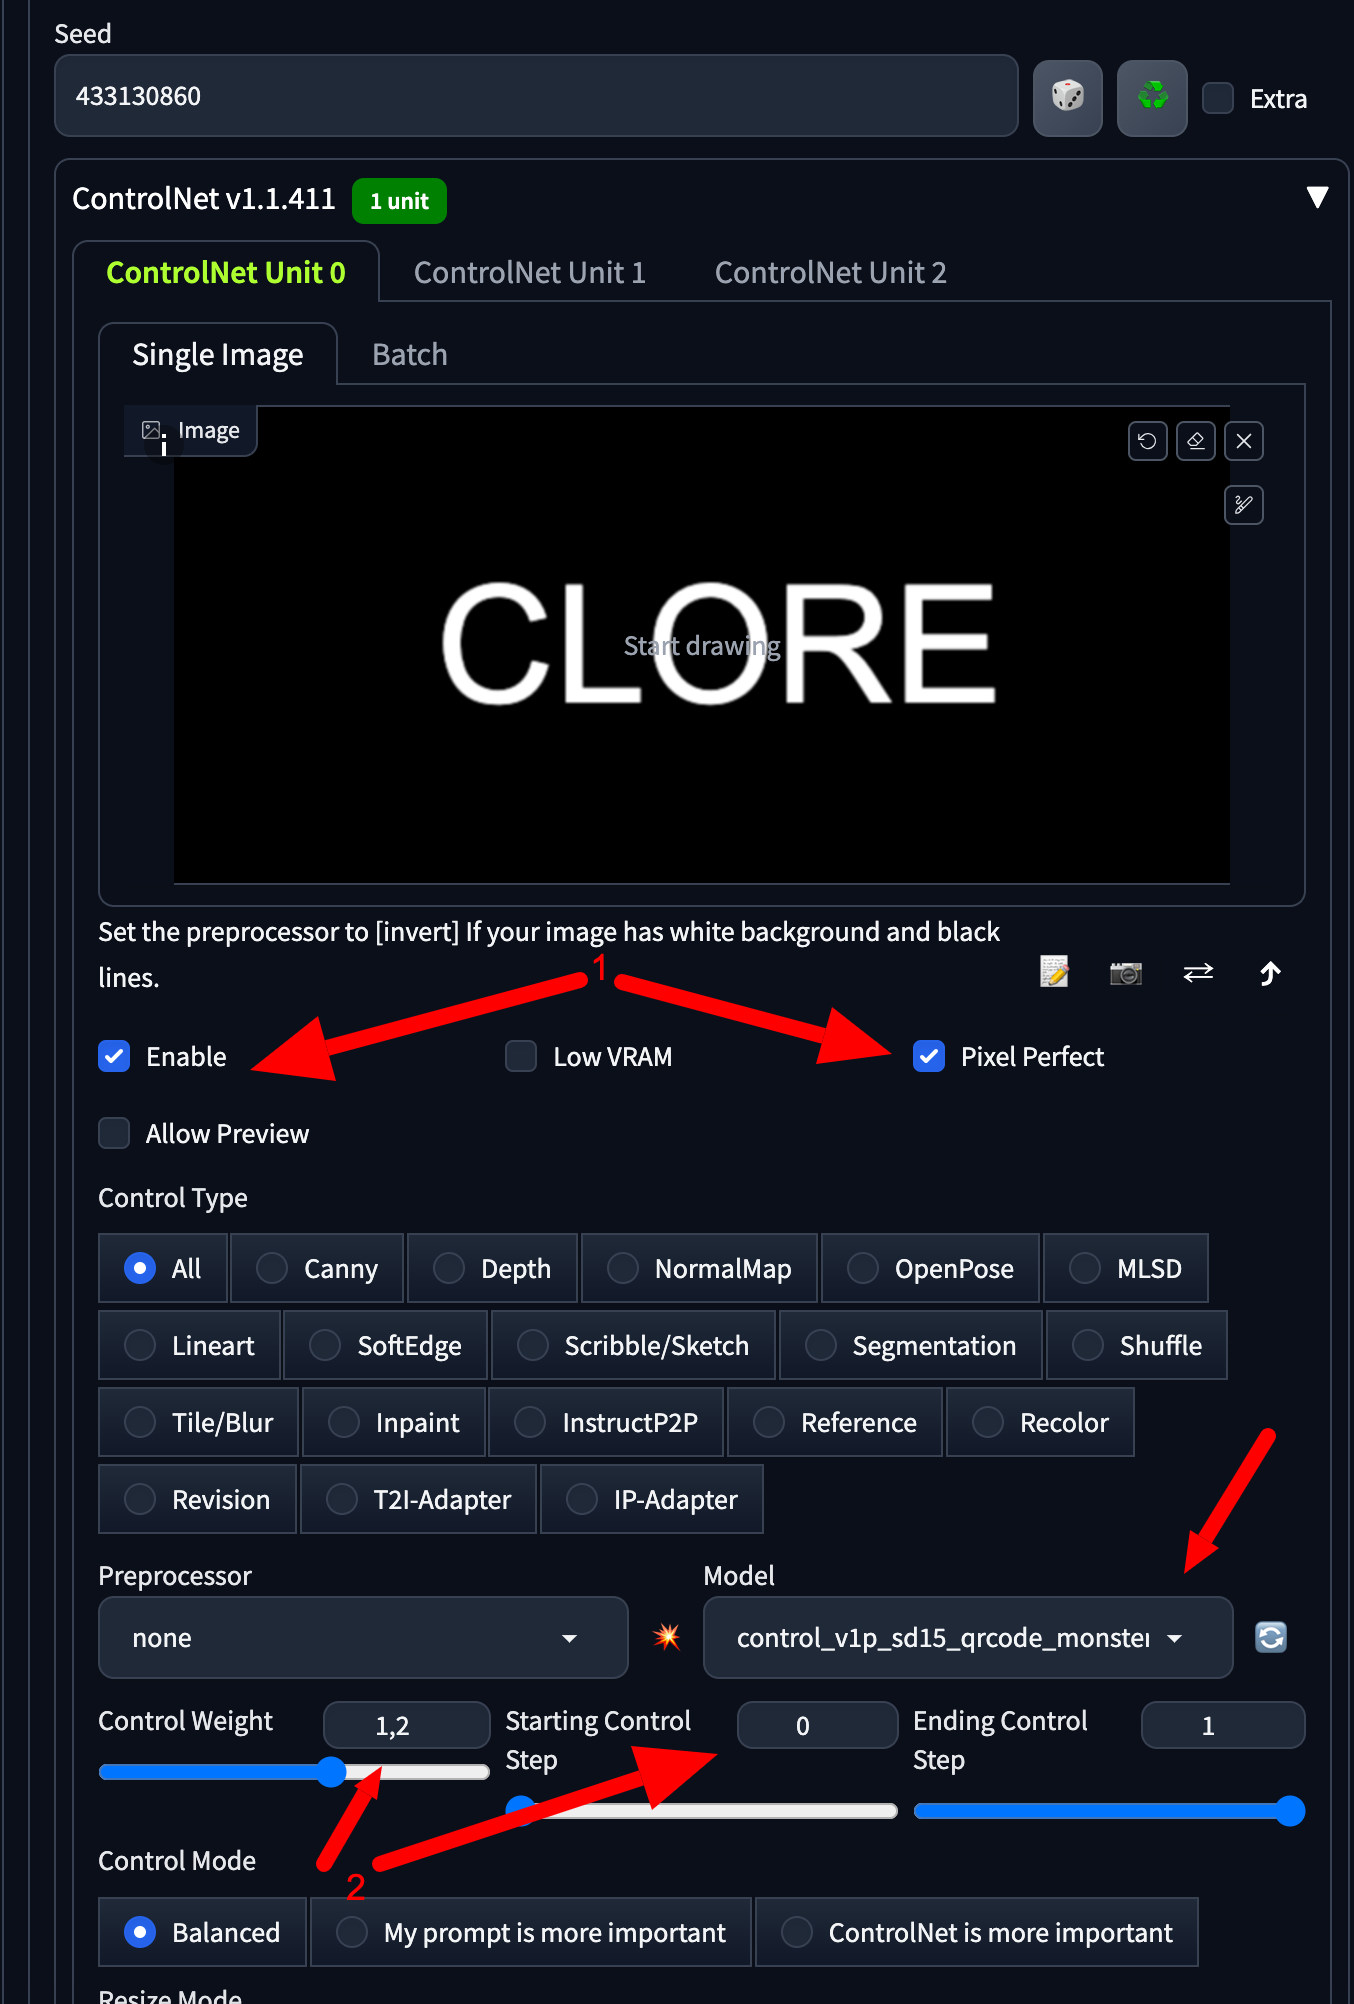
10. Completion
You've made it to the end! Your result should resemble the sample output.

this article is made for the contest clore.ai
my mail proshqa2012@gmail.com