Remove Magisk Modules Using ADB
MistuThis method utilizes an ADB command which was introduced in Magisk v19.4 and above. It is, in fact, the easiest way to quickly remove all the installed Magisk Modules and fix bootloop issues caused by them. The only requirement for this method is that you should have the Android SDK platform-tools (Specifically ‘ADB’) installed on your PC.
First, power off your Android device completely.
Then connect it to the PC via a USB cable.
Next, open the folder on the PC where ADB is installed (e.g. C:\platform-tools).
Hold the SHIFT key on the keyboard and right-click on any empty space inside the folder.
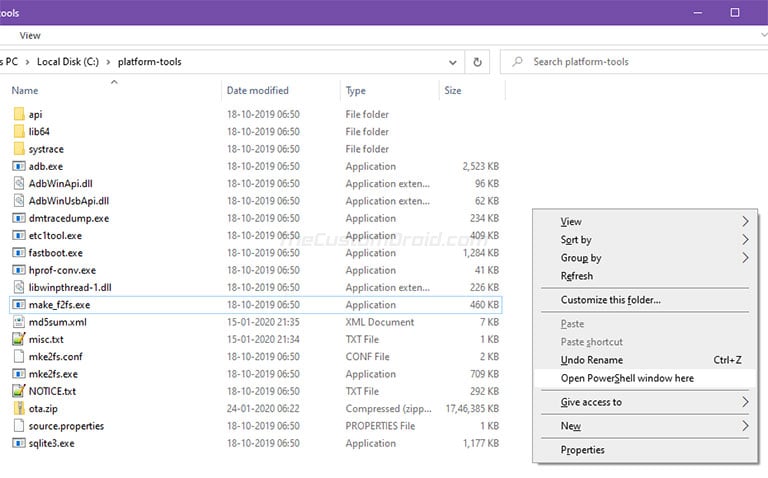
Select ‘Open PowerShell window here’ from the menu that appears.
If you’re using macOS/Linux, simply launch the Terminal and change its directory to the folder where ADB is installed using the ‘cd’ command. For example, if ADB is installed in /Documents/platform-tools, then the command should look like:
cd Documents/platform-tools

This will launch the command-line in the same folder where ADB is installed.
Now, enter the following command in the command-line window:
adb wait-for-device shell magisk --remove-modules
After entering, hold the power button of your device to boot it into the OS.
The said command basically waits for your device till it enters the boot screen, from which point ADB is functional. It will then remove all the installed Magisk Modules to fix the bootloop. With that done, your phone should successfully boot into the system (OS).