Quick Tips on How to Draw Effect of Wind with Pencil
Have you ever heard this saying “God helps those who help themselves”? It determines that constant numerous trials and errors bring about a desirable effect. Thus, no matter who you are, a beginner or a professional artist, an obvious method of how you can hone your skills is to constantly repeat the same actions interacting with some objects. Hence, the perfect case is drawing a cool fall wind gust and its realistic impact. For example, when the blast causes a tree to bend, involving spinning, colorful leaves. So let’s start with this step-by-step tutorial of how to draw wind with autumn foliage.
Needed Tools
First of all let’s find out which tools should be on your working space in your art set for your attempts. In fact, don’t be afraid, there is nothing extraordinary, but there is a basic set of tools such as canvas, an eraser and pencils #2 or HB, H2, and B2. You may be also interested in, this overview of the best manual pencil sharpener brands that will give you an idea of which best quality products should be in your kit.
Step 1: Let's Draw the Ground Line
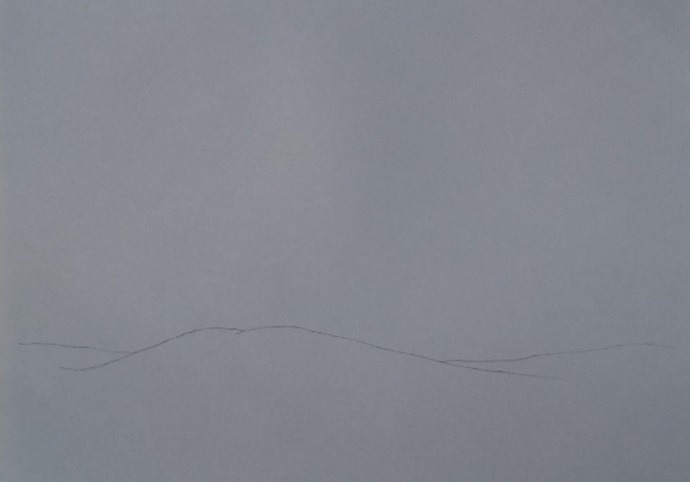
The first thing is the device to be used is the regular pencil HB. Place a piece of paper vertically on the table. Then, virtually divide this paper into 3 horizontally equal fragments and draw the lower border only. This line will indicate the ground border. As a result, the tree and other plants will appear there.
Step 2: Drawing Wind-Blown Trunk and Branches of Tree
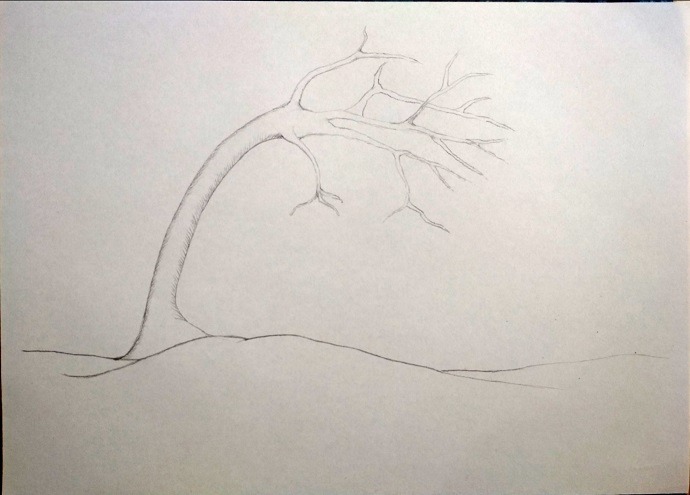
The second stage is, starting to depict a nature scene of a swaying tree. Let’s make it bending to the right side. It’s not a secret, that, a trunk curves from the bottom part, thus contour a natural curve of the trunk. One more detail that you should consider is that the bottom part is constantly roomier compared to the upper part, hence you ought to diminish the stalk at the end. Particular result can be performed with airy hatching, but, the tree outline can be also visualized by soft strokes too; this will give some realism to your picture.
Another important detail is branches - of course, there can’t be only a simple tree trunk. Likewise, depicting branches isn’t difficult to do either; the one thing is to draw them smoothly and prevent angularity. Identically to the tree trunk, branches should narrow down at the end. There shouldn’t be any evident lines but hatching as the tree borders have, as an alternative they can be narrower compared to the main hatching. That’s why you are advised to hone the core to a fine point before you start performing this stage.
Step 3: Add Wind Streams
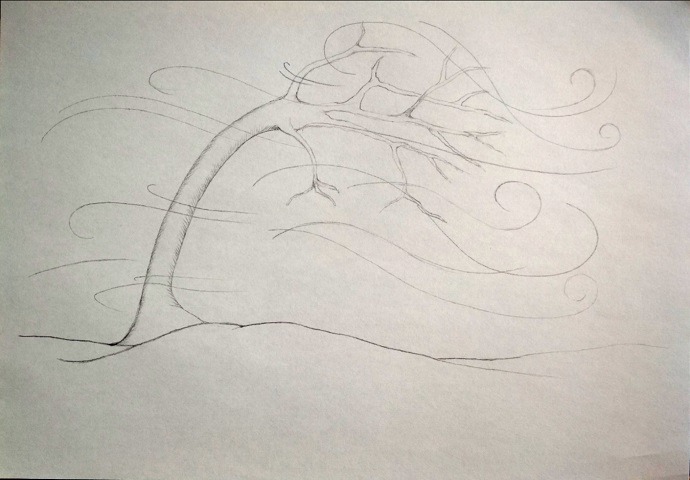
Now, we’ve come up to the most challenging task - depicting the wind stream. This can be achieved with the help of drawing an air flow direction that constantly changes. Do you still keep in mind that the drawn plant is already bent according to the airflow, consequently, the undeniable air direction is from left to the right?
With a light touch, draw a whirling flow, and apply longer strokes spinning at the end; this will visualize a blown air mass when it gets weaker. Lighter wind should be depicted with shorter and fitful marks.
Step 4: Draw Flying Leaves Through Wind
This stage involves the visualization of wind intensity; this can be demonstrated with foliage and other things flying through the air. This time, less hard graphite will be more convenient; which means you should use a softer pencil. Don’t forget that foliage has to float in the air in accordance to the stream - from left to right. However, some spinning can also be present, since the direction can’t be the same all the time.
The leaf shape should not be flat, otherwise they would look like artificial, thus try to make everything a little bit curved - this is a secret of professional thinking. For instance, monitor leaves in nature: carried by the air flow, they spread in regular intervals and become various shapes. Volume is another trick that delivers realism to your picture; this effect can be achieved with hatching and shading details that are more than just relevant.
Step 5: Make Ground Realistic with Stones and Grass
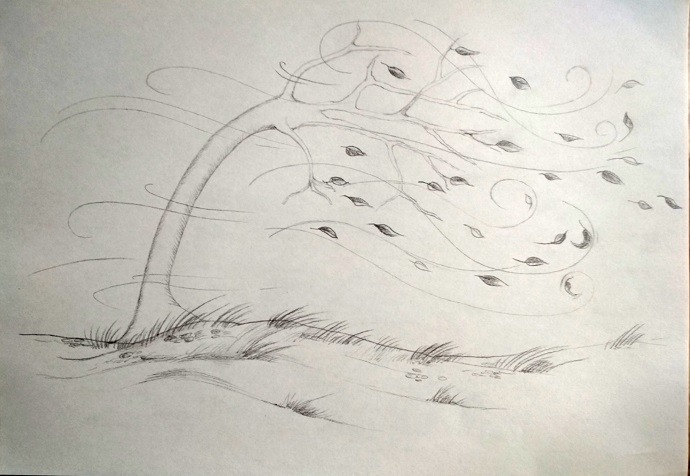
Another marker of moving flow, and that is tiny things such as the lawn beside the tree. As you might understand, the next step will be depicting the grass that is around the tree. Air flow also causes the blades of grass to sway, this means they can’t be identical in direction and movements. However, the majority of the grass leaves have to bend to the right, because the blowing wind pushes them down in that direction, and it should be depicted with softer core. At the same time, you are welcome to combine this with some lumps on the surface, that won’t screw it up; otherwise, the picture would have a tedious nature scenery without them.
Step 6: Shading Work
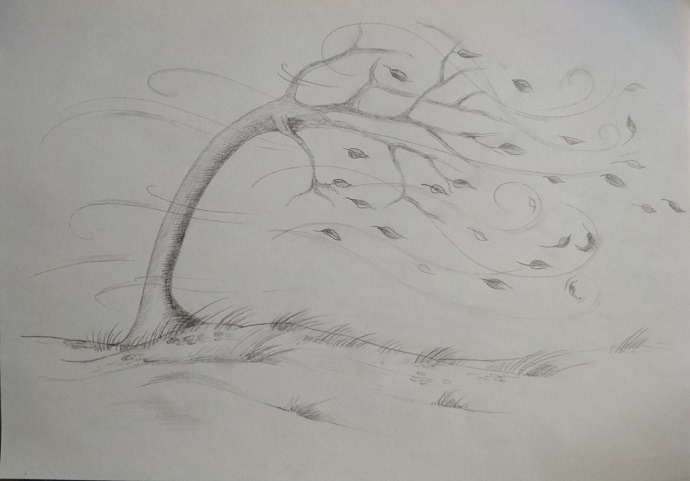
The final stage is drawing realistic things. The most significant is shadow, which accompanies a lively picture, and it’s filled with volume and shine. Thus, taking into account that anything you put in front of the light will have a shadow, thus outline the approximate form of the tree’s shadow, and apply some light touch strokes. However, don’t overdo it at the time when you are hatching the shadow.
Tinting is also significant. Thus, shading the lower segment of details, such as limbs, will make them, let’s say a stereo effect and make them more understandable. This approach can be utilized for the air stream as well: cover with strokes the next add the shading along the stream course. This outcome can be achieved with a firmer lead, thus take either #5 or H2 graphite.
Let's Draw Conclusions
Hopefully, this tutorial was pretty understandable and simple in order to achieve your expected effect, particularly, realistic wind. So next time it’s not necessary to waste too much time in order to investigate how this effect can be performed. However, it doesn’t imply that you shouldn’t test and add details that you would like, rather than trying and honing your drawing skills constantly. Don't have enough inspiration? Pinterest will always help with great board about wind.