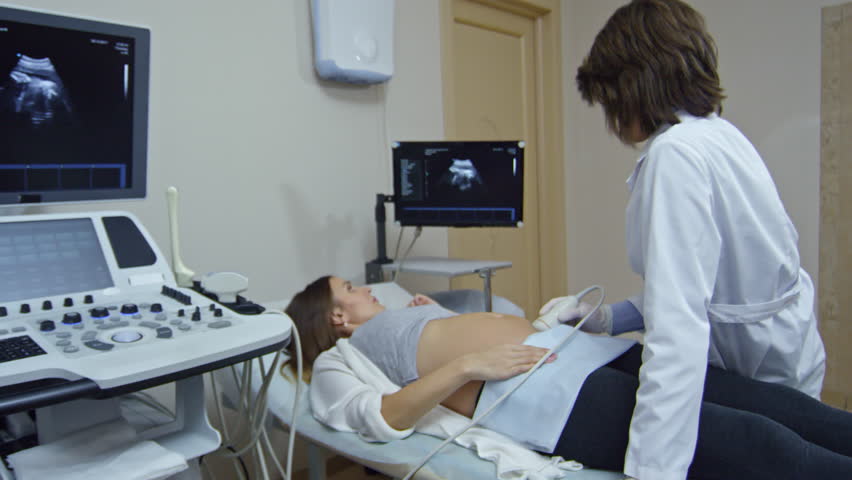
Pregnant Examination

🛑 👉🏻👉🏻👉🏻 INFORMATION AVAILABLE CLICK HERE👈🏻👈🏻👈🏻
Introduction
Positioning and exposure
Equipment
Inspection: Hands
Inspection: Face
Inspection: Abdomen
Symphysis-fundal height
Foetal lie
Foetal presentation
Foetal engagement
Auscultation
Completing the examination
Interactive markscheme
Knowing what to say in a pregnant abdominal examination is important. Here are a few recommended phrases:
“I have been asked to perform an examination of your tummy (can also say ‘baby bump’) today. Have you had one before? Do you understand what it involves?”
“In this examination, I will be taking a few measurements of your tummy and feeling to see which way the baby is facing. The examination should not be painful but it may feel slightly uncomfortable. I will use a special stethoscope to listen to the baby’s heart.”
We measure using the tape measure face down in order to avoid any bias. This distance should correlate with the gestational age +/- 2cm .
There are a few key points to know about the fundus that will help you predict the gestational age of the foetus. At 12 weeks gestation , the fundus is normally at the level of the pubic symphysis . At 20 weeks , it is found at the umbilicus . At 36 weeks , it is found at the xiphoid process of the sternum.
When assessing each other, click on each list item as you go along. Doing so will turn the list item green. Make careful note of any steps missed at the end.
We recommend completing any examination or procedure in under 10 minutes, but you can adjust the timer to suit your needs.
Introduce yourself, confirm the patient's name, date of birth, and gestational age. Ask the patient if the pregnancy is single or multiple.
Ask if they have had a pregnant abdominal examination before and whether they understand what it involves. Explain the purpose of today’s examination and obtain consent . Inform them that the examination may be slightly uncomfortable. Ask the examiner to act as your chaperone. Ask the patient if they would like to empty their bladder before beginning.
Ask the patient to lie supine on the bed set at 15° ; this is to reduce the risk of aortocaval compression. Next, ask them to uncover their abdomen. They will need to be completely exposed from the xiphisternum to the pubic symphysis . You may the curtains to give the patient privacy as they get ready.
Whilst the patient is positioning themselves on the bad, wash your hands, grab a measuring tape and a Pinard stethoscope.
Begin the examination by looking at the overall appearance of the patient. Ask if they are in any pain and are comfortable . Signs such as jaundice and oedema may be clearly visible from the end of the bed.
Assess distal perfusion by recording the capillary refill time. Apply pressure to the distal phalanx of the patient's index finger for five seconds . The finger should turn pale but revert back to its normal colour within less than two seconds . Poor perfusion can be caused by many pathologies including dehydration, aortocaval compression and septic shock.
Look in the eyes for conjunctival pallor (anaemia) and jaundice (intrahepatic cholestasis of pregnancy or hepatitis). Check for oedema of the face (a sign of pre-eclampsia).
It is important to inspect the abdomen for pregnant signs such as:
Observe for any scarring , which may be from previous abdominal surgery or a previous Caesarean section. The most common Caesarean section scar is the Pfannenstiel scar .
If the woman is greater than 24 weeks gestation, foetal movements may be visible.
Ask again if the patient has any pain around their abdomen. Softly palpate the 9 quadrants (see the abdominal examination page) of the pregnant abdomen, feeling for the borders of the uterus. Whilst palpating, look at the patient's face for any signs of discomfort and note down any tenderness or guarding .
The symphysis-fundal height is the length measured between the fundus (the top of the uterus) and the pubic symphysis. This is important as it helps determine if the pregnancy is too large or small for the gestational age .
To measure the symphysis-fundal height, use the ulnar aspect of your left hand, palpate close to the xiphisternum and slowly move inferiorly to locate the fundus. The fundus will feel firm at the uppermost part of the pregnant abdomen. Place one end of the measuring tape face down at this location, and then, palpate for the pubic symphysis and place the other end of the tape there. Measure this distance and repeat two more times.
The foetal lie governs the direction the foetus is facing. Start on the right-hand side of the bed, face the patient and place your hands on either side of the pregnant abdomen. Gently palpate each side. One should be firmer than the other; this will be the foetal back. On the opposite side, you may be able to feel the foetal limbs.
The foetus may lie in one of three ways:
The presentation refers to the anatomical part of the foetus that is closest to the pelvic inlet.
Facing the mother, place your hands on either side of the lower abdomen just above the pubic symphysis. Apply pressure firmly towards the midline to feel the presenting part. If this feels hard, round, and mobile , then it is likely the foetal head. If it feels softer and less well defined , then this is suggestive of another anatomical part such as the bottom.
The presentation can be described in many ways. Three important ones are:
Foetal engagement refers to when the presenting part of the foetus descends into the pelvis. This can be measured as “fifths palpable”. Assuming a cephalic presentation, if the foetal head is not engaged, you will be able to feel the whole foetal head on the abdomen using your hand (five fifths palpable). If you cannot feel the foetal head, then it may have descended into the pelvis (zero fifths palpable). If you can feel the foetal head with only three fingers, it is three fifths palpable. This means that the foetal head is two fifths engaged.
Auscultation of the foetal heart is performed using the Pinard stethoscope, or otherwise a Doppler foetal heart rate monitor. Awareness of the foetal lie and presentation makes it much easier to place the stethoscope. It best to try to place it over the anterior shoulder of the foetus. This is typically found around two inches laterally from the midpoint between the umbilicus and pubic symphysis. Place the wide end of the stethoscope on the patients abdomen and your ear on the flat end. Next, press your ear firmly down and let go of the stethoscope with your hands; it should be balanced between your ear and the patient’s abdomen. Palpate the maternal pulse at the same time to distinguish between the maternal and foetal heart beat.
Thank the patient allow them to re-dress behind the curtains and wash your hands. Complete your examination by offering to measure blood pressure, perform urinalysis, measure weight and height, and accurately assess foetal heart rate using a Doppler ultrasound.
All textual content, images not distributed under a share-alike license and website design ©2020 SimpleOSCE.
Obstetric Abdominal Examination – OSCE Guide
Obstetric Abdominal Examination – OSCE Guide
Download the obstetric abdominal examination PDF OSCE checklist , or use our interactive OSCE checklist .
Caesarian section scar (pfannenstiel) 2
Palpate the upper border of the uterus
Uterine location at various stages of pregnancy
Palpate the abdomen to determine fetal lie
Palpate the abdomen to determine fetal lie
Palpate the abdomen to determine fetal lie
Palpate the abdomen to determine fetal lie
Assess the presenting part of the fetus
Palpate the upper border of the pubic symphysis
Measure from the pubic symphysis to the upper border of the uterus
Measure from the pubic symphysis to the upper border of the uterus
Measure from the pubic symphysis to the upper border of the uterus
Palpate the upper border of the uterus
Palpate the upper border of the pubic symphysis
Measure the distance between the two
Listen to the fetal heartbeat using a Pinard stethoscope (or a doppler ultrasound)
We use cookies to improve your experience and provide relevant advertising. By using our website you consent to all cookies in accordance with our Cookie Policy. Read more
A comprehensive collection of clinical examination OSCE guides that include step-by-step images of key steps, video demonstrations and PDF mark schemes.
A comprehensive collection of OSCE guides to common clinical procedures, including step-by-step images of key steps, video demonstrations and PDF mark schemes.
A collection of communication skills guides, for common OSCE scenarios, including history taking and information giving.
A collection of data interpretation guides to help you learn how to interpret various laboratory and radiology investigations.
A comprehensive collection of medical revision notes that cover a broad range of clinical topics.
A collection of surgery revision notes covering key surgical topics.
A collection of anatomy notes covering the key anatomy concepts that medical students need to learn.
A collection of interactive medical and surgical clinical case scenarios to put your diagnostic and management skills to the test. Each clinical case scenario allows you to work through history taking, investigations, diagnosis and management.
A collection of free medical student quizzes to put your medical and surgical knowledge to the test! Check out our brand new medical MCQ quiz platform at https://geekyquiz.com .
If you'd like to support us and get something great in return, check out our OSCE Checklist Booklet containing over 120 OSCE checklists in PDF format. We've also just launched an OSCE Flashcard Collection which contains over 1500 cards .
Obstetric abdominal examination frequently appears in OSCEs and you’ll be expected to pick up the relevant clinical signs using your examination skills. This obstetric abdominal examination OSCE guide provides a clear step-by-step approach to examining the pregnant abdomen, with an included video demonstration.
Gather relevant equipment including:
Wash your hands and don PPE if appropriate.
Introduce yourself to the patient including your name and role .
Confirm the patient’s name and date of birth .
Briefly explain what the examination will involve using patient-friendly language: “Today I need to examine your tummy as part of the assessment of your pregnancy. This will involve me looking and feeling the tummy, in addition to performing some measurements. Although it may be a little uncomfortable, it shouldn’t be painful. If at any point you’d like me to stop then please just let me know.”
Gain consent to proceed with the examination: “Do you understand everything I’ve said? Are you happy for me to carry out the examination?”
Position the patient on the clinical examination couch with the head of the bed at a 30-45° angle for the initial assessment.
Adequately expose the patient’s abdomen for the examination from the pubic symphysis to the xiphisternum (offer a blanket to allow exposure only when required).
Provide the patient with the opportunity to pass urine before the examination.
Ask the patient if they have any pain before proceeding with the clinical examination.
Inspect the patient from the end of the bed whilst at rest, looking for clinical signs suggestive of underlying pathology:
Look for objects or equipment on or around the patient that may provide useful insights into their medical history and current clinical status:
Obstetric cholestasis is a multifactorial condition that is characterised by abnormal liver function tests , jaundice and intense pruritis (typically affecting the palms and soles of the feet). The disease usually presents in the third trimester and is associated with an increased risk of intrauterine death and premature delivery.
The hands can provide lots of clinically relevant information and therefore a focused, structured assessment is essential.
Inspect the hands for relevant clinical signs:
Place the dorsal aspect of your hand onto the patient’s to assess temperature :
Measuring capillary refill time (CRT) in the hands is a useful way of assessing peripheral perfusion :
Palpate the patient’s radial pulse , located at the radial side of the wrist, with the tips of your index and middle fingers aligned longitudinally over the course of the artery.
Once you have located the radial pulse, assess the rate and rhythm .
Inspect the patient’s face for relevant clinical signs :
The recommended positioning for a patient during pregnancy varies, depending on the current gestation:
Expose the abdomen appropriately, from the xiphisternum to the pubic symphysis and inspect for relevant clinical signs:
Aortocaval compression syndrome occurs due to compression of the abdominal aorta and inferior vena cava by the gravid uterus when a pregnant woman is supine. Aortocaval compression can result in maternal hypotension , loss of consciousness and in rare cases fetal demise . Women in late pregnancy are positioned in the left lateral position when supine to reduce pressure on the aorta and inferior vena cava.
Ask about abdominal tenderness before palpating the abdomen and continue to monitor the patient’s face for signs of discomfort throughout the examination.
Briefly perform light palpation over each of the nine regions of the abdomen to identify any tenderness or masses that may not relate to the pregnancy (e.g. appendicitis). See the abdominal examination guide for more details.
Palpate the uterus to identify its borders, including the upper and lateral edges.
The uterine fundus can be found at different locations during pregnancy, depending on the patient’s current gestation:
Fetal lie refers to the relationship between the long axis of the fetus with respect to the long axis of the mother .
Assess the gravid uterus to determine the fetal lie :
1. Place your hands on either side of the patient’s uterus (ensuring you are facing the patient).
2. Gently palpate each side of the uterus:
There are three main types of fetal lie which include:
Fetal presentation refers to which anatomical part of the fetus is closest to the pelvic inlet .
Assess the gravid uterus to determine fetal presentation :
1. Ensure you are facing the patient to observe for signs of discomfort and warn the patient this may feel a little uncomfortable.
2. Place your hands either side of the lower pole of the uterus, just above the pubic symphysis.
3. Apply firm pressure to the uterus angled medially, palpating for the presenting part:
In late pregnancy, the level of fetal engagement should be assessed. A fetus is considered ‘engaged’ when more than 50% of the presenting part (usually the head) has descended into the pelvis.
The fetal head is divided into fifths when assessing engagement:
Symphyseal-fundal height is the distance between the fundus and the upper border of the pubic symphysis. After 20 weeks gestation, the symphyseal-fundal height should correlate with the gestational age of the fetus in weeks (+/- 2cm).
To measure the symphyseal-fundal height :
1. Begin palpation of the abdomen just inferior to the xiphisternum using the ulnar border of your left hand.
2. Locate the fundus of the uterus (a firm feeling edge at the upper border of the bump).
3. Once the fundus has been identified, locate the upper border of the pubic symphysis.
4. Measure the distance between the upper uterine border and the pubic symphysis in centimetres using a tape measure. The distance measured should correlate with the gestational age in weeks (+/- 2cm).
To avoid bias, it’s best to place the tape measure facing down and only turn to view the numbers once in position.
You may be asked to identify the fetal heartbeat using a Pinard stethoscope (or a Doppler ultrasound probe). As a result, it is important to have a basic understanding of how to locate and identify the fetal heartbeat.
1. Based on your assessment of the fetus’s position, you should place the Pinard stethoscope aiming between the fetal shoulders on the fetal back.
2. Palpate the patient’s radial pulse (i.e. maternal pulse).
3. Place your ear to the Pinard and take your hand away (so the Pinard is held against the abdomen using your ear only):
Explain to the patient that the examination is now finished .
Dispose of PPE appropriately and wash your hands .
“Today I examined Mrs Smith , a 28-year-old female who is currently at 36 weeks gestation . On general inspection , the patient appeared comfortable at rest. There were no objects or medical equipment around the bed of relevance. There was no evidence of oedema of the face or peripheries on assessment.”
“Symphyseal-fundal height was 36cm, which is in keeping with the patient’s current gestation. The fetus was positioned in a longitudinal lie with a cephalic presentation. The fetal head was three fifths palpable.”
“In summary , these findings are consistent with a normal obstetric abdominal examination .”
“For completeness, I would like to perform the following further assessments and investigations .”
Be the first to hear about our latest releases and exciting news .
You can unsubscribe anytime. For more details, review our Privacy Policy .
Be the first to hear about our latest releases and exciting news .
You can unsubscribe anytime. For more details, review our Privacy Policy .
Be the first to hear about our latest releases and exciting news .
You can unsubscribe anytime. For more details, review our Privacy Policy .
https://simpleosce.com/examinations/obstetrics-and-gynaecology/pregnant-abdomen-exam.php
https://geekymedics.com/obstetric-abdominal-examination/
Camkittys Omegle Mrvine
Young Girl Little Porn Vid
Midget Adult Xxx
Pregnant abdomen examination station - OSCE
Obstetric Abdominal Examination - OSCE Guide | Pregnant ...
Maternal Care: 1C. Vaginal examination in pregnancy
Pregnant Abdomen Examination — Medistudents
Pelvic Exam During Pregnancy: Vaginal Examinations ...
Examination Pregnant Women Images, Stock Photos & Vectors ...
Valeria (20 y.o.) [Specialexamination] [Medical.. — Видео ...
Pregnant Examination Stock Photos, Pictures & Royalty-Free ...
Gyno Pregnant Exam Fetish Examination of Pregnant Women
Special Examination: записи сообщества | ВКонтакте
Pregnant Examination


/cdn.vox-cdn.com/uploads/chorus_image/image/63756765/GettyImages_1093781528.0.jpg)