Pi Hole Ubuntu

🛑 👉🏻👉🏻👉🏻 INFORMATION AVAILABLE CLICK HERE👈🏻👈🏻👈🏻
Бесплатная помощь в подборе профессии
Бесплатная помощь в подборе профессии
Бесплатная помощь в подборе профессии
ближайшее время
10:00
10:30
11:00
11:30
12:00
12:30
13:00
13:30
14:00
14:30
15:00
15:30
16:00
16:30
17:00
17:30
18:00
18:30
19:00
Архитектура и принципы межпроцессного взаимодействия
Практика администрирования ОС Linux на компьютере
GNU/Linux — популярная операционная система, лидирующая на рынке серверного оборудования, используемая также как встраиваемая ОС в промышленном и бытовом оборудовании и даже в качестве десктопного ПО. Компоненты GNU используются и в MAC OS X, не обошлось без влияния GNU/Linux и на Windows.
Знакомство с Linux необходимо системному администратору, тестировщику, веб-программисту, специалисту по информационной безопасности, — любому разработчику, претендующему на статус middle и выше.
Данный курс разбирает базовые основы работы в Linux: основы работы в оболочке Linux, управление пользователями и правами файлов, регулярные выражения и написание скриптов в bash, работа с процессами и управление загрузкой и сервисами в Linux.
Понимание основ программирования, систем счисления (двоичная, восьмеричная, шестнадцатеричная системы счисления) и булевой логики.
Урок 2. Настройка и знакомство с интерфейсом командной строки
Урок 3. Пользователи. Управление Пользователями и группами
Урок 5. Устройство файловой системы Linux. Понятие Файла и каталога
Урок 6. Введение в скрипты Bash. Планировщики задач crontab и at
Урок 7. Управление пакетами и репозиториями. Основы сетевой безопасности
После обучения мы предлагаем всем выпускникам оценить программу курса и преподавателя, а также при желании оставить отзыв.
Все отзывы и оценки мы публикуем без изменений.
Пройдя курс, я получил базовые знания по установке и работе в операционной системе Ubuntu. Стало проще понимать разрозненные статьи про различным аспектам настройки приложений и операционной системы. Давно хотел и вот наконец-то установил и настроил Ubuntu на своём домашнем компьютере. Для меня курс оказался очень полезным и познавательным. Хотелось бы выразить отдельную благодарность преподавателю Денису Потапову.
На момент окончания первой четверти - это лучший курс, который был! Учебная программа сбалансирована, отличный преподаватель Андрей Буранов! Для себя понял, что вебинарный формат нравится больше. Жаль, что следующие интерактивные курсы были заметно хуже организованы (либо информации слишком много в одном уроке, либо очень мало). Надеюсь, дальше будет лучше. PS: Очень странно, что курс по компьютерным сетям будет аж в четвёртой четверти. Все курсы первой четверти были бы более понятны, если бы обучение началось с компьютерных сетей.
Преподаватель грамотно объясняет материал. Быстрая обратная связь и проверка ДЗ. В целом учебная программа хорошая, но первые урока 4 можно легко в 2 уместить! сильно растянута как по мне!!!
Конечно, курс продлился несколько больше, чем я ожидал, зато задания не накапливались. Курс хороший, преподаватель большой молодец, я бы ещё потом углублённый курс по Линукс с ним прошёл.
Курс подходит для входа в мир Linux. Обзорно касаются большинства тем работы с операционной системой. Теперь мне ясен принцип работы Linux . Для углубления надо будет уже добирать информацию в книгах, практиковать работу. Хотел сначала книгу почитать а потом курс пройти, но лучше сначала пройти курс. Теперь мне понятны понятия в книге, и какой раздел к какой части относиться. Спасибо , очень полезно .
Курс хороший. Был очень поверхностно знаком с линуксом до начала, теперь чувствую себя намного увереннее. Большое спасибо преподавателю, лекции хорошие, объяснял понятно, всегда давал комментарии к присланным ДЗ. Считаю, что затронули много важных тем в довольно короткий срок.
Ожидал сильно меньше от курса, очень понравилось. Подача материала логичная, краткая и последовательная. Спасибо Виктору, что был всегда готов подсказать, помочь в частном порядке!
Интересные вебинары, понятное объяснение, хорошая обратная связь. Чему можно научиться? Очень подходит тем, кто слышал про страшный линукс и никогда с ним не работал, особенно без графической оболочки. Именно этому вас и научат, плюс немного бонуса , в виде основных инструментов.
Замечательный преподаватель! все доступно объясняет, проверка ДЗ проходит с ответом уже на следующий день! Василию всех благ и дальнейших успехов в обучении ребят!)
Отличный курс, все грамотно, доступно. Отдельного внимания стоит преподаватель Владимир! Всегда поможет, очень активно пишет в чат, дает много дополнительного материала, и в целом видно, что человек "горит" преподавательской деятельностью и своим предметом!
Лицензия на образовательную деятельность № 040485 от 03 декабря 2019 года
ООО «ГикБреинс», Москва, Ленинградский проспект 39, строение 80, ИНН 7726381870
Пароль должен содержать не менее восьми знаков, включать буквы, цифры.
Я подтверждаю согласие на обработку персональных данных в соответствии с условиями Политики конфиденциальности, ознакомился и согласен с условиями Пользовательского соглашения, Оферты GeekUniversity и Оферты для профессий
Я согласен получать уведомления о новых продуктах и предложениях GeekBrains и его партнеров
In this guide, I will walkthrough how to install and test the pi-hole on Ubuntu and more specifically, Ubuntu Server. These same instructions may work on Ubuntu Desktop, but I strongly suggest Server. Why Ubuntu instead of a Raspberry Pi? I love Raspberry Pis and I probably own at least 10 of them. But sometimes I want to perform DNS blocking/blackholing and I either a) don’t have a Raspberry Pi in an environment or b) I have a virtual environment where I can add some robustness to the solution. At the time of this writing, I should mention that pi-hole is currently *not* supported on Ubuntu 18.04 LTS. Instead, the project officially supports 16.04 LTS. So why install it on 18.04? Ubuntu 16.04 LTS will only receive updates/support until April 2021 unless you purchase extended security maintenance (ESM). I install systems with the intention to not make significant changes to them for some time and the end of life for 16.04 is less than that window of time. 😉
Advertising is great because it pays content creators for their work. After all, even this site utilizes Google Ads. So why would I create a write-up on blocking ads? Because advertisements are known to carry malicious payloads and it’s impossible to distinguish what’s good and what’s bad. As a result, blocking advertising has become an absolute necessity for those who are security conscious. On a personal note, I’ll happily sacrifice some advertising income for the sake of readers/everyone improving their security! As many have figured out, a side benefit of blocking ads is a better user experience and a substantial drop in bandwidth usage. I’ve written several walkthroughs on how to block ads using different devices such as pfBlockerNG on pfSense. If you own a pfSense, I would strongly suggest using the aforementioned guide to create an experience very similar to the pi-hole. Using pfBlockerNG on pfSense has quite a few additional features such as IP blocking and quite honestly, there is no need to add yet another system to manage.
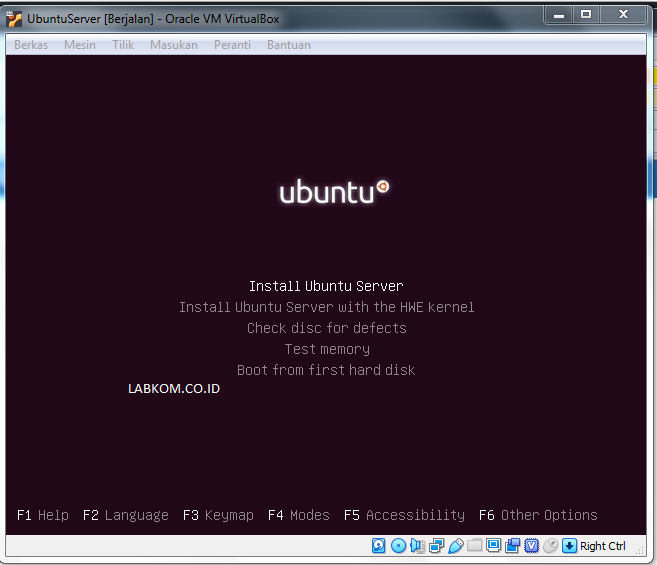
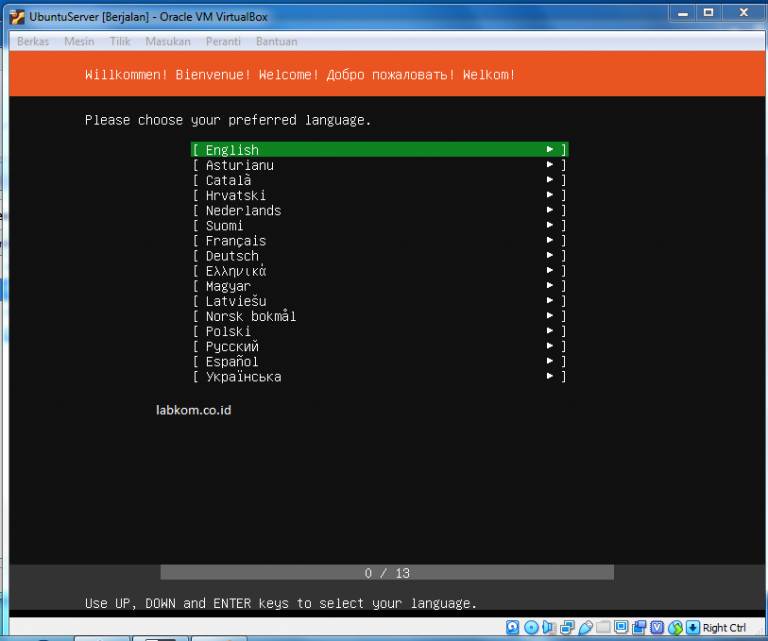
Installing Ubuntu server is ridiculously easy. Simply download the latest Ubuntu Server LTS ISO and install it as you would any standard OS. Note: There is a slight difference in the install steps if you are installing 18.04.1 LTS instead of 18.04 (even if 18.04 is upgraded to 18.04.1). I explain where the 2 install paths diverge in the Ubuntu 18.04.1 LTS section below. You can safely use the defaults throughout the installation, although I would install security updates automatically when given the option. You may also need to install SSH if that is how you plan to access and manage your server remotely (other than the web interface). If you are installing this in a virtual/VMware environment for a fairly small number of devices, I would recommend a 1GB of memory, 1 CPU core, and at least 30GB of hard drive. FWIW, the initial install of Ubuntu and pi-hole (before any logs) is under 5GB of disk space so 30GB should give you some room to grow. You could potentially require more resources if you have a lot of devices or those devices make a ton of DNS requests. That is something you will need to keep an eye on after you get it up and running!
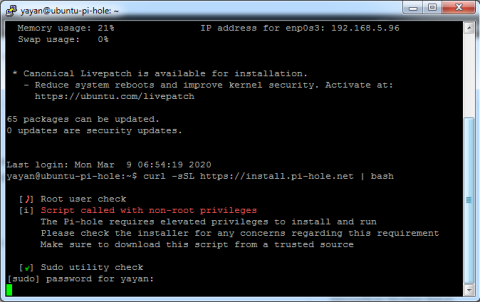
After your Ubuntu system finishes the install and reboots, login via an SSH terminal or from the console. You should be greeted with a welcome screen similar to the one below with the exception your package and security update counts may be different.
Once you are logged in and sitting at a terminal prompt, run package updates manually using the command below. Note the command will do the repository update, upgrade the packages, and then reboot in one fell swoop. Grab your favorite beverage and let that process run its course.
After the system updates and reboots, log back in via SSH or the console. As you will see on your own install, the packages and security updates should both be at zero (or really close).
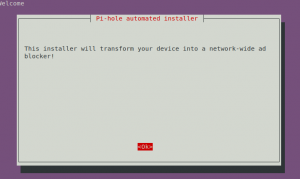
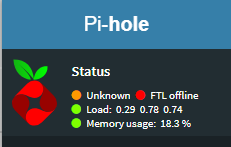
There is a slight difference with the installed base packages between an Ubuntu 18.04 install upgraded to 18.04.1 and a straight 18.04.1 install. Interestingly enough, these additional steps are not necessary for 18.04.2 or later either. The package differences cause the 18.04.1 install to drop back down to a command line (as show below) during install of pi-hole.
The way to correct this issue is in the gray box below. Basically, you add ‘universe’ to the ‘bionic main’ repo line in the /etc/apt/sources.list using the sed command. You follow that with an apt-get update and then install the missing packages. Shout out to xkeyscore_ on Reddit for finding the missing dependencies.
Note: the instructions below are only for the 18.04.1 download. If you installed 18.04 and upgraded to 18.04.1, do NOT run the commands below or you will break your install!!! If you are running 18.04.2 or later, do NOT run these commands!
– /etc/apt/sources.list –
deb http://archive.ubuntu.com/ubuntu bionic main -> deb http://archive.ubuntu.com/ubuntu bionic main universe
If you’re unable to run the last command to install the packages, try the command below and then retry the one above. You do not need to run this command if your apt-get install ran correctly.
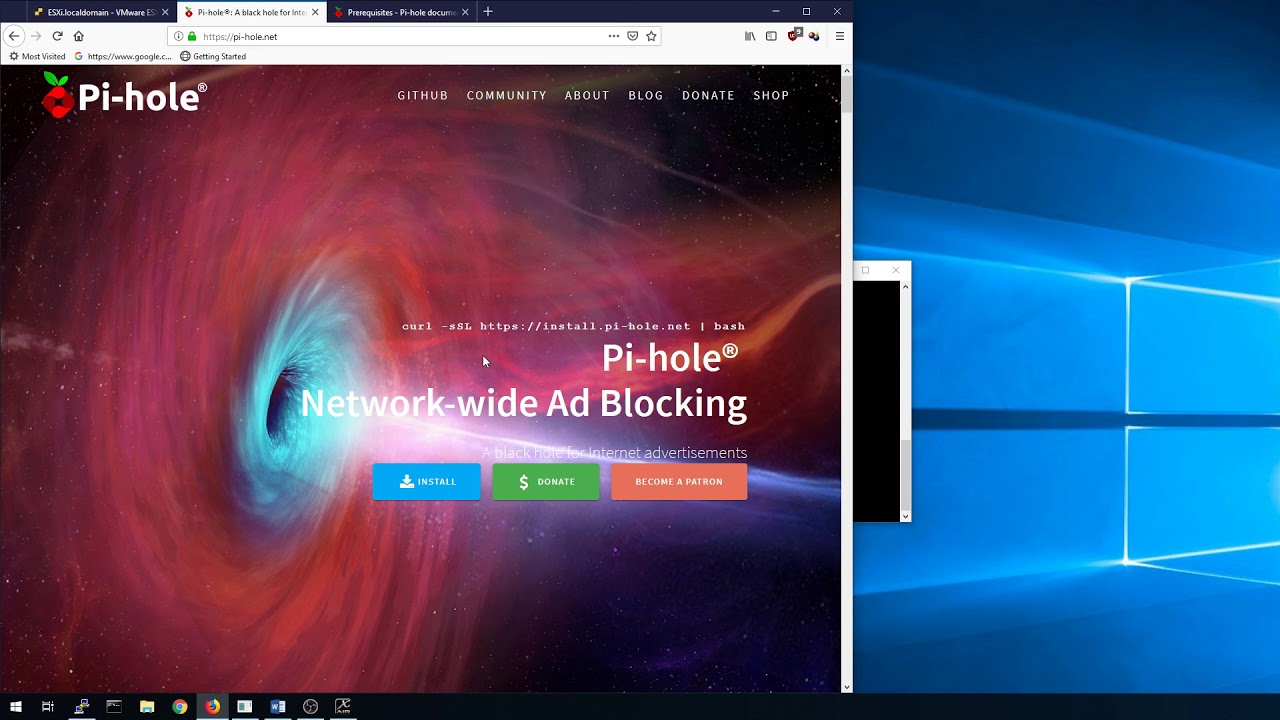
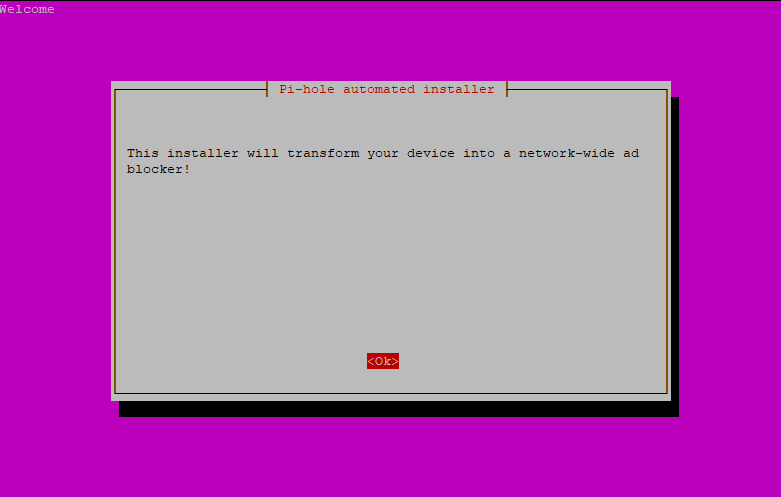
Now it’s time to run the pi-hole install script so just copy/paste the command in the gray box below. Yes, it is a single-lined command. That said, this is extremely dangerous if you are unsure of the source. I would recommend taking a peek at the code before you run it. This is easily done considering the address simply re-directs to “basic-install.sh” script on a GitHub repo. If you can’t read code, that’s ok… At the very least, look at the repo and see if the script has changed recently. If it has, you might consider waiting a few days or at least snoop around some forums to make sure the changes were “expected.”
Assuming you ran the command above as a standard user instead of root (or with sudo), you will get prompted for the user password again.
For the most part, you can select the defaults or simply hit “Ok” on most of the screens, however, I want to highlight a few items/recommendations. First, the pi-hole project is donation-based. Be sure to visit their donation page and keep the project going!
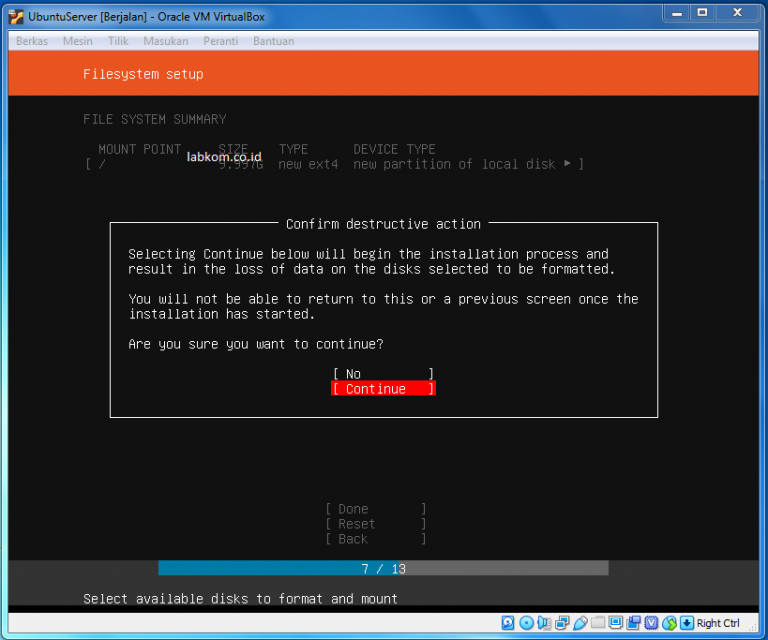
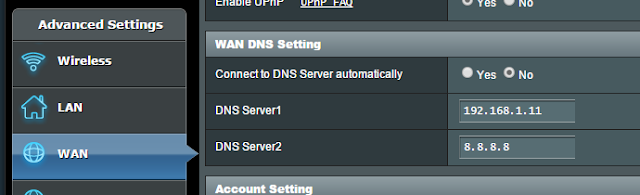
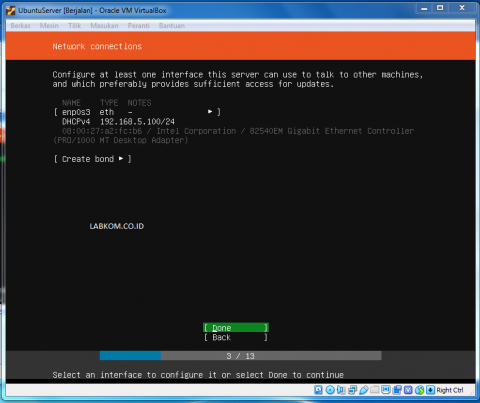
During the install, the pi-hole points out it is currently using a DHCP address instead of a static IP address. As stated in the picture below, using a static IP address is highly, highly recommended. Don’t forget that in most cases, you do not want your new static IP address in your current DHCP range. Instead, assign your pi-hole an IP address outside of your current DHCP pool. For instance, if your DHCP pool is 192.168.1.100-192.168.1.200 then you could safely assign your pi-hole 192.168.1.2 (assuming that IP address wasn’t already used).
I was an early adopter of Quad9 and I’m still very bullish on them. I’ve written several articles about Quad9 and configuring it on numerous devices. Long story short, Quad9 provides another layer of protection and that’s a good thing! For that reason, I would suggest selecting ‘Quad9 (filtered + ECS)’ as the upstream DNS provider when asked during the pi-hole install.
If you are curious about the different Quad9 options available, here you go. ‘Quad9 (filtered, DNSSEC)’ means we want to block malicious domains and we are protecting against forged DNS records by using DNSSEC. This option is tied to the Quad9 namesake – 9.9.9.9. ‘Quad9 (unfiltered, no DNSSEC)’, which is actually 9.9.9.10, means that we will *not* block malicious domains and we will *not* use DNSSEC. Last, we have ‘Quad 9 (filtered + ECS)’. Filtered is familiar, but what is ECS? ECS, also known as EDNS client subnet, is generally used to help speed up data from content delivery networks. Although not stated in the pi-hole menu, this option is based on 9.9.9.11. According to Quad9, this IP address supports all of the above — DNS encryption, DNSSEC, EDNS Client Subnet, and blocking malicious domains.
When asked which blacklists to use, make sure you de-select ‘hosts-file.net’ or you will receive an error when it attempts to download the file (below). You’ll also receive several ongoing errors because the list is no longer supported. If you accidentally added it and now you’re getting errors, refer to the section below on Removing hosts-file.net (ad_servers.txt).
The install will download At the installation complete screen, you should take note of your IP address (if you changed it) and also the randomly generated password. Beware of ones that look like lowercase l’s and zeros that look like uppercase O’s. If you can copy and paste it, I would strongly suggest it to avoid issues logging in! You can change the pi-hole web password as described in the section below.
Via the an SSH terminal or the console, type in “pihole -a -p” and hit enter. Type in your new password twice.
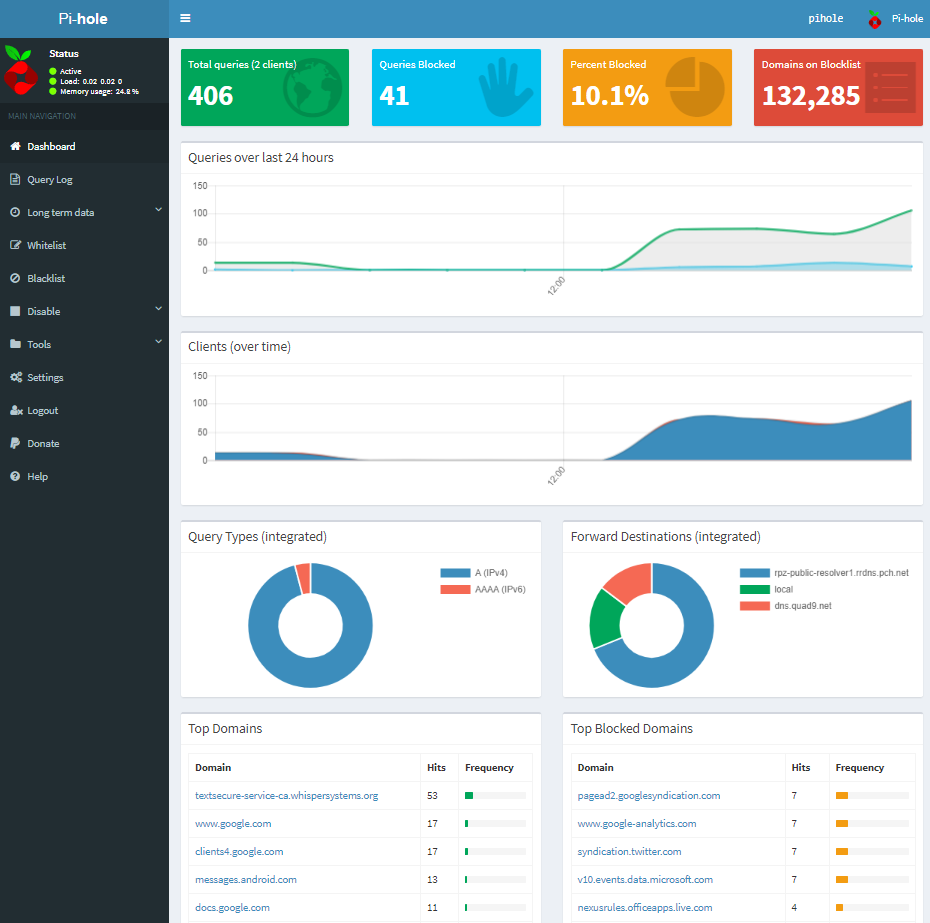
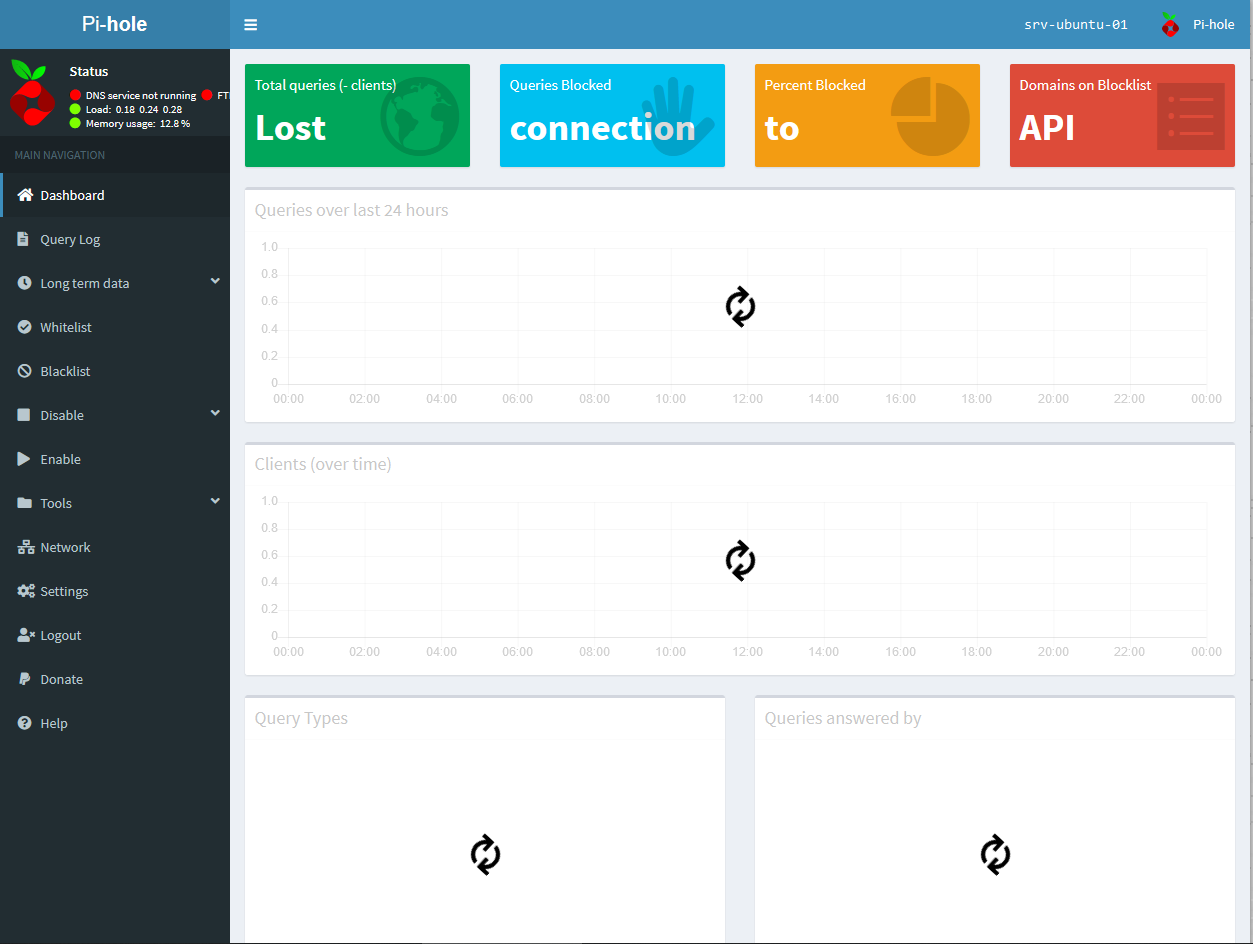
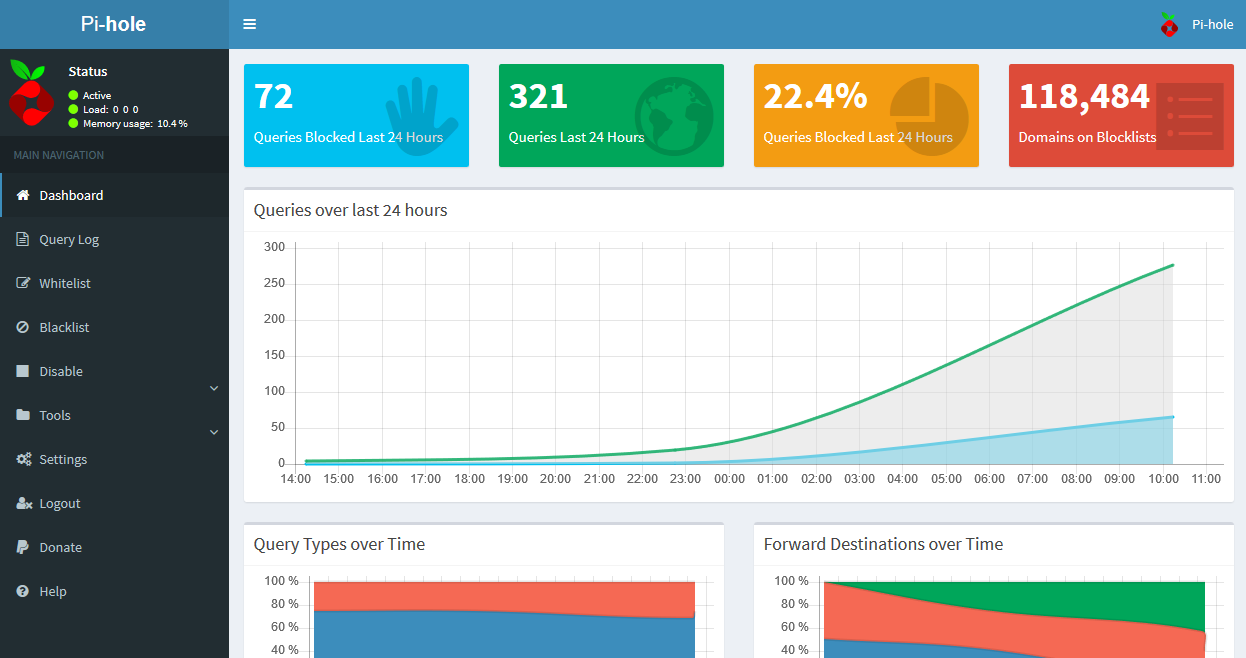
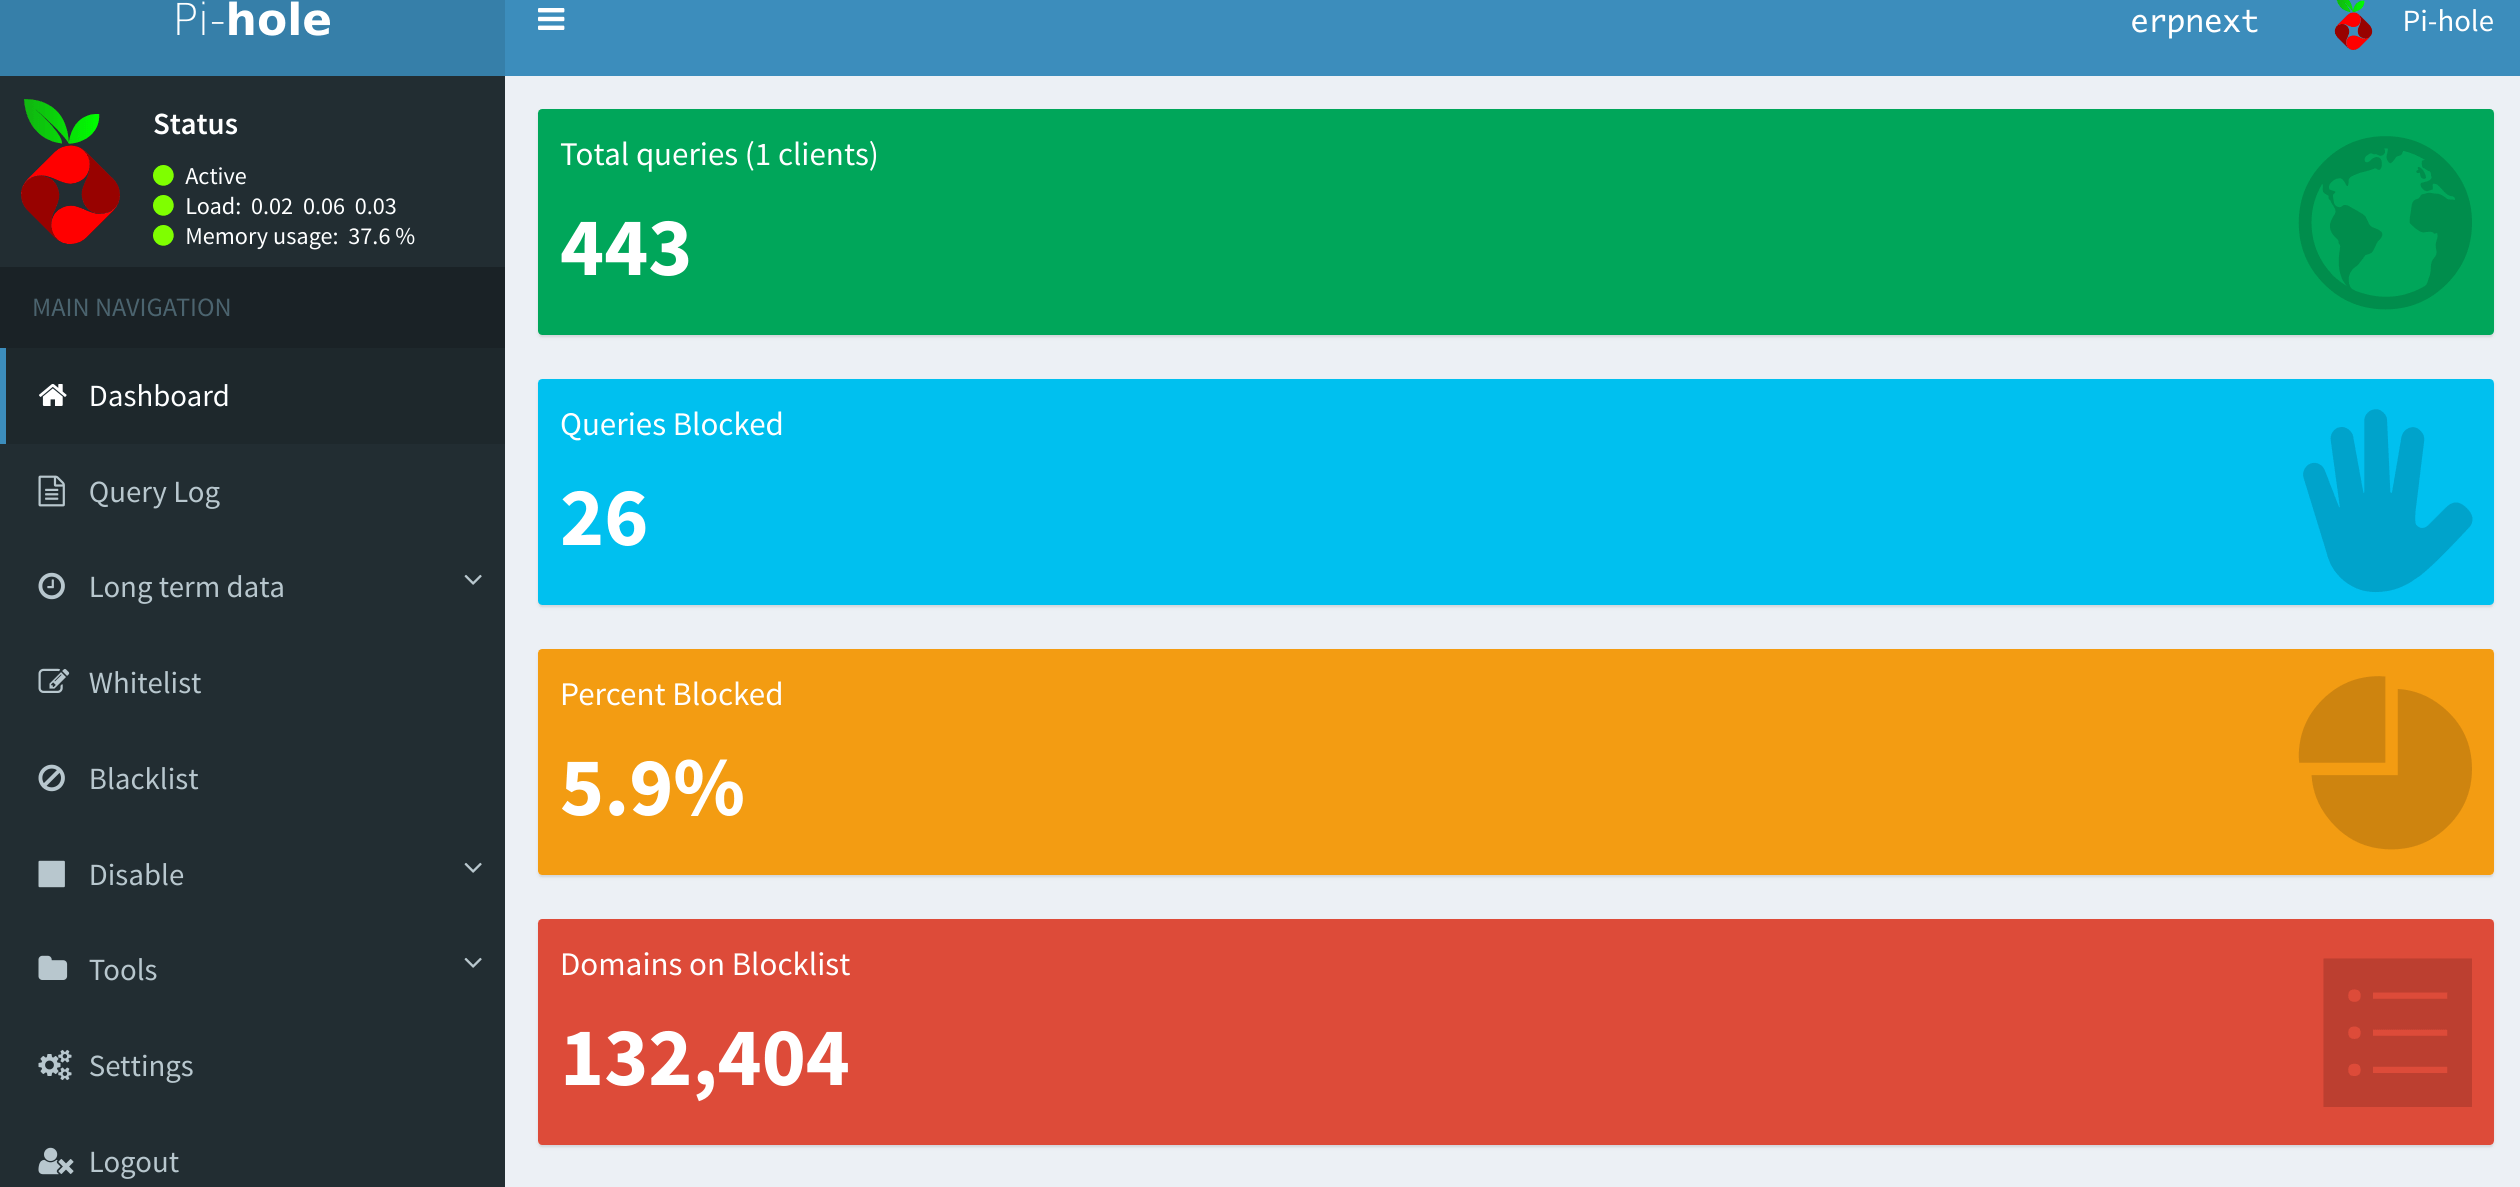
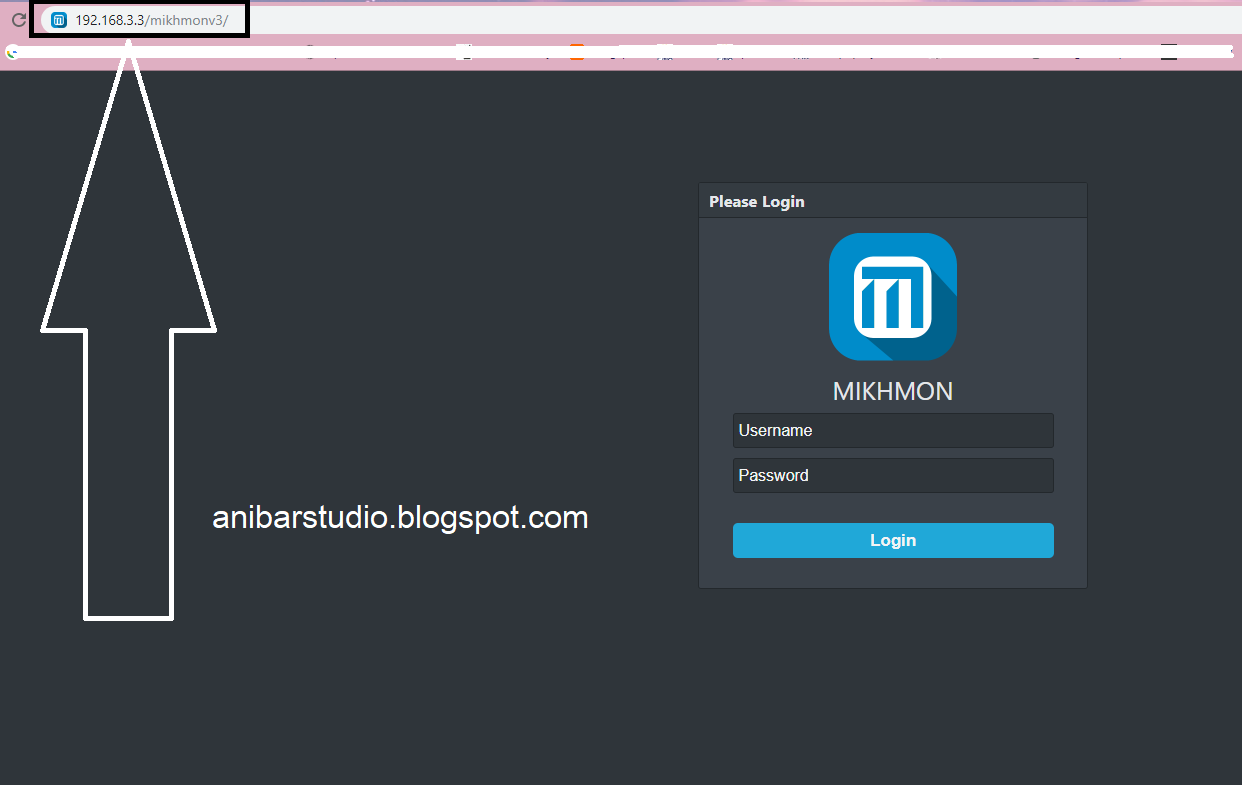
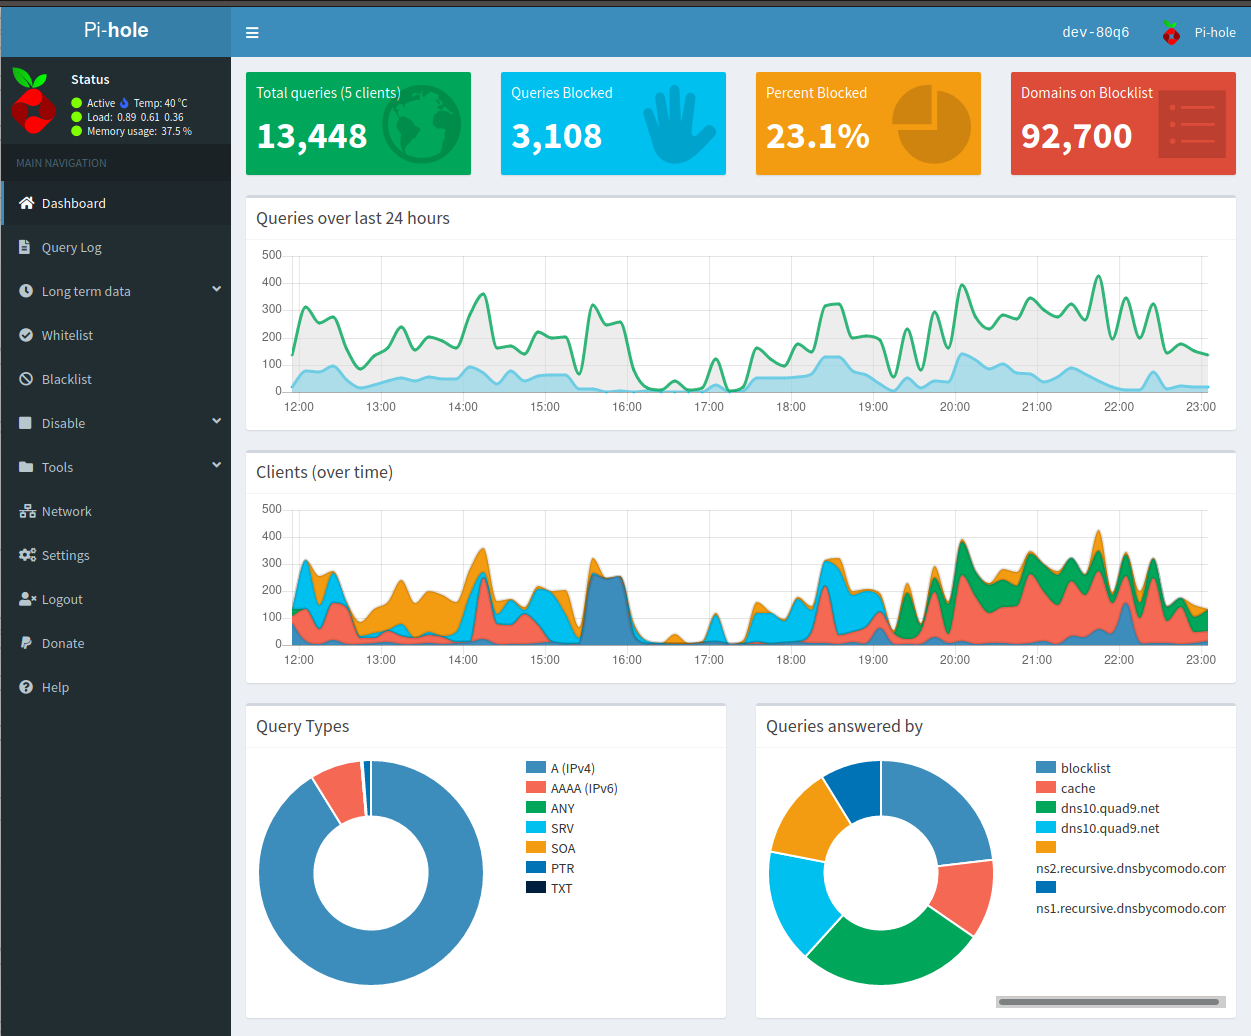
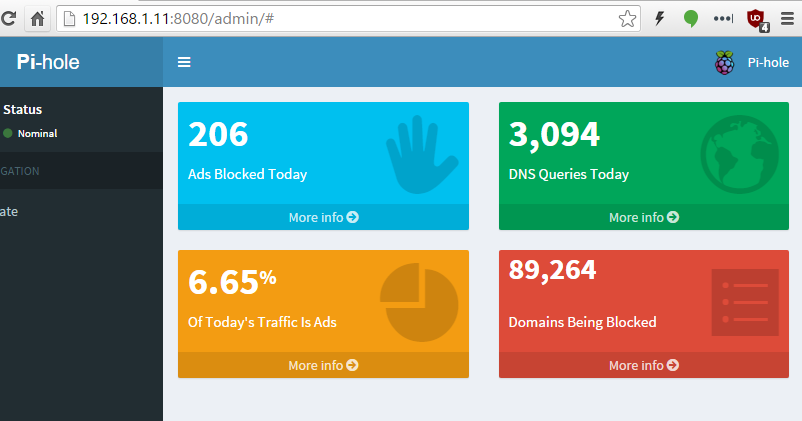
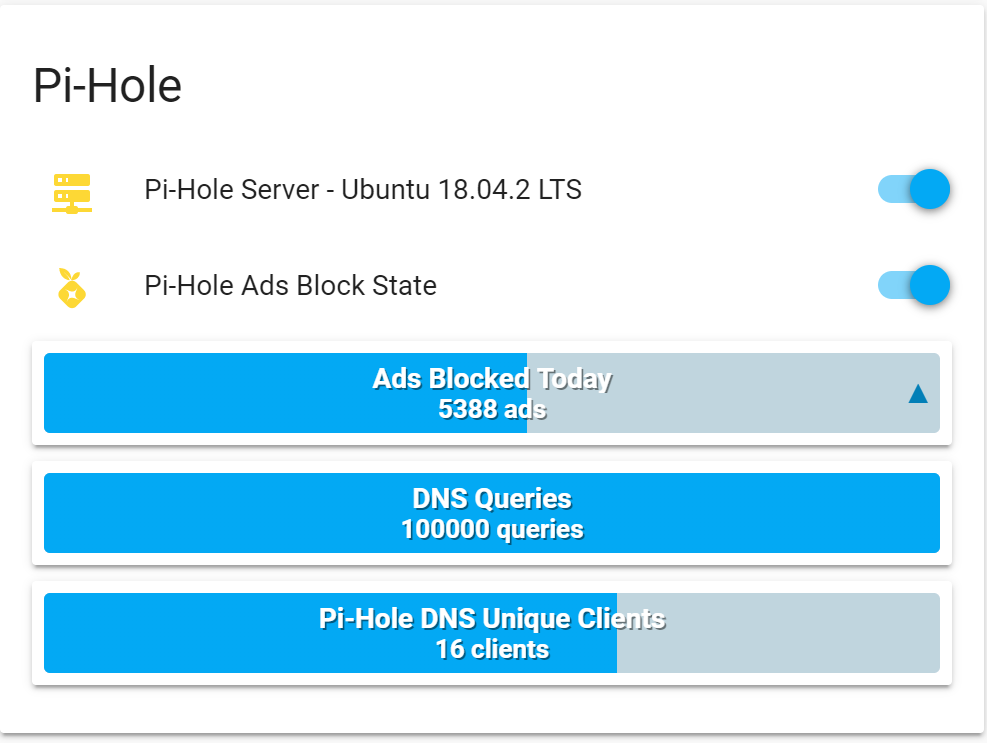
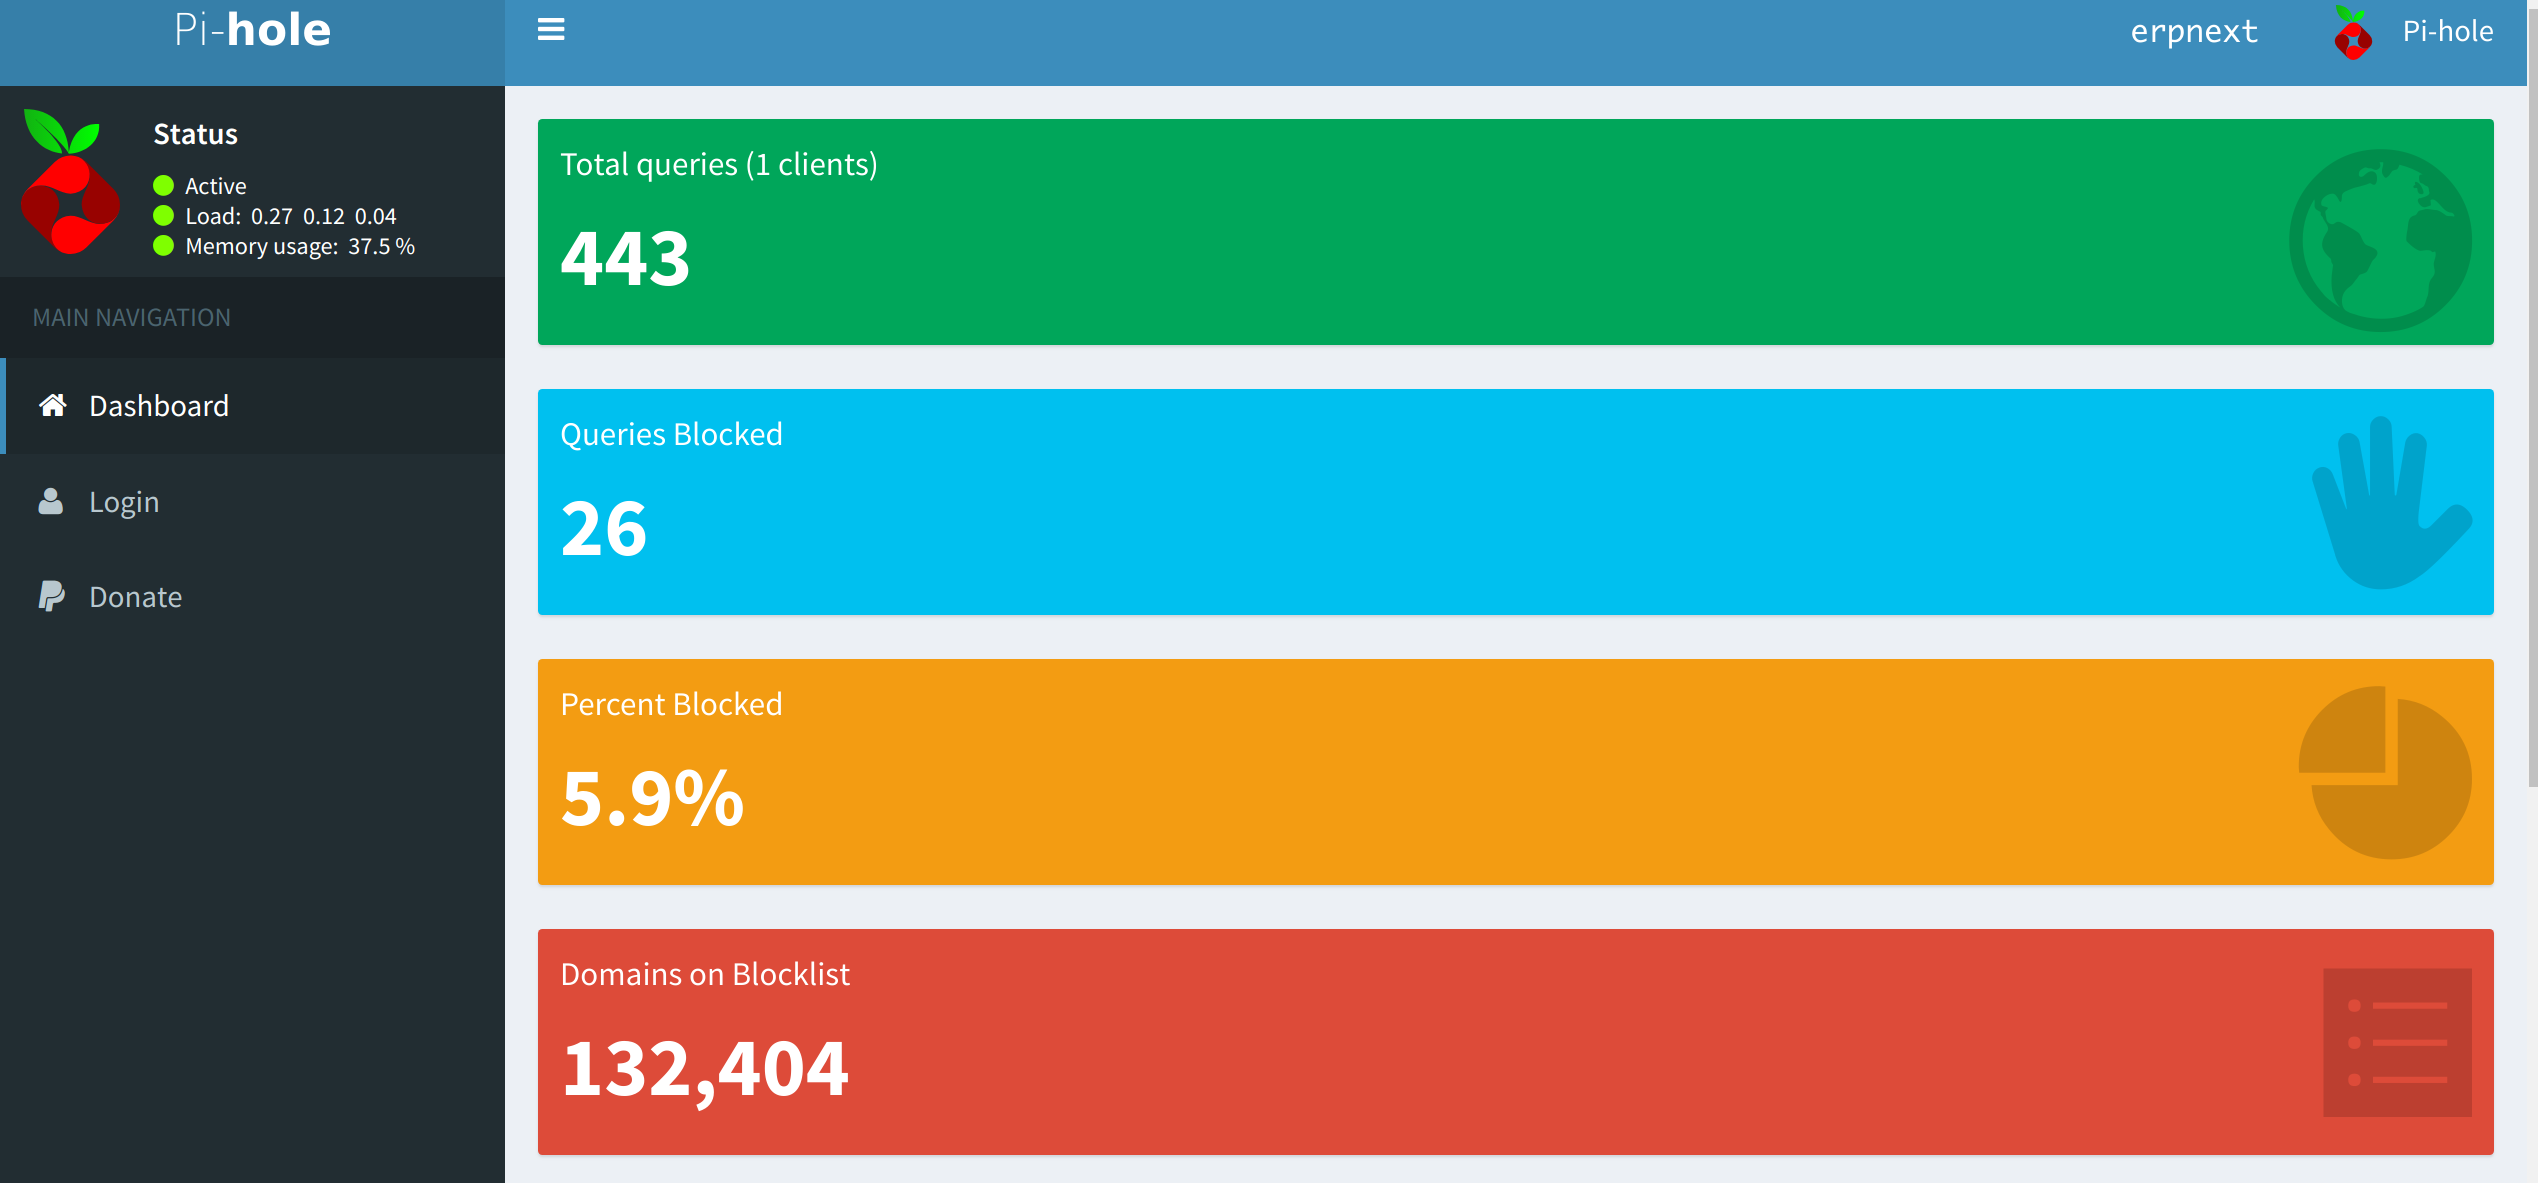
The pi-hole has a very friendly web interface to manage your device. Using your web browser, go to http:///admin and you should see a nice statistics screen as shown below. Click on ‘Login’ and either type in the password provided to you during install (or the password you changed to in the last section).
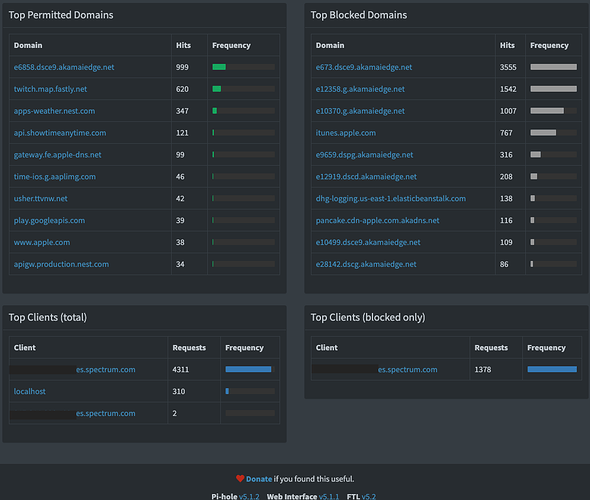
After you get some clients configured (described below), you can come back to the web admin interface and see how many domains are blocked along with quite a few other stats. The web interface is also where you can add other blacklists, whitelist domains, etc.
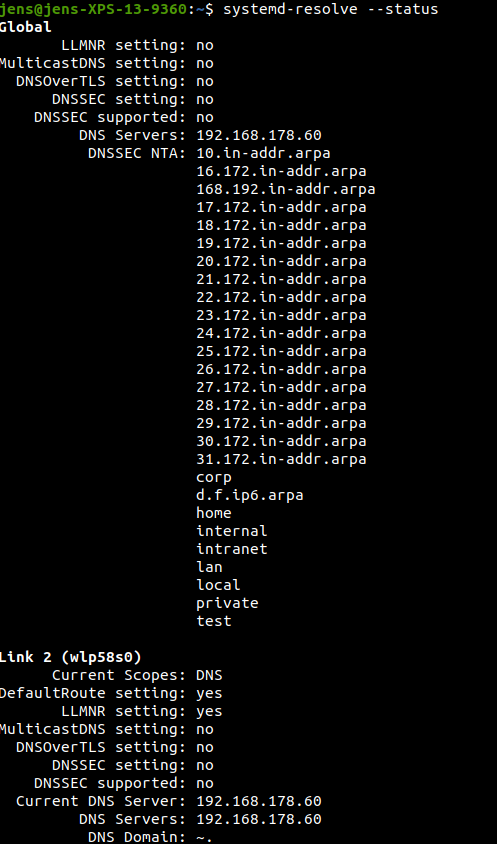
The easiest way to test whether your pi-hole is going to work is via a command line. I would strongly recommend testing before making the DHCP server or client changes below!
We can use the nslookup command from any machine on the network. The format of the nslookup command is the same whether on Linux or Windows — nslookup . In my test environment, the pi-hole is 192.168.1.2 and we are testing a well-known Yahoo advertising domain, analytics.yahoo.com. Instead of returning the actual IP address for analytics.yahoo.com, the pi-hole returns 0.0.0.0. This effectively blackholes the hostname via DNS so your system/browser is not able to access it. Note: the pi-hole used to use its own IP address, but this caused a slight timeout whereas 0.0.0.0 causes the connection to get dropped immediately.
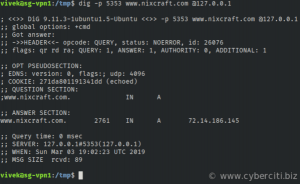
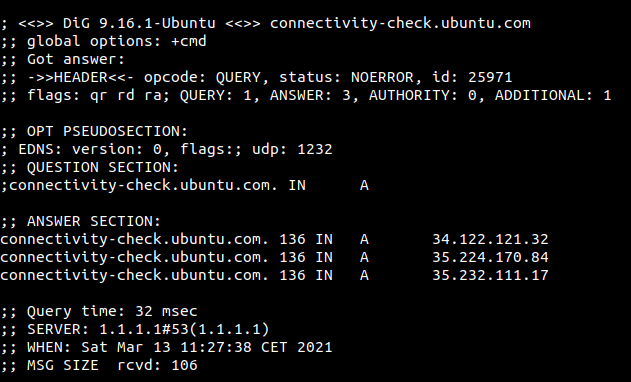
If we test against a domain that is not blocked, then we receive the actual external IP addresses for the hostname as shown below.
This part of the walkthrough will vary wildly because it changes from one environment to the next. If you can make a change at whatever device or server is handing out DHCP addresses (as shown in the Linksys picture below), then you should absolutely make the change there.
Note: If your system already resolved a domain name, then you may need to clear your local DNS cache, your browser cache, or both. To clear your machine’s cache, from a command line on Windows, type in ‘ipconfig /flushdns’ and that should take care of it. You can run a similar command on a Linux system, although the commands can vary from one installation to the next. More often than not, simply restarting your network interface will work; on most distributions, ‘service networking restart’ or ‘systemctl restart network’ should take care of it for you. Each browser has a slightly different way to clear the cache, however, all of them allow you to pull a new version of the website if you hold down “Shift” while clicking on the refresh/reload button.
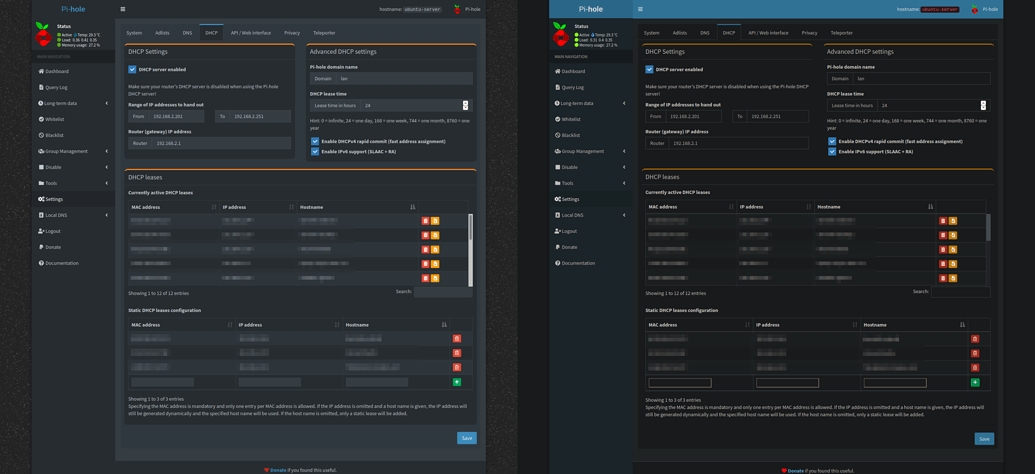
If you can’t make the change at the server or router/firewall for whatever reason, then you may need to make the change at each client. Changing each client is an issue if you have a number of IoT devices where you can’t even access the underlying configuration. If you have a number of devices, this would also be extremely cumbersome and quite honestly, it might be worth looking at swapping out equipment. Alternatively, you could also disable the current DHCP server entirely and instead enable the DHCP server on the pi-hole (also via the web interface). If you go the pi-hole DHCP server route, make sure you disable the other DHCP server so you don’t have two servers on the same network.
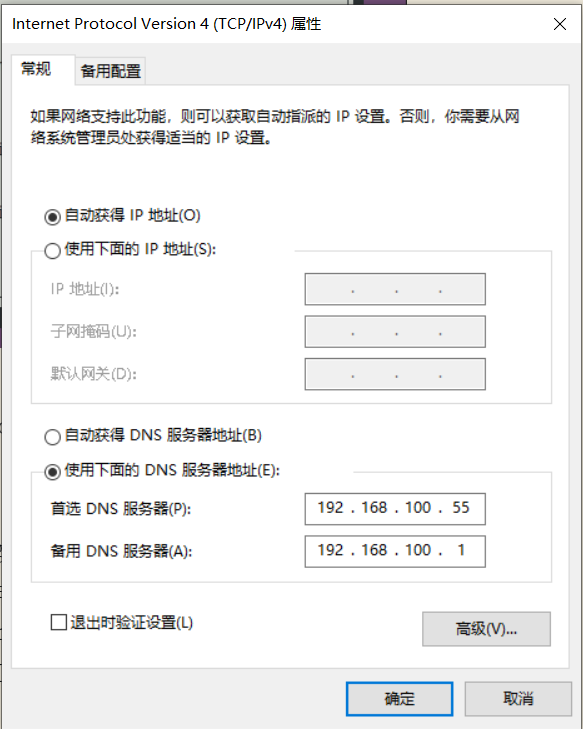
If the client is the route you want to go and I haven’t talked you out of it… On Windows, go to control panel and drill into your network adapter settings as shown below.
So what does the finished product look like? On many sites like YouTube, you’ll see empty space or a gray box where an ad normally would have been. A browser add-on like uBlock Origin (discussed below) further cleans this up by removing the gray box entirely and it also provides some secondary protections. If you visit Yahoo.com (why? seriously, find a new news site), our pi-hole configuration eliminates the wasteland of ads that you normally see as well (red box below). Many sites will look similar to this with vast regions of white space where ads normally would show and don’t be surprised to find ads intermingled with news on many sites. <- In advertising, it’s all about improving that click through ratio (CTR)!
Host-file.net appears to be gone for good despite its popularity. Malwarebytes, in their infinite wisdom have discontinued its support. Meanwhile, they are continuing to dissolve any shred of value their brand has/had. At any rate, to remove the hosts-file.net from your blocklists, log into your pi-hole, then go to Settings -> Blocklists. De-select the checkbox next to hosts-file.net and then click ‘Save and Update’.
I constantly preach defense-in-depth and this is no different. Aside from using pi-hole or other DNS blackholing defenses, I would also strongly suggest using uBlock Origin on all of your browsers. uBlock Origin exists for Chrome, Firefox, etc. so there really isn’t a reason not to have it! While nothing is foolproof, it is another fantastic addition to your overall security.
D
Machine Fuck Porn Videos
Facesitting Rita Video
Retro Erotic Film Ru
Before Mom Comes Plz
Pubg Mobile Private Hack
Installing pi-hole on Ubuntu 18.04 LTS - Linux Included
How to Install Pi-Hole on Ubuntu (Beginner’s Guide ...
Install PiHole on Ubuntu 20.04 - Linux Windows and android ...
Installing Pi Hole on Ubuntu (for Raspberry Pi)
How To Install and Setup Pi-Hole On Ubuntu and RaspberryPi ...
How to Install Pi-hole Ubuntu 20.04 - Unixcop
How to update & upgrade Pi-hole easily on Linux with ...
How to Setup Wireguard + Pi-hole on Debian 10 / Ubuntu 18 ...
Pi Hole Ubuntu