Pi Hole Synology

👉🏻👉🏻👉🏻 ALL INFORMATION CLICK HERE 👈🏻👈🏻👈🏻
13 August 202115 June 2021 by Marius Bogdan Lixandru
Pi-Hole is a Linux network-level advertisement and Internet tracker blocking application which acts as a DNS sinkhole (and, optionally, a DHCP server), intended for use on a private network. What is a DNS sinkhole? A DNS sinkhole, also known as a sinkhole server, Internet sinkhole, or Blackhole DNS is a DNS server that gives out false information, to prevent the use of a domain name. It is designed for use on embedded devices with network capability, such as the Raspberry Pi, but it can be used on other machines running Linux like Synology NAS and cloud implementations. Pi-Hole has the ability to block traditional website adverts as well as adverts in unconventional places, such as smart TVs and mobile operating system adverts.
I’m not a fan of applications like Pi-hole because Ad blocking software is leading to ‘the slow death of niches’ like my website. Ad blockers are white flagging Google, Amazon, Facebook and other Internet giants, but what about the small and medium publishers whose livelihood depends on ad revenues? Where is the morality in this? Anyway, see below my step by step guide on how to install Pi-Hole on your Synology NAS device. If you prefer AdGuard over Pi-Hole read my step by step guide on How to install AdGuard on your Synology NAS using docker.
Note: This guide works perfectly with the latest version of Pi-Hole 5.3.1 and DSM 7
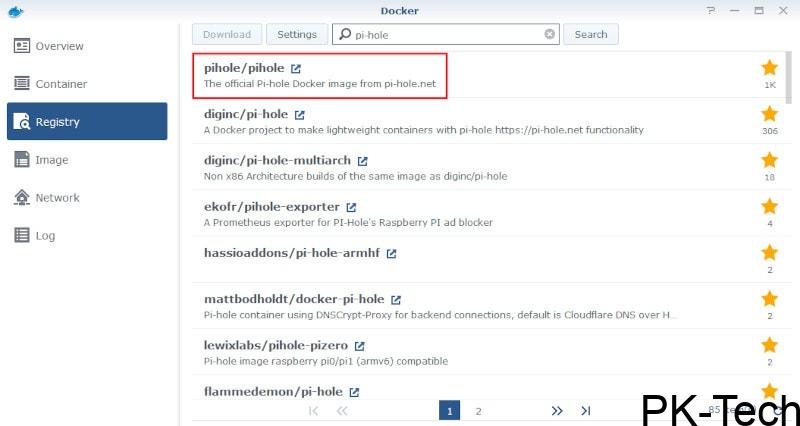
Install Docker via Synology “Package Center”.
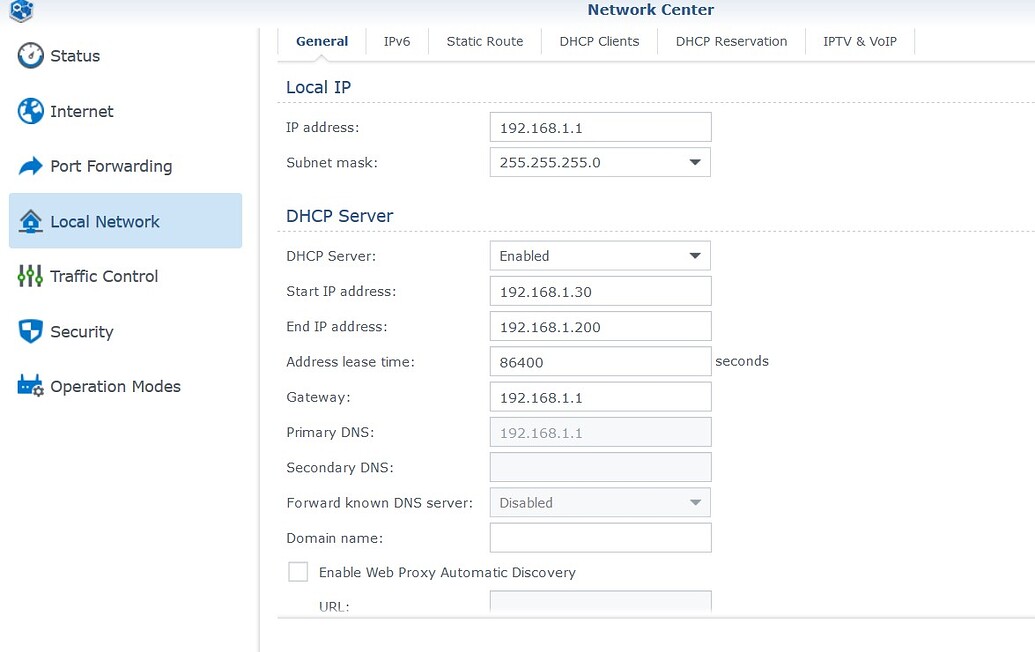
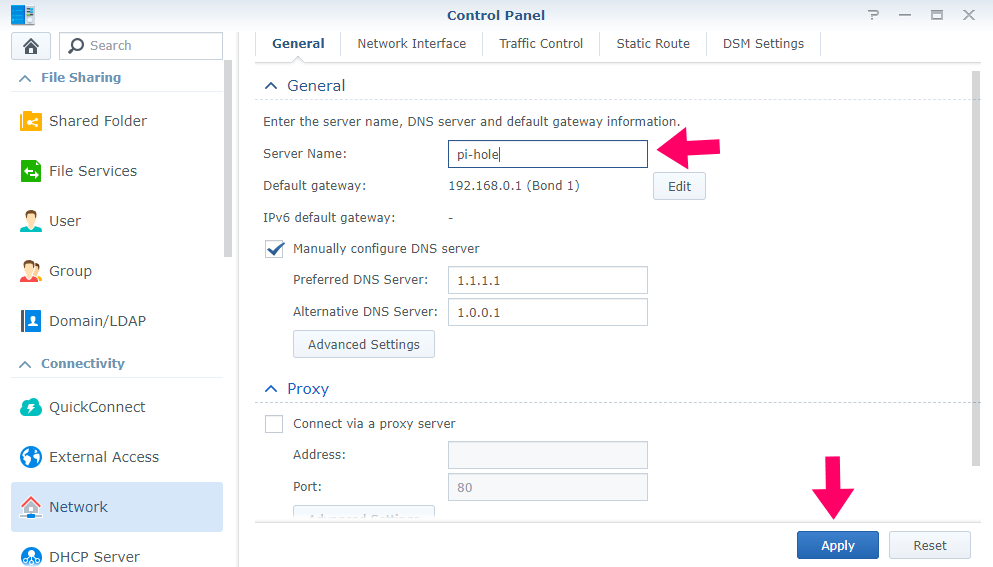
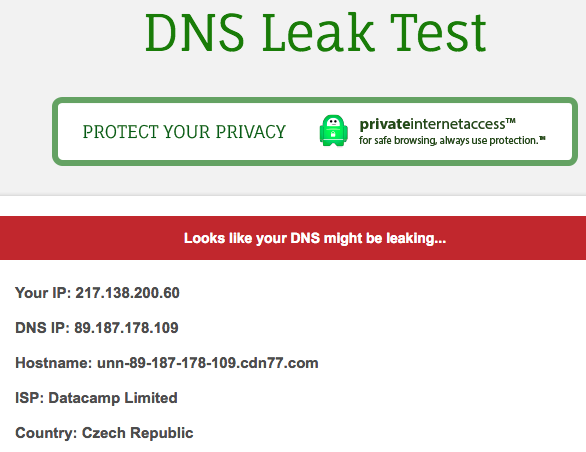
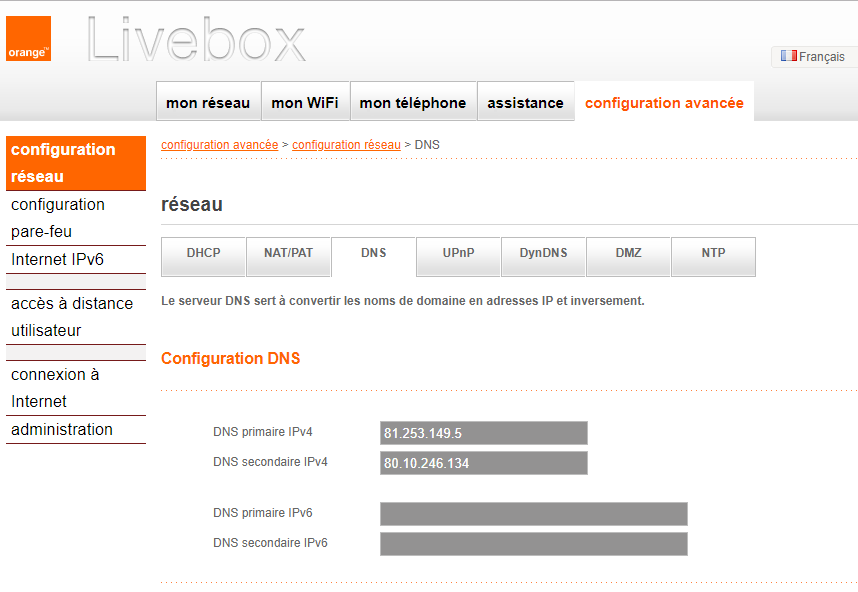
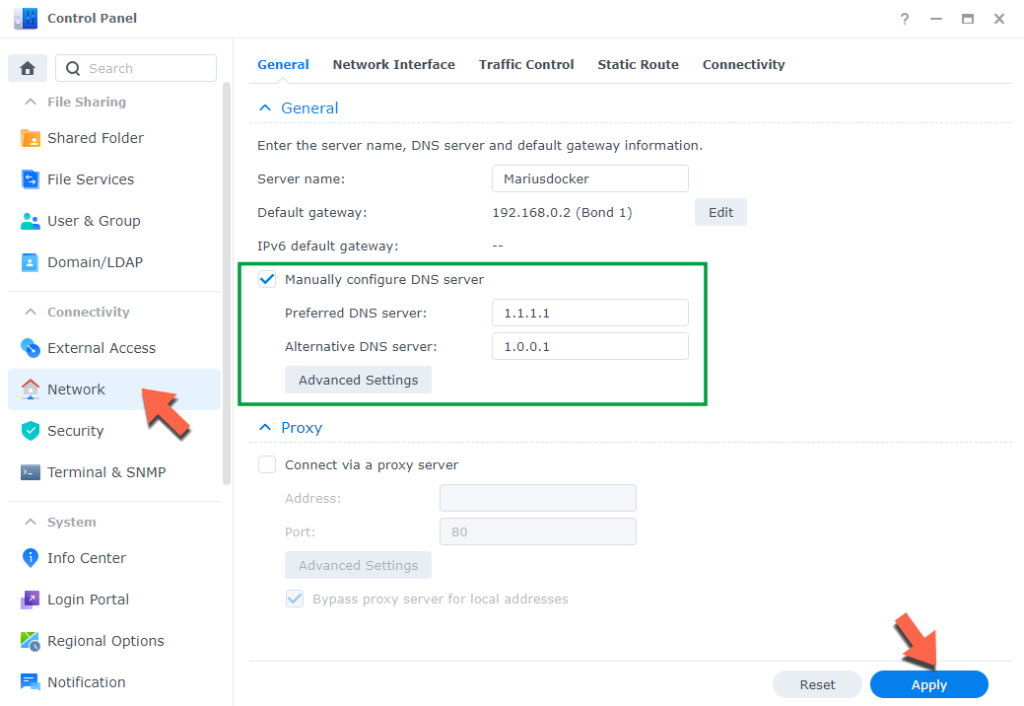
Add Google DNS. Go to Control Panel / Network / General. Check “Manually configure DNS server” and add on Preferred DNS Server: 8.8.8.8 and on Alternative DNS Server: 8.8.4.4 Click Apply. Follow the instructions in the image below.
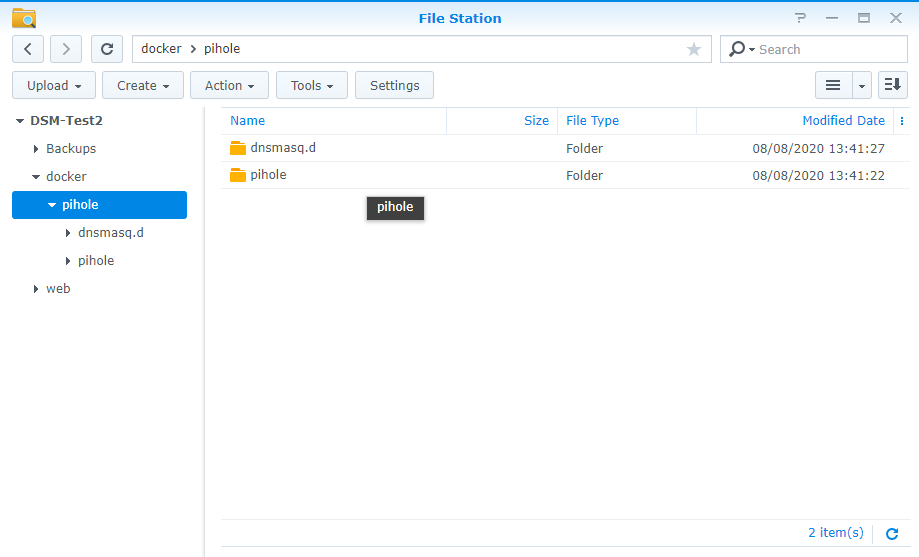
Go to File Station and open the docker folder. Inside the docker folder, create one new folder and name it pihole. Follow the instructions in the image below.
Note: Be careful to enter only lowercase, not uppercase letters.
Now create two new folders inside the pihole folder that you created at STEP 4 name one “pihole” and the other “dnsmasq.d“. Follow the instructions in the image below.
Note: Be careful enter only lowercase, not uppercase letters.
Go to Control Panel / Task Scheduler / Create / Scheduled Task / User-defined script. Follow the instructions in the image below.
Once you click on User-defined script a new window will open. Follow the instructions below:
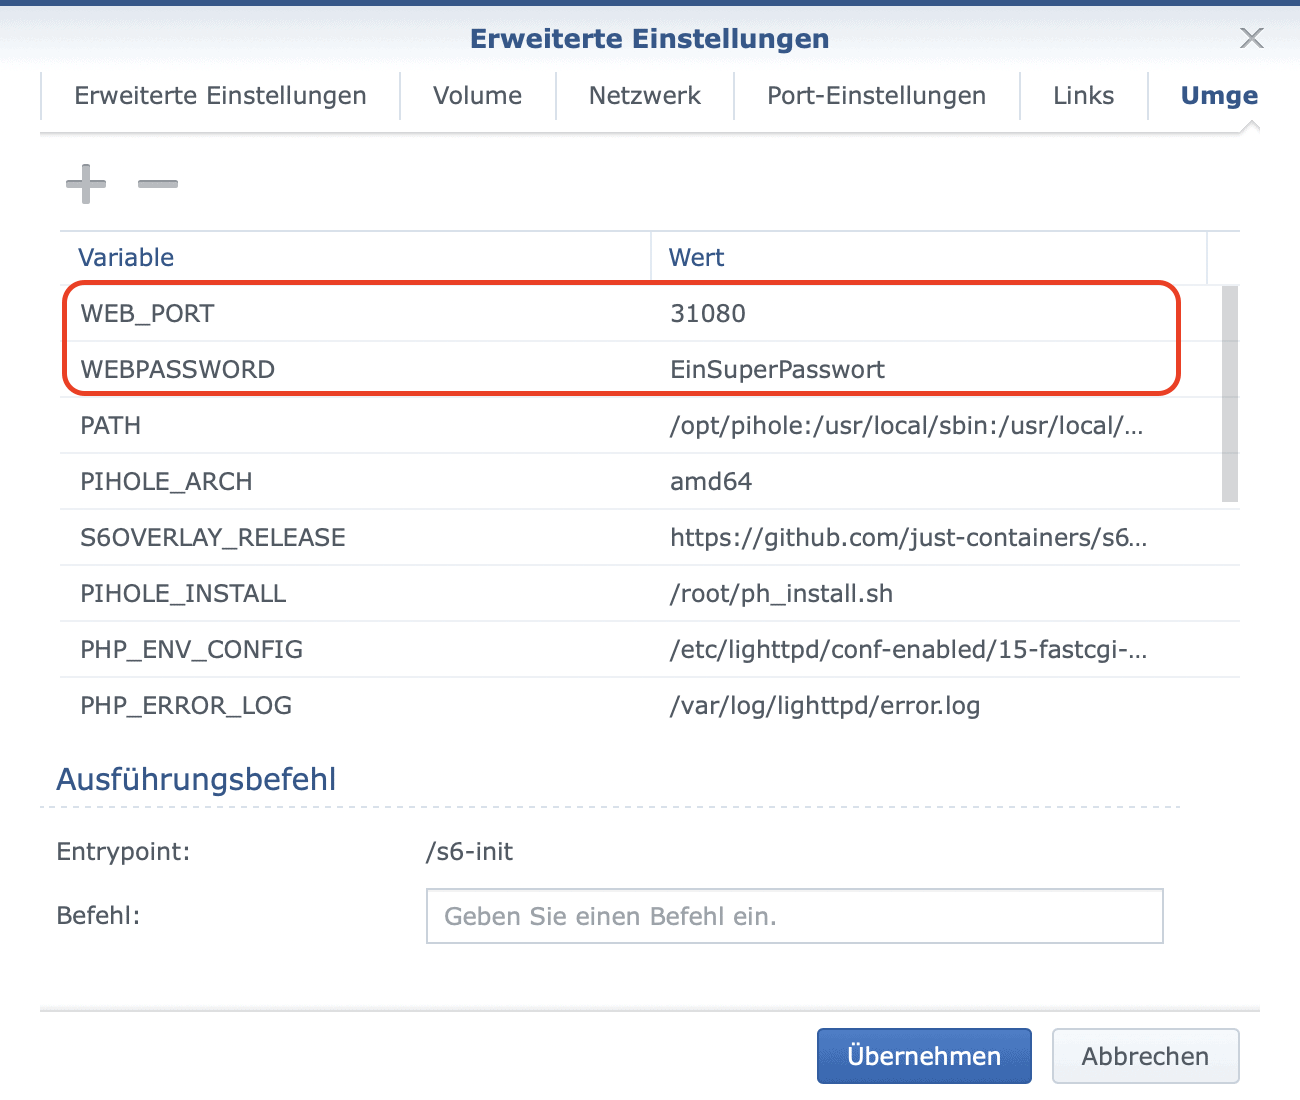
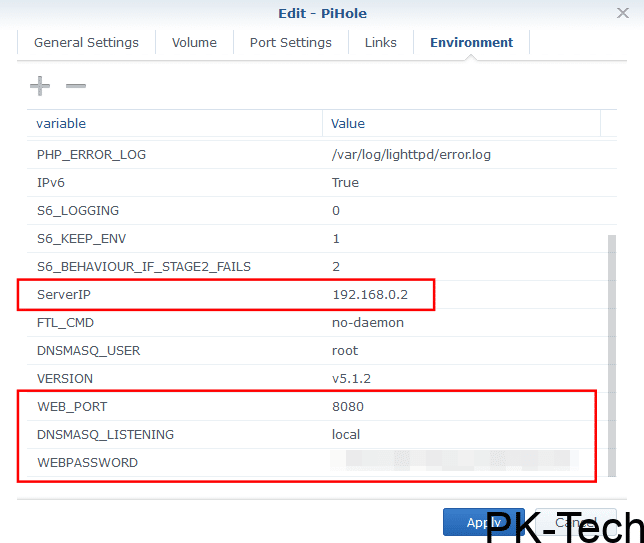
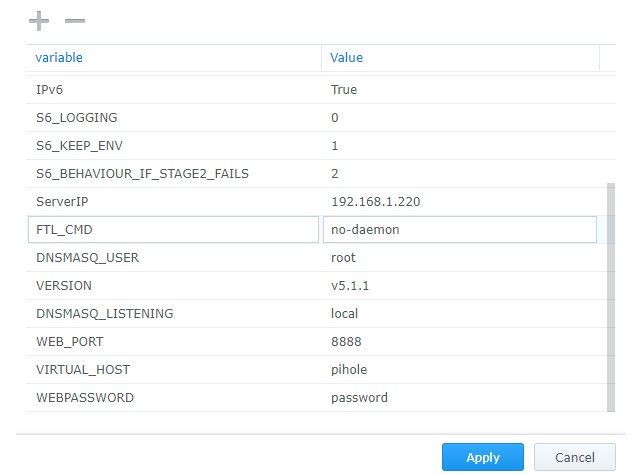
Note: Before you paste the code above in the Run command area, change the value for WEBPASSWORD and add your own password.
Note: Before you paste the code above in the Run command area, change the value for ServerIP and add your own Synology NAS Local LAN IP.
After you click OK on STEP 7 a new warning pop up window will open. Click OK.
After you click OK on STEP 8, select your “Install Pi-hole” Task then click the “Run” tab. You will be asked to run Install Pi-hole – click Yes. Follow the instructions in the image below.
Go back to STEP 1 or you will deal with karma 🙂
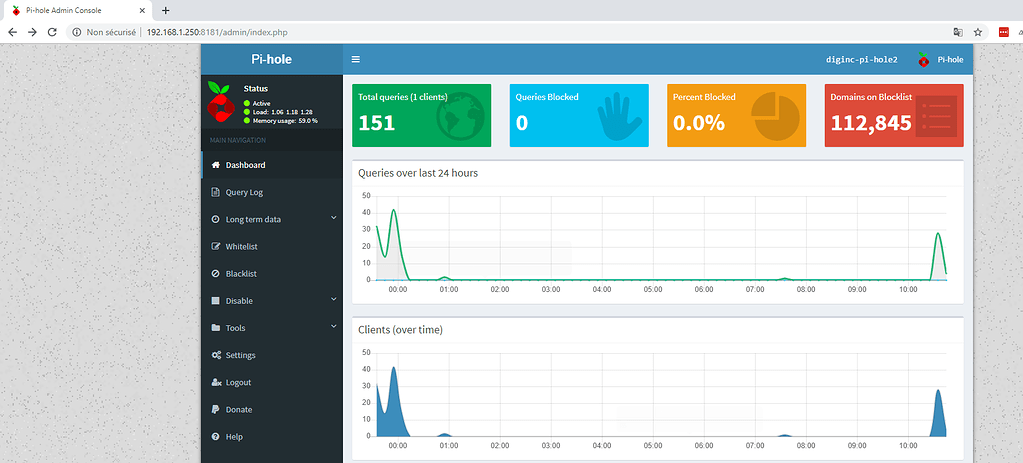
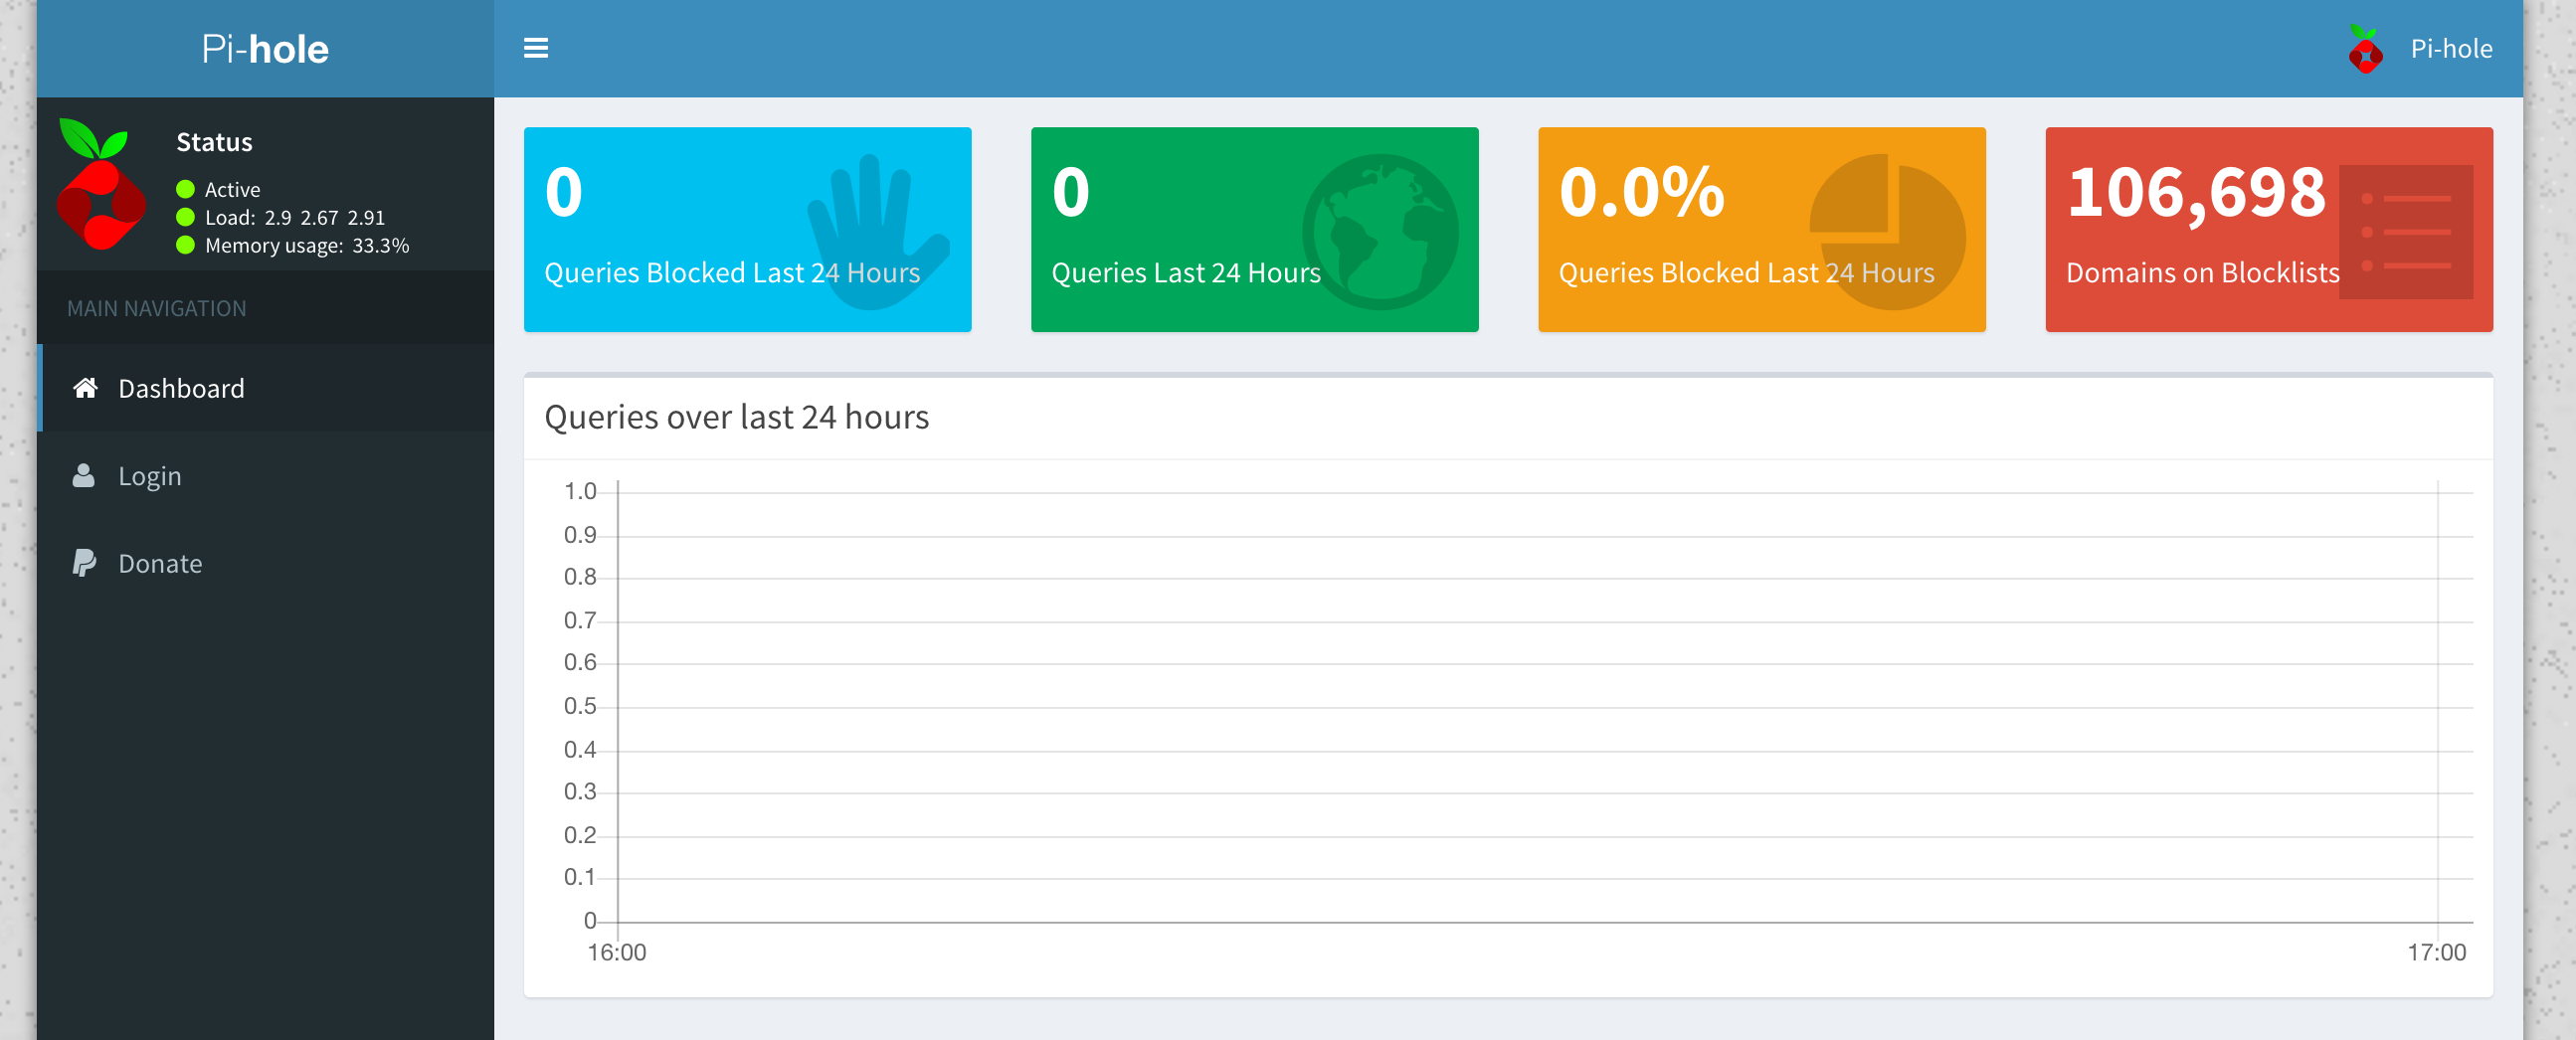
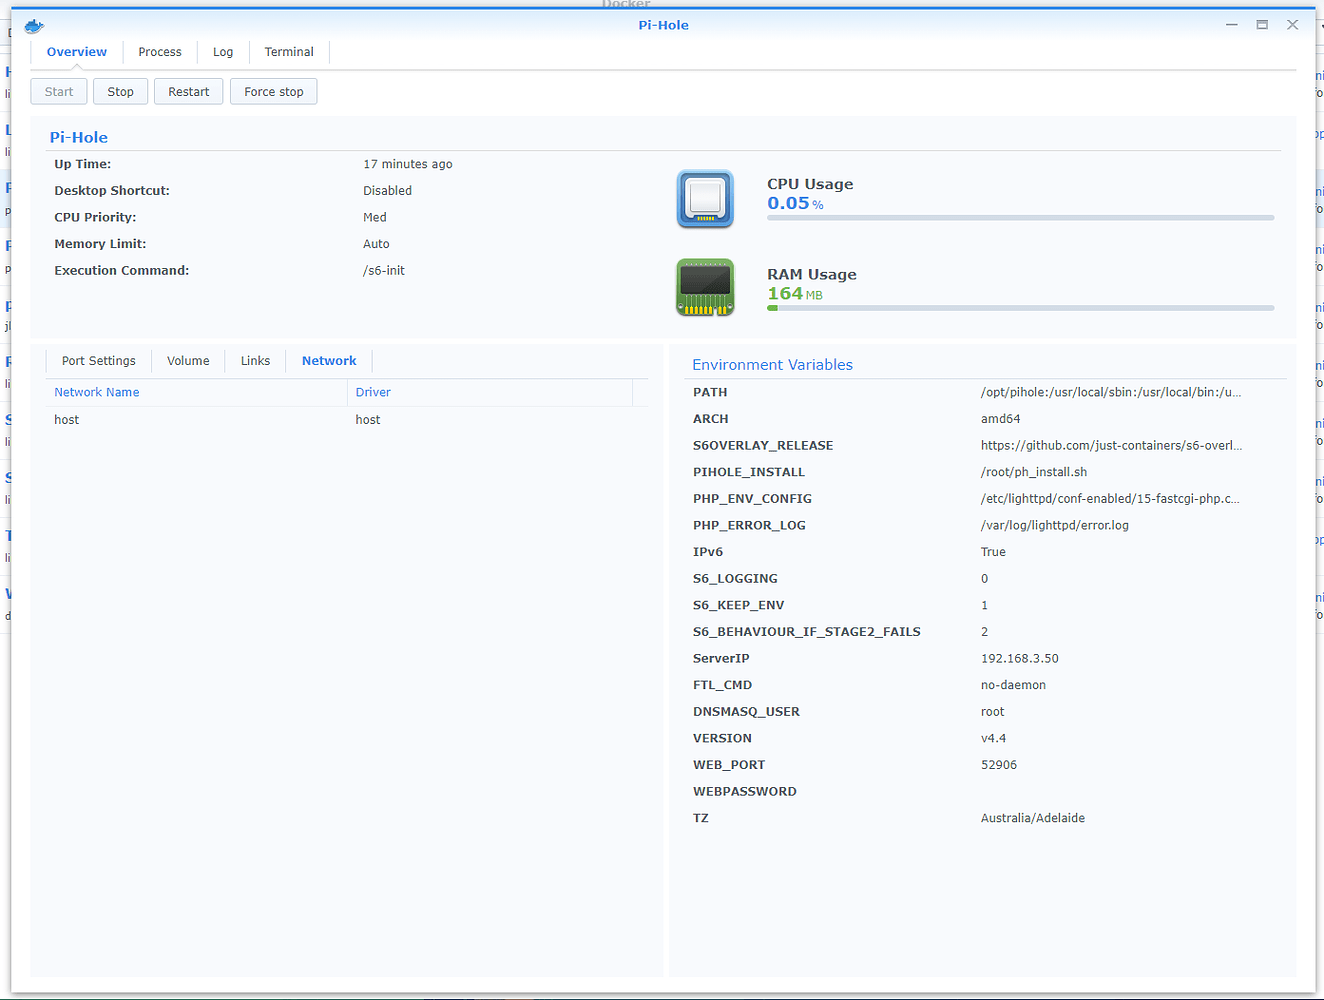
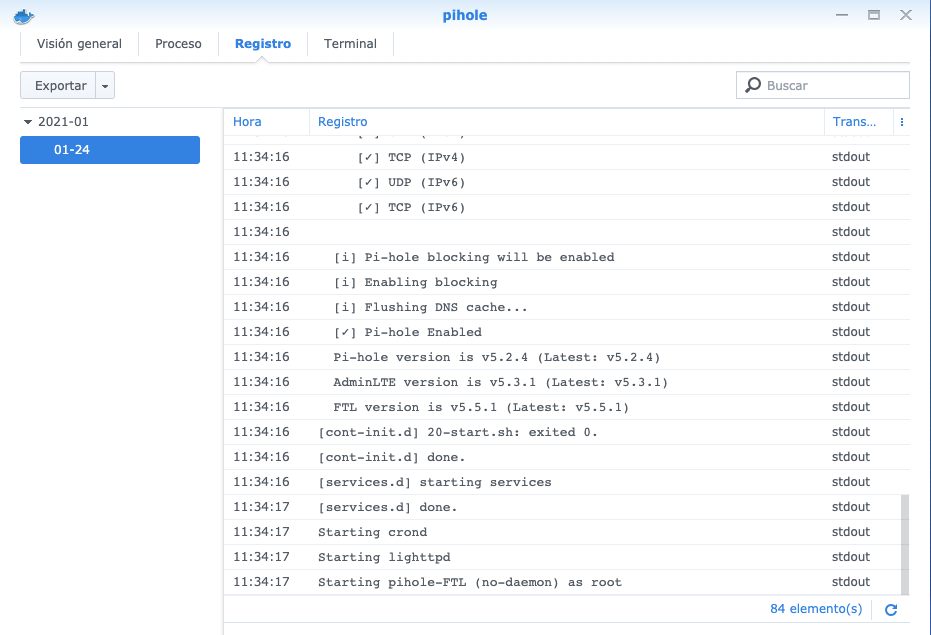
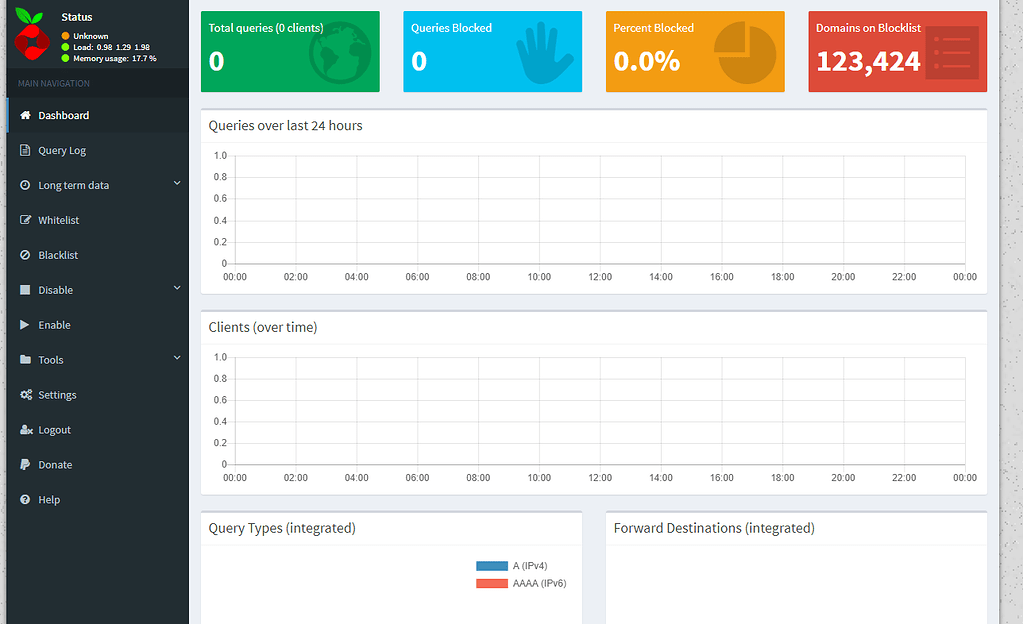
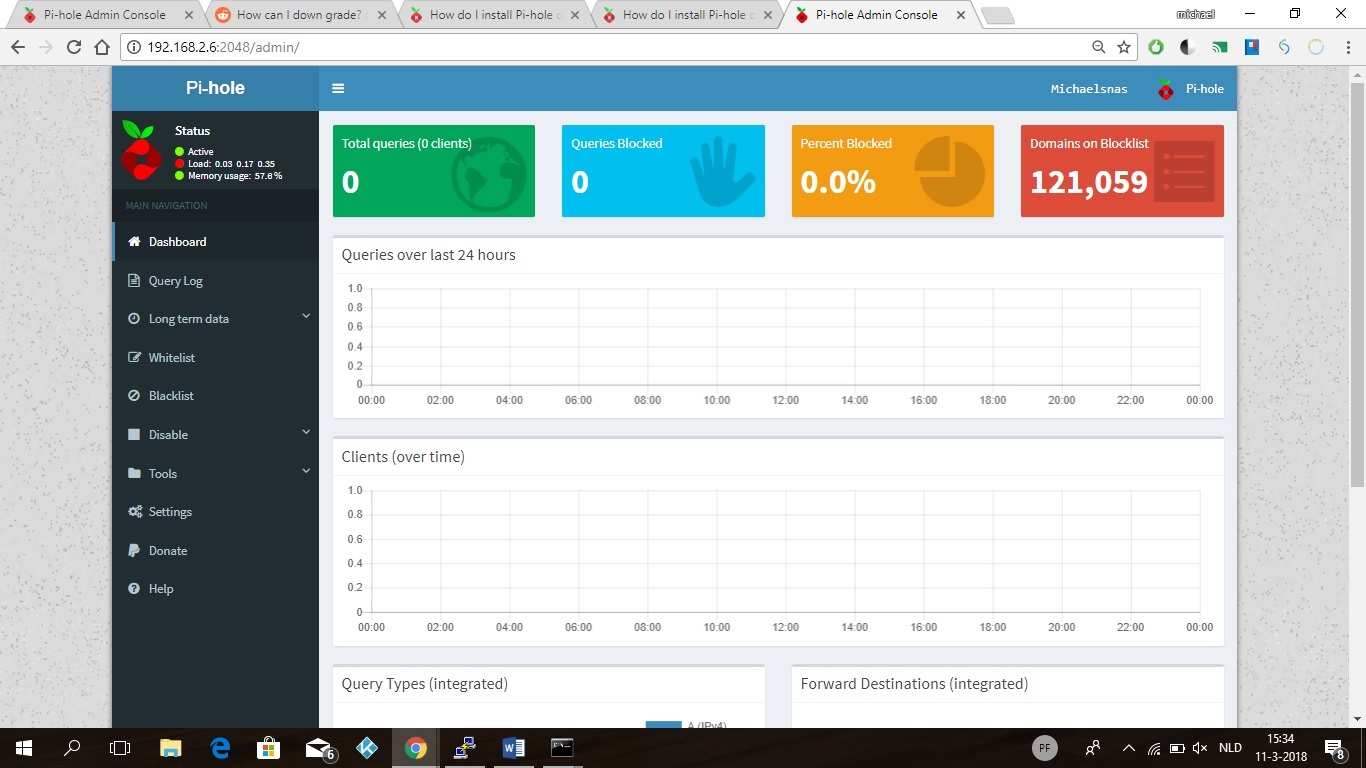
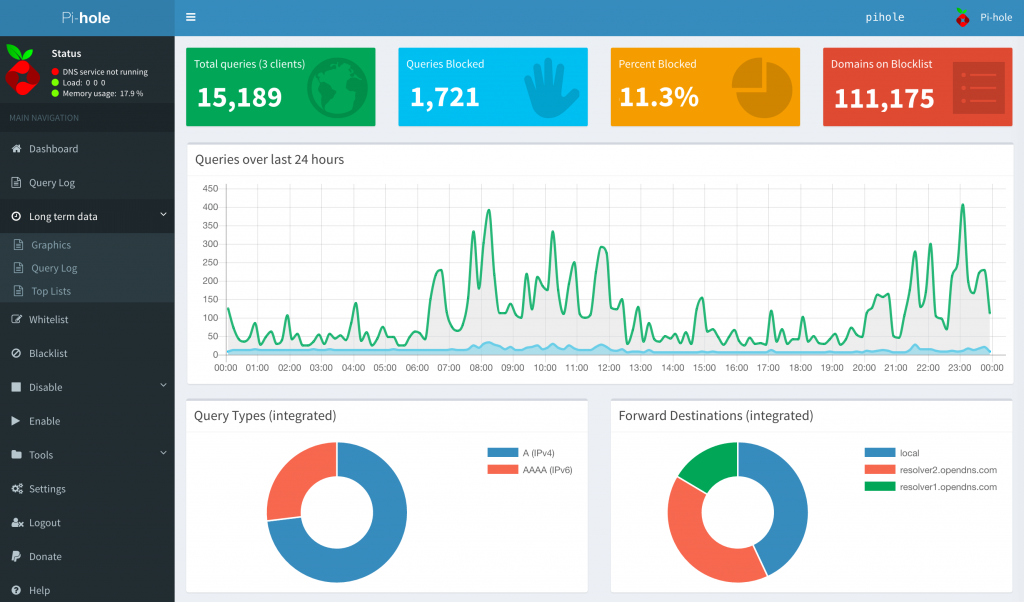
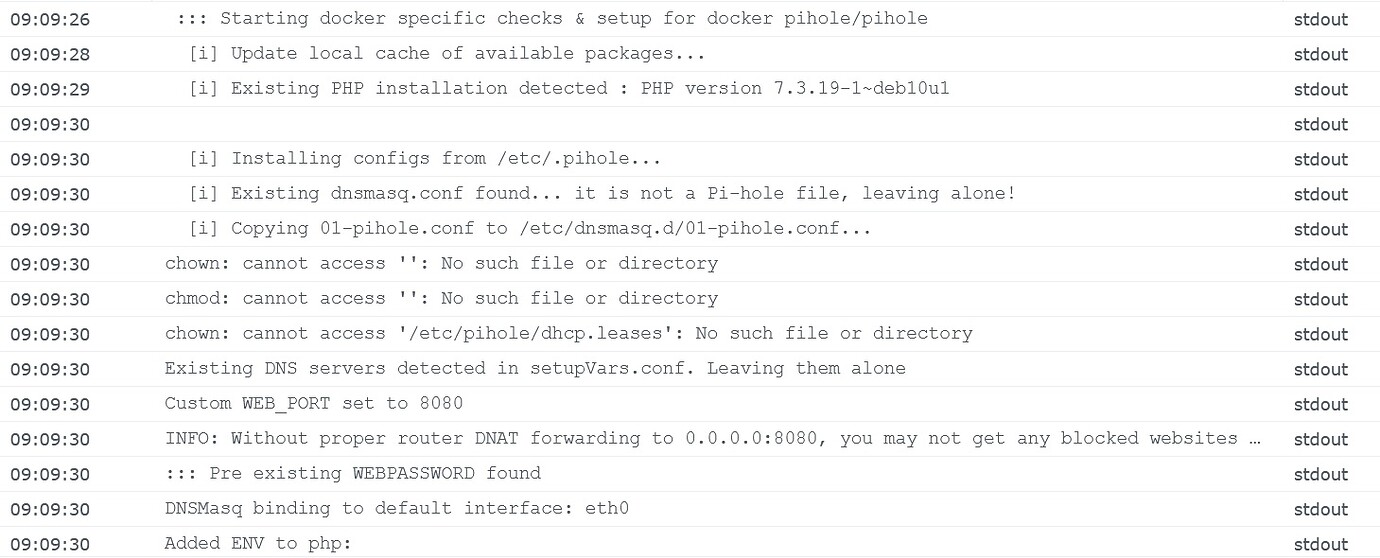
The installation process can take up to a few seconds/minutes. It will depend on your Internet speed connection. Now open your browser and type in http://Synology-ip-address:8080/admin/ on the left sidebar click Login. Follow the instructions in the image below.
Type in the password you have previously created at STEP 7. Click Log in. Follow the instructions in the image below.
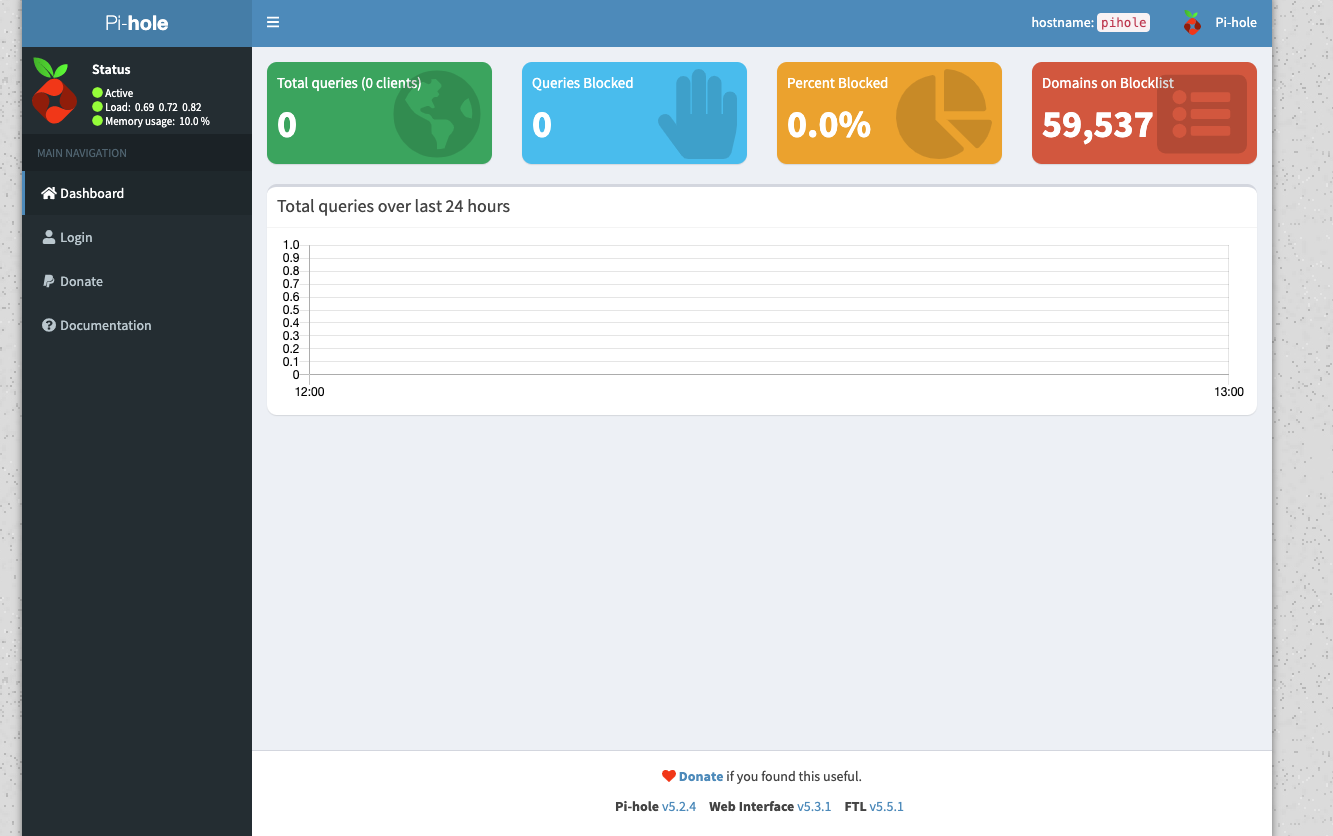
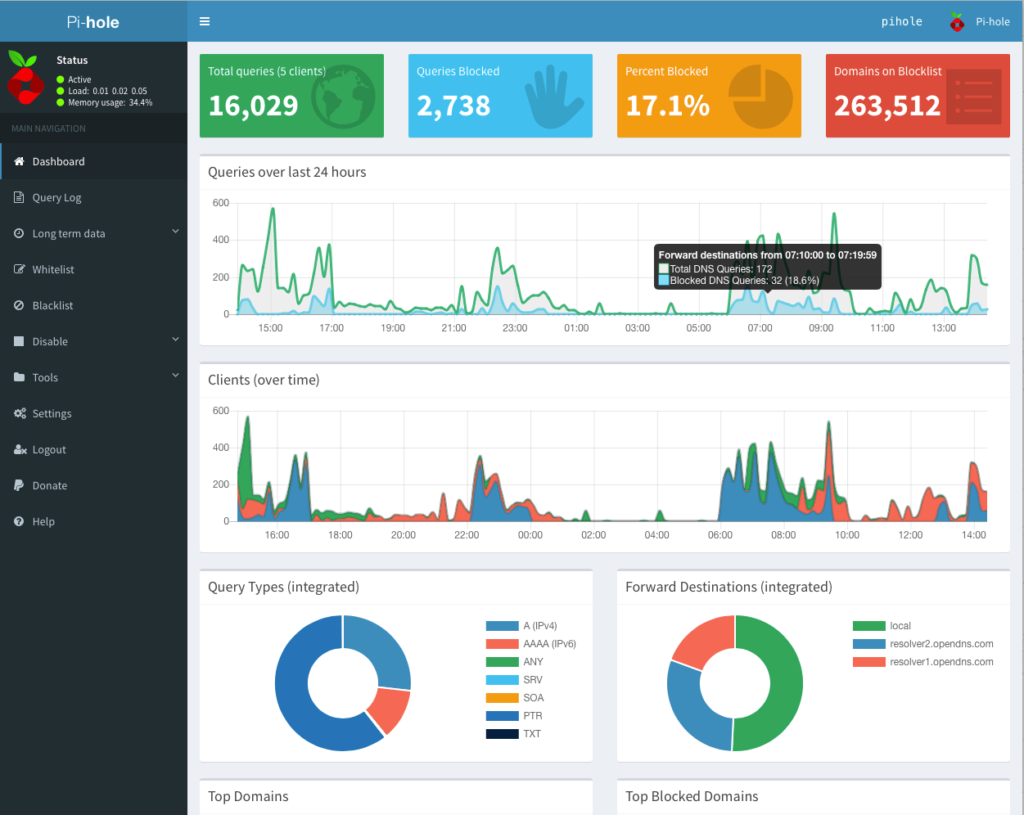
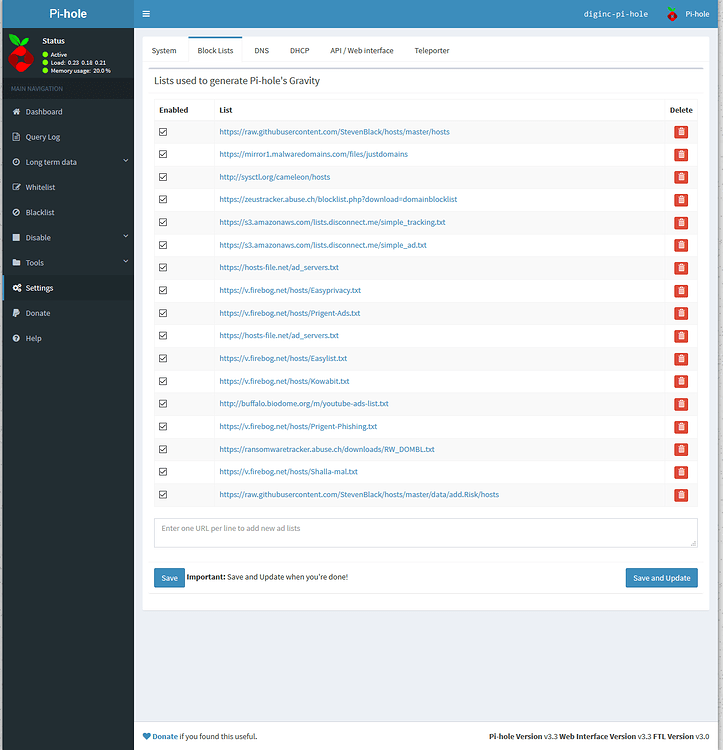
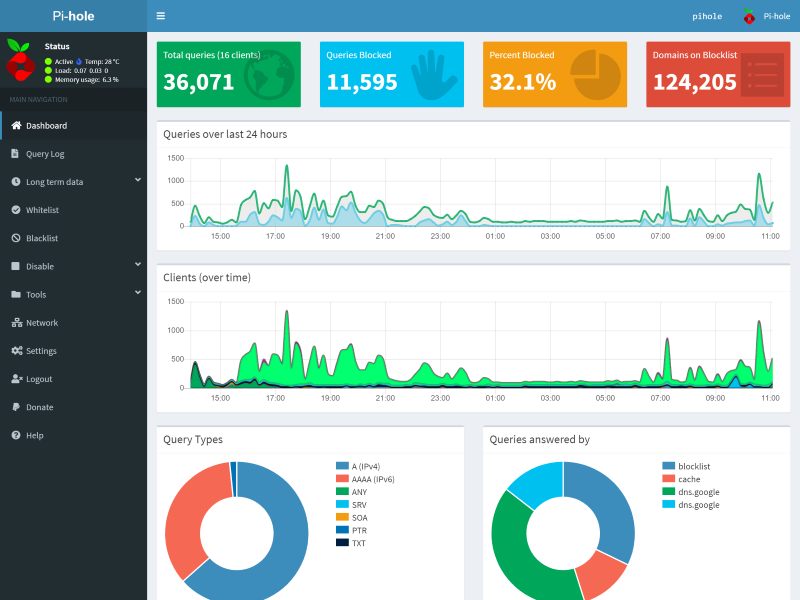
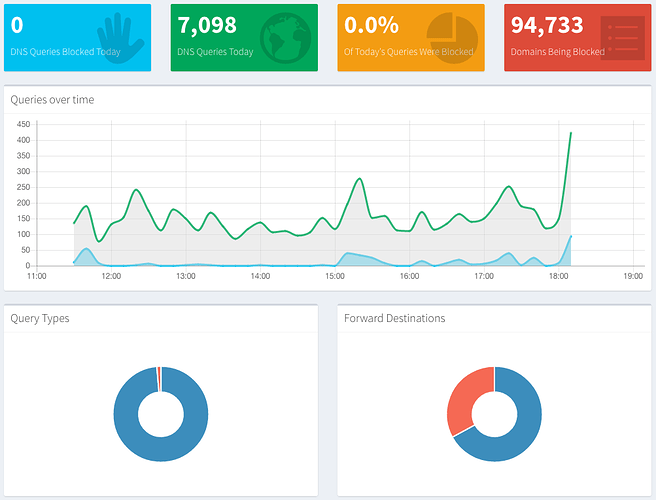
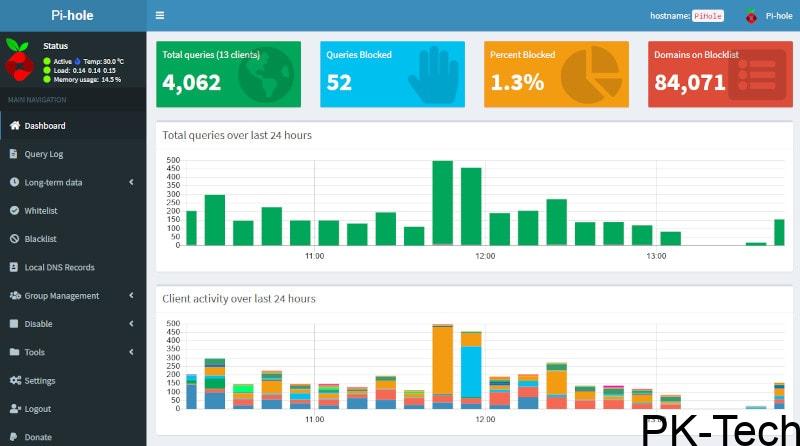
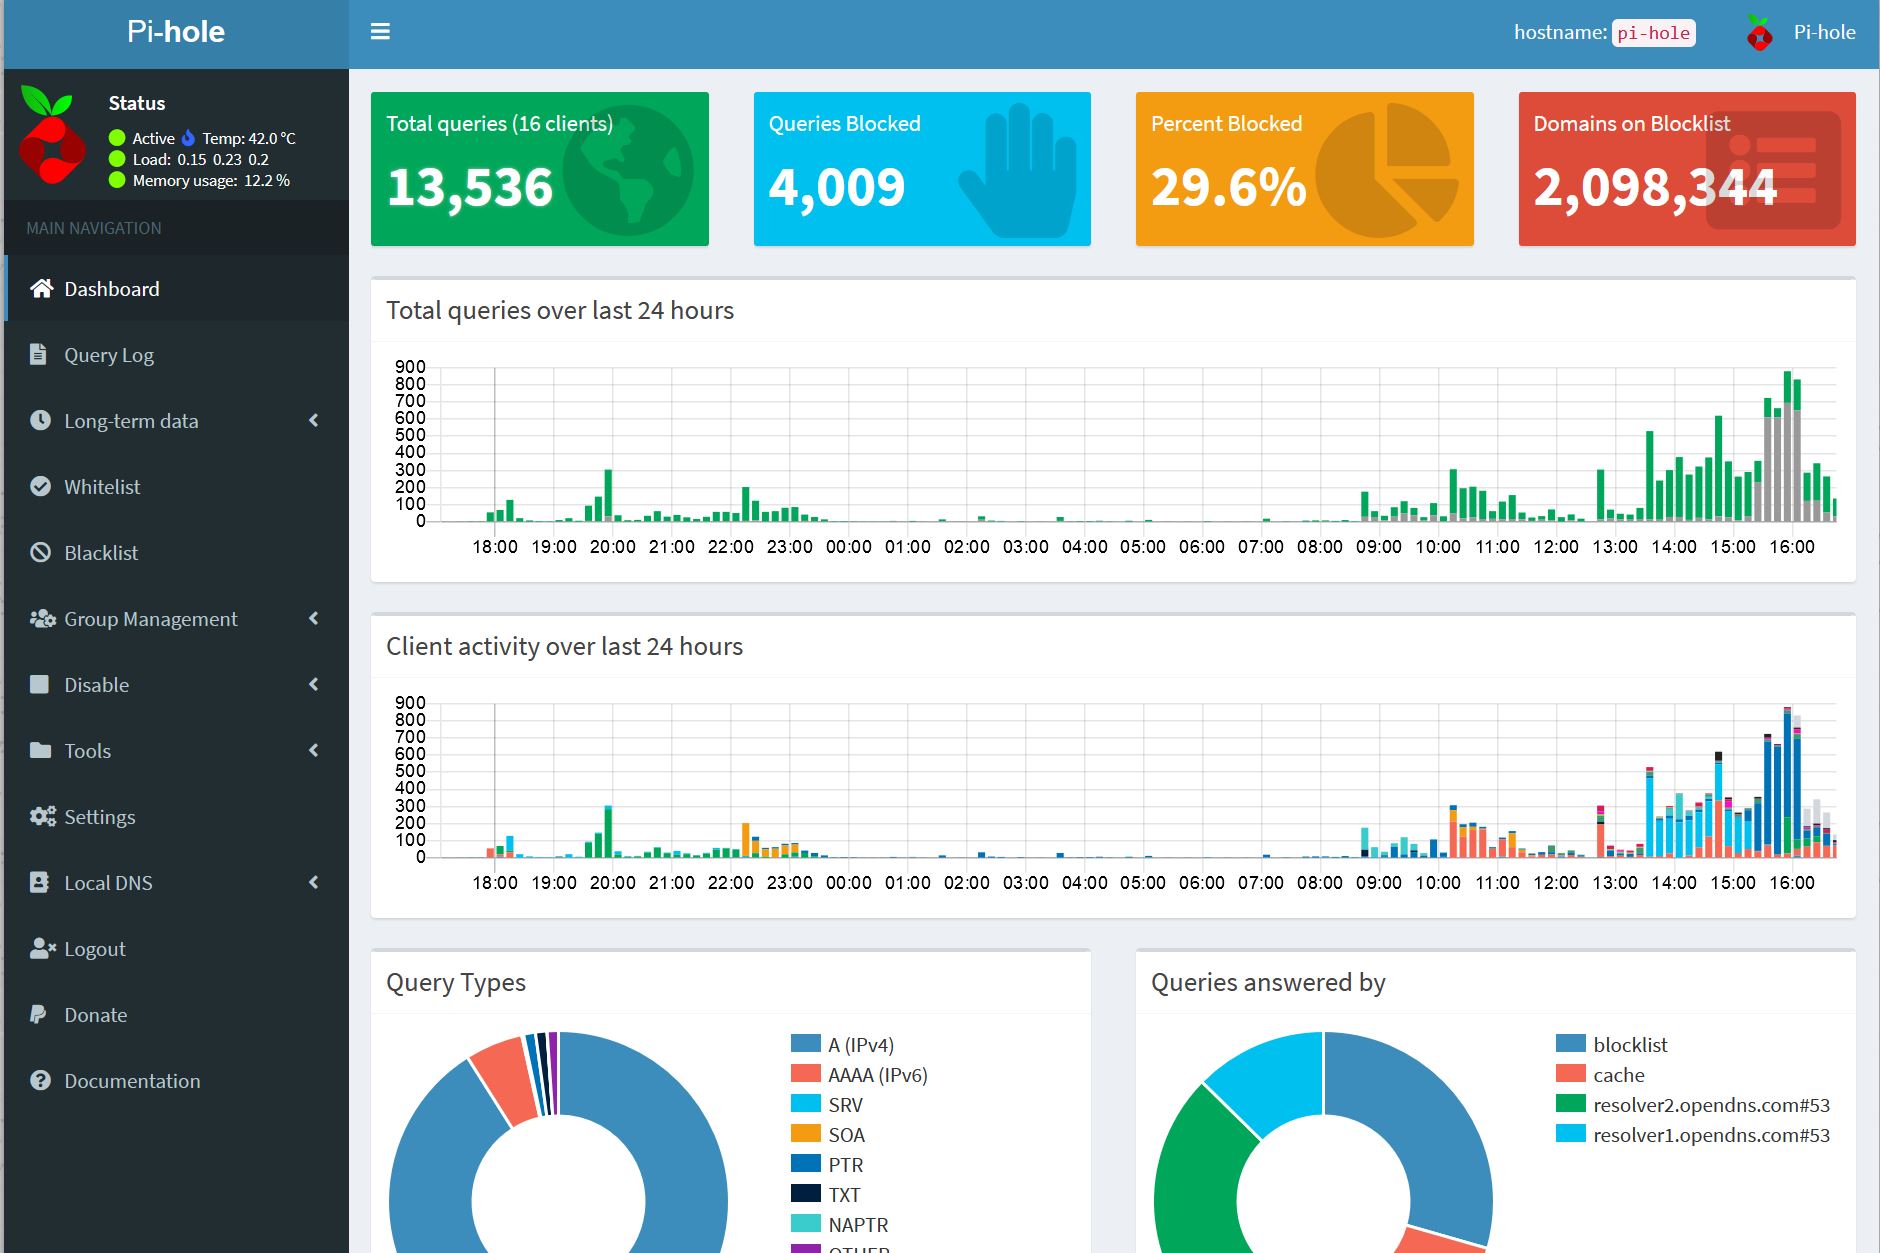
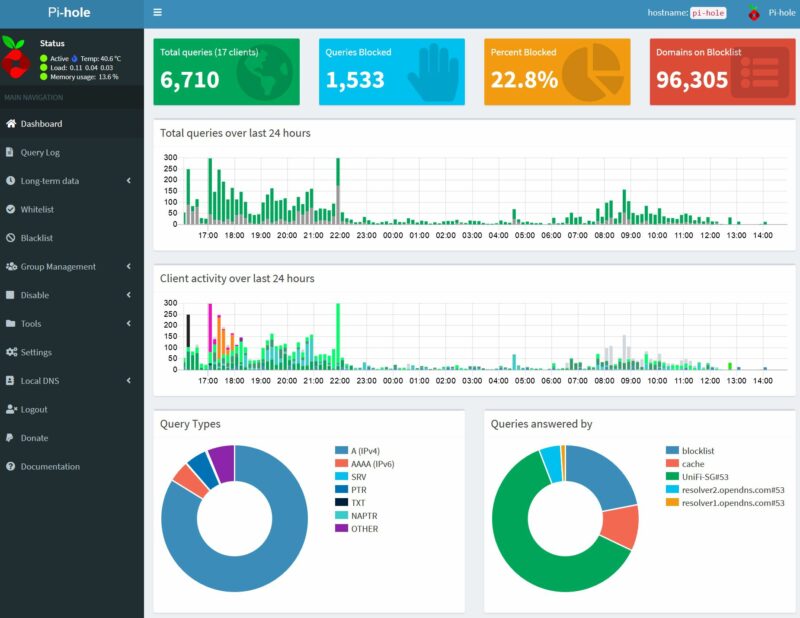
Enjoy your Pi-hole! Set it up according to your preference.
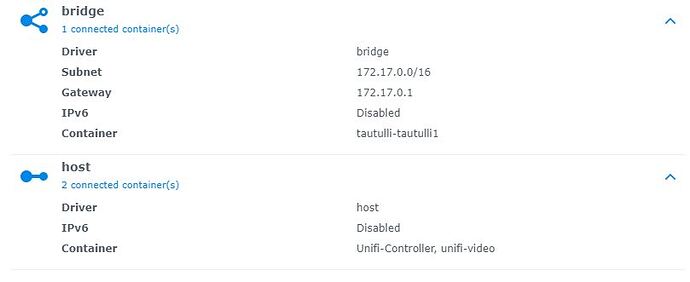
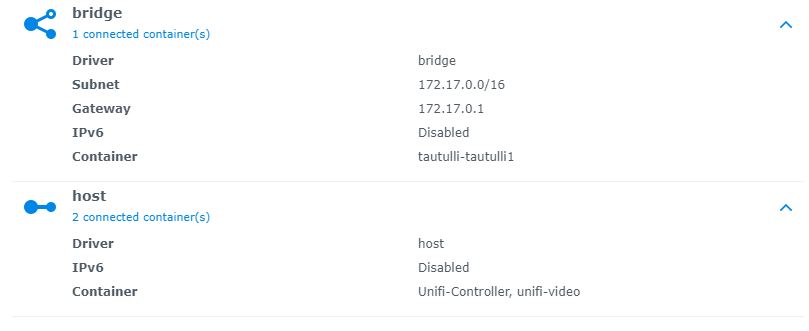
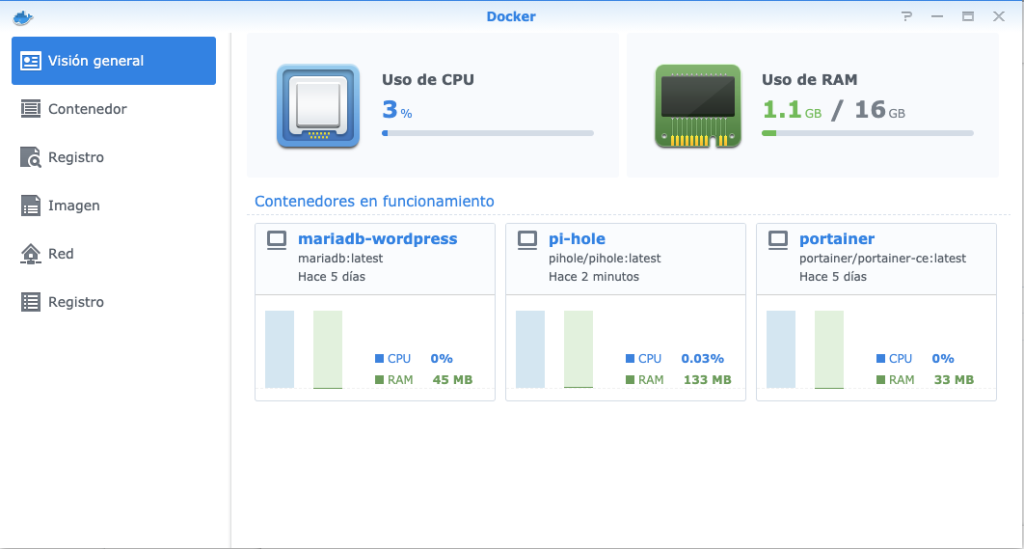
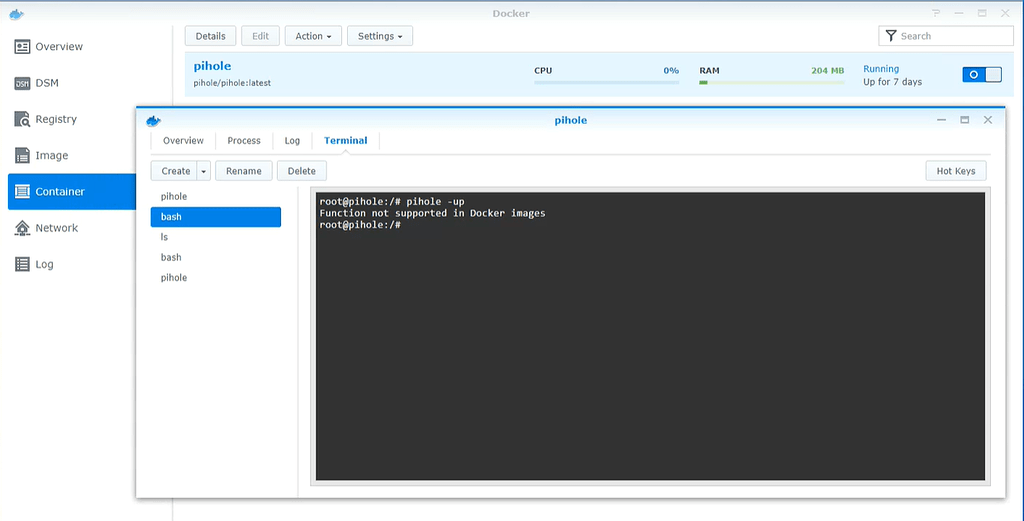
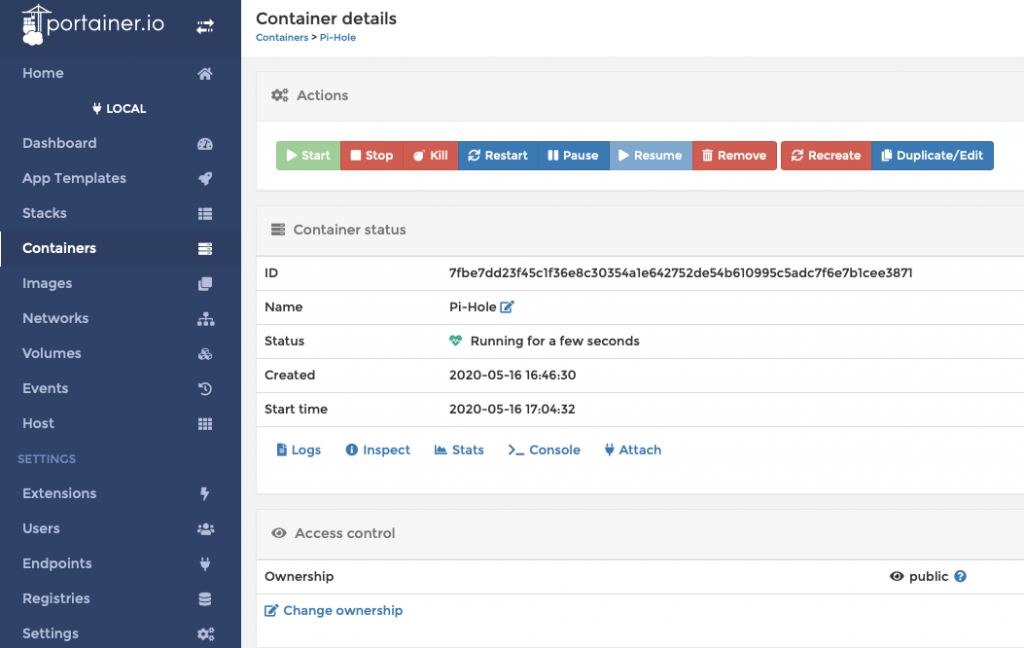
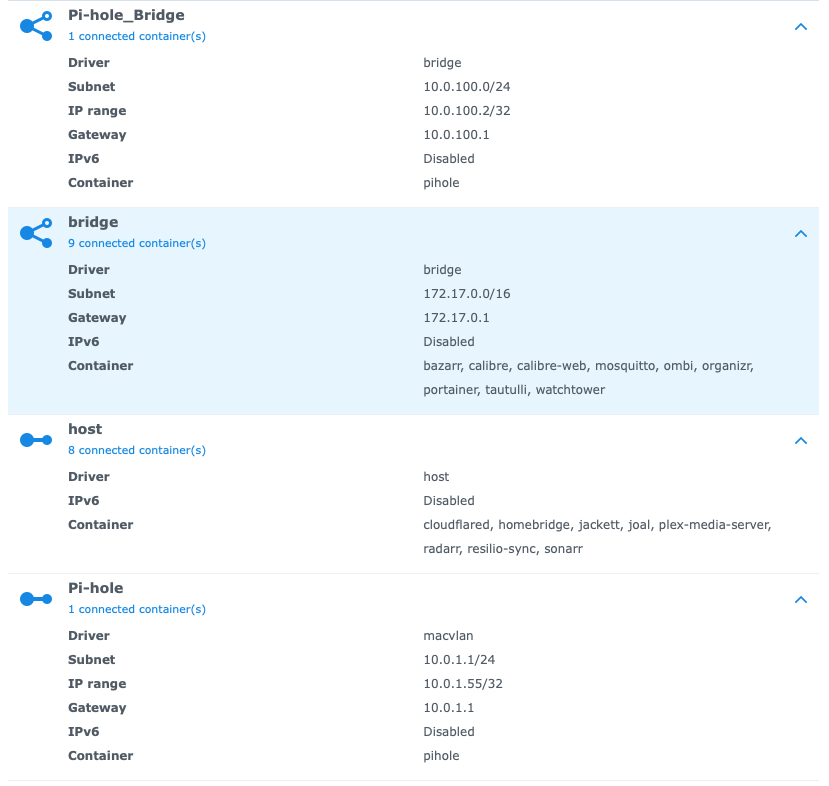
If you have Portainer installed on your Synology NAS you can also see the Pi-hole container perfectly running with the healthy status.
That’s it! I hope this little guide helps you install Pi-hole on your Synology NAS.
Note: Many content providers (like YouTube / Reddit / Twitch / Spotify / Pandora / Facebook / Hulu) now stream/serve ads from the same servers as the content (meaning if you attempt to block the ads using a Pi-Hole you will also block the content).
Note: If you experience connections problems remember to set your Synology Firewall in Control Panel / Security / Firewall / Edit Rules / Create Firewall Rules and allow Custom Port 53 Protocol All.
Note: Mandatory is to upgrade your Synology NAS RAM memory. Why do you need more RAM? To be more responsive! You will not use Synology NAS just for Docker. Pi-hole needs a minimum of 512 MB of RAM (I repeat, a minimum and that’s just for Pi-hole). If anyone wants to stay within the strict minimum RAM, they are welcome to, but their system will never be as responsive as those which have more RAM installed.
Note: How to Free Disk Space on Your NAS if You Run Docker.
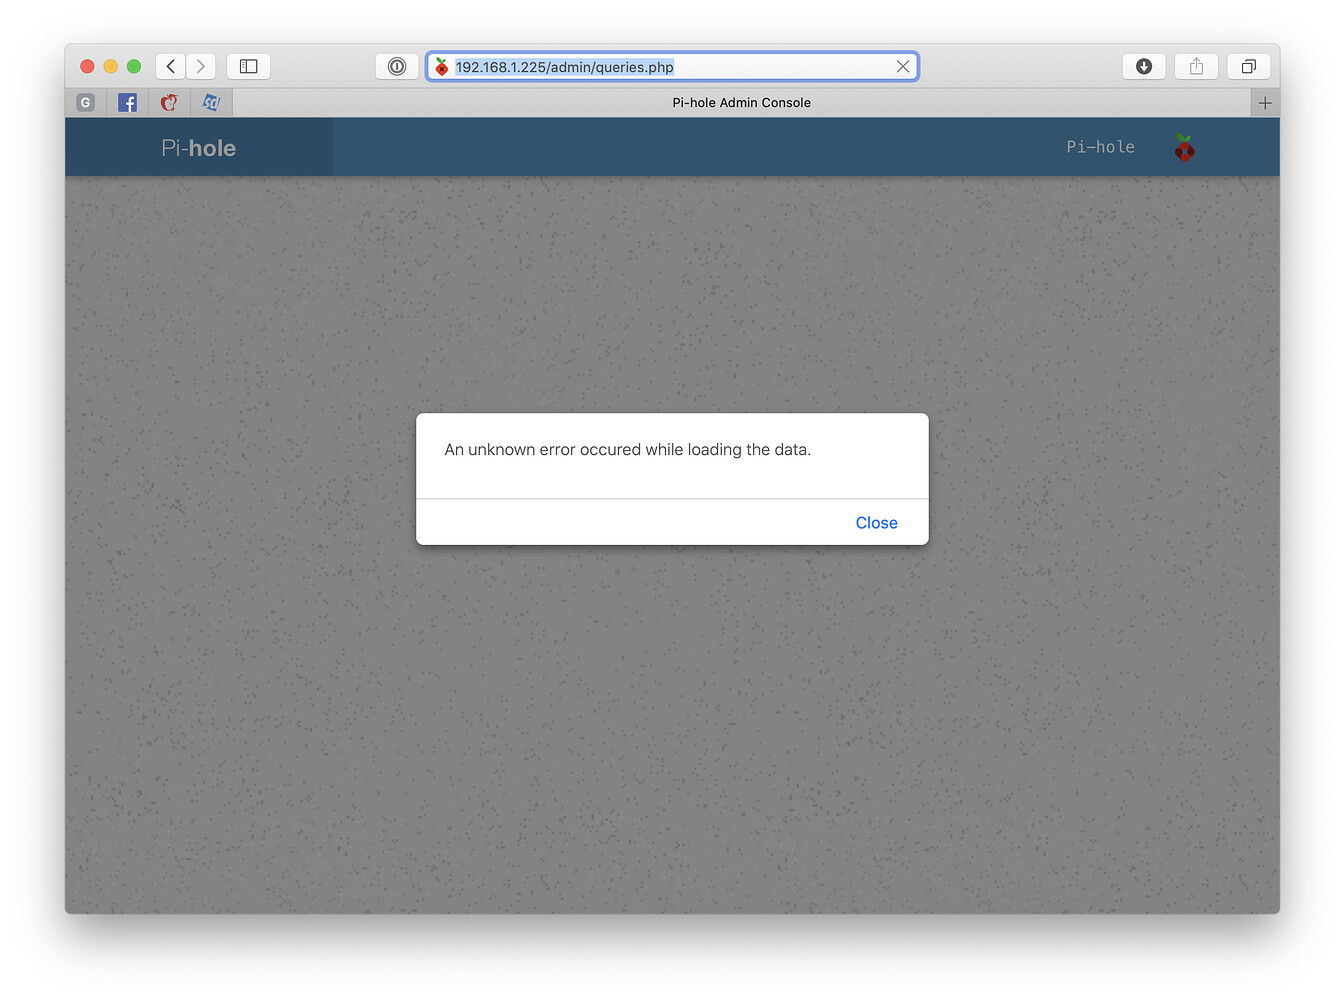
Note: Some people may have problems launching Pi-Hole via Docker. This may be because of different settings in your Synology NAS and router. Every user has their own router settings etc. It’s really hard to troubleshoot the problem. You can also contact me via email and I will try to find a personalized solution for you.
Note: After installing Pi-hole (through Docker), Synology NAS drives are not hibernating at all. The best solution is to Disable Hibernation. This will be easier and much more beneficial overall for everything Pi-hole needs to read database of filters.
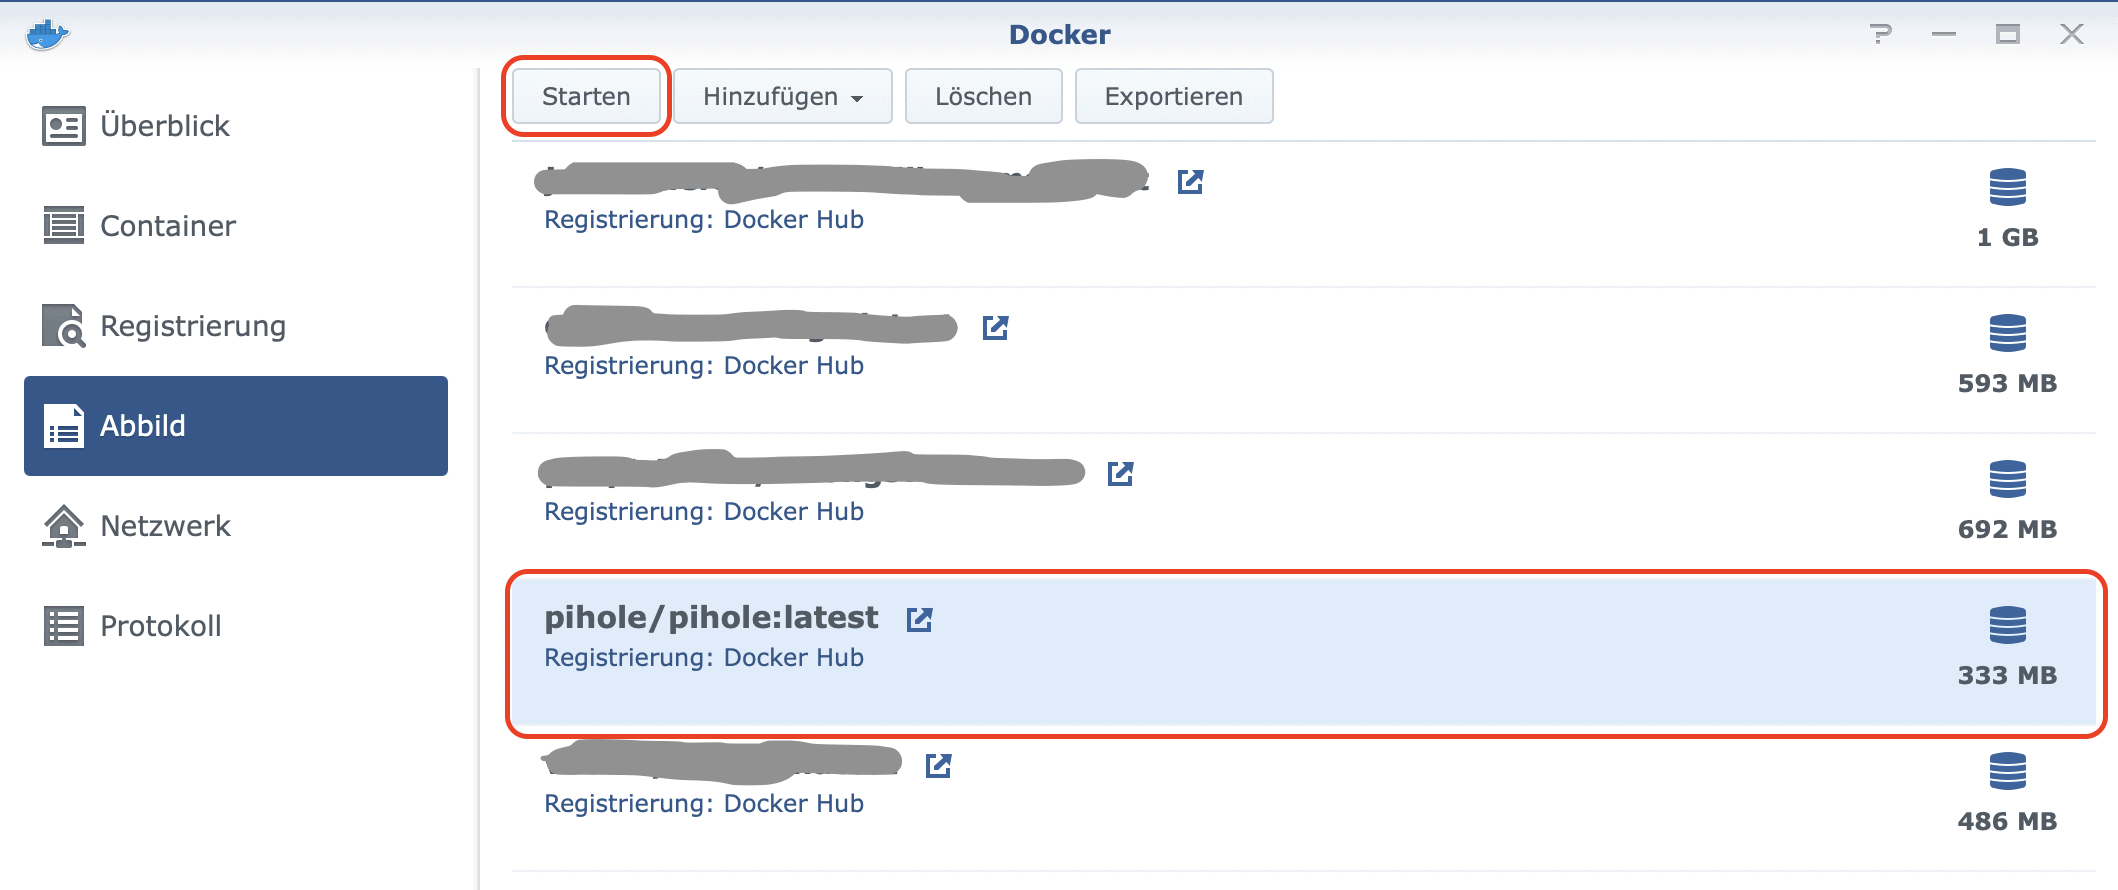
Note: Find out how to update Pi-Hole container with the latest image.
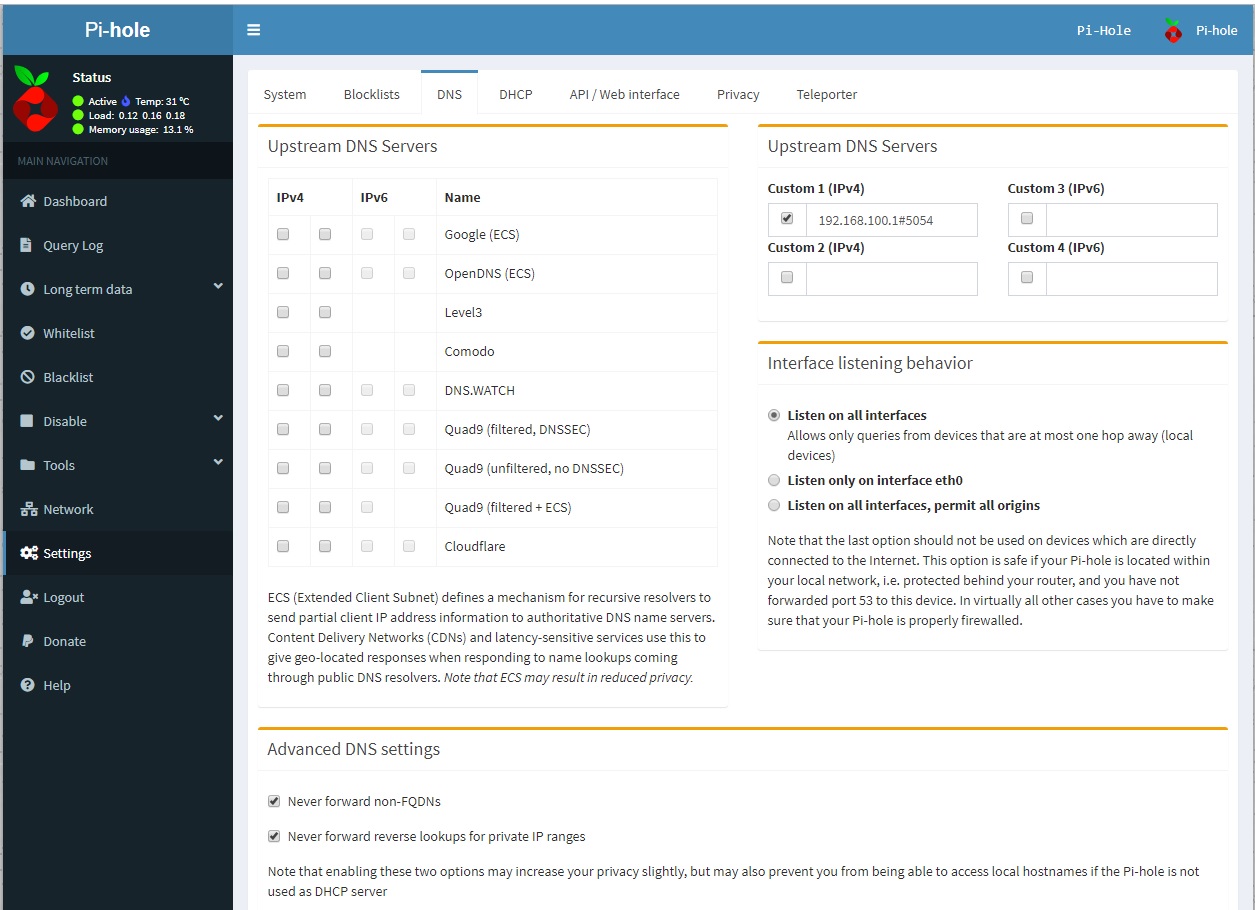
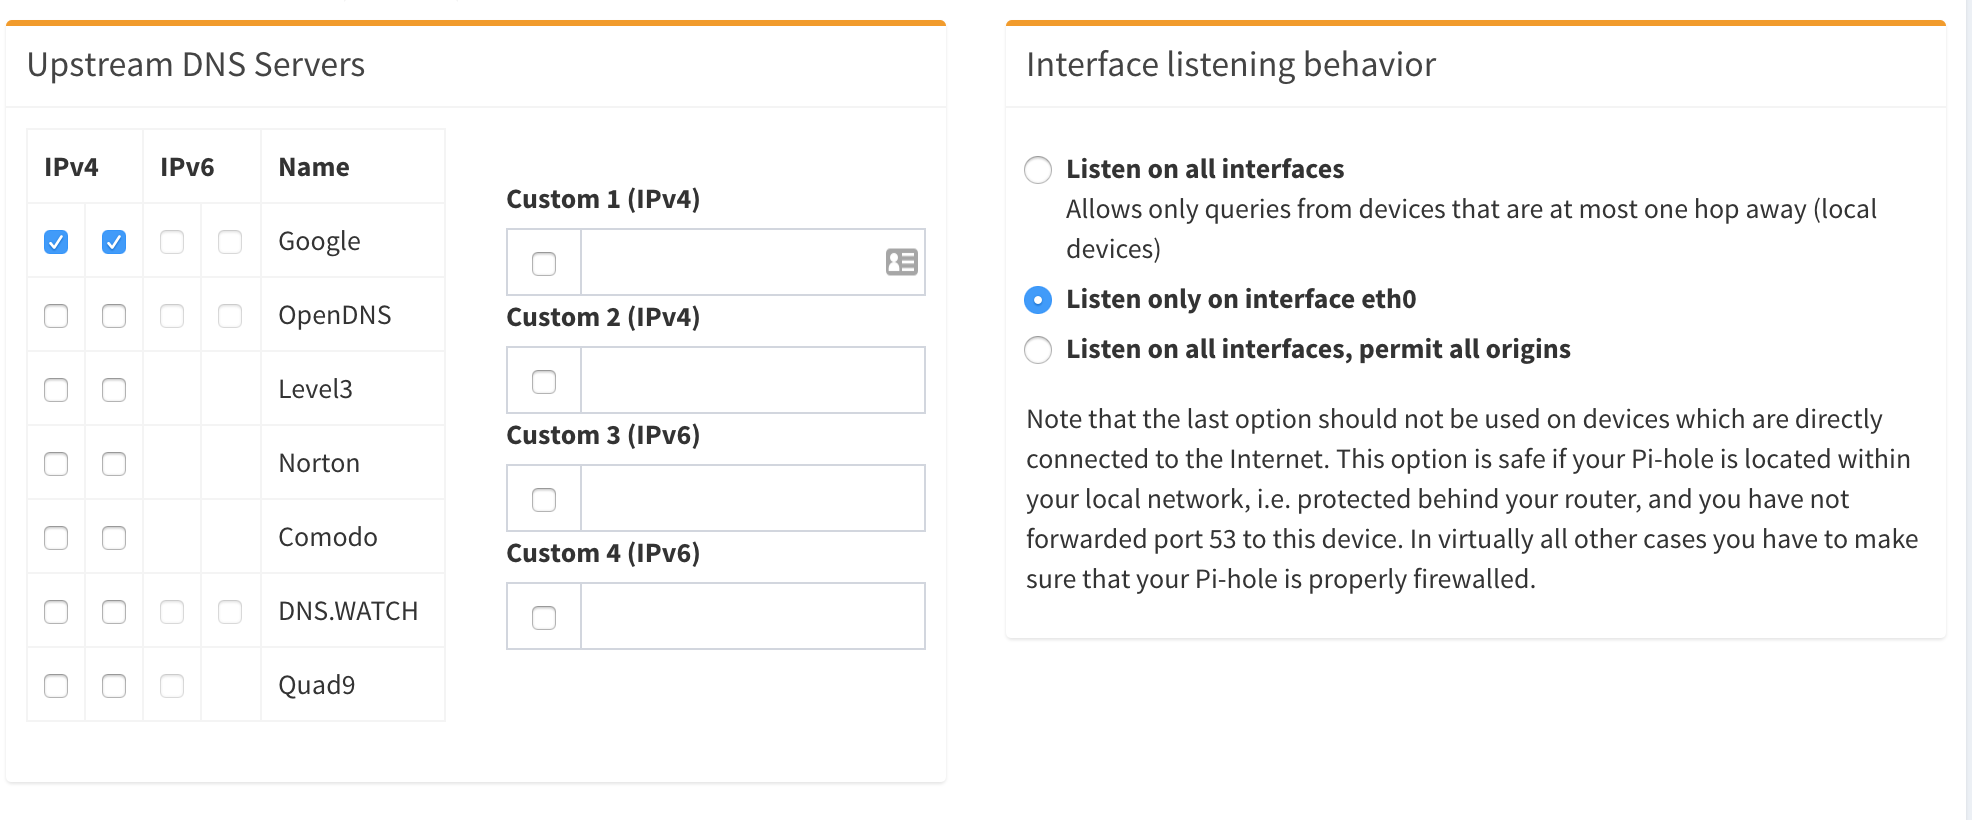
Note: If someone have a problem once installation is completed, and get an error “This site can’t be reached” open the Pi-hole GUI and go to Settings / DNS tab and in “Interface listening behavior” option change to Listen on all interfaces, instead of Listen only on interface eth0. (Reported by jtd).
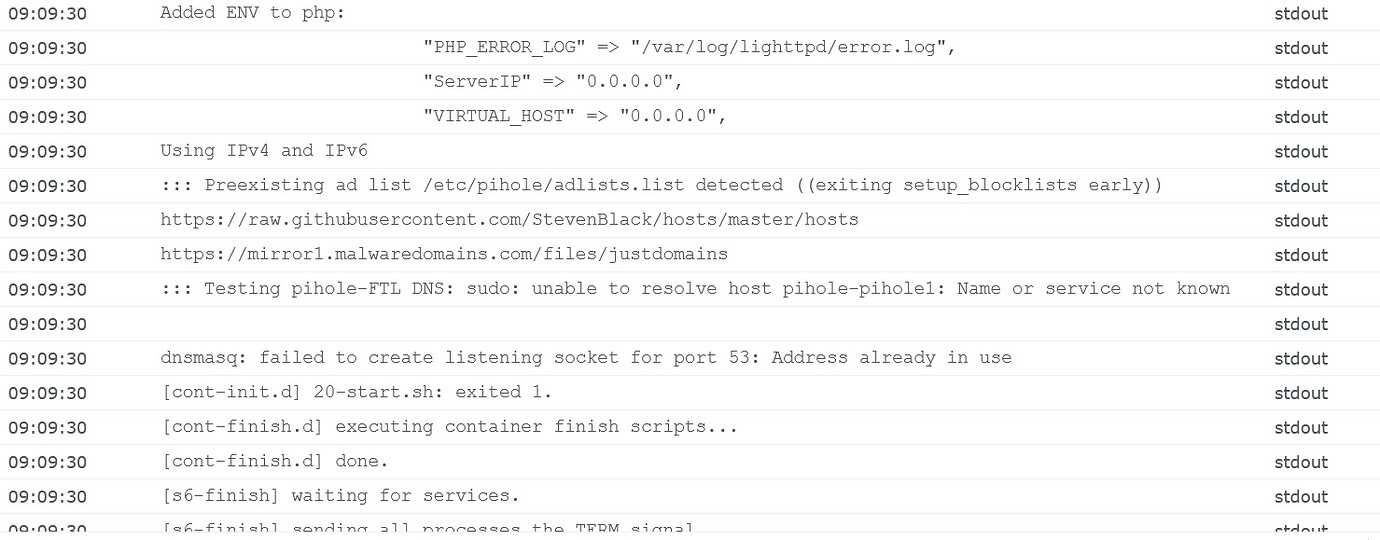
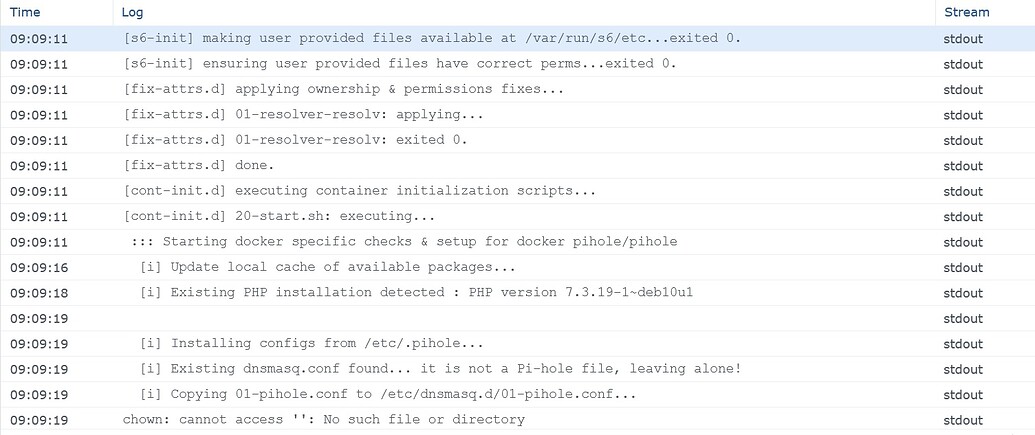
Note: If your Pi-hole container keeps disconnecting uninstall the Synology Package named “DNS Server” which will conflict with Pi-hole on port 53 and don’t let your Pi-hole start.
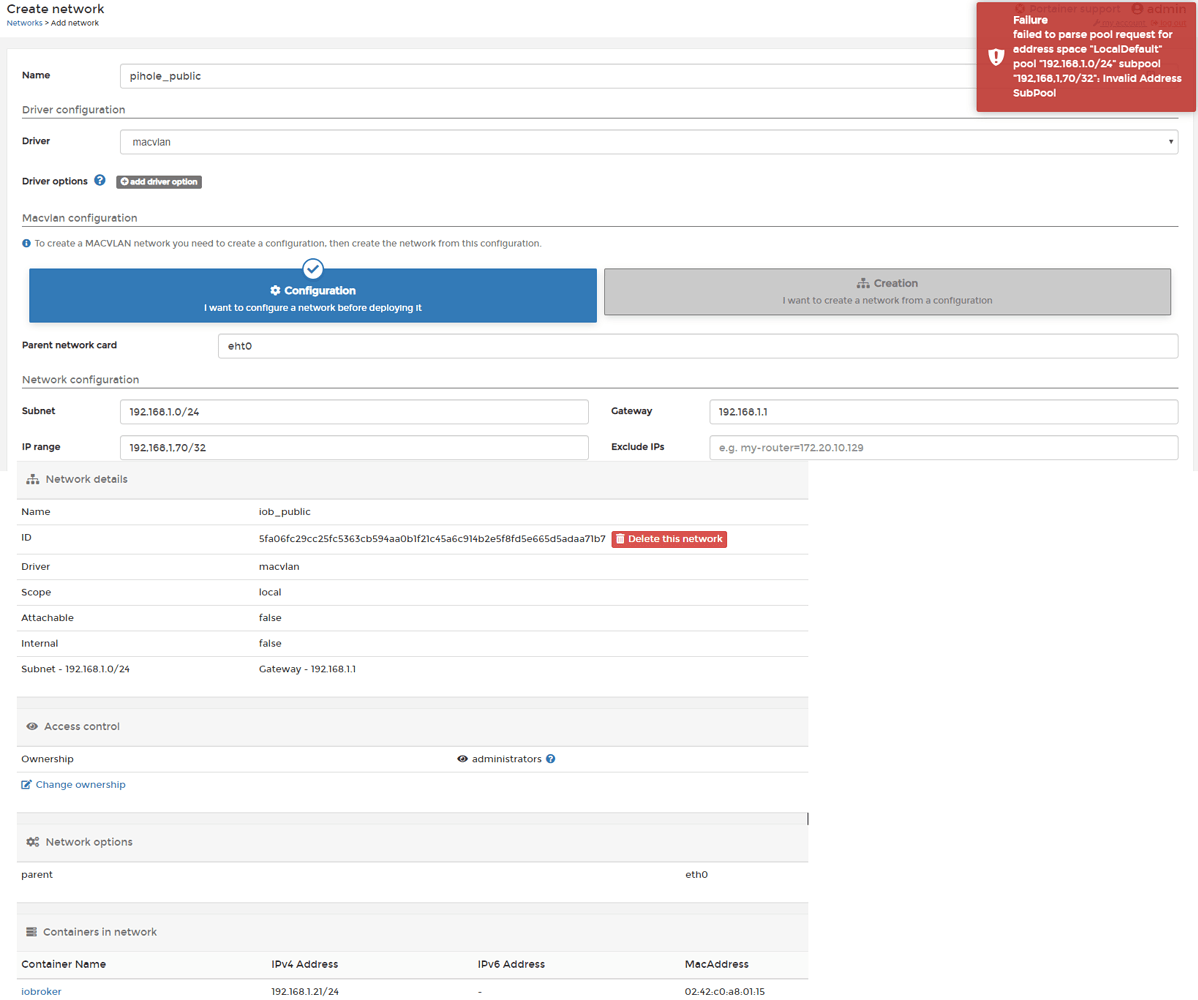
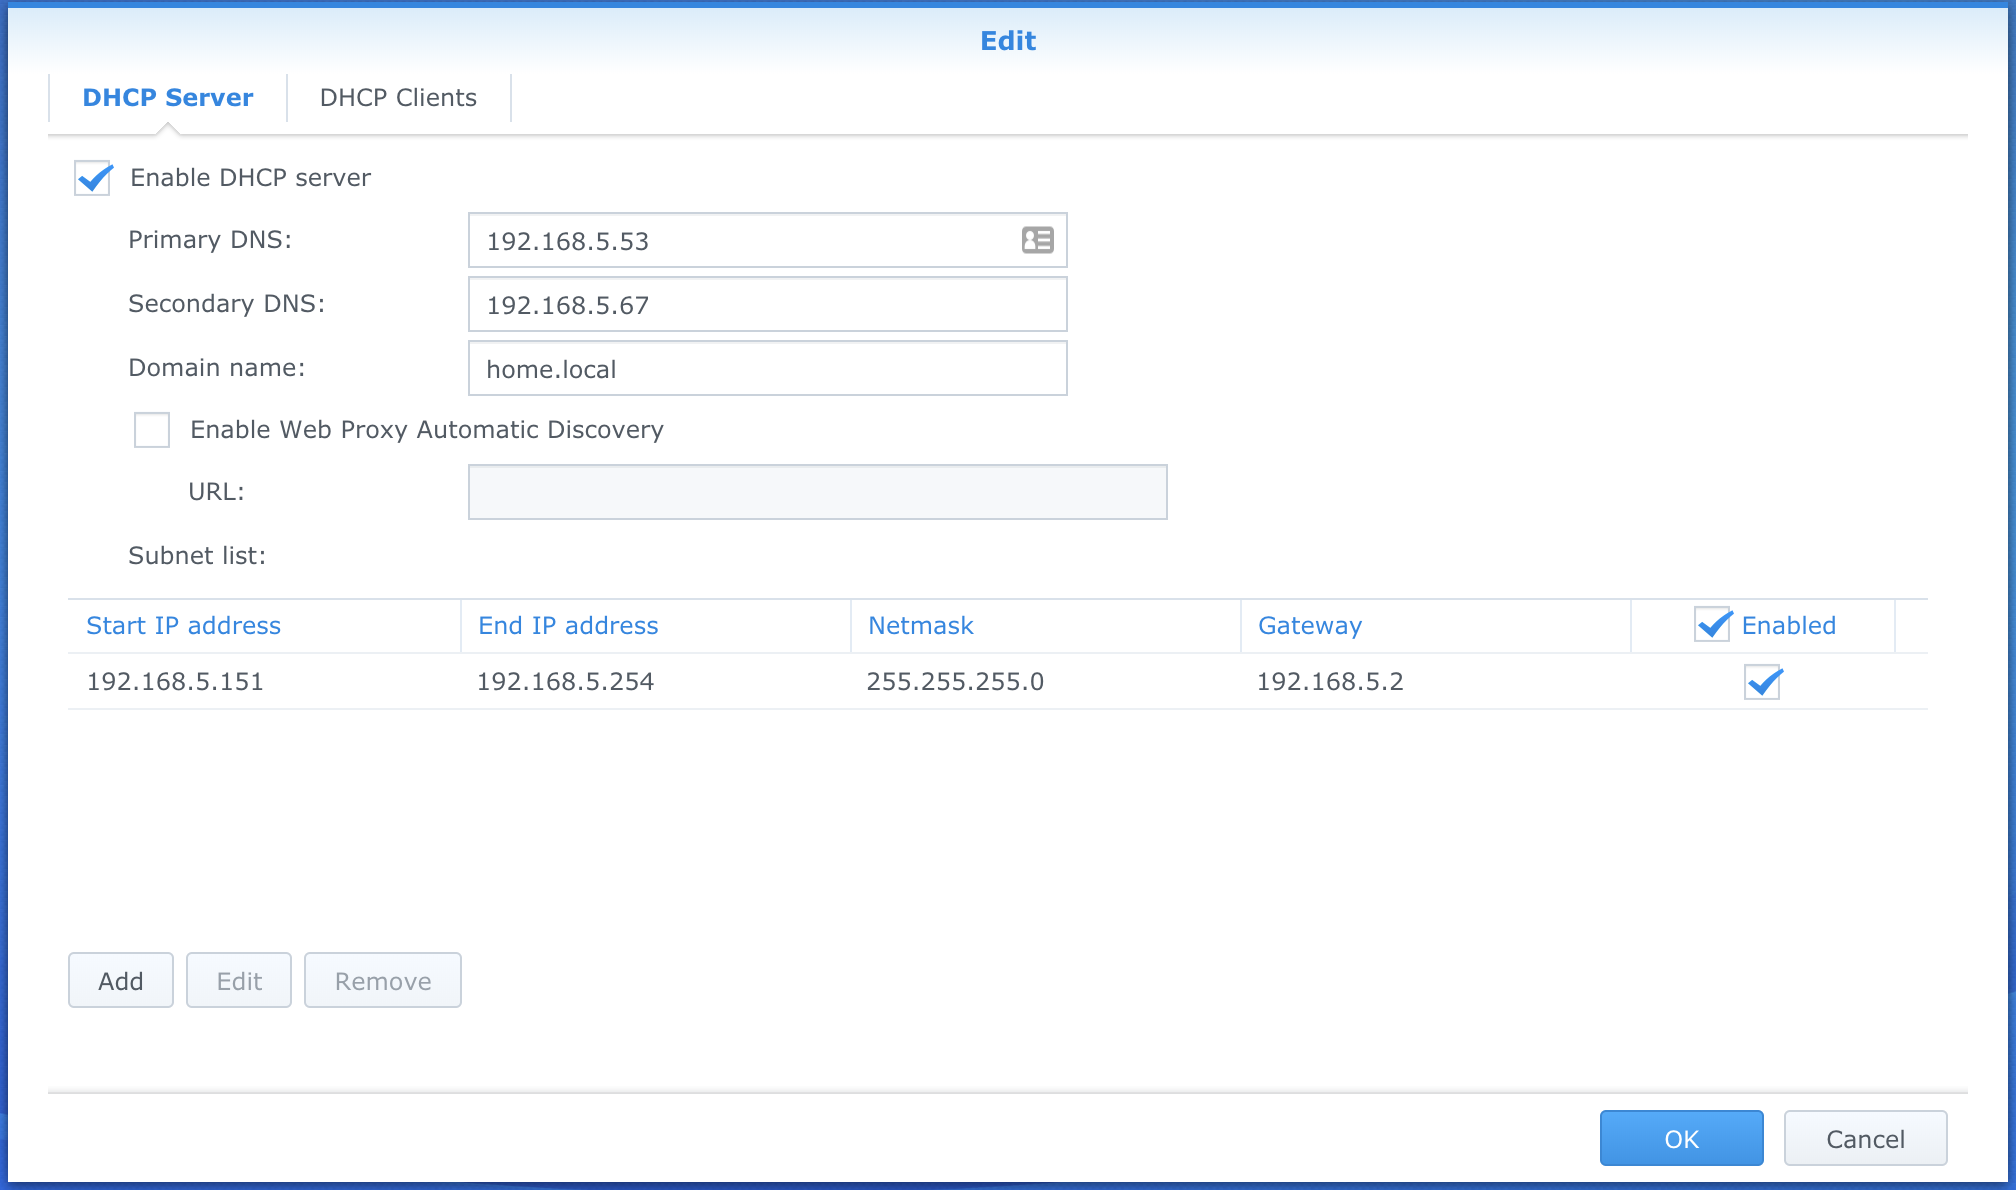
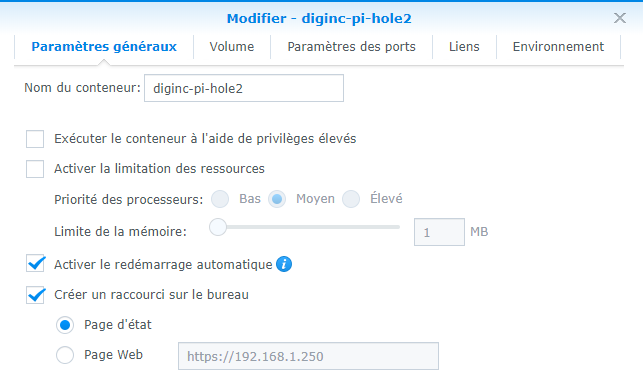
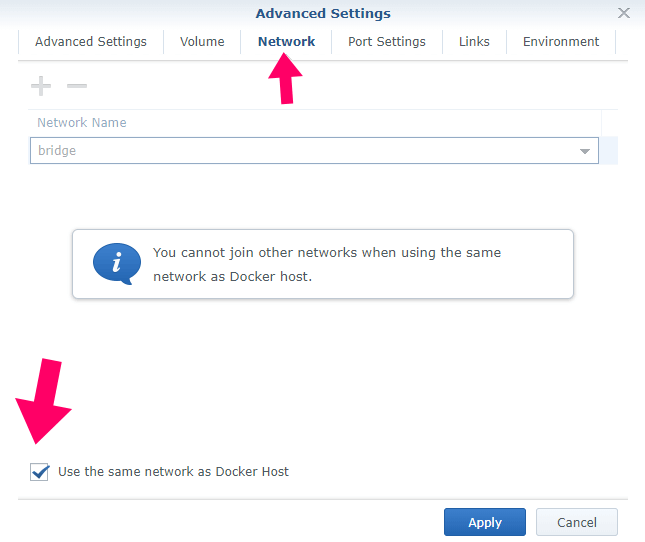
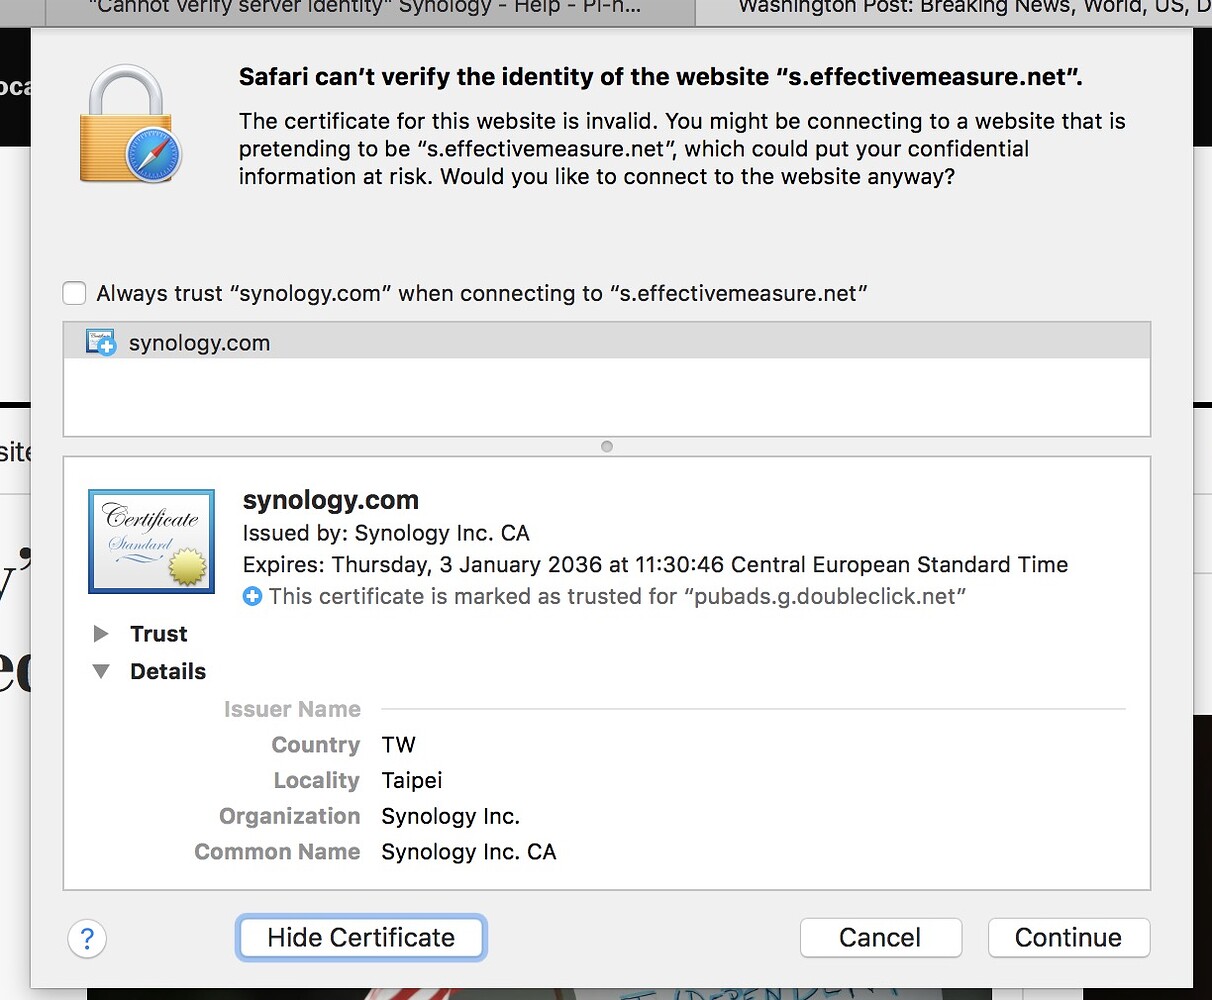
Note: How can I make Pi-Hole work over VPN connection? Go to Pi-Hole Preferences then check “Listen on all interfaces, permit all origins” on “Interface listening behavior”. Follow the instructions in the image below:
Note: Can I run Docker on my Synology NAS? See the supported models.
Note: At STEP 7 you can also change the value variable for the: WEB_PORT – 8080 or 1010 or whatever you want.
This post was updated on Friday / August 13th, 2021 at 8:33 PM
🧡 Support my work
Marius Bogdan Lixandru
Copyright © 2019 – 2021
Cookie Policy – Privacy Policy
Always Faithful to Synology
© 2021 Marius Hosting • Built with GeneratePress
РекламаКомпьютеры, электроника и бытовая техника в интернет-магазине TopComputer. · Москва · 20511 · пн-пт 9:00-21:00, сб-вс 10:00-21:00
Сеть точек самовывоза · Быстроногие курьеры
Включая результаты для "pi-hole synology".
Показывать только результаты для Pi Hole Synology?
https://mariushosting.com/how-to-install-pi-hole-on-your-synology-nas
15.06.2021 · Pi-Hole is a Linux network-level advertisement and Internet tracker blocking application which acts as a DNS sinkhole (and, optionally, a DHCP server), intended for use on a private network. What is a DNS sinkhole?
https://www.wundertech.net/how-to-setup-pi-hole-on-a-synology-nas-two-methods
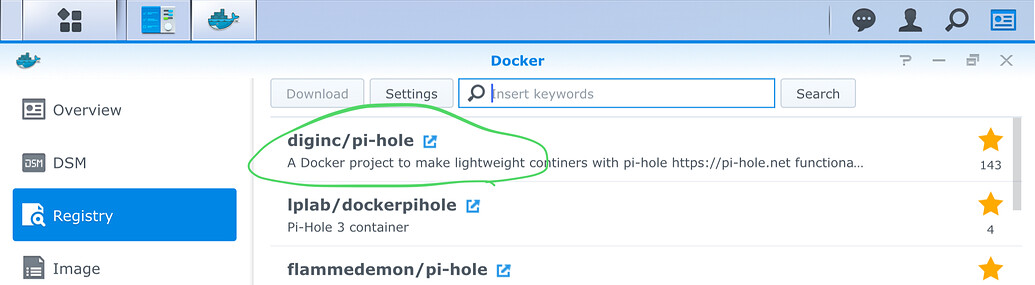
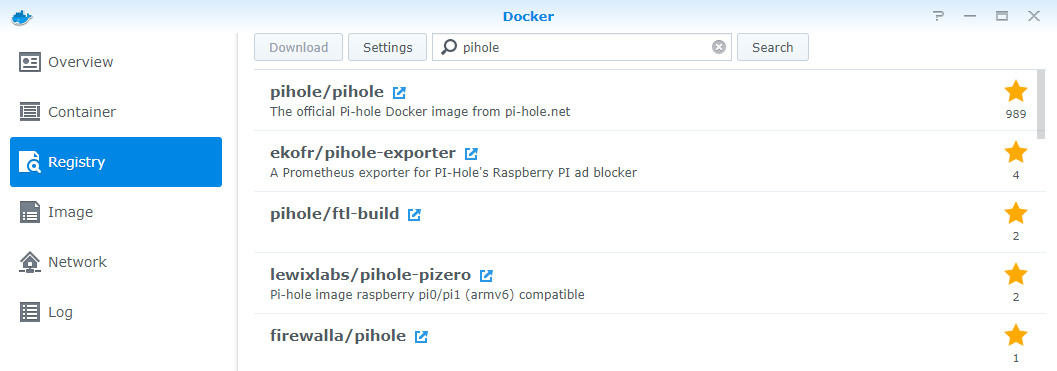
01.08.2021 · Host Network Interface (Option 1) - Synology NAS Pi-hole Setup. As stated above, this option will use the host network interface. For this reason, you will need to access Pi-hole using your Synology NAS’s IP address and a defined port. 3. Open Docker, navigate to the Registry, and search for Pi-hole.
How to Setup Pi-hole on a Synology NAS using Docker!
Instalación y configuración de Pi-Hole en Synology
YouTube › Quik Tech Solutions L.L.C
Pi-Hole in Docker for Home Assistant on Synology - #009
YouTube › Quik Tech Solutions L.L.C
Docker 101: Pi-Hole on Docker and Synology with MacVlan
https://kevq.uk/how-to-setup-pi-hole-on-a-synology-nas
Setting Up Pi-Hole on A Synology
Next Steps
Conclusion
Right then, let’s get to work, shall we? The first thing you’re going to need to do is install the Synology Docker app. So launch the Synology Package Centre, search for docker and click on the Install button. Next, launch the Docker app, click on Registry from the left-hand pane and search for pi-hole. You should see the official Pi-hole at the top of the list. Double-click on the official Pi-hole image to download it to your Syn…
https://servicemax.com.au/tips/pi-hole-in-docker-on-synology-the-best-way
16.05.2020 · Create your Pi-Hole This can be done from inside the Synology Docker interface or inside Portainers interface, but let’s stick with Portainer for now. Still in the Portainer portal, go to ‘ Containers ‘ …
https://discourse.pi-hole.net/t/how-do-i-install-pi-hole-on-a-synology-nas
22.10.2016 · How do I install Pi-hole on a Synology NAS This is a basic functional installation, it does not take into account any special servers/services that you may have running on your DSM. This was done succesfully on DSM 5.2-5967 and DSM 6.0.2-8451 Update 2. It uses Debian chroot to run Pi-hole …
How do I install a Pi hole on Synology?
How do I install a Pi hole on Synology?
So launch the Synology Package Centre, search for docker and click on the Install button. Next, launch the Docker app, click on Registry from the left-hand pane and search for pi-hole. You should see the official Pi-hole at the top of the list. Double-click on the official Pi-hole image to download it to your Synology.
kevq.uk/how-to-setup-pi-hole-on-a-synolo…
Using a Pi-hole on your network is a great way of blocking adverts and protecting you from tracking at a network level. In this post I’m going to take you through setting up Pi-hole on a Synology NAS using Docker. I’ve been using Pi-hole on my network for a few weeks now and things are going great.
kevq.uk/how-to-setup-pi-hole-on-a-synolo…
Is there a way to use Pi-hole for free?
Is there a way to use Pi-hole for free?
Pi-hole is free, but powered by your donations. In addition to blocking advertisements, Pi-hole has an informative Web interface that shows stats on all the domains being queried on your network. Pi-hole works fine with an existing DHCP server, but you can use Pi-hole’s to keep your network management in one place.
How to use Pi-hole as a DNS server?
How to use Pi-hole as a DNS server?
3. Use Pi-hole as your DNS server Configure your router’s DHCP options to force clients to use Pi-hole as their DNS server, or manually configure each device to use the Pi-hole as their DNS server. 4. Block ads everywhere, even on the go
https://bafista.ru/pi-hol-synology-nas
Pi Hole – это блокировщик рекламы в сети. В типичной домашней обстановке это позволяет отключить практически всю рекламу на всех устройствах в вашем доме без необходимости …
https://www.reddit.com/r/synology/comments/8h43gx/synology_and_pihole
Skip docker on Synology and install pihole on the Pi itself. The reason is, you don't want to your internet to not work whenever you reboot the NAS. Install raspbian (I like the minimal version without the GUI), setup the …
Skip docker on Synology and install pihole on the Pi itself. The reason is, you don't want to your internet to not work … read more
Are you saying you have a Pi that you want to use? Or you're trying to set up PiHole on Docker?
I gave up on pi-hole via docker as dnsmasq simply isn’t a powerful enough DNS server outside of simple home … read more
I run pihole in docker at home on a ds1817+ Seems to work ok. Everything has a backup dns of 1.1.1.1
It looks like FTLDNS (Pi-hole’s Faster Than Light daemon) has been installed on the Synology using Debian … read more
Use a real raspberry pi. Better yet, use two and make one your primary dns and make the other your secondary dns.
https://foxly.de/article/3-pi-hole-auf-einer-synology-nas-installieren
06.01.2021 · Pi-hole ist eine freie Software mit der Funktion eines Tracking- und Werbeblockers sowie eines optionalen DHCP-Servers. Pi-hole basiert auf einem Linux-System und ist entwickelt worden, für …
Use Pi-hole as your DNS server Configure your router’s DHCP options to force clients to use Pi-hole as their DNS server, or manually configure each device to use the Pi-hole as their DNS server. Use Pi-hole as your …
https://naseros.com/2020/01/12/instalacion-y-configuracion-de-pi-hole-en-synology
12.01.2020 · Instalación y configuración de Pi-Hole en Synology. Ya te he explicado las ventajas de tener un servidor DNS que admita listas de bloqueo para eliminar la publicidad, evitar webs malicosas y aumentar nuestra privacidad bloqueando los rastreadores. Mediante la app Docker de Synology vamos a poder instalar un contenedor en el NAS de Synology.
РекламаСравнение цен на Synology в интернет-магазинах. Отзывы покупателей
РекламаSynology купить за 13576 руб. Только сегодня! Бесплатная доставка.
Гарантия низкой цены · Мега скидки до 70%
Не удается получить доступ к вашему текущему расположению. Для получения лучших результатов предоставьте Bing доступ к данным о расположении или введите расположение.
Не удается получить доступ к расположению вашего устройства. Для получения лучших результатов введите расположение.
Czech Lesbian Swing Orgy
Brazzers Porno Video Aktirisa Ruski
Domina Prostate Massage
Homemade Webcam Lesbian
Mot Her And Son Xnxx Vied
How to Install Pi-Hole on Your Synology NAS – Marius Hosting
How to Setup Pi-hole on a Synology NAS - WunderTech
How To Setup Pi-hole On A Synology NAS - Kev Quirk
Pi-Hole in Docker on Synology- The Best Way! - ServiceMax
How do I install Pi-hole on a Synology NAS? - Synology ...
Установка Pi-hol на Synology NAS • Александр Linux
Pi-Hole auf einer Synology NAS installieren - Foxly - IT-Blog
Pi-hole – Network-wide protection
Instalación y configuración de Pi-Hole en Synology | NASeros
Pi Hole Synology