Pi Hole Dns

💣 👉🏻👉🏻👉🏻 ALL INFORMATION CLICK HERE 👈🏻👈🏻👈🏻
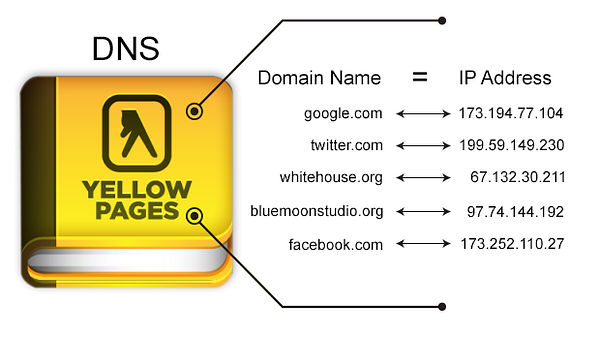
You can run Pi-hole in a container, or deploy it directly to a supported operating system via our automated installer.
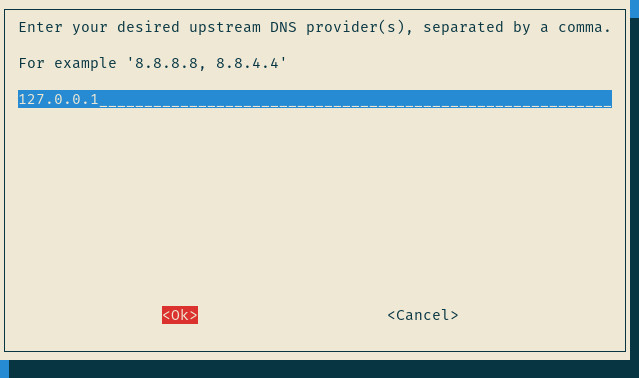
Our intelligent, automated installer asks you a few questions and then sets everything up for you. Once complete, move onto step 3.
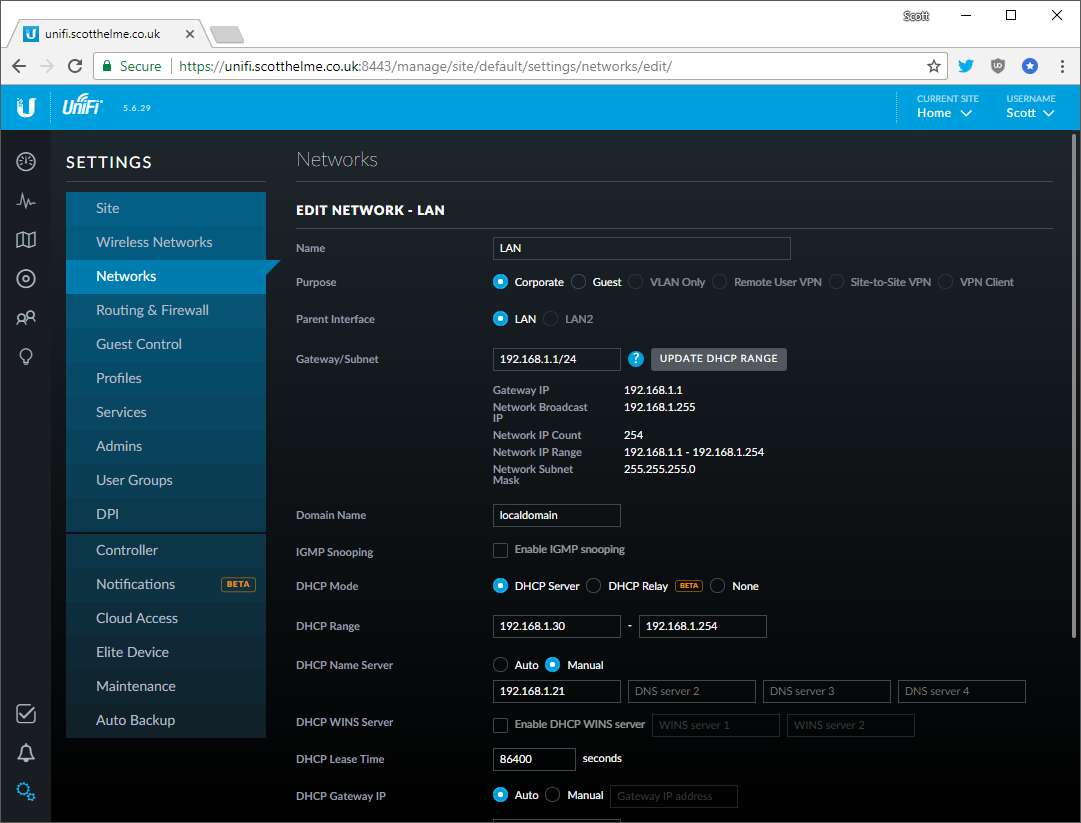
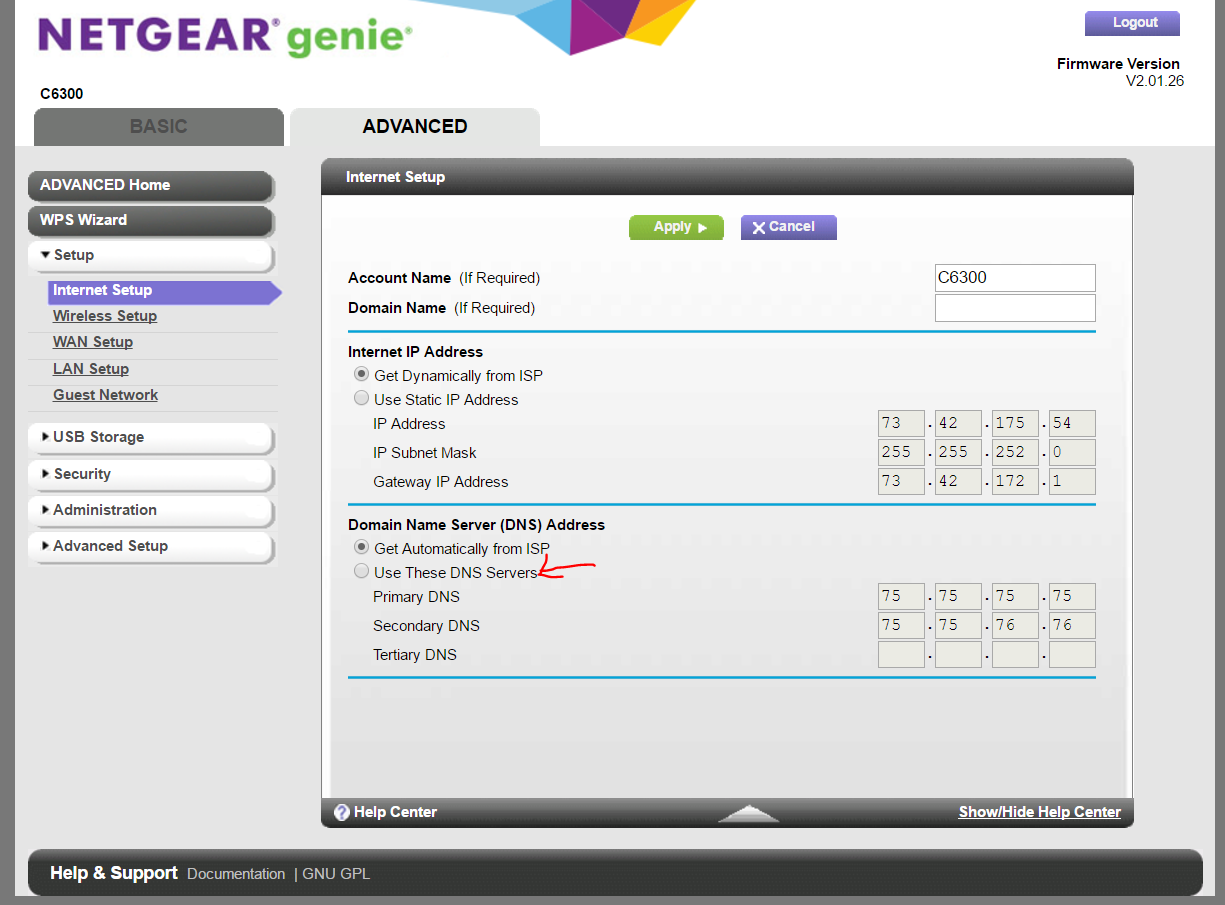
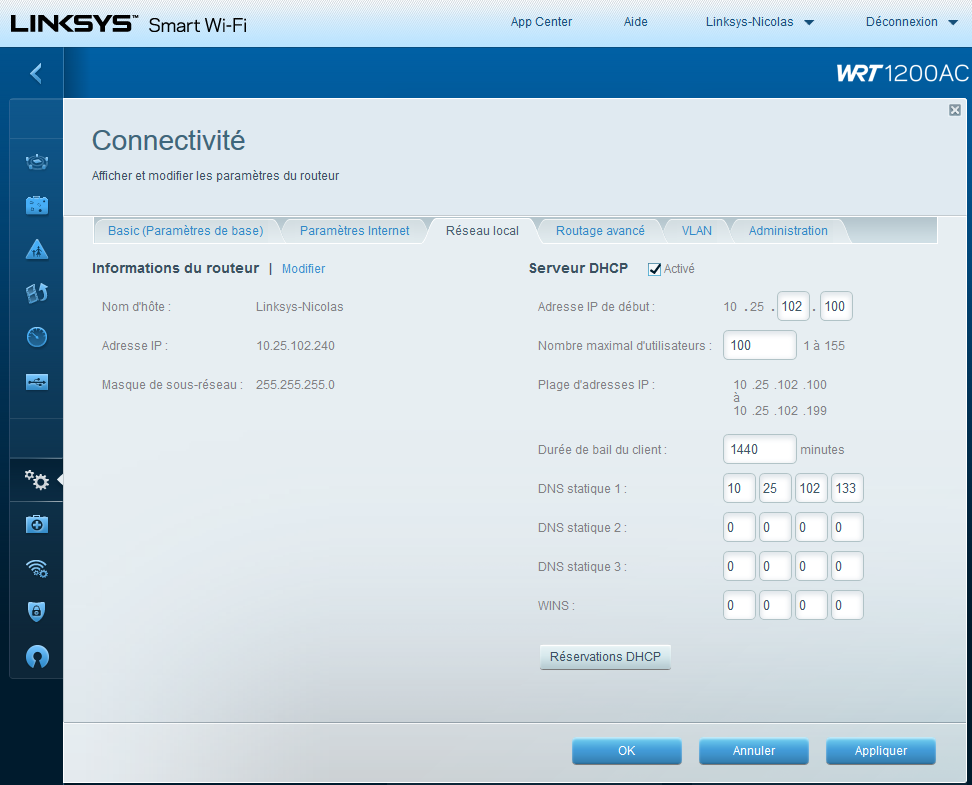
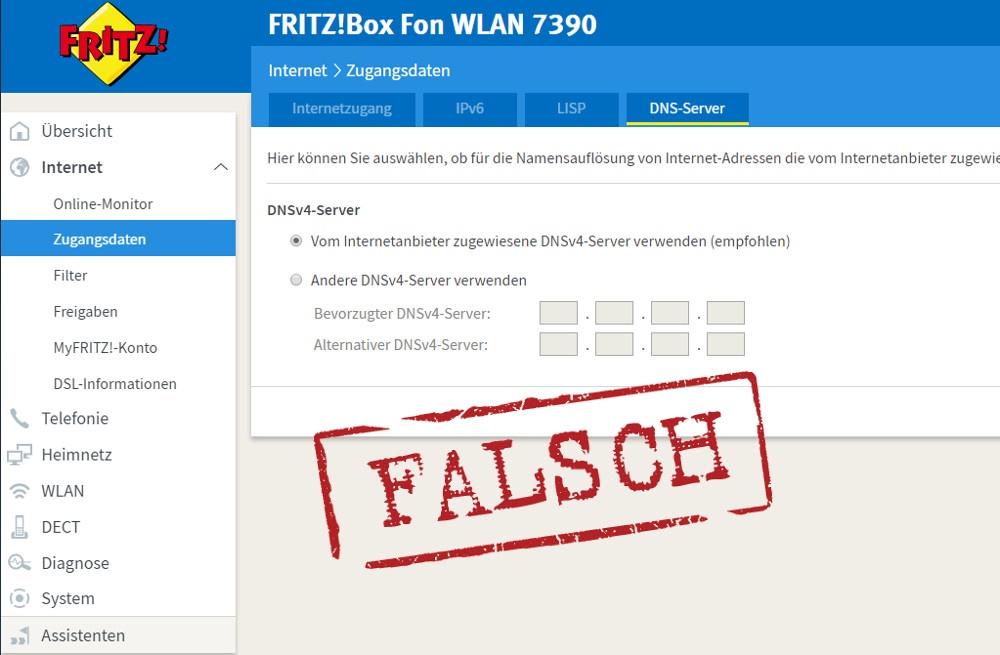
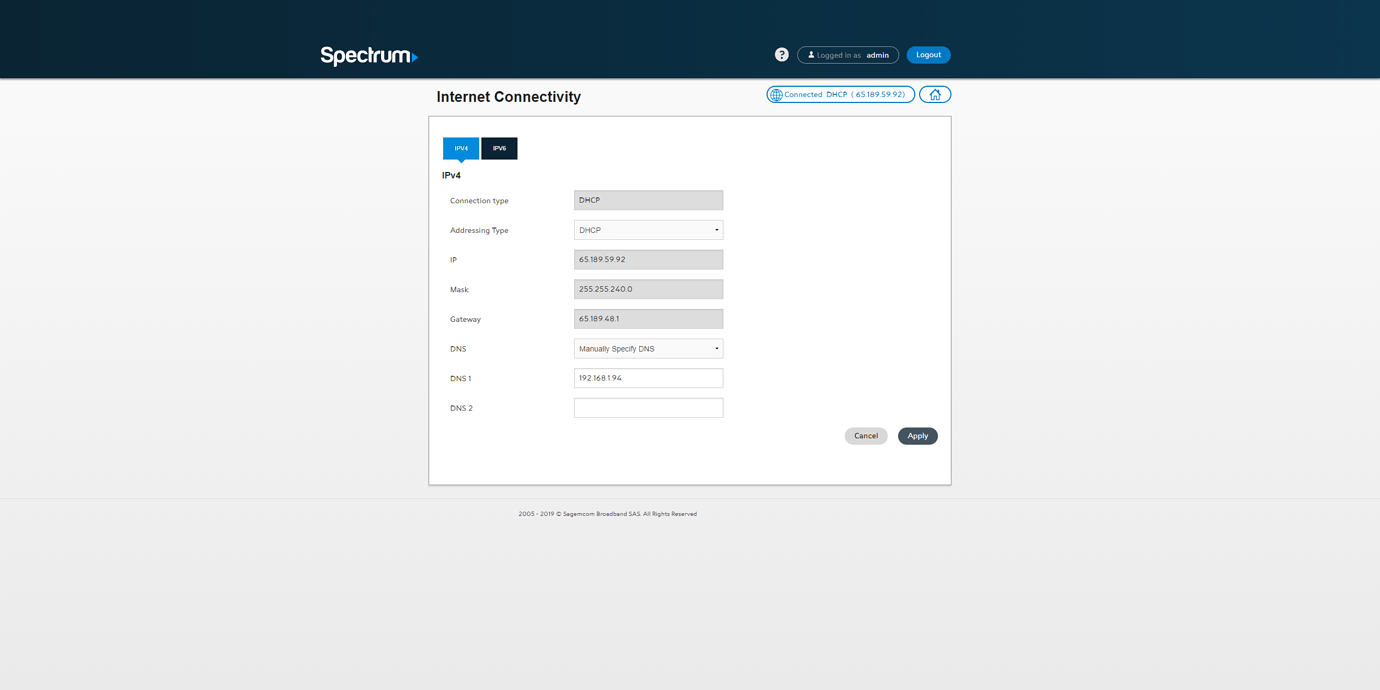
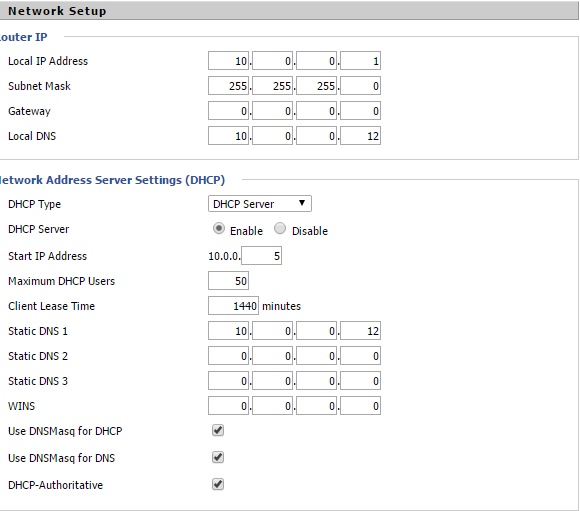
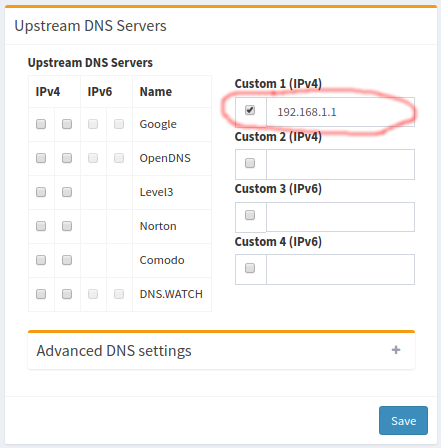
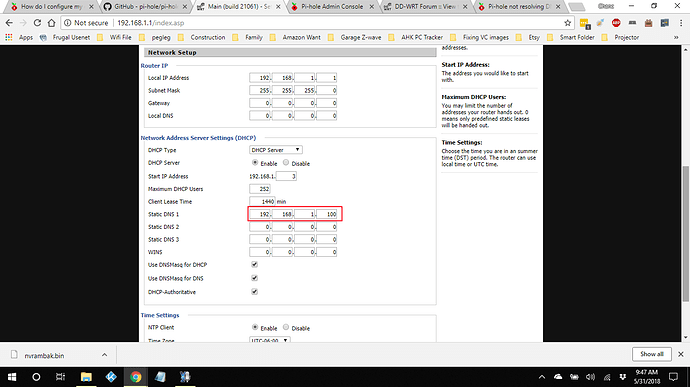
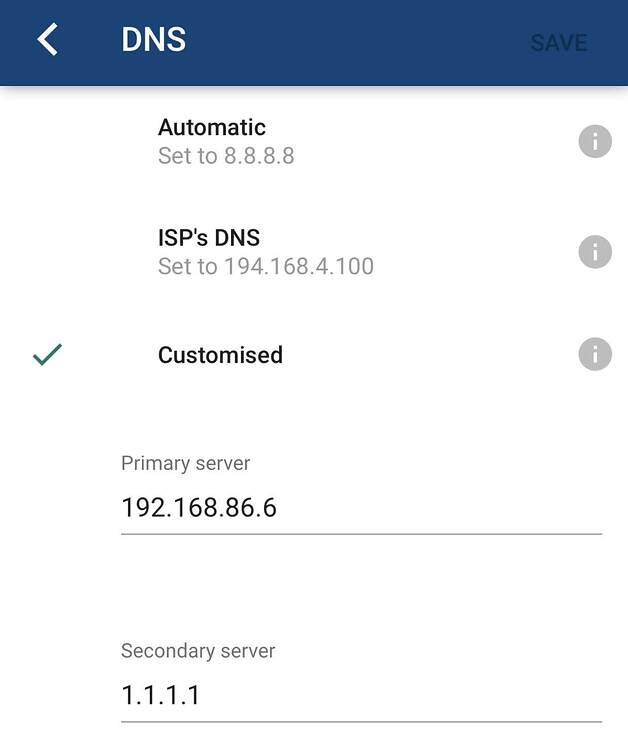
Configure your router’s DHCP options to force clients to use Pi-hole as their DNS server, or manually configure each device to use the Pi-hole as their DNS server.
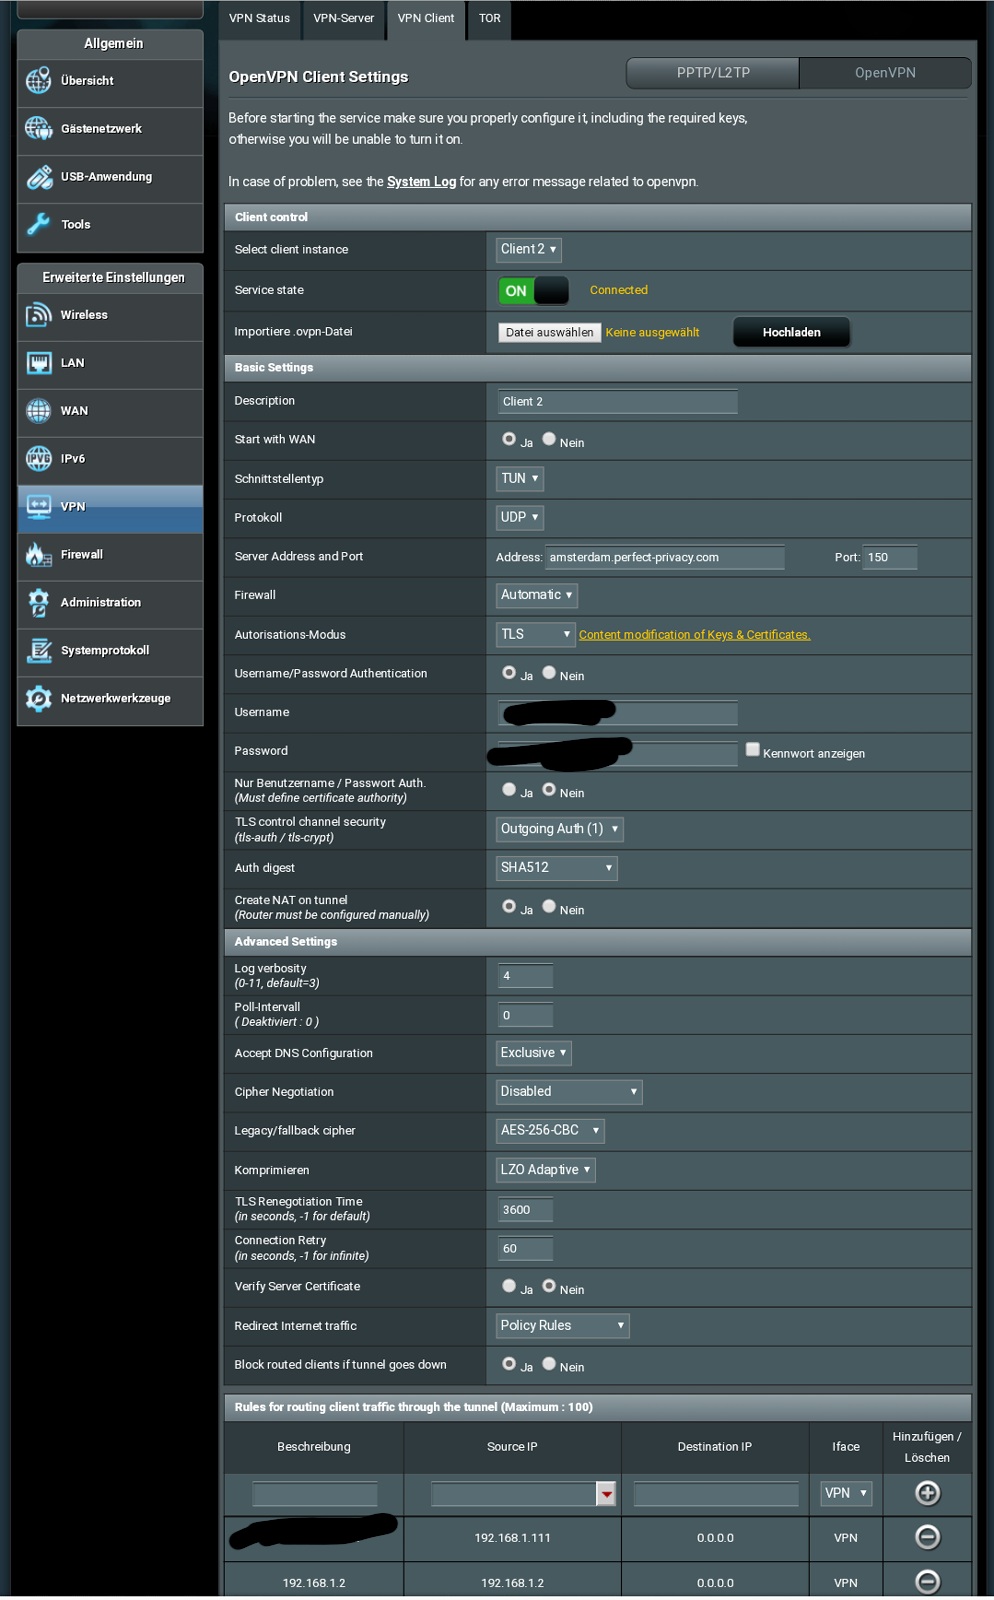
By pairing your Pi-hole with a VPN, you can have ad blocking on your cellular devices, helping with limited bandwidth data plans.
Instead of browser plugins or other software on each computer, install Pi-hole in one place and your entire network is protected.
Network-level blocking allows you to block ads in non-traditional places such as mobile apps and smart TVs, regardless of hardware or OS.
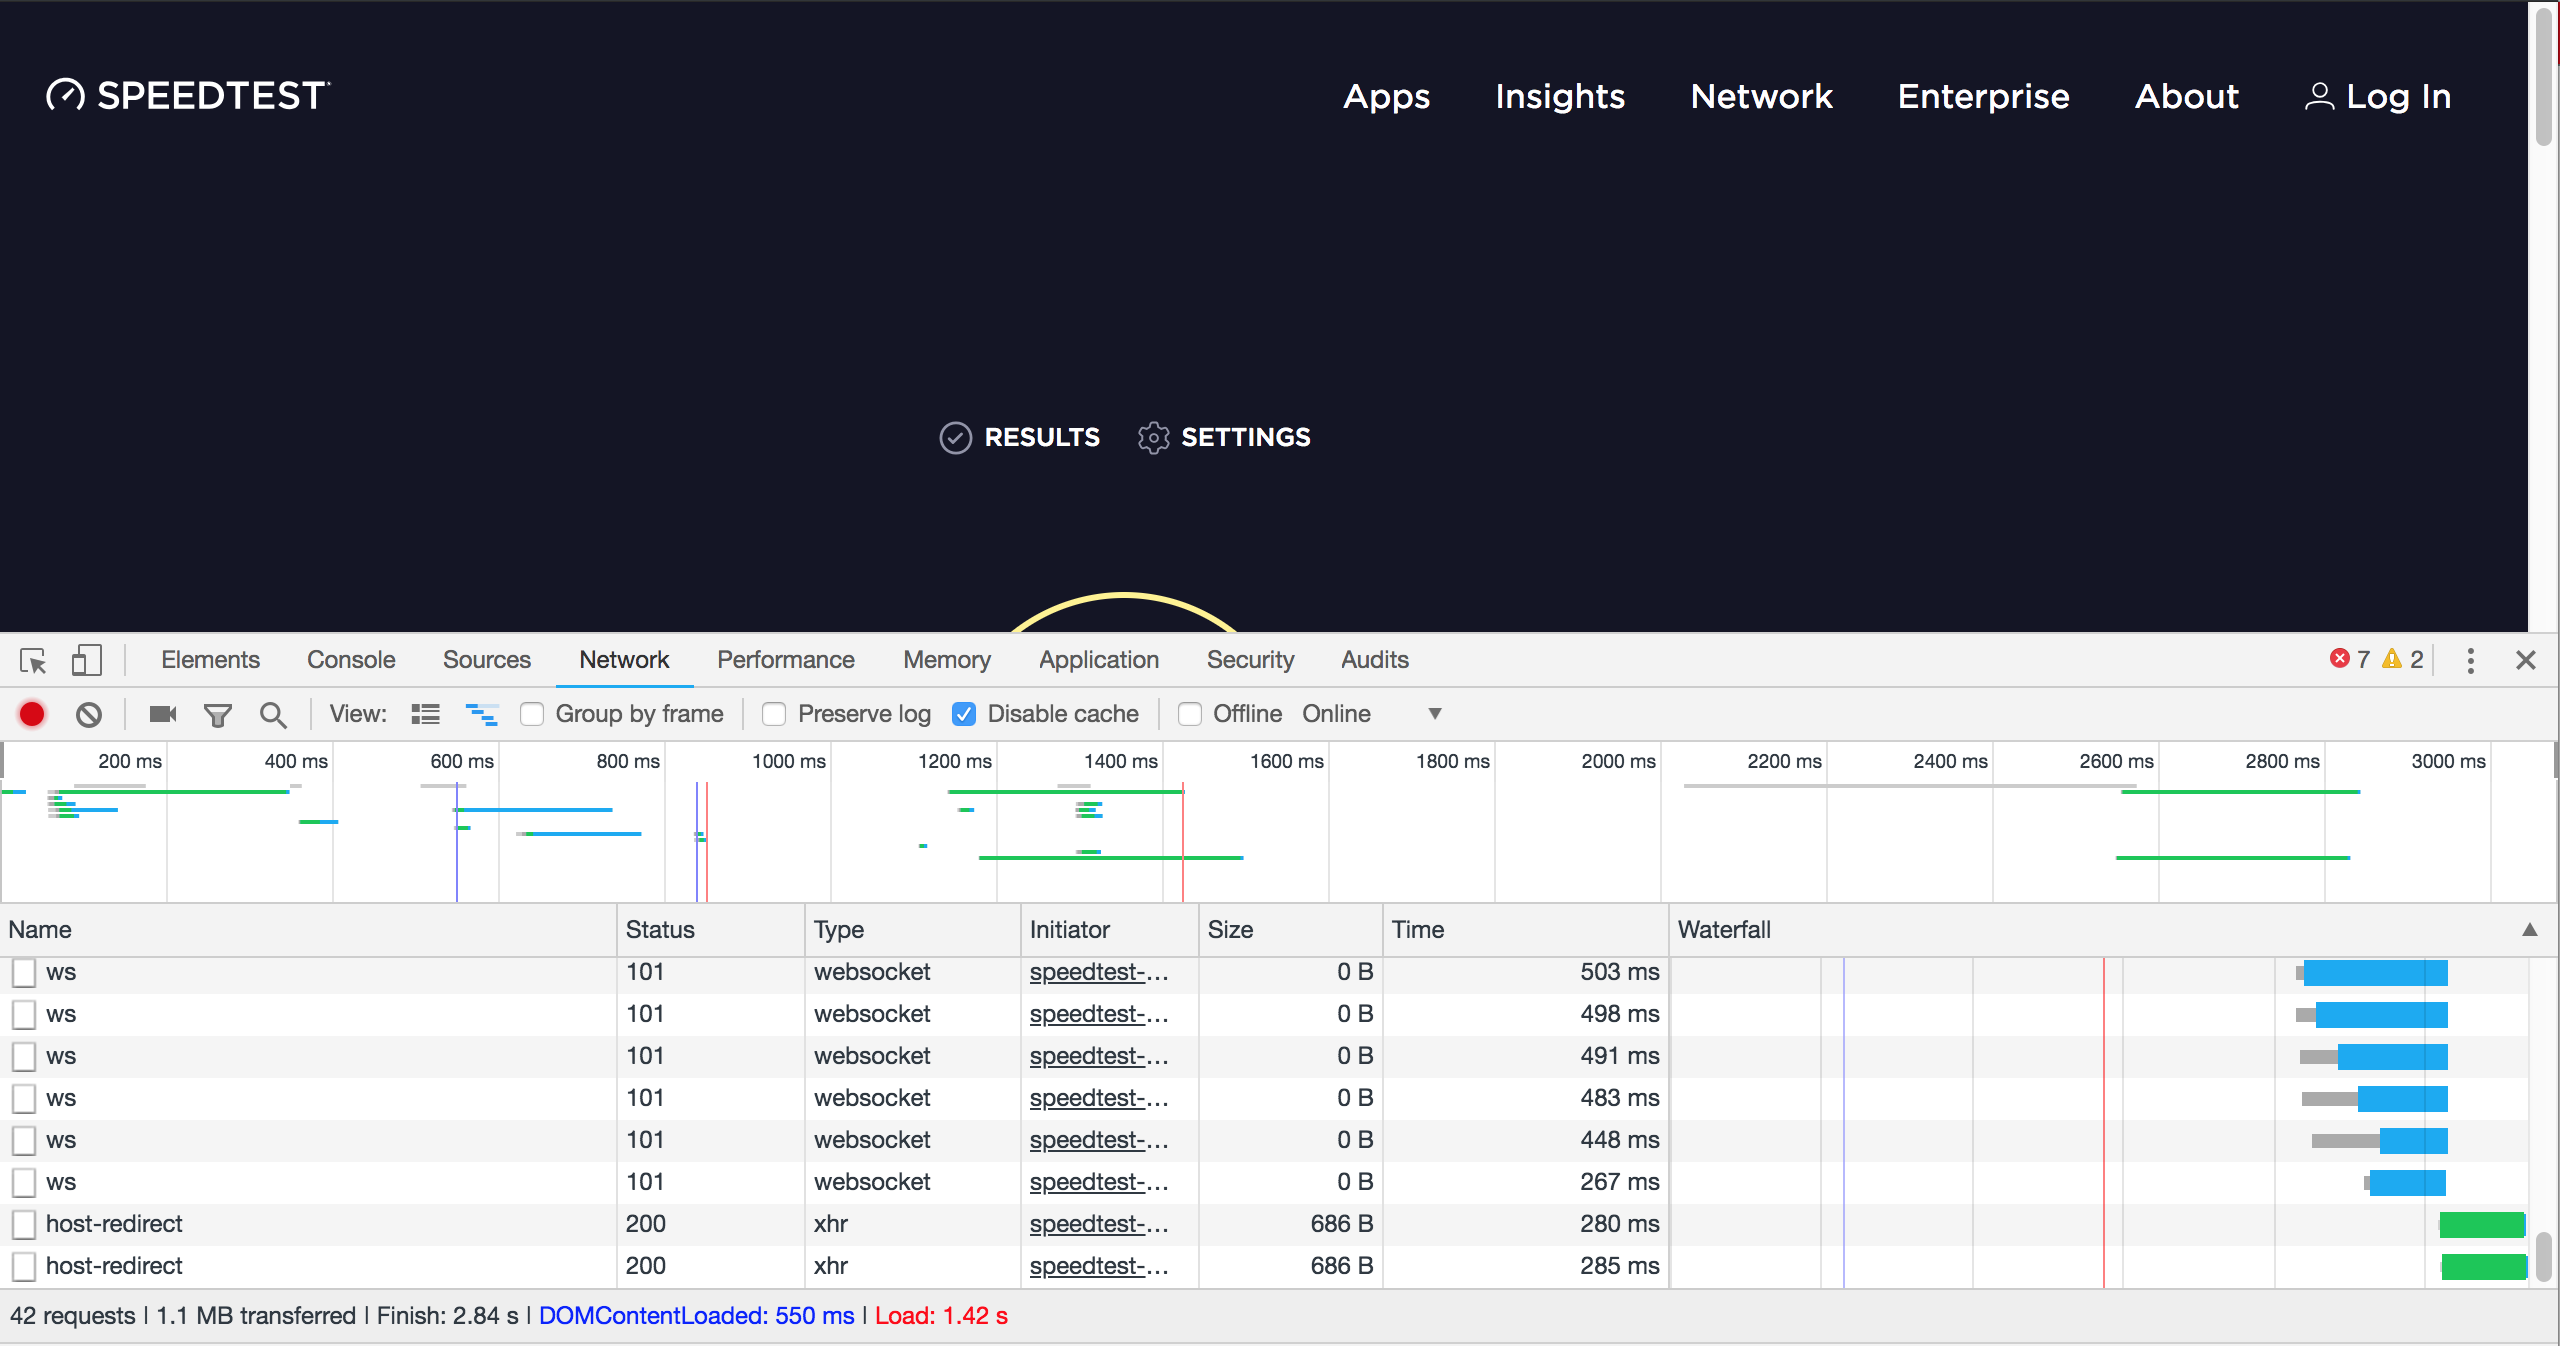
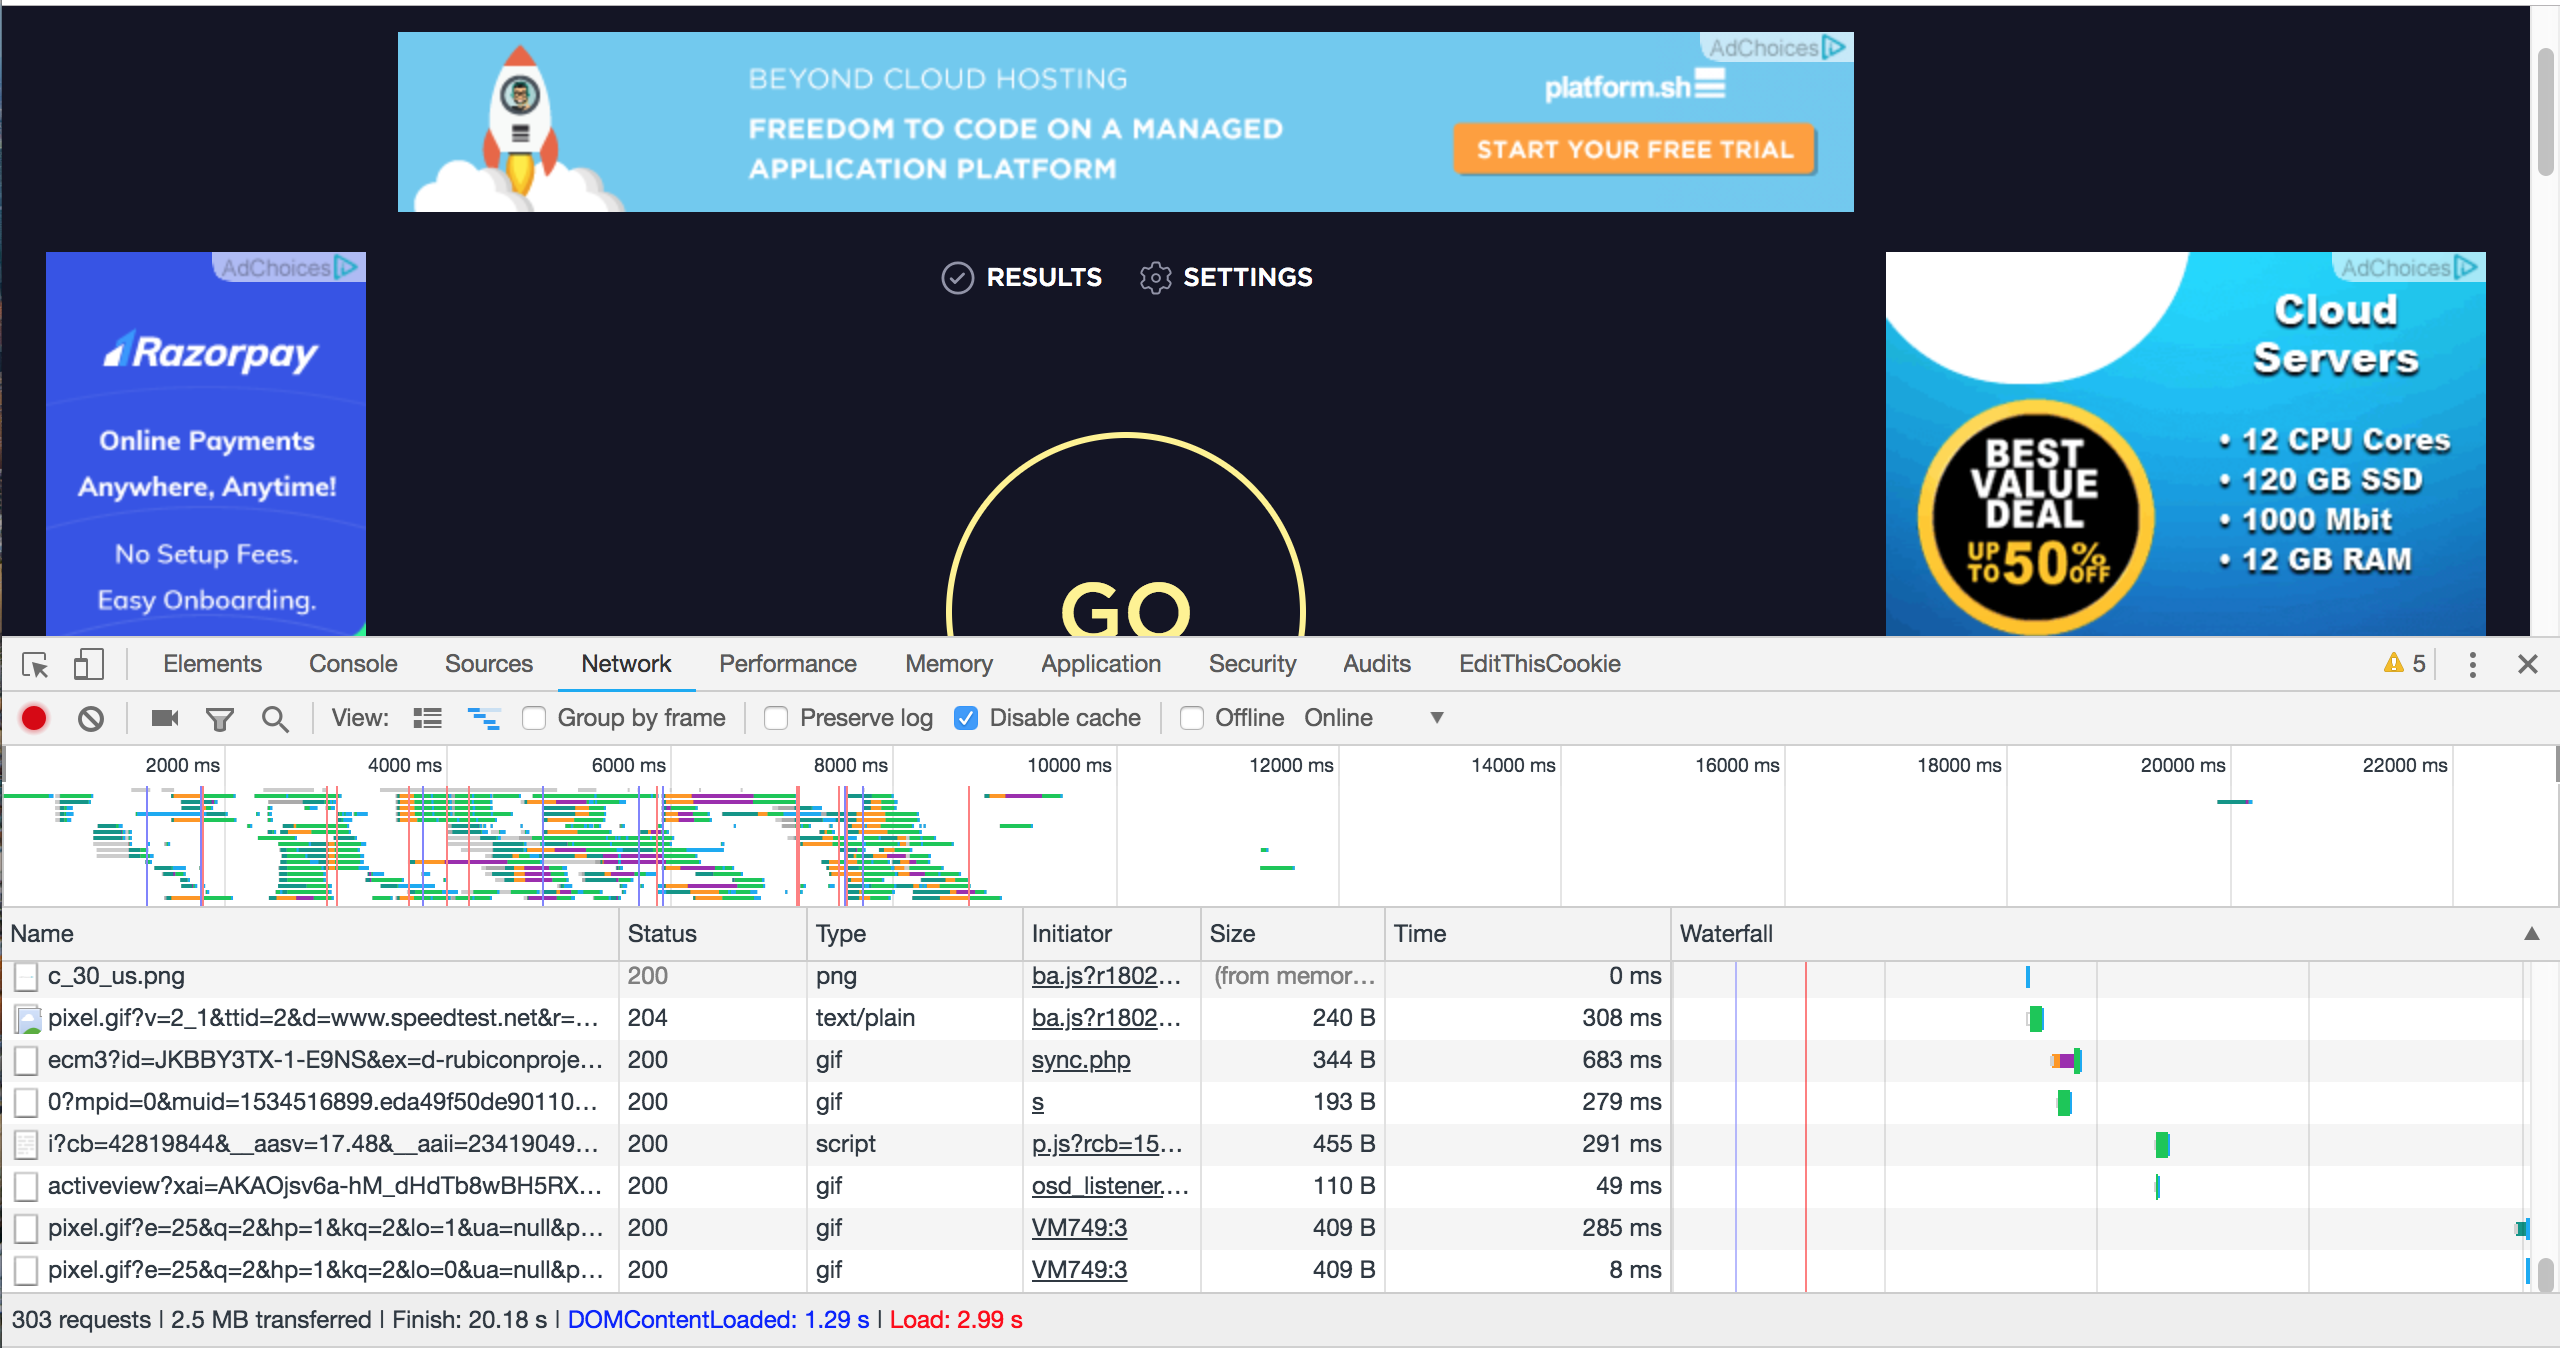
Since advertisements are blocked before they are downloaded, network performance is improved and will feel faster.
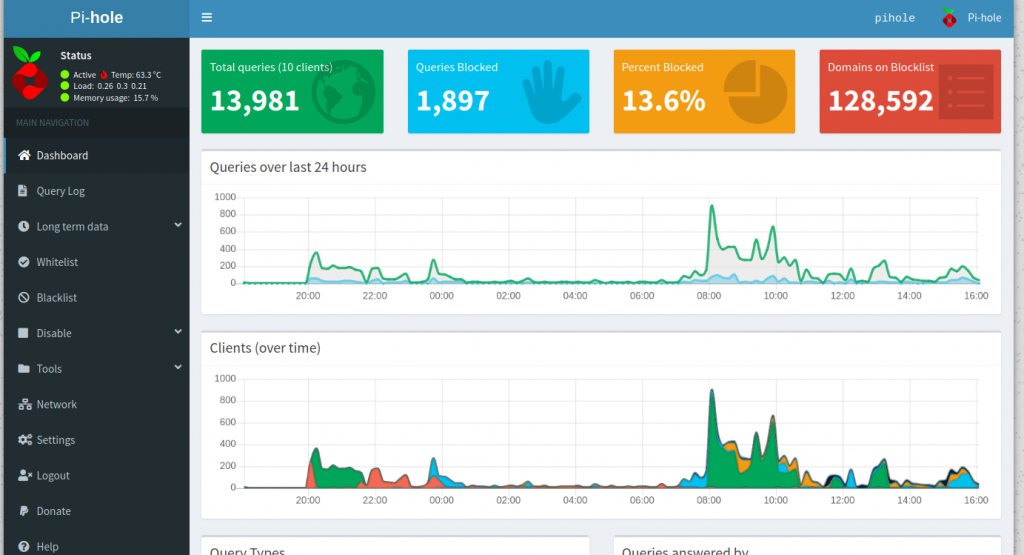
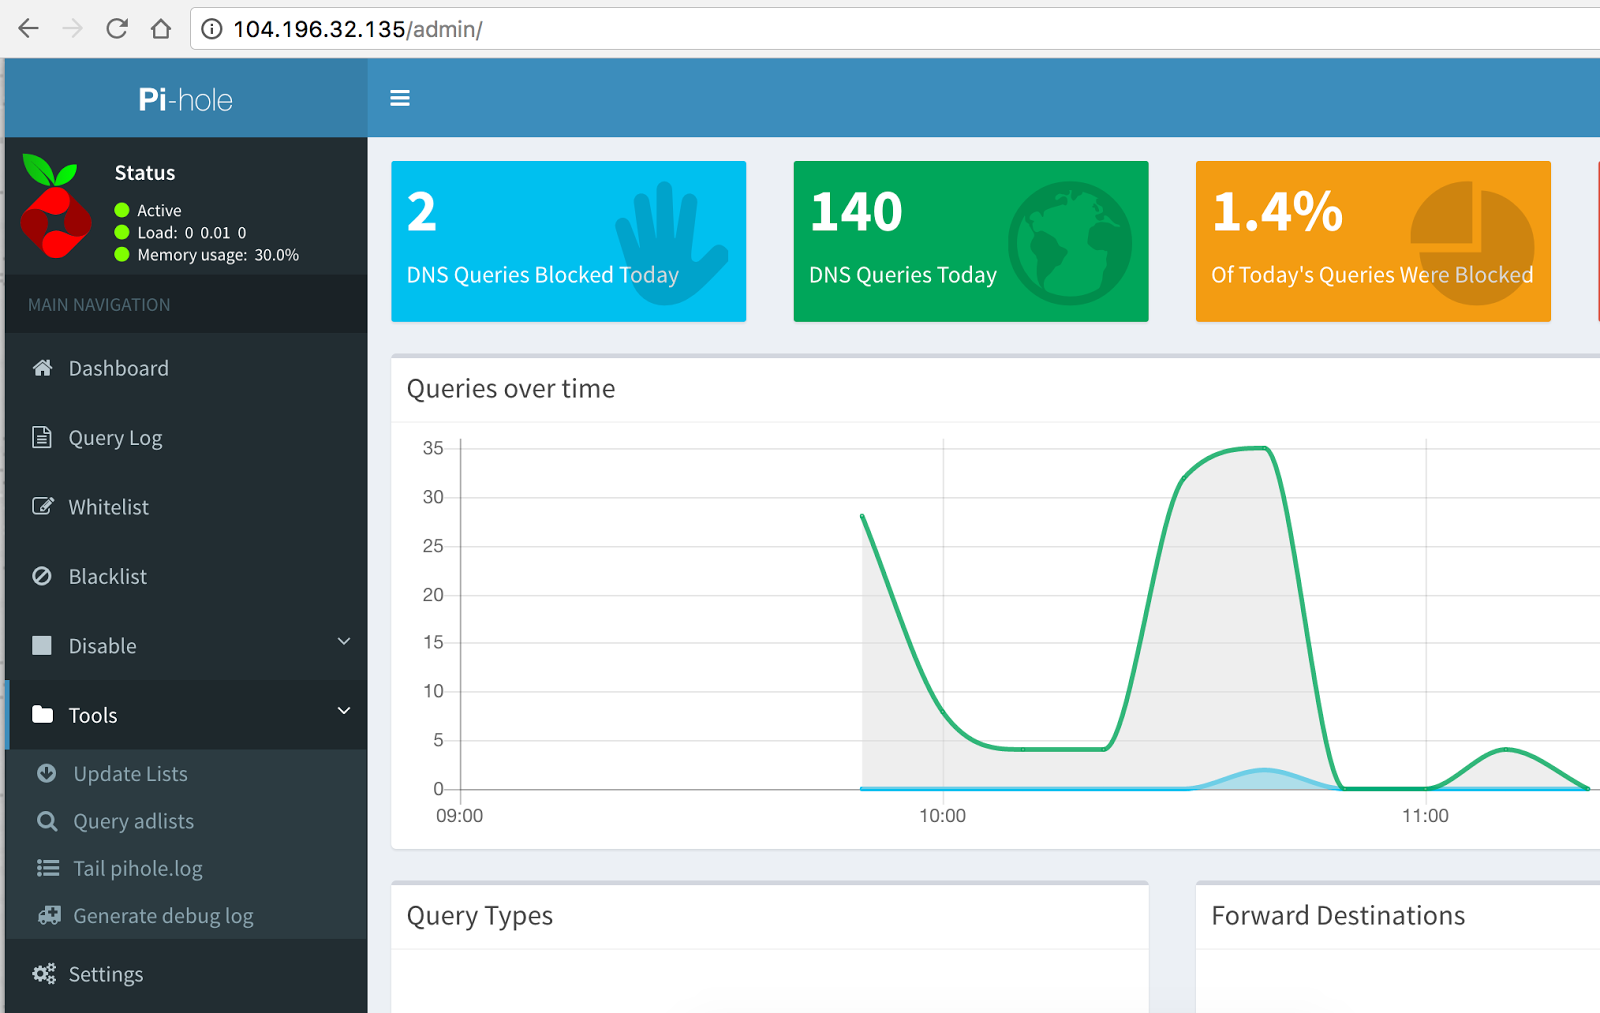
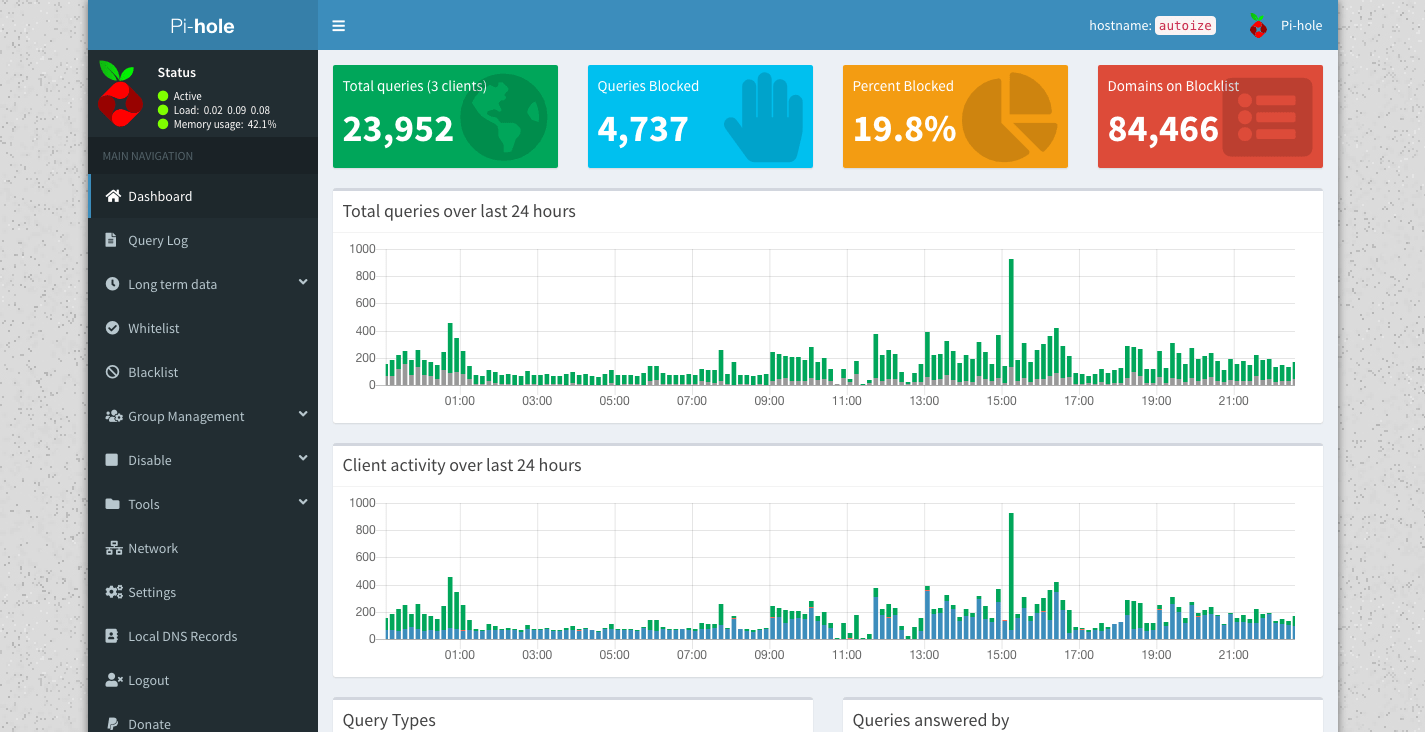
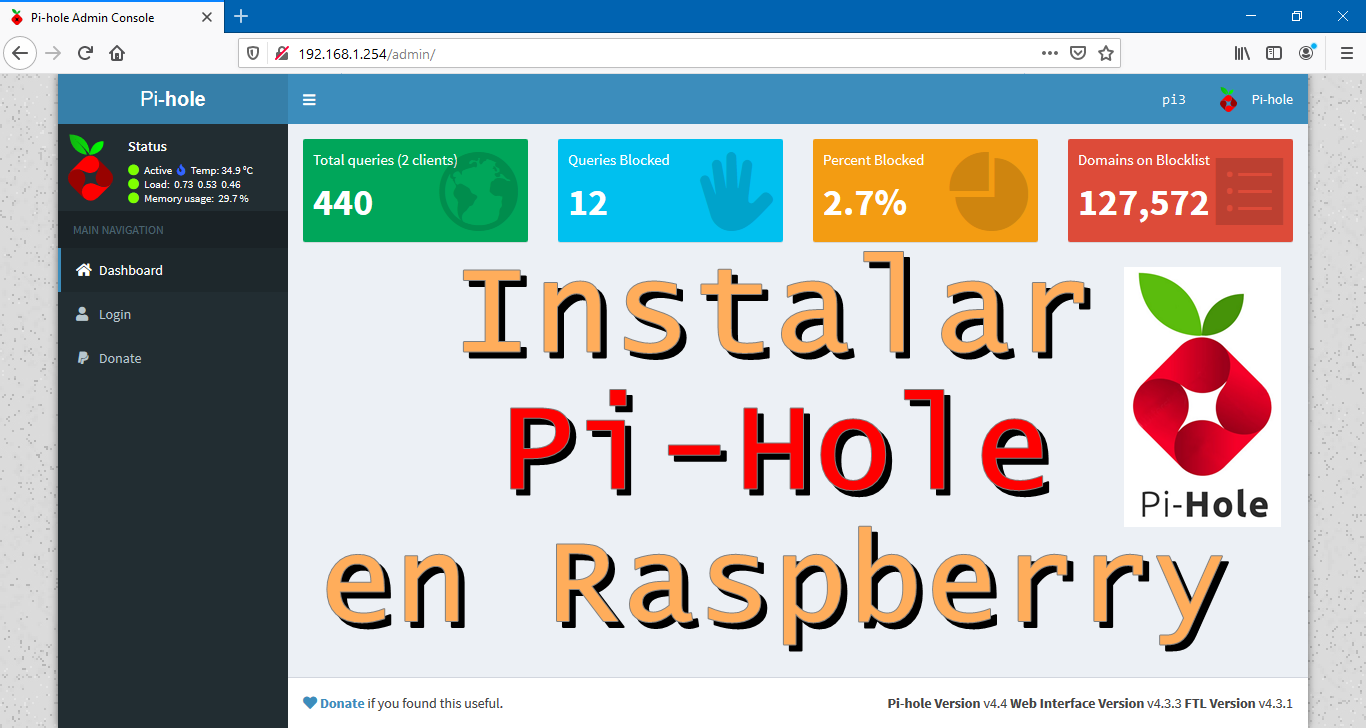
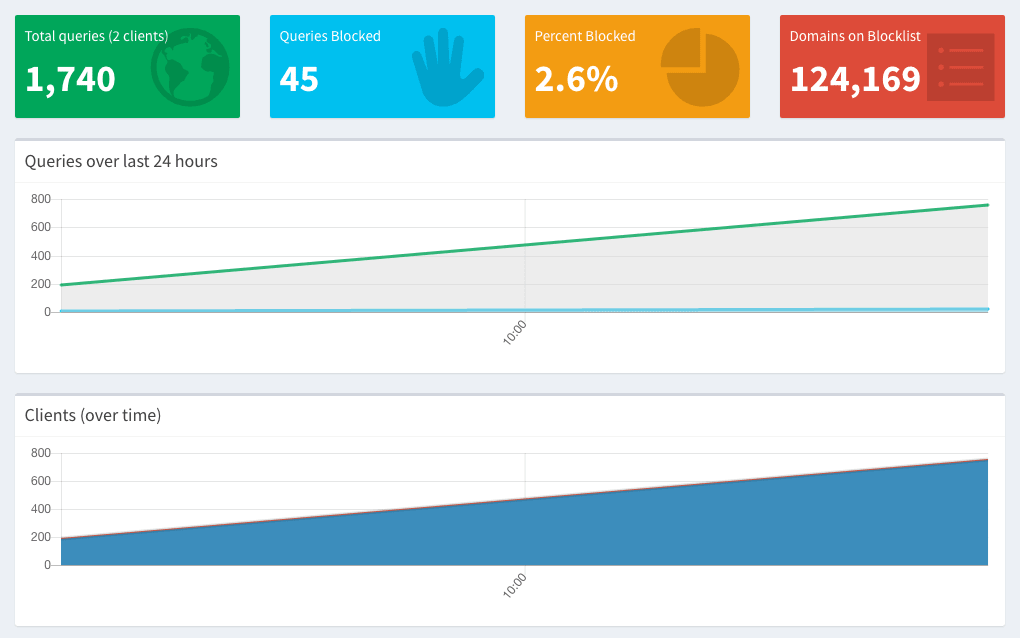
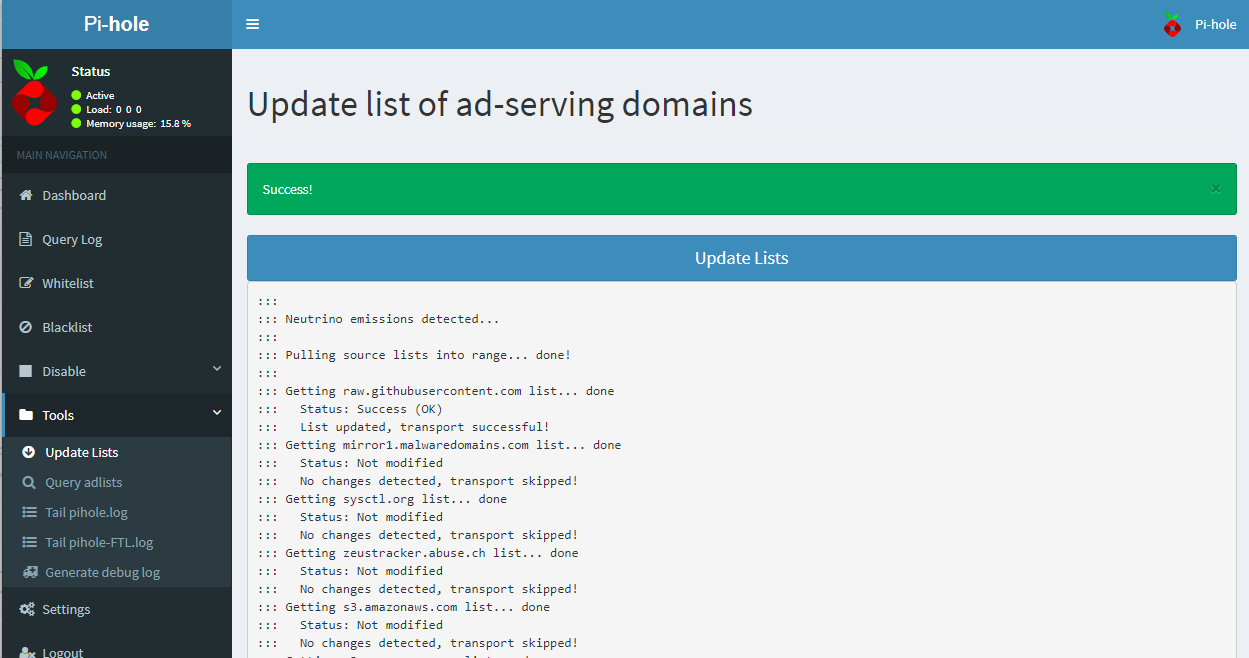
Our Web interface offers control of your Pi-hole and a central place to view statistics. We also include an API for extending these stats.
The Pi-hole developers are spread across the globe and work on the project in their spare time. We are a 100% remote team.
Pi-hole is free, but powered by your donations.
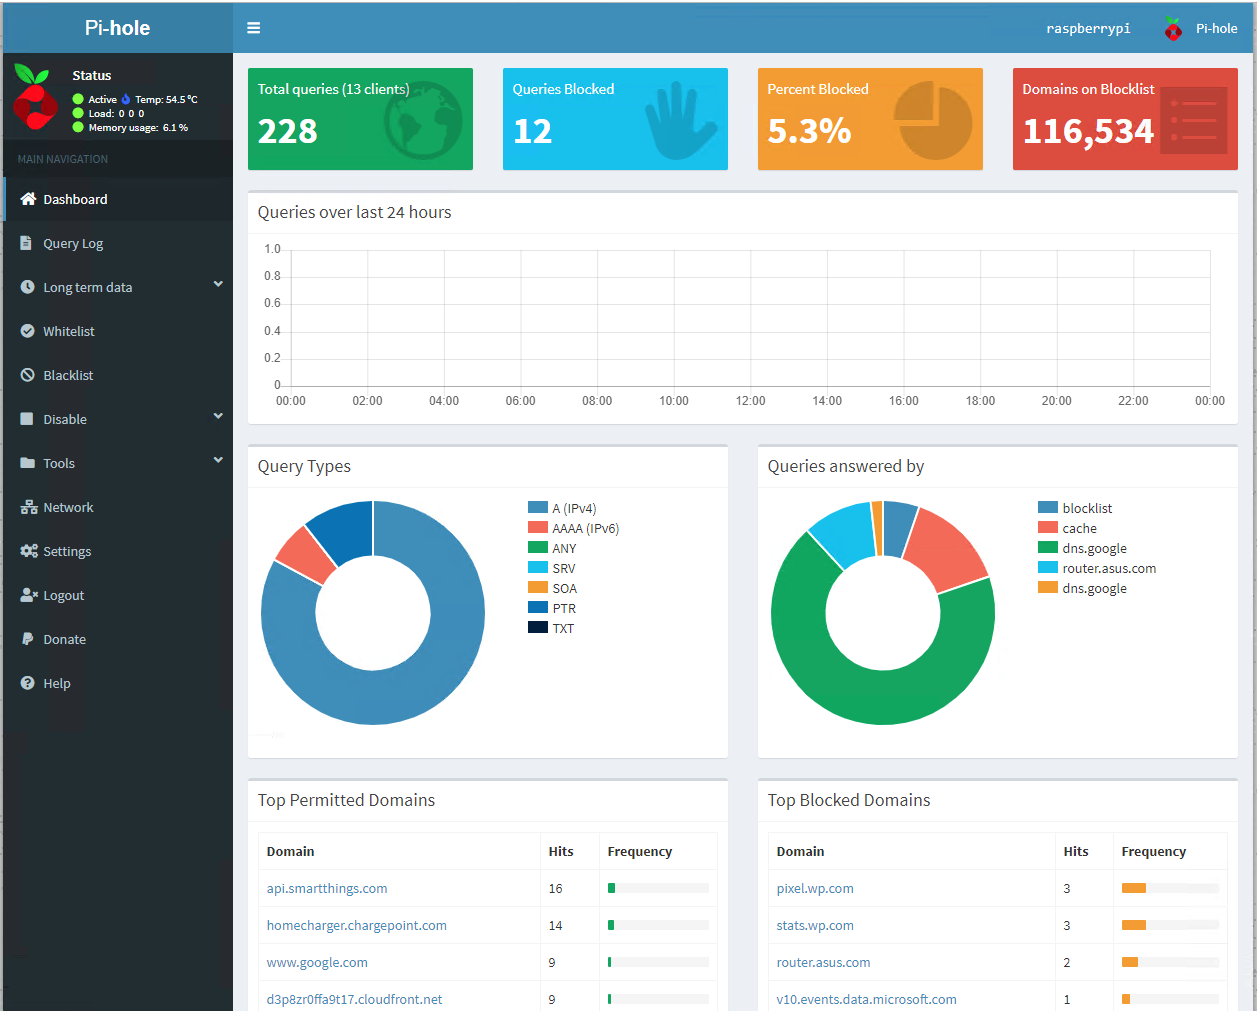
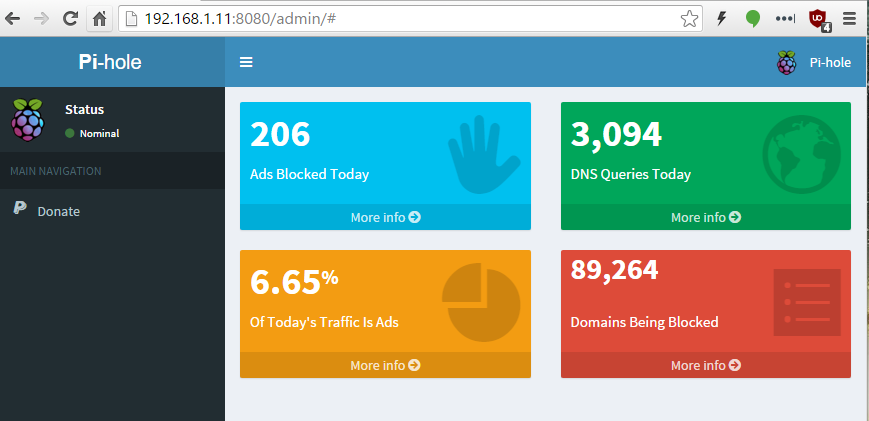
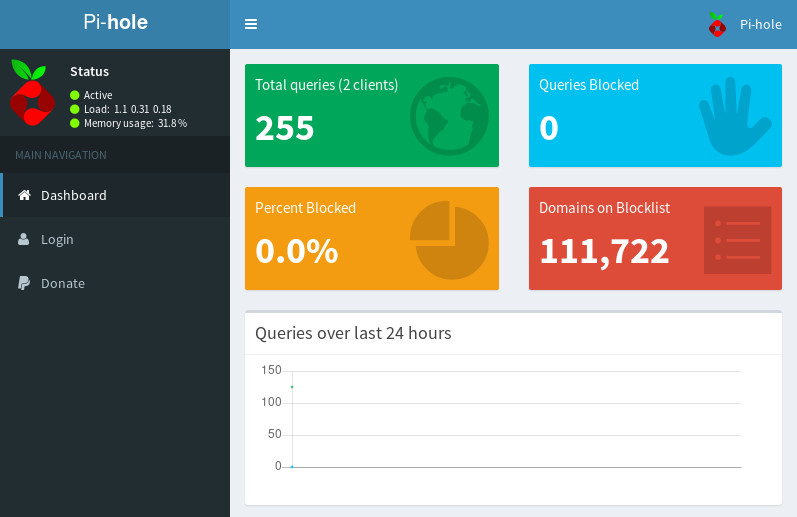
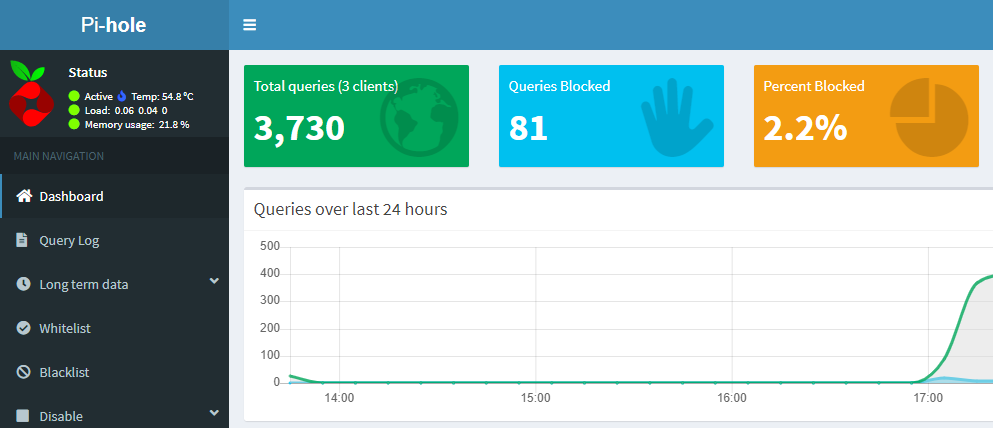
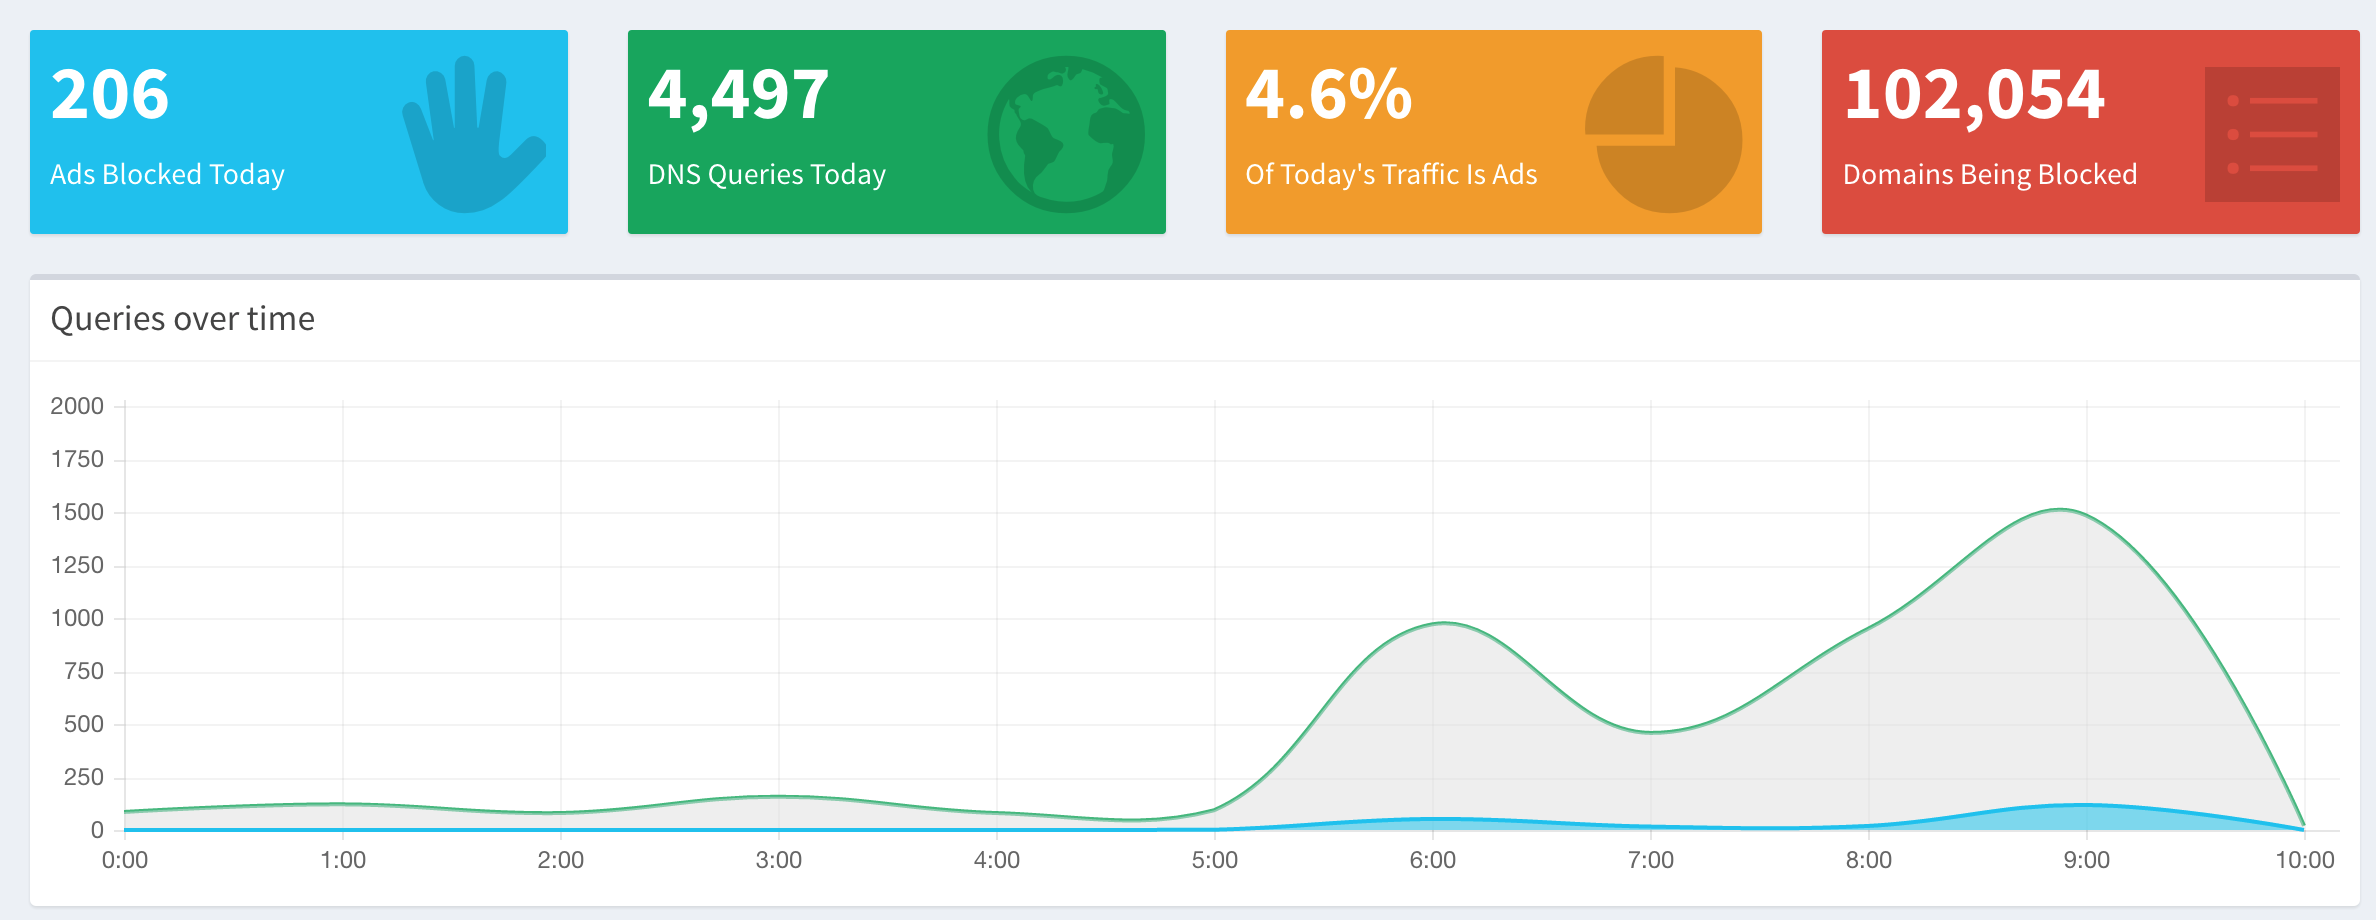
In addition to blocking advertisements, Pi-hole has an informative Web interface that shows stats on all the domains being queried on your network.
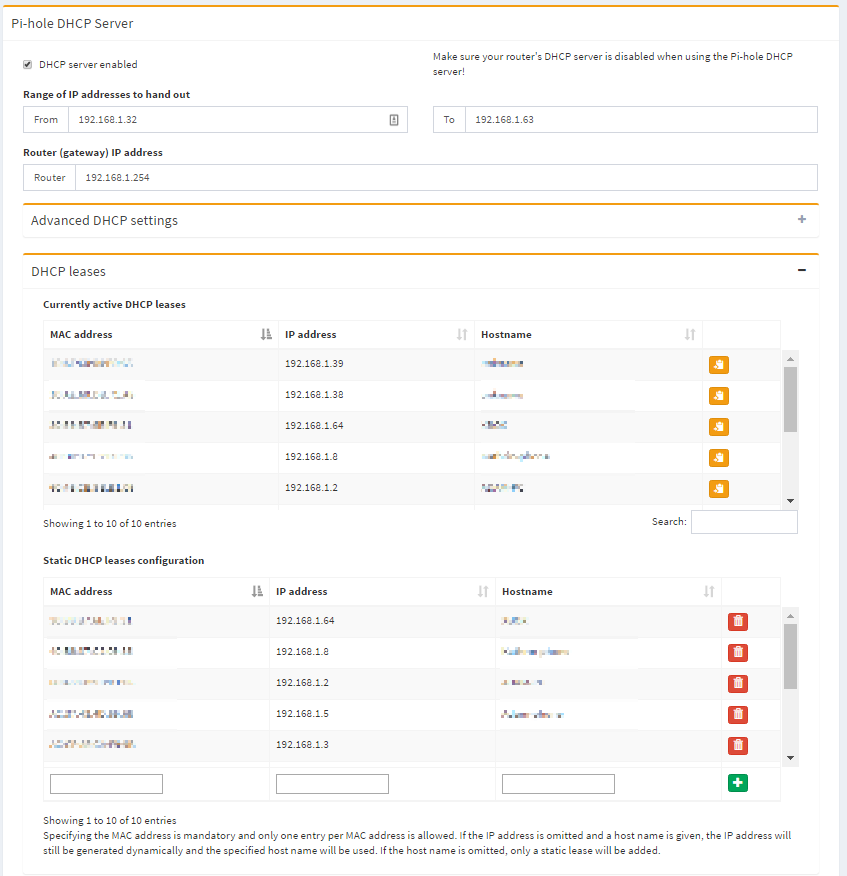
Pi-hole works fine with an existing DHCP server, but you can use Pi-hole’s to keep your network management in one place.
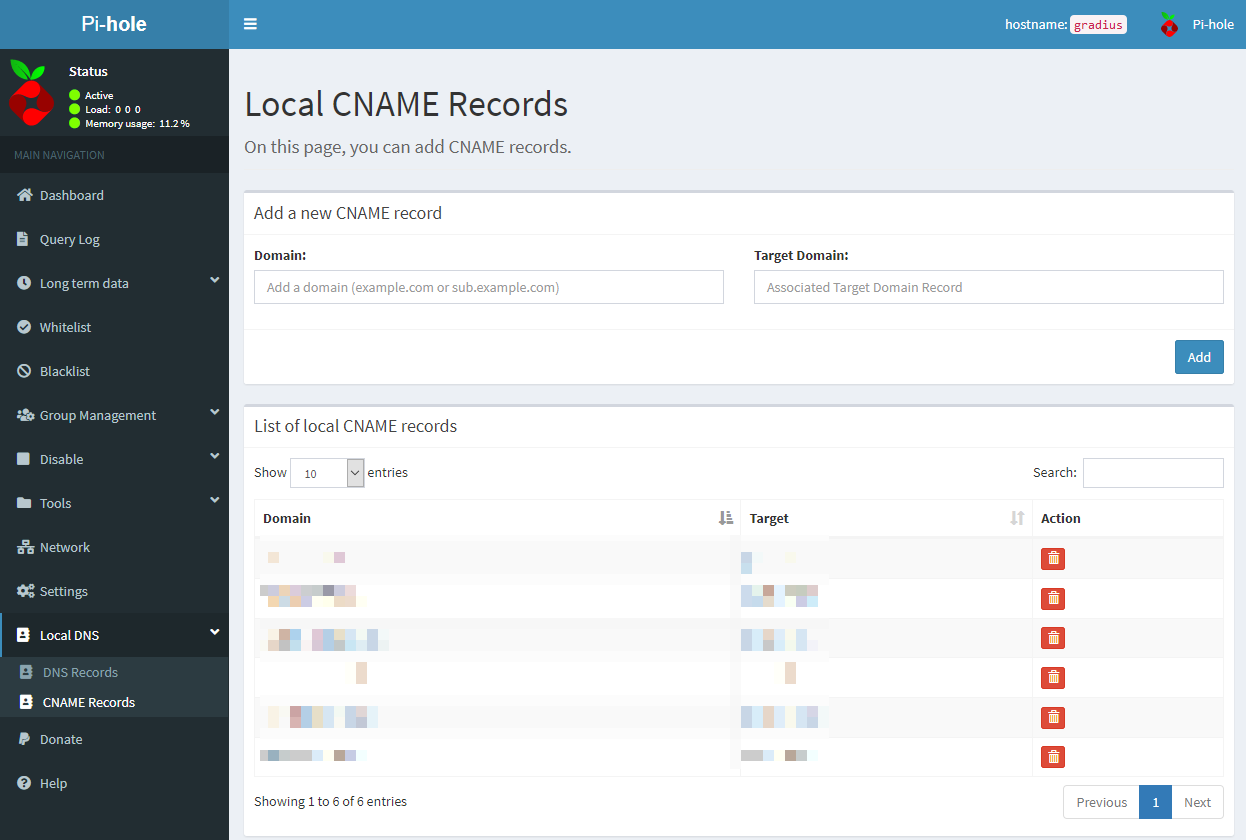
Fine tune your experience by blacklisting or whitlisting domains. Extend this capability with powerful regex statements.
See all the domains being queried on your network, where they originated, and more.
Queries are stored in a database and can be queried at any time. Learn about what’s happening on your network over time.
Keep track of the most queried domains and add them to a white or blacklist from a central page.
Choose from four different privacy modes that works for your environment.
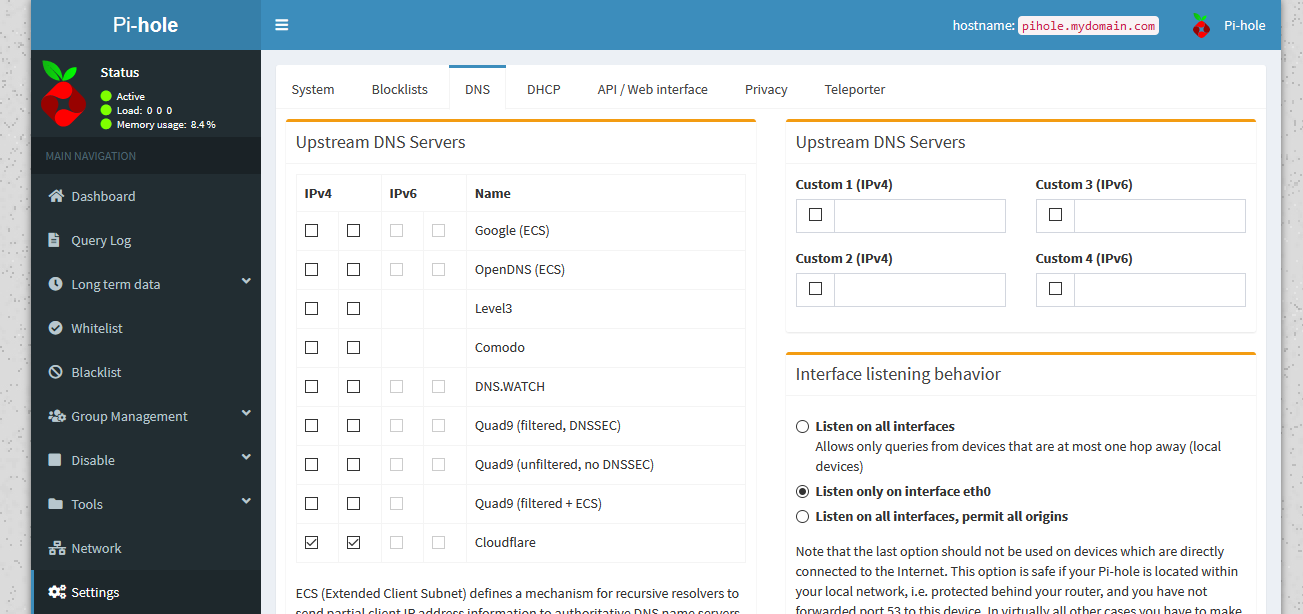
Control and configure other settings from the Web interface.
If you operate your Pi-hole + OpenVPN at home, you are likely sitting behind a NAT / dynamically changing IP address. In this case, you should set up a dynamic DNS record, which allows you to reach your server. You can exchange the address that has been configured during the setup of OpenVPN like this:
vim /etc/openvpn/server/client-common.txt
Look for the remote line and adjust it accordingly (remove IP address, add hostname), e.g.
This change has to be repeated in each client config file (*.conf) that you have been created up till now.
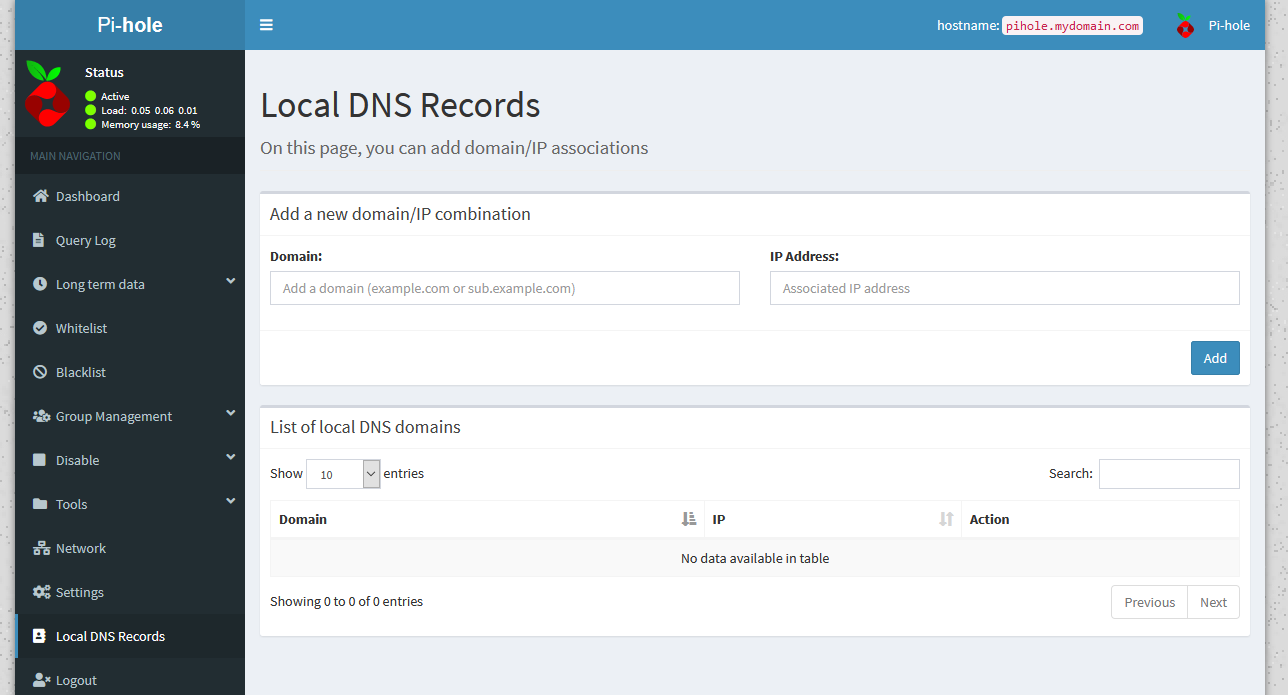
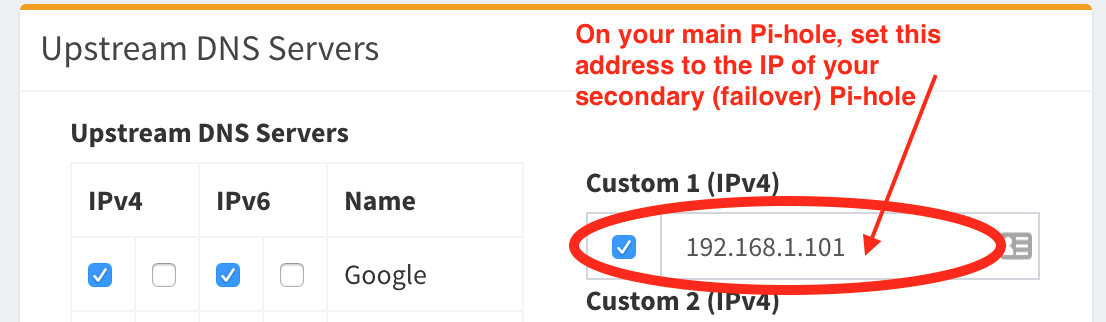
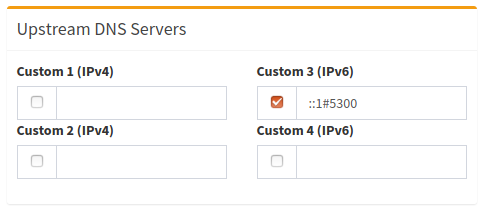
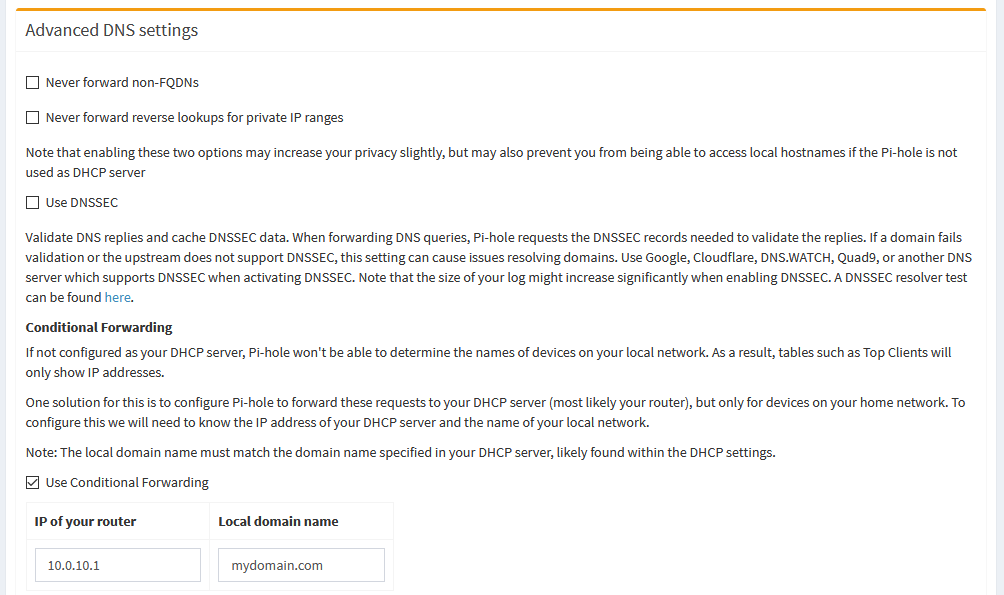
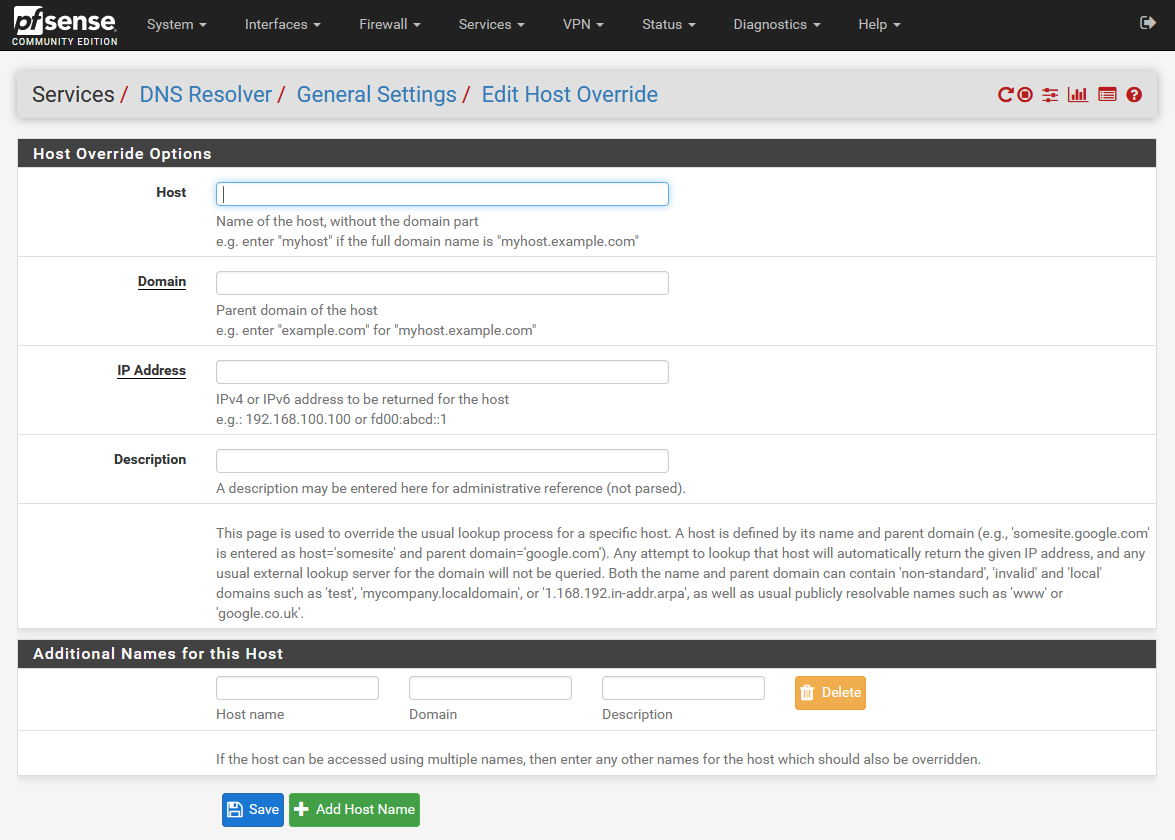
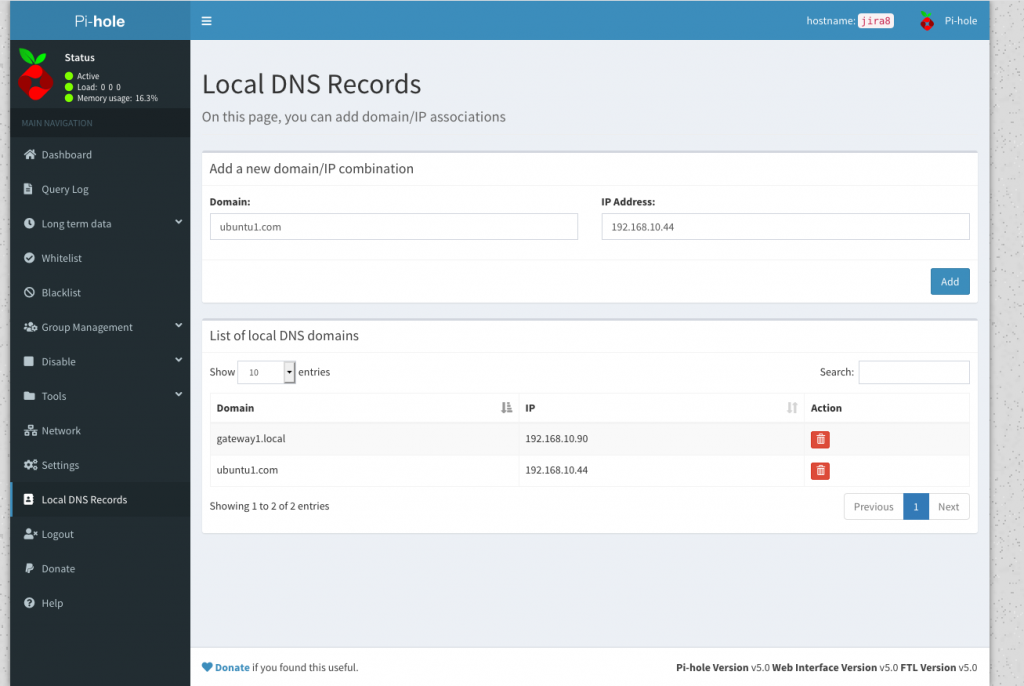
If you have set up a DDNS domain for your IP address, you will likely need to add a host-record to Pi-hole's settings.
pihole -a hostrecord home.mydomain.de 192.168.1.10
If you don't do this, clients (like the Android OpenVPN client) will not able to connect to the VPN server when inside the internal network (while it will work from outside). Afterward, the client will be able to connect to the VPN server both from inside and outside your local network.
If your router cannot update the dynamic DNS record, you can use for example ddclient.
This configuration file resides in /etc/ddclient.conf. During installation, apt probably already asked you some questions and prepared a useful config file. In general, configuration files look like:
# /etc/ddclient.conf
#
protocol=dyndns2
use=web
login=mylogin
password=mypassword
myhost.dyndns.org
If you want to have ddclient running as daemon (recommended!), change also your /etc/default/ddclient to:
# Configuration for ddclient scripts
# generated from debconf on Do 9. Feb 22:29:13 CET 2017
#
# /etc/default/ddclient
# Set to "true" if ddclient should be run every time DHCP client ('dhclient'
# from package isc-dhcp-client) updates the systems IP address.
run_dhclient="false"
# Set to "true" if ddclient should be run every time a new ppp connection is
# established. This might be useful, if you are using dial-on-demand.
run_ipup="false"
# Set to "true" if ddclient should run in daemon mode
# If this is changed to true, run_ipup and run_dhclient must be set to false.
run_daemon="true"
# Set the time interval between the updates of the dynamic DNS name in seconds.
# This option only takes effect if the ddclient runs in daemon mode.
daemon_interval="300"
In the following, we give an example of how to set up ddclient using the German Internet hosting provider Strato. First, you need to create a subdomain. Then you need to enable DnyDNS for this domain:
Afterwards, modify your ddclient config file to look like:
protocol=dyndns2
use=if, if=eth0
use=web, web=checkip.dyndns.org
server=dyndns.strato.com/nic/update
login=strato-login-name
password='password1234'
meine.domain.de
where you replace strato-login-name by your Strato login name (most likely your domain name, like maxmustermann.de), password1234 by the password you configured above (see the third screenshot), and meine.domain.de by the subdomain you created and enabled dynamic DNS for.
Previous Optional: Full and DNS-only
Wank Handjob
William Hole
French Ass Fuck
Sexy High Heels Sandals
Xnxx Stockings Heels
Pi-hole – Network-wide protection
Optional: Dynamic DNS - Pi-hole documentation
Pi-Hole With DNS Over HTTPS - 3os
unbound - Pi-hole documentation
Создаем собственный фильтрующий DNS-сервер на ба…
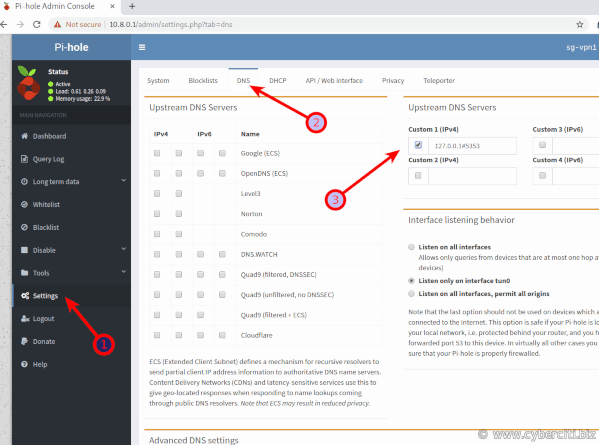
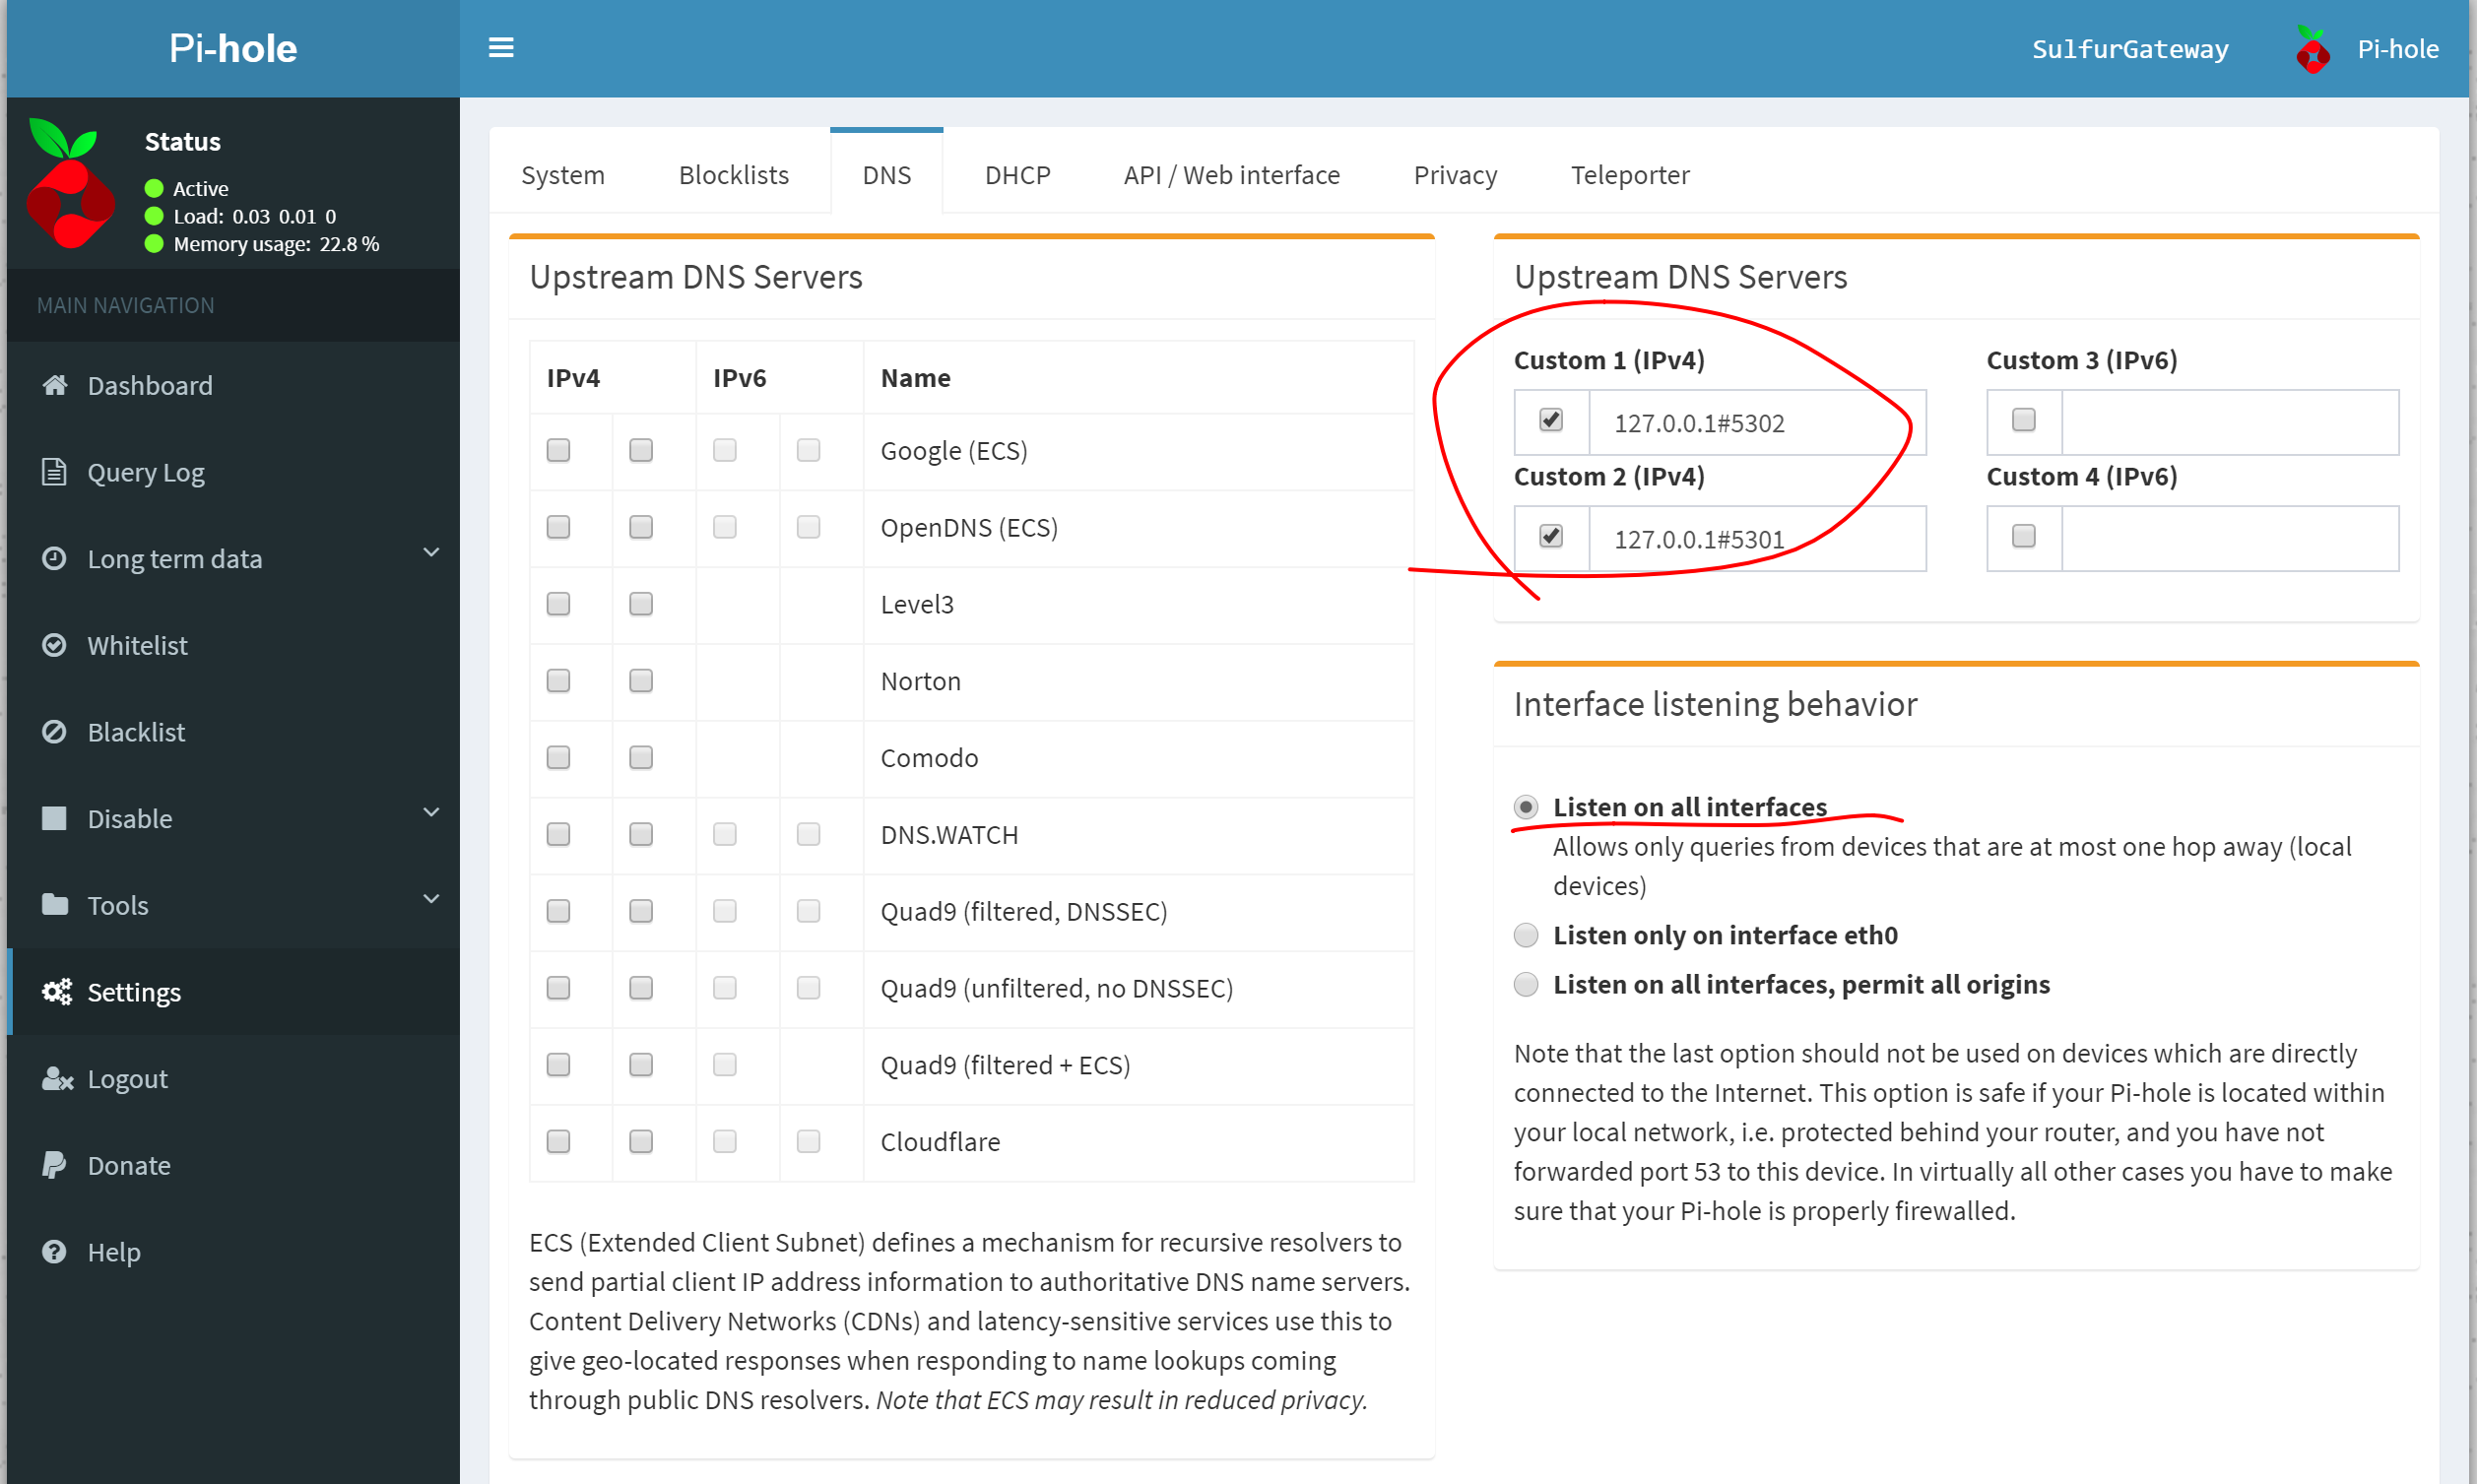
Configure Pi-Hole DNS + Cloudflare DNS over HTTPS (DoH) on ...
DNS with Pi-Hole + DNSCrypt - Sean Wright
HOWTO: Using pi-hole as LAN DNS server - Community How-to ...
Pi Hole Dns