OmniStyle: How to do some fancy header with accent
BootleggersBecause sharing is caring, we'll teach you about some cool stuff you can do with Android drawables and system accent for OmniStyle.
On this example, we'll use a Sonic The Hedgehog (Sega Genesis/Megadrive) sprite and some tool like photoshop or gimp, or even paint.net, the important thing is that has layers. Also, some suggestion: This is for stuff that isn't vectorized, so, if you got a vector, that's better, else, let's rely on this method of PNGs. Sorry if it's a dirty trick, if you got a better way to do this, let us know on our Off-Topic group.
STEP ONE: Our lovely image
This is actually dumb to add but here it is the image we want to "spice up with accent". In this case, we'll use this lovely sonic idle sprite.

With our image already set, we have to take into consideration the following things:
What's the color of the image that we want to replace with the accent? Does it have any extra colors? (Like, shadows or color variations) How can i get the rest as normal without getting it tinted?
In this case, i want to change all the sonic body colors, and unfortunately does have some light color variations. And the good thing about this example is that is a small sprite, so the layer preparation will be easier.
I'll do the following layers:
A layer with all the body parts like a mask (This will be needed for the android code part), another layer with the color variations for the main color, and finally, the part of the body that's unthemed.
This is a visual example of the previous layer explanation:
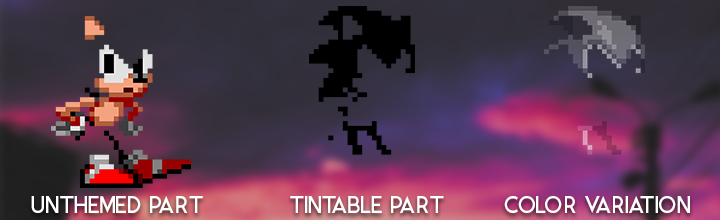
After cropping everything, and getting all the layers done, you can do a proof if the tintable part is done by using Color overlay on photoshop or painting all the black blocks with the paint tool on your image editor. This should be the result:
After testing with the image editor, be sure to export your image per layer on PNG (save every layer on a different PNG). We'll need that when we want to do our header drawable. So keep them in handy.
STEP TWO: Putting our layers in a drawable
Editor's note: This is in case you're doing a headers app, and you need to follow this step. In case that you're just making drawables to send to us, just send the image layers on a zip and we'll take care of the rest.
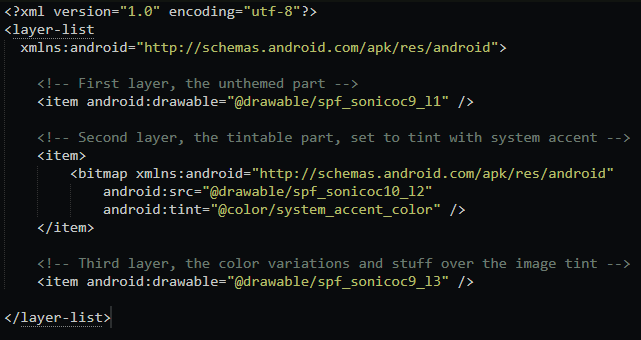
Now this is kind of easy, it's a matter to copy the layers PNGs into res/drawable-nodpi, and then do a XML file on res/drawable with the info related to your images. Here's a code snippet of the XML file (we named it spd_sonicocaccent) because it's our Original character, please do not steal.
So, now with this drawable done, you have to add your header list to assets/yourheadername.xml and finally on AndroidManifest.xml


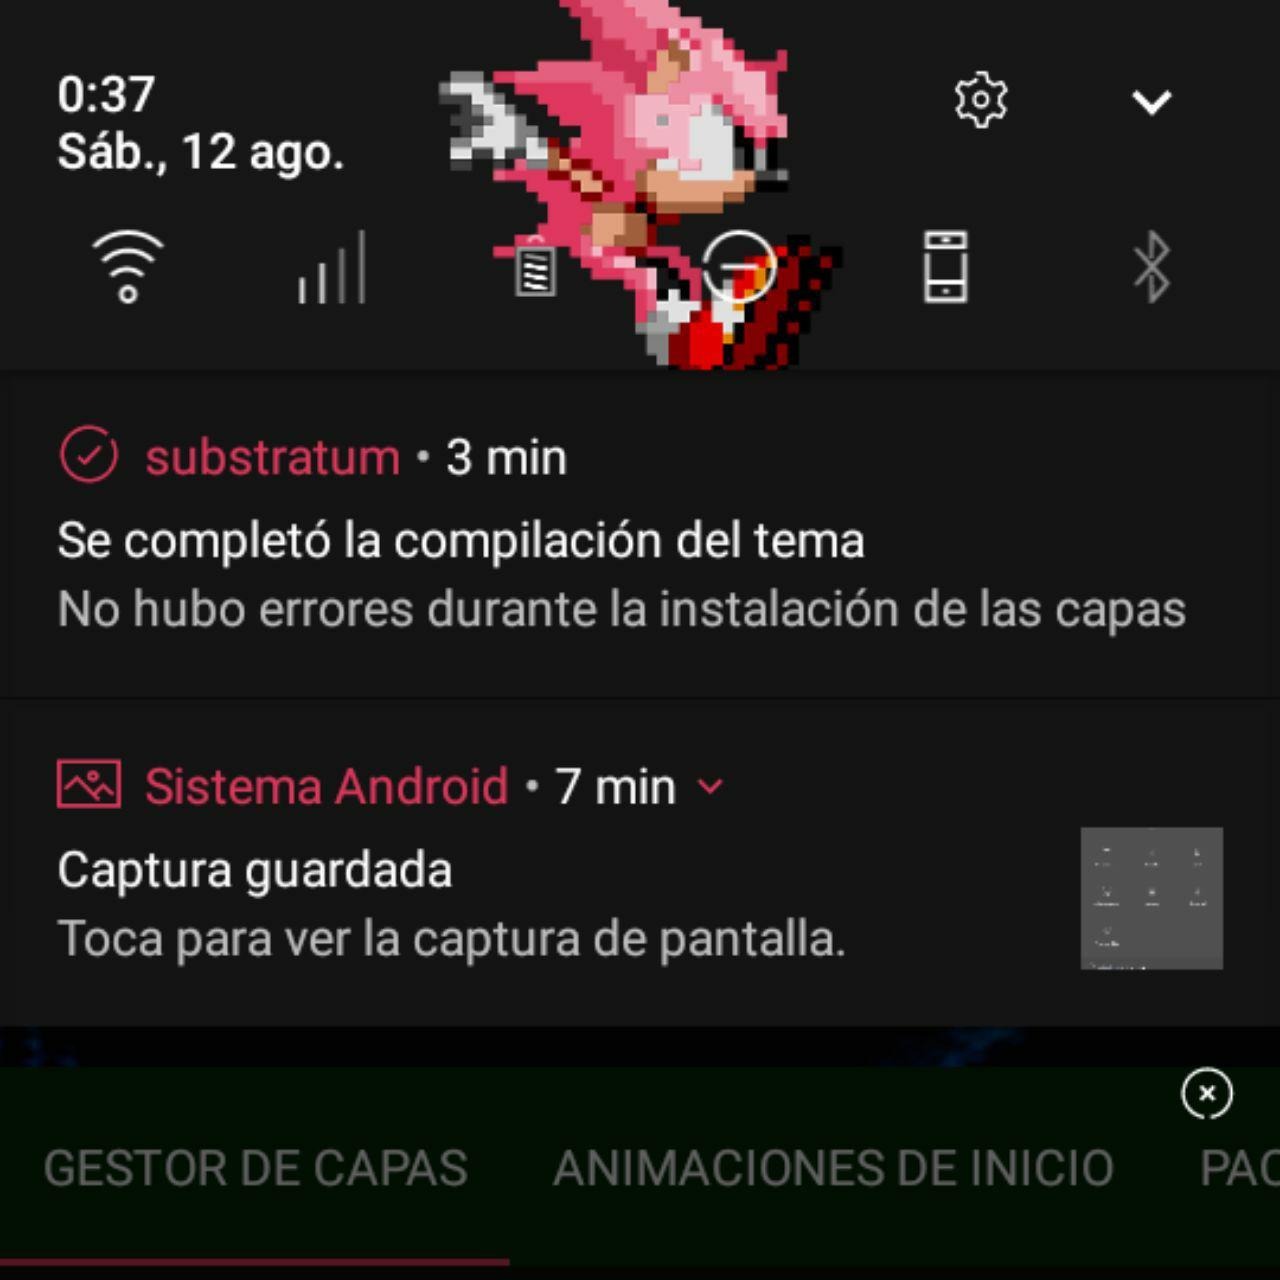
And with that being said and done, you have to compile your app and see if the new header shows up!
And now enjoy your dynamic header colors!

Ending note: I'm sorry if the explanations weren't super clear, but if you have some questions, suggestions or feedback, please let us know on our off-topic group, and i'll try to explain stuff that i've missed, or try to give a better explanation. Hope it's easy to understand and have a nice day.
Also, there's the project file for this experiment, in case you want to see how it's done.