Mastering Clipping Path Services in Photoshop
TysonIn the world of graphic design and image editing, mastering clipping path services in Adobe Photoshop is a valuable skill. Clipping path is a technique used to remove the background of an image or isolate a specific object. It involves creating a vector path around the subject to make precise selections.
This blog will delve into the details of mastering clipping path services in Photoshop, providing comprehensive guidance and tips for both beginners and experienced users.
What is a Clipping Path?
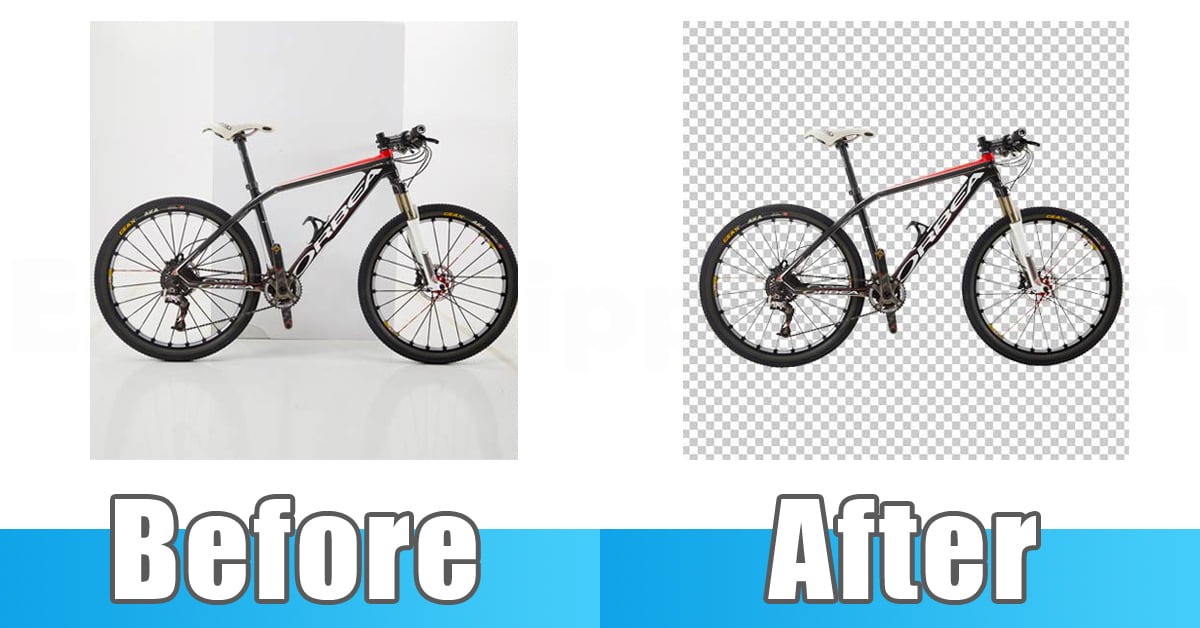
A clipping path is a closed vector path used to cut out a 2D image in photo editing software. It enables you to separate an object from its background, creating a clean and precise silhouette. This technique is commonly employed in graphic design, e-commerce product photography, and various digital art projects.
How to Create a Clipping Path in Photoshop?
- Using the Pen Tool:Open your image in Photoshop.
- Select the Pen Tool from the toolbar.
- Carefully trace around the object you want to clip.
- Complete the path by connecting the endpoint to the starting point.
- Right-click and choose "Make Selection" to convert the path into a selection.
- Quick Selection Tool:Select the Quick Selection Tool from the toolbar.
- Brush over the object you want to clip.
- Refine the selection using the Add or Subtract from Selection options.
- Once selected, go to the Paths panel and click "Make Work Path from Selection."
- Adjust the path if needed.
Types of Clipping Paths
- Basic Clipping Path:Used for simple shapes with straight lines.
- Ideal for products like books, smartphones, etc.
- Complex Clipping Path:Involves intricate shapes with many edges and curves.
- Suitable for objects like jewelry, furry animals, etc.
- Multiple Clipping Paths:Involves creating paths for different parts of a single image.
- Useful for adjusting color corrections or applying different effects.
Tips for Mastering Clipping Path Services
- Practice Regularly: Like any skill, mastering clipping paths requires practice.
- Use Keyboard Shortcuts: Learn and use Photoshop shortcuts to speed up your workflow.
- Refine Edges: After creating a path, use tools like Feather and Refine Edge for smoother selections.
- Work in High Resolution: Higher resolution images offer more detail and better results.
- Experiment with Layer Masks: Combine clipping paths with layer masks for non-destructive editing.
Common Mistakes to Avoid
- Rushed Paths: Take your time to create precise paths, especially around detailed objects.
- Ignoring Edge Details: Pay attention to fine details like hair or fur.
- Overuse of Filters: Filters can degrade image quality, especially on detailed selections.
- Using Low-Resolution Images: Always work with high-resolution images for better clarity.
Advantages of Clipping Path Services
- Enhanced Product Images: Crisp, clean product photos can boost sales and attract customers.
- Creative Freedom: Clipping paths enable creative flexibility in graphic design and digital art.
- Consistent Branding: Maintain a consistent look for e-commerce platforms and marketing materials.
- Time and Cost-Effective: Outsourcing clipping path services can save time and reduce overhead costs.
Conclusion
Mastering clipping path services in Photoshop opens up a world of creative possibilities in graphic design, photography, and digital art. Whether you're a freelance designer, a professional photographer, or an e-commerce entrepreneur, understanding this technique is invaluable. With practice, patience, and attention to detail, you can leverage clipping paths to create stunning visuals and elevate your projects to the next level. Start honing your skills today and unlock the potential of Photoshop's clipping path tools!