Lip Filler Safety Essentials: Red Flags and Best Practices
Lip augmentation sits at the crossroads of art and medicine. When done well, lip enhancement looks effortless: balanced proportions, a soft taper at the corners, hydrated texture, and a shape that suits the rest of the face. When safety is overlooked, the risks are not just aesthetic. Compromised blood flow, infection, and scarring are real possibilities. I have treated hundreds of lips across a range of ages and goals, and the pattern is consistent. Patients who understand the process, choose their injector wisely, and commit to thoughtful aftercare tend to get natural looking lip filler results that age gracefully and can be maintained with minimal drama.
What follows is a practical guide to safe lip injectable treatment. It focuses on red flags you can spot before you’re in the chair, techniques and materials that reduce risk, and the realistic recovery milestones that separate healthy healing from problems that need attention. I will use plain language, but I won’t gloss over details. Lips are small structures with large consequences.
The real anatomy behind a “simple” lip injection procedureThe lips are deceptively complex. A cushion of fat sits under a mobile muscular layer, wrapped in a dense web of blood vessels and sensory nerves. The superior labial artery and inferior labial artery feed the lip, and there can be variations in their course. That variability is one reason copy‑and‑paste injection maps fail. An injector must adjust depth, angle, and volume in real time.
Hyaluronic acid lip filler, the standard for modern lip enhancement procedure, integrates with tissue by drawing water and providing structure. Different HA lip filler types crosslink the gel differently, which changes how they move, how long they last, and how they look when you smile. A soft lip filler might be ideal for a hydrated, supple result, while a more cohesive gel plays better for lip border enhancement or shaping the Cupid’s bow. Expert lip filler work is less about how much product goes in and more about where and why.
Understanding this anatomy and material science reduces your risk of lumps, migration, and vascular complications. It also explains why a five minute lip injection procedure video on social media doesn’t tell you much about safety.
Red flags before you bookI vet clinics the same way I advise patients: assume nothing and verify everything. The following warning signs consistently correlate with problems.
Pricing that seems unrealistically low for your area. Reputable dermal lip filler brands and safe clinical setup cost real money. Heavily discounted lip plumping injections often mean older stock, unknown lip filler brands, or rushed workflows. Cheap can be very expensive when complications arise.
Vague product disclosure. You should know the exact filler name, batch number, and expiration date. If an injector avoids specifics or cannot explain differences between Restylane lip filler and Juvederm lip filler in practical terms, find someone else.
No dissolver on site. If a clinic does not stock hyaluronidase and know how to use it, walk out. Lip filler dissolving is a safety requirement, not an optional extra.
Cookie cutter promises. Claims like “everyone gets 1 ml” or “zero swelling lip volumizing treatment” show a lack of individualized planning. Lip filler candidates vary in tissue quality, symmetry, hydration, and risk tolerance.
Missing medical oversight. A licensed prescriber should review your medical history, consent forms, and emergency plan. If there is no mention of a supervising physician, protocols, or complication management, your risk is higher than it needs to be.
Those five red flags cover 80 percent of the safety issues I encounter in lip filler correction work. There are others, but if you address these early, you set yourself up for a safer experience.
How to choose a provider who prioritizes safetyCredentials matter, but they don’t tell the whole story. You want three things in your injector: technical skill, aesthetic judgment, and a conservative mindset about anatomy. Ask to see lip filler before and after photos with consistent lighting and angles. Look for healed results taken at two to four weeks post procedure, not just immediate swelling. A gallery with both subtle lip filler and more defined lip shaping treatment shows range.
Then listen to how the injector talks. You should hear phrases like tissue support, projection vs. volume, vermilion border, and philtral columns. Technical language, used clearly, signals training and experience. Another sign of a safety‑first clinician is a readiness to say no. Patients with active cold sores, pregnancy, unchecked autoimmune disease, or recent dental work should be deferred. If you are pushed to proceed anyway, that is a measurable risk.
Finally, evaluate the consult. A solid lip filler consultation covers the pros and cons of lip augmentation treatment, filler options, realistic longevity ranges, potential for lip filler touch up, and the plan for complications however unlikely. You should leave knowing how to reach the clinic after hours, what to do for lip filler swelling solutions, and when to come back for evaluation.
Product choices that support safe, natural looking lip fillerMost natural lip filler today is HA based. The primary differences you will notice as a patient are firmness, flexibility, and water attraction. Gels with lower G’ (a measure of firmness) and higher flexibility can look particularly natural in the lip body. They move with speech and smile and are less likely to feel stiff. Cohesive gels with a slightly higher G’ can define the white roll and Cupid’s bow without bleeding into the lip lines. Non‑HA fillers exist, but I counsel patients away from them in lips. If you want a long lasting lip filler option, you can build longevity through conservative layering over time rather than with permanent or semi‑permanent materials that complicate future care.
Brand names are useful, but beware of chasing the best lip filler by label alone. Within Restylane lip filler and Juvederm lip filler families, multiple products exist with different characteristics. One may be ideal for lip hydration filler, another for lip contouring or lip border enhancement. The “best” choice shifts with your lip thickness, baseline asymmetry, smile dynamics, and goals. An experienced clinician can explain why a soft gel suits you better than a firmer one, or why a thinner gel will reduce lip wrinkle filler risk of bumps. If that explanation is missing, press for details.
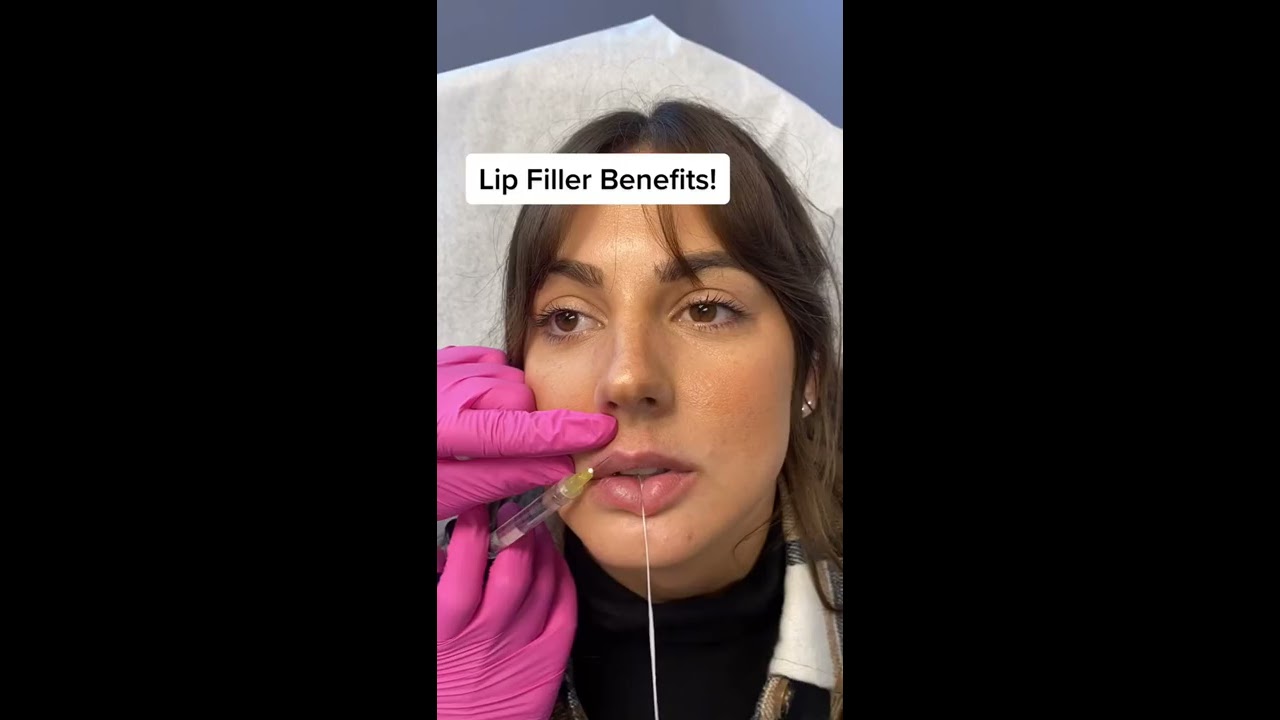
The appointment flow when safety is the priorityOn procedure day, the room should be organized and calm. Proper antisepsis is non‑negotiable for lip cosmetic injections. I begin with a thorough cleanse, then an antiseptic like chlorhexidine or povidone‑iodine on the perioral area. A topical anesthetic can help, though I often use strategically placed local anesthesia to avoid excessive swelling before the first pass.
Mapping comes next. I review the lip for asymmetries, previous filler, and dynamic movement. If you already have filler, I might suggest lip filler refinement or lip filler reshaping in smaller volumes, or even dissolving prior product to correct migration. A conservative first session with beginner lip filler patients helps me learn how their tissue behaves. For returning patients, an advanced lip filler strategy can focus on subtle improvements like lip definition treatment or lip line filler to reduce lipstick bleed.
During the lip injection procedure, I use small aliquots and reassess constantly. Cannula or needle selection depends on your anatomy and the chosen lip filler techniques. A cannula can reduce bruising and risk of intravascular placement in certain planes, but it is not a free pass. Needles are precise in tight areas like the Cupid’s bow. Either tool requires aspiration checks and slow injection rates. Excessive pressure or speed increases risk without improving results.
Before you leave, you should have ice, instructions, and a check‑in plan. I schedule early follow‑ups within 7 to 14 days. If you have any risk factors, I provide direct contact options and a brief symptom diary so early warnings are not ignored.
What safe healing looks like, day by daySwelling is part of lip filler recovery, but the pattern matters. Most patients see the peak within 24 to 72 hours, then a steady taper over the next few days. Microbruising can appear as freckle‑like dots and resolves within 7 to 10 days. Tenderness is common. What should not happen is escalating pain, blanching (pale or white patches), dusky or mottled skin, or patches of numbness. Those can indicate vascular compromise and require immediate evaluation.
I routinely advise patients to sleep with their head elevated for two nights, keep lips clean and moisturized, avoid extreme heat or cold on the area, and pause strenuous exercise for 24 to 48 hours. Kissing, dental work, and facials can wait. If you are prone to cold sores, prophylaxis is wise. Your clinician should manage that plan in advance.
Two weeks is the earliest reasonable moment to judge lip filler results. By then, swelling has settled, and you can evaluate shape, symmetry, and feel. If you see small firmness in discrete areas, gentle massage guided by your provider can help, but don’t mash your lips at random. Overtreatment by massage can move product. If issues persist beyond three to four weeks, a touch of hyaluronidase or a minor lip filler touch up can refine the result.
Complication awareness without panicReal risk is low when best practices are followed, but it is not zero. The worst day in my practice was a vascular event from a labial artery variant I could not have predicted, even with careful technique. The patient recognized blanching within minutes, we reversed with hyaluronidase in large, repeated doses, added warm compresses, aspirin as per protocol, and close follow‑up. She healed fully. That experience tightened my already conservative approach and reinforced the value of immediate access to dissolver.
Other complications include delayed swelling from hypersensitivity, infection from poor hygiene or post‑procedure contamination, and filler migration. Migration shows as a shelf above the vermilion border or puffiness beyond the intended area. It’s more common with aggressive volumes, superficial placement, or habitual lip compression. A measured plan and precise technique reduce this risk. If migration occurs, lip filler dissolving followed by a rest period and a more thoughtful lip sculpting strategy typically solves it.
Natural looking lip filler requires restraintLips do not live alone on your Orlando FL lip filler services face. A full, hydrated lower lip with a refined upper border and gentle tubercles will always look more natural than a uniformly blown up shape. For many, 0.5 to 0.8 ml in the first session achieves a noticeable yet subtle lip enhancement treatment. Chasing volume quickly is the fastest way to distortion. If your goal is fuller lips treatment with a plush look, we build in layers over a few months. That approach maintains lip integrity, reduces swelling risk, and improves longevity by letting the tissue adapt.
I often adjust treatment plans based on smile dynamics. Some people show more gum on smiling, others invert their upper lip or purse strongly. The best lip filler solutions take those habits into account. The result should feel like your lips on their best day, not someone else’s lips attached to your face.
Longevity, maintenance, and the reality of budgetsHA lip filler lasts in lips roughly 6 to 12 months on average. Metabolism, product choice, placement, and lifestyle shift that range. Heavy exercise and fast metabolism lean shorter. Cohesive gels placed for structure can stretch toward a year, sometimes longer. A maintenance plan that prioritizes shape and hydration over raw volume feels more sustainable and often looks better in the long run.
If lip filler Orlando FL cost is a concern, ask your injector how to stage a plan. An affordable lip filler strategy might start with correcting asymmetry and restoring border definition, then add subtle volume three months later. Strategic sequencing preserves your budget without compromising safety. If you are tempted by a bargain clinic to do everything in one go, revisit the earlier red flags.
The role of photography and honest self‑assessmentLip filler before and after photos are useful, but your mirror can lie during swelling. I take standardized photos from multiple angles in neutral expression and in a half smile. Patients sometimes bring inspiration images, which help us clarify goals, but anatomy sets limits. Your philtral length, dental projection, and chin position shape what is possible with non surgical lip augmentation.
If you want lip pout enhancement but your teeth angle inward, a dental consult might do more for your profile than any lip injectable filler. A straight‑talking injector will say this. You can still pursue a lip smoothing filler for hydration and polish, while you plan orthodontic or restorative work that changes the foundation.
My approach to first‑timers vs. experienced patientsBeginners are often anxious about looking “done.” I set expectations clearly. The lip filler procedure itself takes minutes, but the planning and aftercare make the difference. We start with conservative volumes, a soft product for the lip body, and minimal passes at the border. If you love the lip hydration and shape but want a touch more volume after three weeks, we add it. That staged strategy builds trust and reduces the chance of regret.
For experienced patients, we review what worked last time, what felt too firm, and how long the last filler lasted. If you are considering a lip filler upgrade to a more structural gel, we test in small areas first. If you want a trending lip filler style, like a crisper border or a lifted corner, I examine your resting mouth posture and smile lift. Sometimes a tiny amount of neuromodulator in the depressor anguli oris or lip flip techniques can complement a lip filler improvement better than more filler. A measured combination gives more control than stuffing a single tool into every job.
When dissolving is the right movePatients sometimes see dissolving as a failure. I do not. Lip filler correction with hyaluronidase can reset your baseline and prevent years of chasing small irregularities. Indications include persistent lumps, migration into the upper cutaneous lip, asymmetry that can’t be massaged out, or a product that simply doesn’t suit your tissue.
The dissolving process is quick but can be uncomfortable. Enzyme doses vary depending on the filler type and amount. I prefer to under‑dissolve first and reassess in 48 to 72 hours, then repeat if needed. After dissolving, give your lips at least 10 to 14 days to calm before reinjecting. The second attempt often yields cleaner, crisper results because you are working with a clean canvas.
What makes a safe clinic day‑to‑daySafety is not only what happens in the chair. It is a culture. The best clinics standardize sterile setup, track inventory and batch numbers for every lip injectable treatment, and log consent forms and aftercare instructions. They run drills for rare events and debrief complications openly. They don’t hide behind “no risks” advertising.
One of my colleagues keeps a small binder in every treatment room with flowcharts for vascular compromise, delayed hypersensitivity, and herpetic flares, plus dosing guidelines for hyaluronidase. Most days, no one opens the binder. On the day you need it, that preparedness is priceless.
Filler myths that get people into troubleThe myths are persistent. “Massaging aggressively prevents lumps” is a common one. In reality, unstructured massage can move product into places it doesn’t belong. “More swelling means longer lasting” has no basis in evidence. Swelling is primarily trauma and osmotic pull, not a predictor of longevity. “Cannulas can’t cause vascular occlusion” is another myth. They lower risk in some planes, but they are not magic wands.
Another misconception: “Natural looking lip filler requires microdoses only.” Microdoses can be a good start, but some lips need structure first to hold shape. A thoughtful plan can use both structural threads and microdroplets to achieve a refined, soft result.
The essential patient checklist for safe lip enhancementVerify your injector’s credentials, product details, and that hyaluronidase is on site.
Agree on a plan that includes volumes, areas, and a follow‑up date within 2 weeks.
Prepare for recovery: ice, elevation, and a pause on heat, heavy workouts, and dental work.
Know the red flag symptoms: increasing pain, blanching, mottling, fever, or spreading redness.
Commit to maintenance with restraint: reassess at 3 to 6 months, avoid chasing trends with volume.
What realistic expectations sound likeIf you arrive with thin, dry lips and want a soft, hydrated finish, a lip hydration filler can deliver noticeable improvement immediately, with peak results after swelling subsides. Expect touch ups every 6 to 12 months. If your aim is lip filler for symmetry, small corrections at the corners or in the upper lateral tubercles can balance your smile without making you look overdone. If you want lip filler for volume with a plush look, plan on staged sessions to protect your lip’s function and avoid migration.
Not everyone is a strong candidate on any given day. Active acne around the mouth, recent dental procedures, or immune system shifts may justify a delay. A clinic that values safe lip filler will steer you accordingly rather than push to fill the schedule.
Where artistry meets restraintThe best lip filler artistry is quiet. You should feel more confident in photos and stop reapplying balm every hour. Your lipstick should sit cleaner along the border. Friends might mention you look rested or ask about your skincare, not your lips. This outcome depends on three partnerships: a clinician who respects anatomy and knows modern lip filler techniques, a patient who accepts staged improvements over instant extremes, and a clinic culture that rehearses for rare problems it hopes to never see.
Lip augmentation procedure is not just a lip plumping treatment. It is lip rejuvenation, lip contouring, and often lip border refinement guided by your unique proportions. With the right team and thoughtful planning, you can achieve long lasting lip filler results that feel like you were born with them.
Final guidance you can act on this weekIf you are considering lip filler now, start with research and one in‑person consult. Bring questions about product choice, technique, aftercare, and complication plans. Ask to see healed lip filler before and after examples that match your starting point. Consider conservative goals first, such as lip definition treatment or soft hydration. Build from there.
If you have filler already and something feels off, don’t wait. Schedule an assessment for lip filler evaluation. The fix might be a simple massage protocol guided by your provider or a tiny adjustment. If migration or irregularity persists, a targeted lip filler dissolving session can clear the way for a cleaner result.
Safety is rarely flashy. It looks like clean rooms, clear plans, calm hands, and honest advice. If you surround your lip enhancement journey with those elements, you will navigate the many lip filler options with confidence and keep the focus where it belongs: on healthy tissue, balanced shape, and results that last for the right reasons.