Life-Hack #2: User groups in bots @MenuBuilderBot
MegaHubTelegram
User Groups in your bot will allow the admin to control access to the bot's functionality by permitting and restricting access for different groups. It will allow you to create access levels - when a user with a high level will have access not only to his group, but also to all lower groups. It is possible to organize paid access and automate the assignment of groups.
📜 The translation of this materials into your native language can be automatically done using the Google translator. Follow the link and select the desired language in the title:
https://translate.googleusercontent.com/translate_c?depth=1&sl=en&tl=es&u=https://telegra.ph/Life-Hack-2-User-groups-in-bots-in-MenuBuilderBot-EN-07-29
Life-Hack - involves the use of existing functionality in non-obvious and rather ingenious ways, creating functions in your bot, that were not originally built by the constructors’s developers.
In this section, we publish various options and turnkey solutions for what can be created using the capabilities that are already available in the @MenuBuilderBot constructor.
When creating such manuals, it is assumed that you, to one degree or another, are already familiar with the basic functions of the constructor and the basic mechanisms for working with it. If in the process of studying the presented material your basic knowledge is not enough, we advise you to study the basics before continuing.

⬛ To create user groups in your bot you need:
1. Numeric user variable (1$)
You can use any existing unneeded numeric variable if you already have some.
2. Button conditions (3$)
One-time purchase for the whole bot.
3. (Optional) Fix course change button (2$)
Needed for group purchasing automation.
◾ The purchase of Extensions can be done in your bot. For that go to your bot:
☞ 🔐Admin | 🧩Extensions

⬛ Steps to set bot behavior for user groups:
1. Purchase and create a numeric variable. Name it, for example, "group".
You can use any existing unneeded numeric variable if you already have some.
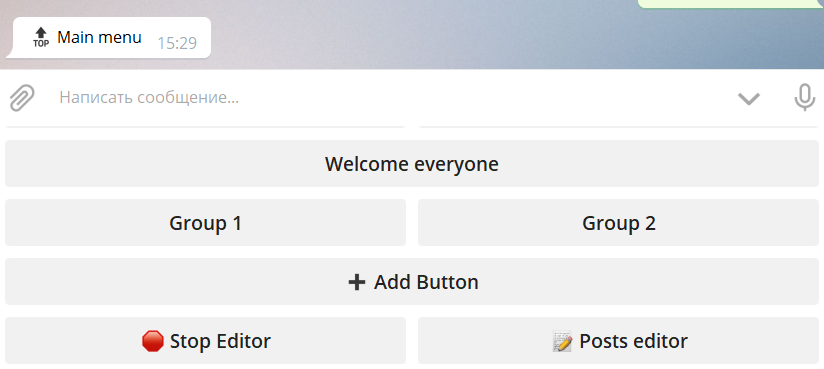
2. Create three buttons
2.1 One for common access menu, for example: "Welcome everyone"
2.2 One for the first-level group, for example: "Group 1"
2.3 One for the second-level group, for example: "Group 2"
3. Add some test messages
3.1. Go to "Welcome everyone" and add messge like "Everyone is welcome here"
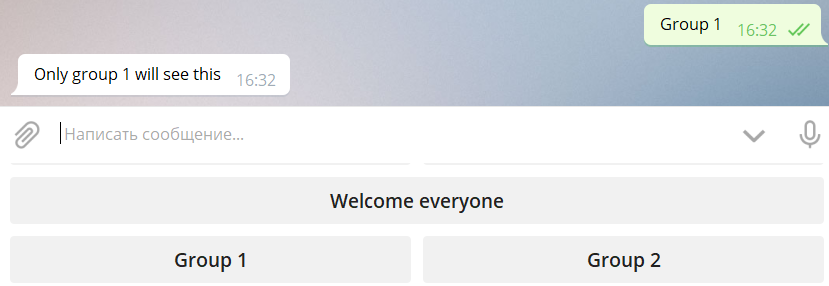
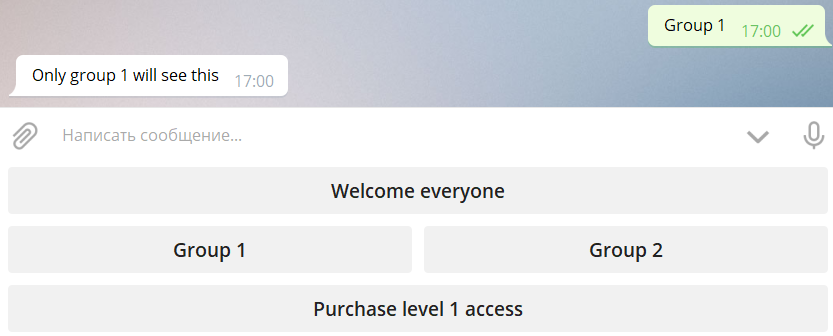
3.2. Go to "Group 1" and add messge like "Only group 1 will see this"
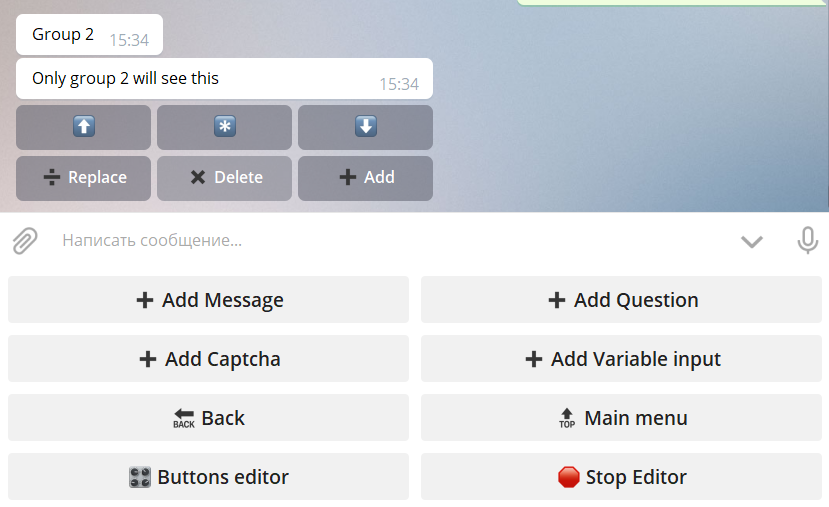
3.3. Go to "Group 2" and add messge like "Only group 2 will see this"
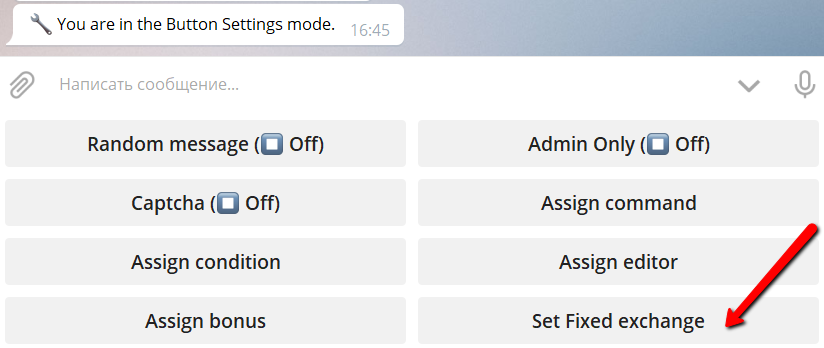
4. Select "Group 1" and go to it's properties using Buttons Editor.
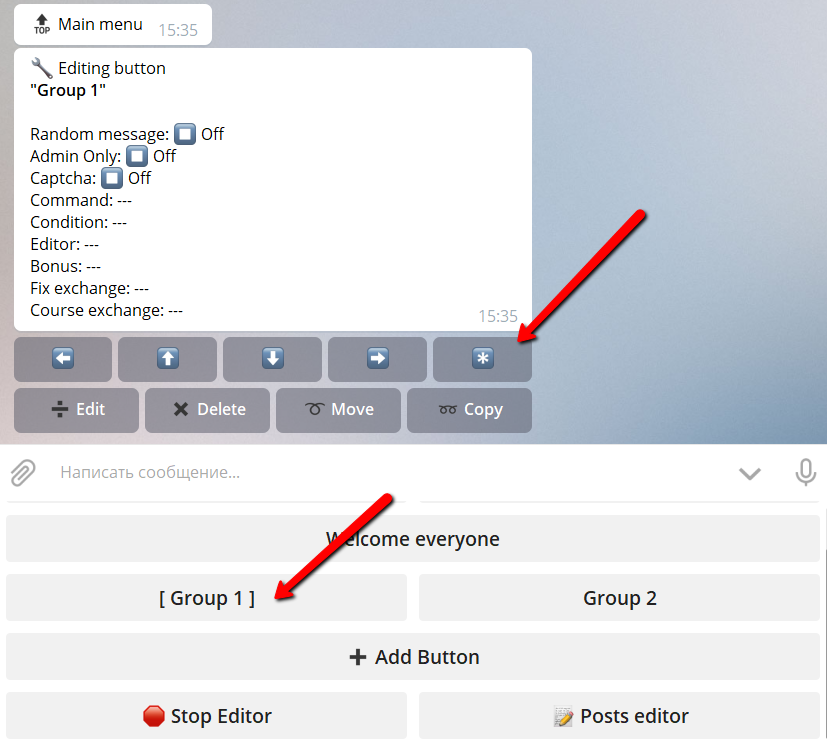
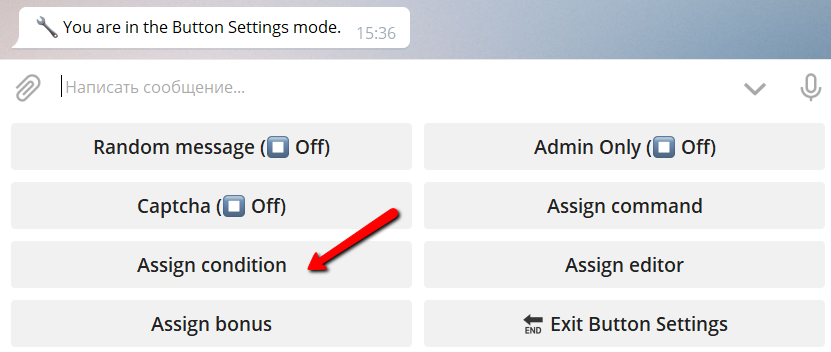
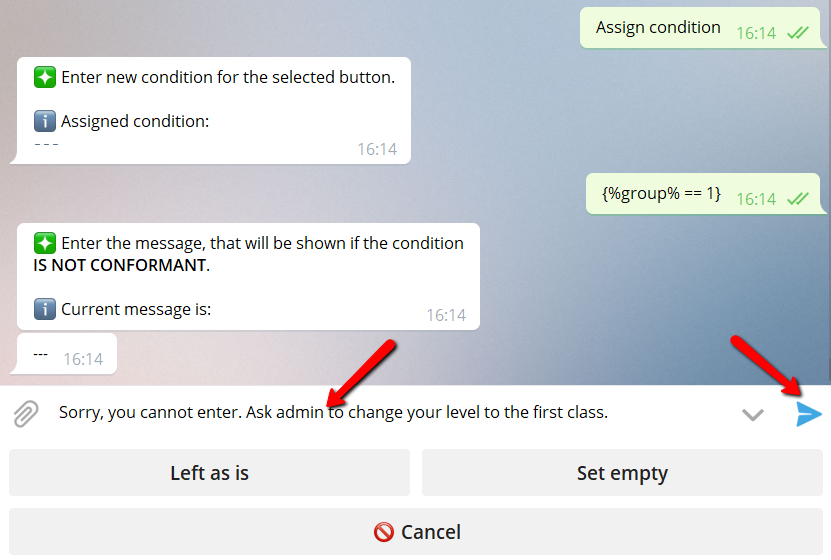
5. Press "Assign condition".
You will not see this button if you did not purchase button conditions!
6. Put there the following condition
The %group% should be replaced with your variable name if it differs.
The 1 should be replaced with the group number you want to.
If you want users with group 2 to have access to this menu also, you can choose other condition:
only users from group 1 or group 2 will have access
if you use following expression:
all users with the group 1 or higher will have access
7. Put any message you want to show to user if he has no access to this menu.
For example:
"Sorry, you cannot enter. Ask admin to change your level to the first class."
8. Exit button settings.
9. Set the condition for the button "Group 2"
Now you are done with setting bot behavior for user groups.
⬛ How to manage user groups.
1. By default, all your users will have group 0.
2. Use var commands to manipulate user groups:
2.1 To know what group user have:
(Replace "userid/usercode" with exact user id or user code)
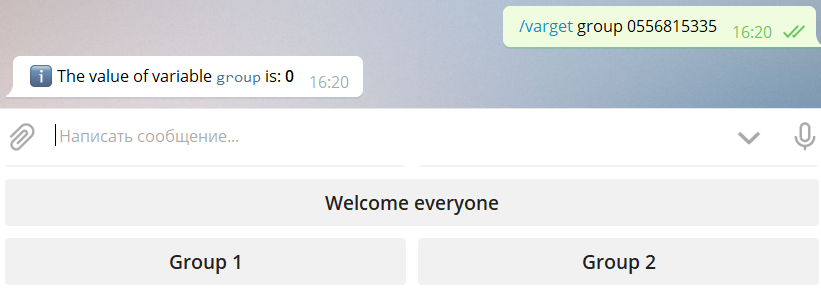
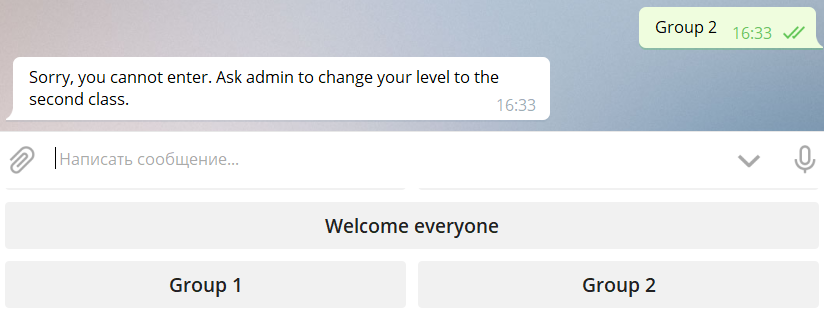
If user have the group 0. When he try to access "Group 1" menu, he'll fail:

2.2 To set group for user:
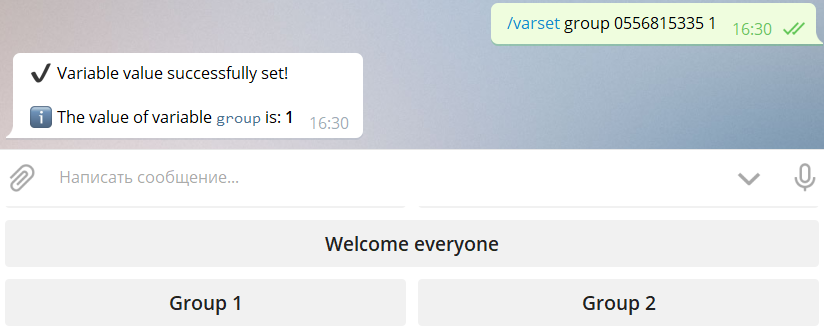
Now the user have the group 1. He can access "Group 1":
but access to the "Group 2" for him is restricted:
⬛ How to automate access purchasing:
1. Purchase the "Fixed exchange 1" button.
You can use any existing unneeded if you already have some.
2. Add button:
For example: "Purchase level 1 access".
Go to button settings.
3. Set condition to button:
With the fail message like:
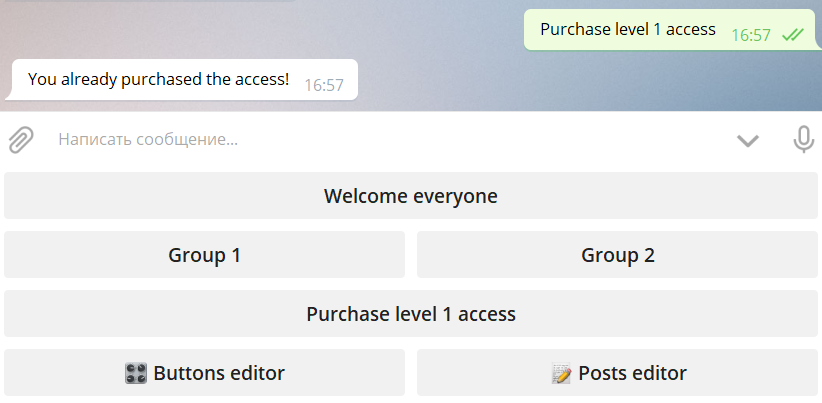
"You already purchased the access!"
This will save users from double purchases.
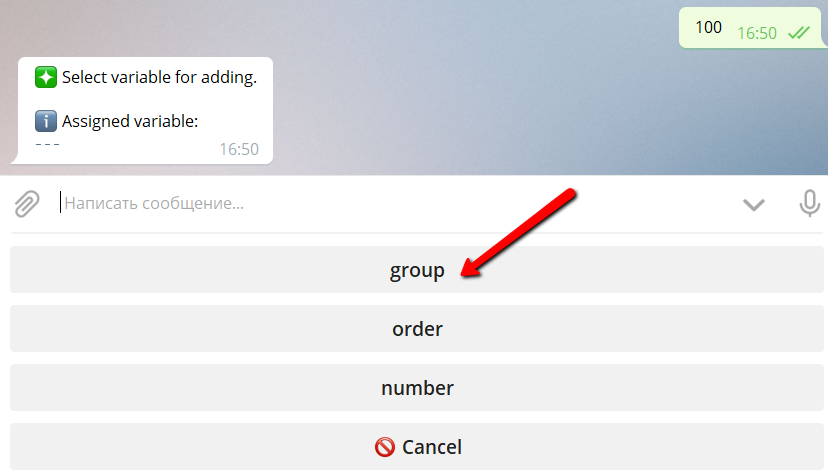
4. Press "Assign Fixed exchange" button:
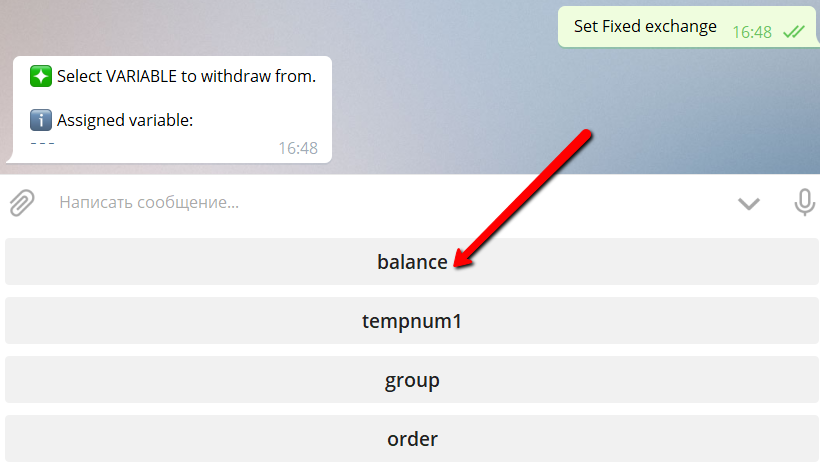
You will not see this button if you did not purchase Fixed exchange buttons!
4.1 Select "balance" variable from the list:
(or other variable where user money are stored in your bot)
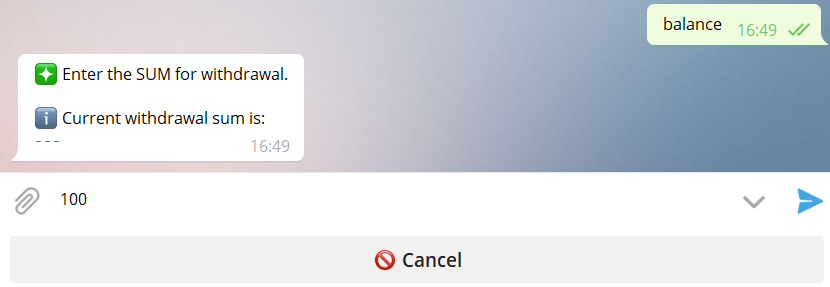
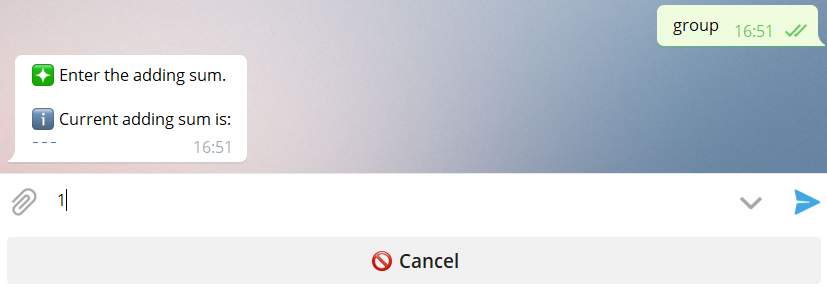
4.2 Enter the price for group 1 access:
This sum will be withdrawn from the user balance.
4.3 Select "group" variable from the list:
(or the one you are using for groups)
4.4 Set the value to 1:
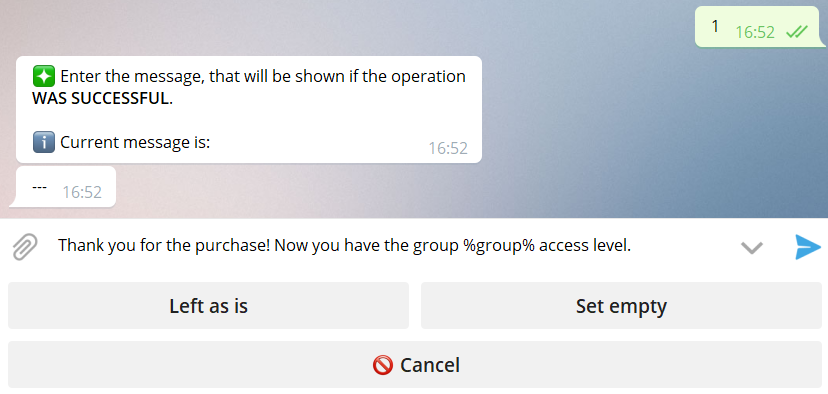
4.5 Enter the message for successful purchase.
For example:
"Thank you for the purchase! Now you have the group %group% access level."
(As you can see, you can use %group% macros to show the new value).
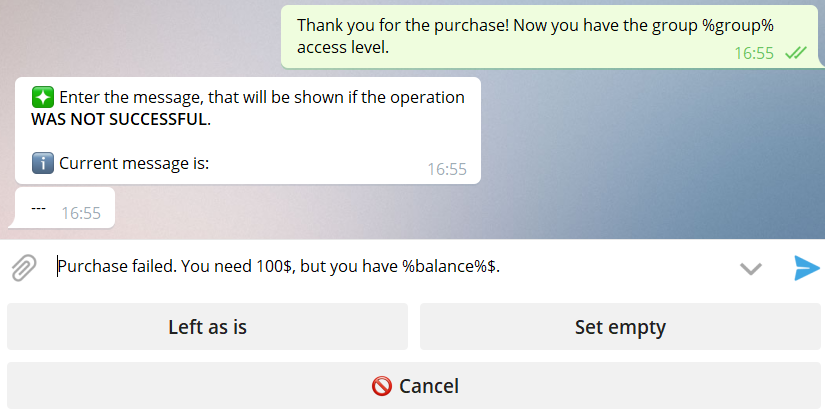
4.6 Enter the message for failed purchase.
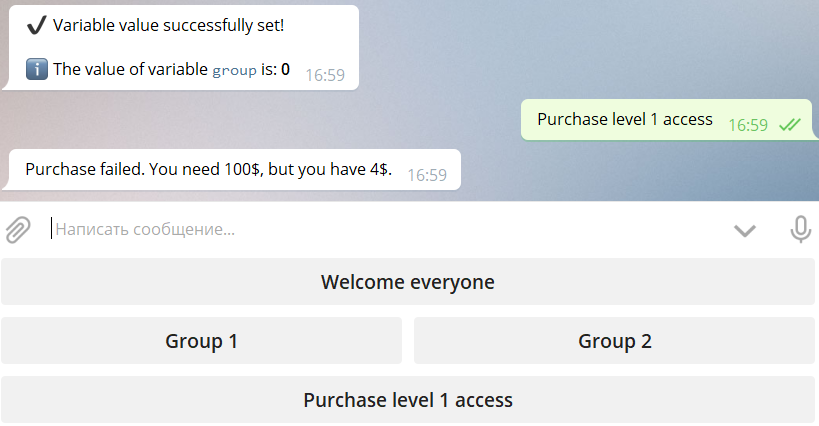
For example:
"Purchase failed. You need 100$, but you have %balance%$."
(As you can see, you can use %balance% macros to show the user balance).
4.7 Exit button settings
You are done with group 1 access purchase button.
If user already have group 1 he'll see:
If user have group 0 and not enough money he'll see:
If user have enough money he'll see:
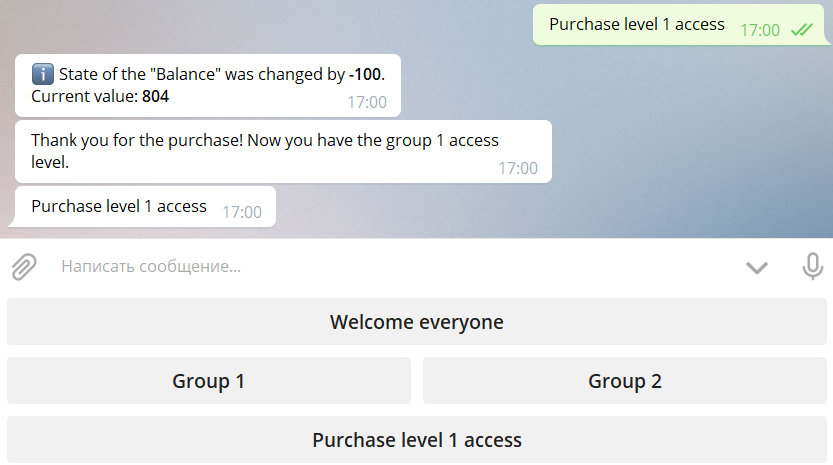
And now he'll have group 1 and can access "Group 1" button.
The creation of a user's mechanism for the automatic group 2 access acquisition can be created in a similar way.