Jorne split keyboard how-to guide
Iskander Iskakov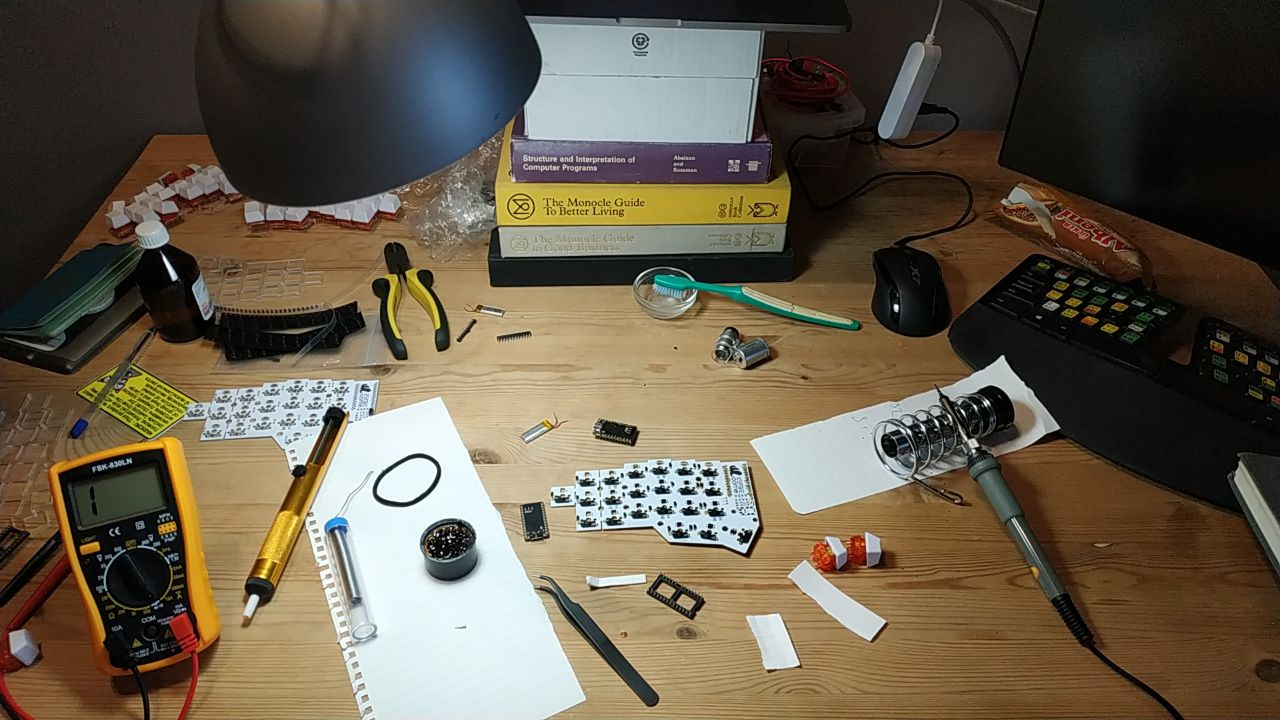
Why jorne?
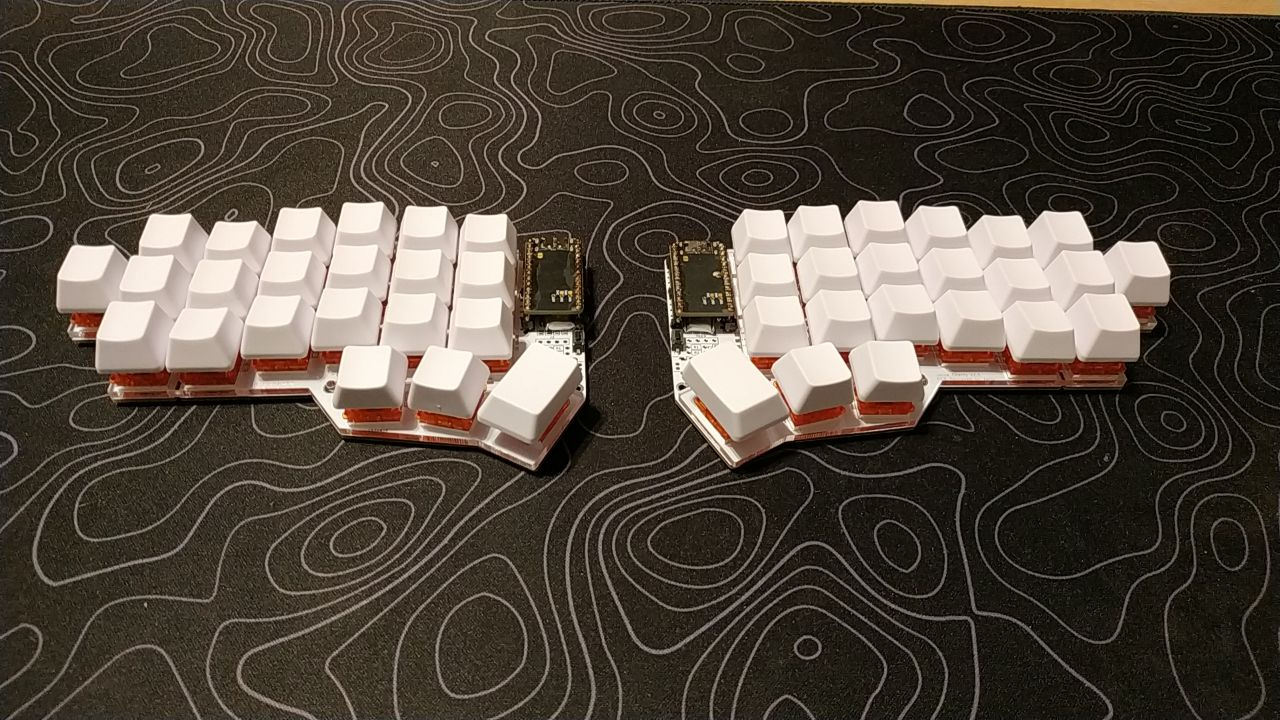
Jorne is an ortholinear, split keyboard.
Look at your keyboard right now. The rows of the keys are slightly shifted, the 'S' key is not exactly above the 'X' key. You might think that it has a purpuse, and you're right, but the purpose different. And it has nothing to do with ergonomics.

The key rows were shifted a long time ago, and persisted since. The reason for this staggering was to allow equal distance between the arms that connect the keys to the type-writing mechanism. It's time leave this as history.
Using a split keyboard also gives you a lot of perks. You can position your hand in a natural (slightly curved) way. The space between splits is now free to use, and you can place your favorite coffee cup or your mouse there. This comes at the cost of learing how to touch type, though.
Okay, let's get back to the guide.
Materials you'll need to assembely a Jorne v2.1 Hot-swap and fully Bluetooth version
- Jorne PCB's * 2
- SMD Diodes * 44
- Switches * 44
- Keycaps * 44
- Kailh hot-swap sockets * 44
- nice!nano
- Reset button
- Soldering kit
- A case of choice.
Sockets
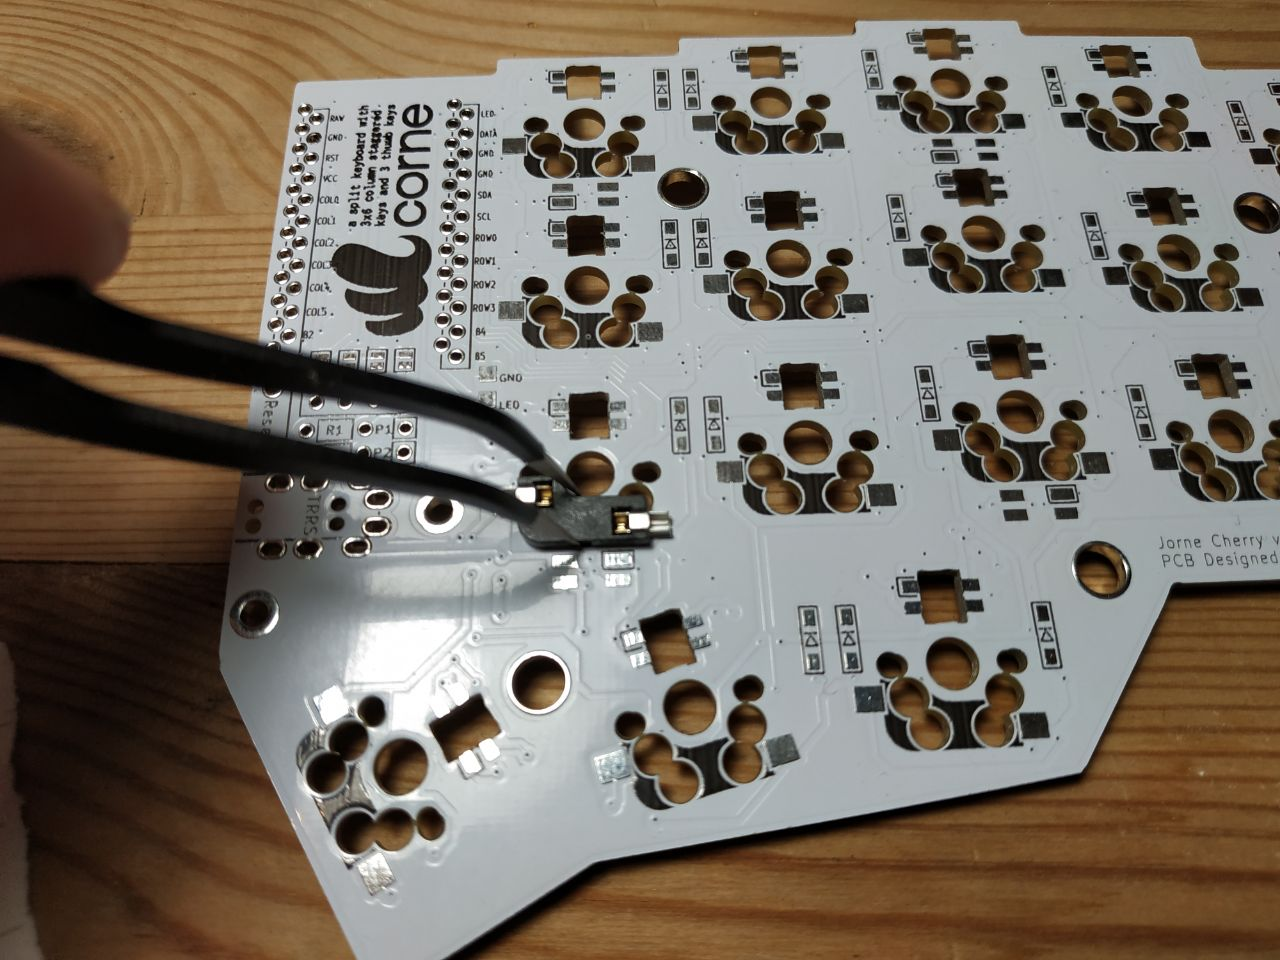
Apply some flux to both socket and PCB platform first. Then add some lead one of PCB contact points. Use tweezers to hold the socket, then plug it into the plate (you'll feel what I mean here, it will almost plug into the right spot). Now apply your soldering iron to the contact point. Now add some lead to second contact point of the socket, and solder it as well.
Repeat 22 times, and your're done.
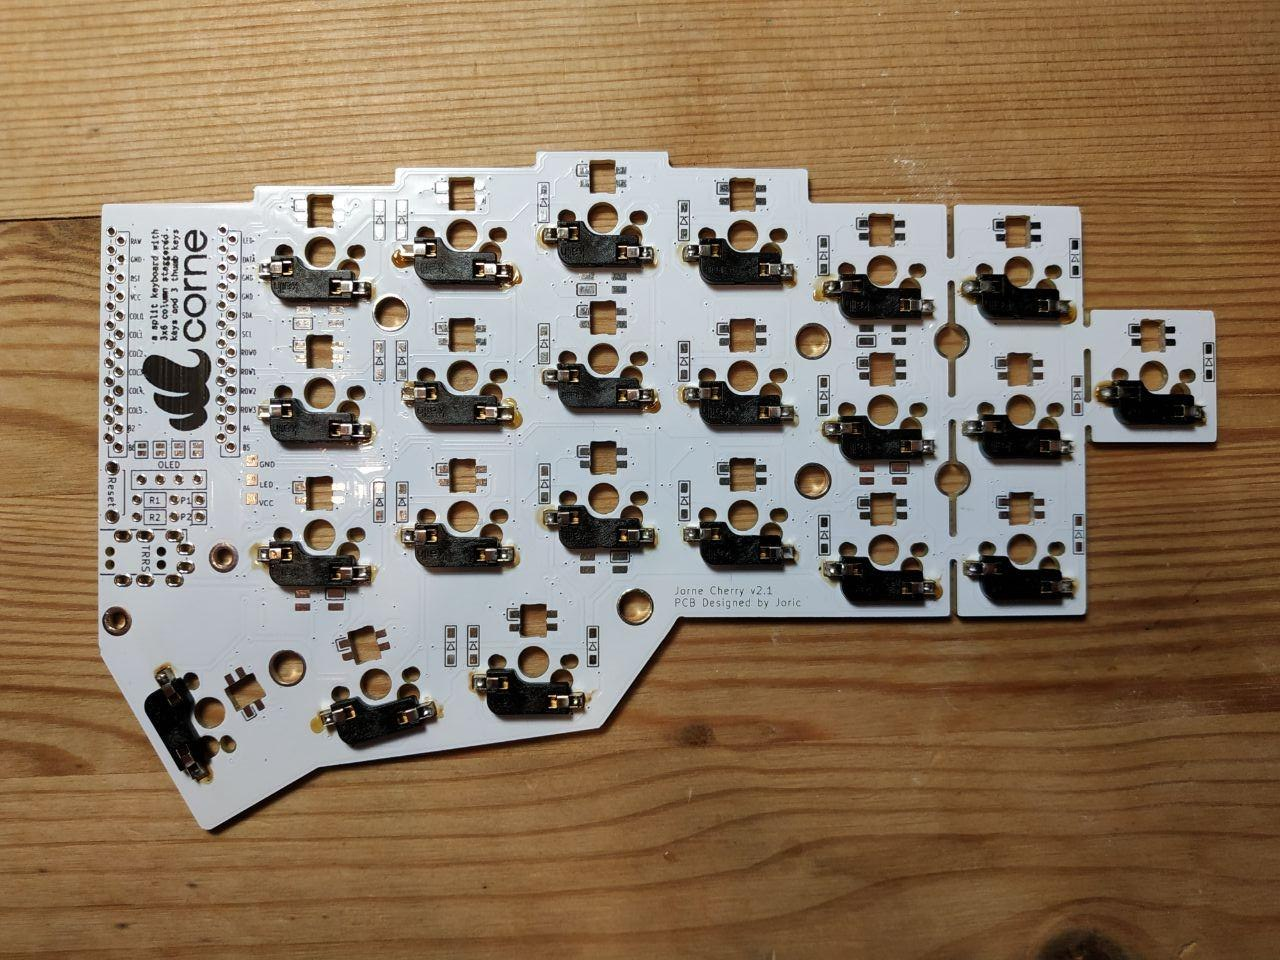
Diodes
The main thing about diodes is that they have polarity, so be sure to place them the right way. Diodes usually have a little line mark, which needs to be aligned with corresponding line mark on the PCB.
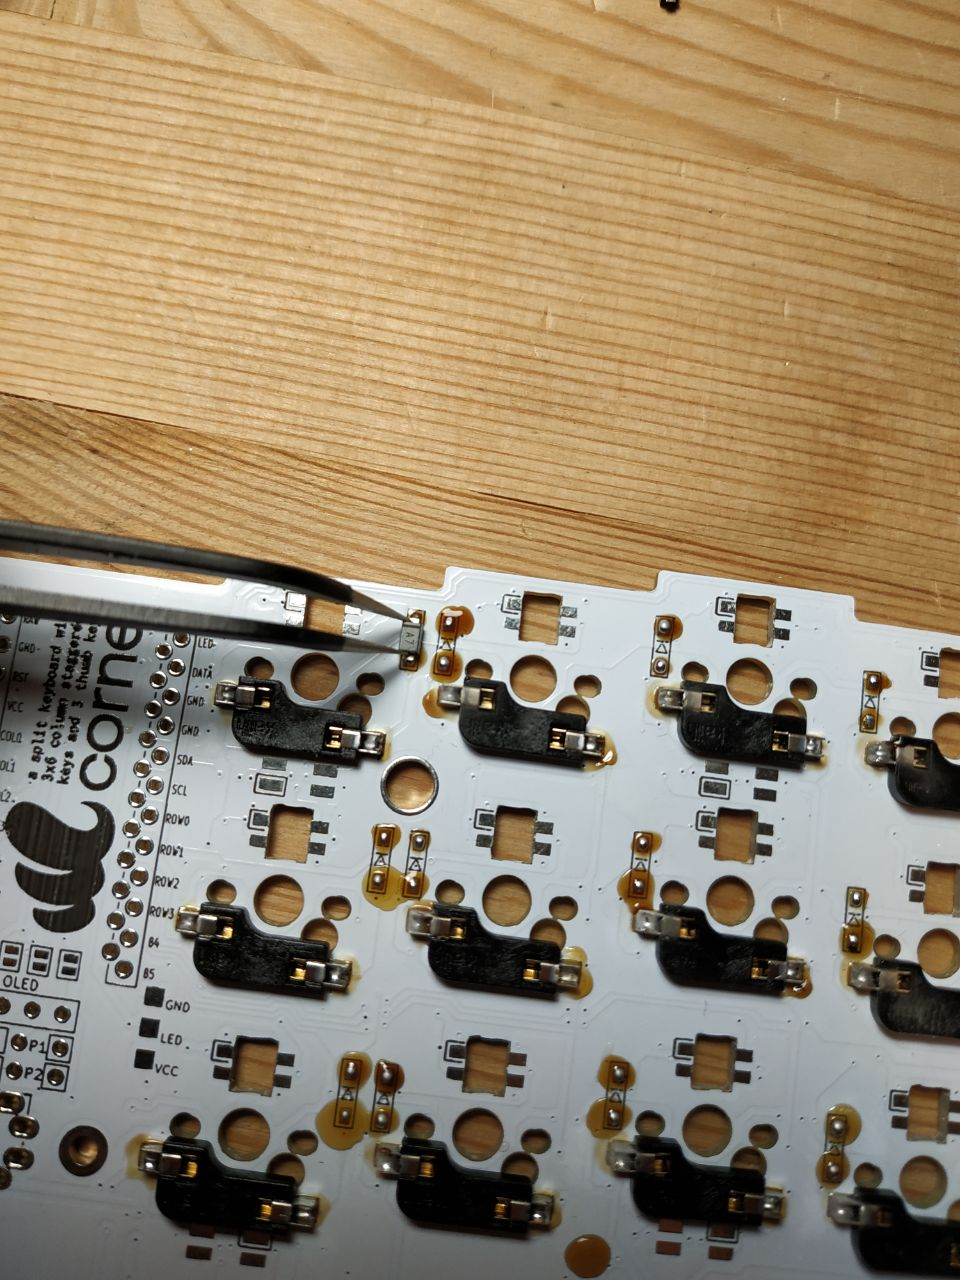
Soldering diodes is a bit harder, but similar overall. You first apply some flux to the board. The apply some lead to it, before soldering the diode itself. You the top part of the diode with your tweezers. While holding it in place, apply some heat with your iron to the first contact, then to second. Remove the iron, but hold your tweezers for a couple seconds more. Repeat.
nice!nano
You'll need a microcontroller to process key input. I'm using nice!nano, because it's bluetooth. nice!nano is somewhat hard to get due to chip shartage, there are some alternatives available. The most known is probablu ProMicro.
Depending on which microcontroller you ordered you might or might not have special sockets included in the kit. If not - you'll have to buy them.
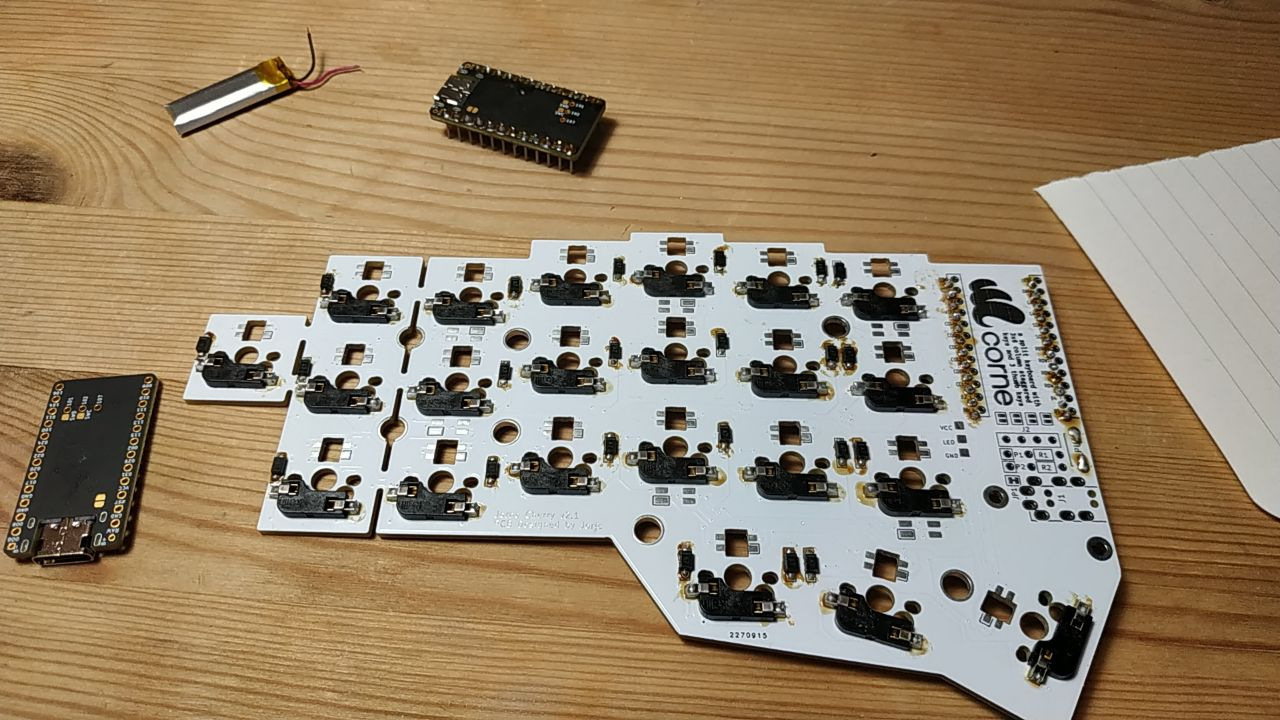
TL;DR: soldering is ASYMMETRICAL. One of microcontrollers is shifted one row of pins closer towards the edge.
Also don't forget to solder your battery to two small pins at the top.
Cases
There are a couple of case options availale, you can check them out in the official Jorne wiki. I haven't chosen one yet.
Voila
You'll also need to install ZMK Firmware, which can be done in less than 10 minutes, and you're done.
Now do something great.