Its History Of Replace Door Lock
How to Replace Door Locks
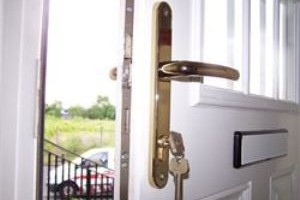
The first protection is your door lock. It will stop unauthorized access into your home. The signs of wear and tear as well as instances like moving into a new house or burglaries, could trigger the need to replace your lock.
To begin, determine your cylinder size by measuring the distance between the adjustment screw and the center of the cylinder knob. This measurement will help you select the appropriate lock.
Deadbolt
If you want to make sure your door is secure from burglars, it's a good idea to install a deadbolt. When the bolt is extended into the strike plate of the doorframe it makes it more difficult for an intruder through the door. A single-cylinder deadbolt can be activated with a key on the outside and the thumb-turn mechanism located on the interior. A deadbolt is only effective if it's installed correctly however.
First, replace upvc door lock mechanism Repair My Windows And Doors must determine whether the door already has an existing hole for a deadbolt, or if you need to bore it out. Mark the location of the hole to install the deadbolt on the surface of the door using the template that came with your lock installation kit. Use your tape measure to determine the height of the deadbolt. Then, mark the height on the edge of the door. You can then use the speed square to draw an even line across the mark you made for the bolt hole.
Then, use a drill to drill this hole until it reaches the other side of the door. This could take a bit of time. Sand the hole and the door edge to make it smooth. At this moment, it's a good idea to paint or stain your door.
When the door is open take off any screws that are visible on the existing deadbolt. This will reveal the front and back assembly of the deadbolt and also the bolt that is inside. Then unscrew the old bolt and replace it with an alternative bolt that matches the door hardware. You'll need to remove the bolt from a setplate. After that then you need to chisel out the area for the strike plate on the door frame.
If your strike plate is not in alignment, it could be because the previous installer failed to mortise it properly, or a weatherstripping has changed the strike's position. To fix this problem you'll need to remortise the strike plate and the deadbolt. Once this is completed Test the deadbolt by closing and locking it. Make sure that the bolt is extending into the strike plate and then test the key to make sure it is able to open and close easily.
Knob
It could make your home or business less secure If the knob on your door is damaged. It could also make opening and closing the door more difficult, which is why it is an ideal idea to replace the knob. Replacing a knob is a relatively easy DIY project and shouldn't take longer than 30 minutes to complete. Use a screwdriver or pliers to remove any old knobs or handles. Be careful not to harm the other components of the door.
Spray WD-40, or a different dry lubricant on the mechanism of your door knob before you begin. This will allow the new lock to slide smoothly when you turn it. To ensure proper operation it is essential to select the right knob and handle to match the doors you already have. If you don't already have a doorknob that is compatible, you will need to buy a replacement.
To begin the replacement process, first examine the old knob or handle to see the screws that hold it in place. If there aren't any screws you can use a screwdriver to wedge between the cover plate and the hidden screws plate and pop it off.
After you have removed the knob, inspect it for indications of damage and rust. You'll need to clean it up if there are any marks or dents, but you shouldn't have to do anything major if the knob is in good condition.
Install the new knob. Before you do that, look over the new knobs to make sure that you're choosing the right one for your door. You'll need to choose one with an extending rod that will interlock with the rod mechanism of the other knob. After you've placed the new knob in the hole, slide it into the latch.
Test the spring by pressing it repeatedly. The latch should spring back up each time. Install the second knob and lock it to the rod mechanism of the first knob. Thread the long screws of the doorknob's interior through the holes for cylinders on the exterior knob, and secure it in place.
Latch
A latch is a metal piece that extends into the door jamb to keep it shut. The latch can be operated via a knob or handle located inside the door, or by a thumb-turn on the outside. The latch can be secured with deadbolts to prevent intrusions from piercing the glass. It can also guard against intentional or accidental closing by children or animals. You can install an entry point with either a single-cylinder deadbolt, or a double-cylinder deadbolt, depending on your preferred level of security.
Installing a deadbolt is the same as installing a latch, however there are some differences. To make sure that the new lock will fit first, you must determine the setback of the doorjamb with an instrument such as a tape measure. The setback is the distance between the edge of the doorjamb, to the center of the hole to accommodate the faceplate of the latch. A typical setback is 2 3/8 to 2 3/4 inches. If you have a larger setback, you might need to purchase a longer latch from a hardware store or locksmith.
The next step is to drill an edge bore hole in the doorjamb to accommodate the latch plate. Utilize a chisel to chisel the latch mortise. Make sure the hole's depth is enough to allow the faceplate to be in line with the doorjamb. Place the strike plate in place to ensure that it is positioned correctly.
If the strike is placed too high, the door could be pushed in or pressure imposed on it using a crowbar, or tire iron. This can cause the doorjamb to break. This can be repaired by drilling a new hole into the doorjamb, then removing the core from the old one.
The final step is to mount the new strike plate, which is done by screwing it over the screw holes that are already in place. Then you can use wood putty to fill in the screw holes that were previously used and the bolt hole that will not be used. Once the putty has dried, sand it to an even finish.
Strike
An electric strike is the metallic piece that holds the deadbolt and latch are engaged when the door is shut. It is a vital component of the overall security of a lock since it keeps the door shut and provides extra resistance to force or kicking applied to the door. If a door is equipped with an electric strike, it will only be opened by a key or the control unit that controls the electrical impulses.
Traditionally the installation of an electric strike required cutting a section of the doorjamb in order to remotely remove the latchbolt of a circular lock from the pocket in the strike. This is an issue when it comes to the appearance of openings and also exposes the mechanism of the latchbolt and keeper to any unauthorised users.
Recently, a variety of electric strike manufacturers have come up with a "No Cut" kind of strike that does not require a cutout for operation. These strikes have a unique design that allows the keeper and latchbolt to slide into the strike pocket without marring the doorjamb faceplate.
The strike has an internal ramp that lifts the keeper and latchbolt when it receives an electrical signal from a reader or controller. The retracting of the keeper and latchbolt pushes them up higher on the ramp, locking the door. When the door is shut, the deadbolt stays extended and the latchbolt is retracted into the keeper.
Installing an electric strike can be an easy process, particularly in the case of replacing a strike on an existing door. If you are upgrading an existing access control system to an electric strike, it is important to ensure that your new system is compatible. Also, you must ensure that the strike is properly connected to your access control system and that it is set up for fail-safe operation.
One way to protect against intrusions by thieves is to upgrade the strike on your doors to a heavy-duty strike plate. These plates are fitted with four to six screws of three inches instead of the two, three-fourth inch screws typically used in regular strikes. These screws are longer, making it harder for anyone to break the frame and reach inside to turn the thumb turn piece of a single deadbolt cylinder.