Instructions for purchasing Blast Network (#Blast) through MetaMask
InstructionDear traders, I have created training for you in the form of instructions for purchasing Blast Network (#Blast)
All instructions are clear and simple, you need to follow each step step by step and you will succeed
*To purchase Blast Network (#Blast) tokens you will need Ethereum (ETH)
Next, I will clearly demonstrate how to quickly purchase tokens using MetaMask
1. Download the MetaMask wallet 🦊
Go to the Trust Wallet website and select the version you need
https://metamask.io/download/
iOS/Android/PC
(if you want to use it on a PC, I recommend working through an extension for your browser)
2. Create and configure a MetaMask wallet
2.1 Launch the wallet, click on the “Create a new wallet” button
2.2 Set a password, click “Create password” and “Start”
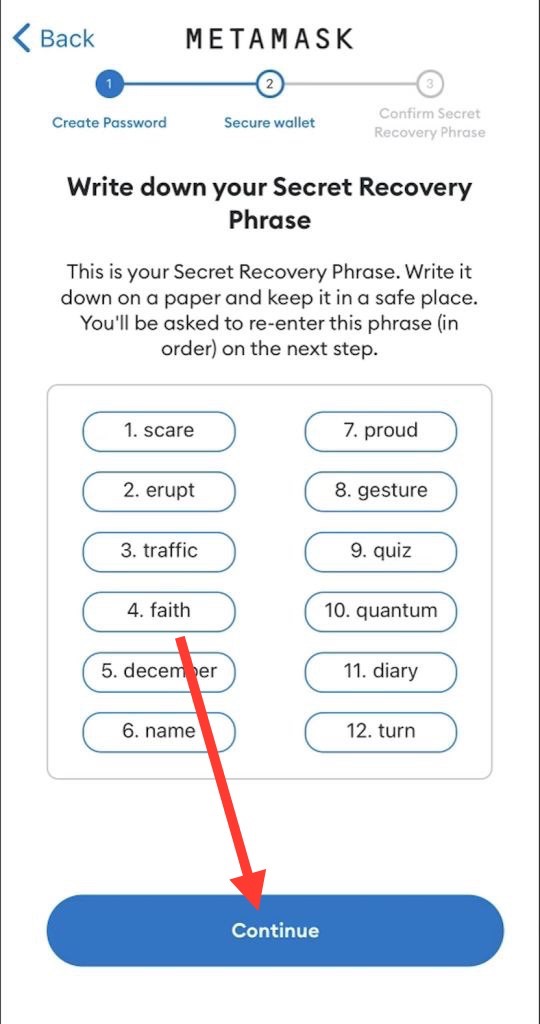
2.3 Review the secret phrase, save it, confirm the secret phrase, agree to all security points and click on the "Continue/Confirm" button
Ready. You have created a MetaMask wallet
2.4 Make sure “Ethereum Main Network” is selected at the top. If not, click on the network name at the top of the page, select the "Ethereum Main Network", add this network and switch to it


2.5 (SOMETIMES - depending on the version of your wallet) may ask for confirmation to change the network - to do this, click on “Approve” and “Switch to network”
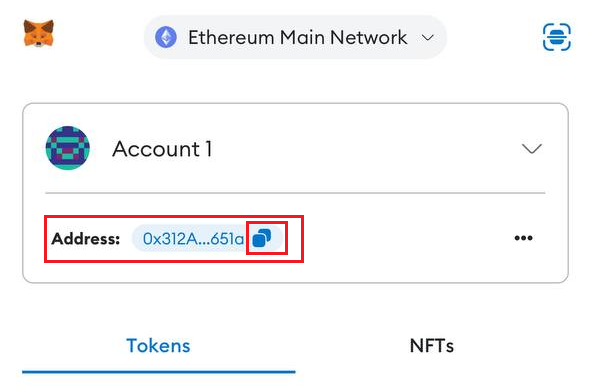
2.6 Top up your MetaMask wallet balance - to do this, copy your wallet address.
*Or click on “ETH”, scroll down, then click “Get” and copy our wallet address into MetaMask
3. Top up your wallet balance from the exchange
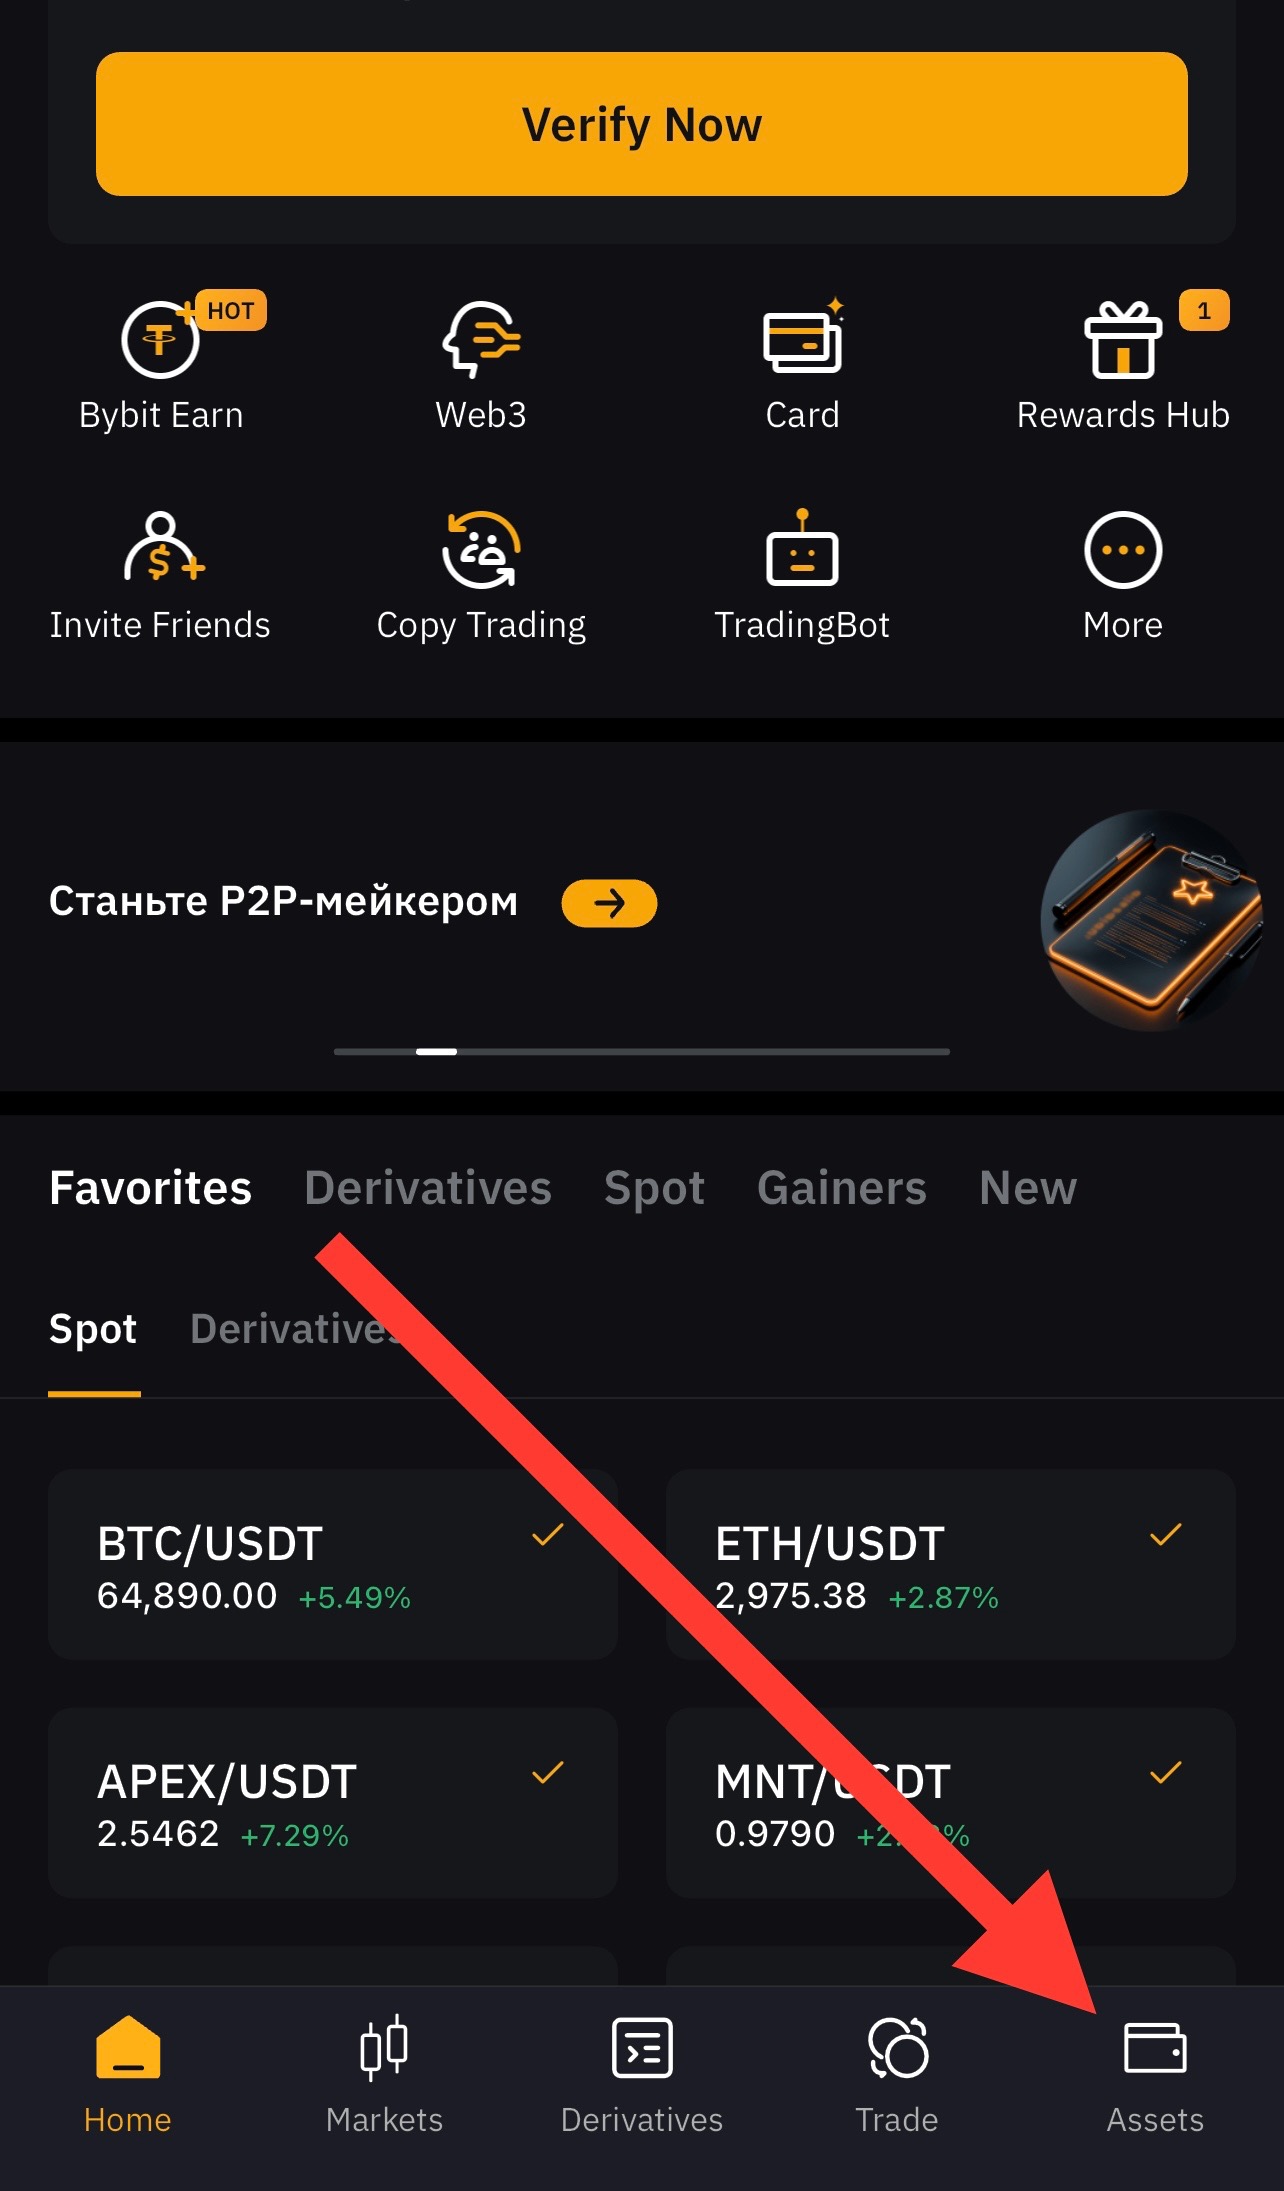
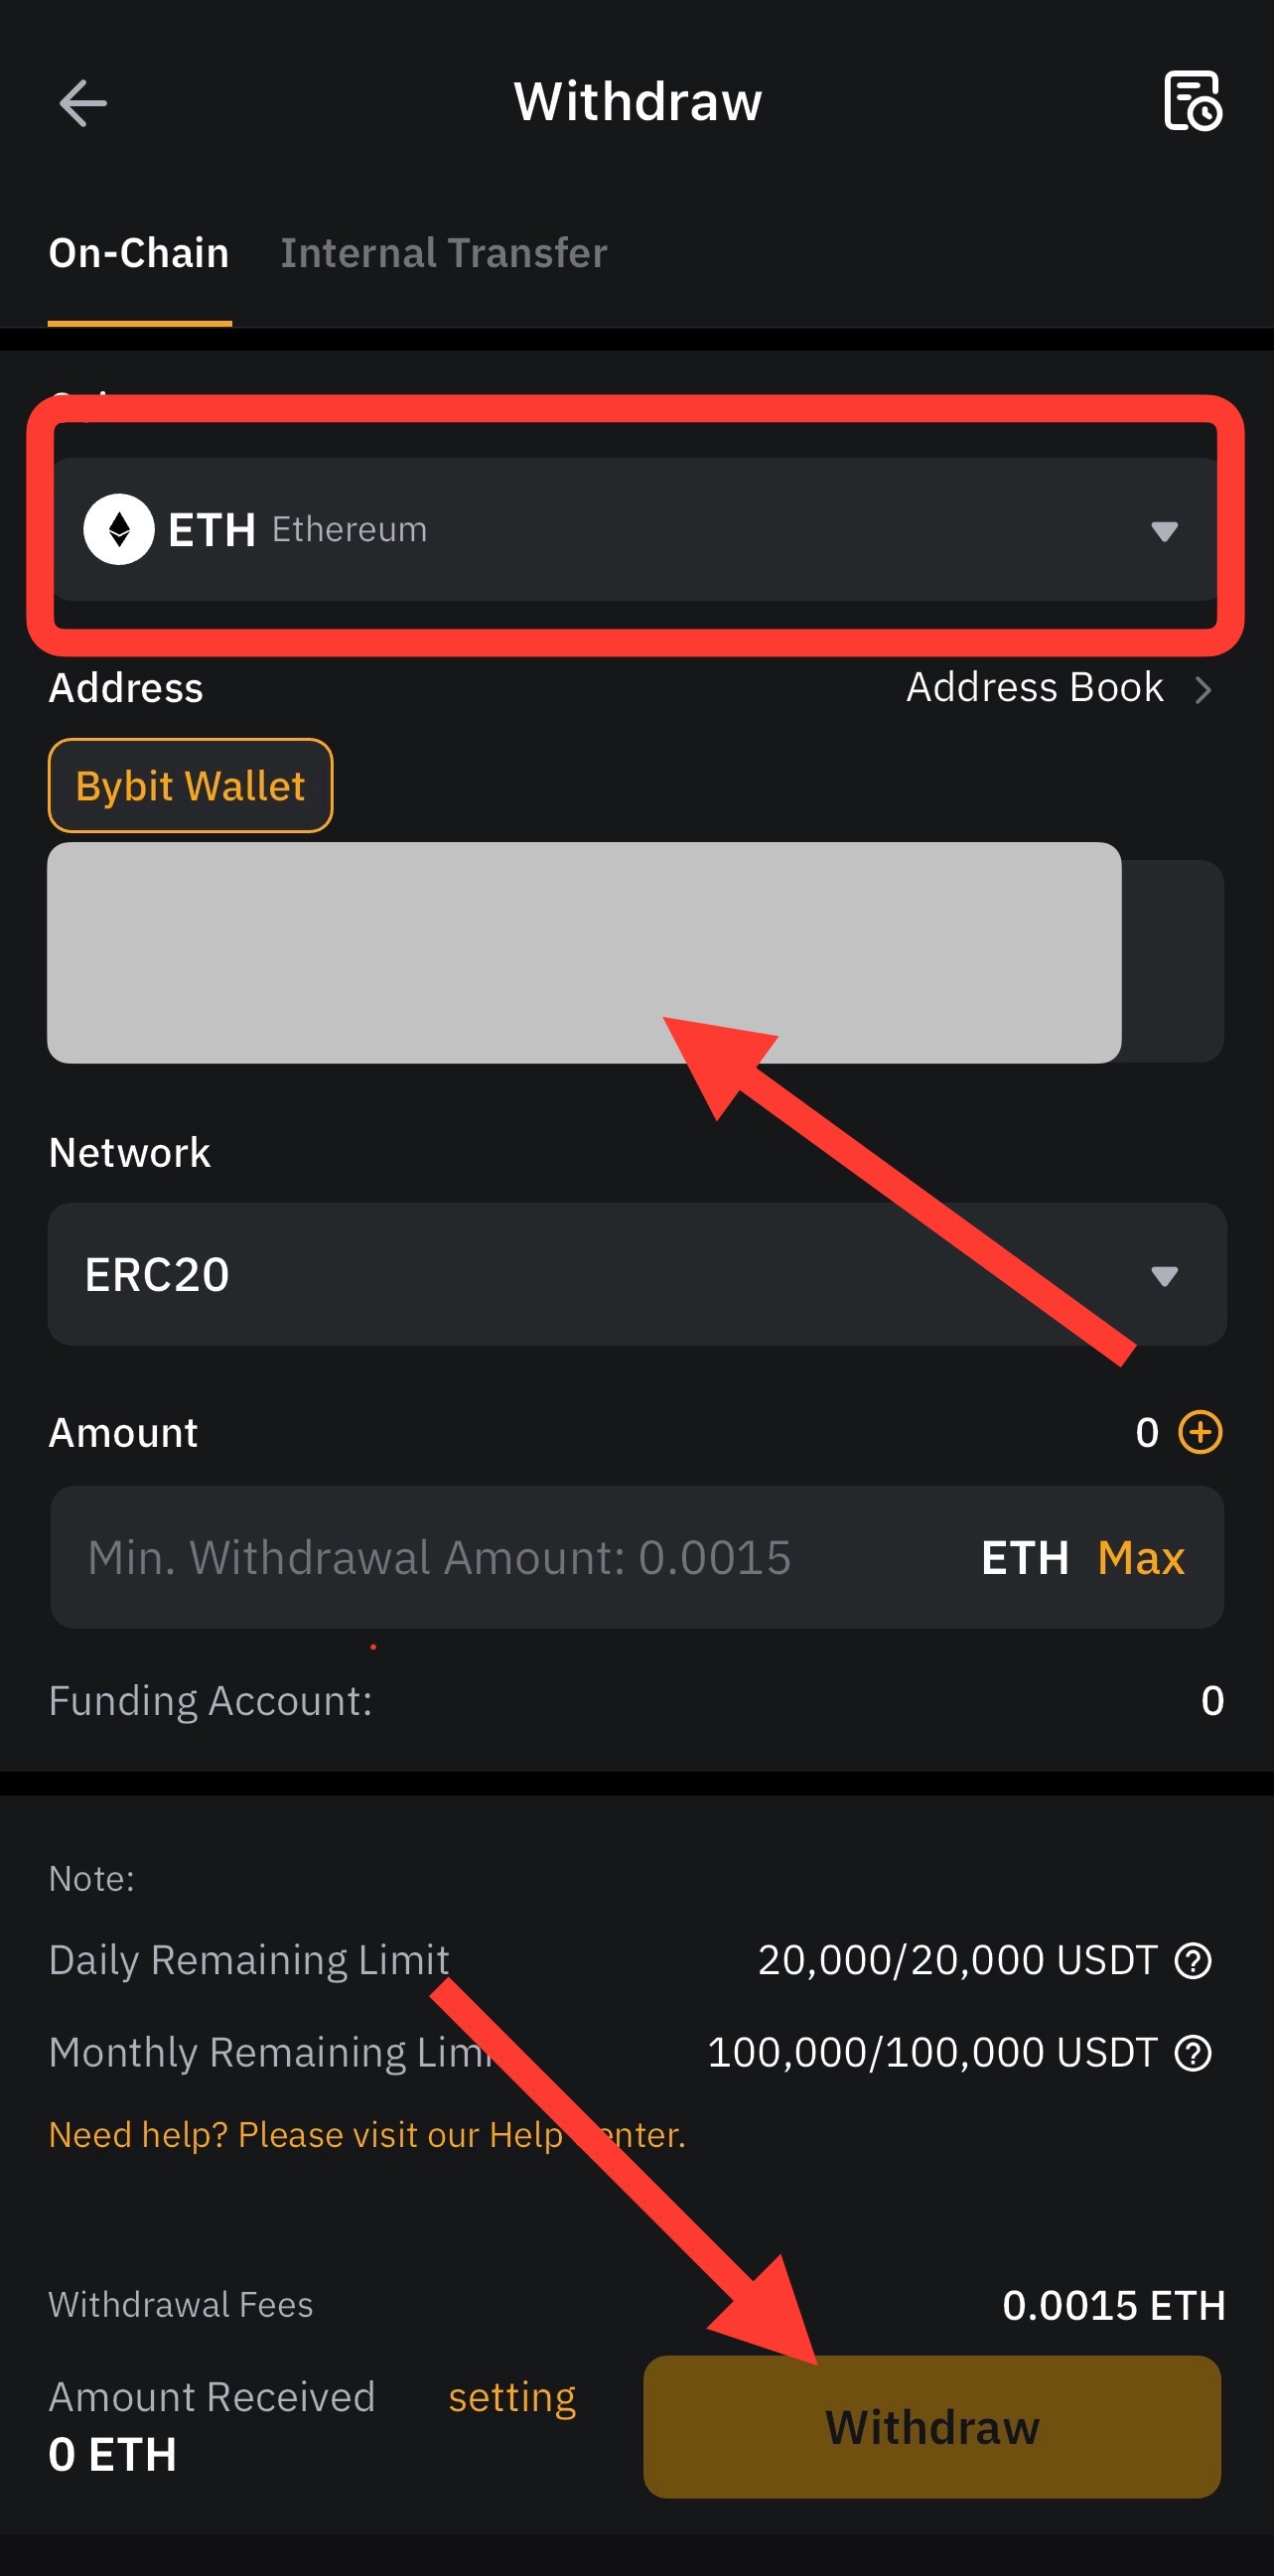
3.1 To purchase Blast Network (#Blast), we will need Ethereum, which we purchased in advance on an exchange (for example, ByBit). To do this, go to the "Assets" tab.
3.2 Then click the “Withdraw funds” button.

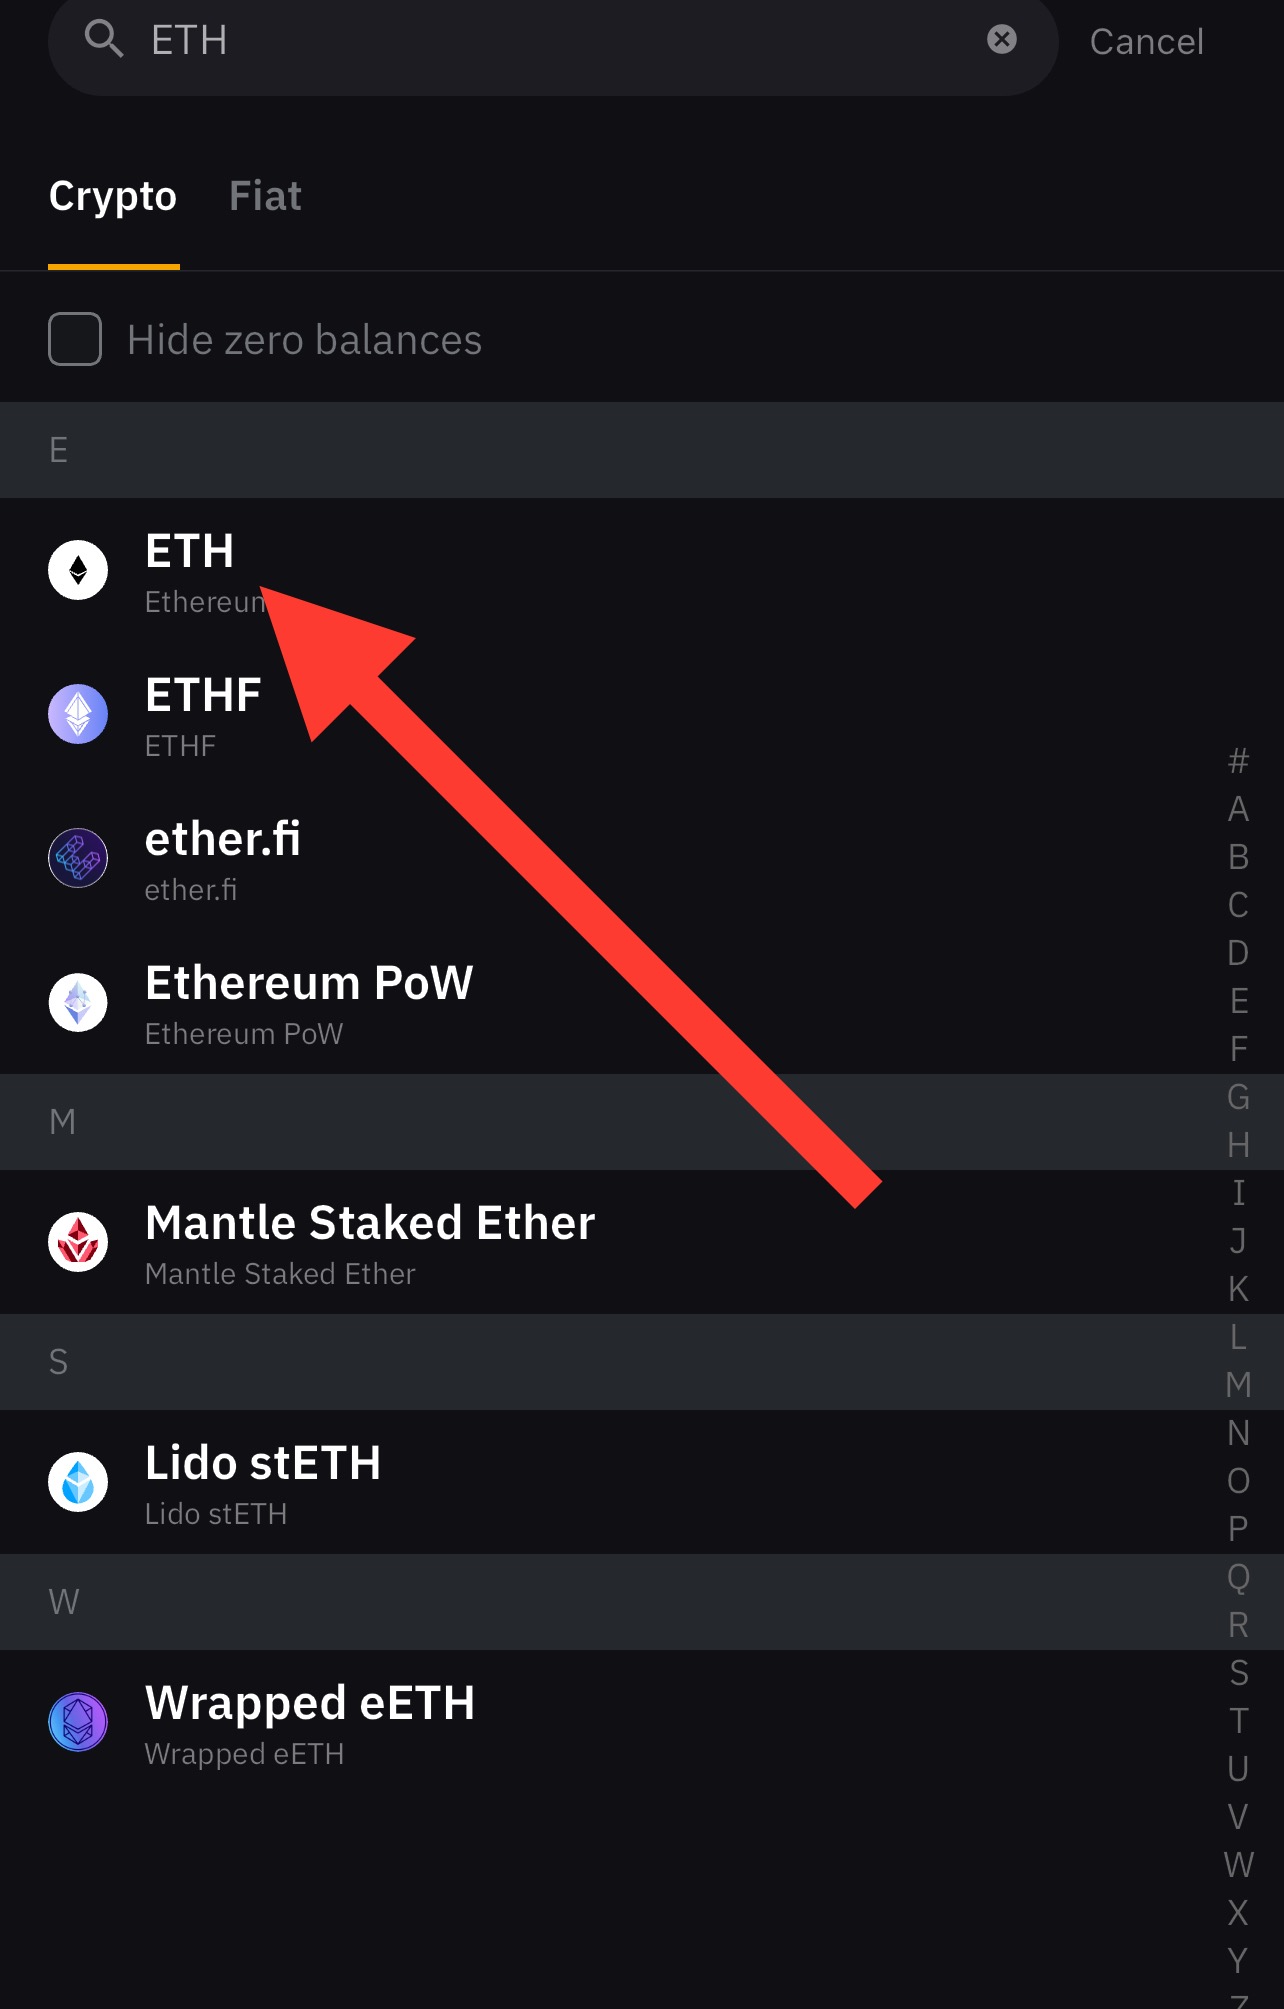
3.3 Select Ethereum(ETH) coin
3.4 After this, the withdrawal window opens, insert the wallet address that we copied into MetaMask into the address bar, select the ETH Ethereum network, enter the withdrawal amount and click on the “Withdraw Funds” button, then confirm it and wait for it to arrive on MetaMask.
4. Buy Blast Network (#Blast) token
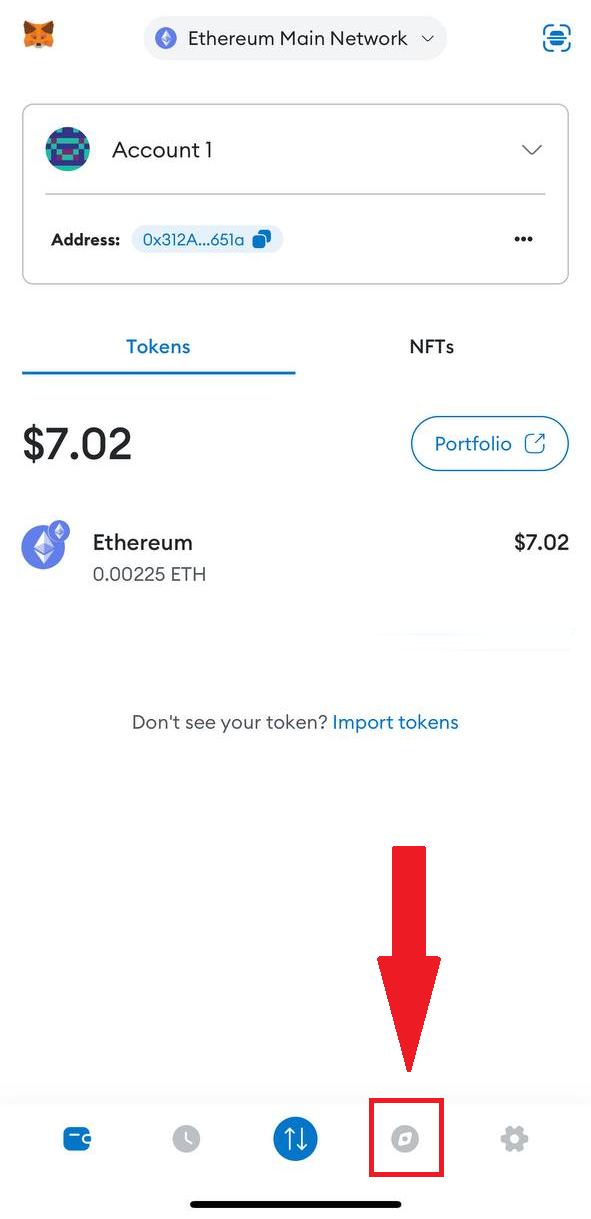
4.1 Return to the MetaMask wallet and click on “Browser” from below
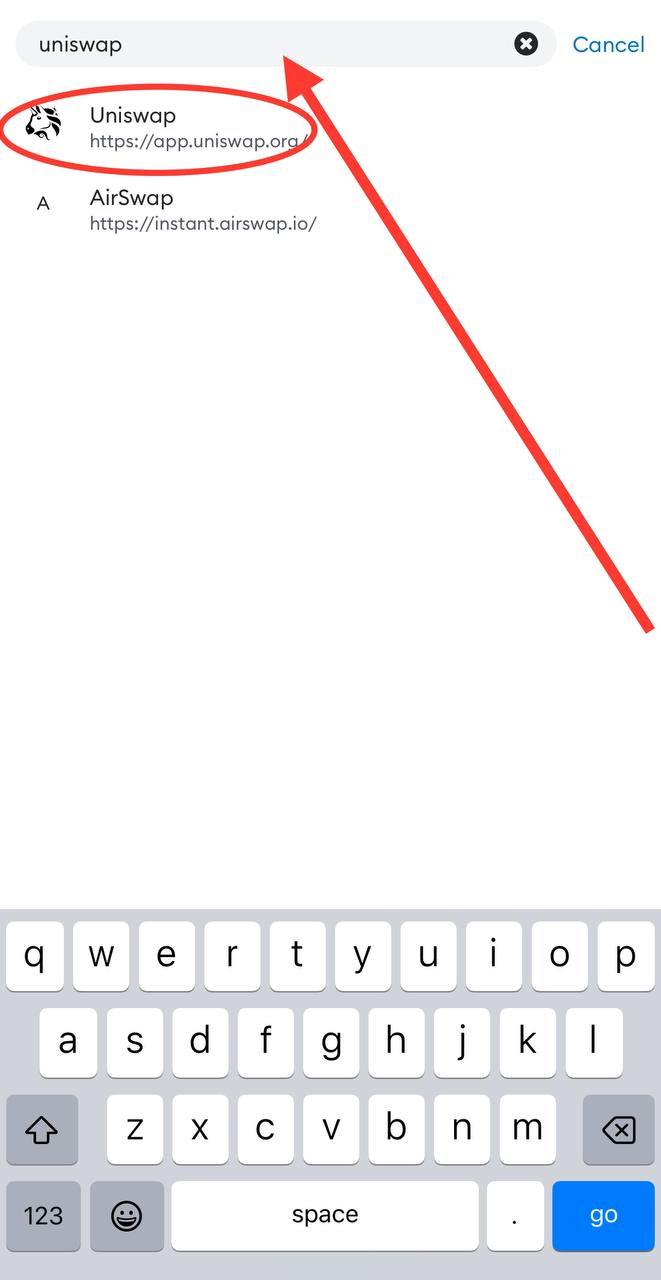
4.2 copy and paste the link to UniSwap into the address bar, click on search or simply write “UniSwap” and select UniSwap
Link address: https://uniswap.org
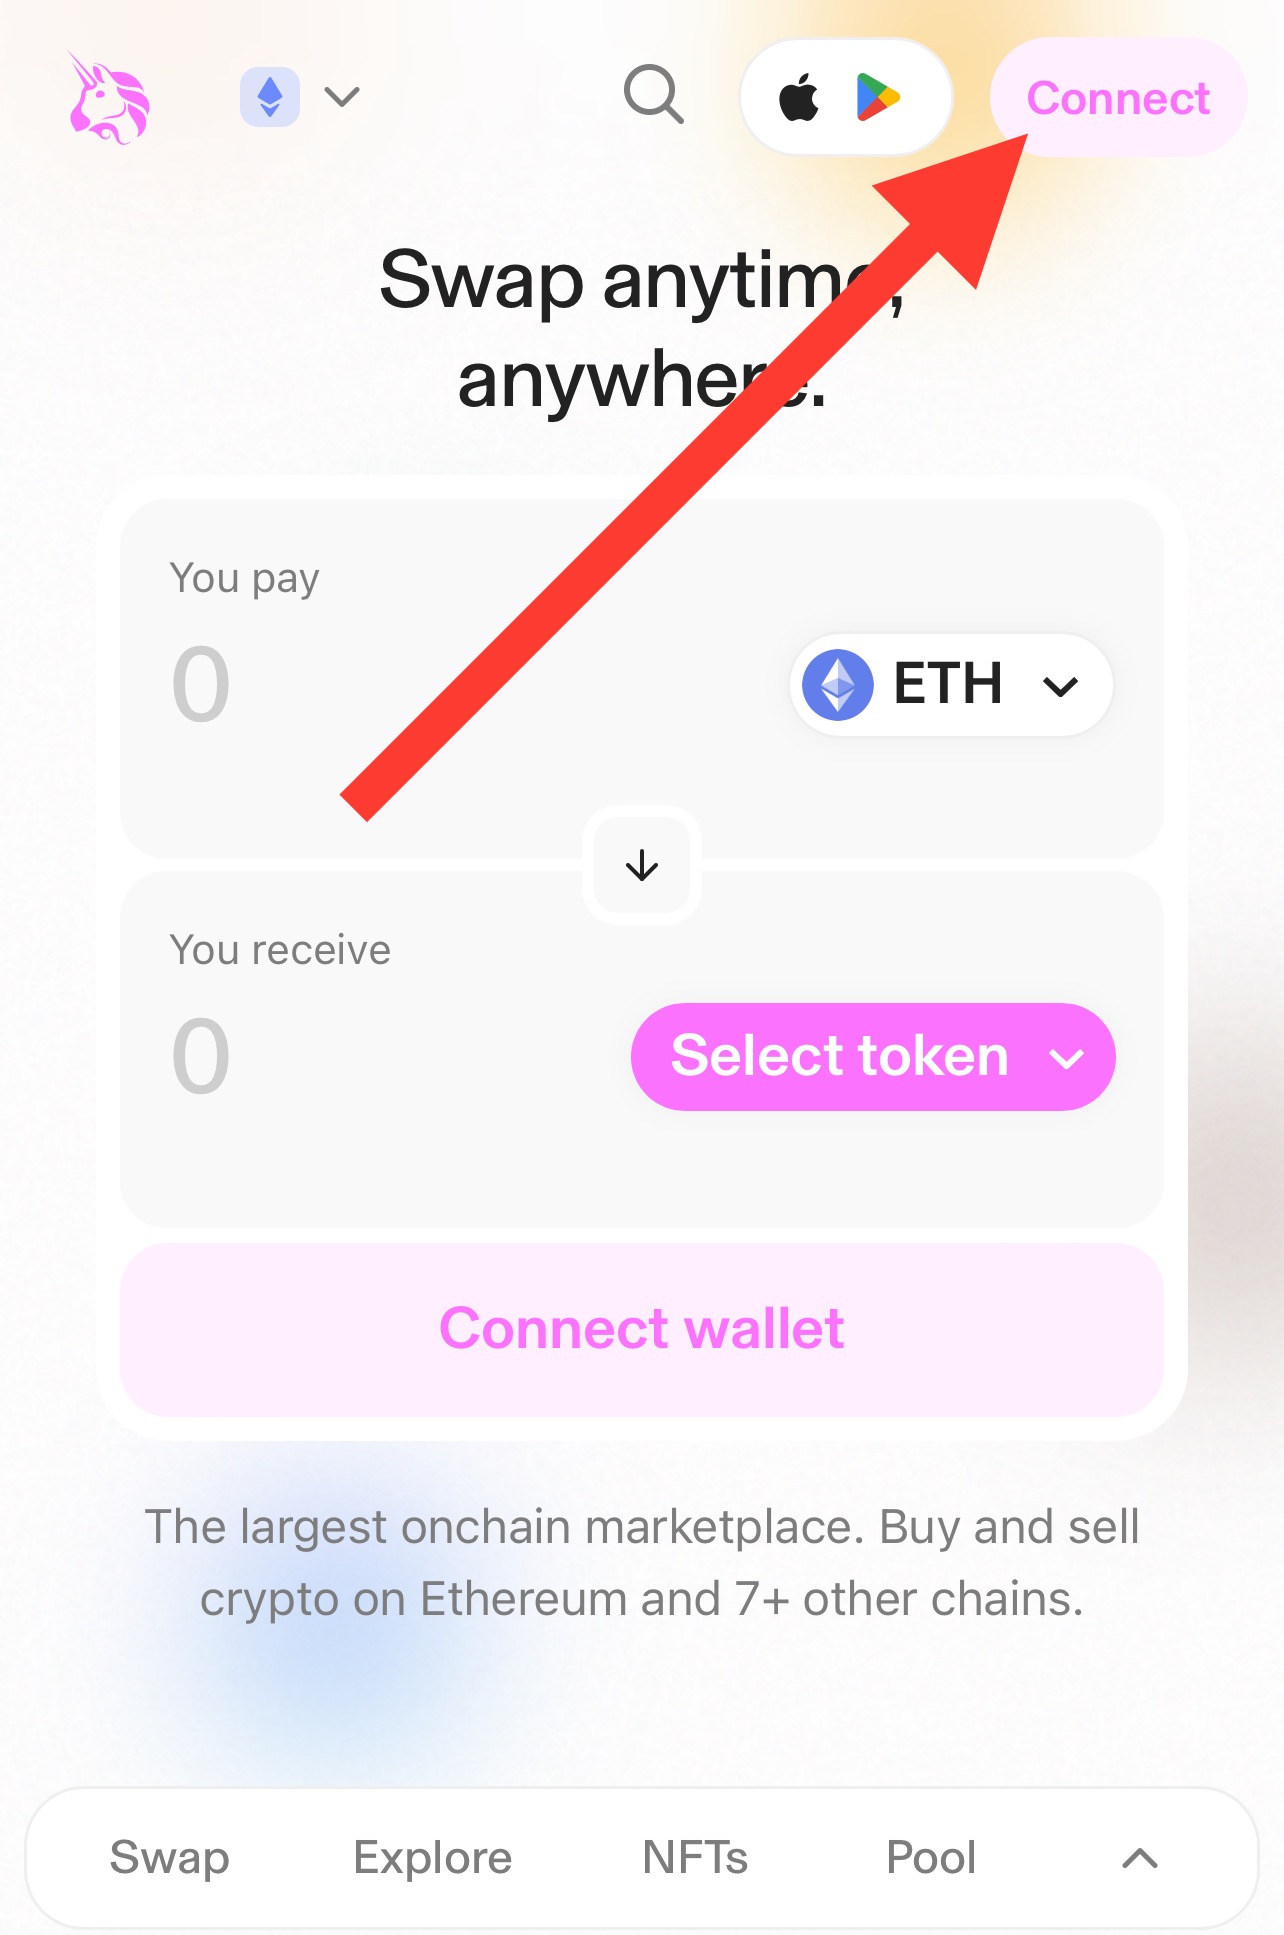
4.3 Connect your wallet, if necessary, and select the one you need from the list
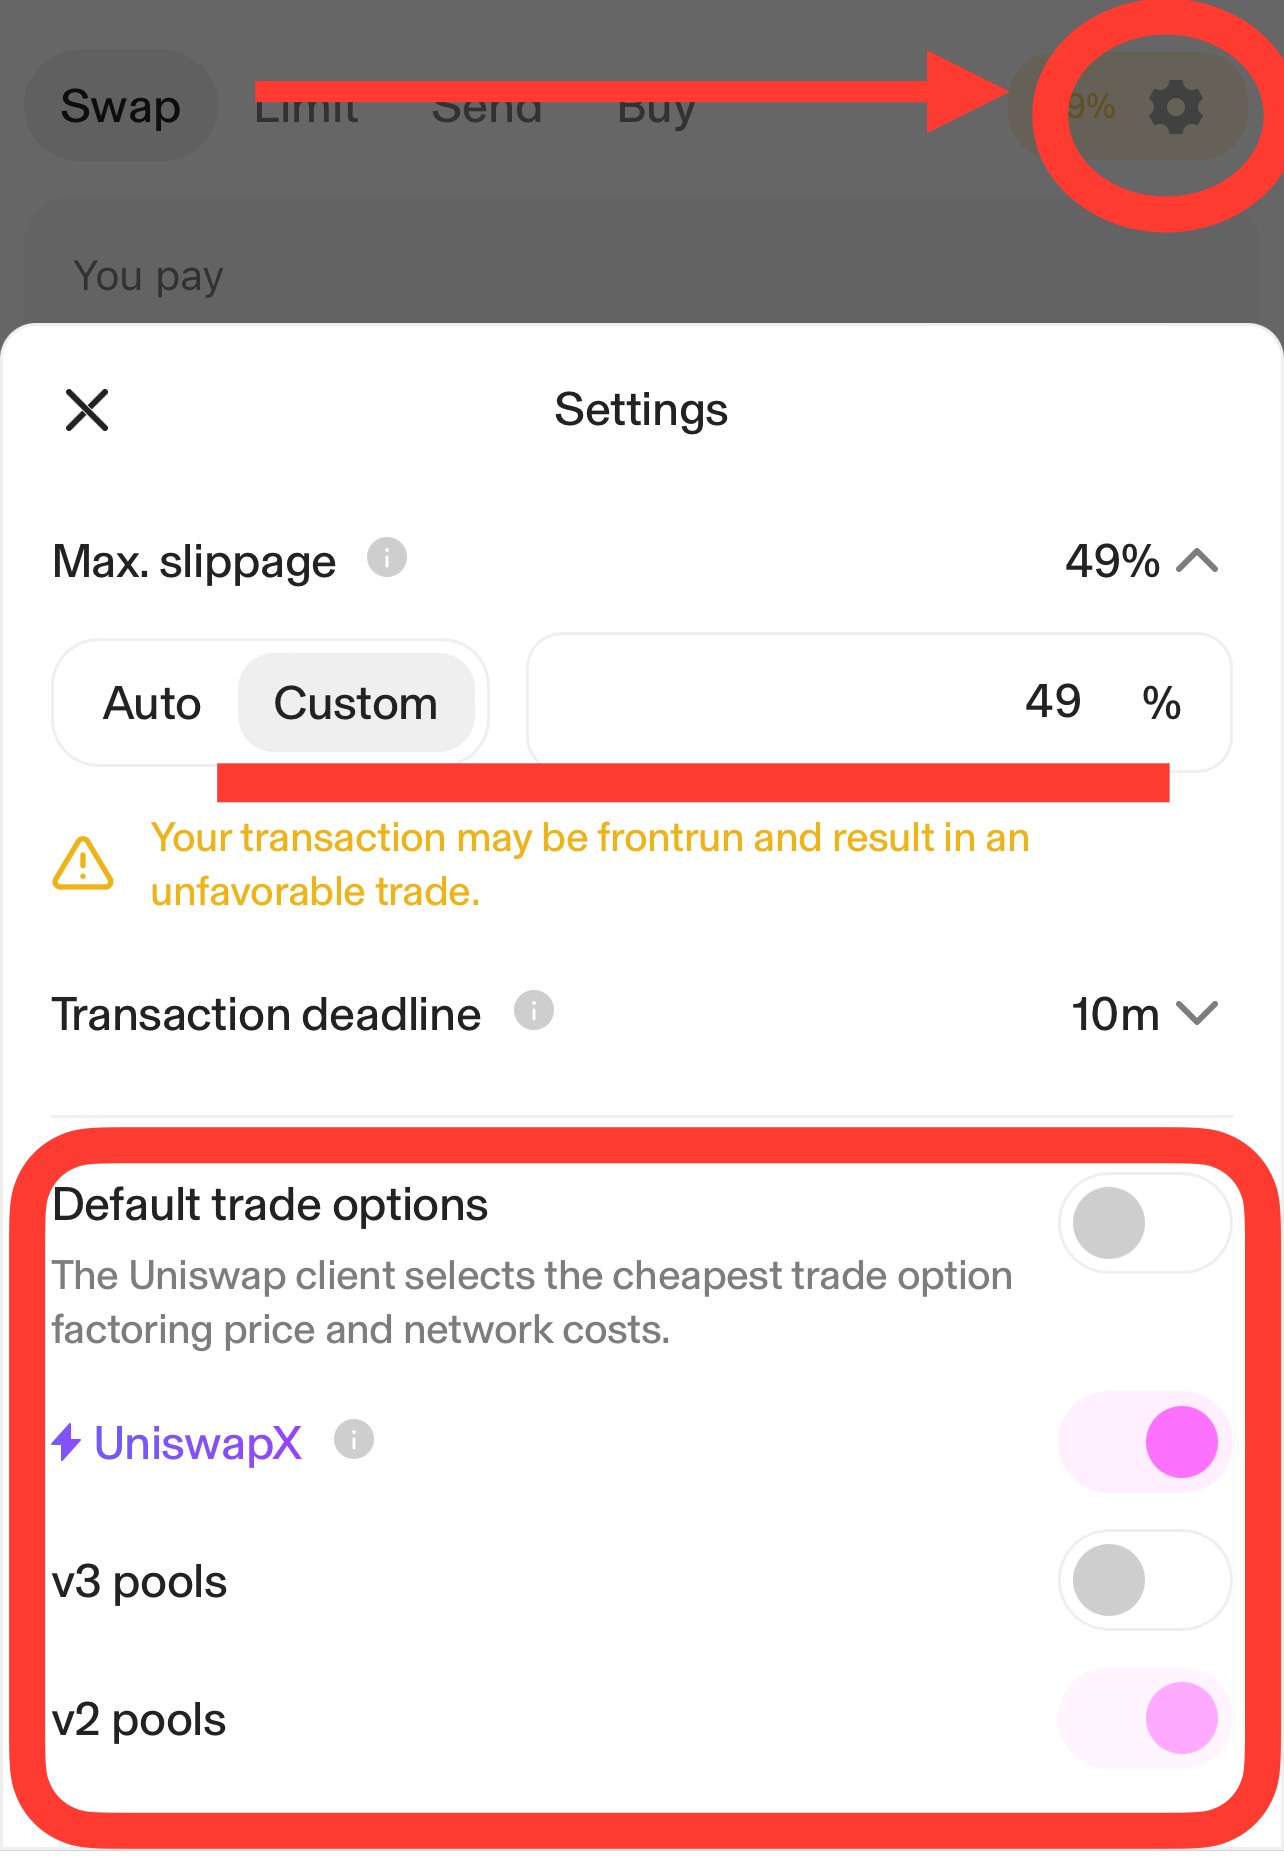
4.4 Now click on the gear in the upper right corner of the screen and set the settings exactly as shown in the screenshot to avoid slippage and make the transaction more secure
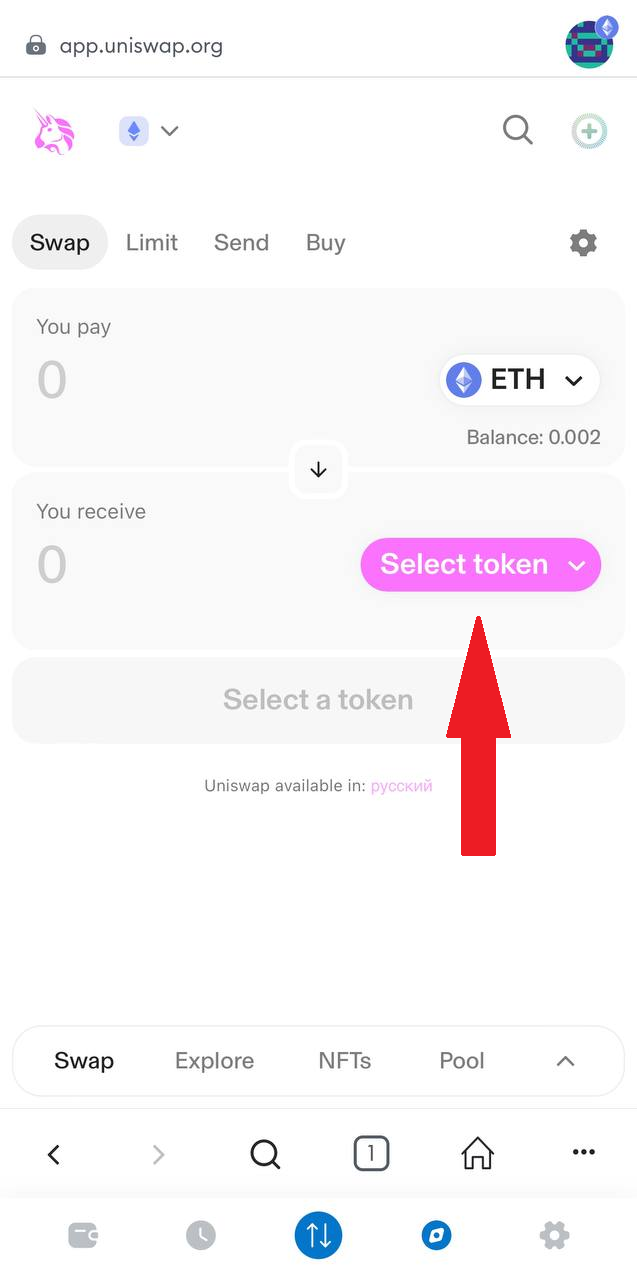
4.5 Press the button "Select token"
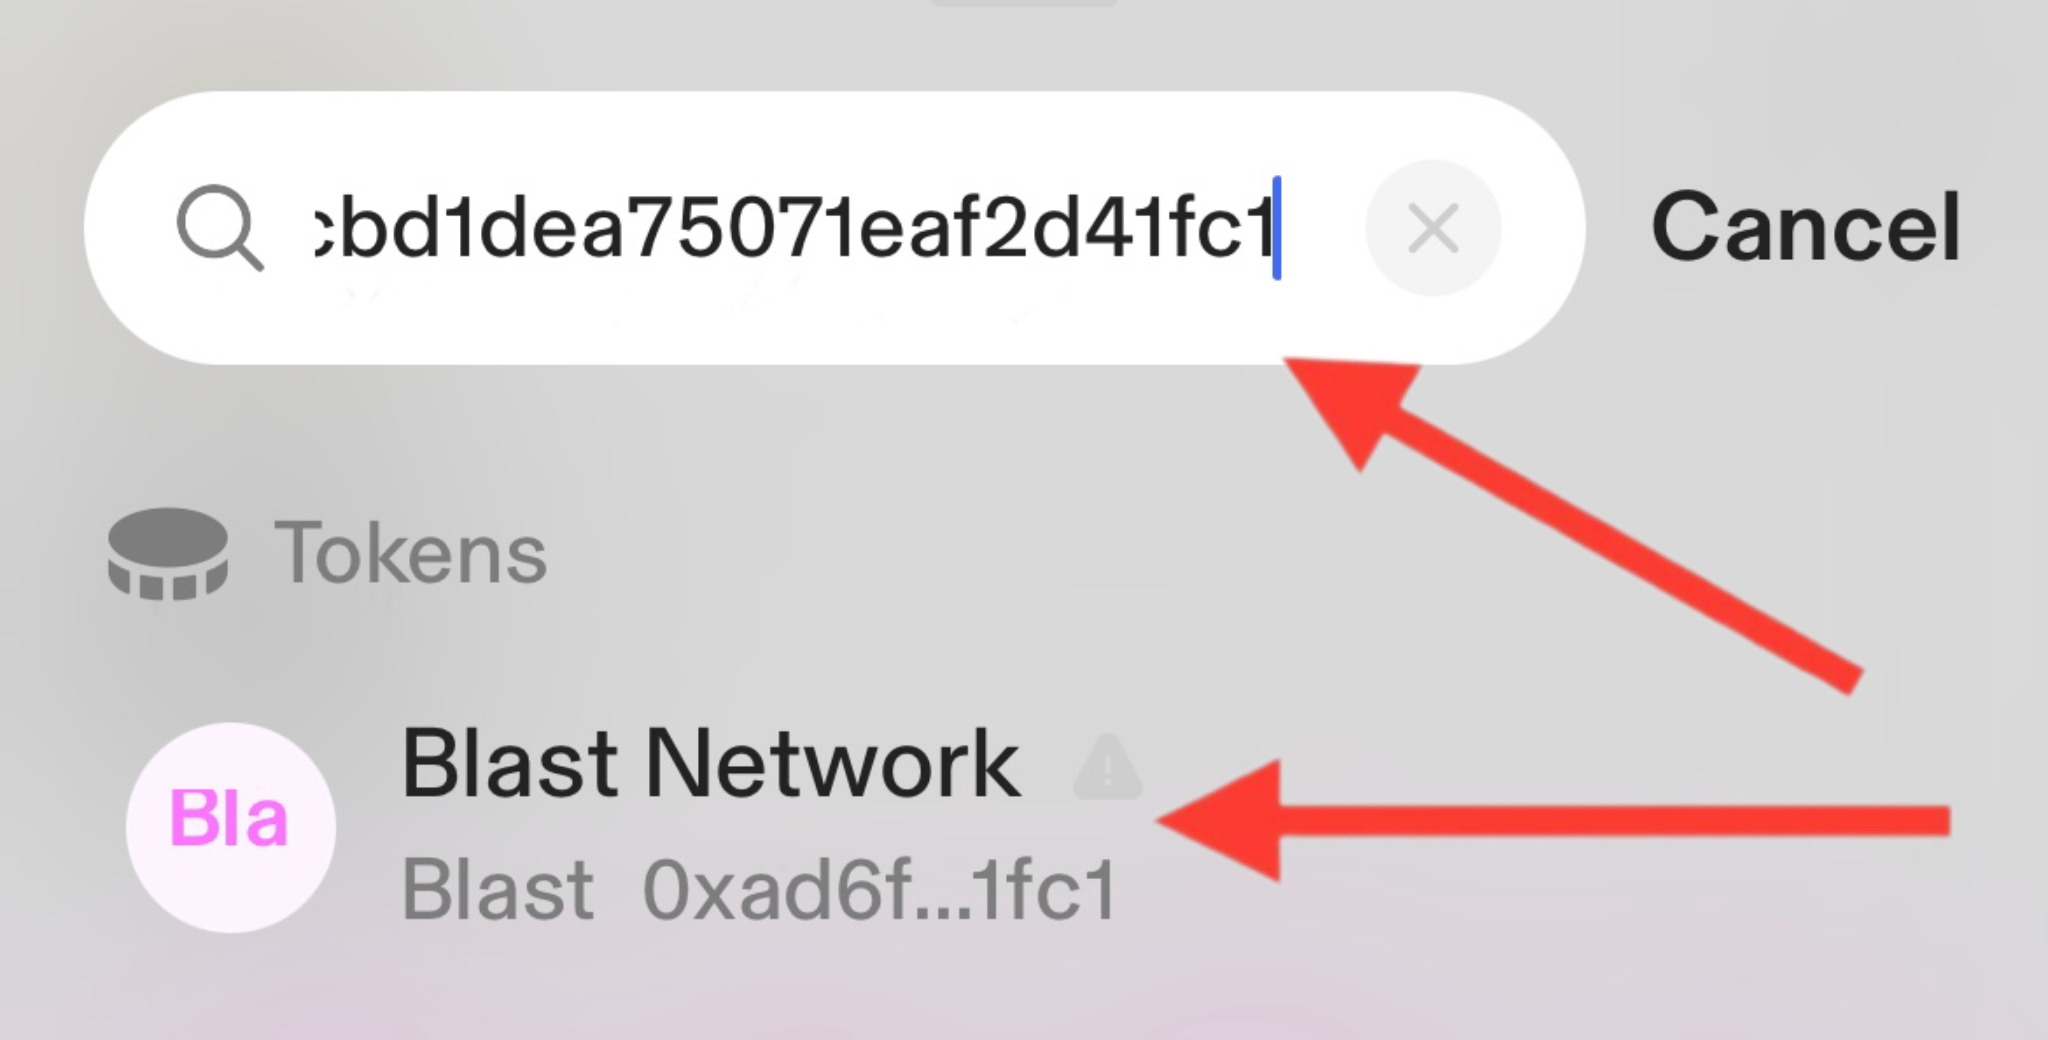
4.6 Put an address Blast Network (#Blast):
0xad6fcea09a5374672dcbd1dea75071eaf2d41fc1
4.7 Selecting Blast Network (#Blast)
4.8 We agree to the terms of trade

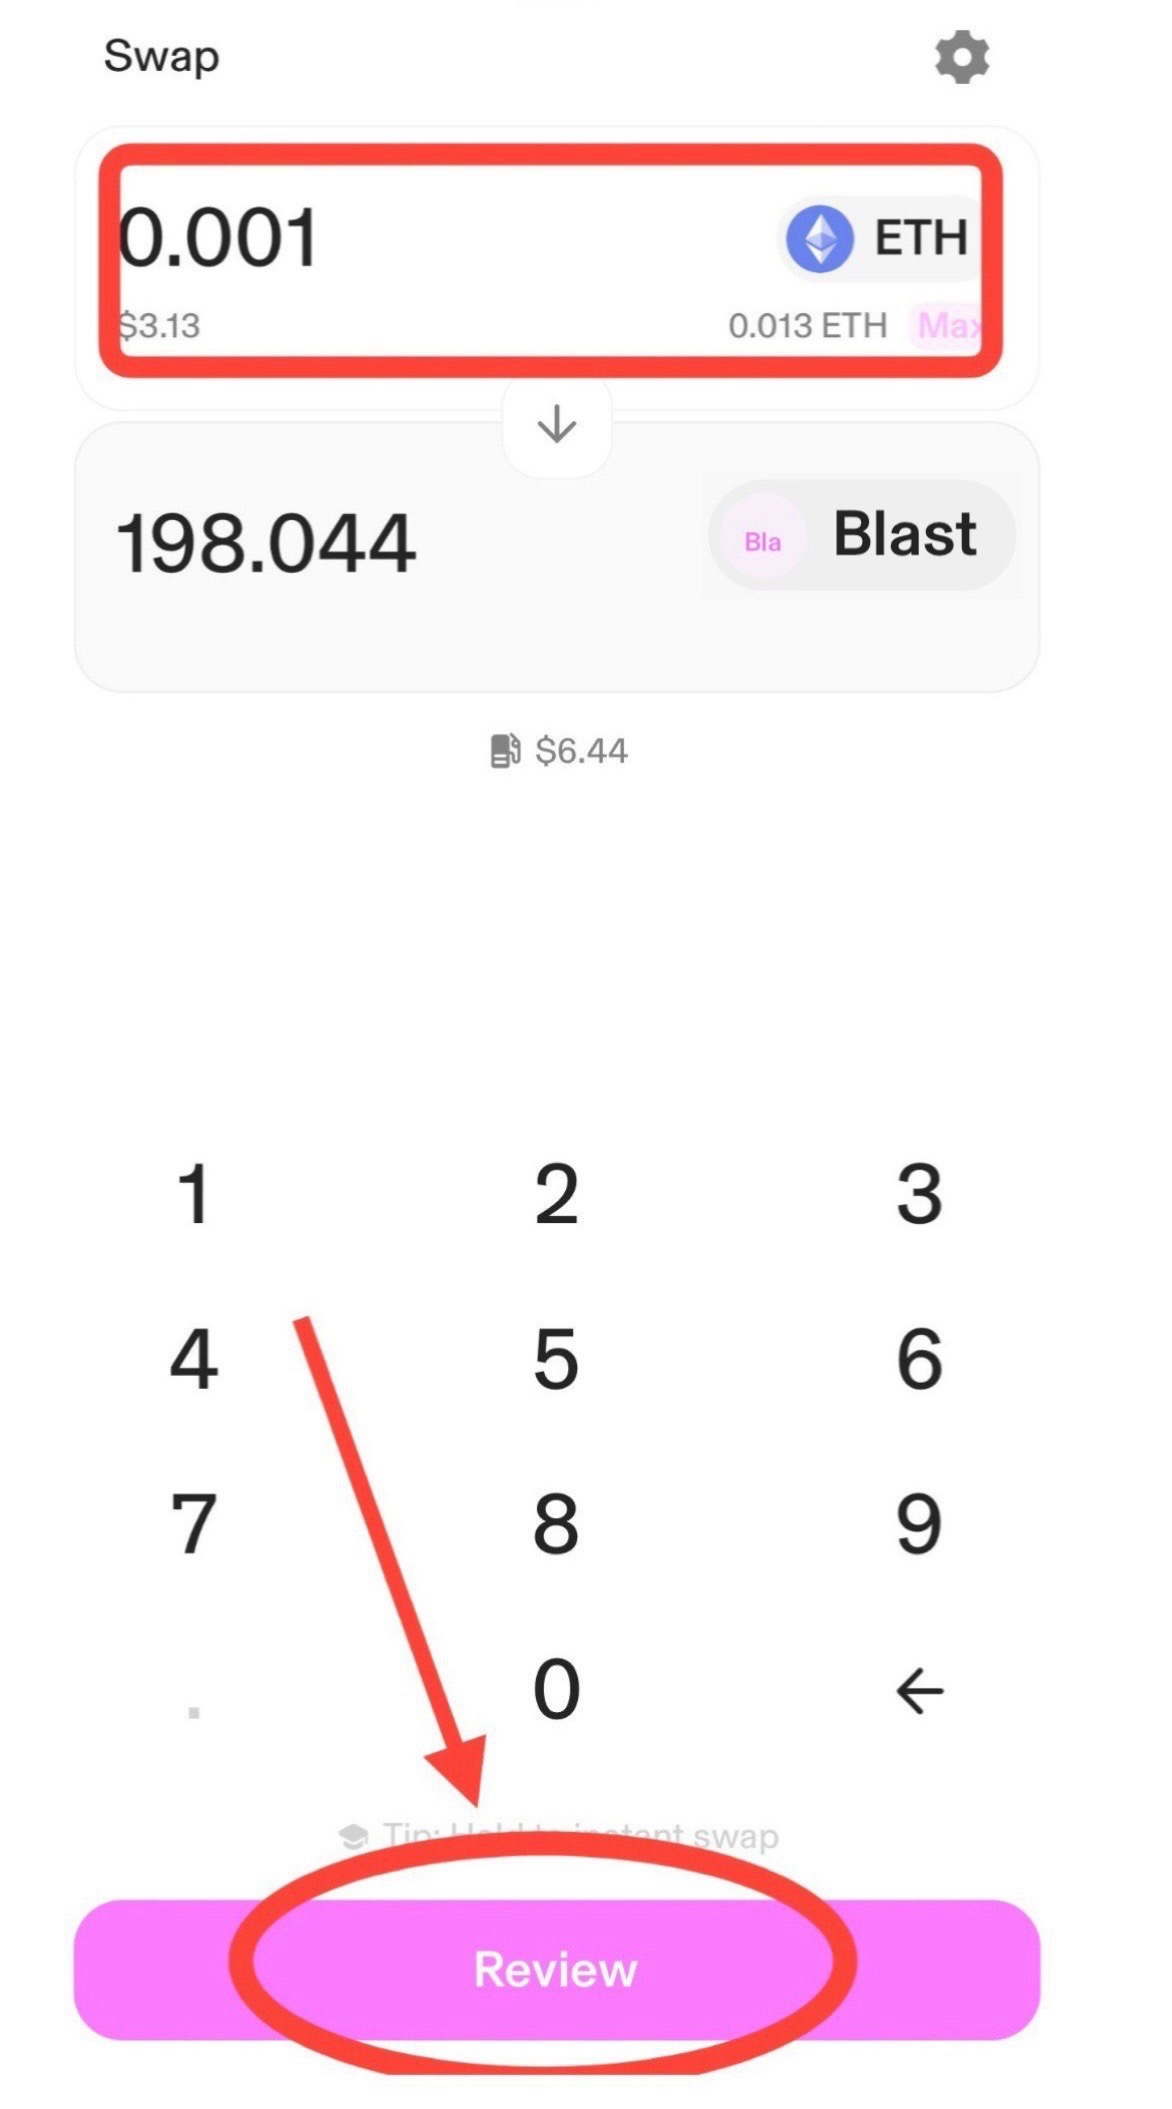
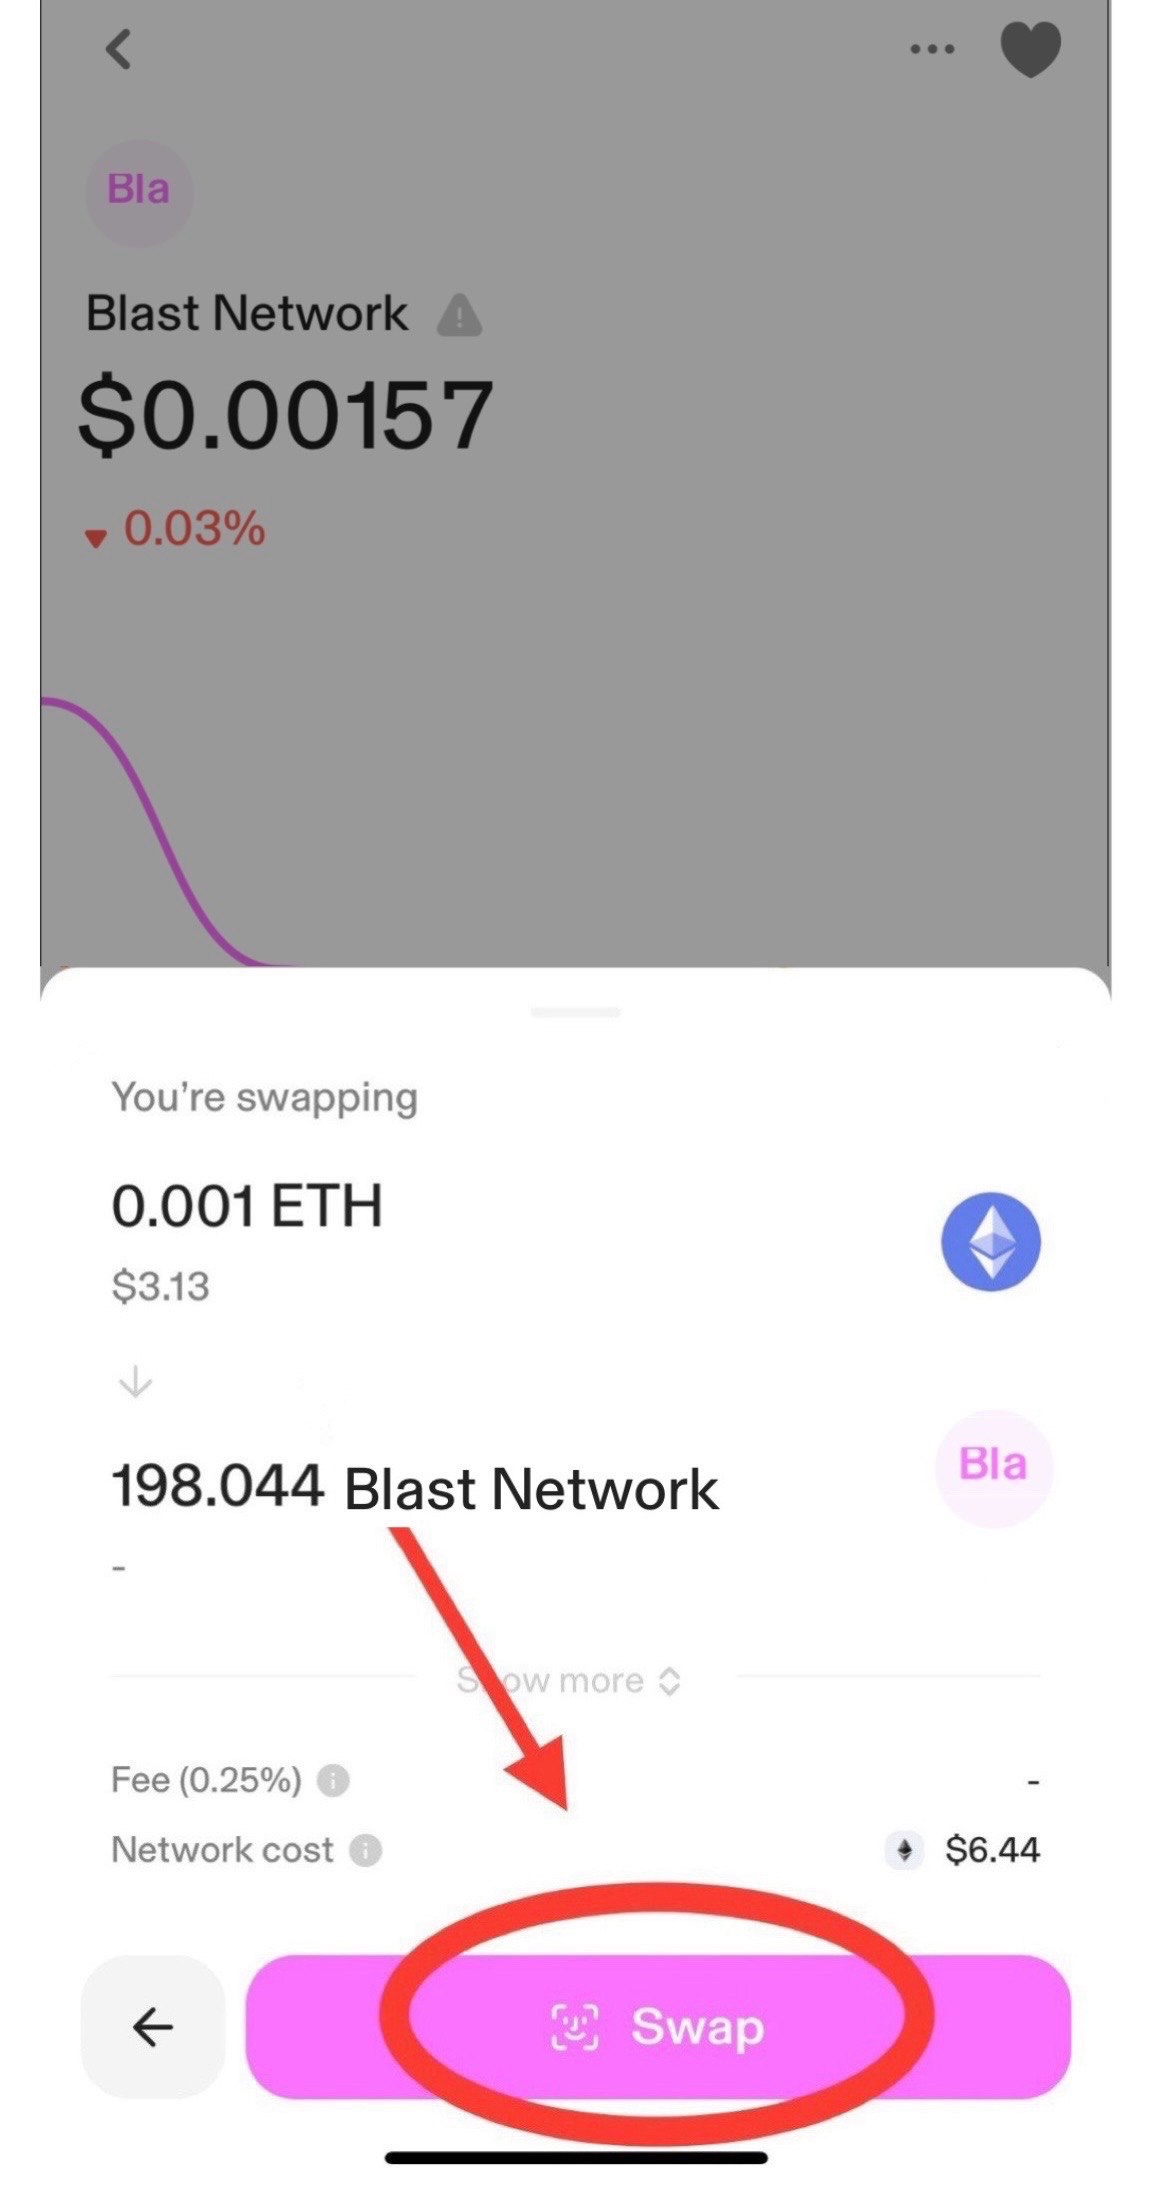
4.9 Enter the required amount to exchange for Blast Network (#Blast)
4.10 Click "Swap/Exchange"
Also, the purchase does not always go through the first time due to the congestion of the ETH network. For 2-3 times, following the instructions, you can buy Blast Network (#Blast)
4.11 click "Confirm/Confirm exchange" and go through additional authentication, if any
4.12 Congratulations, you bought Blast Network (#Blast) and now wait for a sell signal on the channel
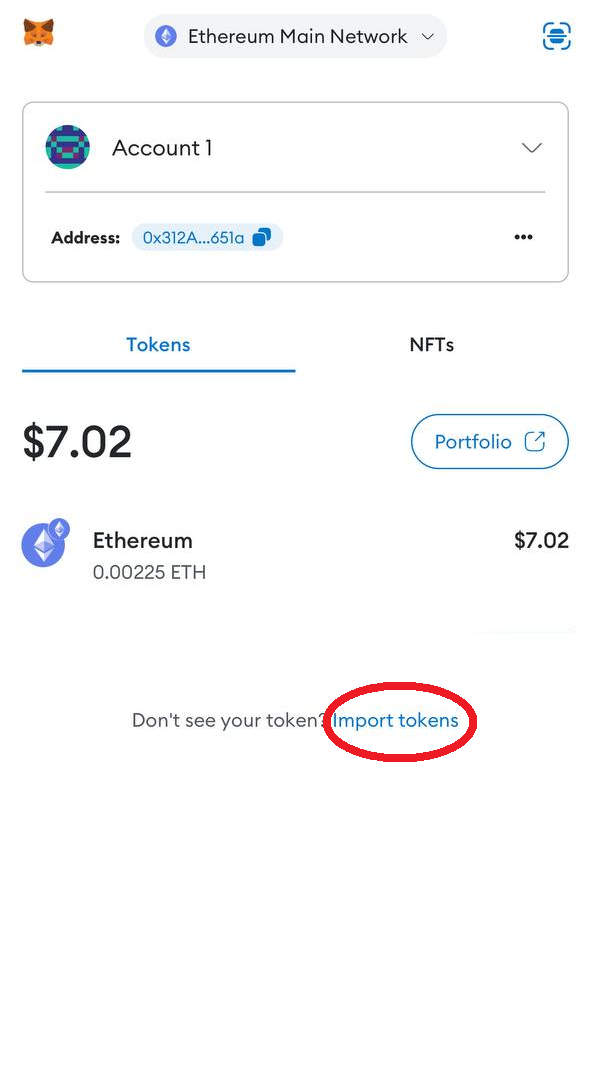
5. How to add Blast Network (#Blast) to the wallet display:
5.1 Click “Manage tokens”
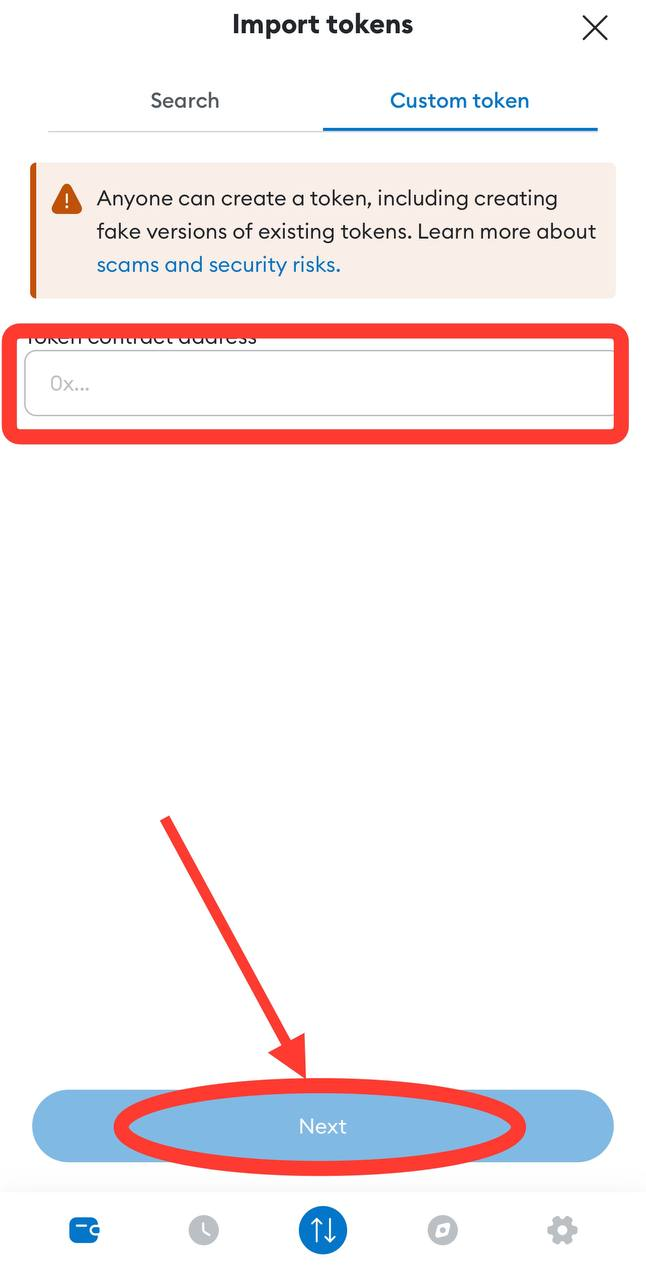
5.2 paste the Blast Network (#Blast) address into the highlighted line:
0xad6fcea09a5374672dcbd1dea75071eaf2d41fc1
Congratulations, your Blast Network (#Blast) tokens are showing up in your wallet.