InNoHassle Guard Instruction
Vladislav KonovalovIntroduction
At Innopolis University, we commonly use Google Spreadsheets to collect student feedback. While flexible, it lacks security. Shared editing links are anonymous, allowing anyone to modify the file without accountability.
The one-zero-eight team provides a solution with InNoHassle Guard. It doesn’t prevent incidents but helps identify who edited the file. Students will no longer be anonymous when editing guarded spreadsheets, and you can restrict or penalize them as needed.
Instead of a direct link, you’ll share a guarded link to InNoHassle Guard. It prompts users to enter their email and authenticate via our university’s SSO system, linking their @gmail.com and @innopolis.university accounts. This way, you can identify students based on their Gmail address.
Guarding Files
You can create a new protected spreadsheet or copy an existing one.
Creating a New File
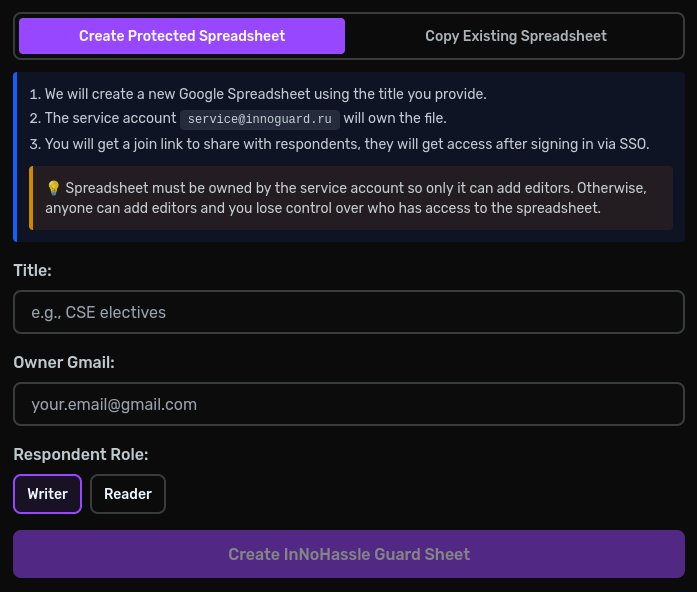
- Select "Create Protected Spreadsheet" on innohassle.ru/guard
- Enter a title (or filename) for the new file
- Provide your Gmail address to be added as an editor immediately
- Select the default role for students: writer (editor) or reader (viewer)
Copying an Existing File
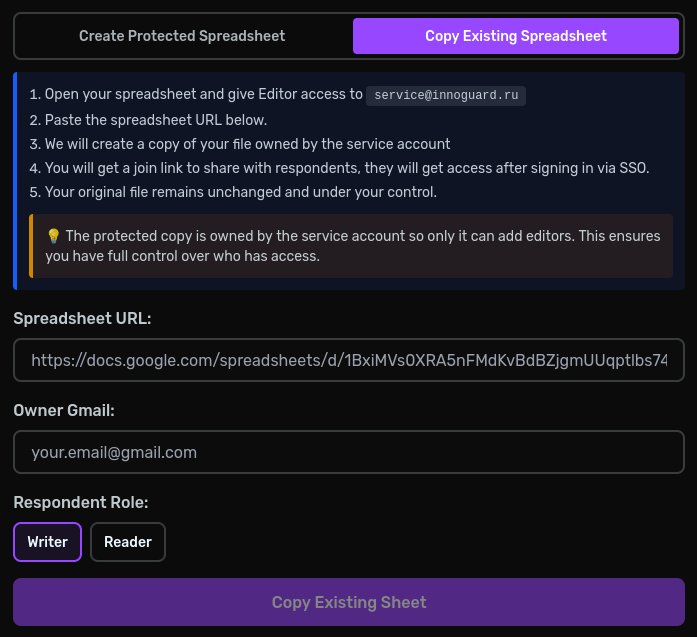
- Open the existing file and invite service@innoguard.ru as an editor
- Provide the link to your file
- Enter your Gmail address to be added as an editor immediately
- Select the default role for students: writer (editor) or reader (viewer)
After Creation
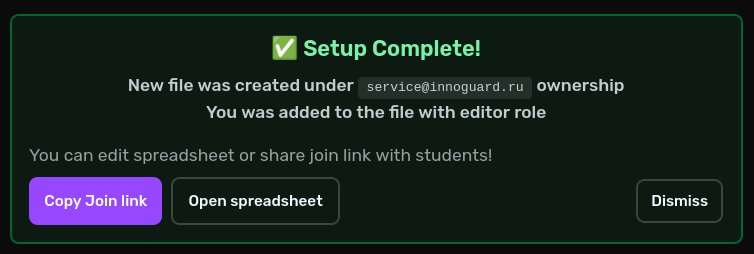
The new file will be created under the ownership of service@innoguard.ru, and you will be added as an editor. You can then open and edit the spreadsheet or share the guarded link. Students who join via the guarded link will be assigned the default role you selected. You can update the default role at any time.
Managing Guarded Files
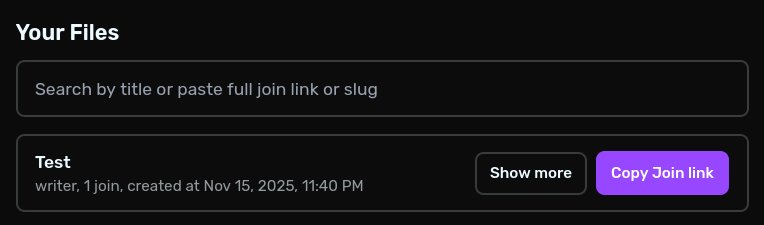
You can see all your files at the bottom of the page. Here, you can copy the guarded link or view file details by clicking "Show More."
Guarded File Details
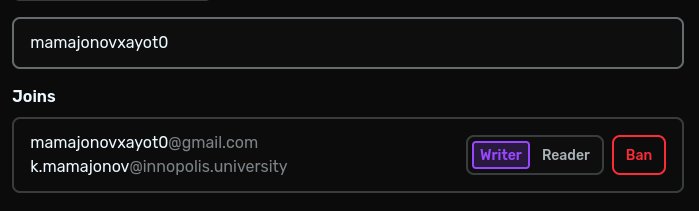
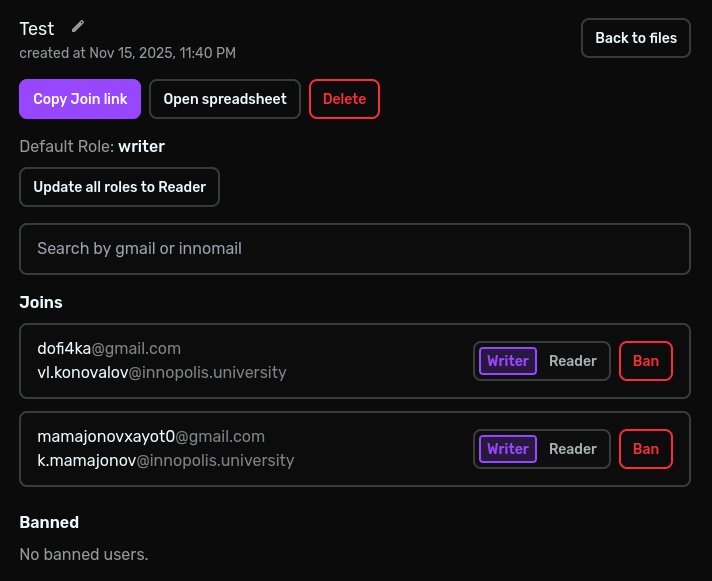
You can view the list of students who have joined the file. Each student will have both their @gmail.com and @innopolis.university email addresses, along with their role in the file.
By default, students will receive the role you selected, but you can change the role of specific users if needed. For example, if you want to allow someone to edit a view-only file, you can upgrade their role, or if you want to restrict someone from editing, you can change their role to "reader."
You can also update roles globally. For instance, changing everyone to "reader" after collecting feedback, so no one can modify the file.
To restrict a student's access, simply change their role to "reader". If you need to completely remove a student’s access from even reading file, you can ban them.
Identifying Who Modified the File
Google Spreadsheets stores edit history, but retrieving an editor's Gmail address can be tricky.
Checking edit history
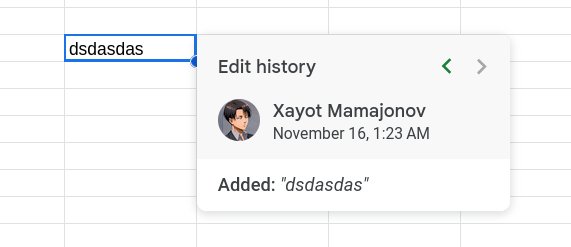
Right-click on any cell and select "Edit History."
You’ll see the user’s avatar and full name, but not their Gmail address.
Getting the Gmail Address
To obtain the Gmail address:
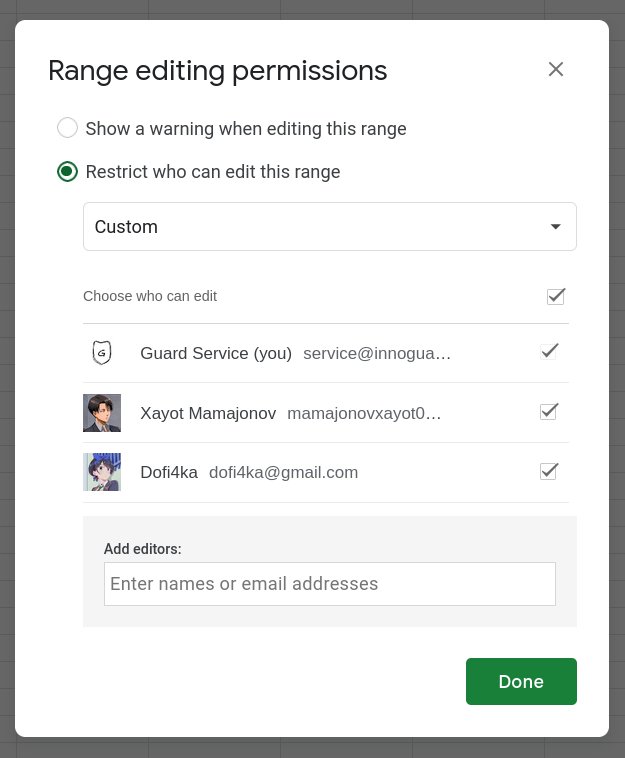
- Go to "Data" > "Protect sheets and ranges"
- Click "Add a sheet or range"
- Click "Set permissions"
You’ll see a list of all users with Gmail addresses next to each user.
To identify a user, copy their full name from the edit history and search for it in the list using your browser’s search feature (Ctrl+F). If the Gmail address is partially hidden, double-click the visible part of the address to select the full Gmail address.
Getting the Innopolis Email Address
In the file details, paste the Gmail address into the search bar to find the corresponding @innopolis.university email.