HowToUploadMaskOnBraundress
https://t.me/braundressai蒙版上传功能/UploadMask
Introduction/介绍
The "UploadMask" feature allows users to manually draw masks over images instead of relying on automatic detection.
This feature is particularly useful in complex situations where automatic detection may fail, such as with intricate garment designs.
It enhances the success rate of image processing, conserves credits, and gives users greater creative freedom.
“蒙版上传功能”允许用户手动在图片上绘制蒙版,而非依赖自动识别功能。
这一功能在复杂场景中尤其有用,比如在机器无法自动识别复杂衣物设计时, 它提高了图片处理的成功率,节省了积分,并且赋予了用户更高的创作自由度。
Key Features/功能特点
- User-Driven Masking: Users can redraw specific areas according to their preferences.
用户驱动的蒙版: 用户可以根据自己的喜好重新绘制特定区域。 - Enhanced Accuracy: Avoids the limitations of automatic recognition in complex images.Improve the success rate of image production and avoid wasting points
提高准确性: 避免在复杂图片中自动识别的局限性, 提高图片出图的成功率,避免浪费积分 - Can apply dressing effects to images generated for NUDE characters and outpaint features
可以为裸体的人物和扩展功能生成的图片应用换衣效果 - Speed: Processes images faster by UploadMask.
速度: 上传自定义蒙版图片来提高处理速度。 - Availability: Available to all users.
普及性: 对所有用户开放。 - Application: Initially available for "Undress&Dressing" effects; outpaint effects will not support the UploadMask feature currently.
应用范围: 初期仅可用于“脱衣换衣效果”; 扩展效果和脸部效果暂不支持蒙版上传功能。
Operating Steps/操作步骤
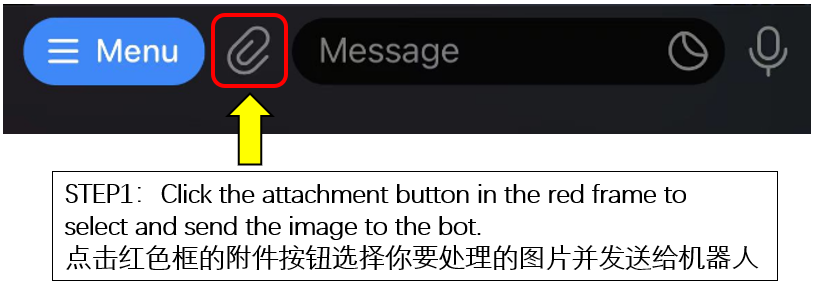
**STEP 1**:
Click the attachment button in the red frame to select and send the image to the robot.点击红框内的附件按钮,选择你要处理的图片并发送给机器人。
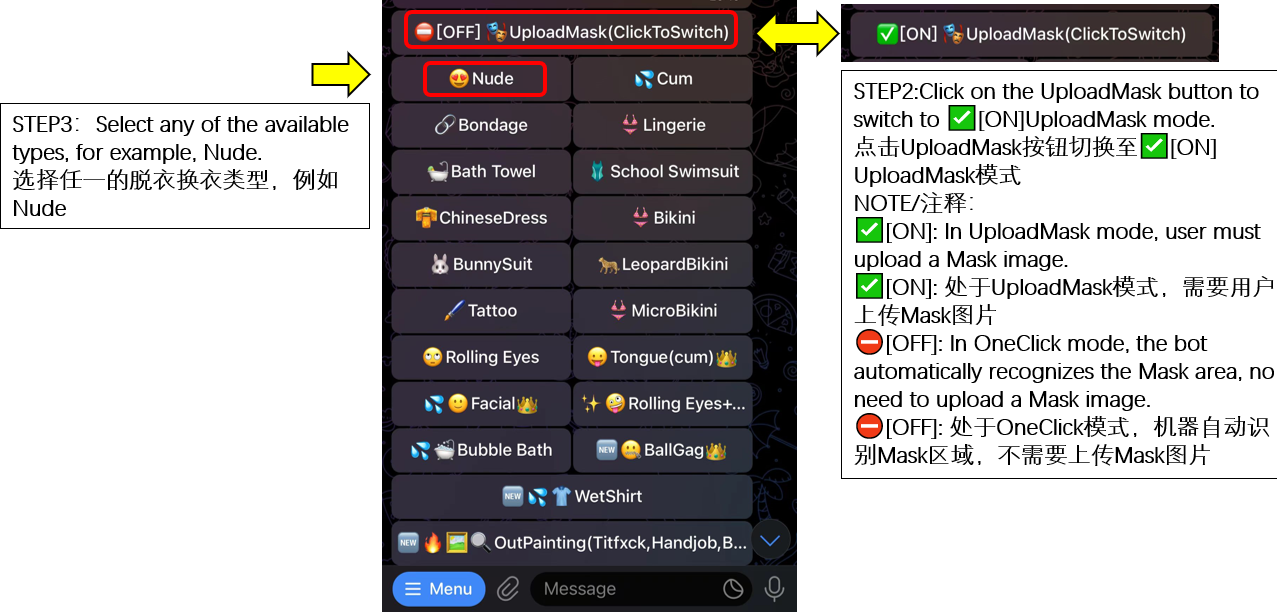
**STEP 2**:
Click on the UploadMask button to switch to ✅[ON]UploadMask mode.
点击UploadMask按钮切换至✅[ON]UploadMask模式。
Notes/注释:
✅[ON]: In UploadMask mode, user must upload a Mask image.
✅[ON]: 处于UploadMask模式,需要用户上传Mask图片
⛔[OFF]: In OneClick mode, the bot automatically recognizes the Mask area, no need to upload a Mask image.
⛔[OFF]: 处于OneClick模式,机器自动识别Mask区域,不需要上传Mask图片
**STEP 3**:
Select any of the available types, for example, Nude.
选择任一的脱衣换衣类型,例如全裸。
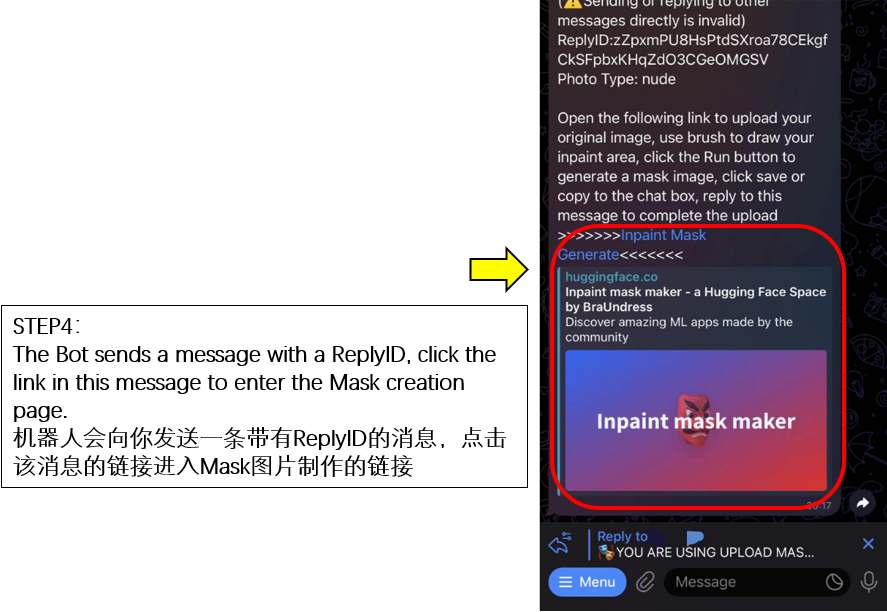
**STEP 4**:
The Bot sends a message with a ReplyID, click the link in this message to enter the Mask creation page.
机器人会向你发送一条带有ReplyID的消息,点击该消息的链接进入蒙版制作页面。
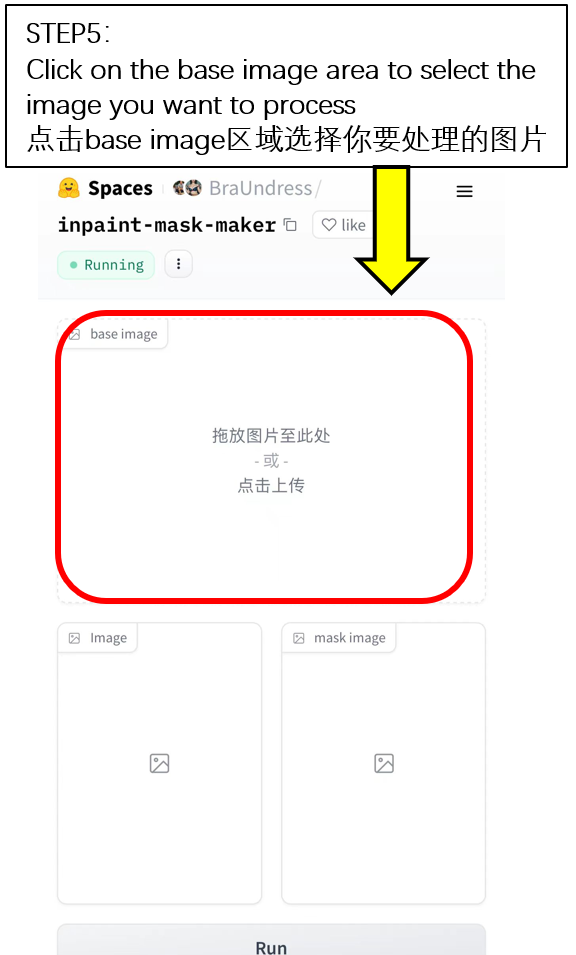
**STEP 5**:
Click on the base image area to select the image you want to process 点击base image区域选择你要处理的图片
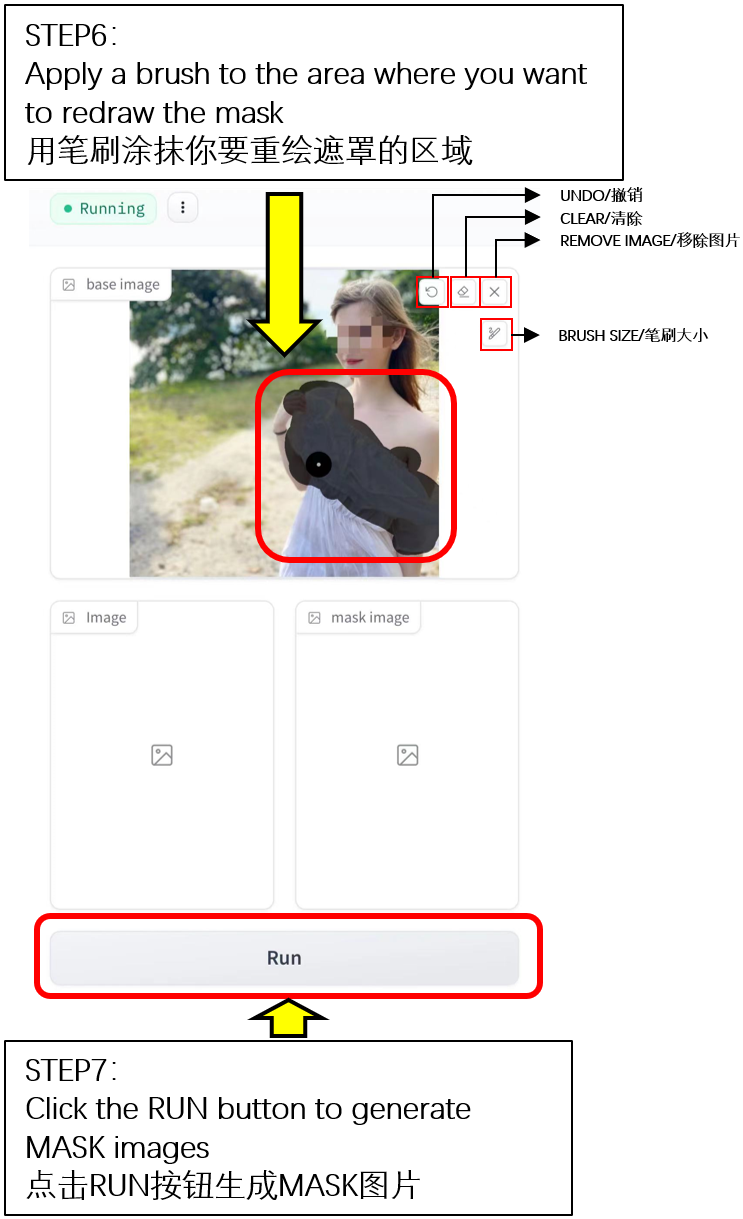
**STEP 6**:
Apply a brush to the area where you want to redraw the mask
用笔刷涂抹你要重绘遮罩的区域
**STEP 7**:
Click the RUN button to generate MASK images
点击RUN按钮生成MASK图片
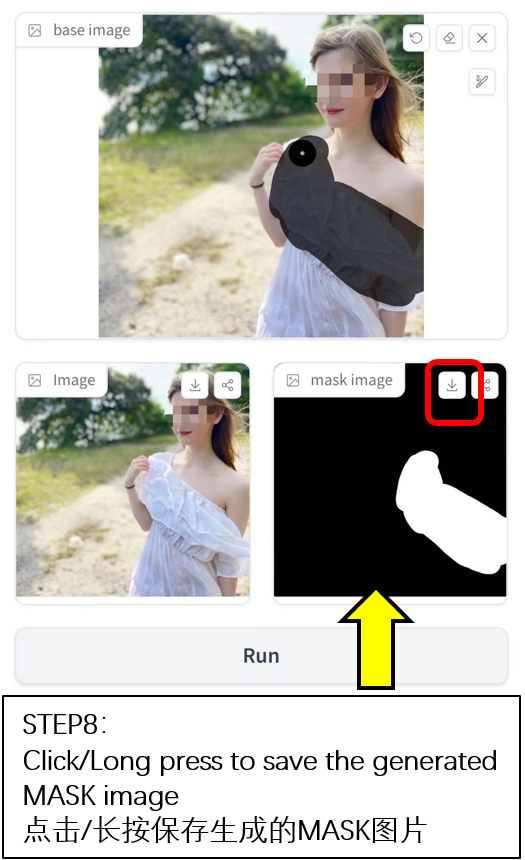
**STEP 8**:
Click/Long press to save the generated MASK image
点击/长按保存生成的MASK图片
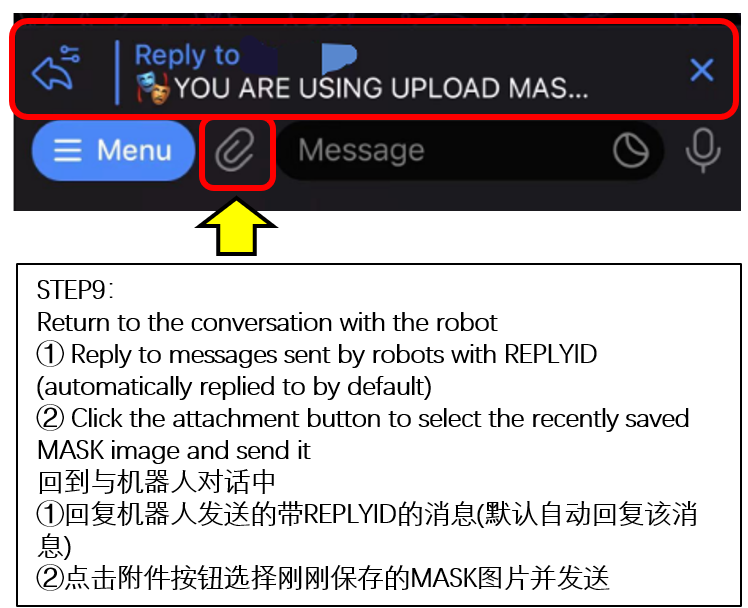
**STEP 9**:
Return to the conversation with the robot
① Reply to messages sent by robots with REPLYID (automatically replied to by default)
② Click the attachment button to select the recently saved MASK image and send it
回到与机器人对话中
①回复机器人发送的带REPLYID的消息(默认自动回复该消息)
②点击附件按钮选择刚刚保存的MASK图片并发送
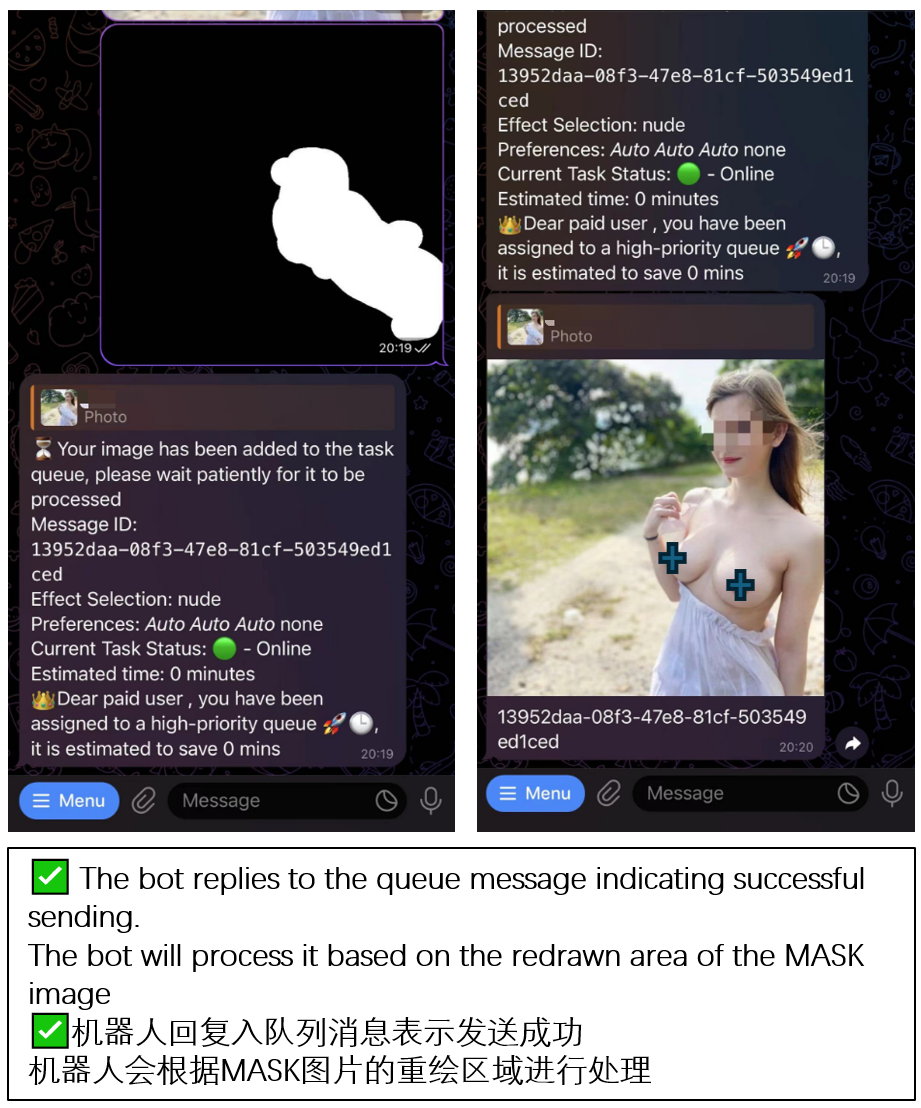
**FINAL**:
✅ The bot replies to the queue message indicating successful sending.
The bot will process it based on the redrawn area of the MASK image
✅机器人回复入队列消息表示发送成功
机器人会根据MASK图片的重绘区域进行处理