How to mint NFTs on TON
by getgems.ioIn this guide, we’ll tell you everything you need to know to launch your collection or a single NFT on the TON blockchain.
Contents:
- Preparing your collection
- Wallet setup
- Security when using a wallet
- Log in to Getgems
- Collection creation
- Minting an NFT.
Preparing your collection
Resources
In order to launch a collection, first, we need the resources. In this case, these are images in the .JPG,.JPEG or .PNG format. They need to be stored in the resolution in which you want to make them available to the end-user — the NFT owner. In order to minimize the possibility of errors, we recommend naming files in the English alphabet and without special characters (%;! etc.).
For example: my_first_nft.png
When you create an NFT, you will need to provide the names and descriptions for each NFT.
Collection
You also need to prepare an image for your collection’s cover (an avatar and a banner):
- Avatar 512х512.
- Cover picture 2500х665. This image is displayed at the top of your collection’s page.
- A snippet or collection preview banner 1200х627. The snippet is displayed as a preview when you share the link to your collection.
In addition to the images, you need to prepare a text description of the collection. Make sure to highlight the value and purpose of your artwork to communicate your idea with NFT collectors.
In addition to all the images and descriptions, prepare all the necessary links to the social media pages of your collection beforehand; the more high-quality information people receive about your NFTs, the higher the chance of successfully launching them. We recommend that you provide links to:
- Telegram channels, chats, and bots
- Discord
- TikTok
- Official website.
Here’s an example of what an NFT collection on Getgems can look like: TON Punks
Personal Profile
In Web3, just like in the Web2 world, appearance and the buzz around the project matter. Therefore, you should put some effort into designing your collection’s profile to radiate that energy.
Come up with a name for your profile, which will be displayed on your collection’s page.
Similar to the collection, we recommend that you include links to your social media pages.
In the profile, you can set a profile picture of 512x512 pixels and a banner of 2500x665 pixels.
Collection prep checklist:
☐ JPG/PNG files of future NFTs are ready to be uploaded
☐ Names of the NFTs
☐ Descriptions of the NFTs
☐ Description of the collection
☐ Collection cover
☐ Collection avatar
☐ Collection preview snippet
☐ Collection name
☐Profile name
☐Profile picture
☐Profile description
Wallet setup
Currently, Getgems.io supports two wallets: TON Wallet and Tonkeeper. Let’s start with TON Wallet. It’s a Chrome extension, which you can download via this link.
The following instructions are applicable to those who haven’t created a TON Wallet before. For those who already have a wallet, just skip this part.
- Follow the link above and click the blue “add to chrome” button.

2. Click on “Add extension.”

3. The extension is now installed. Click on the 🧩 puzzle icon in the top right corner in the Google Chrome browser, then click on the TON Wallet extension next to the 💎 diamond icon. A new window will appear.

4. Click on “Create My Wallet,” and voilà, your wallet has been created. Now, you just need to write down your recovery phrase. To do that, click “Continue.”

5. You will see 24 secret words that need to be written down and stored in a safe place! Remember that these 24 secret words give access to your wallet and all of its funds. Never share this phrase with anyone!

6. After writing them down, click “Continue” and pass the test by entering 3 words from your secret phrase in the order the security system requests. Once done, click “Continue.”

7. If everything is done correctly, you will need to create a password for your wallet. Remember to use a strong password since the security of your funds depends on its strength. After entering and repeating the password, click “Continue” and then “View my wallet.”

8. Boom! The wallet is set and ready to be used!

Security when using your wallet
Attention!
Never share the 24 words from your recovery phrase because these words are, in fact, a wallet. If you reveal or share these 24 words with anyone, they could potentially steal all of your funds and valuables.
Never share these 24 words!
Learn more about security when working with cryptocurrencies and NFTs here: Safety Disclaimer
Log in to Getgems
As mentioned earlier, you can log in to the Getgems NFT marketplace using TON Wallet or Tonkeeper.
Log in through TON Wallet goes like this:
- Head to the getgems.io home page and click “Sign in.”

2. Click on “Log in with TON Wallet.”

3. A TON Wallet window will appear. You’ll need to confirm the authorization by clicking “Sign.” Then, enter your wallet password.

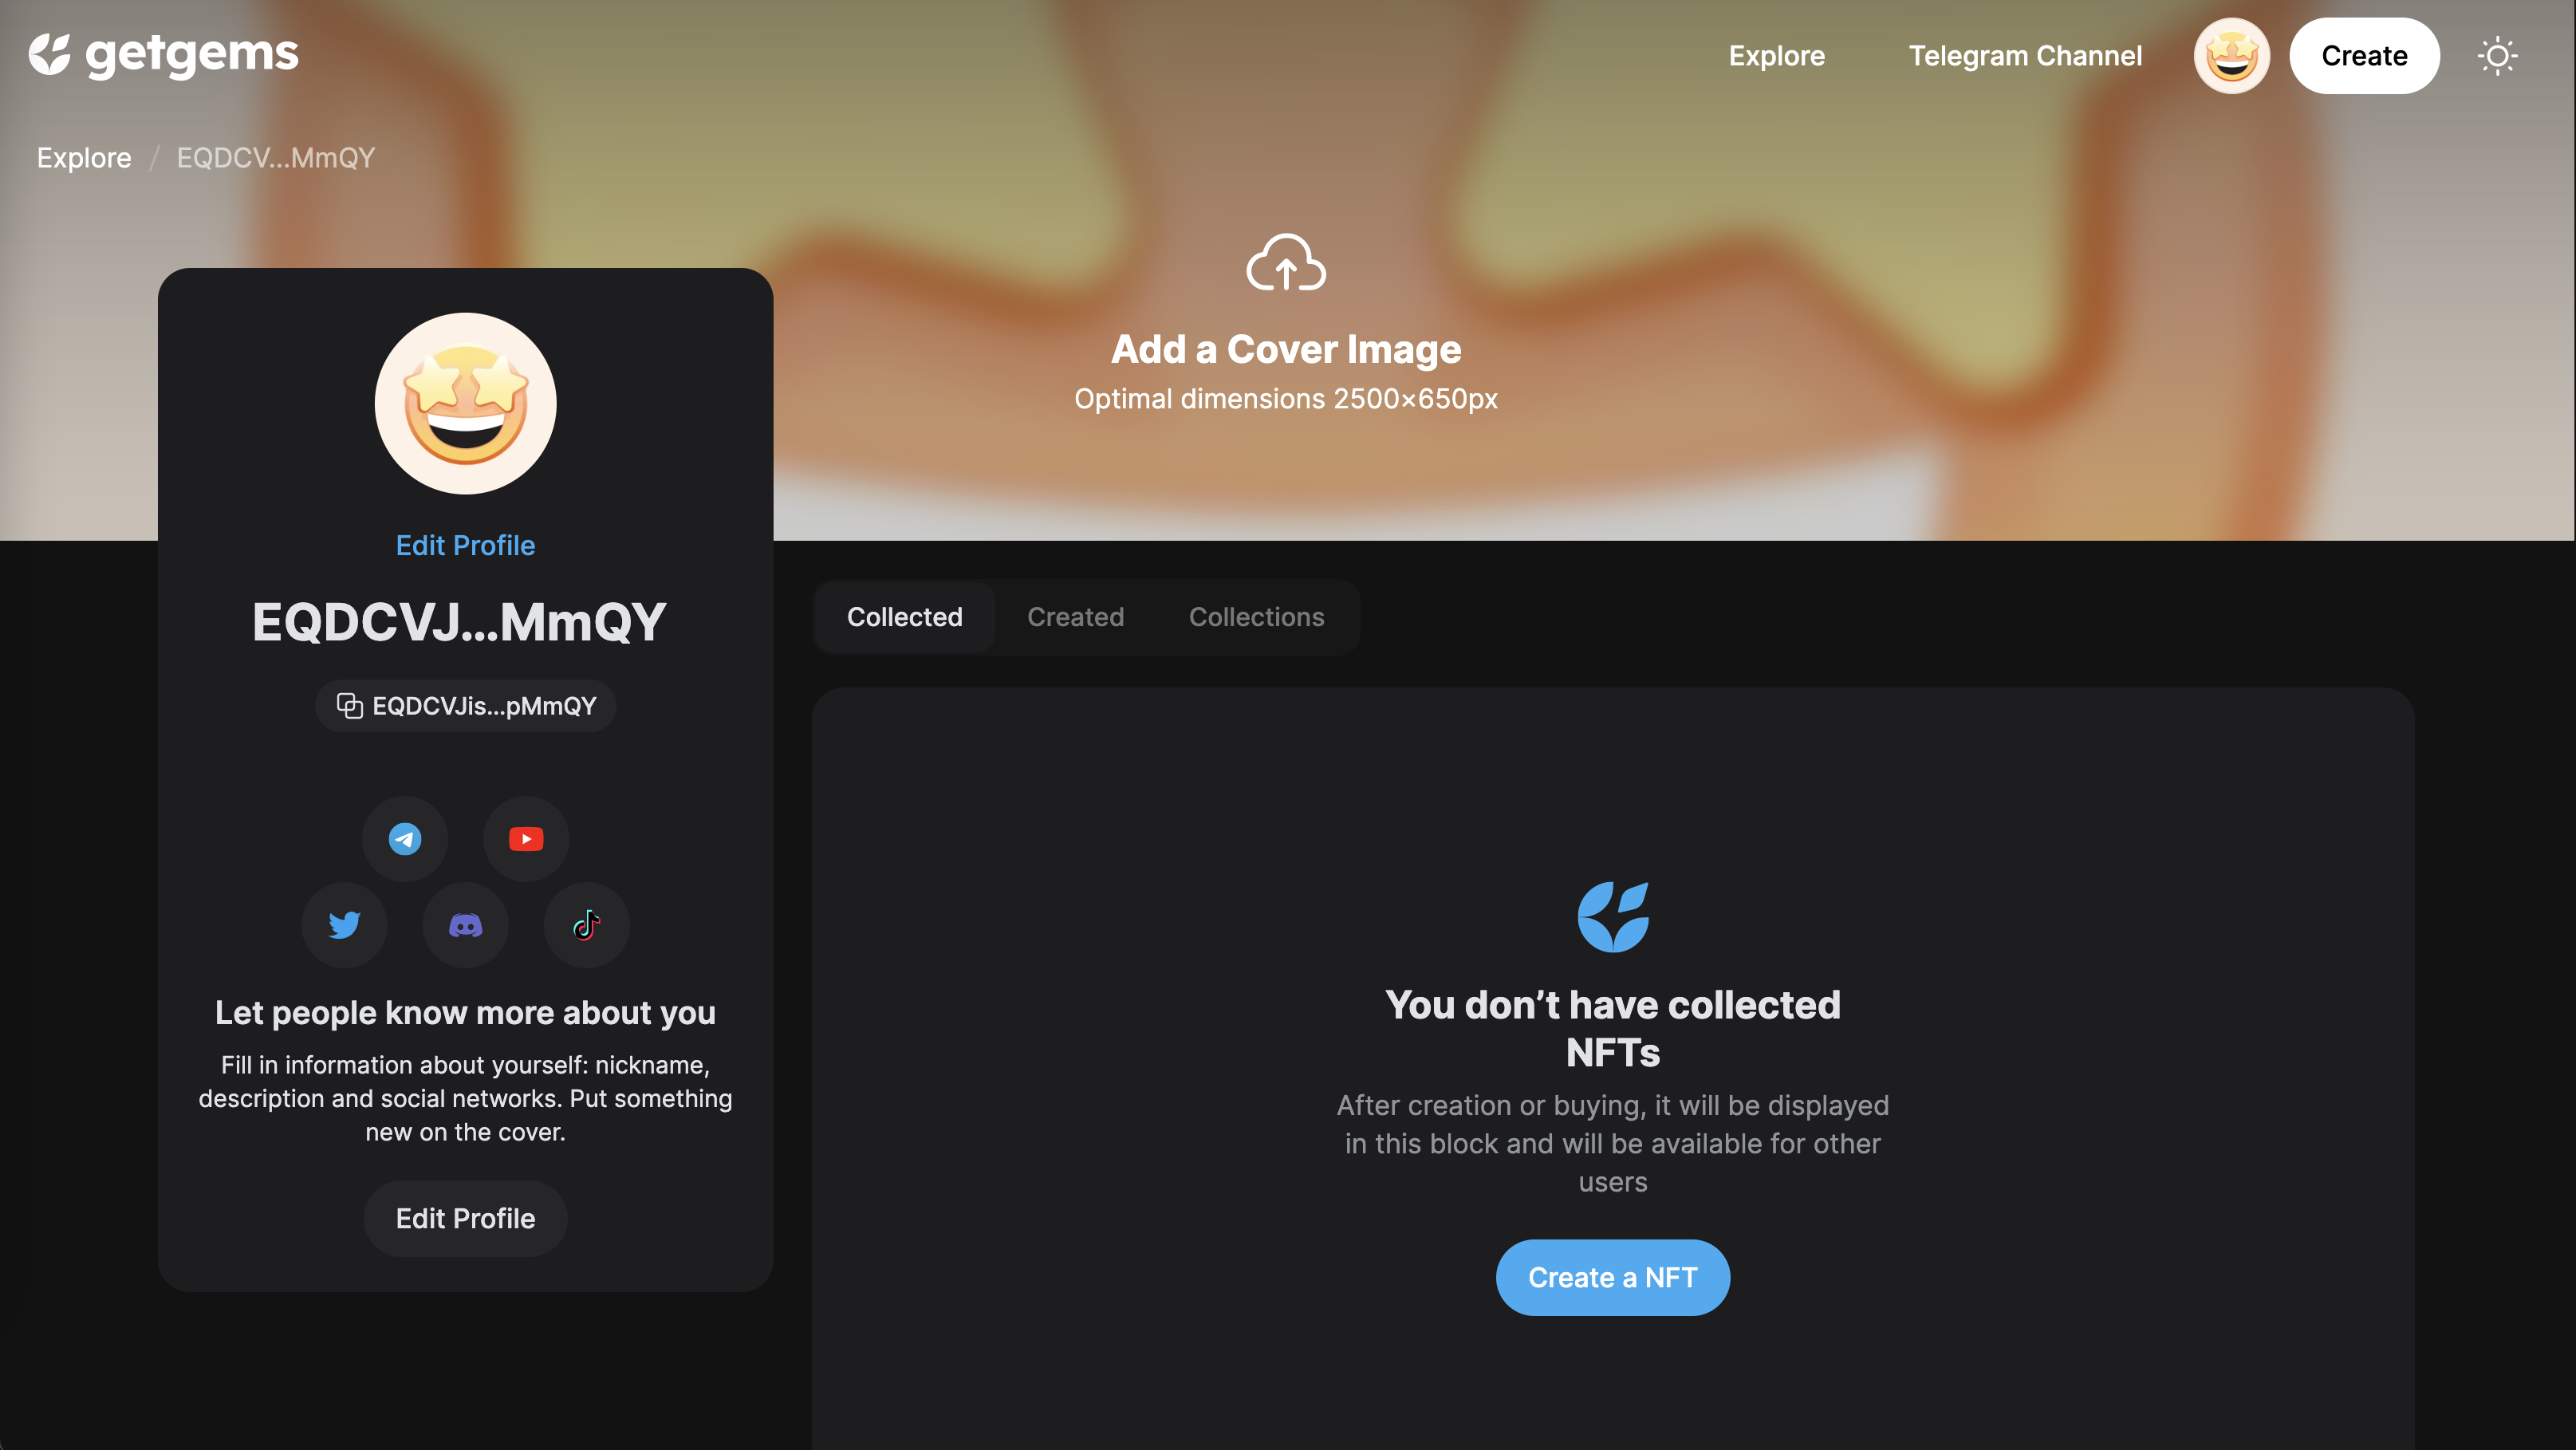
4. Done! You are now logged in to the Getgems marketplace. You’ll see a button that’ll let you enter your profile where you can add and edit your personal information: your profile’s avatar and banner, your profile’s name, its description, and links to social media pages.
Creating your collection
Let’s move to the next step and create your NFT collection on Getgems. It’s pretty simple if you’ve followed the steps discussed above. It won’t take much time.
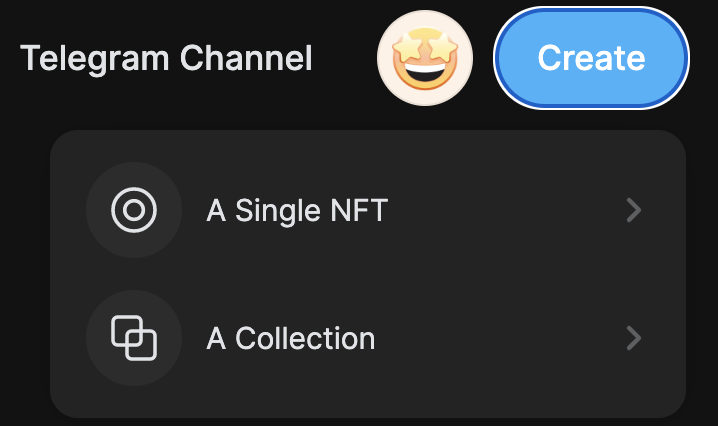
- On the Homepage or in your profile, click “Create” and select “A Collection.”
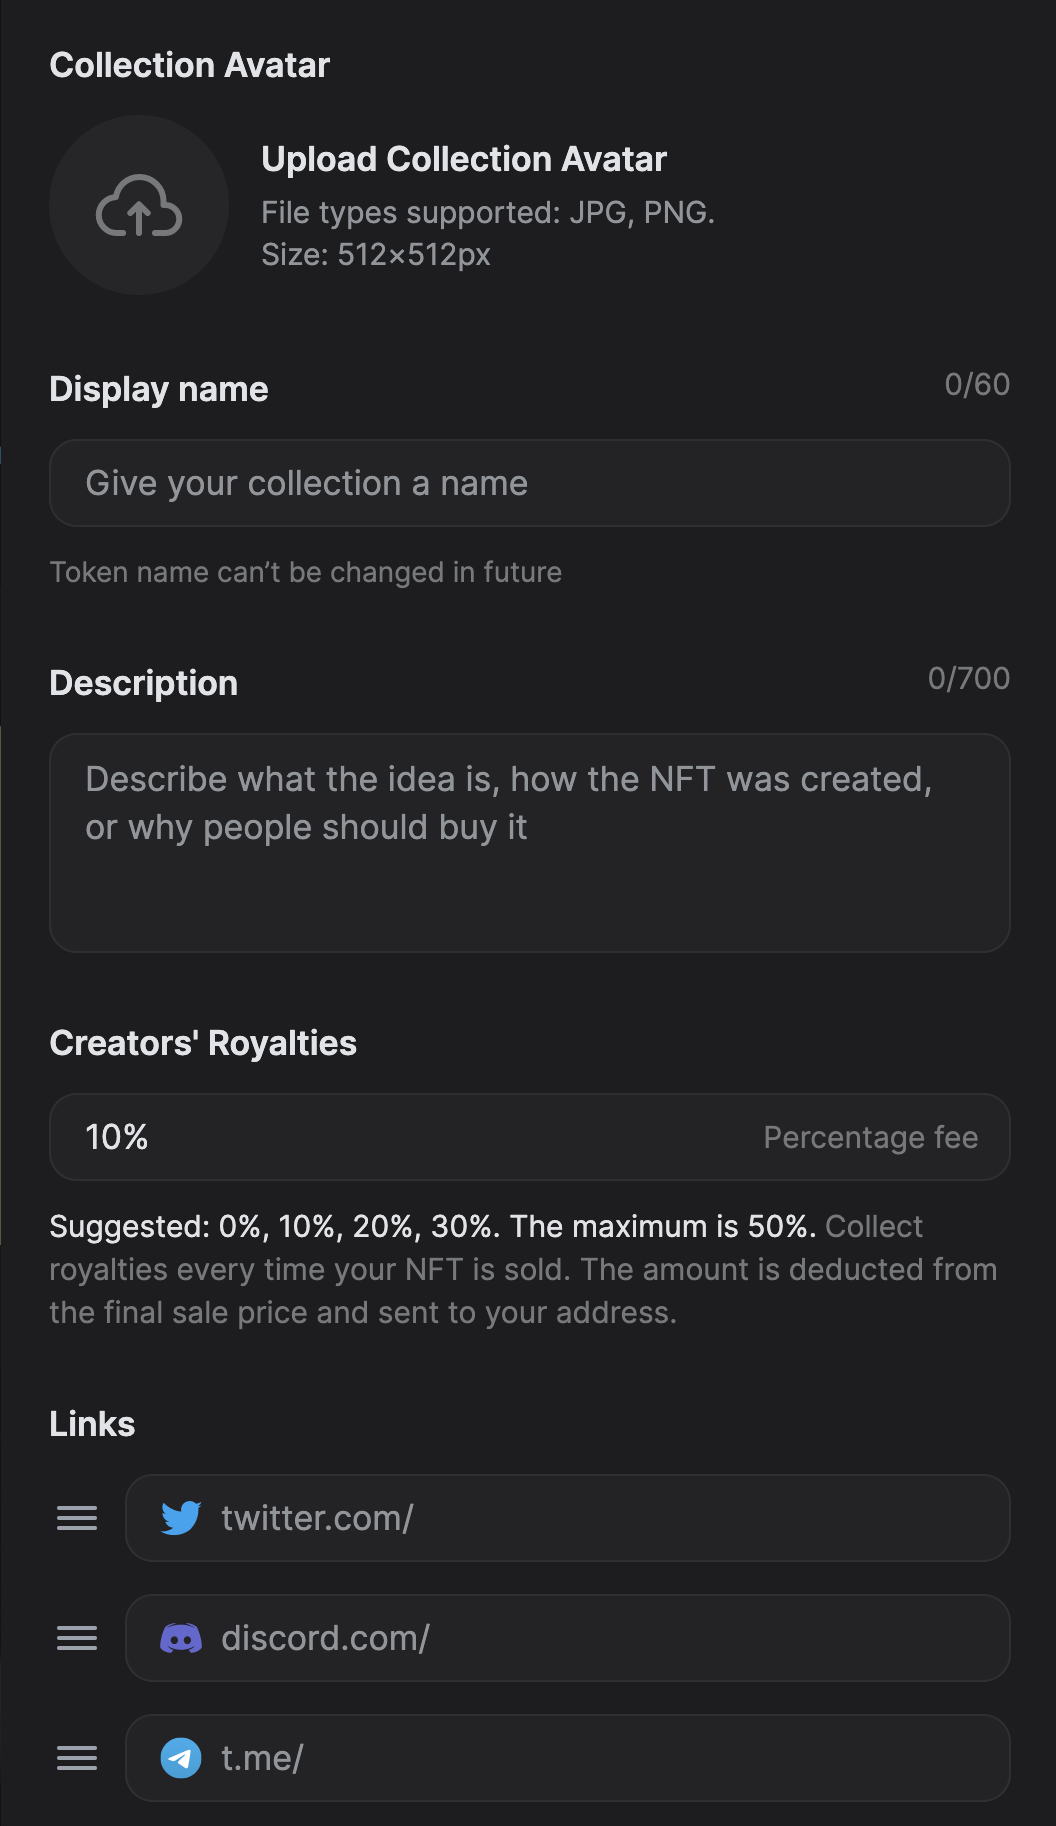
2. Please fill all the fields to provide in-depth info about the collection — name, description, links to social media pages, etc. — and upload a banner and collection avatar. Please, don’t forget to set a royalty percentage you’d like to receive after every time your NFT is sold.
3. Once you are done filling all the information, click “Create a collection” at the bottom. This will launch the TON Wallet extension where you’ll need to pay the gas fee and service fee for creating your collection on the blockchain (approximately 0.05 + 0.02 TON per NFT)

4. After you click “Send TON,” you’ll need to enter your wallet password to confirm the transaction and wait for it to go through. If everything is done correctly, the next window will pop up.

5. Voila! The collection is created. Now you can start minting NFTs.
Minting an NFT
The minting process on Getgems is very simple; the process is similar to minting a collection. You only need to prepare some files, their names, and descriptions in advance.
- On the Homepage or in your profile, click “Create” and select “A single NFT.”

2. Upload an image, add a name and a description, then pick the collection this NFT belongs to.
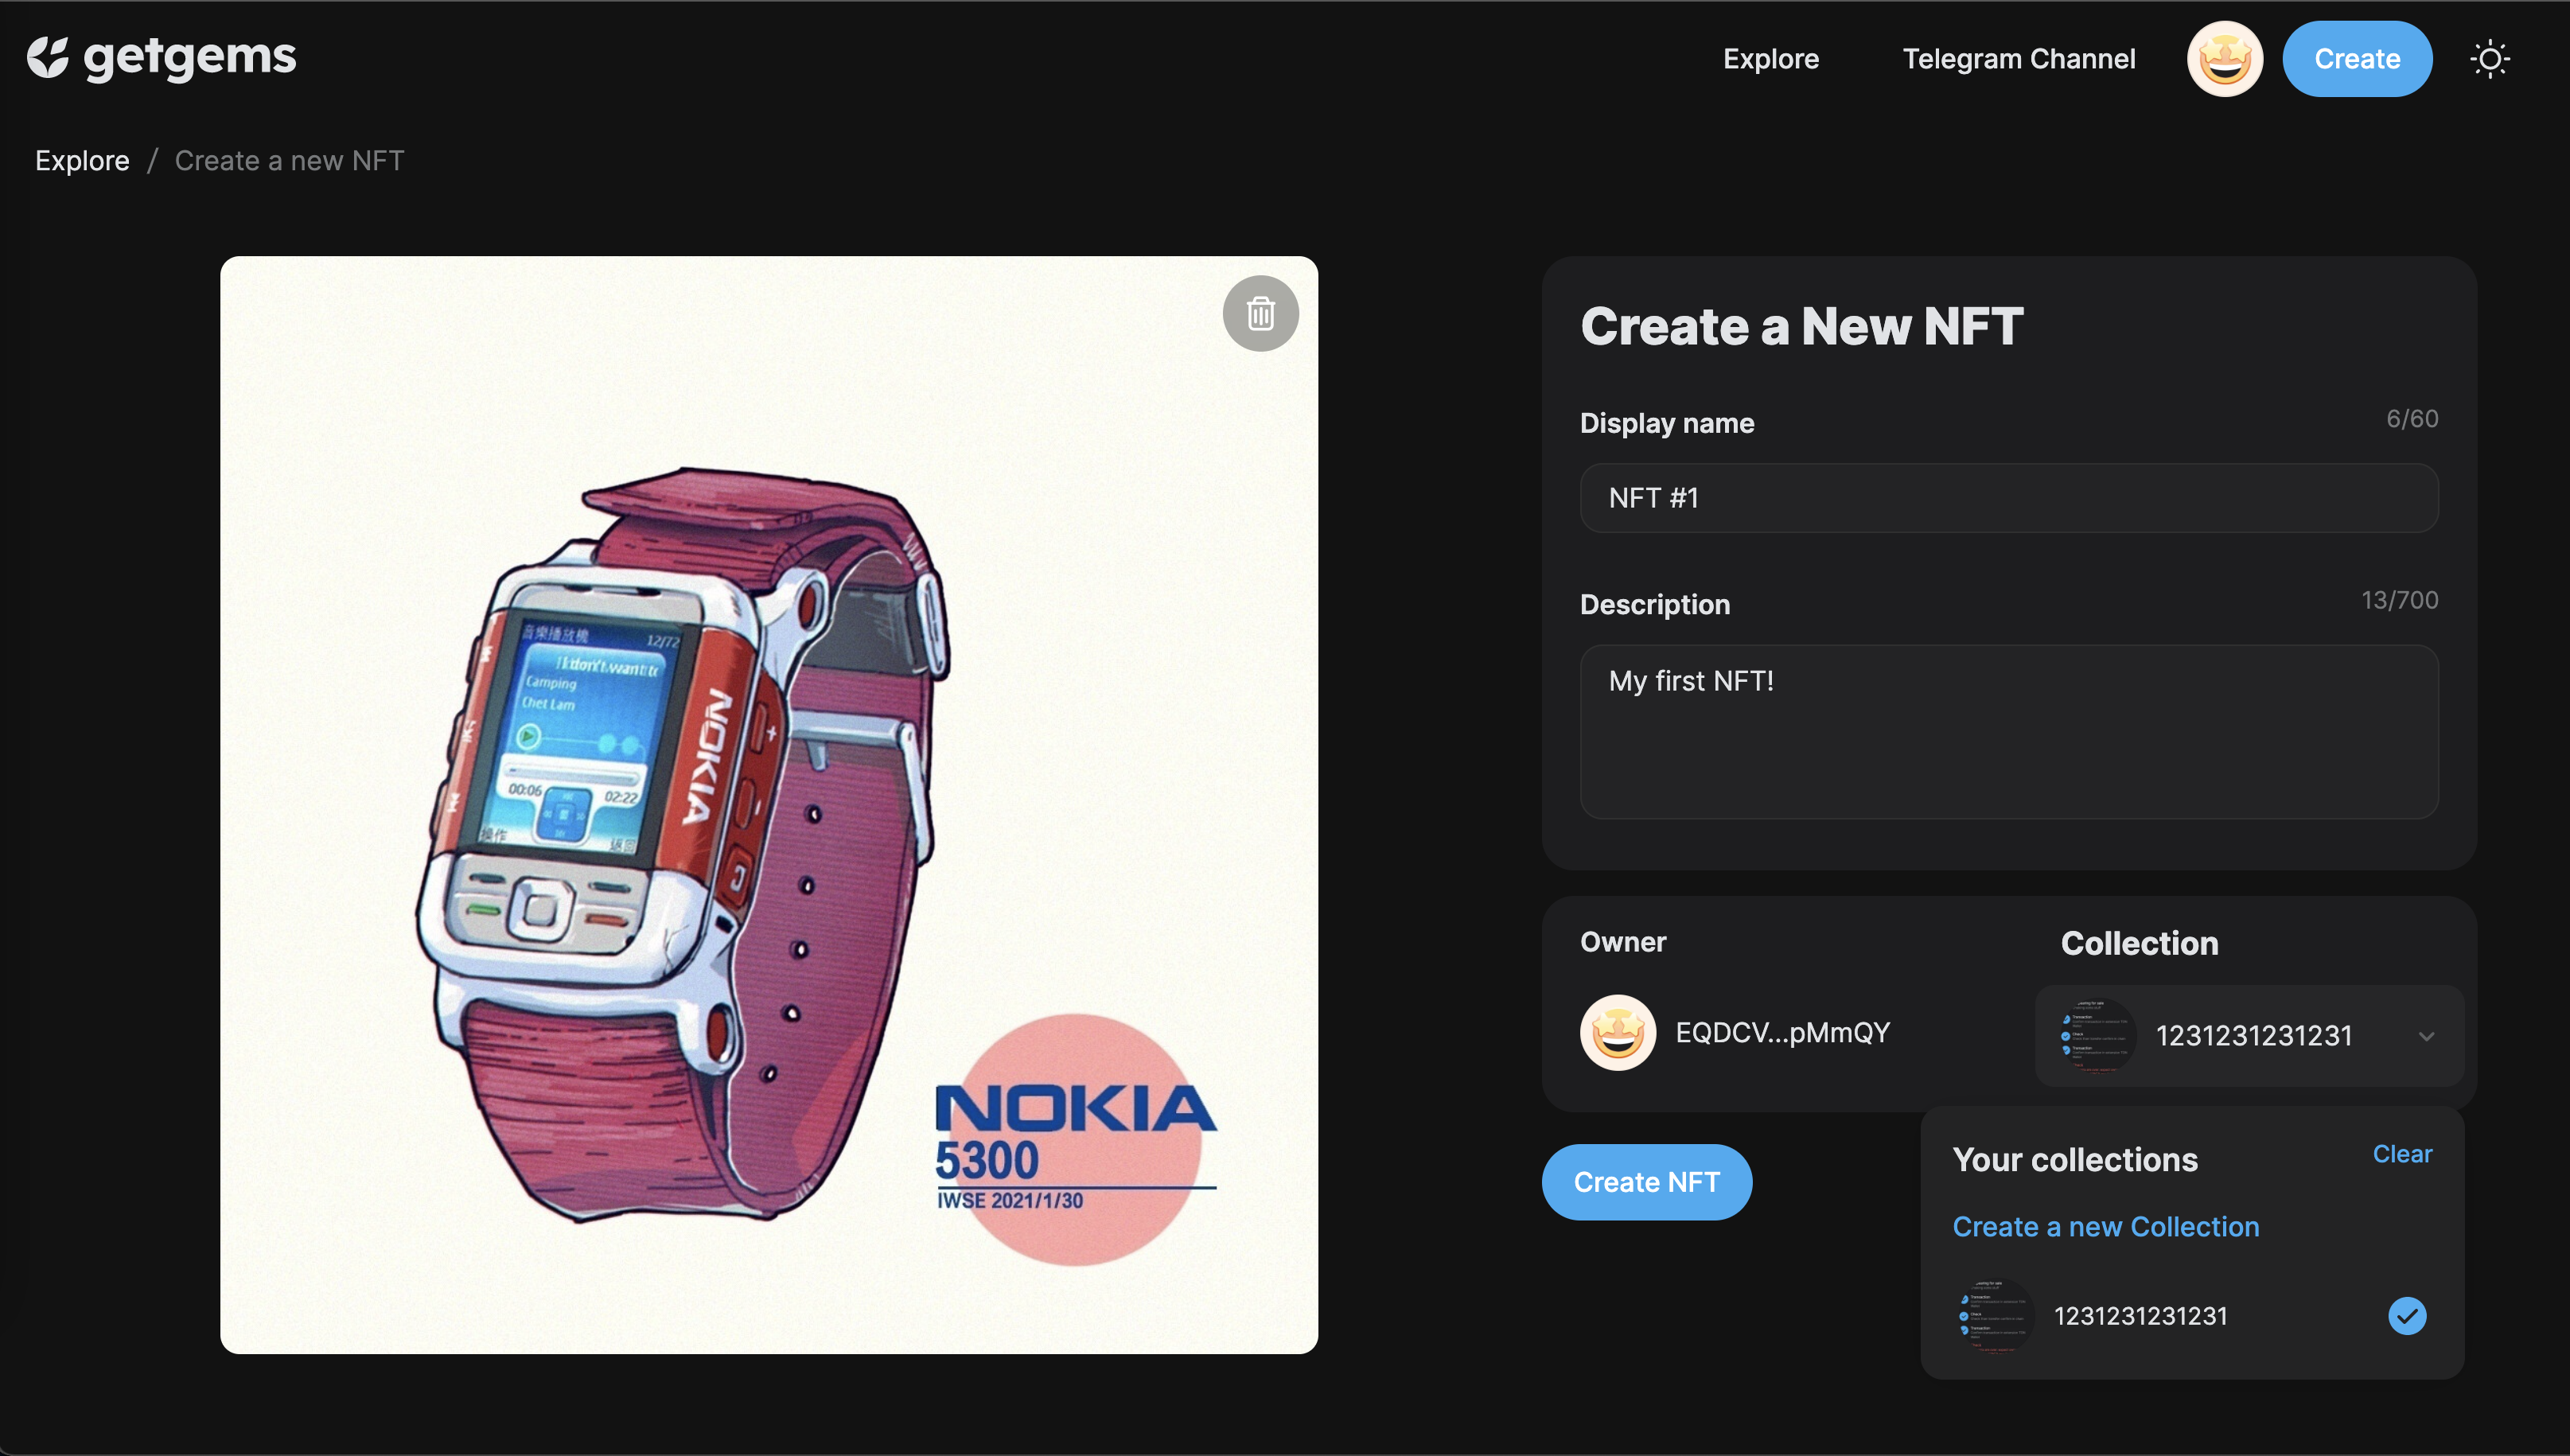
3. Once you are sure that everything is nice and correct, click “Create NFT.” You will see a pop-up window prompting you to pay gas and a service fee (0.05 + 0.02 TON per each NFT).

4. Click “Send TON” and enter your wallet’s password to confirm the transaction. If everything is done right, the NFT will be minted and added to the chosen collection.

5. All done! Now you can mint another NFT or check the one you’ve just minted. To mint another NFT, follow the steps mentioned above. To review your NFT, click “View NFT.”
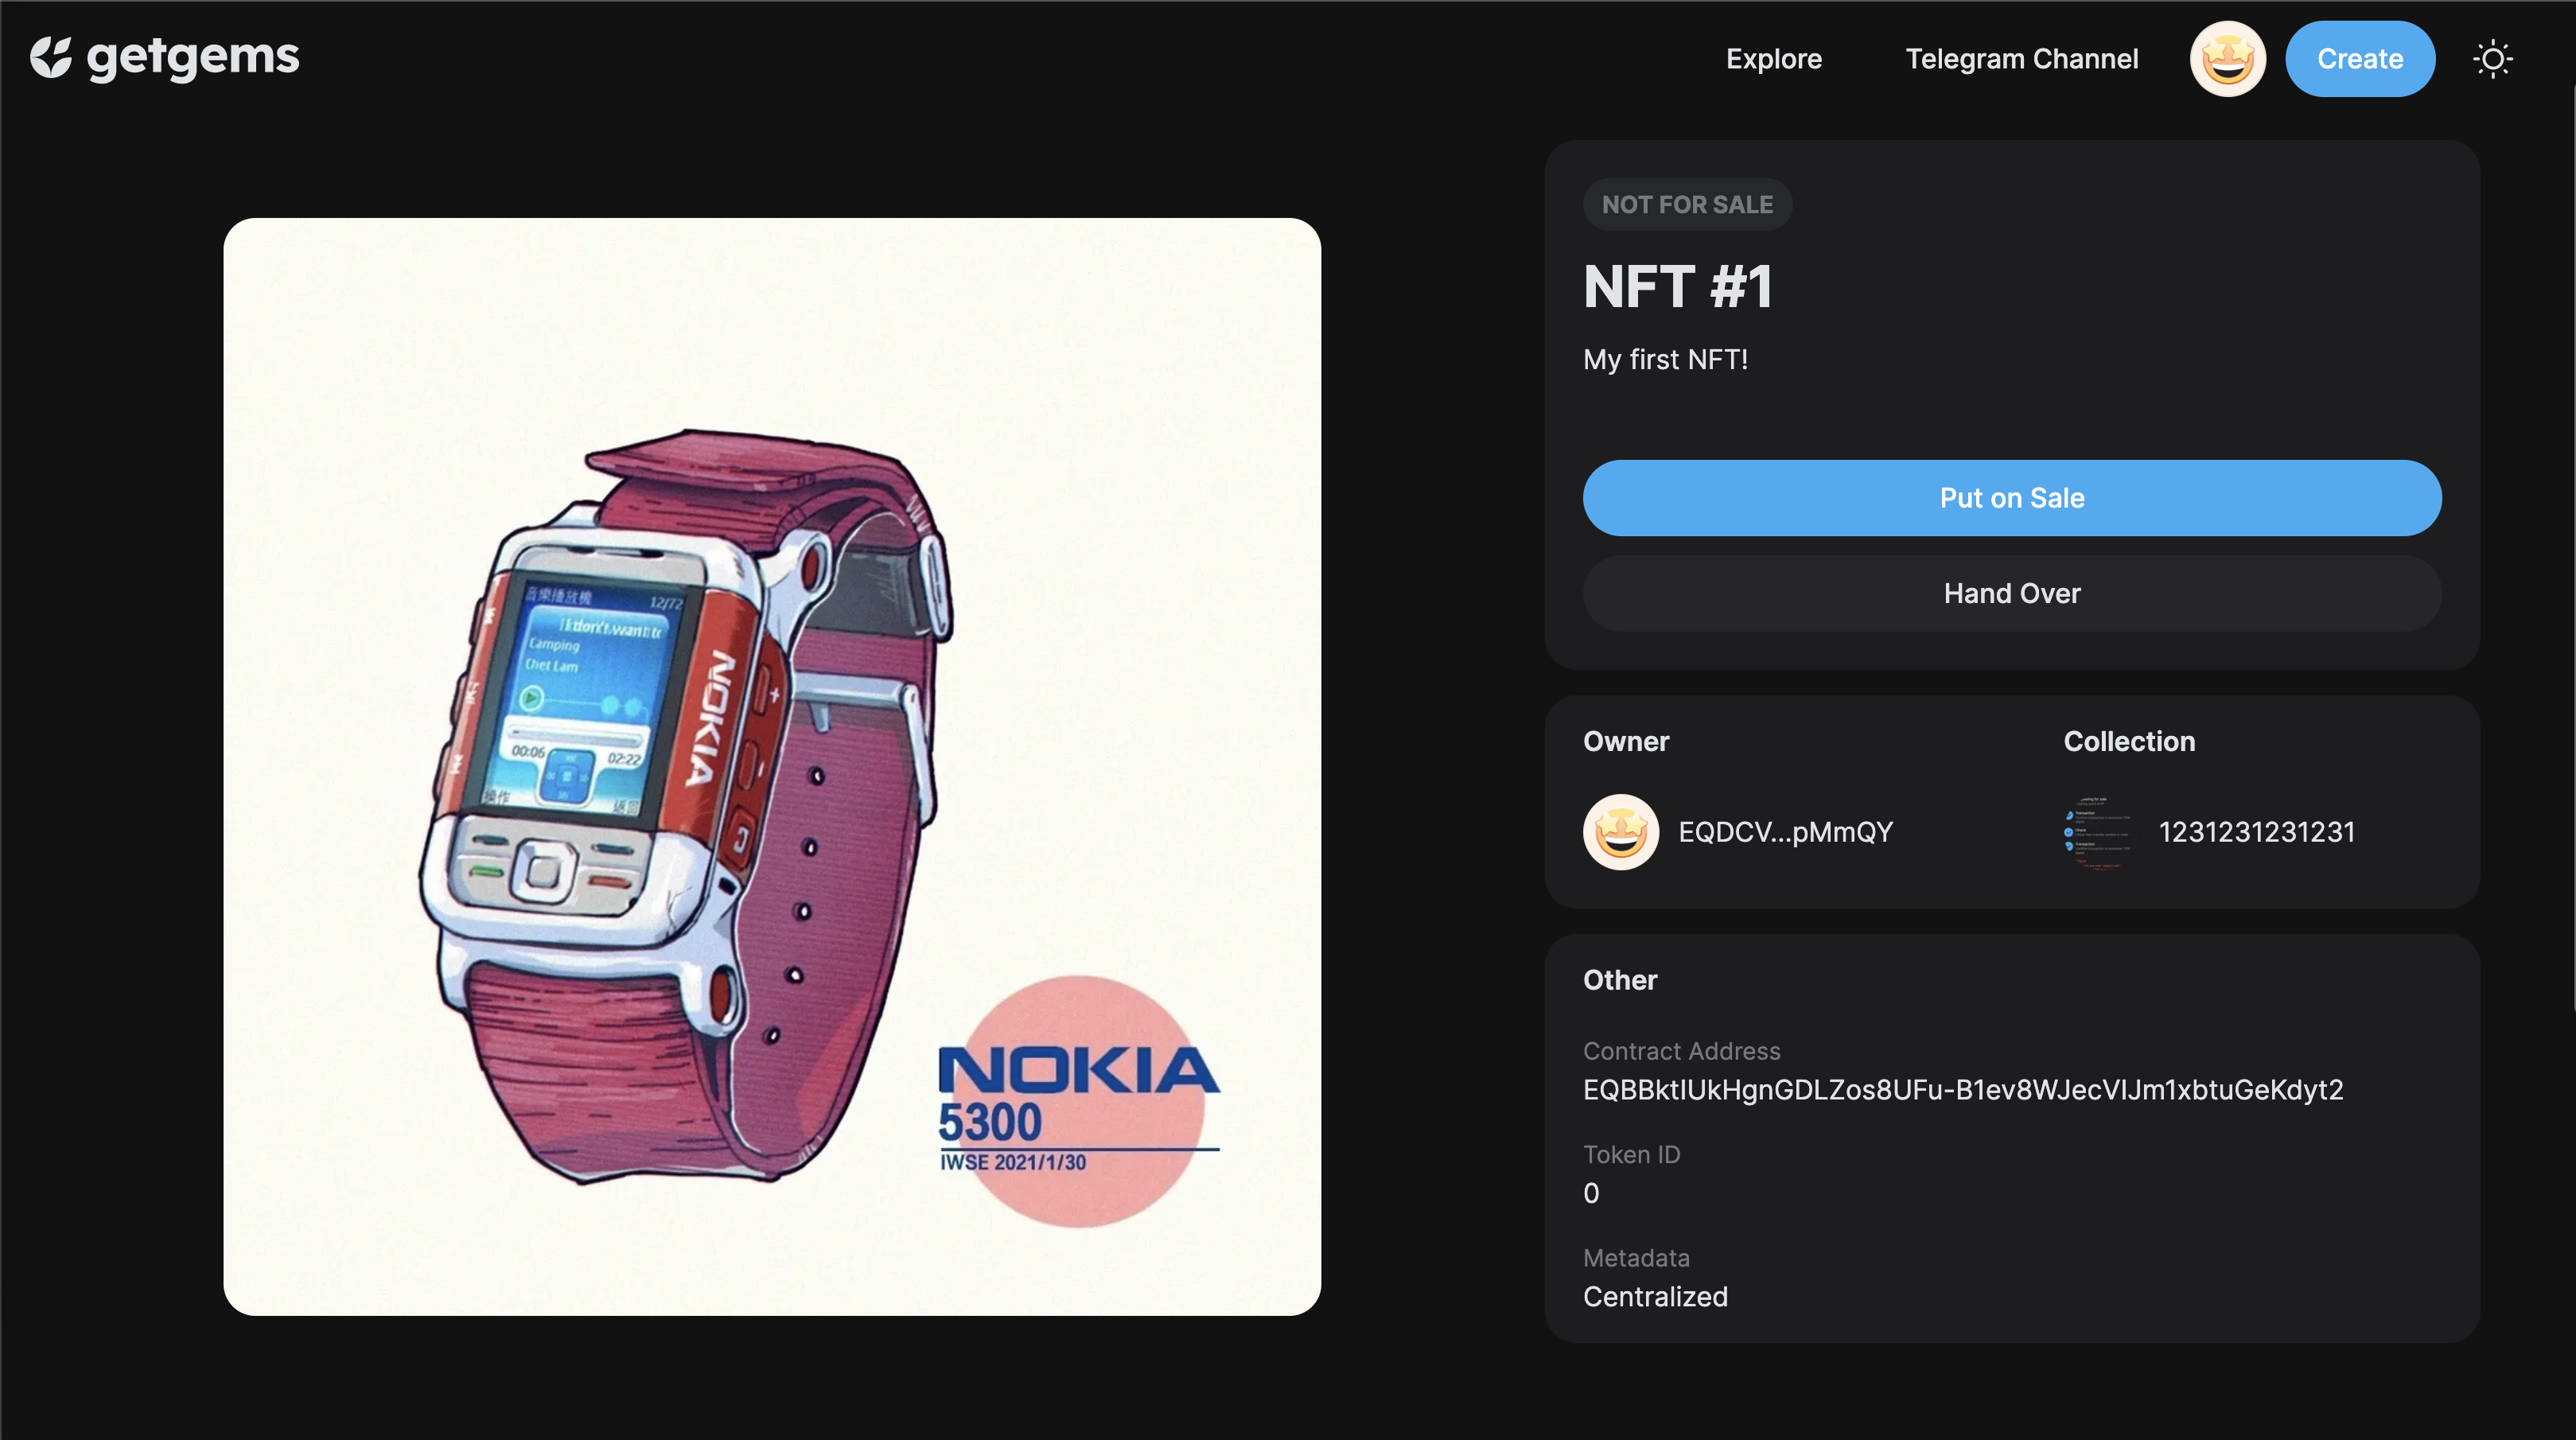
6. In this section, you can put your NFT up for sale or transfer it to someone for free (except for paying the transaction fee).
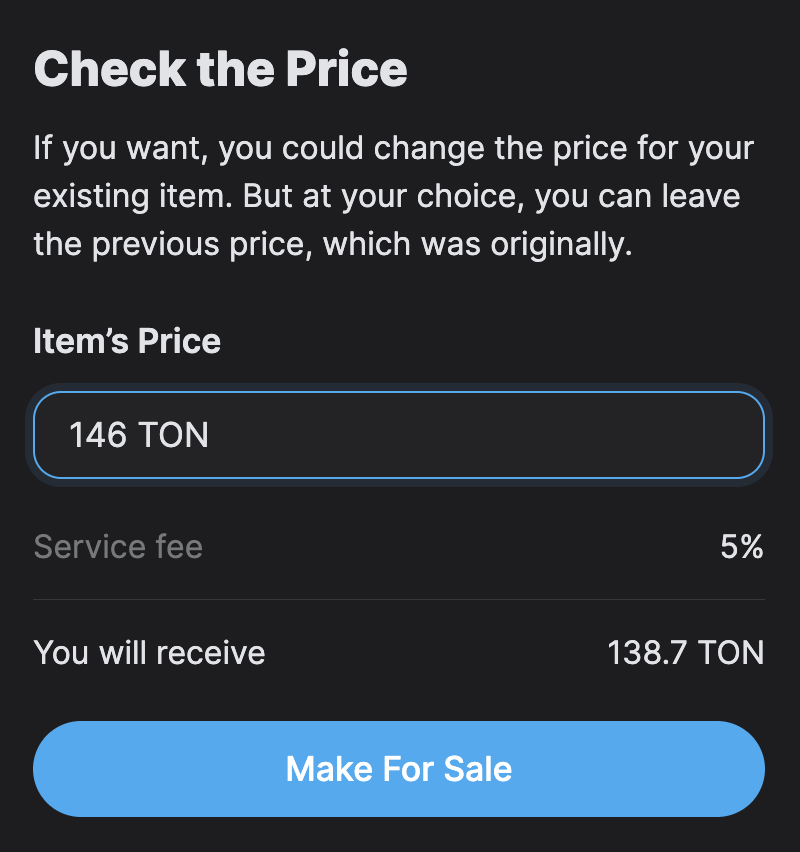
For this example, we’ll put up an NFT for sale. Start by clicking “Put on Sale” and enter the sale price in TON in the pop-up window. Take into consideration that the marketplace takes a 5% commission fee for every NFT sale; therefore, the final sale price will reflect this deduction.
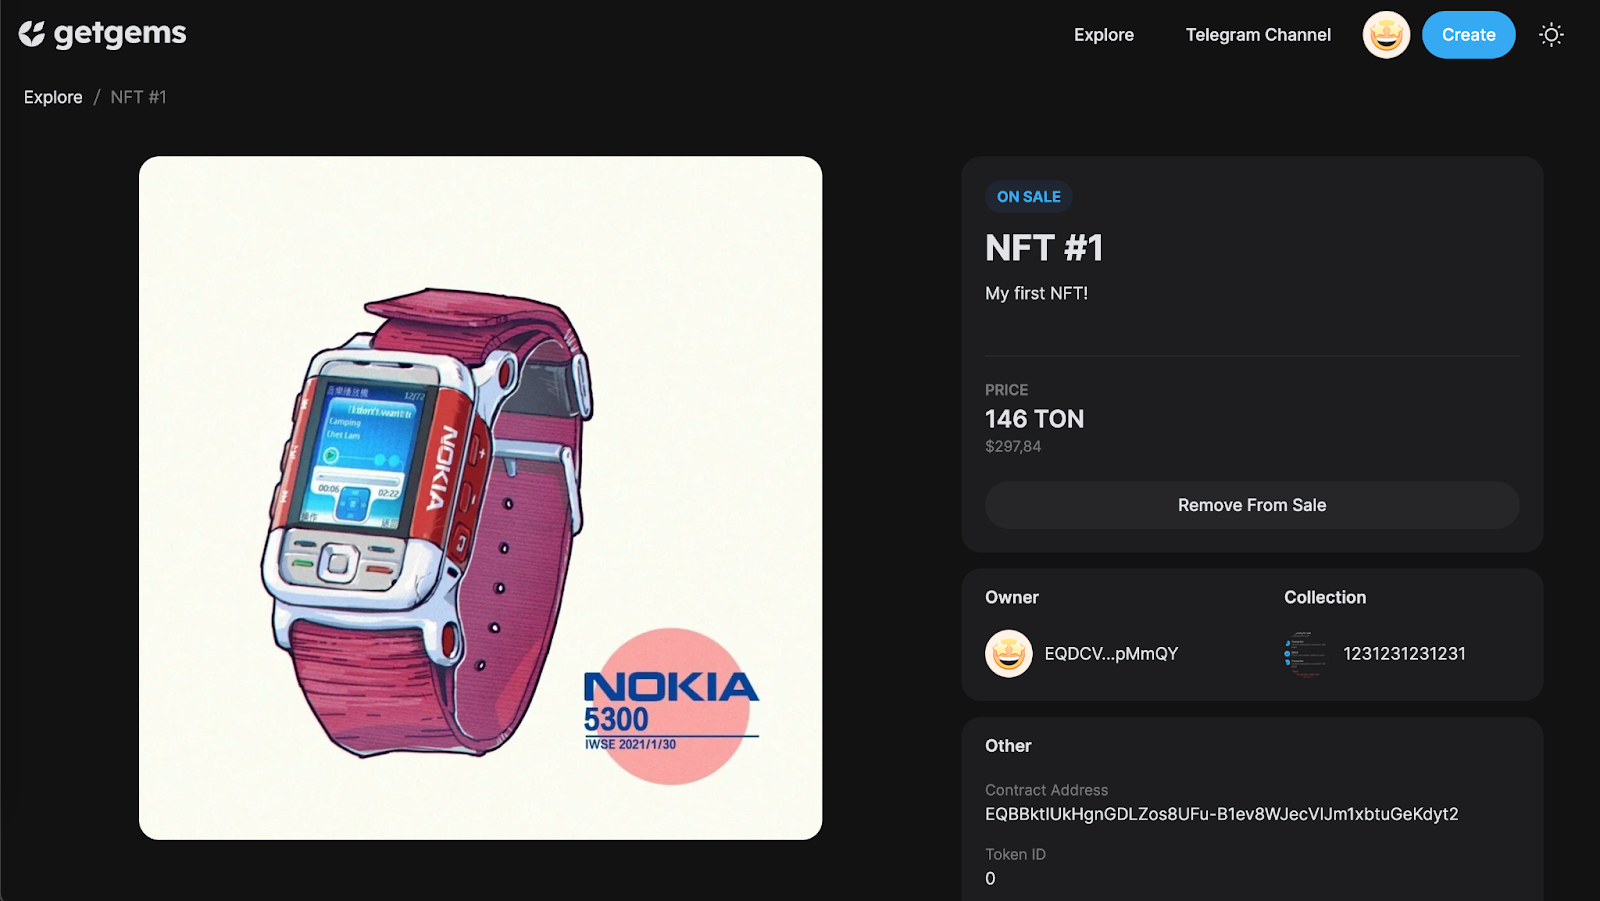
7. Once you’re sure that everything is good to go, click “Sell,” which will launch a window from the TON Wallet extension, wherein you’ll need to pay the gas and service fee to put your NFT up for sale on the blockchain. To confirm the transaction, click “Send TON” and enter your wallet’s password.

8. If everything is done right, great job! Your NFT has been minted and is up for sale! In this window, you can also manage the status of an NFT by clicking “Remove from Sale.” The process of removing an NFT from the market — i.e., no longer wanting to sell it — is the same as putting it up for sale: You need to pay the gas and service fee and confirm the transaction in your TON Wallet browser extension.
9. Transferring an NFT. If you want to transfer an NFT, the process is similar as well. In the NFT viewing section, click “Hand Over,” enter the recipient’s wallet address, and click “Send.”

10. When you click on “Send TON,” a window will appear to prompt you to confirm the gas and service fee payment in the TON Wallet browser extension by entering your wallet’s password.

11. If everything is done correctly, the NFT will be transferred to its new owner, and the wallet address in the “Owner” field will automatically change. You’re all done. Congratulations!
