How to hook LND into your Dojo and set it up for access over Tor and then connect to it with an Android wallet like Zap or Zeus
dammkewl
Introduction
This guide will help you set up LND on top of your Dojo installation.
The following topics will be covered:
- Prerequisites
- Before you start
- Dojo Configuration
- Installing tor
- Configuring tor's controlport
- Configuring a tor hidden service
- Installing LND
- Configuring LND
- Running LND
- Connecting to LND
- Tor on Android
- Zap
- Zeus
- Wrapping things up
- Extra info
- Special thanks
Preface
This project started with me tinkering to try and get LND up and running for the heck of it, and ended up with a couple weird ramifications:
- I found out about the lndconnect project which generates qr codes for wallets like Zap or Zeus to connect to LND, and it turns out that it currently falls short and doesn't support tor.
- I helped identify a connection issue scenario for android 9+ users that use orbot to connect to onion addresses. Not that I was the one who found and submitted the issue for orbot itself, just the part that wallets like Zeus wallet are affected by this generic issue and it seemed they were not yet aware of it:
- https://t.me/zeusLN/13201
- https://twitter.com/ZeusLN/status/1269326663256596485 - I got SamouraiWallet out of all people to suggest I should write a guide: https://t.me/samourai_dojo/22869
So I was thinking: why the heck not?
Prerequisites
You must first have the following:
- A Linux installation with internet access. I am using an Arch based distro (Manjaro XFCE) so the bash scripts in this guide will be based on this fact. Users of other distribution bases like ubuntu(debian) or fedora(red-hat) might have to make adjustments for themselves, like replacing "pacman -S" with "apt-get install" or "dnf install".
- An installed Dojo on that Linux system. Their code and installation instructions can be found on their self-hosted gitlab: https://code.samourai.io/dojo/samourai-dojo
This guide won't help you set up a Dojo, but there are some recommendations I have, even if you already have one up and running.
The first piece of advise is to simply join the relevant telegram channels where you can ask away about the software and more.
There are some ARMV8 systems like Raspberry Pi4 and Odriod N2, for which a set of automated Dojo install scripts have been made by a team called Ronin. These Ronin scripts are only for managing your Dojo and related SamouraiWallet projects like Whirlpool, so you won't find anything LND related there, but they really make your life easier: https://code.samourai.io/ronindojo/RoninDojo.
I have forked that codebase and customized it so that these scripts run on x86_64 systems, so if you're feeling adventurous it's best to check out the latest branch (not tag!): https://code.samourai.io/dammkewl/RoninDojo.
Feel free to ask me on telegram about it, as not all scripts have been customized yet: https://t.me/dammkewl.
I have no good indication on what the recommended hardware specs are. I'm running this in a VM with 6 GB of working memory and 3 cpu cores, though that may be overkill if you run your Linux without a desktop environment. A storage space of at least 1 TB is still recommended though.
The last prerequisite I must stress is this: understand that these tools are under active development, may exhibit bugs and you should exercise caution as to what you put at risk. Even this guide itself will refer to resources, like example config files, which may very well have changed since this guide is released. I've done my best with supplied screenshots to give you an impression of what the situation should be, but I can only do so much. The onus is on you to do your due diligence, most importantly before it's due.

Before you start
Before you start making changes to your system according to this guide, your Dojo should first be fully up and running and synchronized so that it's up-to-date on Bitcoin's block chain. If you have installed Dojo with an added indexer, I suggest you first get that fully synchronized and past the compaction phase as well.
You should also have your system fully up to date to make sure your system has the necessary security updates and that everything thereafter is still in working order.
To get your system up-to-date, stop your Dojo first, then do the following command:
sudo pacman -Syyu
This should update your mirrors, keyring, and all your installed packages, if there's any updates applicable. And yes, in case the double "y" looks funny to you: the "-Syyu" part is correct.
Then reboot the system (specially if there's kernel updates).
After the system is back up and running, your Dojo should also automatically start. If your Dojo is a bit on the older side (version 1.3 or older) then you'll have to start it manually.
Before you continue with this guide, start your SamouraiWallet app on your phone, assuming you have it set up to connect to your Dojo installation. This way you know everything is in working order with the latest updates, before you start making changes and setting up LND. If you're running your Linux system inside a VM, this is a good moment to take a snapshot.
Dojo configuration
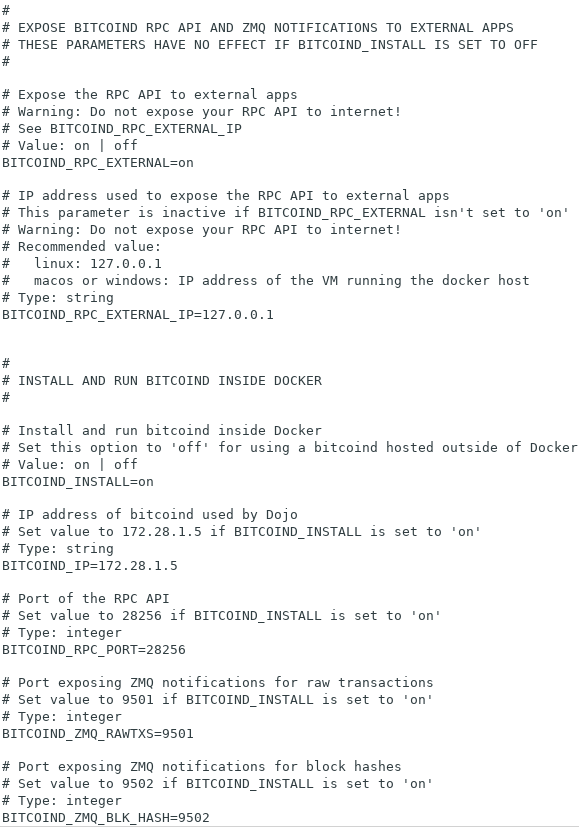
There is one configuration change you may need to make to your Dojo setup. The configuration file ~/dojo/docker/my-dojo/conf/docker-bitcoind.conf should have the following setting as such:
BITCOIND_RPC_EXTERNAL=on
If it's already set to this, skip to Installing and Configuring Tor.
Here's an example piece of the config file:
You need to restart your bitcoind docker container after changing that config file:
sudo docker container restart bitcoind
But if you don't trust restarting the individual container, feel free to restart Dojo itself instead.
Installing and configuring Tor
Installing tor
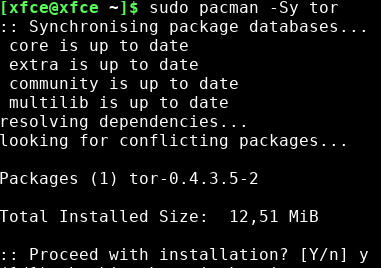
For arch based Linux it's as simple as:
sudo pacman -Sy tor
For diagnostic purposes it's better to also install torsocks, since it is required for torify.
sudo pacman -Sy torsocks

Now tor should be configured by your package manager as a service in systemd. Verify that using the command:
systemctl status tor

It's okay that it's inactive, you can start the daemon with:
sudo systemctl start tor
If the status says it's "disabled" then it means it won't automatically start when the system boots. You can enable it with:
sudo systemctl enable tor
If you've installed Dojo using Ronin, or if you've set up Whirlpool CLI on the same OS, chances are you already have tor installed, though maybe not torsocks so try to install that one either way.
If you ever want to see a live status of the tor daemon, just do:
watch systemctl status tor
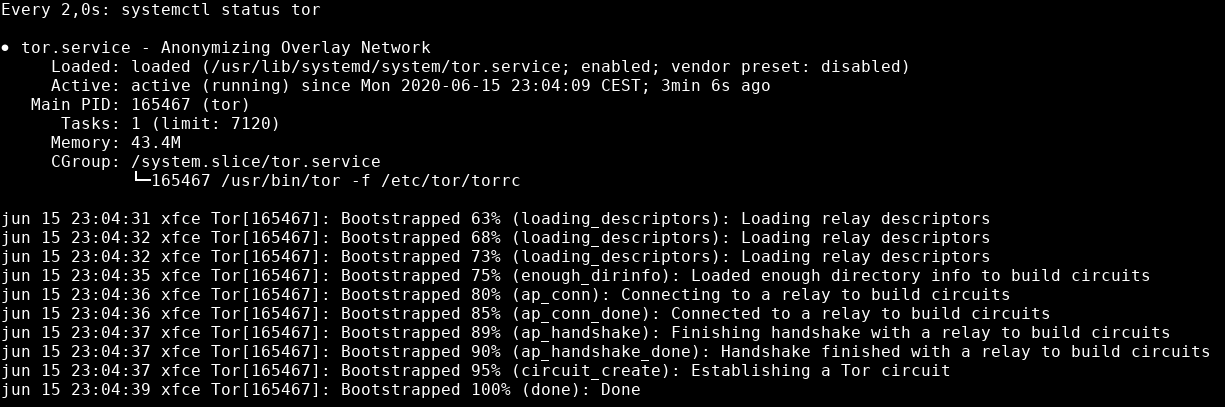
It will show the latest 10 status lines of the tor daemon at the bottom, this screen will update every two seconds. You can exit this view at any moment with the key combination ctrl+c.
Configuring tor's controlport
Now you need to hash a password for the tor controlport. It's possible to use LND without giving tor's controlport a password, but I wouldn't recommend this for basic security reasons.
To hash the password, use the following command on a strong password:
tor --hash-password putASecurePasswordHere

This will output an uppercase hexadecimal value of 58 characters preceded by the three characters "16:".
You will need to set this value, including the three character prefix, into tor's config file /etc/tor/torrc (root access required). If you're having trouble accessing it in your desktop environment because it requires root access, you can edit the file by running this from the terminal (install nano first with pacman if you haven't got it yet):
sudo nano /etc/tor/torrc
You can exit nano with ctrl+x, after having made changes it will ask you to save them first. If you're ever afraid of messing up the config file, don't worry: there should be a copy of the original config file, which you can find at /etc/tor/torrc-dist.
The setting should be as follows:
HashedControlPassword 16:E16ED18A032D4AA360947D422B238E793E142CEC46EB2B94FF85479337
So you will replace this long 16:4E... value with your own value that you generated earlier. If I catch you using the example value I've put here in this guide, even just temporarily, I will throw you off a balcony.
You will also have to enable the ControlPort setting in this config file, like so:
ControlPort 9051

your package manager added it to systemctl on its own
Instead of a password for the controlport, you could use an authentication cookie file. That's what the CookieAuthentication setting is referring to, but it's more trouble to configure properly. If you already have have an active tor config that uses this cookie, you will have to either change the config to use the password instead, or figure out how to get LND to use the cookie file instead of the password. You can't use both the password and the cookie at the same time.
Configuring a tor hidden service
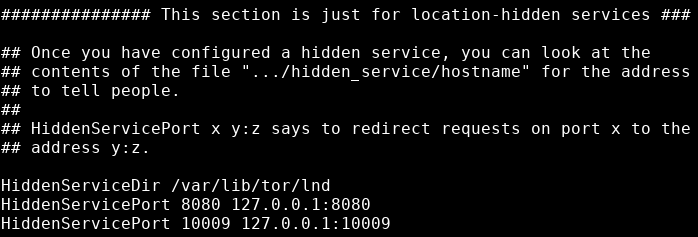
The following additions need to be made to tor's config file /etc/tor/torrc (remember, root access required):
HiddenServiceDir /var/lib/tor/lnd
HiddenServicePort 8080 127.0.0.1:8080
HiddenServicePort 10009 127.0.0.1:10009
You can set the hidden service directory to any value you want, so as long as the Linux user "tor" can access it, but if you stick to this example then you don't have to edit any of the scripts in this guide.
The 8080 port is for LND's REST port and the 10009 port is for LND's gRPC port. These are default values. I would suggest to not change these value unless you have a good reason. One such reason could be that you already have these one of these ports in use, like if you run a Payara web server which uses port 8080 on all network interfaces by default (both localhost and public IP addresses). In that case, you may be able to change LND's ports without affecting the ports public on the hidden service. For that, see "Ports used by LND versus the Tor hidden service" further into this guide.
Your wallet will use one of these two ports. For Zap it's the gRPC mechanism and thus port 10009. for Zeus it's the REST mechanism and thus port 8080. Feel free to adjust this tor configuration and LND's config (further into this guide) to only have one of the two ports open, or both if you simply want to keep your options open.
I do suggest to leave the 8080 port open for now at least, regardless of your choice of mechanism, as later in this guide a test will be performed on that port to make sure everything works before you start connecting your wallet.
Don't forget to restart your tor service so that the files for the hidden service will be generated:
sudo systemctl restart tor
And make sure to check the tor daemon's status again, so that you see the tor service is up and running and not that it stopped with an error.
You can now see the onion address of your tor hidden service with:
sudo cat /var/lib/tor/lnd/hostname
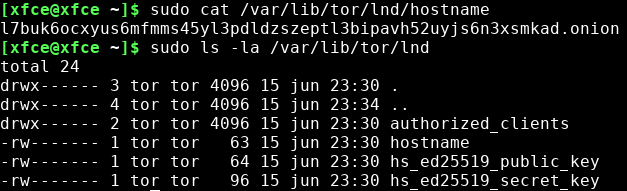
This URL with ".onion" as the top level domain suffix is something you need to add to your LND config later on. It's what your wallet(s) will connect to.
It's not what other lightning network nodes will connect to, LND will generate its own hidden service and onion URL for that internally.
Installing LND
First you need to have the Go programming language installed, because that's what LND is written in. The LND repo prescribes a download link for x86-64 and one for ARMv6 (I don't know if that's forward compatible) but I got away with installing it using my distro's package manager as such:
sudo pacman -Sy go
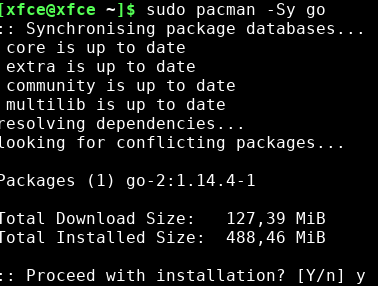
At the time of writing this guide, this command got me version 1.14 of Go, while the minimum requirement for LND is Go 1.13 currently.
At this point there is one thing you should check, specially if you already had Go installed or if you followed instructions on LND's github repo. Execute the following command:
echo $GOPATH

this example shows this, as a result of following instructions from LND's github repo
If you see output, then in the scripts below you need to pay attention that you replace "~/go" with whatever was shown by this echo command. For example: if the output was "~/gocode", then "cd ~/go/src" must be replaced with "cd ~/gocode/src"
After that you can install LND using go itself. Start with this command:
go get -d -v github.com/lightningnetwork/lnd

It may take some time before anything happens on the screen after running this go get command, as there's no progress bar like you might be used to from pacman. In total it will show quite a few screens full of downloads it will execute before it completes.
After that's done, run the following two commands:
cd ~/go/src/github.com/lightningnetwork/lnd
make && make install


At this point the LND installation is complete.
The LND installation guide says you can do a test with:
make check
But you will run into the issue that some tests may fail, which they warn about in that guide if bitcoind isn't installed locally. These tests can't access the bitcoin full node that's in your Dojo, so it just means that some tests will fail, but that's not an issue for this installation.
Configuring LND
Before you can start LND, it needs to be configured to connect to both your Dojo's bitcoind node and your tor setup. While it's possible to use command line arguments, using a config file makes life easier in my experience so I'll focus on that here. Do the following:
cd ~
mkdir .lnd
cd .lnd
wget -O lnd.conf https://raw.githubusercontent.com/lightningnetwork/lnd/master/sample-lnd.conf
Then open the the newly created ~/.lnd/lnd.conf configuration file in a text editor.
Note: this config file may have changed since this guide has been released. If what you see in the screenshots below is very different from what you see in the sample config file you've just downloaded, you may need to dive into the LND documentation to understand the differences. If you're interested, you can look at how the file has evolved over time: https://github.com/lightningnetwork/lnd/commits/master/sample-lnd.conf. At the time of writing this guide, it's at commit 9f5f48b from May 1, 2020.
The config file is divided into groups, each group starts with title between brackets, the characters "[" and "]".
Remember to remove the semicolon character ";" at the start of the line for these settings, otherwise they will not be active with the entered value.
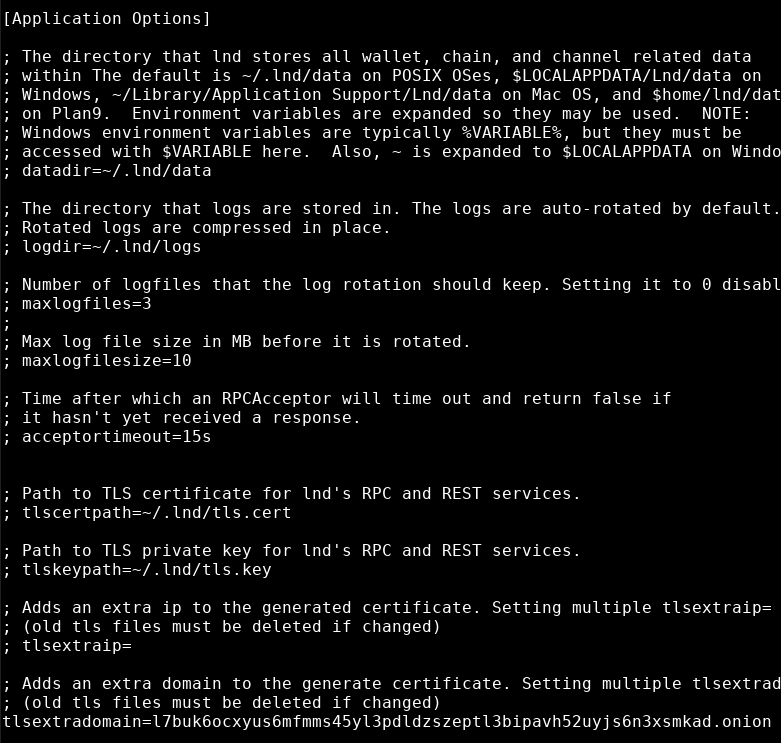
Edit the following groups as it is shown with the example screenshots:
[Application Options]
tlsextradomain=yourOnionAddressHere.onion
listen=localhost:9735
rpclisten=localhost:10009
restlisten=localhost:8080
Also replace the onion address here with the onion address you generated earlier.
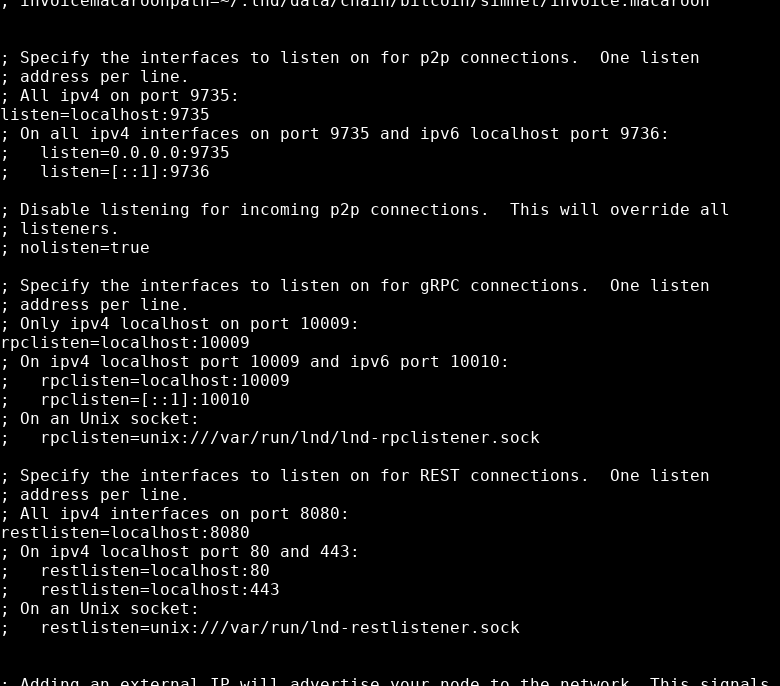
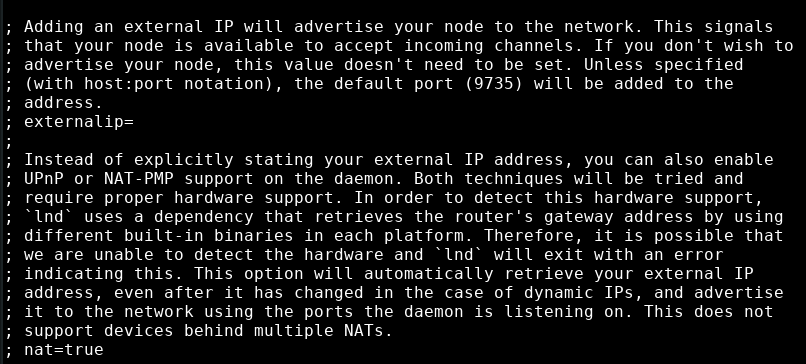
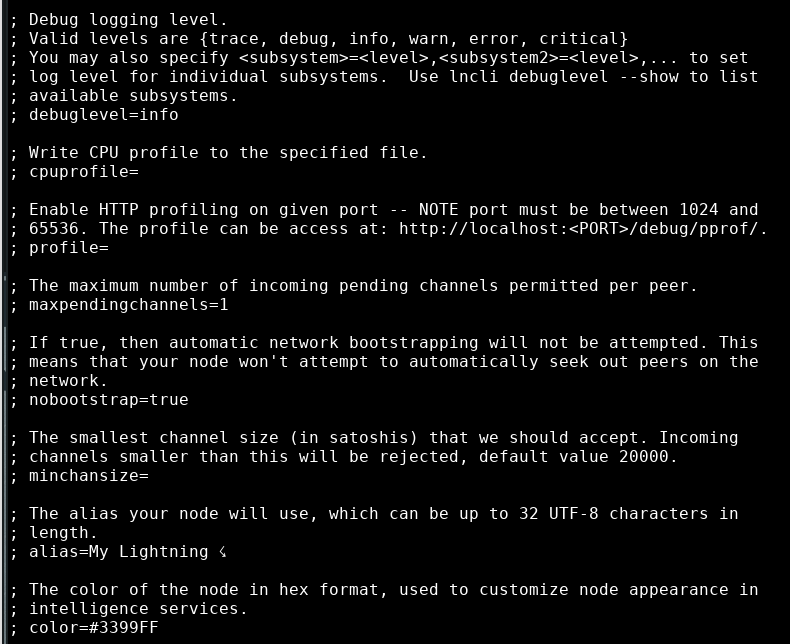
though feel free to give your LND node an alias and a colour code
This next group is about the fact that you want to use Bitcoin and not some alt like Litecoin.
[Bitcoin]
bitcoin.active=true
bitcoin.mainnet=true
bitcoin.node=bitcoind
Turn off all other settings in the [Bitcoin] group (not the [Bitcoind] group!) by starting the line with a semicolon character.
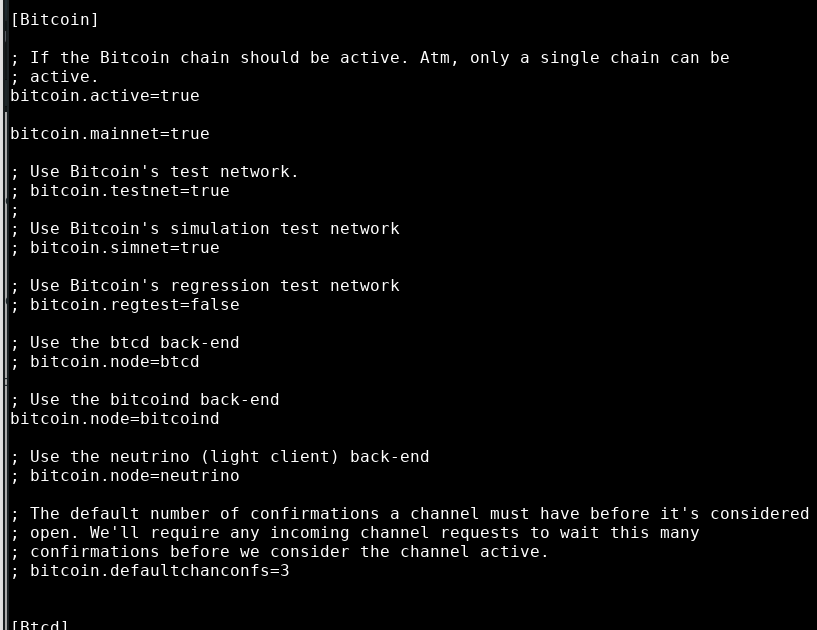
If you don't see the setting for bitcoin.mainnet in your file, add it yourself
This group is about configuring the connection with the full node you're using, in your case it's the one you have in your Dojo installation.
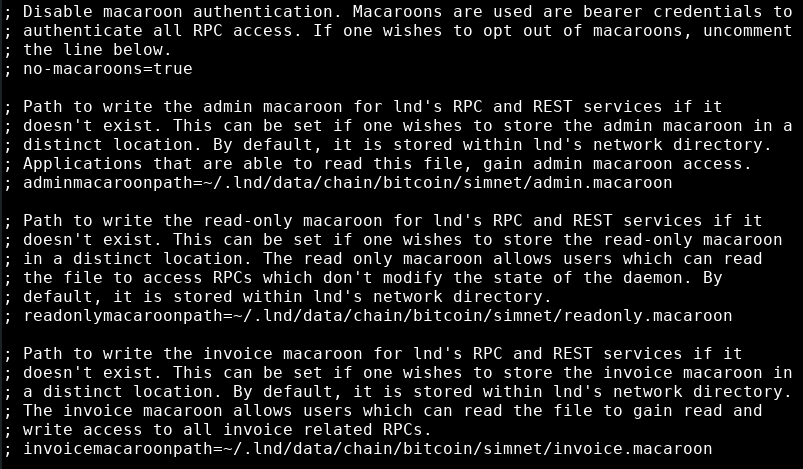
[Bitcoind]
bitcoind.rpchost=172.28.1.5:28256
bitcoind.rpcuser=placeholderUser
bitcoind.rpcpass=placeholderPass
bitcoind.zmqpubrawblock=tcp://172.28.1.5:9503
bitcoind.zmqpubrawtx=tcp://172.28.1.5:9501
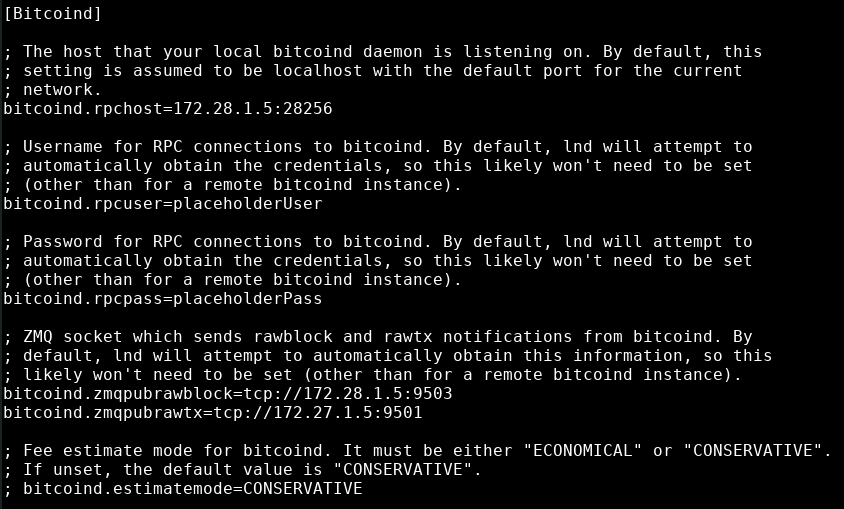
The values for bitcoind.rpcuser and bitcoind.rpcpass you will find in your bitcoind docker configuration file at ~/dojo/docker/my-dojo/conf/docker-bitcoind.conf which you opened earlier this guide.
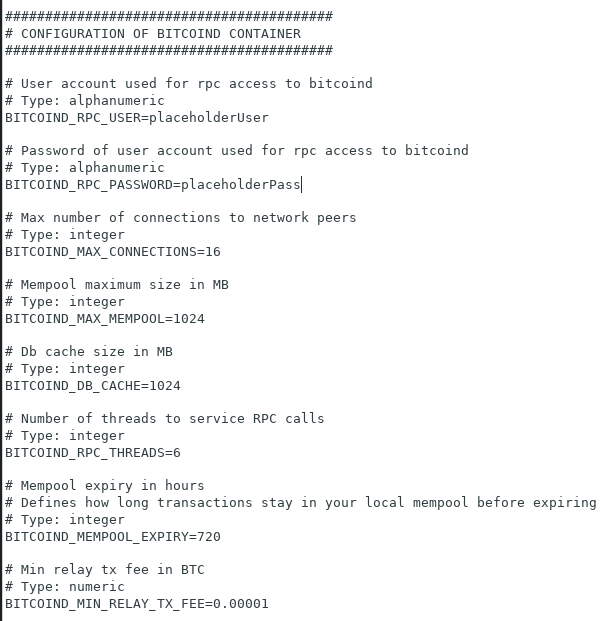
for the BITCOIND_RPC_EXTERNAL=on setting
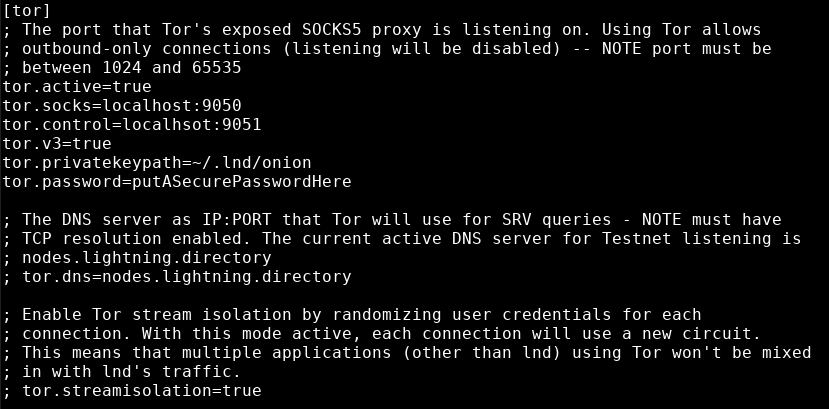
This group of settings is for your LND node to talk to other LN nodes over tor.
[tor]
tor.active=true
tor.socks=localhost:9050
tor.control=localhost:9051
tor.v3=true
tor.privatekeypath=~/.lnd/onion
tor.password=putASecurePasswordHere
Remember to replace putASecurePasswordHere with what you used in the "tor --hash-password" command earlier in this guide. Do not put the value that starts with "16:" here.
You can remove the settings groups [Btcd], [neutrino], [Litecoin], [Ltcd], [Litecoind] completely, if you want to reduce the clutter of your config file.
The groups [autopilot], [watchtower], [wtclient] may be handy for you in the future so keep these, just have their settings all unconfigured for now using the semicolon character at the start of the lines.
Running LND
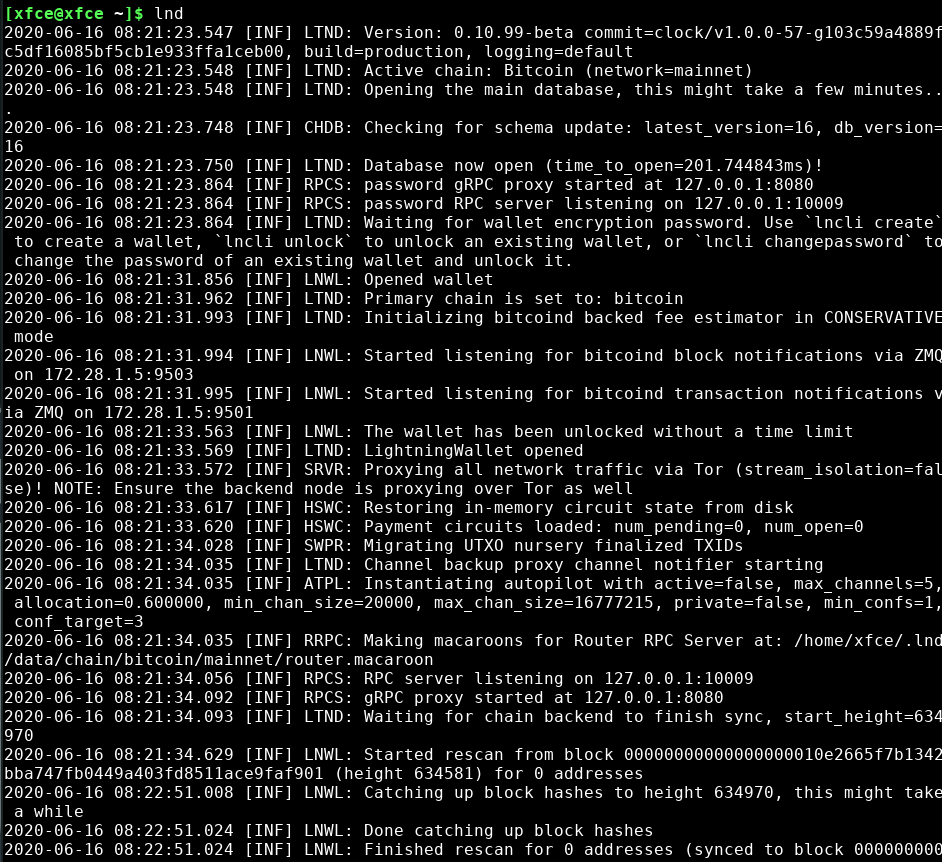
After configuring this, you should be able to simply start LND with
~/go/bin/lnd
Your LND will start off with the following information:
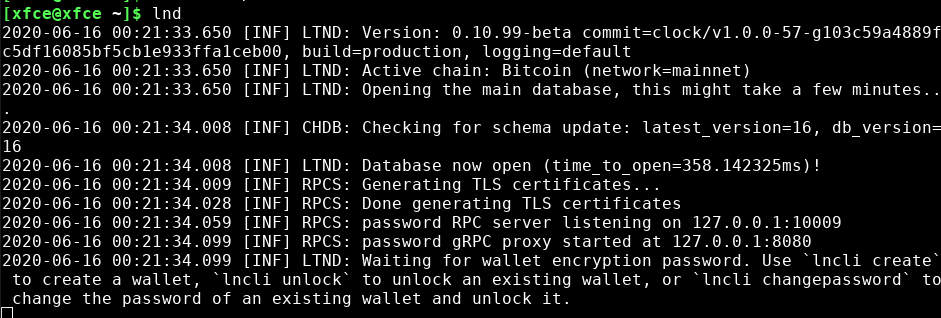
Before your LND will actually be fully operational, you need to have an unlocked wallet first. Since you're probably here for the first time, you need to create one. I suggest you don't use the seed of any of your existing bitcoin wallets, it's really important for security reasons that you make a separate wallet for this.
Whether you're creating a new wallet, or unlocking an existing one, you first need to be able to run another command while this LND process is still running. It's easiest to just start a second terminal/ssh session for managing LND with the lncli command, since exiting lnd with the ctrl+c command terminates the active process entirely.
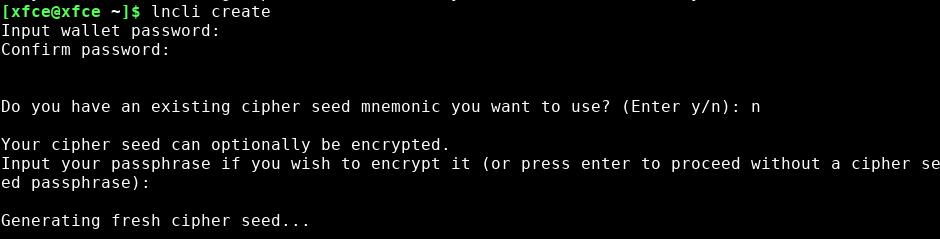
Create your new wallet with:
~/go/bin/lncli create
Follow the instructions lncli gives you there. Note that the password you enter at the start there, will have to be entered every time you restart LND (like after a reboot). This password is not the same thing as the passphrase. It will ask about the passphrase after you've entered a password. Your passphrase is an important part of your seed. The password unlocks the LND installation you have been configuring in this guide.
You will need the passphrase whenever you enter the seed in a new wallet (like when installing LND on a different machine), in which case your funds cannot be accessed without the passphrase. With the seed and passphrase and the backup of your channel states together (you need all three!) you can always recover the correct state of your funds.
When your lncli command ends with "lnd succesfully initialized!", your LND process maybe still be busy setting things up for connecting to the lightning network. That may take a while, as it's also trying to load a lot of information the first time from your bitcoind node.
If you ever restart LND and it asks to be unlocked, run this and enter your LND password when it asks for it:
~/go/bin/lncli unlock
At this point your LND should be up and running when it says "Chain backend is fully synced" along with the current block height.

Now execute a test to see if the LND node's REST endpoint can be connected to over tor:
torify curl -k --header "Grpc-Metadata-macaroon: $(xxd -ps -u -c 1000 .lnd/data/chain/bitcoin/mainnet/admin.macaroon)" https://`sudo cat /var/lib/tor/lnd/hostname`:8080/v1/getinfo
You can also edit this script so it doesn't need root access, by replacing the part where it looks up the hidden service hostname, with the onion address you looked at earlier this guide, as follows:
torify curl -k --header "Grpc-Metadata-macaroon: $(xxd -ps -u -c 1000 .lnd/data/chain/bitcoin/mainnet/admin.macaroon)" https://yourOnionAddressHere.onion:8080/v1/getinfo
After a couple seconds, this should output a JSON blob which looks something like this:
{"version":"0.10.99-beta commit=clock/v1.0.0-33-gbe36776120853240ac48fcba3225d605e0e8babc","commit_hash":"be36776120853240ac48fcba3225d605e0e8babc","identity_pubkey":"scrubbed","alias":"scrubbed","color":"#ffffff","num_pending_channels":0,"num_active_channels":0,"num_inactive_channels":0,"num_peers":0,"block_height":634424,"block_hash":"0000000000000000000501533213dd98e93a76e5b200836ff3e28c17210718f9","best_header_timestamp":"1591693564","synced_to_chain":false,"synced_to_graph":false,"testnet":false,"chains":[{"chain":"bitcoin","network":"mainnet"}],"uris":[],"features":{"0":{"name":"data-loss-protect","is_required":true,"is_known":true},"5":{"name":"upfront-shutdown-script","is_required":false,"is_known":true},"7":{"name":"gossip-queries","is_required":false,"is_known":true},"9":{"name":"tlv-onion","is_required":false,"is_known":true},"13":{"name":"static-remote-key","is_required":false,"is_known":true},"15":{"name":"payment-addr","is_required":false,"is_known":true},"17":{"name":"multi-path-payments","is_required":false,"is_known":true}}}
If you get an error instead, you need to go back and see what parts are not correct.
Note that this command tests only the REST endpoint (port 8080) and not the gRPC endpoint (port 10009). To date, I have no method to test the gRPC endpoint. Because of this I recommend simply setting up both equally as I have instructed thus far, so that you can test one and it will be probably representative of the other one working as well.
Connecting to LND
You need to install qrencode if you don't have it already:
sudo pacman -Sy qrencode
You now have to use one of the following two commands to generate a QR code for your wallet.
For a wallet that uses gRPC like Zap
echo lndconnect://`sudo cat /var/lib/tor/lnd/hostname`:10009?cert=`grep -v 'CERT' ~/.lnd/tls.cert | tr -d '\n' | tr -d = | tr /+ _-`\&macaroon=`cat ~/.lnd/data/chain/bitcoin/mainnet/admin.macaroon | base64 -w 0 | tr -d = | tr /+ _-` | tr -d \\n | qrencode -o theQRcodeForZap.png
For a wallet that uses REST like Zeus
echo lndconnect://`sudo cat /var/lib/tor/lnd/hostname`:8080?cert=`grep -v 'CERT' ~/.lnd/tls.cert | tr -d '\n' | tr -d = | tr /+ _-`\&macaroon=`cat ~/.lnd/data/chain/bitcoin/mainnet/admin.macaroon | base64 -w 0 | tr -d = | tr /+ _-` | tr -d \\n | qrencode -o theQRcodeForZeus.png
Like before, you can edit these scripts so they don't require sudo, by replacing the part between the backticks with the onion address you generated earlier. So you replace the following part:
`sudo cat /var/lib/tor/lnd/hostname`
An example would then look like this:
echo lndconnect://yourOnionAddressHere.onion:8080?cert=`grep -v 'CERT' ~/.lnd/tls.cert | tr -d '\n' | tr -d = | tr /+ _-`\&macaroon=`cat ~/.lnd/data/chain/bitcoin/mainnet/admin.macaroon | base64 -w 0 | tr -d = | tr /+ _-` | tr -d \\n | qrencode -o theQRcodeForZeus.png
These commands should each create a png file where your session's current working directory is at. So if you're in your home directory, the png file will be there.
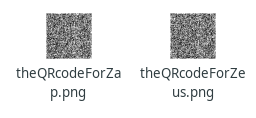
The resulting QR code is what you can use to connect to your LND node when you scan it with your LN wallet.
Don't leave these QR codes lying around, anybody with access to these has access to your funds. All it takes is for them to see it once and you wouldn't know until it's too late!
Make sure that you can display your QR code on-screen for your mobile phone wallet to record with the camera, so if you're running a Linux without a graphical desktop environment you may need to find some way to work that out.
After your wallet is connected you can just throw away the QR code image file, after all: you can just re-generate the QR code by running the command again.
Tor on android
You can install your LND based LN wallet at this point, if you haven't already. Zap and Zeus are the only ones I've tried out. If you want to try a different one, you will have to figure out if it uses REST or gRPC, though just simply trying out both QR codes to see if it works with one of the two will probably work out.
Before your LN wallet will work, it either needs to have tor embedded or you will need to install orbot. I believe there is active development on Zeus to embed tor, so that you don't need orbot, but at the time of writing you still need it. Zap also doesn't have tor embedded and needs orbot.
You can download orbot from the google play store here: https://play.google.com/store/apps/details?id=org.torproject.android
Or if you prefer installing from F-droid: https://f-droid.org/packages/org.torproject.android/
Before you can use orbot properly, you may need to dive into an Android OS setting first, specifically if you have Android 9 or newer. There's a setting called Private DNS which at the time of writing is in conflict with orbot's name resolution mechanism, incidentally preventing it from being able to resolve and connect to onion URLs. It seems that the orbot devs cannot work around this setting when it is active, so the issue has been closed: https://github.com/guardianproject/orbot/issues/262.
The only way to deal with it is simply to turn the Private DNS off, temporarily if you have to.
On my own Android installation, I can disable private DNS as follows: go to Settings, then "More Connections" and then "Private DNS". This gets me to the following screen:
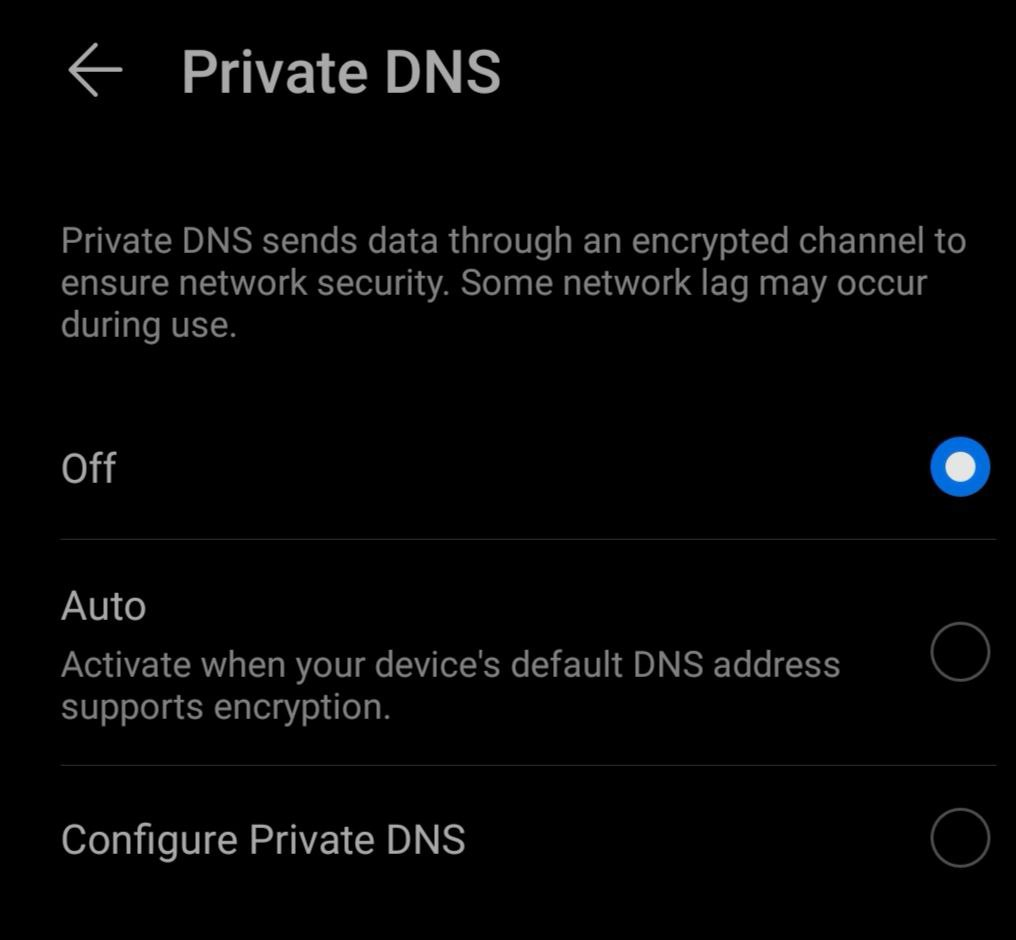
Set it to "off" when using orbot so that you can access onion URLs, so that your LN wallet works.
If you cannot find the setting straightaway, it may be hidden on your system. I haven't experienced this myself, but I've seen mention of this: https://twitter.com/Luuk_Damhuis/status/1270812879466496002.
After installing orbot, there's two things you need to configure in the orbot app:
- Set it to VPN mode
- Add your LN wallet(s) as a Tor-Enabled app

After that, your orbot setup should be good to go. Whenever you want use your LN wallet, your orbot must first be connected to the tor network.
I have sometimes had issues starting or stopping orbot in vpn mode, the GUI seems to be a bit buggy at times. Be prepared to kill the app process and restart it if you have to.
What seems to work best is to first have vpn mode turned off, tell orbot to connect with the big round onion button that says "start", then turn on vpn mode. Then if you want to turn off orbot, first turn off vpn mode and then tell orbot to stop by tapping the big round onion again.
Zap
While your orbot is running and connected, open Zap, tap "SETUP WALLET", then "Connect to Remote Node" and scan the qrcode that has a lndconnect URL which uses port 10009. After the scanner recognizes the QR code, it will show an "Attention" popup which will display the onion address part of the QR code. After you press "Ok" the wallet should be ready within a minute.

On a rare occasion it may first display in the center of the screen an error for a couple of seconds, like "timeout server is not responding", but after a moment it still connects correctly.
There may also be a temporary red popup in the bottom of the screen saying "Invalid payment information" but I think that's a visual bug and not really an issue.
Zeus
While your orbot is running and connected, open Zeus, tap "go to settings" and then "add a new node". Then tap "Scan lndconnect config" after which you can scan the qrcode that has a lndconnect URL which uses port 8080. After scanning the QR code, you can see in the fields that the values from your lndconnect URL are there.
Make sure the settings are correct and that "lnd" is selected under "Implementation", then Tap "Save Node Config".

Your Zeus wallet should try to connect straightaway and succeed within half a minute.
If you read this in the future where Zeus 0.3 is released, the one thing that may be different is that after scanning the QR code, there is an extra box you can check named "Certificate Verification". In your case, since you're connecting over tor, you don't need to set that to active. Since only your configuration can respond to the onion URL you generated, you don't need to verify with an extra security layer that does the same.
Wrapping things up
Updates
If you ever want to update your LND installation, according to INSTALL.md on LND's github, it's as simple as
cd ~/go/src/github.com/lightningnetwork/lnd
git pull
make clean && make && make install
Don't forget to stop LND first of course.
Changing config
If you followed the guide about the lnd.conf for the rpclisten/restlisten settings, the ports that LND itself has are not exposed. They are only available to processes running on your Linux system, this is because of setting them to "localhost" in lnd.conf.
If you ever need to change settings so that you use a different onion URL, or other such changes like simultaneously opening up the ipv4 access, replacing "localhost" with "0.0.0.0" or maybe a set of specific IP addresses, you'll need to re-pair your wallets with a new certificate.
Stop LND
Update your lnd.config file, specifically the settings tlsextraip and/or tlsextradomain.
Delete the files ~/.lnd/tls.cert and ~/.lnd/tls.key
Start LND again.
Re-generate the QR code
Scan it with your wallet app
Remember to delete your QR codes after your wallet is configured and connects to your LND, you shouldn't be leaving those QR codes lying around.
Extra info
Dojo's BITCOIND_RPC_EXTERNAL setting
If you're looking at the setting's name and thinking to yourself "Will this give other people access to use RPC on my bitcoind node?!", then the answer to that is: no, not with the Dojo configuration you have by default.
You can see for yourself how this setting affects your bitcoind node by looking in the file ~/dojo/docker/my-dojo/bitcoin/restart.sh where you'll find the following:
if [ "$BITCOIND_RPC_EXTERNAL" == "on" ]; then
bitcoind_options+=(-zmqpubhashtx=tcp://0.0.0.0:9500)
bitcoind_options+=(-zmqpubrawblock=tcp://0.0.0.0:9503)
fi
The reason you need to set it to "on" is that your LND needs access to the zmqpubrawblock port. You can see in that same restart.sh file that the zmqpubrawtx port, the other port on bitcoind that LND needs access to, is already open regardless of the BITCOIND_RPC_EXTERNAL setting.
Looking at the lndconnect url
If you're curious and want to take a look at what your lndconnect:// URL looks like, just remove the last part of
| qrencode -o theQRcode.png
And it will output what looks like a lot of random characters, but in there should be the following structured text:
lndconnect://yourOnionAddress.onion:8080?cert=aLotOfRandomLookingData&macaroon=aLotOfRandomLookingData
Ports used by LND versus the Tor hidden service
The lightning wallet apps connect to the ports on your onion address. They don't connect to the ports on your LND directly, because your Tor service is in between this. Because of this, you can change these numbers on your LND configuration and make Tor work with that, without changing what you tell your wallet apps to connect to.
You could use any other port like so in the torrc config file:
HiddenServiceDir /var/lib/tor/lnd
HiddenServicePort 8080 127.0.0.1:1234
HiddenServicePort 10009 127.0.0.1:5678
And then you'd have to change the following settings in the lnd.conf file like so:
rpclisten=localhost:5678
restlisten=localhost:1234
You then need to restart the Tor service and the LND process, it shouldn't matter in what order you do that.
You don't have to generate a new cert file for your wallets to connect to, with these changes the apps should work the same as before.
After this, the publicly exposed ports on the onion address are still 8080 and 10009, which means that nothing has changed for your wallet apps, and these ports internally point to LND's ports of 1234 and 5678 respectively.
Disclaimers
I do not speak for SamouraiWallet and also not for team Ronin. I may be a mod in some of SamouraiWallet's telegram channels but that's as of yet only for removing spam and such.
I make no claims on the security and/or privacy of this setup. Consider this guide an effort to get you "up and running". Make sure you do your due diligence as you actually start using this with real funds.
The same thing goes for actually using LND, like channel management/autopilot: I simply have yet to dive into these matters myself.
Post mortem
The p2p part of LND as part of the Lightning Network for discovering and communicating channels, and the gRPC/REST part of LND which lightning wallets need to connect to, are two separately configurable aspects that can each use tor and/or "clearnet". I wish I could've split up how to configure them separately, but honestly a full picture that uses tor across the board in 1 go is best for keeping things easy.
It might be interesting to take the time to turn this into a docker container that can be plugged into the Dojo network setup, but I would need quite a bit of my free time to research it and make that happen.
If readers of this guide run into a pattern of specific errors while following this guide, I hope they (you) will contact me about this, so that I may update this guide. I particularly would like to know what typical errors the user runs into when executing the REST /v1/getinfo test to see if the running LND can be accessed over tor.
I realize that I am dependent on some things for this guide, mainly the structure of config files and that hopefully they don't get changed too much in the future. I hope I will be contacted by any reader that sees discrepancies between what I show in this guide and what their software is currently showing on the screen. But if the future is fortuitously fruitful, maybe this guide's actions will have been automated before that by somebody else contributing to this cool space.
Special thanks
I'd like to express my thanks to
- SamouraiWallet for their amazing Bitcoin software stack that provides the most private solution to date.
- Team Ronin for their great efforts of making the Dojo setup easy and accessible for everyone.
- KetoMiner for helping me with the lndconnect bash script.
- ∴ Ergo ∴ for giving me pointers on this guide.
If you feel like paying me for this guide, my paynym is +lingeringhall54C, though I suggest you rather send your donation to SamouraiWallet and/or Team Ronin as they are both still actively developing and making real improvements and new tools.
Some examples of what's to come: SamouraiWallet have just now released Dojo 1.6 which for example adds Whirlpool CLI as a docker container to the default Dojo setup, while team Ronin are working on a remote GUI called RoninUI as well as a Linux image on which everything is already installed and ready to go.


-----BEGIN PGP SIGNED MESSAGE-----
Hash: SHA256
+lingeringhall54C PM8TJRYesZQuPYfDofuioCK2ef2xs1fPUF3rYX5oQZ425xQ197cTpKFt7JJy5CqCFdrTbjWwwPiRw96KRyD1feYhNFdbFxkDwdji8BiPDEshUYCXTXEA
-----BEGIN PGP SIGNATURE-----
iQIzBAEBCAAdFiEE7+iyqF/e0RZ67q5Cb8KSnZ/jWQoFAl7nF+8ACgkQb8KSnZ/j
WQrOJg//W66OA+D7XBwsVzGCwEjek2jUGv+v9qpncFLv8R9xn/KoJfHGdoKrx1gK
14gSHSX/3uiqEbrqEurL+oF3Vxmm5A6YATzxTE3oa76yAzDO3qEUmF9llNxHEC+y
Q5nCdkdownyQ83hNymZkRm05OXmt75SCiIhbUjMIoYAGZvcFksNdReFafFOwA0q7
rOhBZ/N+8A0t5lwSwI4LqOZ/n3YVwIflzfkNRW+0DIDjLwtdJ1mqATtHUaeehzE+
V9A5BbiDYzr1nyumAK+HSlN/k4QqsBl8VVIV761HdoS2Lp0aChfrb0+Ndxig80Go
3EqVsbt/kuxwiUY+RaKwcPxy6f/25qx/7gA7pifnqMSmNobF+bST+D8iD8DT09XD
dCnJxBPI99znEI0DrYHCI307U+G12T1OAtnMXWFOiAP0NWgt3Sn4h4YwUZKmy3wU
MY05hZNlsSeS7ukXD0JeHhaRb7Y9uLx1/YcGsCFK8FJgiJg9EZphmt3q0dumu3N4
jI6/FxCQpW0BPn071r7d5ees5qK62dg0fgoTmSELjE9yEWLBNYX/mbrecH7ttAU1
7NAv6iIzNMN4Nve/vbHUh/Afq2cfsJ7+NNC/KzDrLrtGv1h5ybEdXoTKJ5nhZyWU
+WqGKlx4Frc9OdTQK7Di7J9d3KiWhg2w1fMF+iXOcS7OERruSmc=
=RhWh
-----END PGP SIGNATURE-----