How to RESET a school or enterprise Chromebook

Heads Up! This page is for Educational Purposes Only
Why would anyone want to do this?
Perhaps you’ve purchased a used laptop that’s still enrolled in a managed domain because it was never unenrolled properly.
Or maybe you had a user sign in to their account without enrolling their laptop properly.
This guide will help you troubleshoot and resolve the issue.
Ready to fix it up? Let’s roll.
But first, some legal matters.
An important legal notice
Please, don’t use this guide for any illegitimate purposes. Stay legal.
You should know that’s it’s questionably illegal to unenroll your device from any managed domain without consent.
If you’re doing this and you’re not sure if it’s okay with your school, business, enterprise, or any other form of management, you need to get permission or else you could face some serious consequences. Ask your Ketua Jabatan (Guru Besar/ Pengetua)
You should also know that it was set into a managed mode by your school’s or business’s tech team. By resetting a managed Chromebook, you’ll be unlocking it from its own network. This could get you in a lot of trouble if you don’t have proper consent.
Be sure to get the permission(s) you need from the proper authority before attempting any of this.
Don’t attempt to unenroll your device if you’re not allowed to.
You may only use this guide only for legal and educational purposes with consent.
But even then, I assume no responsibility for any consequences that may occur (should you void your warranty or damage your device.). This guide may only be used for those who have express consent to unmanage a school or business device.
And lastly, think of the consequences before you proceed. Don’t use this tutorial if you don’t have consent to unenroll your Chromebook.
By utilizing this guide in any way, you agree that you won’t use it for illegal purposes.
Phew. Okay, now that we’ve gotten that out of the way, let’s get onto the tutorial.
The Simple One
The common steps to turn on Developer Mode on Chromebook are:
1. Turn off* your Chromebook
2. Holding Esc + Refresh (F3) + Power button. Then release Power Button.
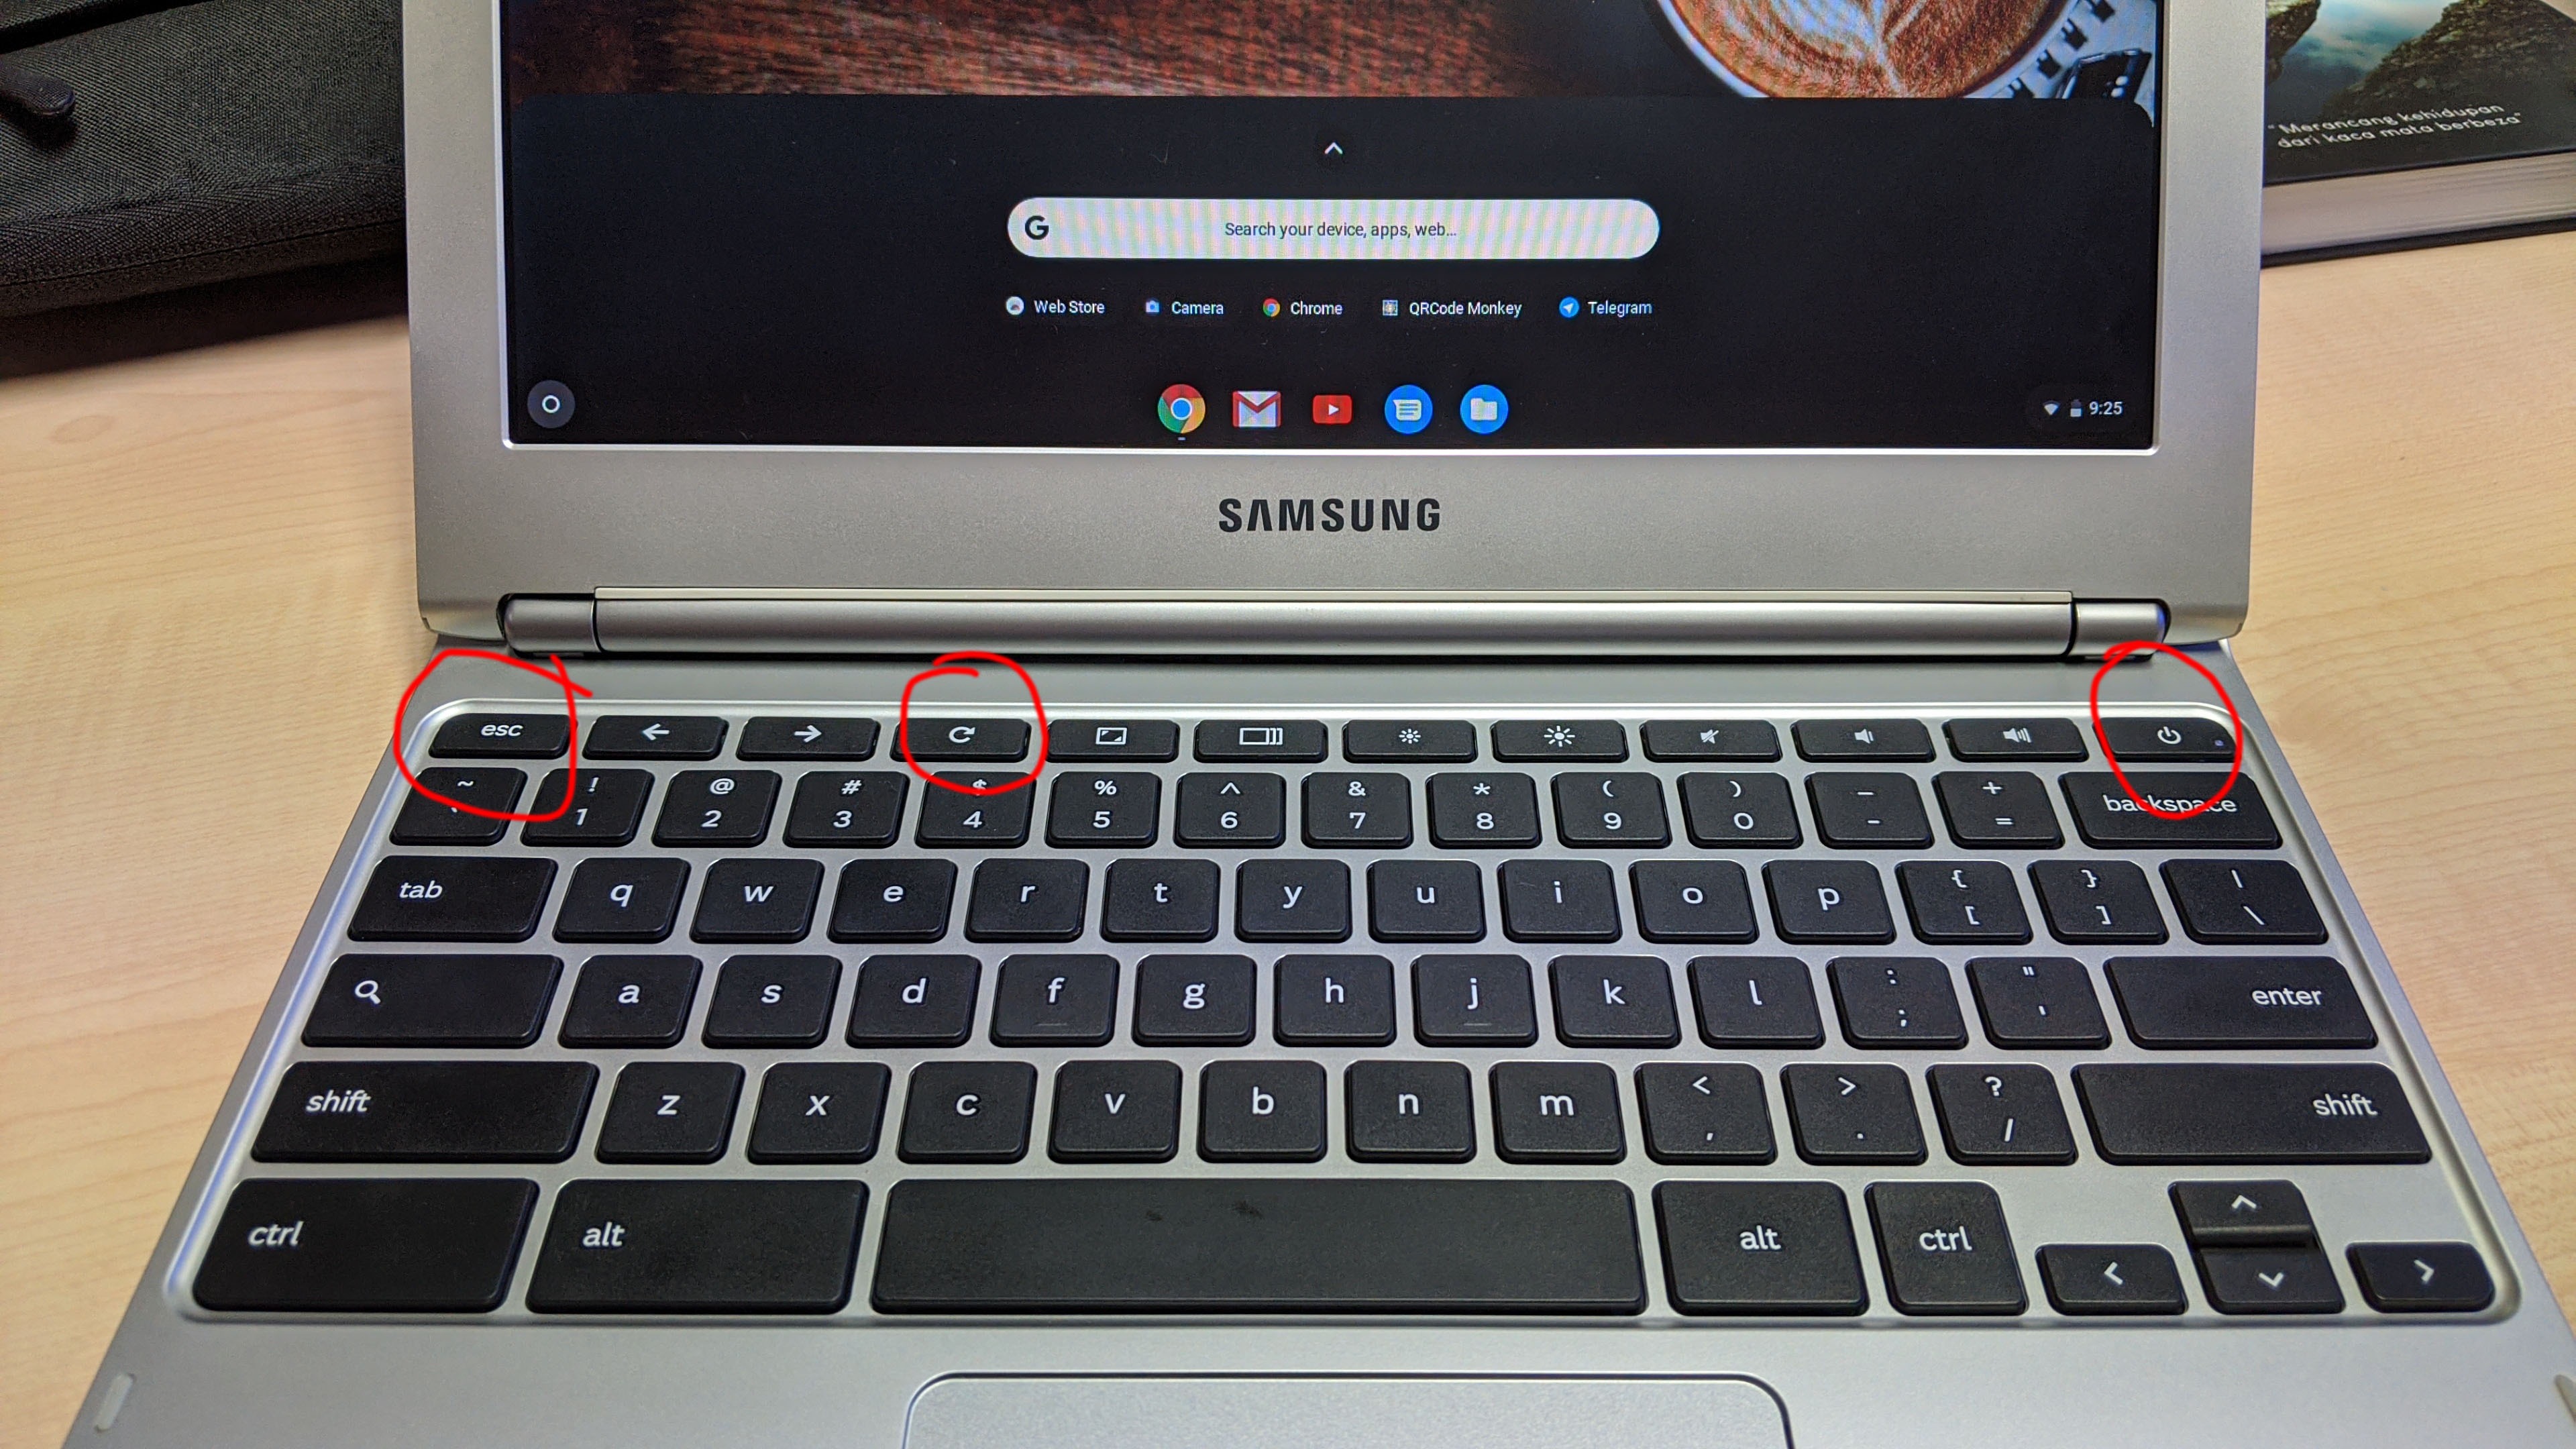
3. Your screen will display Recovery screen. Here, press Ctrl+D to turn on Developer mode. Then wait for couple of minutes.
4. After your Chromebook has reset itself, it’ll reboot and you’ll see a warning screen again. Go ahead and press Enter to enable system verification and return to the default mode.

*Can be done, when the Chromebook is ON too.
The Long Version One (Rick and Morty style)

Step 1: Switch to Developer Mode
You’ll have to switch to Developer Mode in order to reset a managed Chromebook.
You should know this is where all your personal data saved on your device will get deleted, so make sure you’ve already backed up your stuff.
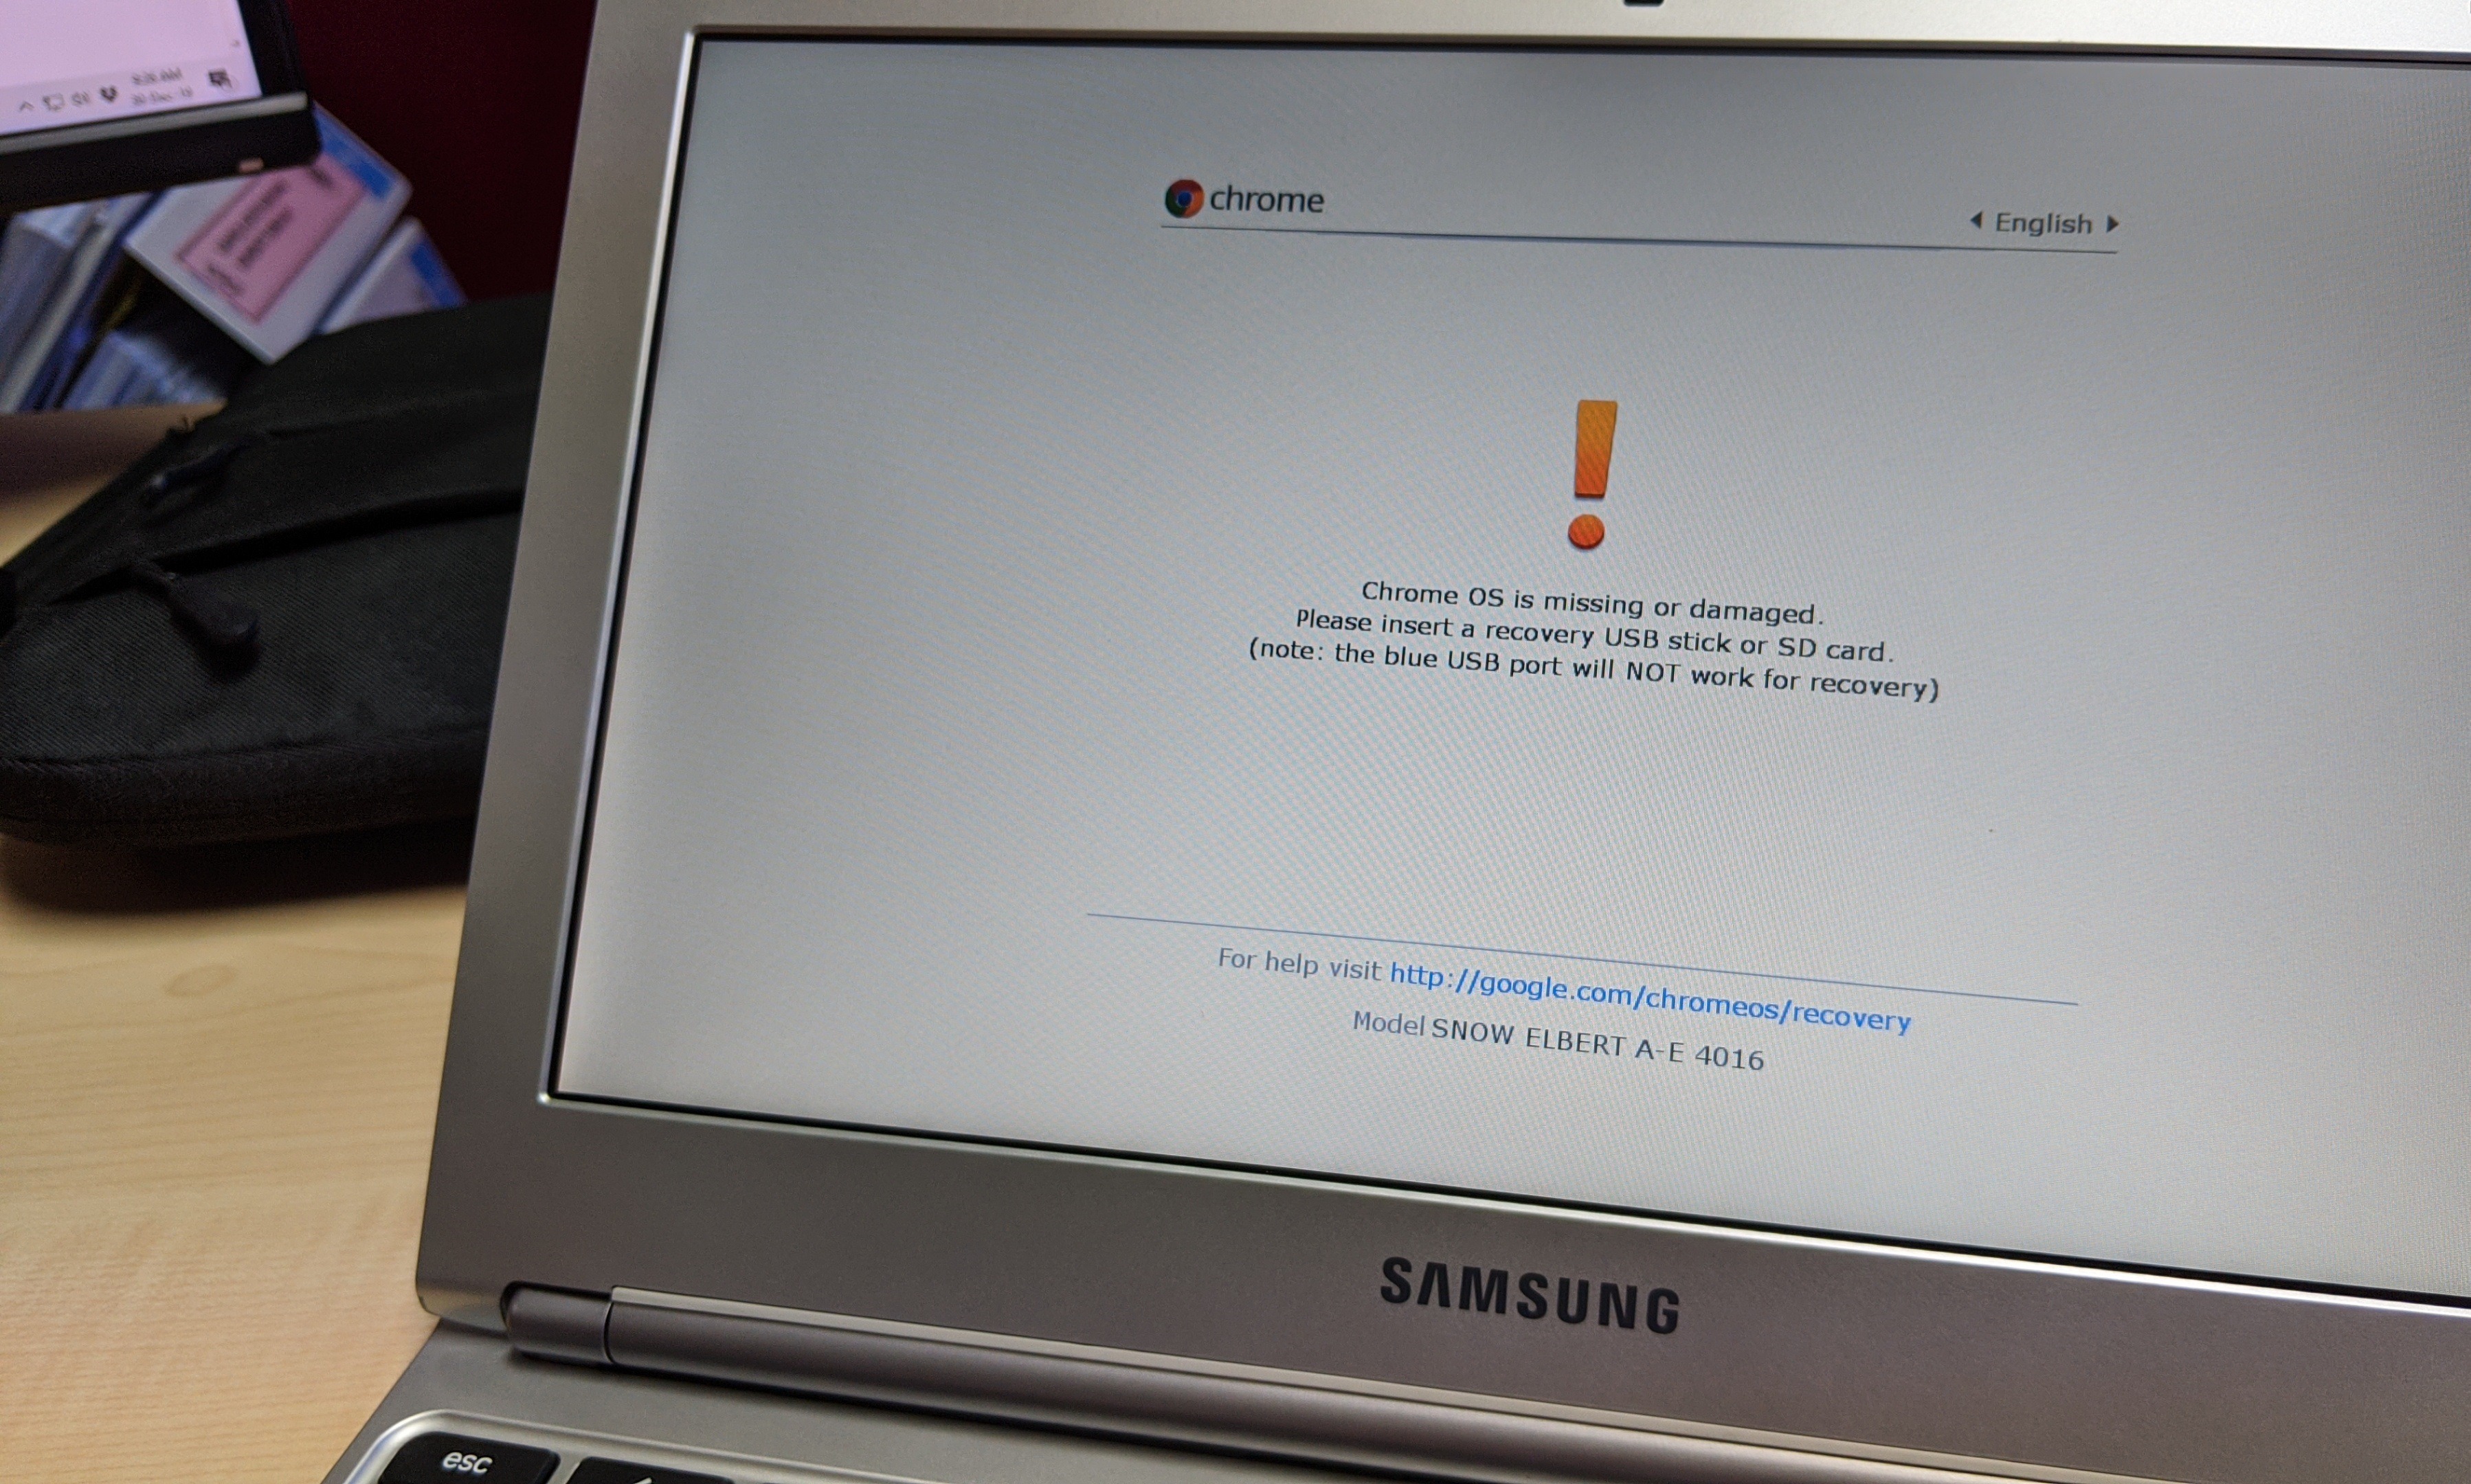
Press the “ESC + Refresh + Power” keys at the same time and you’ll get a warning screen. It’ll pop up and take over your screen. It states a bunch of scary text about the possible damage you could do your device if you proceed.
Don’t worry. This is normal. It’s supposed to be kind of intimidating- especially with the big exclamation mark.
But be sure to actually read the text so you know what you’re getting yourself into and all the possible risks of switching to Developer Mode.
When you’re ready, move onto the next step.
Step 2: Enter Developer Mode
After you’ve read the warnings and acknowledged all of them, go ahead and press “CTRL + D” and then press Enter.
Chrome OS will boot you into Developer Mode and you’ll get another warning.
Again, read all of the text and proceed when you’re ready.
Step 3: Reset your Chromebook
Okay, now we’re getting somewhere.
Go ahead and press “CTRL + D” again.
This is the point of no return. Your Chromebook will automatically Powerwash itself, which means all local data such as images, videos, and files saved on it will get deleted.
It’ll restore to factory conditions as if it were brand new- before it was ever enrolled into any school or enterprise domain.
Step 4: Wait
This is the easiest step. Grab a cup of your favorite drink and wait.
It’ll take about 20 minutes to complete the erasure of everything. Be patient.
Step 5: Enable system verification
After your Chromebook has reset itself, it’ll reboot and you’ll see a warning screen again. Go ahead and press Enter to enable system verification and return to the default mode.
Conclusion
Congrats. Your Chromebook has now reset itself, and it should no longer be enrolled into any school or enterprise domain. Your Chromebook should be completely unmanaged at this point and you should be free to use it without any management. You can reset and unmanage a Chromebook in just a few steps and reset it.
#These text have been copy and paste to suit you.
Credit goes to https://9to5google.com/, https://www.androidcentral.com/, https://forum.xda-developers.com/, https://forum.xda-developers.com/
#For Educational Purposes Only Method 1
This page will update from time to time. Bookmark it. Look up for the date!