How to Make a SCARA Robot 3D Model for CNC: A Step-by-Step Guide
IIn this post we are trying to built some cnc robot arm like this in kickstarter:
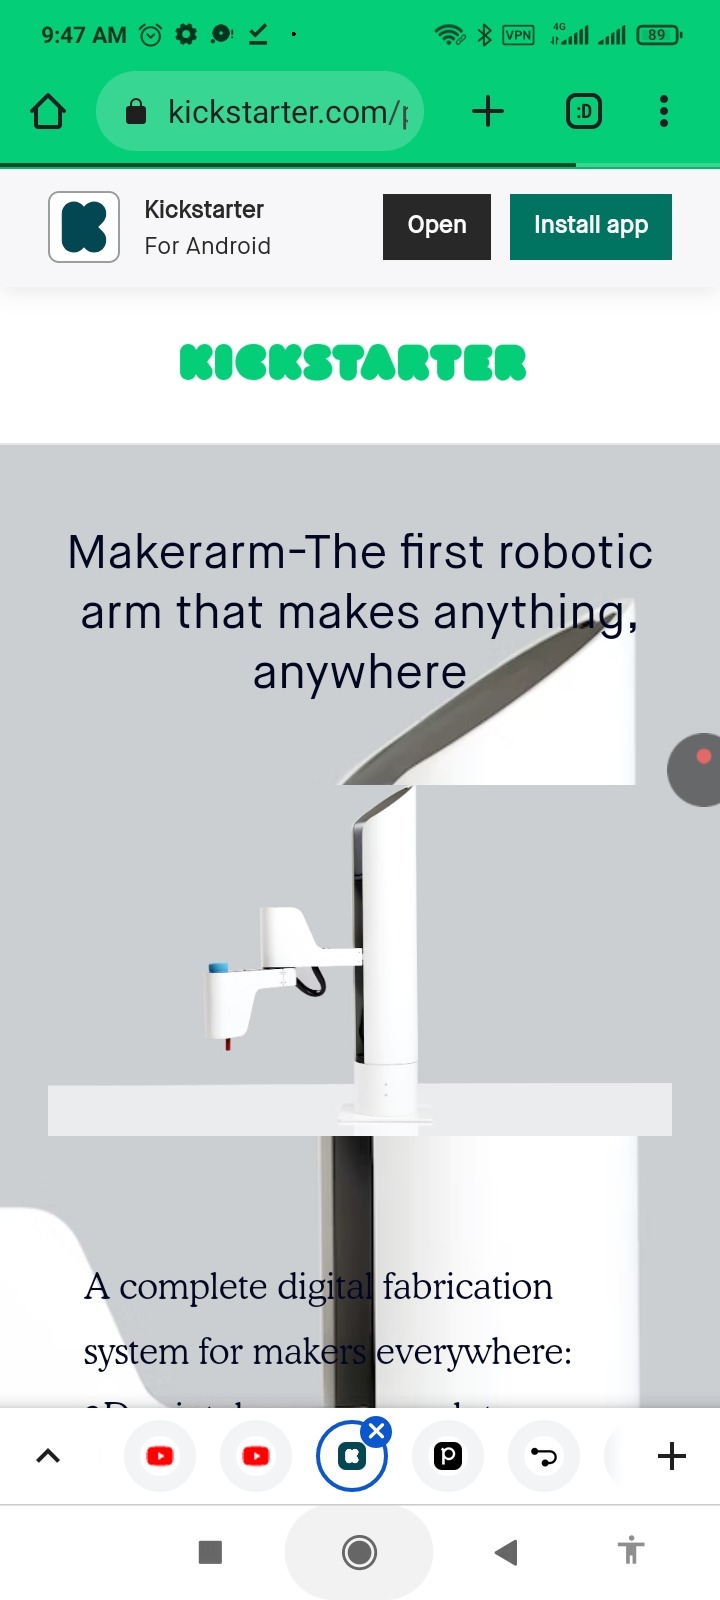
https://www.kickstarter.com/projects/1849283018/makerarm-the-first-robotic-arm-that-makes-anything
This is SCARA Robot 3D Model which is used for CNC usage do we used the YouTube video for finding how to built it and it is easy to ...:
https://m.youtube.com/results?sp=mAEA&search_query=Diy+3D+Printed+Arduino+SCARA+Robot+fir+cnc
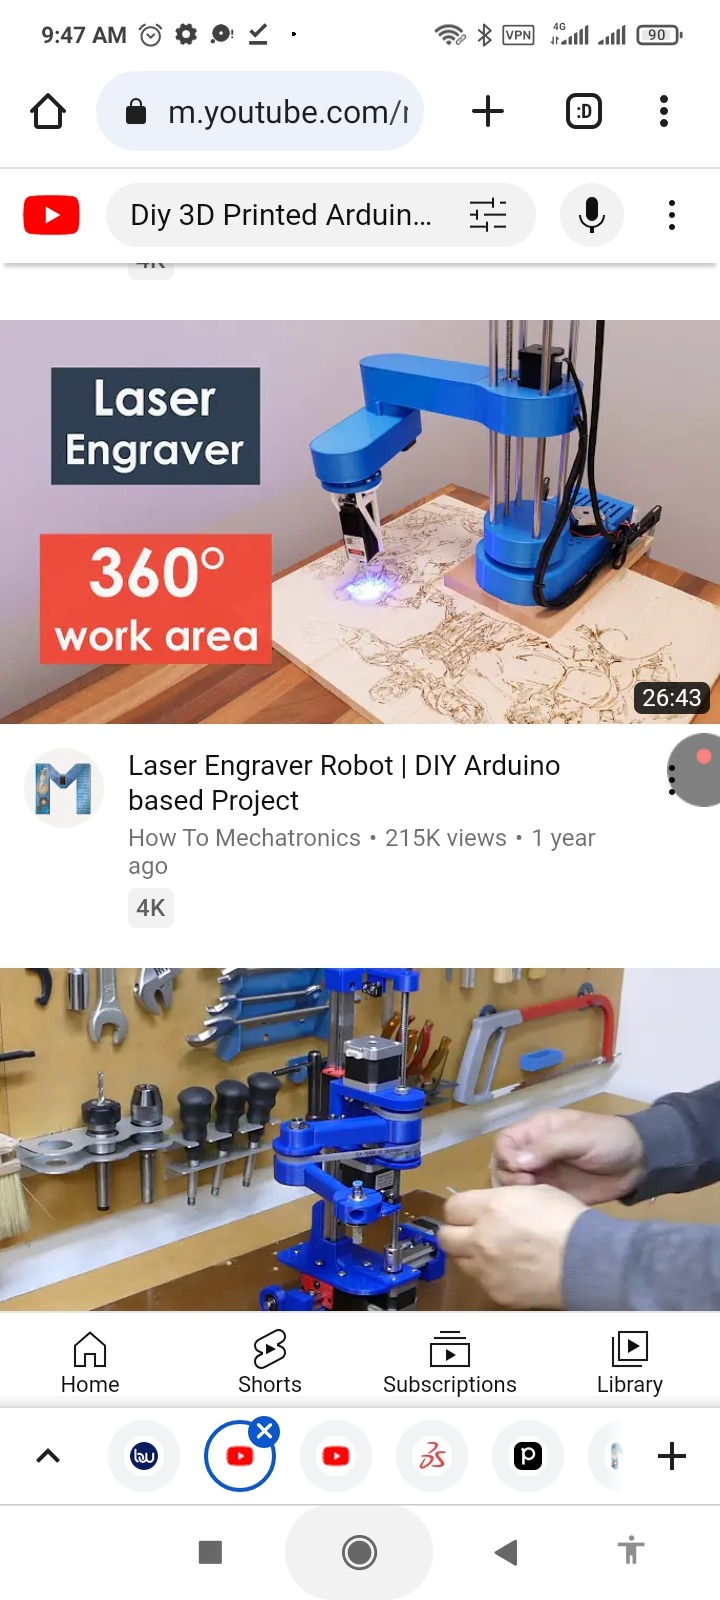
So we found some useful video like these:
1-SCARA Robot | How To Build Your Own Arduino Based Robot

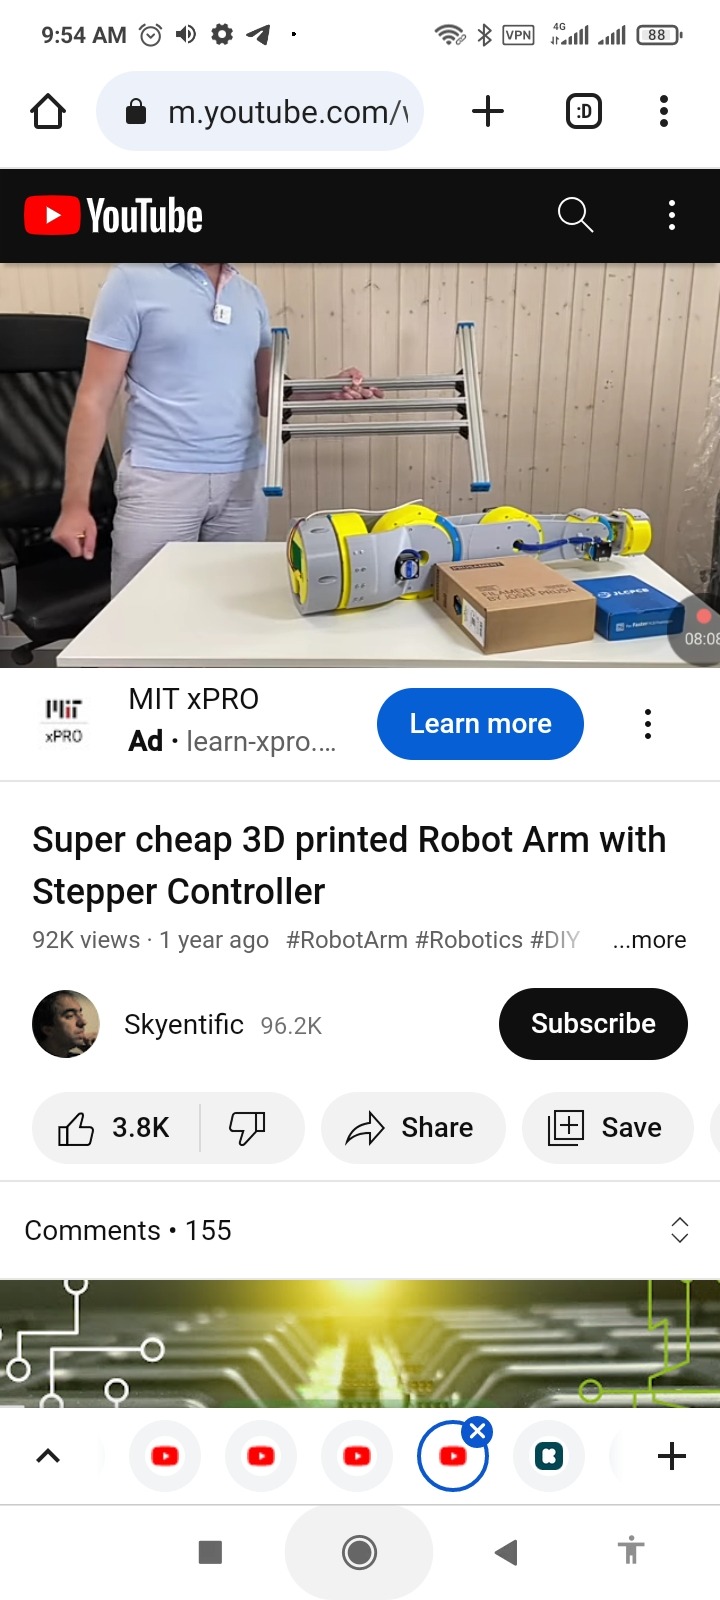
2- Super cheap 3D printed Robot Arm with Stepper Controller
And ...
Now the ChatGPT results are also avaible here:
https://www.phind.com/agent?cache=clkz1sful000nl708qx62jscw
Introduction: In this guide, we will walk you through the process of creating a SCARA Robot 3D model for CNC. Whether you're a hobbyist or a professional, this step-by-step tutorial will help you design and assemble your own SCARA robot using 3D modeling software and 3D printing technology.
Step 1: Design the Robot
Choose a 3D modeling software like SOLIDWORKS or any other CAD software.
Design the individual parts of the SCARA robot, including the base, arms, joints, and end effector.
Ensure that the design is suitable for 3D printing and consider the dimensions and specifications based on your requirements.
Step 2: 3D Print the Parts
Export the 3D model files in a format compatible with your 3D printer.
Use a 3D printer with a suitable printing bed size to 3D print each part.
Pay attention to details like layer height and infill density for optimal results.
Step 3: Assemble the Robot
Connect the different components together according to the assembly instructions.
Ensure proper alignment and functionality of the robot.
Make any necessary adjustments or modifications during the assembly process.
Step 4: Add Electronics and Motor Control
Integrate electronic components such as an Arduino, CNC shield, and stepper drivers.
Test the components with simple code to ensure they are working properly.
Troubleshoot any issues with the electronics before proceeding.
Step 5: Develop a GUI for Controlling the Robot
Use a programming language like Processing to create a GUI for controlling the robot's movements.
Establish communication between the GUI and the Arduino through the serial port.
Implement features like motion control, speed adjustment, and position control in the GUI.
Step 6: Customize the Robot's Parameters
Modify the parameters in the Processing code to match the actual lengths of the robot's arms.
Ensure accurate forward and inverse kinematics calculations for precise movements.
Fine-tune the robot's parameters based on its physical dimensions.
Conclusion: By following this step-by-step guide, you can create your own SCARA Robot 3D model for CNC. From designing and 3D printing the parts to assembling the robot and adding motor control, this process allows you to unleash your creativity and explore the world of robotics. Enjoy the journey of building and controlling your very own SCARA robot!
Note: For more detailed instructions and guidance, refer to the provided references throughout the guide.
Remember to include relevant images, diagrams, and additional resources in your post to enhance the reader's understanding and provide further assistance. Good luck with your SCARA Robot 3D modeling project!
Update 1:
So the list of require decides is available below:
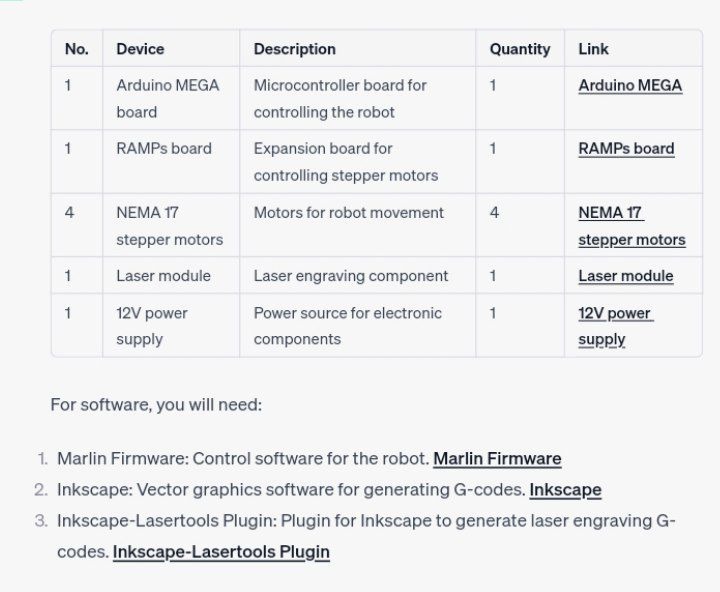
Certainly! Here's the updated table with the number of devices required:
No. Device Description Quantity Link
1 Arduino MEGA board Microcontroller board for controlling the robot 1 Arduino MEGA
1 RAMPs board Expansion board for controlling stepper motors 1 RAMPs board
4 NEMA 17 stepper motors Motors for robot movement 4 NEMA 17 stepper motors
1 Laser module Laser engraving component 1 Laser module
1 12V power supply Power source for electronic components 1 12V power supply
For software, you will need:
Marlin Firmware: Control software for the robot. Marlin Firmware
Inkscape: Vector graphics software for generating G-codes. Inkscape
Inkscape-Lasertools Plugin: Plugin for Inkscape to generate laser engraving G-codes. Inkscape-Lasertools Plugin