How to Install WordPress Plugins
Let's review the three ways to install WordPress plugins starting with the simplest: using the plugin search tool in your WordPress dashboard. (Note: You can update your plugins from the dashboard too.)
To add a plugin to your WordPress website from the dashboard:
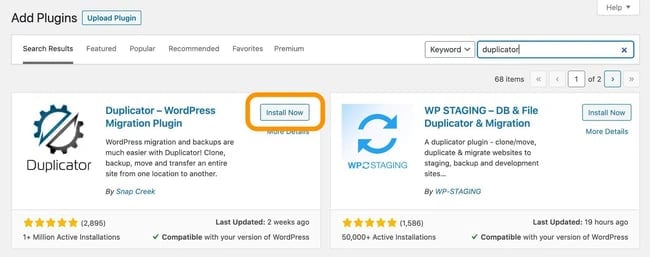
1. In your WordPress dashboard, choose Plugins > Add new.
2. Search for a plugin with the search bar in the top right corner. A number of results will appear.
3. After finding the plugin in the results, click Install Now. You can also click the plugin name to view more details about it.
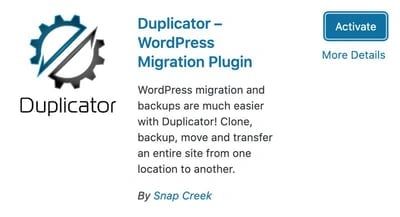
4. To use the plugin, you’ll need to activate it. When the installation is finished (this usually takes a couple seconds), click Activate.
You can also activate or deactivate any plugin under Plugins > Installed Plugins.
For more help installing plugins with this method, here's a video tutorial from Yoast SEO:
To manually add a plugin to your WordPress website:
1. Download the desired plugin as a .zip file from either the WordPress directory or from a third-party source. If you’re downloading from a third-party website, make sure that the plugin developer is legitimate.
2. From your WordPress dashboard, choose Plugins > Add New.
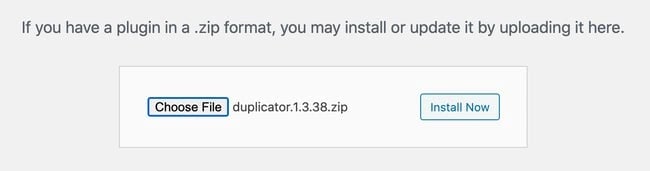
3. Click Upload Plugin at the top of the page.

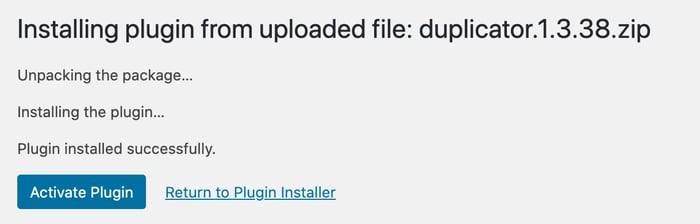
4. Click Choose File, locate the plugin .zip file, then click Install Now.
5. After the installation is complete, click Activate Plugin.
To add a plugin to your WordPress website via FTP:
1. Download the desired plugin as a .zip file from either the WordPress directory or a third-party source. If you’re downloading from a third-party website, ensure the service is legitimate.
2. Extract (or unzip) the plugin file. The unzipped folder will appear with the same name as the .zip file.
3. Next, you’ll need to connect to your WordPress website’s server with FTP. To do this, you can use an FTP client that connects to the host server to transfer files.
4. Once you open the FTP client, connect to your website with a username and password. You might need to obtain these credentials from your hosting provider.
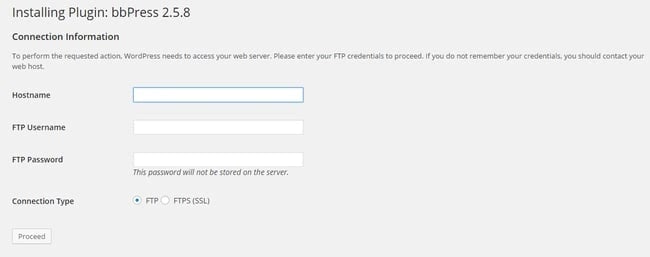
Image Source
5. In your WordPress file directory, open the wp-content folder, then open the plugins folder.
6. Upload the unzipped plugin folder that you downloaded to the plugins folder.
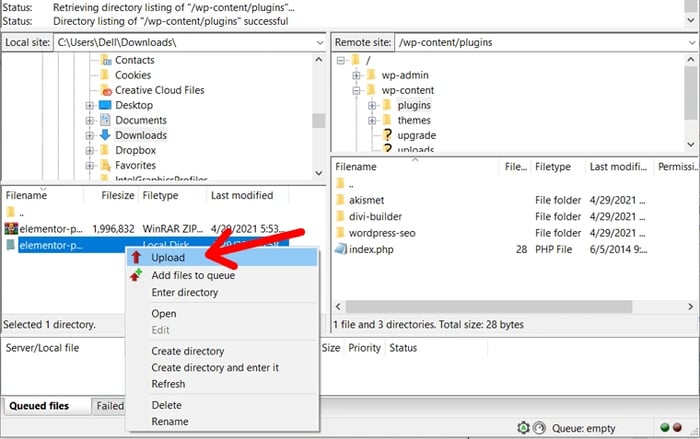
Image Source
7. Return to your WordPress dashboard and select Plugins > Installed Plugins. Find your new plugin and click Activate.
How to Use a Plugin in WordPress
Most plugins that perform simple tasks begin working immediately after installation, but complex plugins with greater functionality may need some configuration from you.
For example, if you install a forms plugin, it will automatically offer you form templates once activated. Then you can customize your forms as you see fit. A more complex language translation plugin, on the other hand, will require some configuration before it starts working.
Some plugins may even bring you to setup wizards after activation to walk you through configuration steps.
The best way to view all of your plugin’s customization features is via the plugin admin page. In the dashboard, go to Plugins > Installed Plugins to view currently installed plugins, then click Settings under any of the plugins listed.
Next, let’s look at some popular plugins to make your WordPress website more functional for you and your audience.