How to Create a Popup in Elementor
Creating a popup with Elementor is super easy. You can design your popup with the visual interface of Elementor where everything is drag and drop. Your job is getting easier since Elementor also offers premade popup templates. You can simply select a template, publish it, and set the trigger. That’s it!
Note: Elementor theme builder is only available to its pro version.
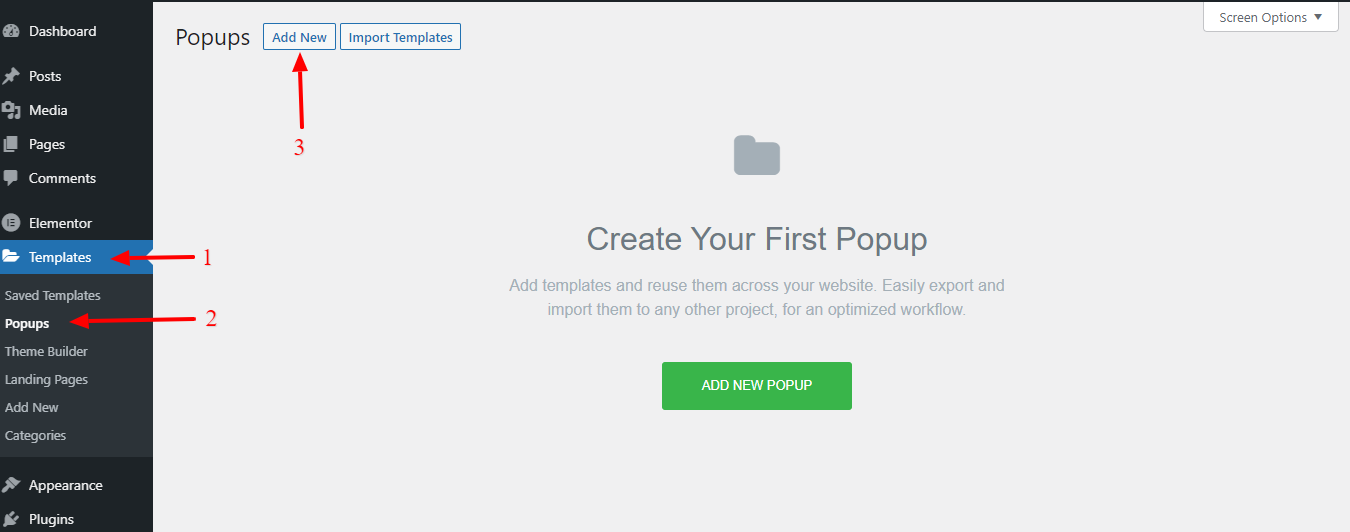
Step 01: Add a New File
- Go to your WordPress dashboard > Templates > Popups. Then click the Add New button on the top side.
- Give your popup a name and click the CREATE TEMPLATE button.
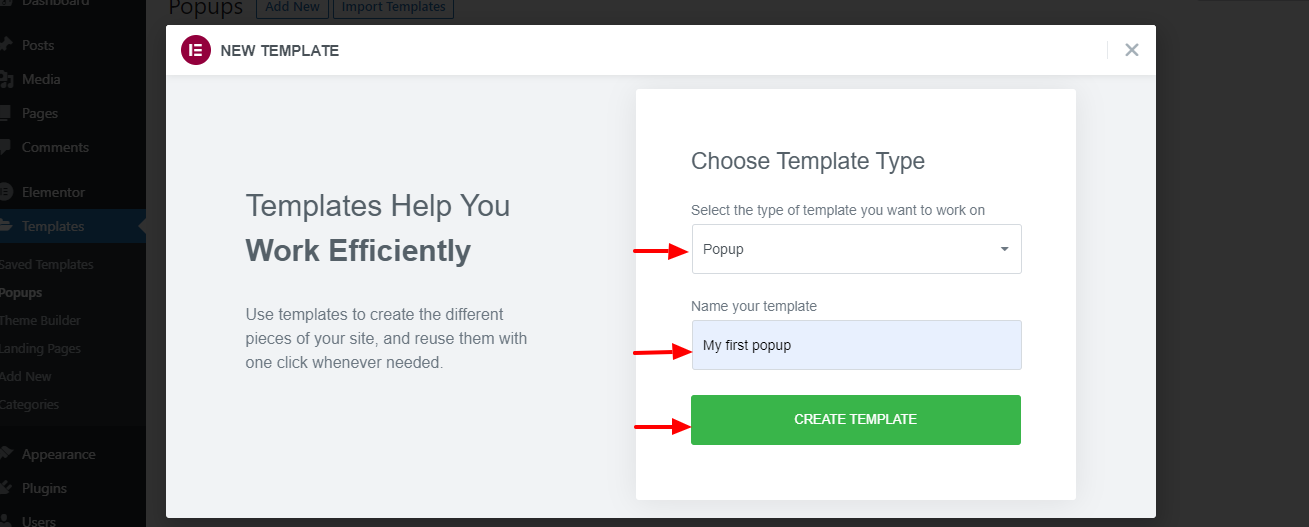
- Select a popup template you want to use. Hover your mouse over it and click the Insert button to take it to the Elementor editor.
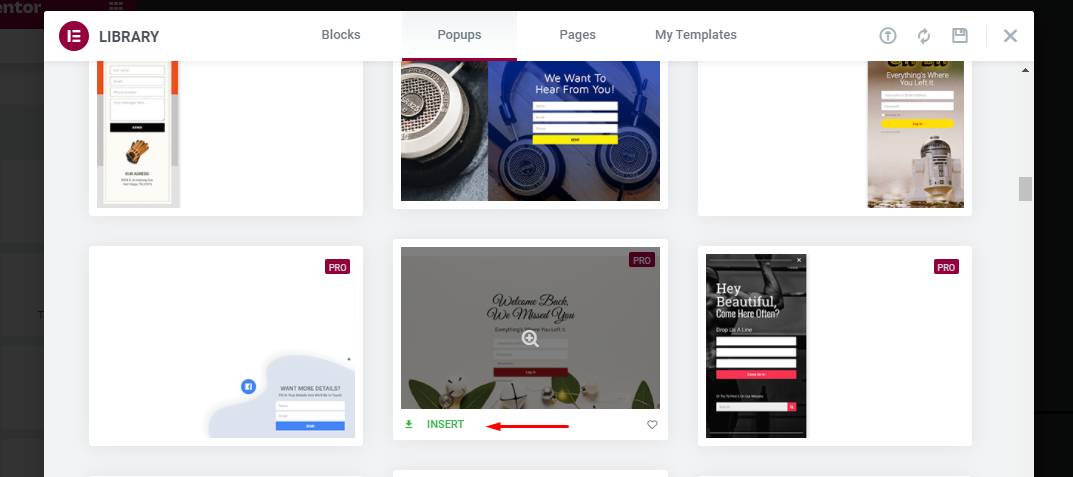
Note: If you prefer to create the popup from scratch, you can simply close the template library to open the Elementor editor.
Step 02: Customize the Popup
After inserting a pre-designed popup into your editor, it’s time to customize that popup. On the Elementor editor, you can customize the popup. You can replace the default content with your own content.
We have already shown you how to customize a pre-designed Elementor template.
Once you are done, click the PUBLISH button.
Step 03: Set Display Conditions and Triggers
In the next step, you will be asked to set display conditions and triggers. There is also an option to set advanced rules.
- Display conditions: Determine on which pages the popup appears throughout your website. You can set the popup to appear on the entire website, specific pages, specific posts, specific categories, and so on.
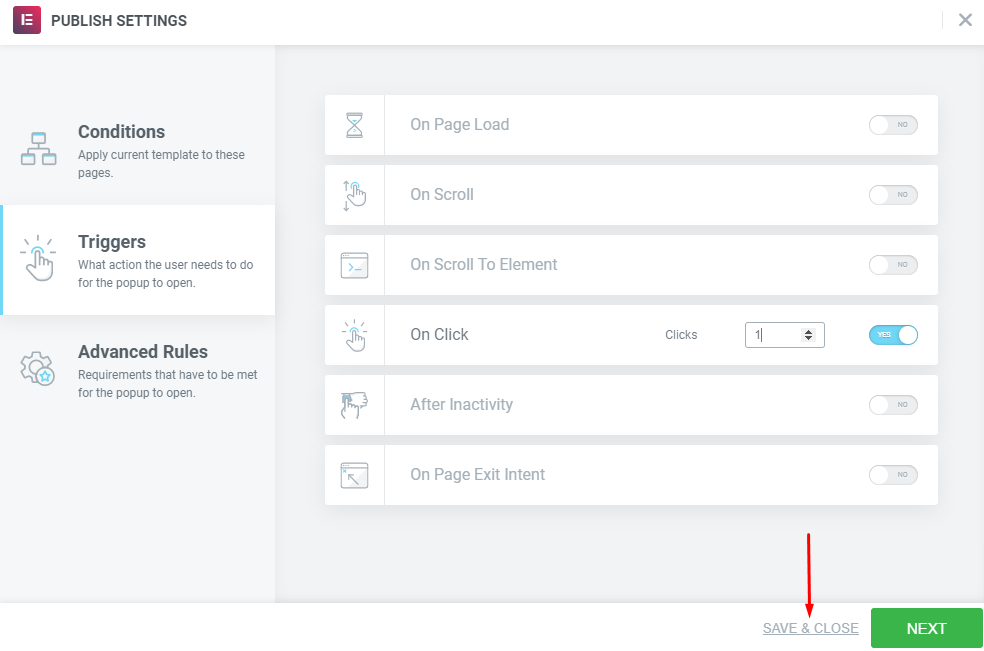
- Triggers: A trigger is an action to show the popup. Elementor supports 6 trigger types: On Page Load, On Scroll, On Scroll To Element, On Click, After Inactivity, On-Page Exit Intent.
- Advanced Rules: The requirements need to be met for the popup to appear. For instance, you can set the popup to appear if a visitor comes to your website via a search engine or certain UR. Elementor Popup Builder itself has 7 advanced rule options you can set choose from.
If you want to display the popup when a user clicks a button, open the Triggers tab and activate the On Click option. Then click Save & CLOSE.
Step 04: Link the Popup to a Page
Create a new page/post and edit it with Elementor (you can also edit an existing one).
- Add a Button widget by dragging it from the left panel to the canvas area. Or, if you are editing an existing page that already contains a button, click the Button widget to turn it into an editing mode.
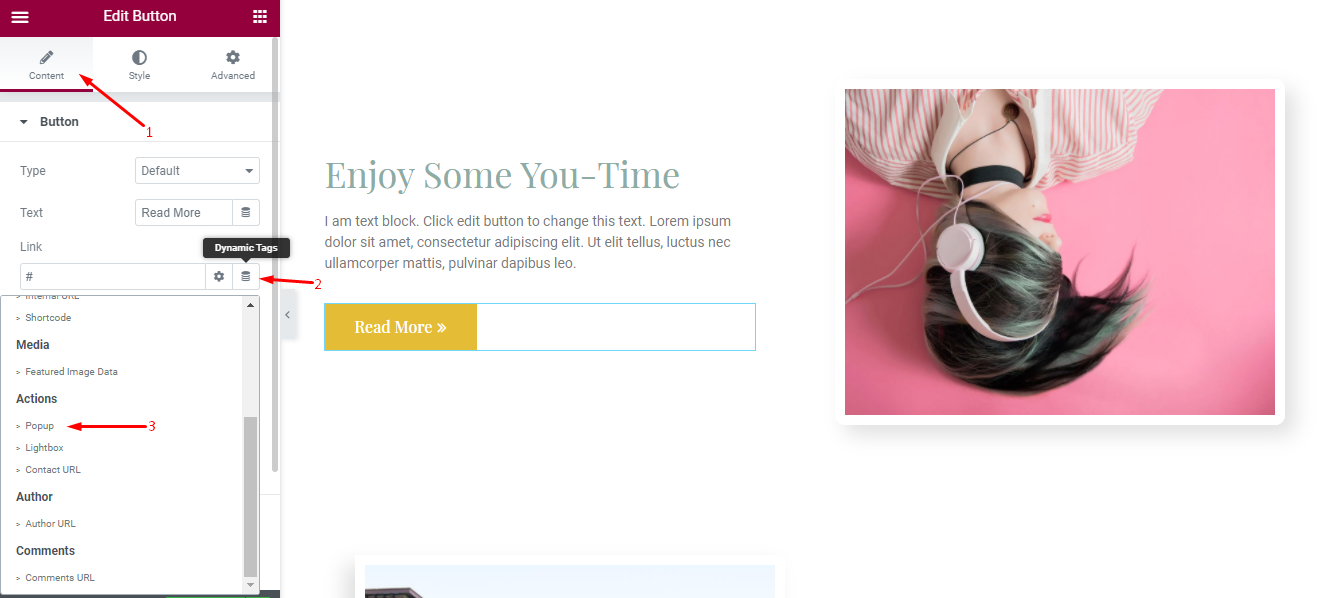
- On the Button option under the Content tab, set the link to Popup. To do so, you can click Dynamic on the Link section.
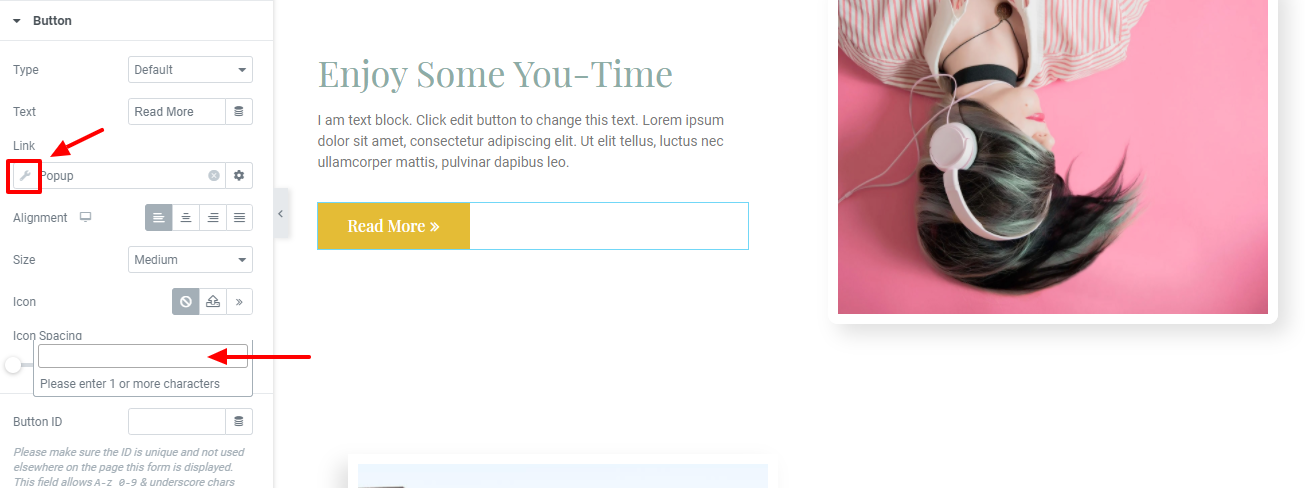
- Click the wrench icon on the Popup field and select the popup you have just created. Type the popup name to find your popup.
Click the Publish/Update once done editing the page.
Before clicking the Publish/Update button, you can preview your page first to see if the popup already works.
How to Use Elementor Advanced Features

In this section, we will focus on mainly two different topics. They are,
- How to Customize WooCommerce Product Page in Elementor
- How to Import an Elementor Template from a JSON File
So let’s get the ball rolling.
How to Customize WooCommerce Product Page in Elementor
Before you can customize your WooCommerce product page, you’ll need to install and activate WooCommerce to your WordPress dashboard. You’ll also need to add a few products to your website. For doing that, you can seek help from this WooCommerce setup (step-by-step) guide.
After setup, you can design your product page. Follow these steps.
Step 1: Create the Single Product Template
- In your WordPress dashboard, go to Elementor > My Templates.
- Click on the Add New button.
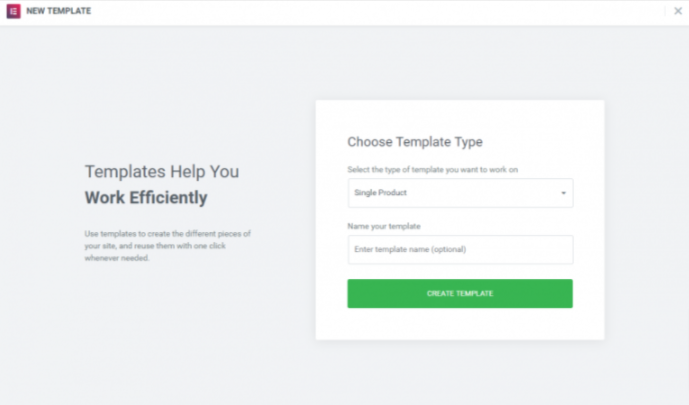
- Choose Single Product as your template type and click Create Template.
Step 2: Choose a Pre-Designed Product Page Template, or Build One from Scratch
- The Elementor Library will load.
- Next, choose a pre-designed product page template, or build one from scratch.
- If you choose a premade product page template, customize it as per your designing skills (Now you have the experience to customize a design as we have shown how to customize a page right before this section).

Step 03: Add Different Product Widgets to Customize Your Page
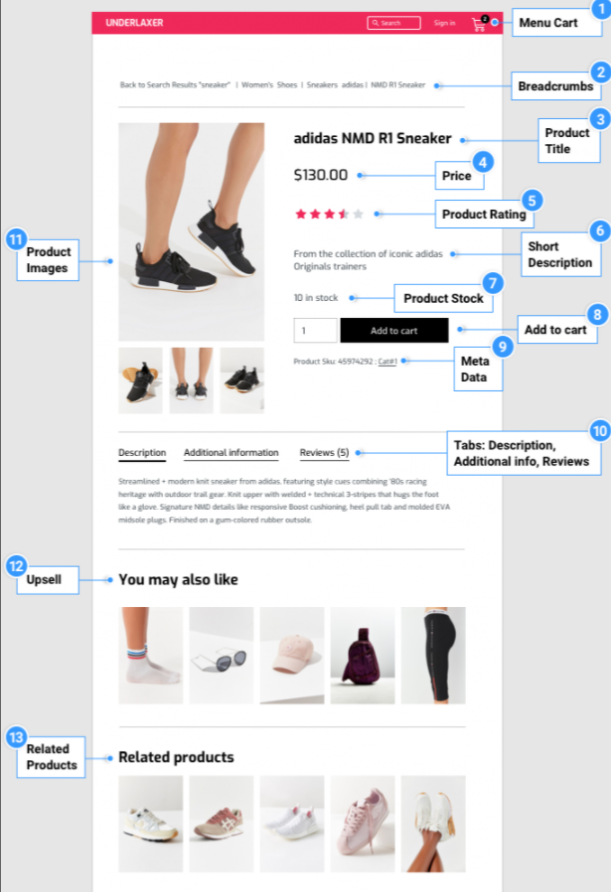
- Now, it’s time to build the elements that will make up your product page. Follow the below screenshot to design your product page. You can add or remove any widget that you need.
Step 04: Publish the Page
- When you’re ready to preview your page, click on the eye icon on the bottom left panel.
- Click Settings, then choose the product you want to display.
- To publish your page, click the green Publish button on the bottom left panel.
It might look like the below image.

How to Import an Elementor Template from a JSON File
Elementor allows you to import a template from a JSON file. To let you do this, there are two ways available out there. Let’s learn how they work!
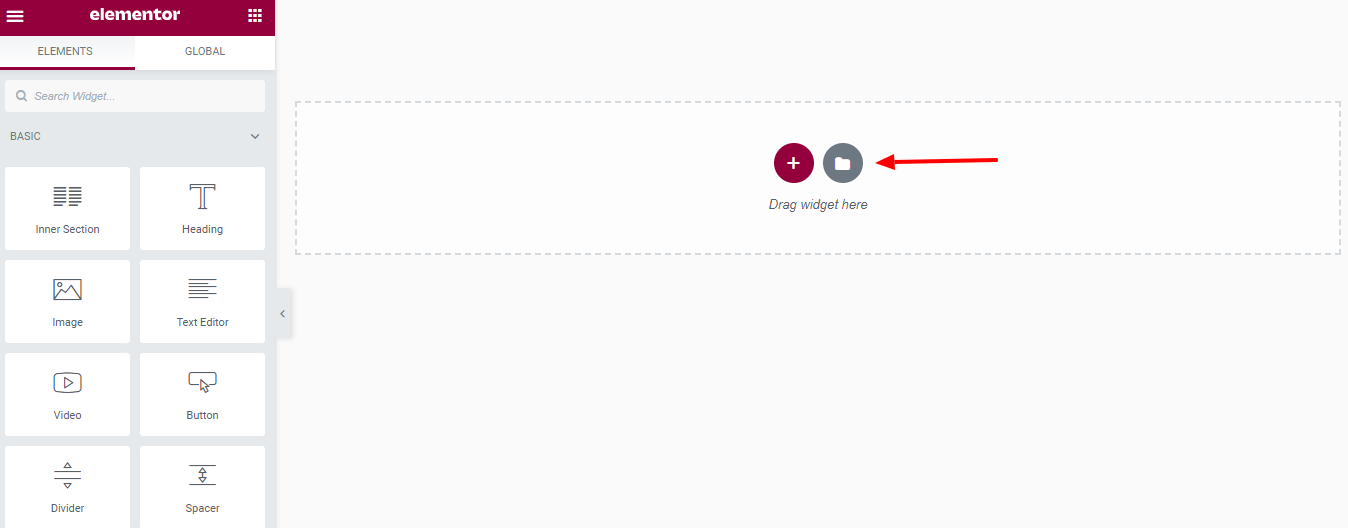
1. Via Template Library
- Click on the Add Template button.
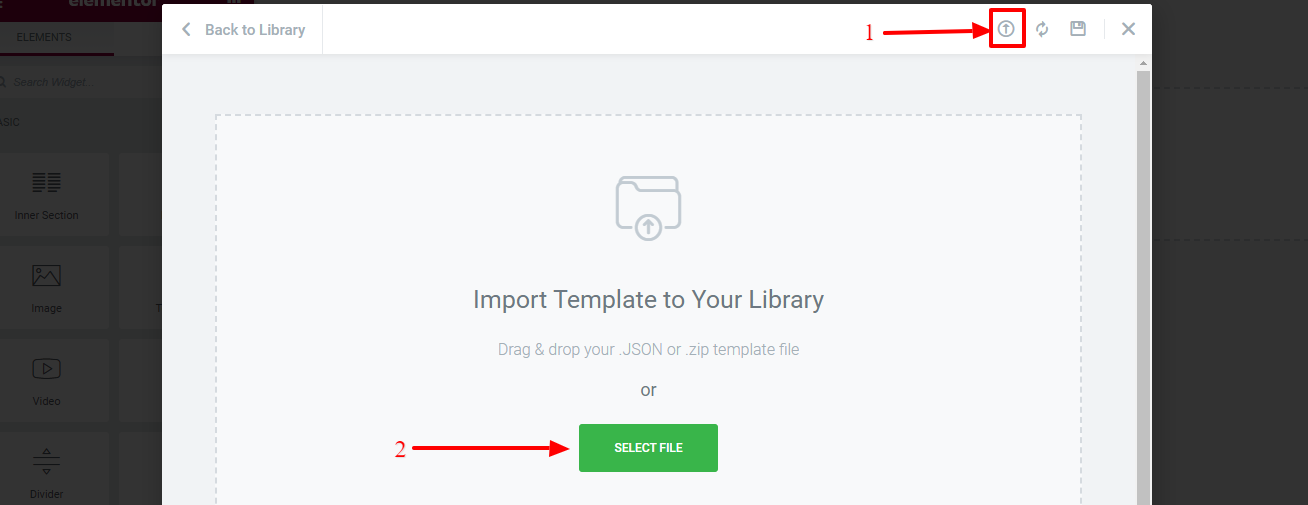
- Click on the arrow icon – Import Template.
- Now, click the SELECT FILE button to select the JSON file you want to import.
- You can find the template you have just imported on the My Templates tab on the template library.
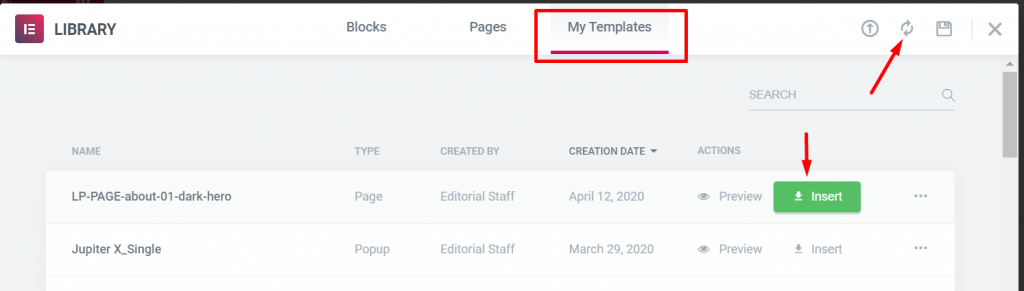
Reload the template by clicking the reload icon if the template you have just imported doesn’t appear. Hover your mouse over a template and click the Insert button to load it to the Elementor canvas.
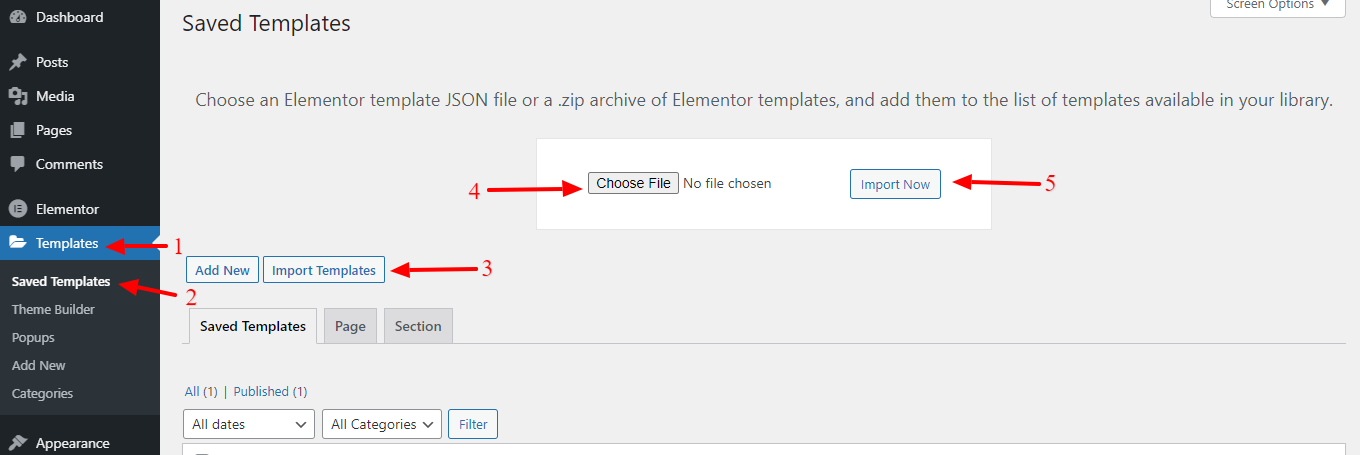
2. Via Template Manager
- From your WordPress dashboard, go to Templates > Saved Templates.
- Click the Import Templates button.
- Then clink on the Choose File button to select the JSON file.
- Finally, click the Import Now button to import it.
These are the two ways to import an Elementor template from a JSON file. You can choose either of the ways to get your job done.
Pros and Cons of Using Elementor Page Builder in Your WordPress Site

It’s obvious that everything has its dark side as well. But in terms of Elementor, it’s not actually the dark side. Instead, we can say it has some limitations that could be improved over-times. What are those?
Well, before that, let’s check its pros at a glance.
Pros of Using Elementor in WordPress
- It’s a free plugin! Most users can fully build out their sites without having to upgrade to the pro version.
- For a free plugin, it has a very wide range of features. The feature set on the free version rivals a lot of paid plugins.
- The real-time editor allows you to make changes to your site and see what’s happening in real-time, so you don’t have to keep going back and forth between multiple screens.
- You can edit and view multiple versions of your site, desktop, mobile, and tablet, and make unique changes to each of these versions.
Cons of Using Elementor in WordPress
- Elementor is a powerful editor, but with all the flexibility and customization options, it can be hard to get everything right.
- Sometimes your pages might have layers of different content overlays and it can be difficult and time-consuming to find the area you want to edit.
- If you build your site using Elementor, you’ll need to keep the plugin installed, otherwise you’ll lose all your designs and customizations you’ve made.
Top 3rd Party Elementor Addons to Enhance Your Design

Third-party addons are the powerhouse of Elementor. Despite Elementor offering 80+ Fantastic Elements, it is very possible that you may want something even more advanced & unique. This is exactly why third-party developers have decided to expand the Elementor functionalities & develop their own Elementor Addons.
Apart from that, you will be getting many special-purpose elements with the add-ons, for example, advanced pricing, team, social elements, creative elements, form styling elements, countdown, etc.
As a result, Elementor now officially recognizes them as its contributor by presenting them on Elementor’s official page. Among them, here is a list of the top 3rd-party Elementor addons that you can use while designing your WordPress website.
- Happy Addons: Comes with 100+ widgets, and 200+ blocks so that you can get the full freedom to design your website in less time and with less budget.
- Premium Addons for Elementor: It offers 55+ highly customizable Elementor essential addons and widgets, 300+ premade Elementor templates that help you to design a website in less time with ease.
- Exclusive Addons for Elementor: A collection of 700+ premade blocks and 10+ useable templates will help you build your websites in less time with no coding.
- PowerPack for Elementor: It offers 60+ creative Elementor widgets and extensions to enhance your Elementor experience.
These addons give you the opportunity to strengthen your website design with its amazing features & layouts. Besides, you can create a special vibe by using the Elementor extensions.