How to Convert JPG to PNG or Any Other Format Using anyPic.tools
However, not all image formats are created equal. Whether you need a transparent background with PNG, a compressed file size with JPG, or another format entirely, converting images is a common task.
Why Convert JPG to PNG?
Before diving into the how-to, let’s briefly explore why you might need to convert a JPG to a PNG or another format. JPG (or JPEG) is a widely used format known for its small file size, making it ideal for websites and emails. However, it uses lossy compression, which can degrade quality over time, and it doesn’t support transparency. On the other hand, PNG is perfect for high-quality images, crisp text, and transparent backgrounds features that are essential for logos, graphics, and professional designs.
With anyPic Tools, you’re not limited to just JPG to PNG conversions. The platform supports over 100 formats, giving you the flexibility to adapt your images for any purpose whether it’s optimizing for web use, preparing files for print, or meeting specific project requirements.
Step-by-Step Guide to Converting JPG to PNG with anyPic Tools
anyPic Tools is an intuitive online tool that combines ease of use with powerful customization options. Here’s how you can convert your JPG files to PNG (or any format) in just a few steps:
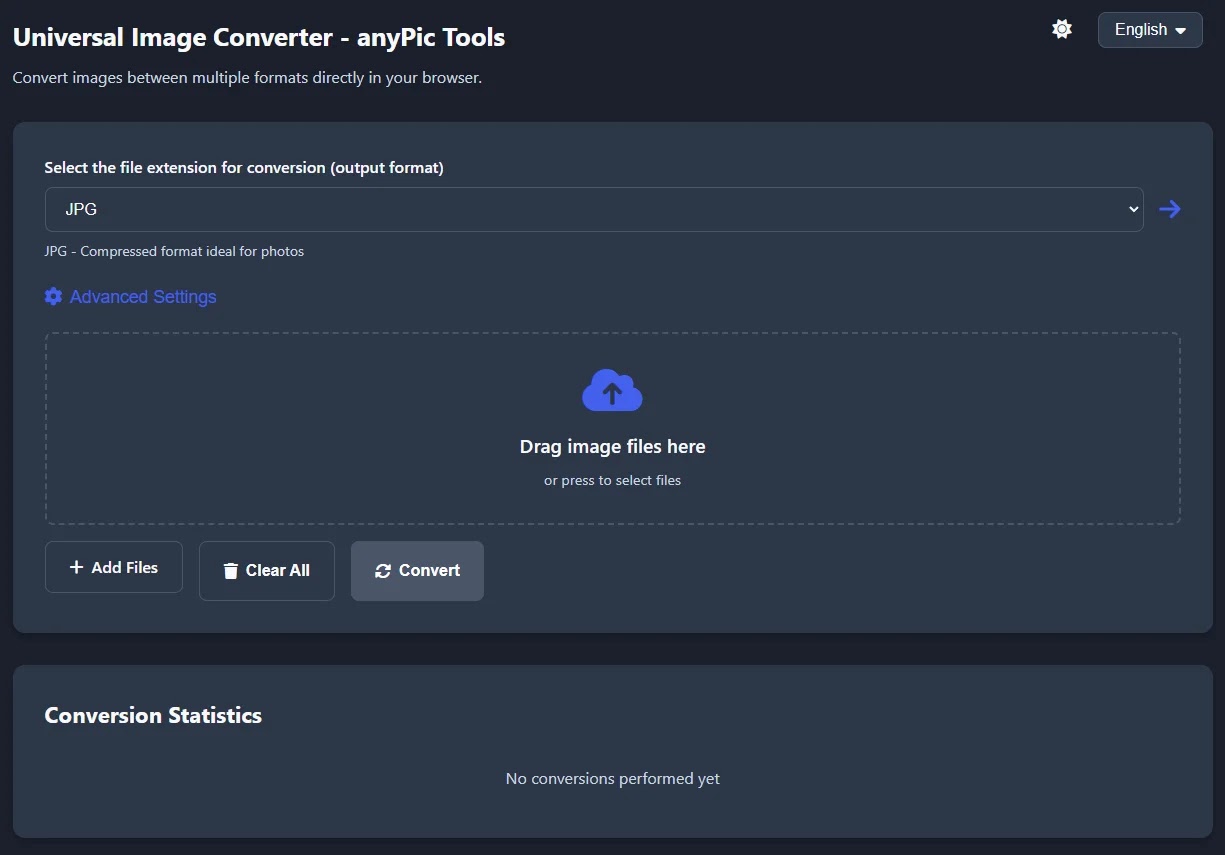
Step 1: Upload Your JPG Files
Start by visiting the anyPic Tools website. Once there, you’ll see a straightforward interface designed for quick uploads. You can:
- Click the upload button to select JPG files from your computer.
- Drag and drop one or multiple JPG files directly onto the page.
This flexibility is great for batch processing perfect if you’re working with several images at once. Whether it’s a single photo or an entire folder of graphics, anyPic Tools handles it seamlessly.
Step 2: Customize Your Images (Optional)
What sets anyPic Tools apart is its suite of advanced editing options, available right within the conversion process. Before converting, you can tweak your images to perfection. Here are some of the standout features:
- Quality Control: Adjust the output quality on a scale from 1 to 100. Higher values preserve details, while lower values shrink file sizes ideal for SEO and faster web loading times.
- Resize Options: Change the width and height of your image. The automatic aspect ratio lock ensures your image doesn’t distort, saving you time on manual adjustments.
- Rotation: Rotate your JPG by 90°, 180°, or 270° to fix orientation issues or match a specific layout.
- Precise Cropping: Use the WxH+X+Y format (e.g., 500x300+50+20) to crop with pixel-level precision.
- Image Filters: Apply effects like blur, sharpen, or grayscale to enhance your visuals.
- Brightness, Contrast, and Saturation: Fine-tune these settings (from -100 to 100) to correct exposure, boost visual impact, or adjust color vibrancy.
- Watermark Tool: Add text watermarks with customizable positioning (center, top, bottom, etc.), perfect for branding or copyright protection.
These tools eliminate the need for separate editing software, streamlining your workflow while ensuring professional results.

Step 3: Select Your Output Format
Once your JPG is uploaded and customized, click the “Convert” button. A dropdown menu lets you choose PNG as your output format or pick from over 100 other options, such as GIF, BMP, TIFF, or WEBP. This versatility makes anyPic Tools a one-stop solution for all your image conversion needs.
Step 4: Convert and Download
After selecting PNG (or your preferred format), hit “Convert” again and wait a few seconds. The processing time is lightning-fast, even for multiple files. Once done, your converted images are ready to download. Simply click the download link, and your new PNG file(s) will be saved to your device.
Tips for Optimizing File Size and Quality
For web users, file size is a critical factor in SEO and page load speed. anyPic Tools makes it easy to strike a balance between quality and compactness:
- Reduce File Size: In the Advanced Settings, lower the Quality setting to 80-90%. This compresses the file without noticeable quality loss, making it ideal for online use.
- Choose the Right Format: PNG is great for transparency and quality, but if file size is your priority, stick with JPG or explore WEBP for even better compression.
By optimizing your images this way, you improve user experience and boost your site’s search engine rankings a win-win!