How To Use Yoast SEO on WordPress: Complete Tutorial

Every WordPress site needs a Search Engine Optimization SEO plugin. This is how you’ll stand a chance of getting your pages to show up in search engine rankings. And when it comes to SEO plugins, Yoast SEO is by far one of the most popular options. However, WordPress SEO is unavoidably a complex topic.
Fortunately, to address that, Yoast SEO has plenty of built-in features to give you pinpoint control over your site’s SEO. Plus, we’re here to guide you through all the main sections to make SEO a little less daunting.
In this post, we’ll share a beginner’s guide to Yoast SEO, covering first-time tips and basic settings. Then, we’ll move on to a more advanced Yoast SEO guide, including the use of meta-variables, schema settings, and more. Let’s get started!
https://www.rtl-theme.com/blog/seo-wordpress/
The Beginner’s Guide To Yoast SEO
In this section, we’ll cover what you need to know if you’re new to Yoast SEO. You’ll learn:
- How to properly enter information in the configuration wizard
- What the Yoast SEO meta box is and how it works
- What you can do from the Yoast SEO dashboard
Then, in the next section, we’ll get into some of the more advanced Yoast SEO settings.
Take a deep dive into how you can use Yoast to boost your WordPress site's SEO. 👍
Using The Yoast SEO Configuration Wizard
After installing Yoast you can access the dashboard by clicking on the new Yoast SEO tab in your WordPress admin area.
If this is your first time using the plugin, you should see a big notice where you can click on Start first-time configuration:
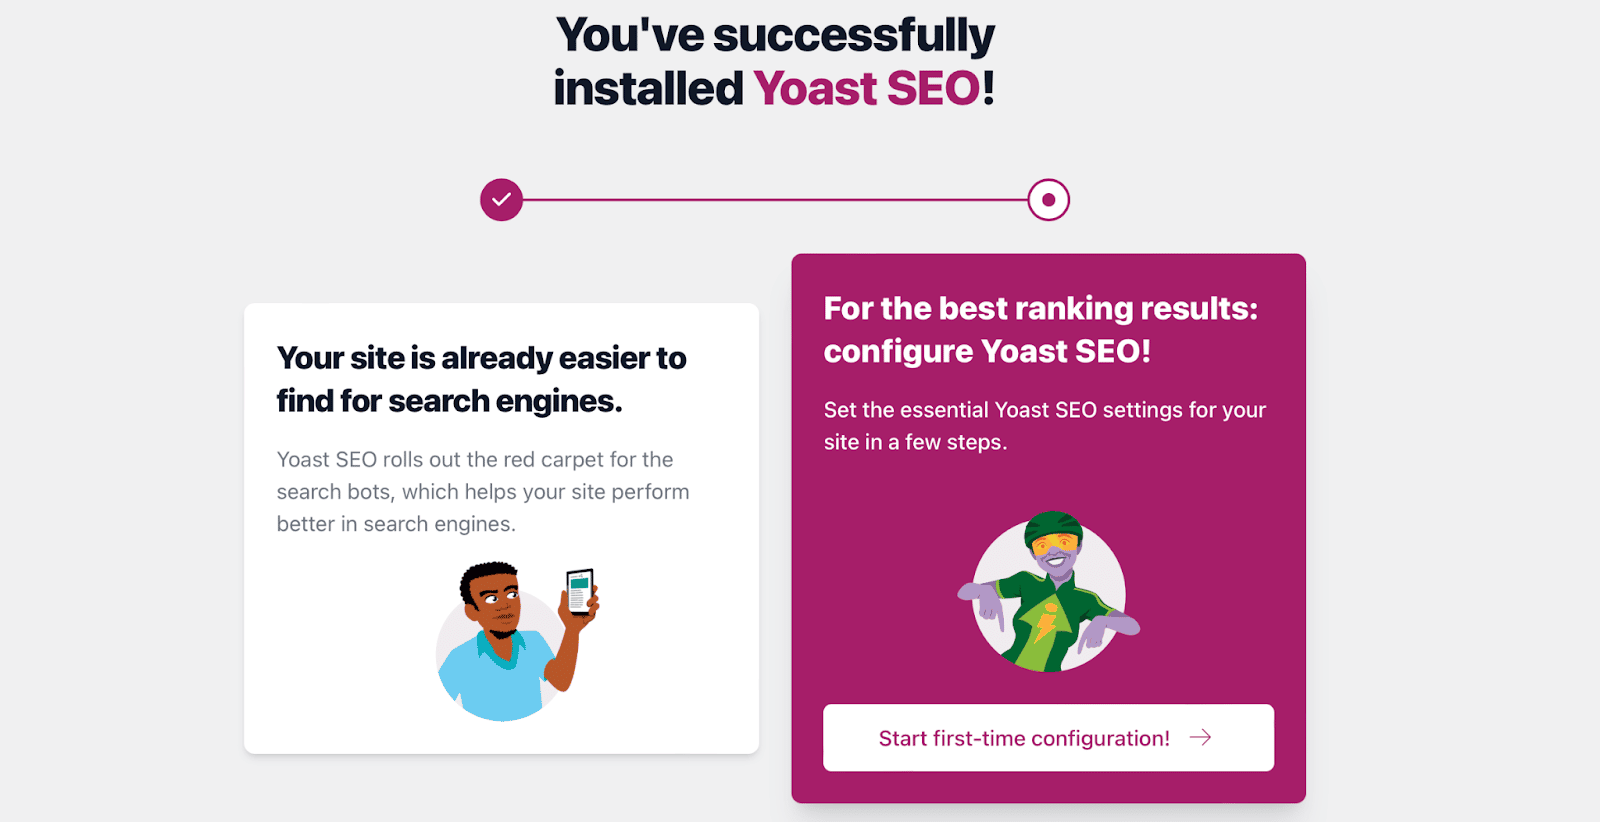
By clicking the configuration wizard button, you can start configuring Yoast SEO on WordPress so that Google can better understand your content.
Below, we’ll take you through the main sections in the configuration wizard.
Section 1: SEO Data Optimization
In the SEO Data Optimization area, you can use Yoast’s indexables to immediately improve any technical issues on your site. It works similarly to the way Google analyzes your site. Although, if you have a lot of content, this can take a little while:
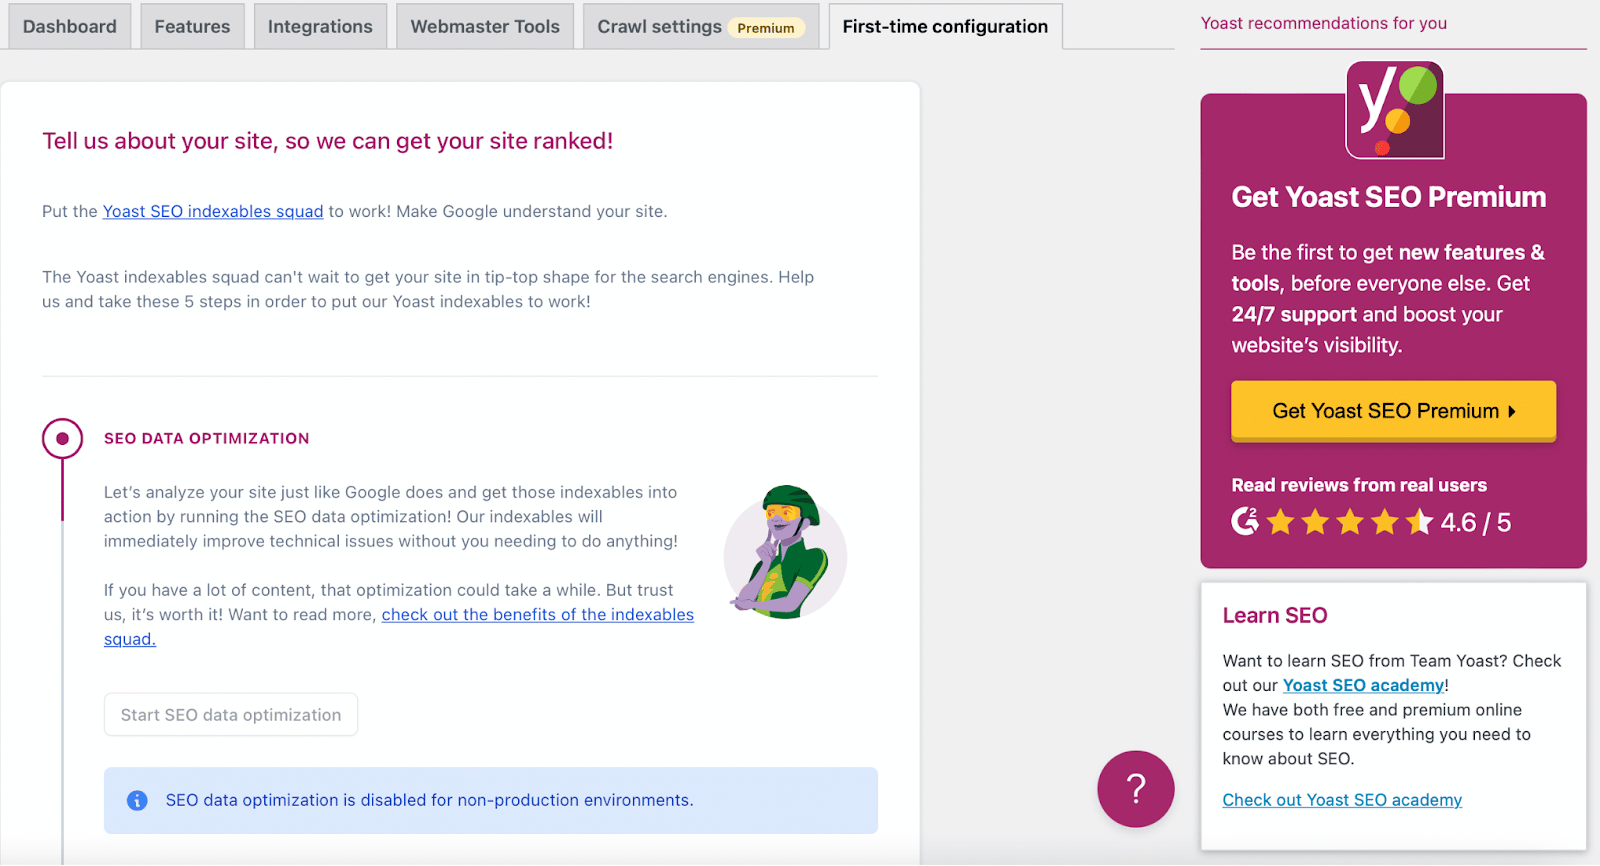
However, it’s important to note that this setting is only available to production environments. Therefore, if your website is a non-production environment, you’ll simply need to click on Continue.
Section 2: Site Representation
In the Site Representation section, choose the type of site that best matches yours. If your site represents a person, use the dropdown menu to specify the user. If your site represents an organization, enter the company name:
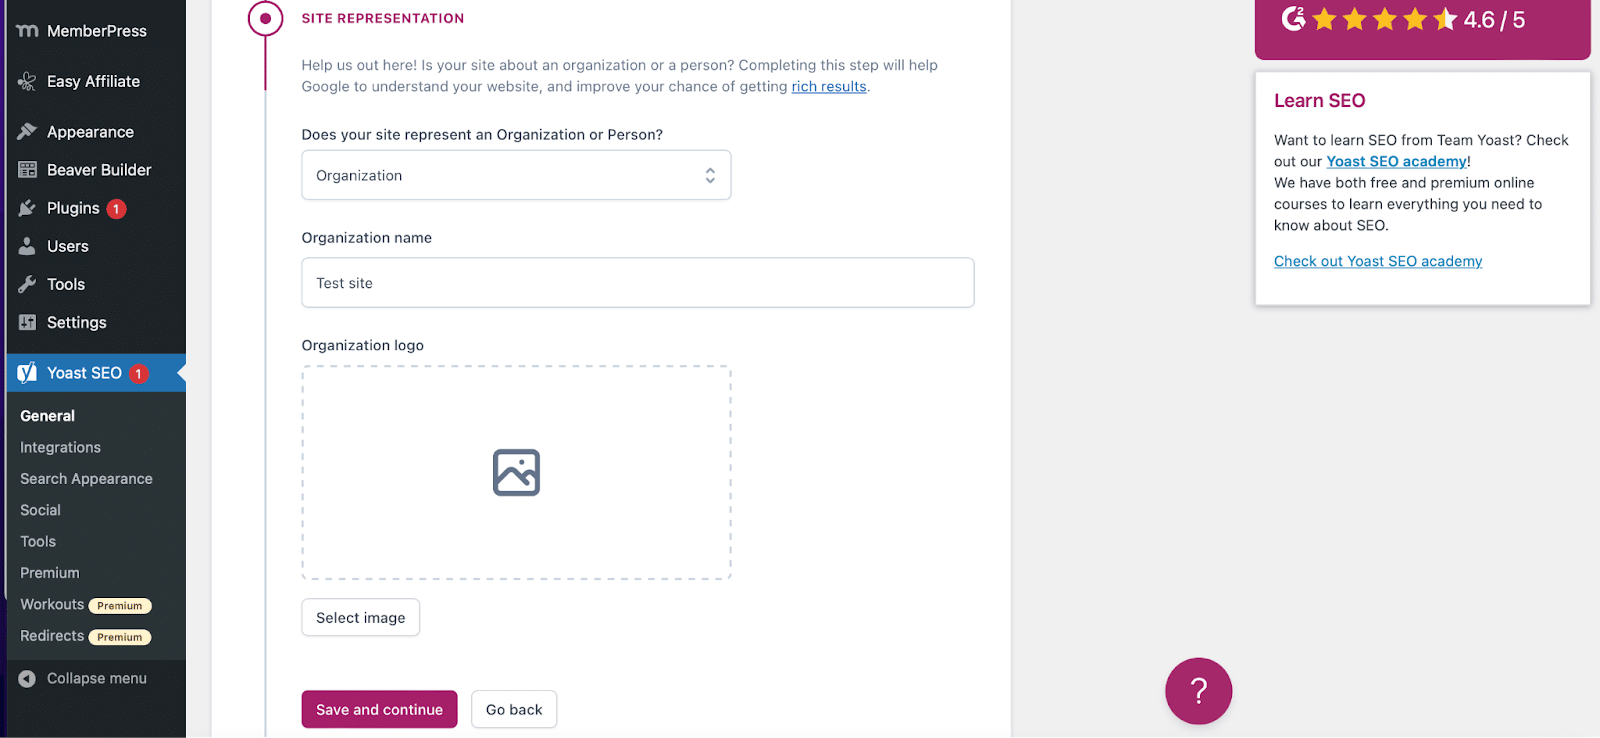
Further down, you’ll be able to upload a company logo from your Media Library or computer. This will need to be 112x112px at a minimum. We’d also recommend opting for a square-shaped image.
Then, hit Save and continue to proceed.
Section 3: Social Profiles
Next, you can enter all of the social media profiles for your website. If you’re creating a website for an organization, this will be your organization’s social media profiles:
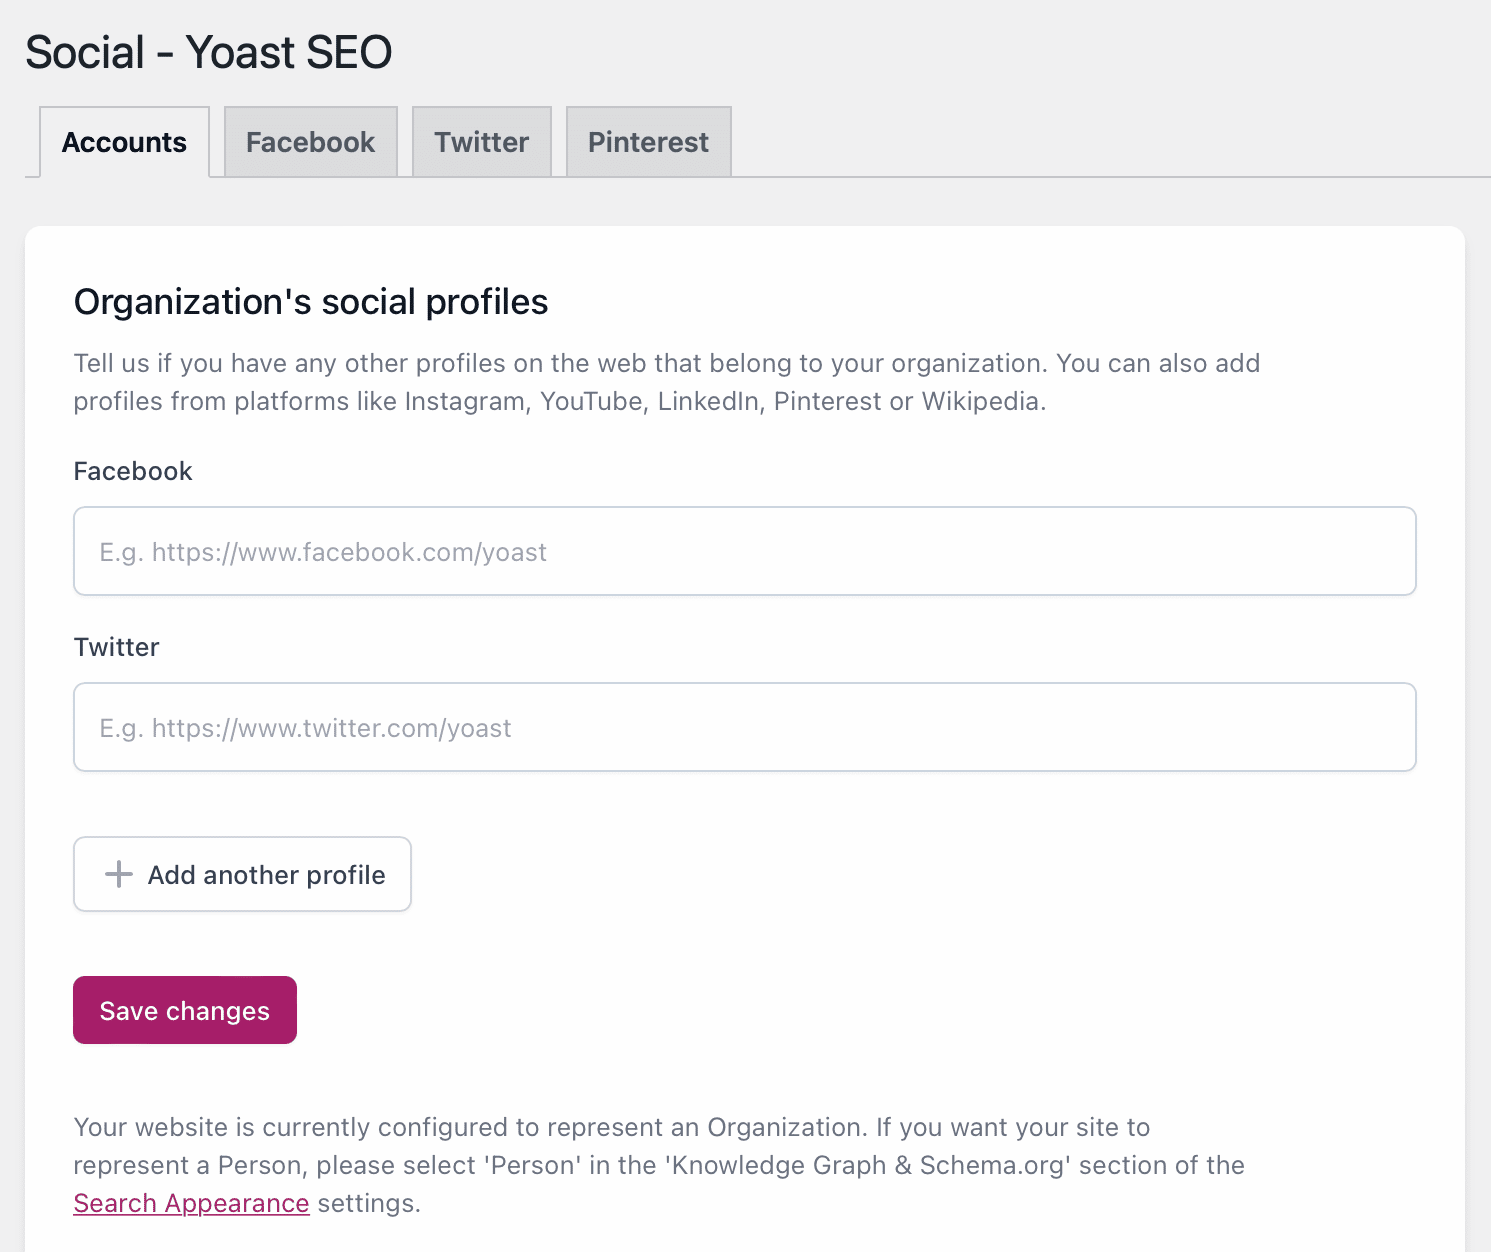
If you’re a single user, you can edit the details, like the social profiles, the name, and the description of the user on your WordPress profile page.
You don’t need to enter all of them – just choose the social media profiles that you actively want to promote.
Section 4: Personal Preferences
In the Personal Preferences section, you can determine whether you want Yoast SEO to track your website data:
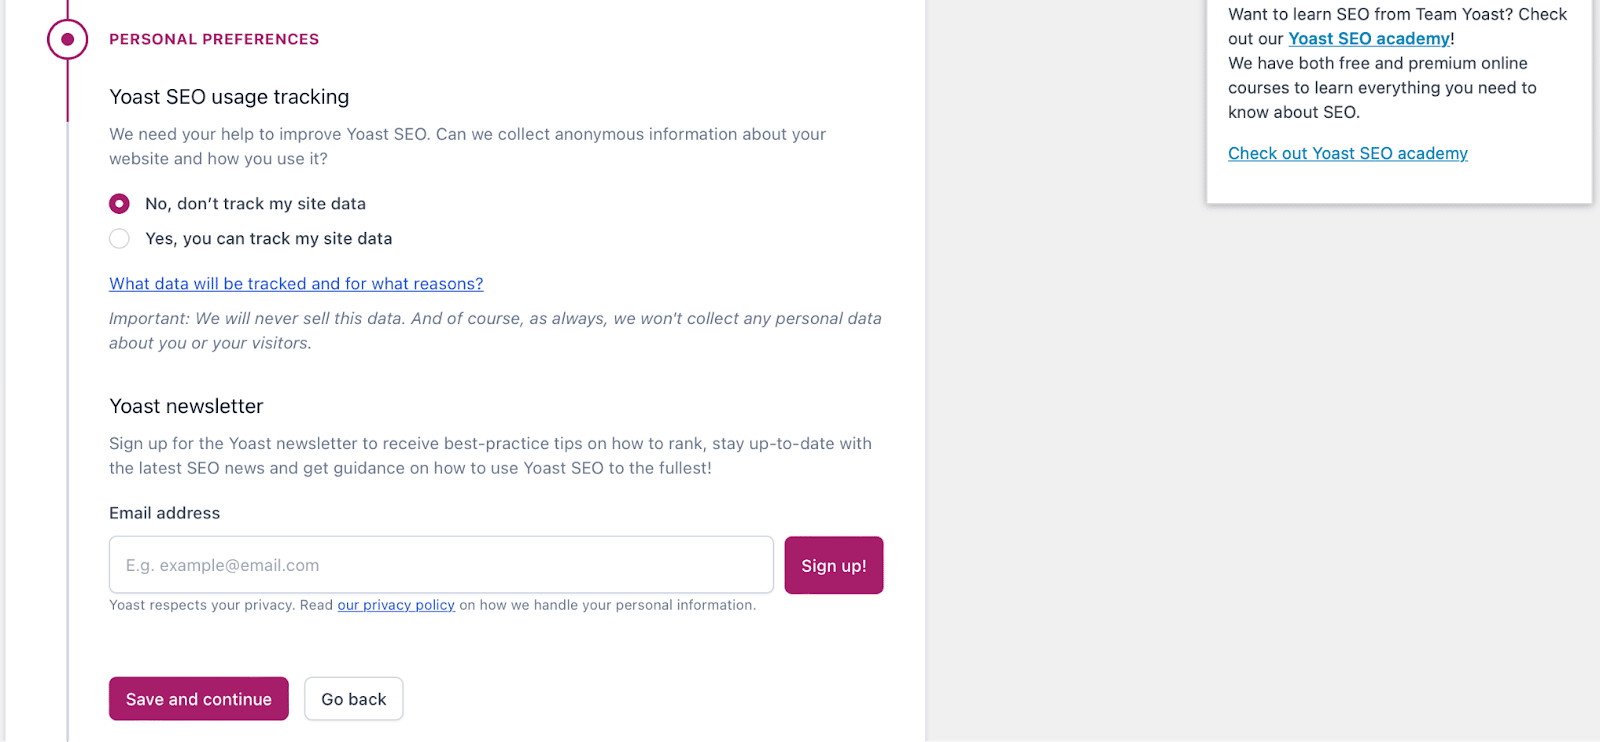
You can also subscribe to the Yoast newsletter if you want.
Section 5: Finish Configuration
Lastly, you’ll need to finalize your Yoast SEO configuration. Here, you can also register for Yoast’s free weekly webinar.
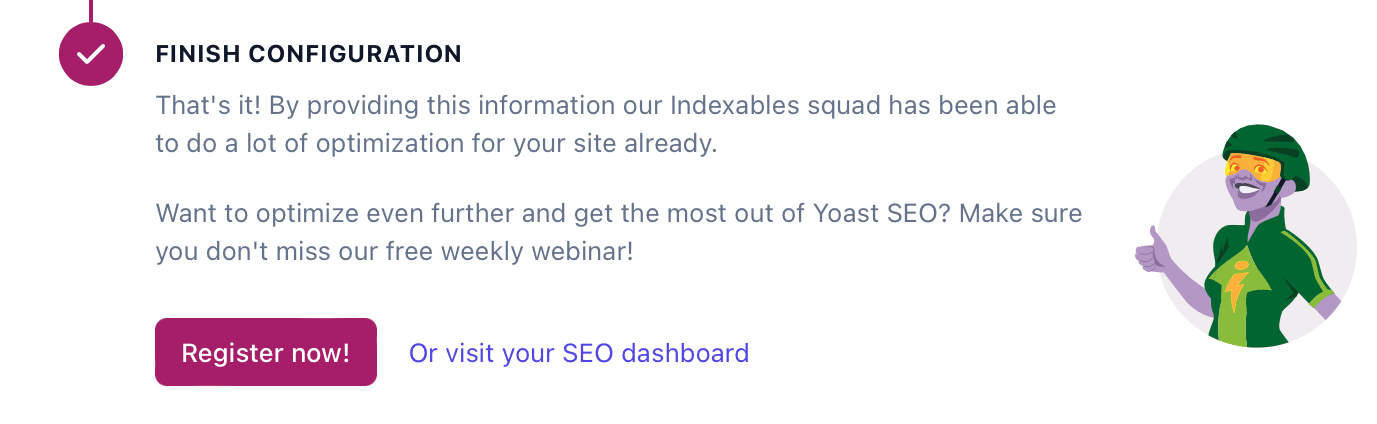
Congratulations – you just configured Yoast SEO! Now, you can follow the link to land right in your new Yoast dashboard.