How To Use WebP Images on WordPress
Starting with WordPress 5.8, you’ll be able to use the WebP image format the same way as JPEG, PNG, and GIF formats. Just upload your images to your Media Library and include them in your content. As WordPress 5.8+ supports the WebP format by default, you don’t have to install third-party plugins to upload WebP images. That should suffice for most common use cases.
To get started immediately, you can refer to our quick primer on using WebP images in WordPress 5.8+. We suggest you go through the caveats about WebP support in WordPress.
However, around 5% of people (mainly Safari users on older macOS) use a web browser that doesn’t support WebP. If you convert WebP images and use them directly in your content, those visitors wouldn’t be able to see your images, which would ruin their browsing experience.
Also, generating WebP images isn’t as straightforward as getting a JPG/JPEG image, which is the default image file format on most cameras, smartphones, and online image libraries. WordPress doesn’t support automatic image conversion to WebP format (yet!).
Don’t fret! There’s a solution.
You can use a WordPress plugin that converts your original images to the WebP format and also provides the original image as a fallback if a visitor’s browser doesn’t support WebP.
For example, if you upload a JPEG file to your site, the plugin will:
- Convert the JPEG file to WebP and serve the WebP version for Chrome, Firefox, Edge, etc.
- Show the original JPEG file to visitors browsing with Safari (on older macOS versions) and other browsers that don’t support WebP.
That way, everyone can see your image, and everyone gets the fastest experience possible.
Below, we’ll go through some of the best WebP WordPress plugins, all of which work with Kinsta and the Kinsta CDN.
Info
Kinsta’s Image Optimization Feature
This first one isn’t exactly a plugin, but rather a built-in feature: Kinsta’s Image Optimization.
This feature — accessed through Kinsta’s custom dashboard, MyKinsta — automatically creates optimized WebP copies of your site’s original images, then serves up the smaller of the two image files to your visitors.
By always ensuring the smallest possible file is retrieved, Image Optimization immediately boosts loading times, which can greatly improve both your SEO results and your users’ experience. The feature takes direct advantage of Kinsta’s lightning-fast CDN to deliver the files even faster.
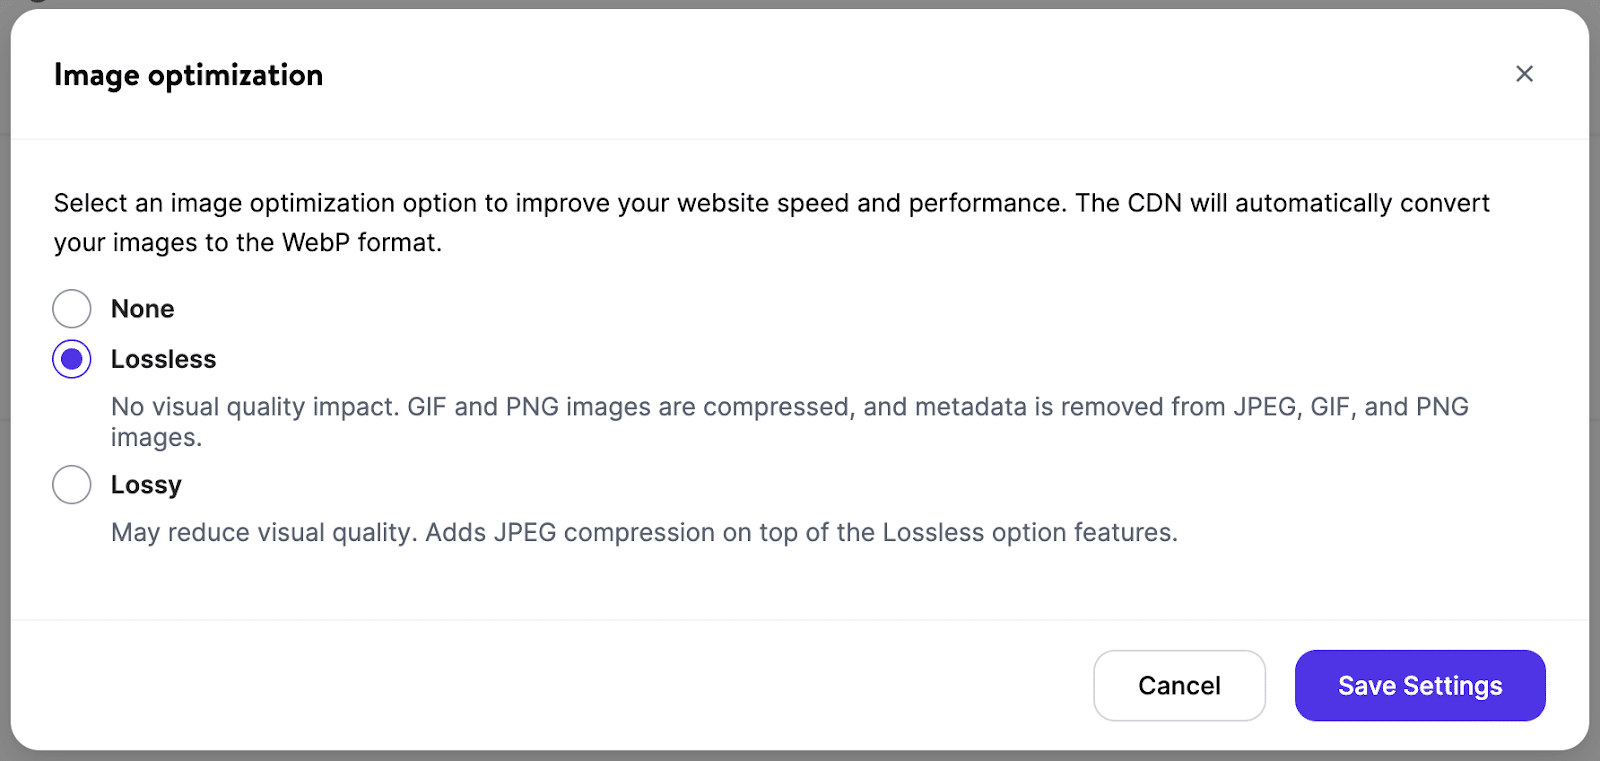
Site owners can choose between lossy and lossless compression for their WebP images, depending on their needs. Optimization can also be switched on or off at will if you need to do some testing.
The Image Optimization feature is completely free for all Kinsta customers. Here’s how to enable it:
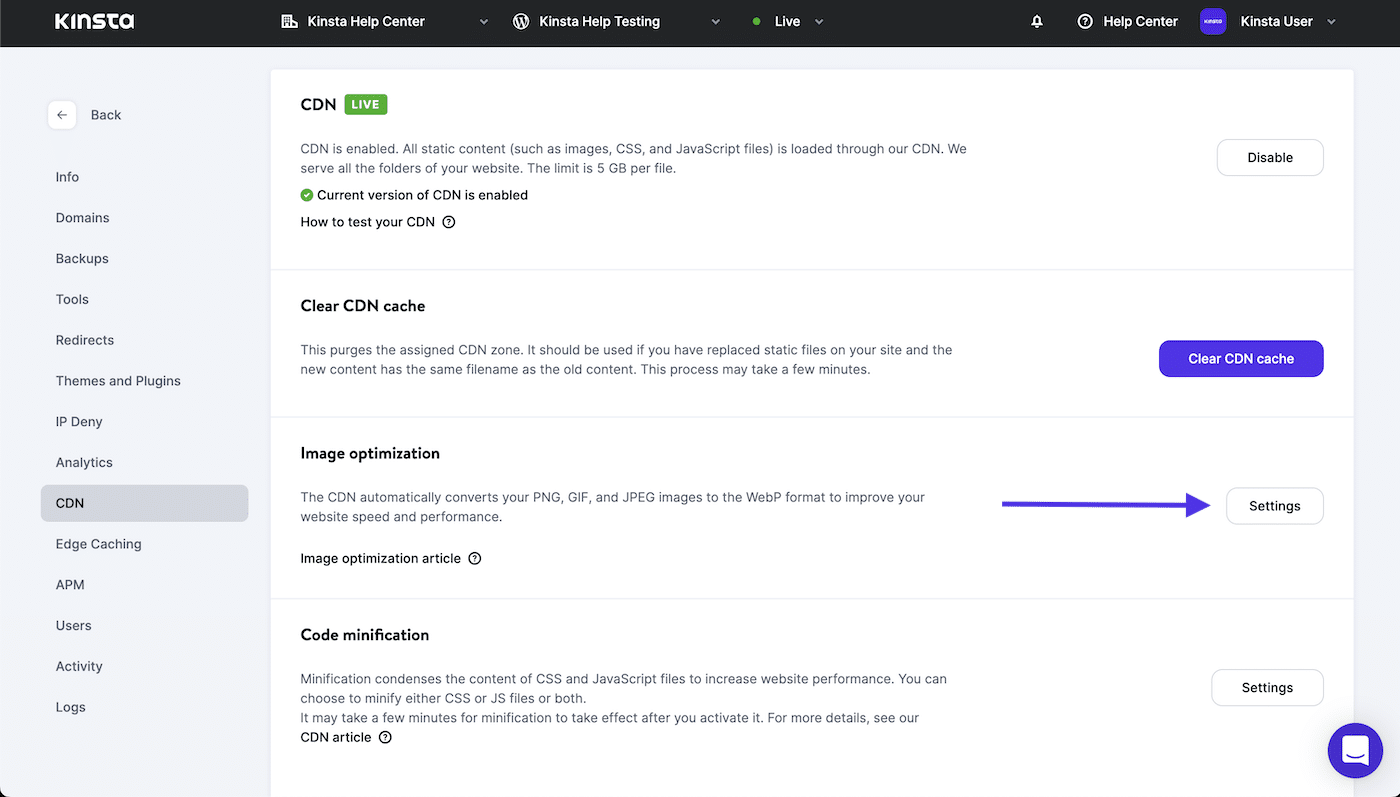
- Upload your images to your Kinsta-hosted WordPress media library.
- Sign in to your MyKinsta dashboard.
- Navigate to WordPress Sites > sitename > CDN.
- Click on the Settings button under the Image optimization section.
- Choose between lossless and lossy compression, then click Save Settings.
If you’re not already on the Kinsta platform, you can give the feature a try yourself at no cost by scheduling a demo.
Lossless vs Lossy Compression
You can choose between lossless and lossy compression for your files. Although both methods will compress your image files and remove their metadata, there’s a big difference between them:
- Lossless Image Optimization: Lossless image compression has zero impact on the quality of your images. You should pick this option if image quality is more important to you than speed.
- Lossy Image Optimization: Lossy image compression might reduce the quality of your images. Pick this option to maximize and prioritize speed over image quality.
Next, we’ll look at some installable WordPress plugins for optimization.
ShortPixel
ShortPixel is a popular WordPress image optimization plugin that can help you automatically resize and compress the images you upload to your WordPress site.
As part of its feature list, ShortPixel can also help you automatically convert images to WebP and serve those images to browsers that support it.
ShortPixel counts each WordPress image size that you optimize as a credit. So if you want to optimize multiple image thumbnail sizes, one image could conceivably use numerous credits. There are no file size limits for images.
You can spread your ShortPixel credits over unlimited websites – there are no per-site limits (and all your websites can use the same ShortPixel account).
To use ShortPixel to serve WebP images on WordPress, you’ll need to install the plugin from WordPress.org and add your API key (which you can get by registering for a free ShortPixel account).
In the General tab, you can set up basic settings for how image optimization works. For example, what compression level to use and whether or not to resize images:
To enable WebP images, go to the Advanced tab and:
- Check the box for WebP Images
- Check the box to Deliver the WebP versions… (this appears after you check the first box)
- Select the radio button for Using the <PICTURE> tag syntax (this appears after checking the previous box)
- Leave the default Only via WordPress hooks selection
Then, save your changes.
If you’re hosting at Kinsta, ShortPixel will give you a warning message about configuring server config files on Nginx. To configure these settings, you can reach out to Kinsta support, and we’ll be happy to set up the server configuration for you.