How To Enable Secure Boot In Asus BIOS
If we attempt to install Windows 11 or if we use Microsoft PC Health Check or other third-party software to determine whether the current computer is capable of running Windows 11 there is a potential that this will occur. Windows 11 cannot be set up on this computer. The PC must be capable of Secure Boot. How is Secure Boot implemented? How can I fix the Secure Boot must be supported by the PC error?
How to enable Secure Boot?
We can enable Secure Boot using the motherboard’s BIOS. Different motherboard and computer manufacturers have slightly different methods for activating Secure Boot. In this post, we’ll show you how to enable Secure Boot on laptops from Lenovo, Dell, and HP as well as motherboards from MSI and asus bios secure boot. If your computer or motherboard is made by a different company, check the user manual, contact the manufacturer, or conduct a web search on Google or Bing to get the pertinent information.
How to enable Secure Boot on MSI motherboard?
- Press the Delete key or F2 repeatedly after the machine turns on to bring up the BIOS configuration screen.
- Go to Security under Preferences.
- Set the Secure Boot setting to On.
- Pressing F10 prior to a reboot will save the current configuration permanently.
On earlier models, Secure Boot might be located in a different location; go under Advanced > Windows OS Configuration > Secure Boot > Secure Boot > Enable.
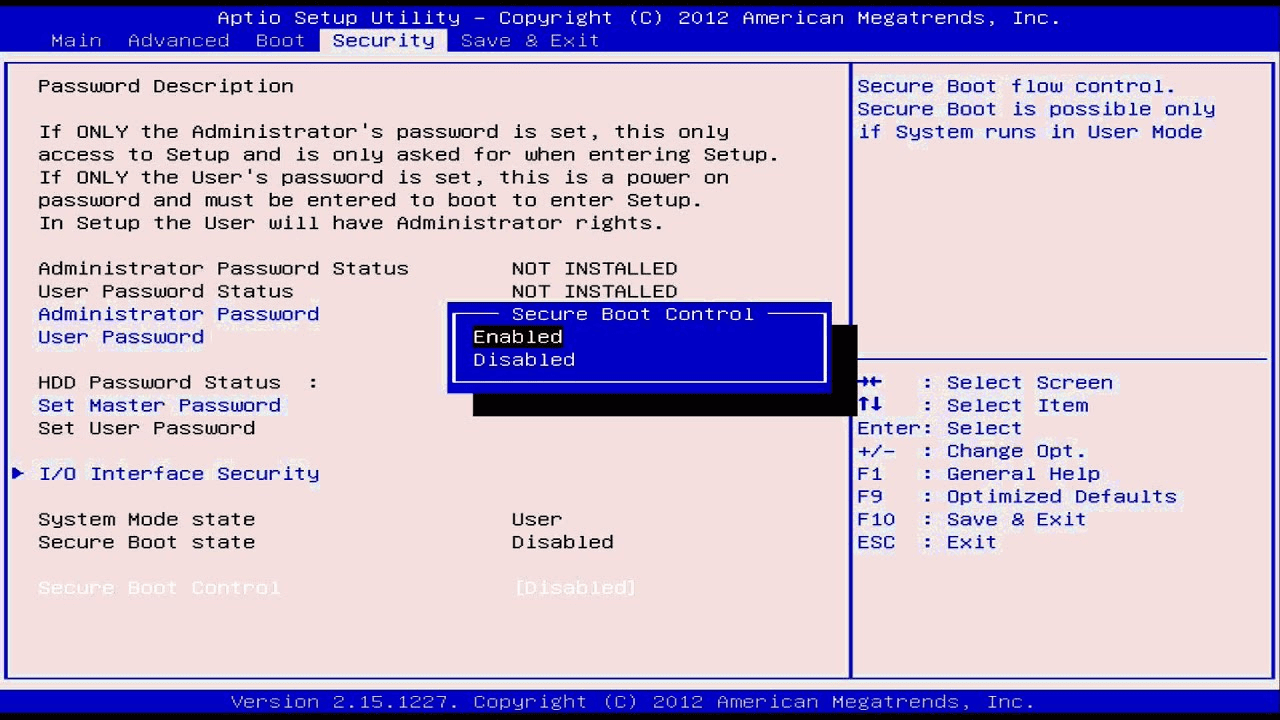
How to enable Secure Boot on ASUS motherboard?
- Turning on the laptop requires pressing the power button while holding down the F2 key. Release the F2 key when the BIOS screen has loaded.
- To access the advanced menu, press the F7 quick access key.
- Under Security, select Secure Boot.
Then select Secure Boot, and then select Enabled before clicking Save and Exit Setup.
How to enable Secure Boot on Lenovo laptops?
- after flipping the power switch on the computer
- Press F2 or Fn+F2 quickly to enter the system’s BIOS.
- To enable Secure Boot, select it from the Security menu.

How to enable Secure Boot on Dell laptops?
- To enter the BIOS after turning on the computer, press the F2 or F12 key.
- Select “Enabled” under “Secure Boot” after clicking “Boot”
- F10 will save and quit.
How to enable Secure Boot on HP laptops?
- Press the Esc key several times quickly to bring up the Startup Menu after turning on the machine.
- Select Advanced — Secure Boot Configuration after BIOS Setup (F10).
- By clicking the respective buttons in the Configure Legacy Support and Secure Boot window, adhere to the instructions to switch off Legacy Support and enable Secure Boot.
- After making changes, exit the editor