How I created this Custom Thermometer Widget in Flutter?
FlutterPulseThis article was translated specially for the channel FlutterPulseYou'll find lots of interesting things related to Flutter on this channel. Don't hesitate to subscribe!🚀
Simple and intuitive tutorial
I wanted to created a realistic thermometer for my Flutter projects. Here is what I made with step by step explanation of how I made it:
We will use primarily two features of Flutter while creating this widget:
1. Custom painting
2. Explicit animations
This widget is created in two main parts:
1. Thermometer Painter which will paint the thermometer.
2. Stateful widget which will animate the thermometer.
Let's begin now:
Part 1:
The thermometer painter has four main parts:
a. Thermometer body
b. Reading lines and numbers
c. Tube and liquid(mercury)
d. Temperature screen
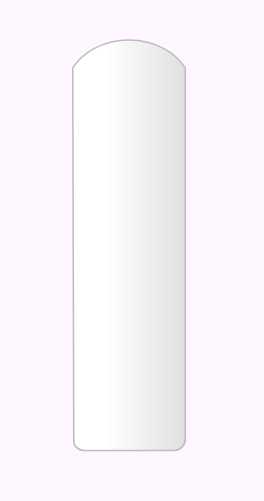
Let's start by drawing thermometer outer body:
a. Thermometer body
class ThermometerPainter extends CustomPainter {
...
void paint(Canvas canvas, Size size) {

 // Thermometer body
    final bodyPath = Path();
    bodyPath.moveTo(0, height * 0.15);
    bodyPath.conicTo(centerWidth, -height * 0.05, width, height * 0.15, 0.45);
    bodyPath.lineTo(width, height * 0.975);
    bodyPath.conicTo(width, height, width * 0.9, height, 0.7);
    bodyPath.lineTo(width * 0.1, height);
    bodyPath.conicTo(0, height, 1, height * 0.975, 0.7);
    bodyPath.lineTo(0, height * 0.15);
    final bodyPaint = Paint()
      ..shader = backgroundGradient.createShader(
        Rect.fromLTRB(0, 0, width, height),
      );
    canvas.drawPath(bodyPath, bodyPaint);
   ...
   }
}
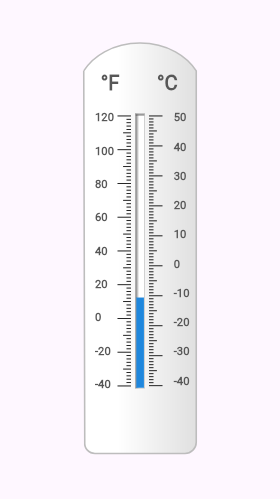
b. Reading lines and numbers
// Fahrenheit lines
    final cFLinePaint = Paint()
      ..color = readingLinesColor
      ..strokeWidth = height * 0.002;
    for (int i = 0; i <= 80; i++) {
      if (i % 10 == 0) {
        var offsetP1 = Offset(
          width * 0.3,
          height * 0.25 + i * (height * 0.0075),
        );
        var offsetP2 = Offset(
          width * 0.42,
          height * 0.25 + i * (height * 0.0075),
        );
        canvas.drawLine(offsetP1, offsetP2, cFLinePaint);
      } else if (i % 5 == 0) {
        var offsetP1 = Offset(
          width * 0.35,
          height * 0.25 + i * (height * 0.0075),
        );
        var offsetP2 = Offset(
          width * 0.42,
          height * 0.25 + i * (height * 0.0075),
        );
        canvas.drawLine(offsetP1, offsetP2, cFLinePaint);
      } else {
        var offsetP1 = Offset(
          width * 0.38,
          height * 0.25 + i * (height * 0.0075),
        );
        var offsetP2 = Offset(
          width * 0.42,
          height * 0.25 + i * (height * 0.0075),
        );
        canvas.drawLine(offsetP1, offsetP2, cFLinePaint);
      }
    }

// Fahrenheit numbers
    final farhrenheitStartTemp = 120;
    for (int i = 0; i < 9; i++) {
      final textSpan = TextSpan(
        text: '${farhrenheitStartTemp - i * 20}',
        style: TextStyle(
          color: textColor,
          fontSize: height * 0.025,
          fontWeight: FontWeight.bold,
        ),
      );
      final textPainter = TextPainter(
        text: textSpan,
        textDirection: TextDirection.ltr,
      );
      textPainter.layout();
      textPainter.paint(
        canvas,
        Offset(width * 0.1, height * 0.24 + i * (height * 0.074)),
      );
    }
...

These two steps were quite basic and don't require much explanation.
c. Tube and liquid
// Tube
    final tubeRect = Rect.fromLTRB(
      width * 0.46,
      height * 0.245,
      width * 0.54,
      height * 0.855,
    );
    final tubePaint = Paint()
      ..shader = LinearGradient(
        colors: [Colors.grey.shade600, tubeColor],
        stops: [0, 0.4],
        begin: Alignment.centerLeft,
        end: Alignment.centerRight,
      ).createShader(tubeRect)
      ..strokeJoin = StrokeJoin.round;
    canvas.drawRect(tubeRect, tubePaint);

 // Liquid
    final double modifiedTemp = (animationTemperature + 40).clamp(0.5, 90);
    final heightAdjustor = 0.00675;
    final liquidHeight = -(height * modifiedTemp * heightAdjustor);
    final liquidRect = Rect.fromLTWH(
      width * 0.4675,
      height * 0.854,
      width * 0.0675,
      liquidHeight,
    );
    final liquidPaint = Paint()..color = liquidColor;
    canvas.drawRect(liquidRect, liquidPaint);
Here we first painted tube. Then we painted liquid on it but the height of liquid has to be adjusted according to the temperature we received. We first add 40 to temperature to make it positive so height can be achieved from it easily and clamped it between 0.5 and 90 because the tube can only display temperature between -40°C to 50°C (90 units).The temperature is multiplied with a height adjustor and total height to get the height of liquid.
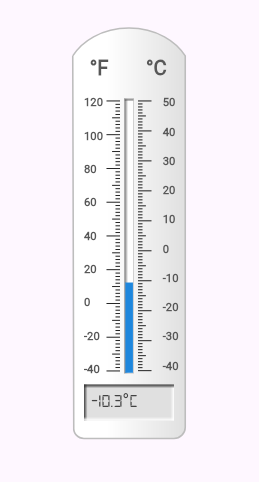
d. Temperature screen
// Temperature screen
    final screenRect = Rect.fromLTRB(
      width * 0.1,
      height * 0.88,
      width * 0.9,
      height * 0.96,
    );
    final screenPaint = Paint()
      ..strokeJoin = StrokeJoin.round
      ..shader = LinearGradient(
        colors: [Colors.grey.shade800, screenColor, screenColor, Colors.white],
        stops: [0.0, 0.04, 0.96, 1.0],
        begin: Alignment.centerLeft,
        end: Alignment.centerRight,
      ).createShader(screenRect);
    canvas.drawRect(screenRect, screenPaint);

// Temperature on screen
 final screenTextSpan = TextSpan(
      text: showScreenTemperatureInFahrenHeit
          ? '$modifiedTemperature°F'
          : '$modifiedTemperature°C',
      style: TextStyle(
        color: screenTextColor,
        fontSize: height * 0.042,
        fontFamily: screenTextFontFamily,
      ),
    );
    final screenTextPainter = TextPainter(
      text: screenTextSpan,
      textDirection: TextDirection.ltr,
    );
    screenTextPainter.layout();
    screenTextPainter.paint(canvas, Offset(width * 0.16, height * 0.89));
  }
For text, first we checked that if user wants to display temperature in Celsius or in Fahrenheit and displayed accordingly.
Now our thermometer is fully painted so we can move to the next part.
Part 2:
The Stateful widget 'Thermometer' which will animate the liquid when temperature changes.
class Thermometer extends StatefulWidget {
...
}

class  ThermometerState extends State<Thermometer>
    with SingleTickerProviderStateMixin {
  late AnimationController _liquidAnimationController;
  late Animation _liquidAnimation;
  late Color _color;
  double _currentValueLiquidAnimation = 0.0;

  @override
  void initState() {
    super.initState();
    _liquidAnimationController =
        AnimationController(vsync: this, duration: widget.duration)
          ..addListener(() {
            setState(() {
              _currentValueLiquidAnimation = _liquidAnimation.value;
            });
          });
  }

  Widget build(BuildContext context) {

  _liquidAnimation = Tween(
      begin: _currentValueLiquidAnimation,
      end: widget.temperatureC,
    ).animate(_liquidAnimationController);
    _liquidAnimationController.forward(from: 0.0);

  ...

  return SizedBox(
      height: thermometerHeight,
      width: thermometerWidth,
      child: CustomPaint(
        painter: ThermometerPainter(
          temperatureC: widget.temperatureC,
          animationTemperature: _liquidAnimation.value,
          ...
      ),
    );
  }
}
So here major point of explanation is Animation logic. When the temperature changes, we want to go from last temperature to new temperature. So we store temperature at each frame in a variable '_currentValueLiquidAnimation' and we put it in begin value of our _liquidAnimation. When temperature changes, Thermometer is built again such that animation is forwarded again from last value to new value of temperature.
It is recommended to use this widget in a Stateful widget with variable temperature to see the liquid animating effect shown in the start of article.
Conclusion
That widget demonstrates Flutter's power and flexibility that we can literally create any widget for our application.
If you are interested in reading full code or using this widget in your application, then you are welcome to visit my Github: