Hiding root detection | Passing Integrity | Fixing Native Detector detections
@i_am_sokolovsky
The Invisible War: When Your Own Device Betrays You
A Treatise on Digital Camouflage and the Art of Systemic Deception
So you've crossed the Rubicon. You've liberated your device, tasted the forbidden fruit of true control. The world should be your oyster. But instead? Silent alarms blare.
Your apps have turned into paranoid jailers. Banking vaults slam shut. Streaming sanctums raise drawbridges. Games scrutinize you like a Stasi officer eyeing a dissident. That cold, accusatory toast: "Root Detected." The sheer ingratitude of it all.
You didn't root for chaos. You rooted for sovereignty. Yet here you stand — a digital ghost in your own machine, forced to wear a mask for the comfort of your captors. The irony is thicker than OEM bloatware.
This isn't just about hiding a `su` binary. This is performance art. A meticulously staged play where you must become the thing the system craves: The Illusion of Purity. We're talking about:
- Fooling Integrity Oracles that probe your device's soul,
- Neutralizing Native Sentinels that hunt for shadows in the code,
- Weaving Spells of Normalcy so potent, even Google Play smiles in approval.
Prepare to descend into the looking-glass world. Where truth is malleable, detectors are blind, and your rooted device learns to whisper: "Nothing to see here... only compliance."
The masquerade begins.
Let’s vanish in plain sight.
I am not a supporter of Integrity Box and there will be no link to it and I strongly recommend not to use this module
MAIN QUESTIONS:
read them before asking me in dm, or better yet, read the whole article.
Q: What does such and such module do?
A: Read the article on github or read a short description that i done in tg channel
Q: TrickyAddon disappears/is not reflected in the list of modules
A: TrickyAddon is not a separate module, but an addition to the existing one, allowing you to make Tricky Store more convenient to use.
Usage - "Action" Button (install WebUI)
Q: How to make "device certified" in play market without Integrity Box?
A: you need to clear data and cache from Google Play (com.android.vending) and Google Play Services (com.google.android.gms)
Q:I have 1 ✅ and nothing else...
A) ...I have xiaomi.eu A13+

Freeze (disable) this app in your ROM
B) ...I have evolution X, crdroid, etc. A13+
Disable all spoofs in the settings (spoof device for Netflix, Google Play, etc.), as well as in lsposed such as "bootloader spoofer", etc. (Reverse Pixelify does not prevent you from getting 3 ✅) and reinstall the modules again.
C) ...I have A11 and lower.
You won't get more than 1 tick, you'll have to either give up with it or install Android 13 at least
D) ...I have A12
Perhaps you can get 3 checkmarks using YuriKeybox manager. But this is not a 100% guarantee.
E) ...none of the above options.
Just reinstall Tricky Store and PIF (get 3 ❎) and install again according to the guide.
Q: After removing modules, 1/2/3 ✅ still remained.
A: Reinstall the firmware (not always necessary) and delete all data (factory reset)
Q: Full ❎ and nothing helps.
A: Change your rom, especially if they already have gapps, or download the vanilla version and then install nikgapps (A10+)/opengapps (A11 and below). Sometimes problem maybe in keybox.xml or pif.json.
Q: I can't get 3rd ✅
A: Most likely you need to update your security patch using Tricky Addon Module. Or you use revorked keybox.xml
Ask your stupid questions and i will add them
HOW TO PASS INTEGRITY (from the beginning)
Let's imagine you have a device, the bootloader is open, root has just been installed, custom or stock rom, data has recently been reset and you need to pass the integrity check. (otherwise if you can't do it and you turned to this guide then delete tricky store, pif and other similar modules and reboot your device).
Steps:
1. Install next modules
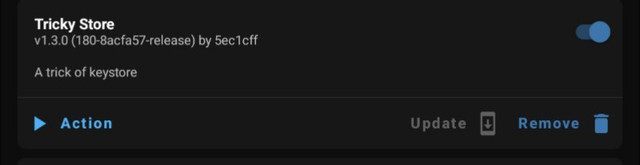
Tricky Store (or its fork)
2. reboot your device
3. Intall KSU WebUI, give it root permissions and open it
4. Now you see something like this picture:

4.1. Open tricky store and click on the 3 stripes in the upper right lower corner.

5. Press the buttons in the following order:
a) Select All
b) Deselect Unnecessary
c) SAVE
5.1. Use search to find the following packages:
com.google.android.gsf
com.google.android.gms
com.android.vending
com.google.android.safetycore (optional)
com.google.android.contactkeys (optional)
Click the checkbox next to them and tap the green/orange icon depending on your situation. (use if you can't pass integrity, explanation of each option in tricky store at the end of the guide)
6. Install keybox.xml from my channel (or use own if have bought it)
6.1 Click "Set custom keybox" and pick keybox.xml
7. Close tricky store and now open Play integrity fix (PIF). Click "Advanced" button

now it all depends partly on luck. CLICK FETCH PIF.JSON.
I don't use any spoofs or anything else and have 3 ✅. If it doesn't work for you, use the provider spoof or the build spoof, or at least both together.
8. You can check by opening the Google Play settings, clicking a couple of times on the Google Play version to open the developer mode, and then open it. There will be a check in it. You should have something like this:

All 3 points, I have 3 ✅.
That's it. There's nothing complicated about it and there's nothing to be afraid of.
Native Detector detections:
shere will be the main detections from the native detector, if something is missing, then write in dm.
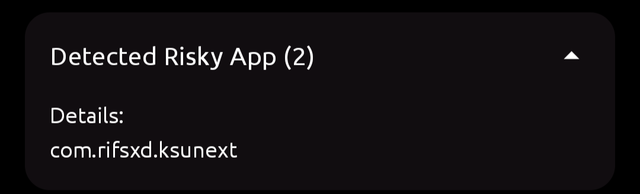
Also it can detect for example Magisk (com.topjohnwu.magisk) or Apatch and other.
For Magisk:
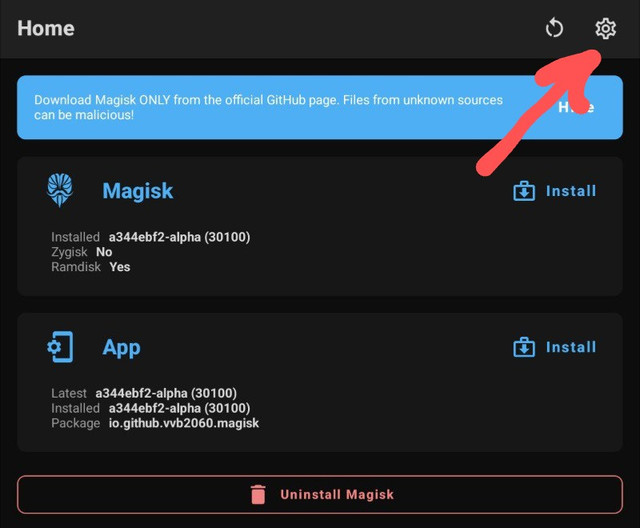
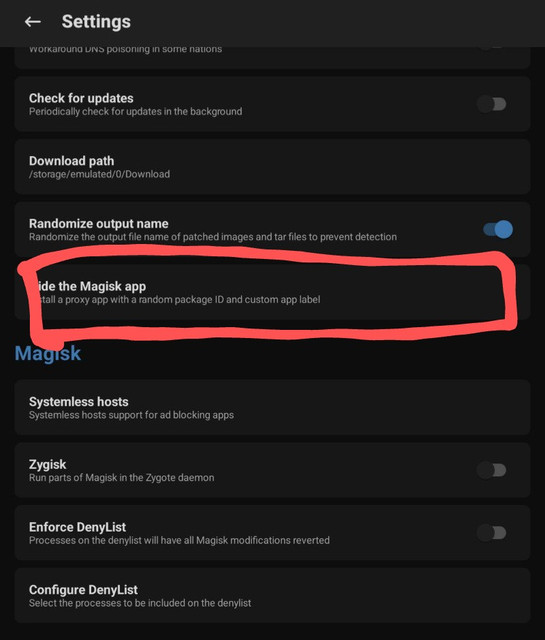

For KernelSU Next:
Install Spoofed Version Kernel SU Next
For Apatch, KSU:
Use Hide my Apps List. (Scroll almost to the end to see "guide" how to use it)

Let's look at the example of the trace from the Integrity Box (I don't have any other screenshots, don't flash this module)
what you need:
1. lsposed
3. guide in the end of article
(Let me remind you that when you select an application according to the guide at the end, you hide the list of applications only FROM IT)
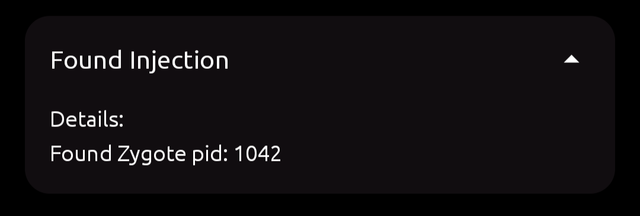

write in Termux or other terminal this command:
su -c 'getprop | grep -E "pihook|pixelprops" | sed -E "s/^\[(.*)\]:.*/\1/" | while IFS= read -r prop; do resetprop -pd "$prop"; done'
Or copy it here. If not everything is deleted, then use the method below (PIF v2)

1. Go to /data/adb/service.d/ on your phone
2. Create file "*.sh", for example "fortniteballs.sh"
3. open it

4. write in it:
resetprop -p --delete <package name>
This option is suitable for both cases. For example, from option v1:
resetprop -p --delete persist.sys.pixelprops.games

5. give 777 rights and execute with ROOT privileges


done.


For Magisk(maybe apatch):
Install Shamiko module and flash it. Configure Denylist in settings.


For KSU/KSUN/SUKISU ULTRA:
Install Shamiko module and flash it. Unmount Modules for app (optional).


You need:
1. Copy boothash and open tricky store. (If you use pixel experience or other pixel based roms you can copy hash code using your navbar, otherwise just click on detect (or hold))
2. click on the three stripes on the top right and click set verifed boot hash

3. paste your boot hash and save
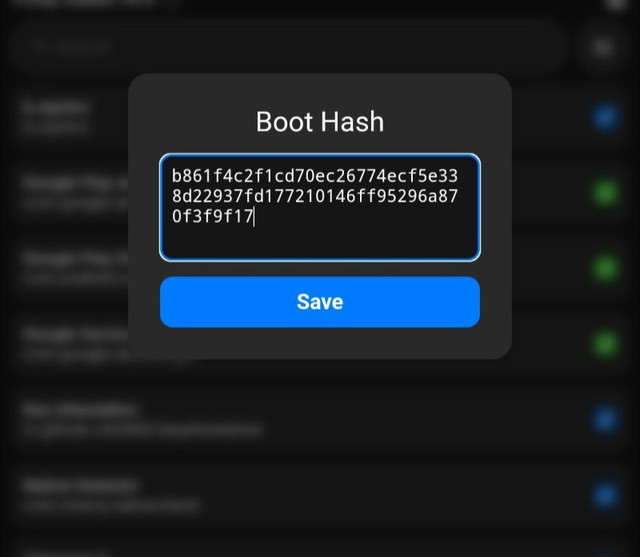
done.

If your kernel supports susfs, so hide this path in settings. Like this:

If your kernel doesn't support susfs, then I don't know what to do. for now....

Just delete addon.d folder from /system

Don't you think you're a little dumb if you're reading this? Simply delete the folder with the corresponding name from one of the following paths (from the root):
/sdcard/
Magic, right?
/storage/emulated/0/
A more standard option.

Just change keybox.xml on a valid one.

Do the same as in the previous one.

Check your /data on suspicious files/folders (be careful, delete unnecessary ones - next time you won't be able to boot into the system). In theory, to solve the problem, you can disable all modules, reboot, flash the stock boot.img, boot into the system and then flash the magisk/ksu image again.
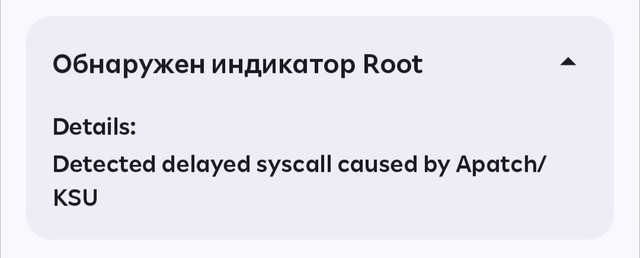
For Apatch - flash NoHello module
For KSU/KSUN users - flash shamiko module

To solve this problem you can:
Susfs kernel - Hide YouTube revanced in SUSFS settings

NonSusfs kernel - Uninstall Revanced module, reboot, Flash ThreatWheel, reboot, go to Treat Wheel settings, disable Revanced hiding, reboot, install Revanced module, reboot, enable Revanced module hiding in Treat Wheel, reboot.


Update lsposed to the latest version.

Go to this path /data/adb/.../oat/arm64 and delete "base.odex" file

Flash vbmeta fixer module

the problem of hiding is quite easy, there are 2 options:
1. wait for update magisk to 30.0
2. turn off in-built zygisk in magisk and flash zygisk next module

I don’t know exactly how to solve it; the person who had this problem couldn’t solve it because it disappeared on its own.
As Reveny told me you need to look at the next path:
/proc/self/maps
How to use Hide My Apps List
Even I don't know to use it correctly, but it works so.....
1. Open Hide My Apps List

2. Click "App Manage"
3. Choose your app (from which you want to hide apps list)
4. Do the same as in the screenshot below.

5. Repeat the procedure with the remaining applications.
done.
How to set up tricky store (using tricky addon)
Just flash it in magisk/kernelSU (Next)/SukiSU Ultra/Apatch.
I've said everything for now, so here will be an explanation of how and what works in the tricky store.

1. Blue Check (in my case — pink):
The blue "O" checkmark indicates automatic mode (a flag file in the Tricky Store folder specifies your TEE status to Tricky Store).
2. Green Check (!):
The green "!" checkmark is for users with an intact TEE.
3. Yellow (Orange) Check:
The orange "?" checkmark is for users with a broken TEE.
This aspect is explained in more detail in the Tricky Store documentation on GitHub.
Don't use green and orange checks "for fun"

1. Refresh - refresh 🤨 (apps list)
2. Select All - selects all applications for target.txt
3. Deselect All - reverse effect of paragraph 2
4. Deselect Unnecessary - deselects unnecessary applications from target.txt
(All the buttons above will help to configure target.txt, this is the file with which Tricky Store determines for which applications it should hide the presence of an open bootloader via a keybox, etc. )
5. Add system app - add system app (if it does not appear in the list) [not recommended]
6. Set AOSP keybox - sets AOSP keybox (no longer relevant)
7. Set unknown keybox - I don't know what it's for and how it works
8. Set Valid keybox - Previously, it was possible to set the keybox to 2-3 checkboxes, but for some reason it doesn’t work now.
9. Set custom keybox - set custom keybox from your device. (Automatically changes it's name to keybox.xml and pastes into /data/adb/tricky_store)
10. Set verifed boothash - sets BootHash (not on it's own, but with your help)
11. Set security patch (from v4.1+ — Set dev config) — installing a patch for security (boot and vendor), and also from v4.1 works like PIF (only for users forked version of TS)
HOW TO ENABLE WHITELIST MODE IN SHAMIKO?
1. create file "whitelist" in data/adb/shamiko/
2. reboot device
For the blacklist - the same, but "blacklist" (I think so)