Guide For Purchasing SNAKE Tokens (SNK)
CryptosnakeThis is a detailed instruction for purchasing SNK tokens. The instruction is suitable even for beginners who have never used the PancakeSwap exchange before or have never even bought cryptocurrency.
The instructions show the steps for purchasing tokens from a computer through the Metamask wallet in the Google Chrome browser in English. You can use a different device, a different wallet, a different browser and a different language - it doesn't matter, because you can still match screenshots and track the sequence of actions.
Step 1. Buy BNB and BUSD on Binance
You cannot buy cryptocurrencies for fiat money (for dollars, euros, rubles, etc.) on PancakeSwap. If you already have a cryptocurrency wallet and BNB and BUSD coins on it, you can skip the first two steps and go to Step 3. If you do not currently have cryptocurrency and do not know how to buy it, continue reading.
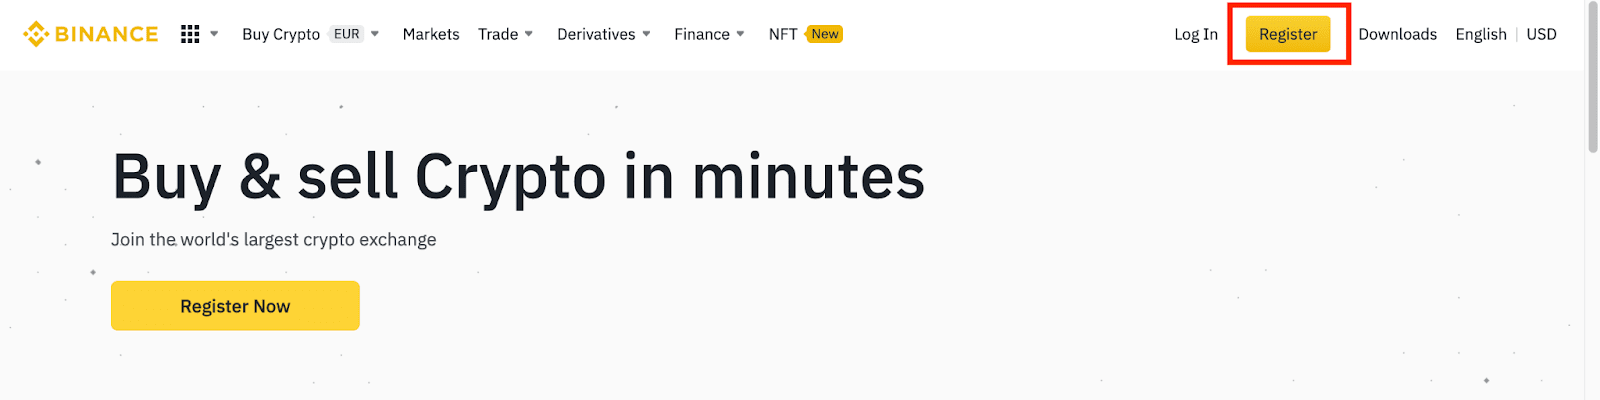
First, we need to register on Binance. It is one of the top and most trusted cryptocurrency exchanges. At the time of this writing, Binance is the largest crypto exchange in terms of trading volume.
Go to binance.com and click Register.
On the registration page, enter your email address, create a password for your account, and enter your referral ID (if any). Then read and accept the Terms of Service and click Create Account.
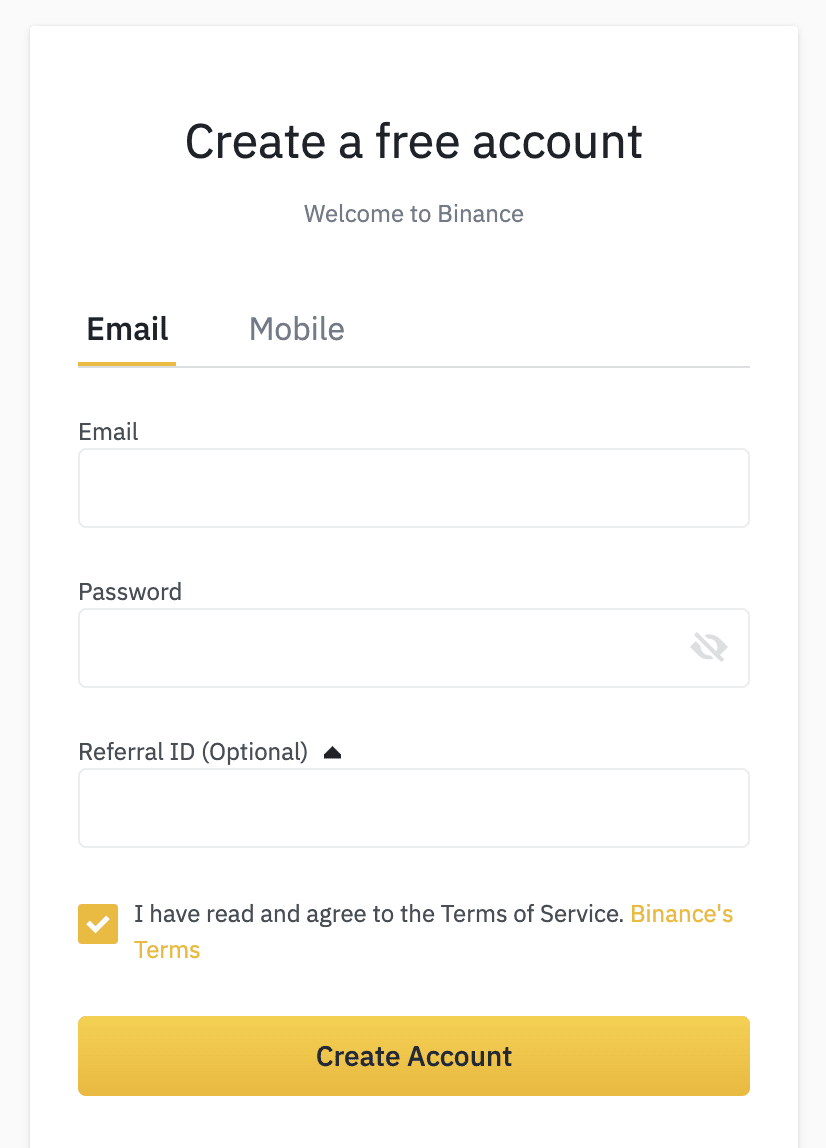
Your password must be a combination of numbers and letters. It must contain at least 8 characters, one capital letter and one number.
Pull the arrow and place the puzzle in the marked place to confirm that you are not a robot.

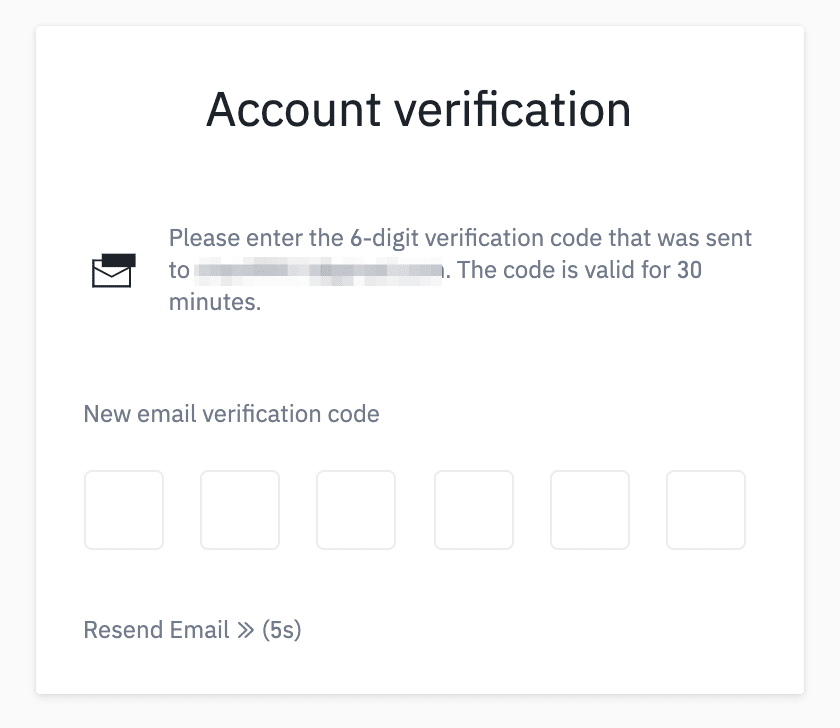
The system will send you a verification code to your email. Please enter the verification code within 30 minutes. If you cannot find the letter in your mailbox, check other mail folders as well, or click Send again to resend it.
Congratulations, you have successfully registered with Binance!
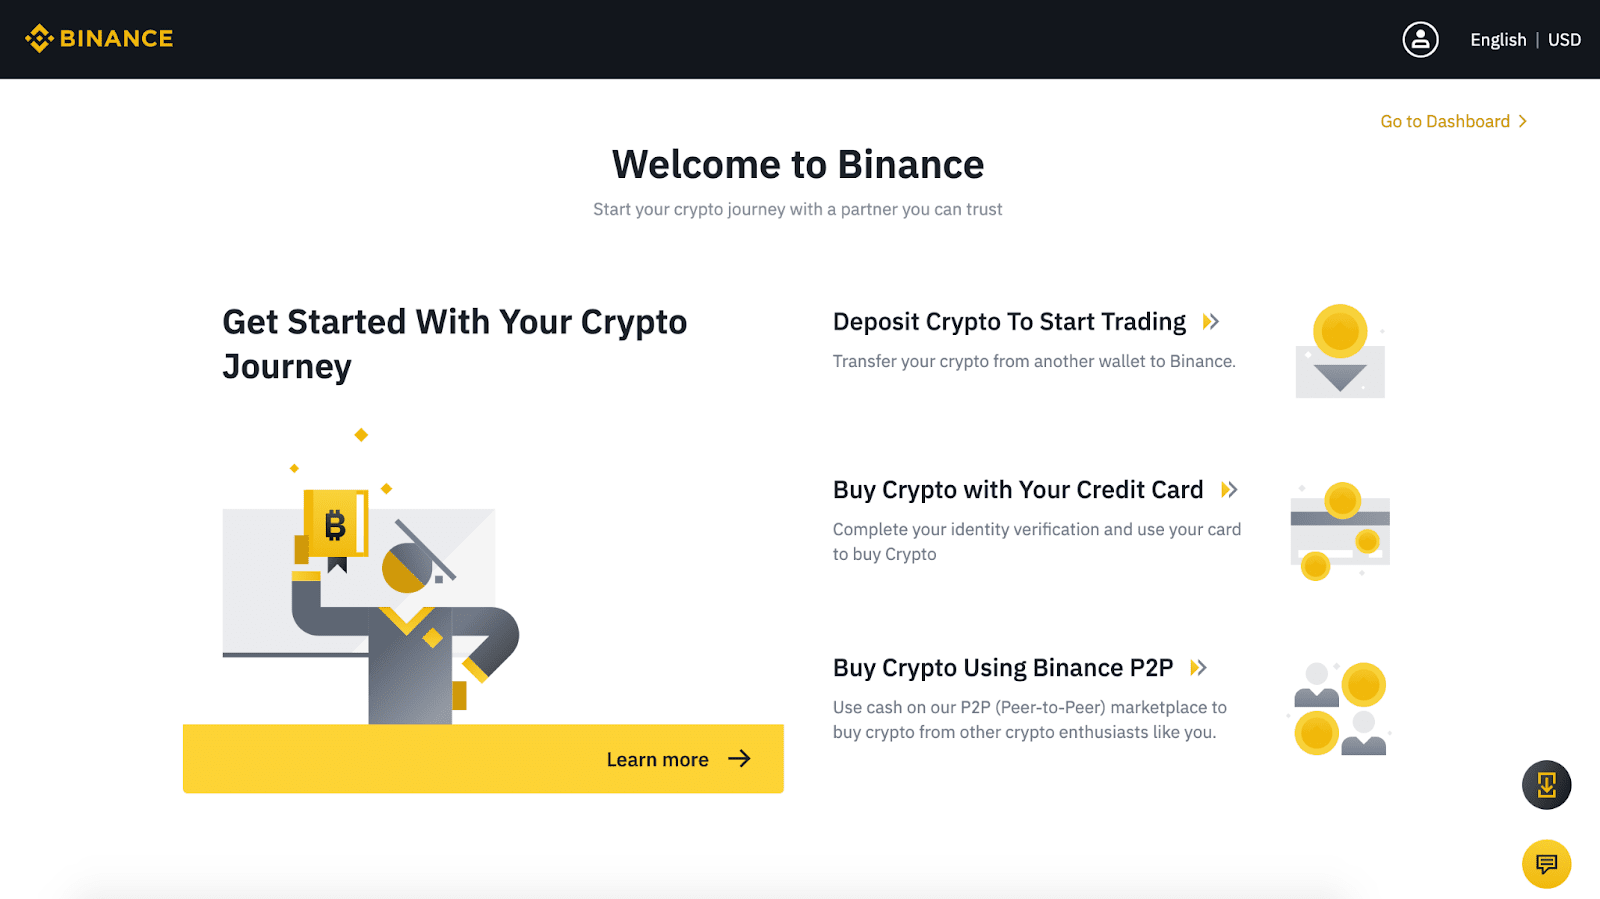
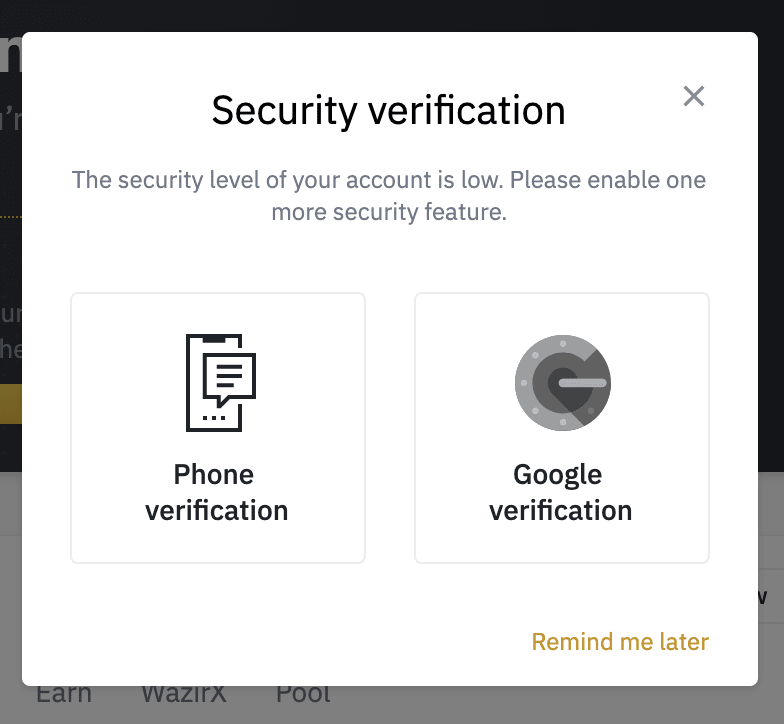
Next, Binance will offer you to strengthen the security of your account by installing two-factor authentication. You can link your account to a phone number, or click "Remind me later".
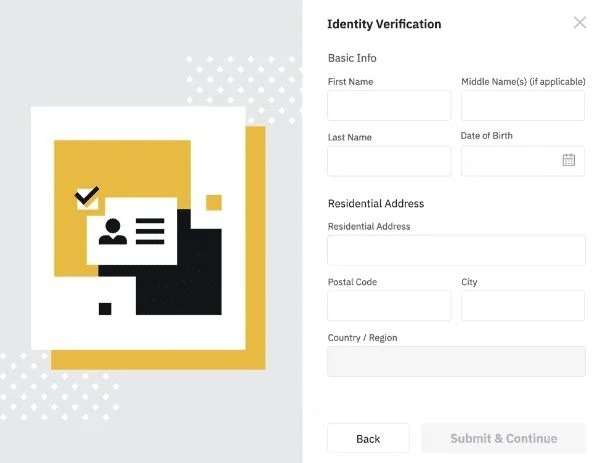
According to regulations from August 2021, Binance asks for proof of identity. Therefore, now you must go to your account and go through verification. You will need to provide your name, date of birth, country, address, and postal code.
Note: Binance is required to collect this data due to US KYC (know your customer) law. This law was passed to combat financial crime in the United States. This data will not be passed on to the authorities in your country without a special request.
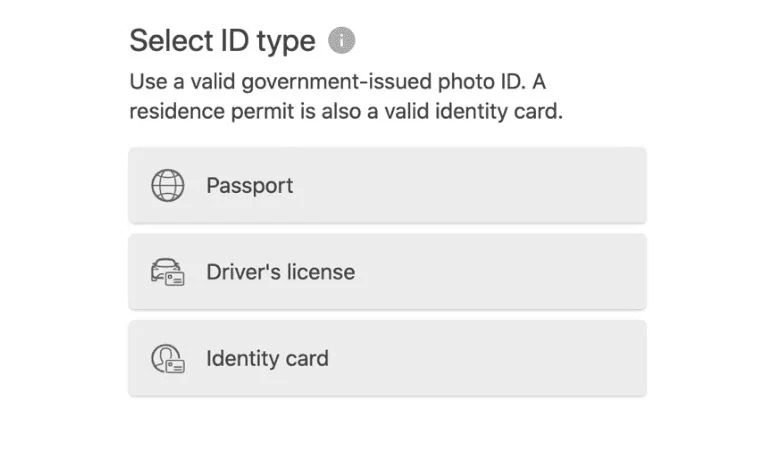
You must now verify your identity by taking a photo of your identity document. This can be a passport, driver's license, or ID card.
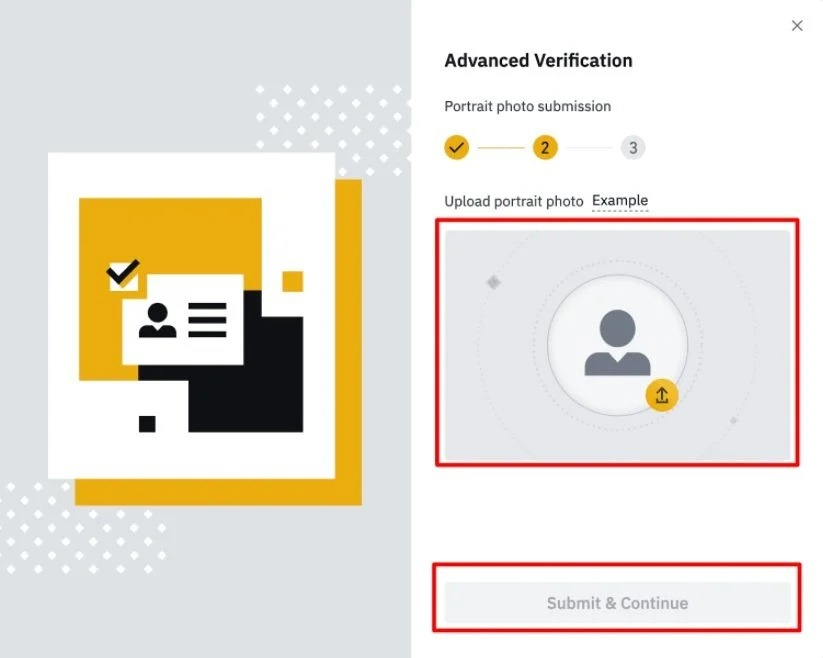
The next step is to upload a portrait photo.
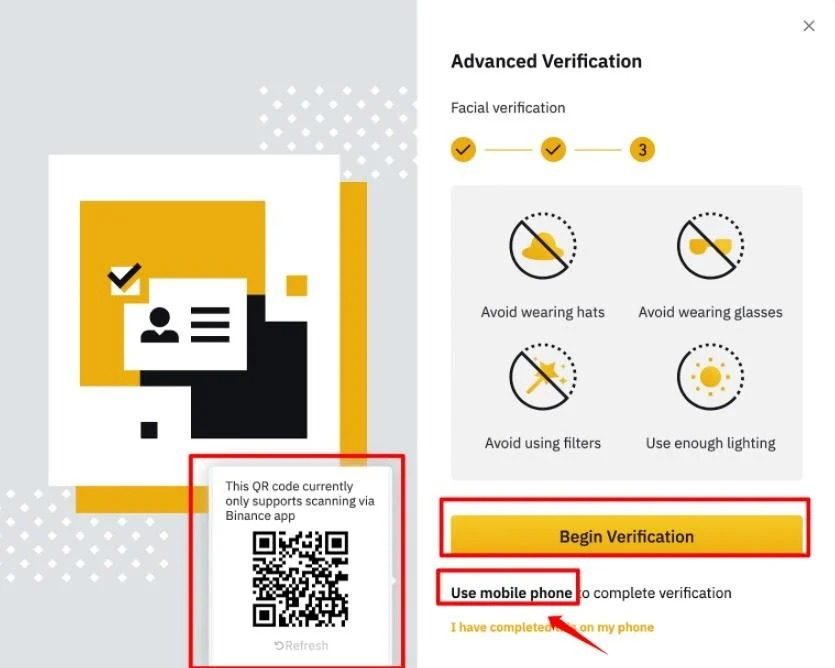
The last step in this step is a facial verification. Binance will use your device's camera to scan your face. You can choose to use your webcam (if you use a computer to verify your identity) or your phone's camera through the Binance app. The site will provide a QR code to scan with the Binance app if you choose to do so.
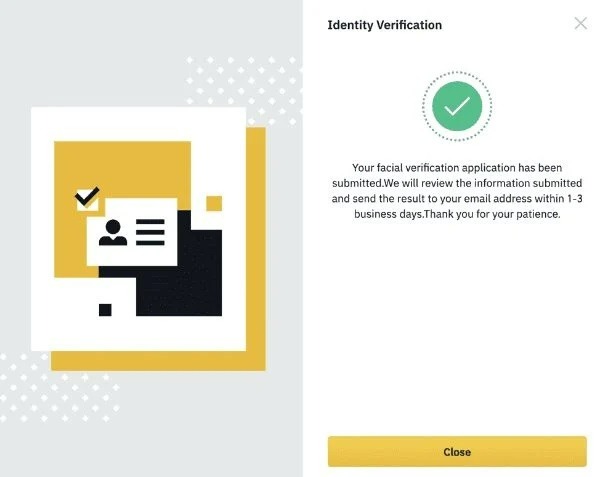
Congratulations. You have been verified. Binance may offer you more advanced verification, but this is not required. Basic verification allows you to trade up to $200,000 per day. There are only 100,000,000 SNK will be available for sale, so there is no need to go through advanced verification to buy our tokens.
Now you can buy cryptocurrency. First of all, you need to top up your balance. You can transfer cryptocurrency from your wallet to Binance, but we guess that some of you have never bought cryptocurrency. In this case, you need to buy cryptocurrency using a card. It can be a bank card with any fiat currency (USD, EUR, RUB, GBP and so on).
The easiest way is to buy SNK with Binance USD (BUSD) - a stablecoin of the Binance exchange, the rate of which is pegged to the dollar rate. Find “BUSD” in the list of cryptocurrencies. Select "Buy with card". Buy as much cryptocurrency as you plan to spend on SNK tokens.
Trades start at 1 BUSD = 100 SNK (one cent per SNK token). However, depending on the balance of supply and demand, the exchange rate may change. Remember that you will be able to use these tokens to feed the snake by increasing its TVL - this will give you an APR bonus.
So BUSD is a stablecoin. This means that its rate is always equal to 1 USD. You can buy exactly as much BUSD as you plan to invest in tokens. You can check the current exchange rate on the PancakeSwap website (more on this in Step 3).
To purchase BUSD on Binance, you must enter your credit card details. This is similar to how you buy any other product from an online store.
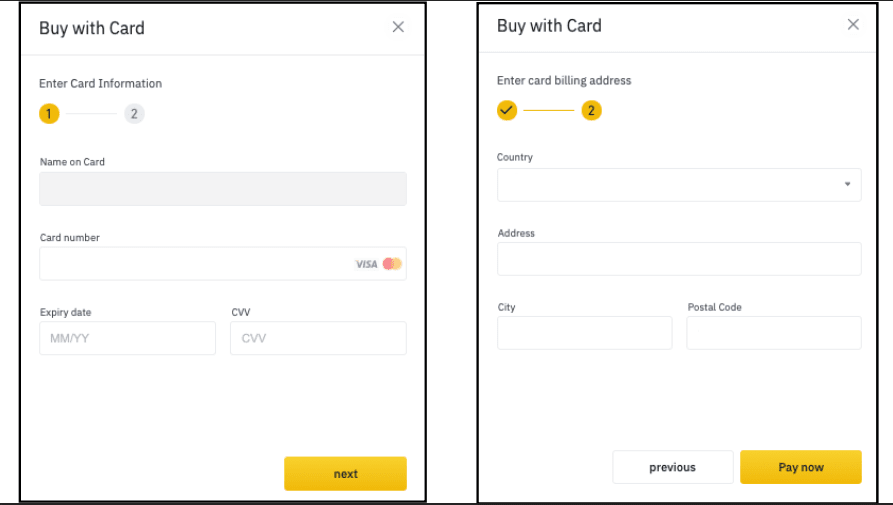
After confirming the payment, the cryptocurrency will be credited to your balance almost instantly.
Congratulations! Now you have a cryptocurrency that you can buy SNK with. But that is not all. Now you need to buy BNB cryptocurrency. It is used to pay transaction fees. Fees rarely exceed $0.50, but the minimum purchase on Binance is $15 and the withdrawal fee is 0.0005 BNB. Therefore, we advise you to buy $16 worth of cryptocurrency. The procedure for buying BNB does not differ from the procedure for buying BUSD, so you just need to repeat the steps described above, but instead of BUSD, buy now BNB.
After you are done, both of the required cryptocurrencies will be in your account. Now you need to create a cryptocurrency wallet and withdraw cryptocurrency to it from Binance.
Step 2. Create and fund a cryptocurrency wallet
BNB and BUSD are currently on your Binance balance. This is enough to trade within the platform itself, but not enough to use the cryptocurrency outside Binance.
Since we need coins to buy SNK on PancakeSwap and further use it in the game, now we need to withdraw your assets to a cryptocurrency wallet.
PancakeSwap supports 8 crypto wallets: Metamask. Trust Wallet, WalletConnect, MathWallet, TokenPocket, Binance Chain, SafePal and Coin98.
Note: You can use any of the listed wallets if you have one. We will take Metamask as an example, and Metamask will be used further in the instructions.
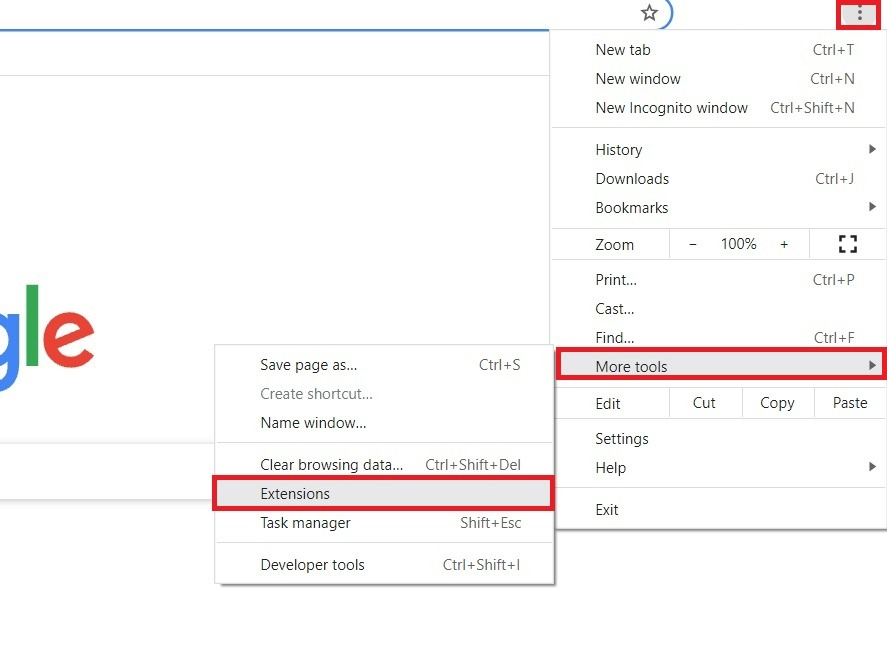
Find the Metamask extension in the browser extensions directory. Below is an example of how to find this extension in the Google Chrome directory. The steps may differ slightly if you are using a different browser.
We go to the browser menu (three dots in the upper right, slightly lower than the browser close button). Go to More tools - Extensions.
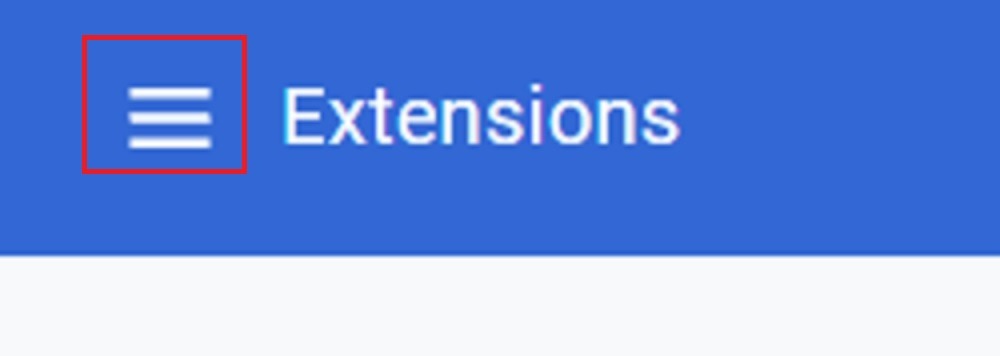
Click on the three stripes at the top left.
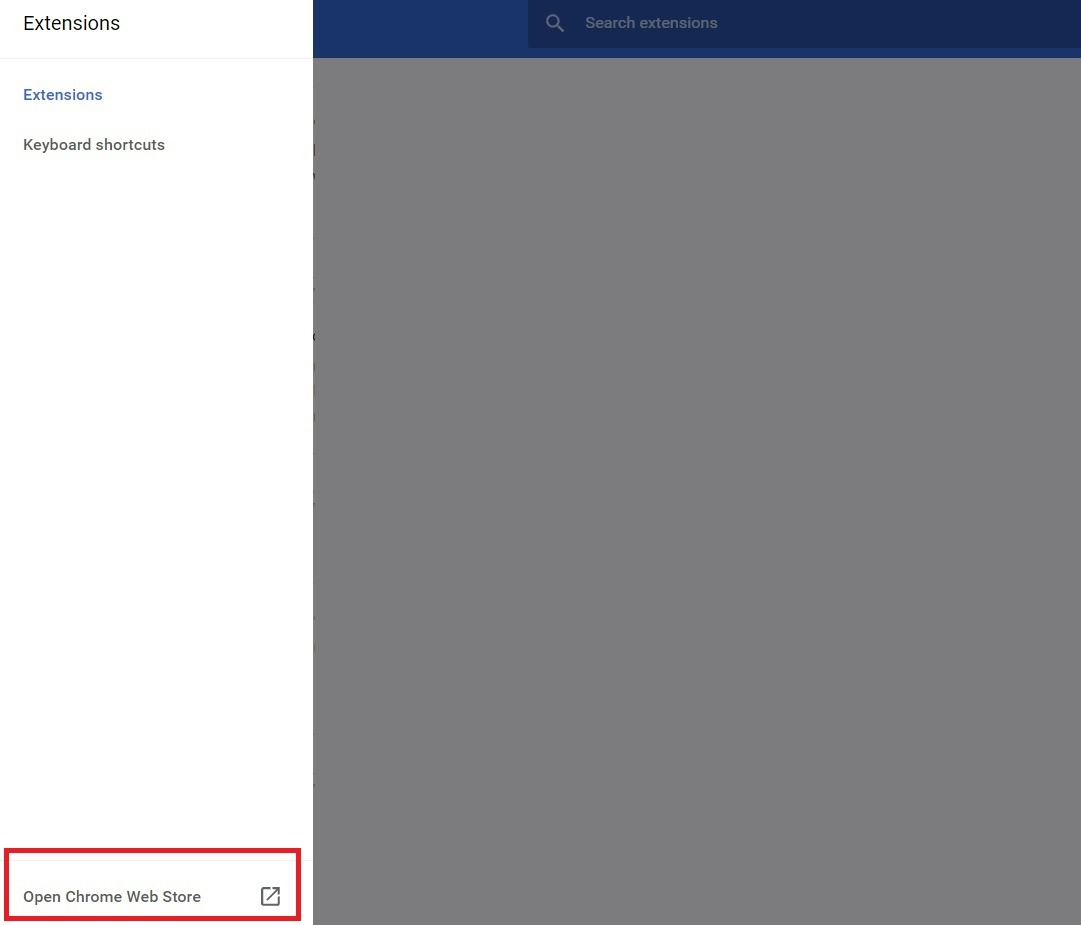
Click on the Open Chrome Web Store (at the very bottom left).
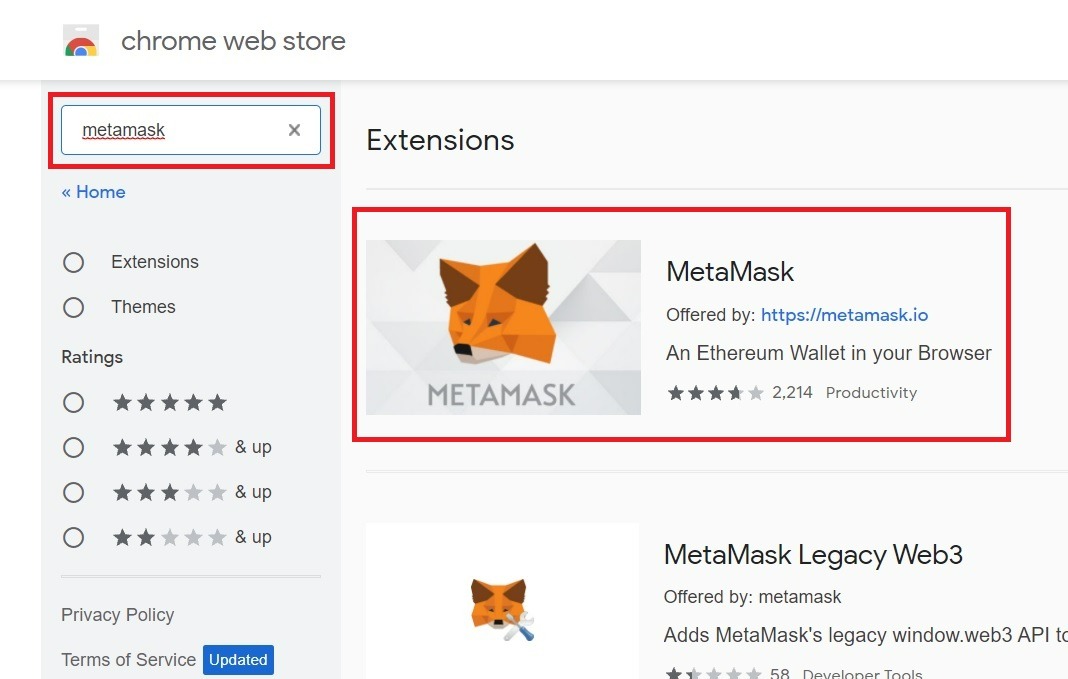
Enter "metamask" in the search. Click on the first fox extension - it's simply called MetaMask.
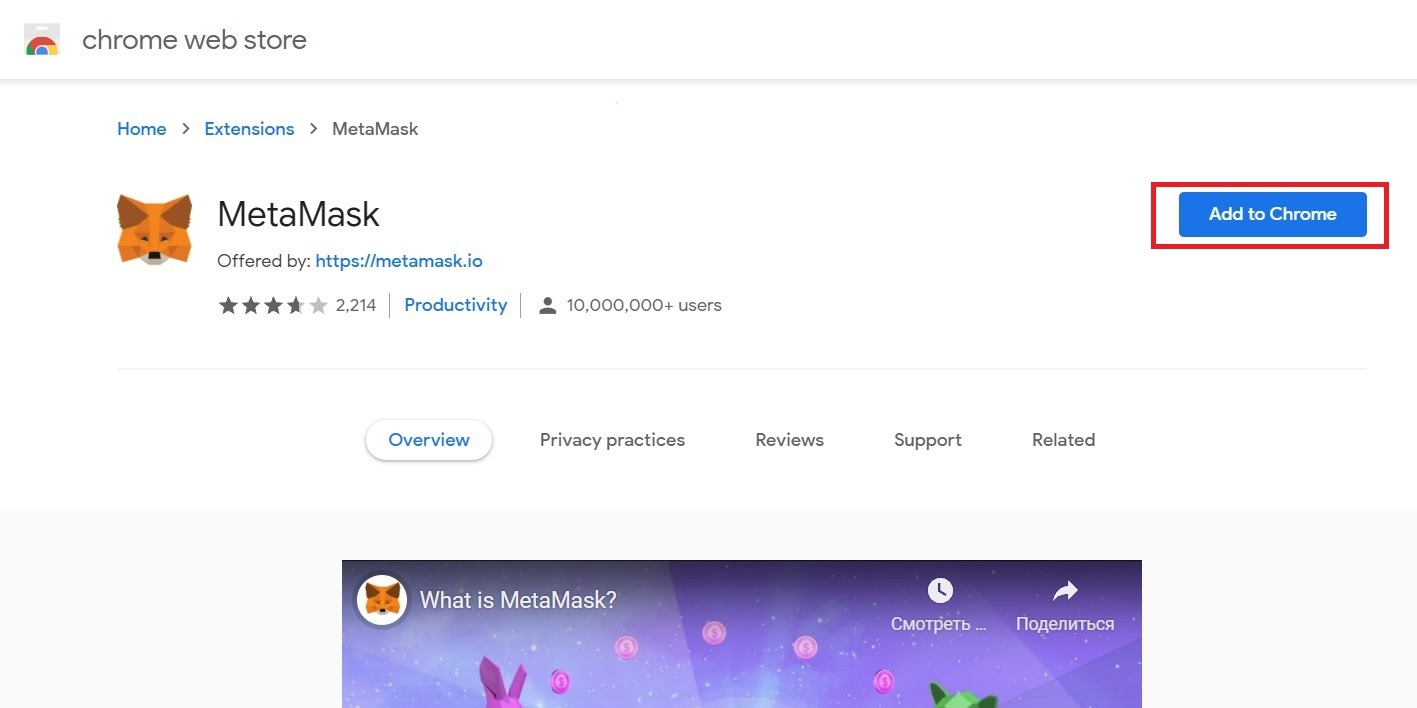
Click Add to Chrome. If you see a notification window, confirm the installation of the extension by clicking Add extension.
The extension window should open automatically. There will be a fox head that follows your cursor and a welcome text. Just click on the blue Start button.
Next, Metamask will offer you a choice. You can import a wallet or create a wallet.
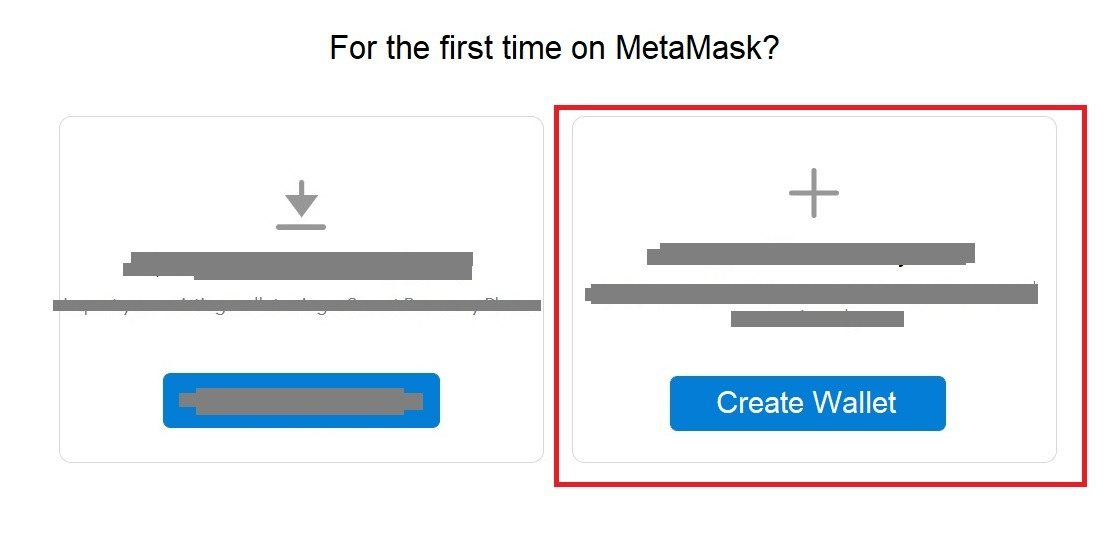
If you have a wallet, import it (left). If you don't have a wallet, create one (right). You haven't missed the second step, so you probably don't have a cryptocurrency wallet yet. In this case, choose create it (right).
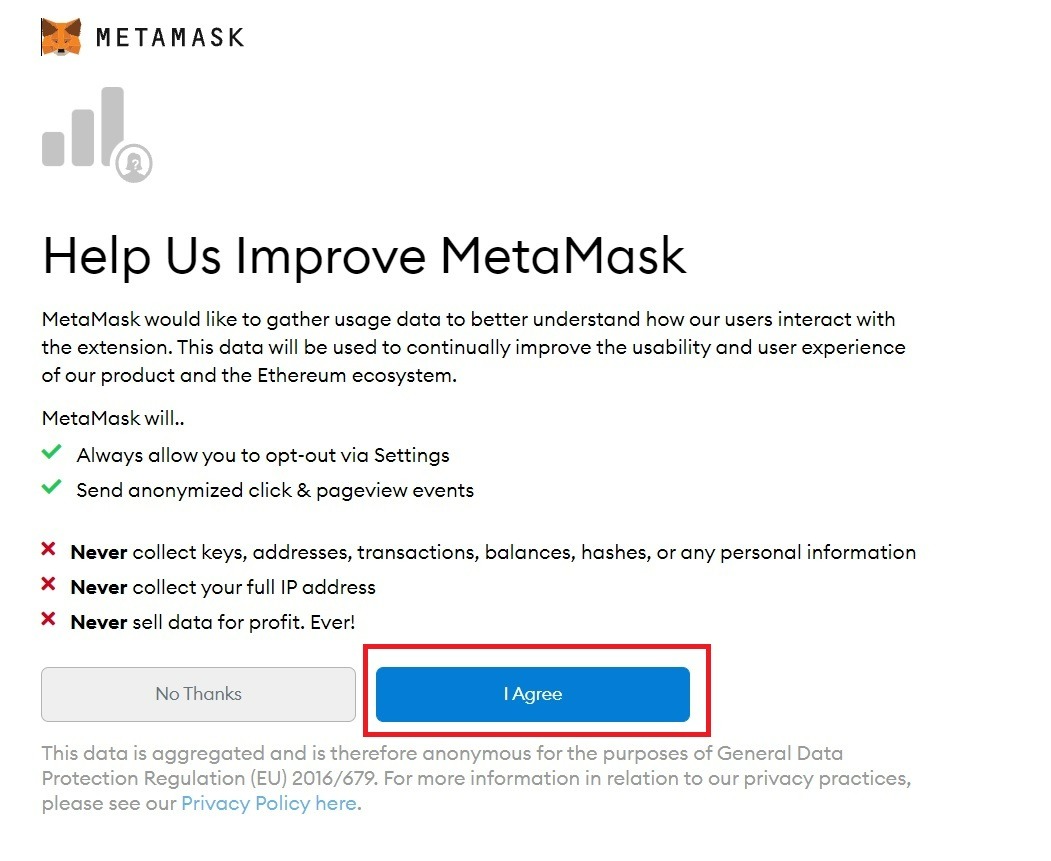
In any case, the next step is to accept the privacy policy. Click I Agree.
So now you need to come up with a password to login.

Next, you will be prompted to watch the video. Take a look if you like and click "Next".
Metamask will generate an 8 word seed phrase for you. Copy and save them so you don't lose them. This is a kind of password. Even if you forget the password that you came up with during registration, the seed phrase will help you gain access to your wallet. So take care of the safety of this set of words and do not say it to anyone.
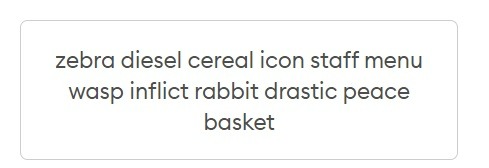
Note: The phrases in the picture are just an example. They will be different for you.
You should now repeat the sequence of words in the seed phrase. Do this and click on the blue button.
Next, Metamask will offer to go to the mobile application using the QR code. We advise you to close this window, as further steps in the instructions assume that you are using the wallet through a browser.
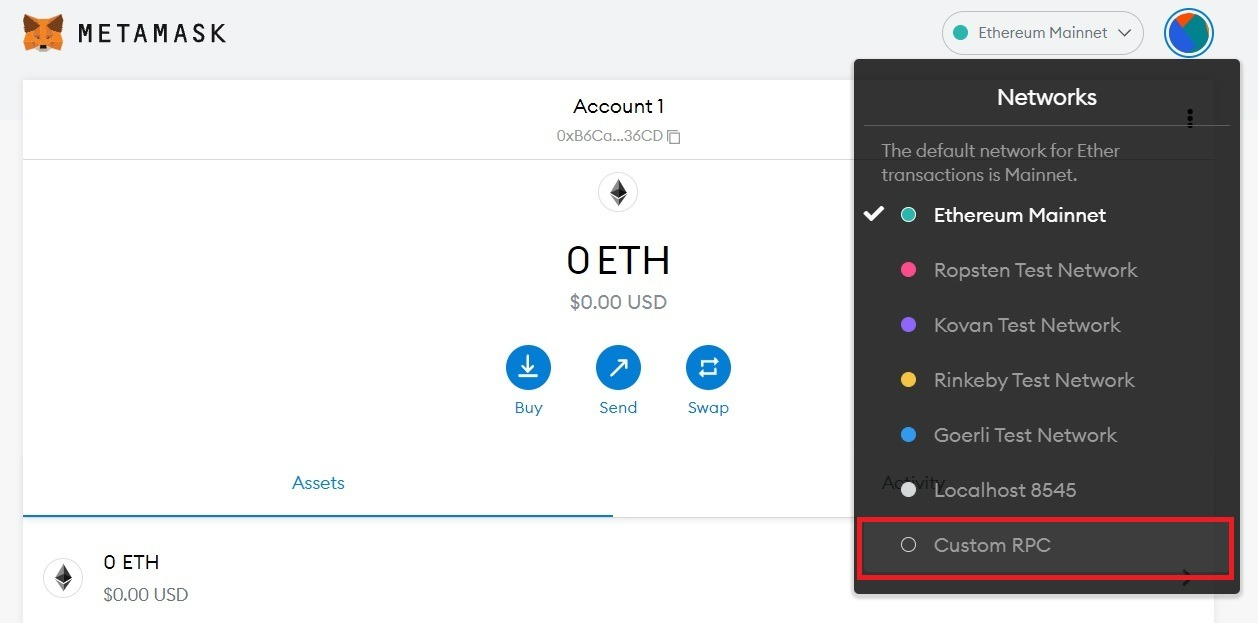
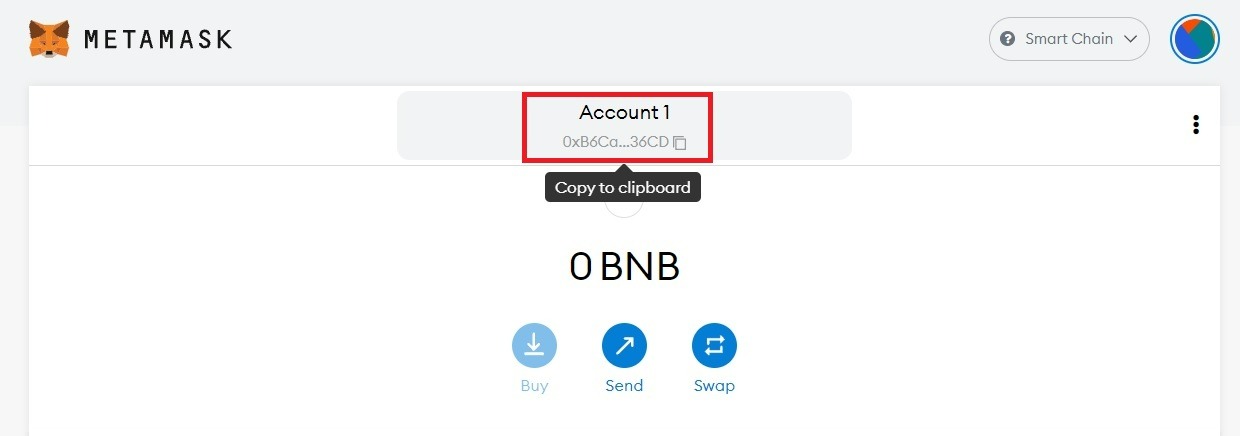
You have created a MetaMask wallet. This is how it should look.

So, you have a wallet. By default, MetaMask is configured on the Ethereum Mainnet, and shows the amount of ETH in your balance. This is not what we need. We are interested in BUSD and BNB, so now we need to connect the Metamask wallet to the Binance Smart Chain. Click on Ethereum Mainnet - Custom RPC.
Enter the following data:
- Network Name: Smart Chain
- New RPC URL: https://bsc-dataseed.binance.org/
- ChainID: 56
- Symbol: BNB
- Block Explorer URL: https://bscscan.com
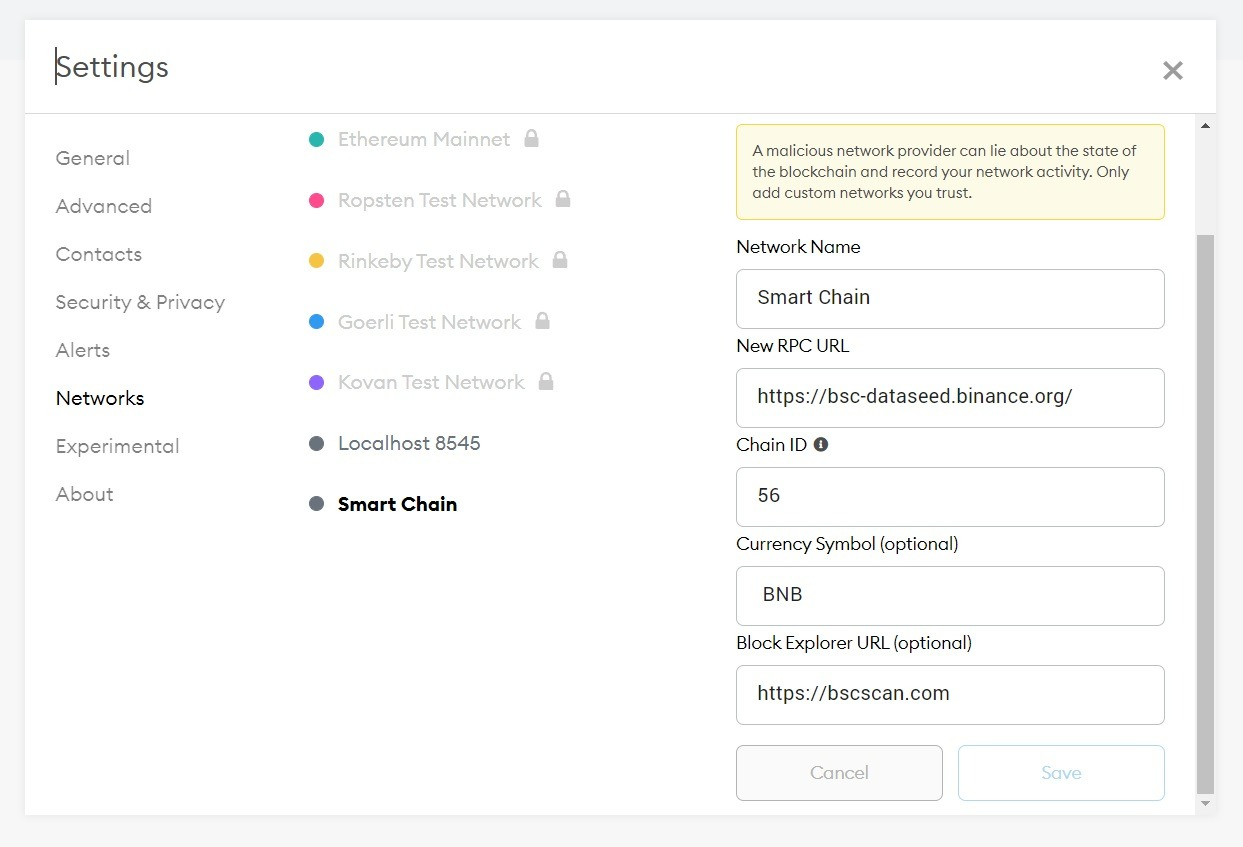
Save your data. Now your wallet should look like this:
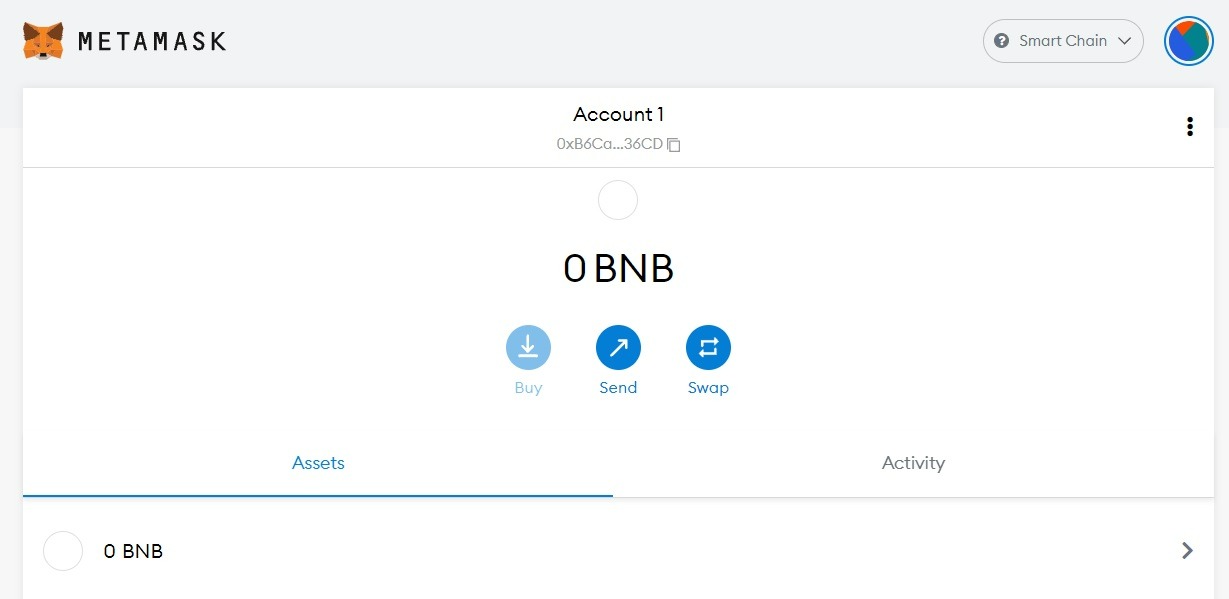
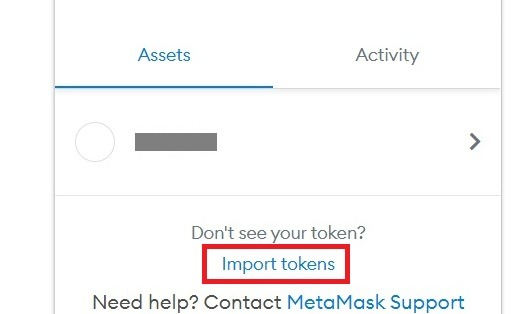
Fine. We have connected Binance Smart Chain and BNB token, but that's not all. Now you need to add the BUSD token. To do this, on the main Metamask page, click "Import tokens".
You must now enter the contract address. Here is the address of the BUSD coin (copy it in full and paste it into the input field):
0xe9e7cea3dedca5984780bafc599bd69add087d56
The token symbol and the number of decimal places will appear automatically. Your window should look like this. Click Next / Add Custom Token.
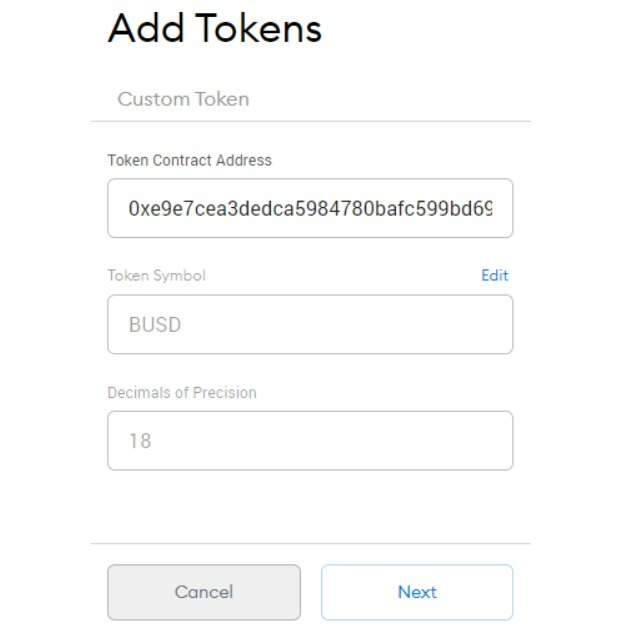
Note: copy the address above, do not try to copy it from the picture. Some of the symbols are hidden in the picture.
Now do the same with the SNK token. Here is its address:
0x53a38D12b84a7413eDa4B1206A7A28B59Aed9850
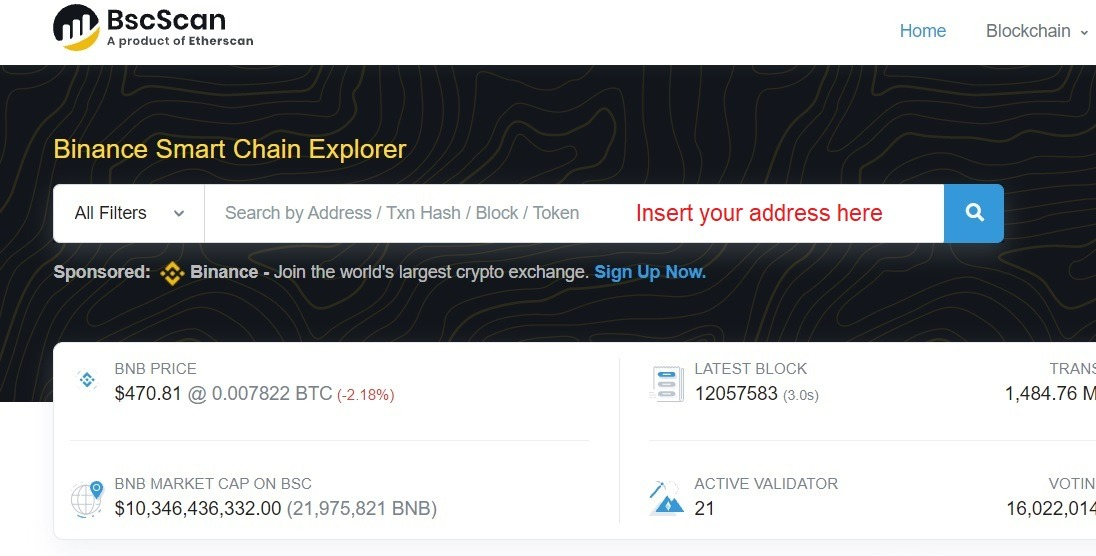
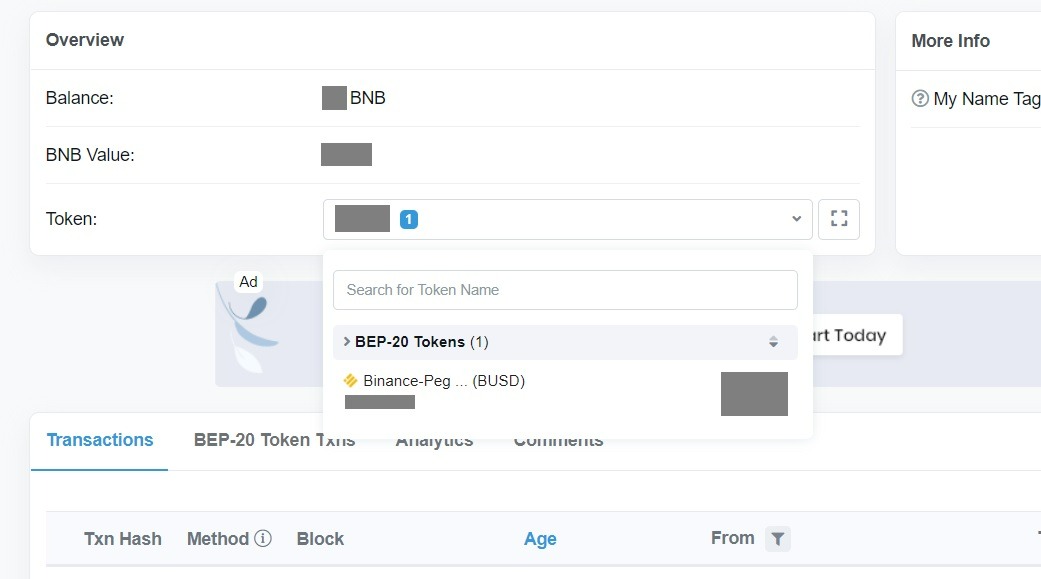
Make sure all three cryptocurrencies are displayed in the crypto wallet. Go to Bscscan.com and search for your wallet address. It is listed on the home page of the site.
Note: If you have accidentally closed a tab with Metamask, you can go to it again through the extension button on the top right panel of your browser.
Your wallet page on Bscscan should look something like the one below. Both BNB and BUSD should be visible there.
Now you have zero balance of both cryptocurrencies, because we have not transferred funds from Binance yet. Therefore, we now need to transfer BNB and BUSD from your Binance to your Metamask.
Go back to Metamask, copy your wallet address and save it.
Let's go back to Binance. If you didn't skip Step 1, you should already have BNB and BUSD on your account. If you don't have them, buy BUSD for the amount that you plan to spend on SNAKE (SNK) tokens. Also buy $17 in BNB (you will need no more than $0.50 per transaction, but the minimum purchase amount is $15 and $2 just for sure).
Transfer BUSD and BNB to your Metamask wallet. To do this, go to your Binance balance, select an asset and click "Withdraw".

Paste in the address you recently copied to Metamask (this will be a long character set).
Select the Binance Smart Chain and click "Confirm".
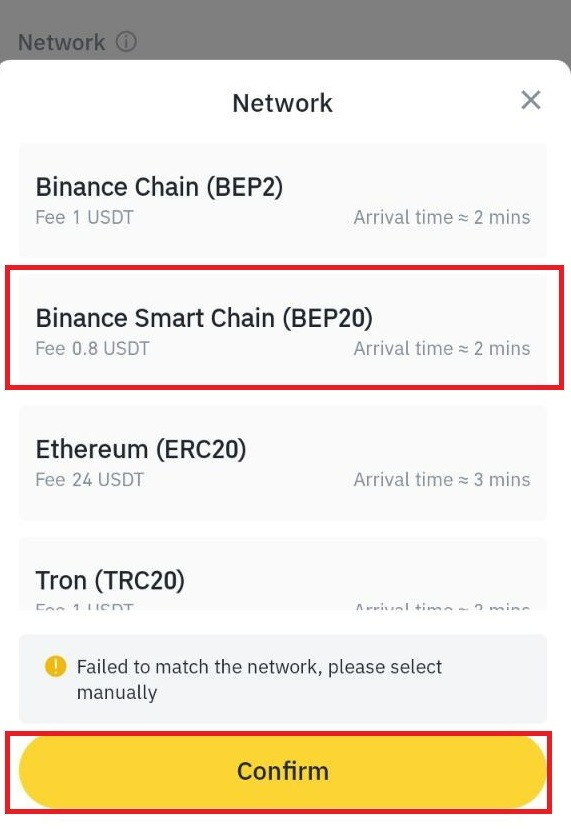
Finally click "Withdraw".
Repeat the same steps for the second coin. You must output both BNB and BUSD. Funds must be credited to Metamask within a few minutes (usually no more than 5 minutes).
Go to your wallet and make sure that the funds have been credited to your balance. You may not be able to see both currencies, but only BNB. To verify that BUSD has also been credited, go back to the Bscscan website and search for your wallet. The wallet address is the long string you used to send cryptocurrencies from Binance. The address is also displayed on the wallet home page.

If the cryptocurrency has appeared in the wallet, we can proceed to the final step.
Step 3. Buying SNK Tokens on PancakeSwap
First, go to pancakeswap.finance. You should see the following main page.
There will be screenshots in English, but you can choose another language on the site if you prefer. This will not change the design, so you can easily compare what you see with the screenshots in the instructions. Russian, Spanish, French, Chinese and other languages are available on PancakeSwap.

On the main page, you have a choice: connect a wallet (Connect Wallet) or immediately start trading (Trade Now). In fact, this is a kind of illusion of choice, because you have to tie the wallet anyway, so let's do it now. Click on "Connect Wallet". You will see this window.
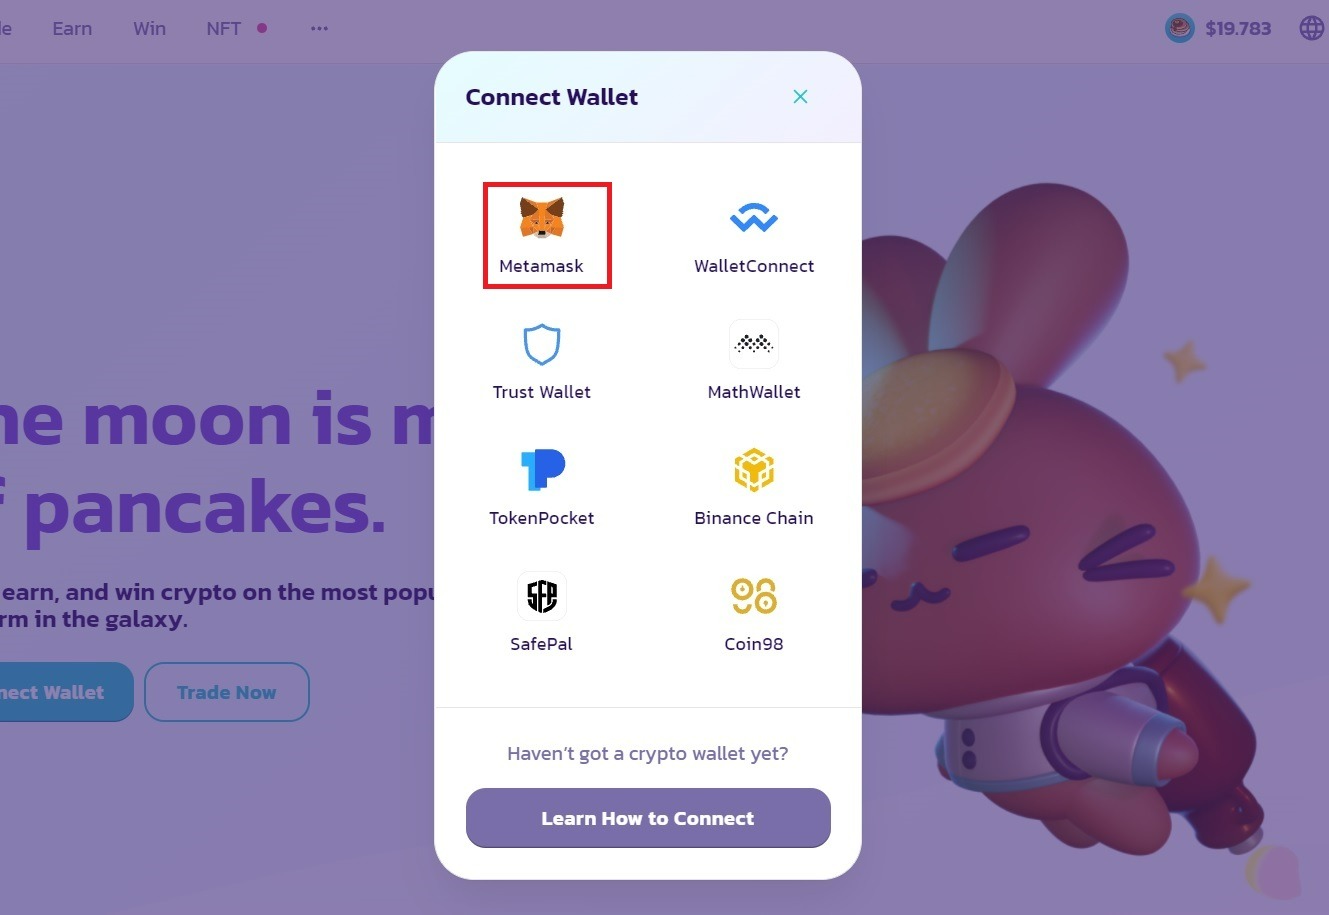
You can choose from one of the popular wallets. In the previous step, we created the Metamask wallet and topped it up, so now we will select Metamask. If you have another wallet and you know how to use it, you can choose it - it doesn't matter.
The Metamask window will appear. You must enter your password and connect the wallet to the PankaceSwap site.
The data may not be updated immediately. If you have connected a wallet, but you still see the “Connect Wallet” button, try refreshing the page.
If you did everything correctly, the first and last characters of your wallet address will be visible in the upper right corner instead of the “Connect Wallet” button. Now click “Trade Now” or go to pancakeswap.finance/swap.
Next, you will see this window.
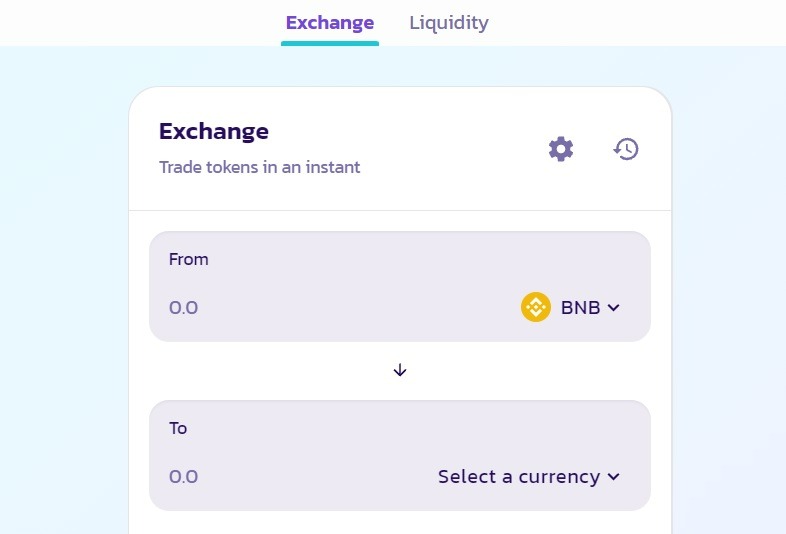
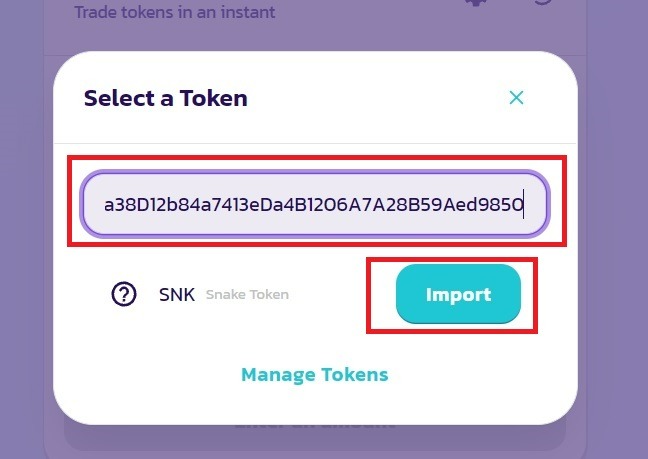
There are two fields: From (top) and To (bottom). At the top, you have to select the currency you are going to pay for the SNK tokens. Select BUSD. At the bottom, you have to click on "Select a currency" and select the SNK. Do not try to find a token by name, otherwise you risk choosing the wrong token. Better to copy this address and paste it into the “Search name or paste address” window.
0x53a38D12b84a7413eDa4B1206A7A28B59Aed9850
Such a window should appear. The short name of the Snake Token is SNK. Click "Import".
PancakeSwap will alert you to potential risks. This is a standard message that appears when importing any cryptocurrency outside the top. Check the "I understand" box and confirm the action.
Note: You can also go to BUSD / SNK pair via direct link.
Link to BUSD/SNK pair:
Now you need to enter the amount for which you want to buy SNK tokens. Enter the amount in BUSD on the top line. Since BUSD is a stablecoin, its rate is equal to the dollar rate (if there is a difference, it will be less than half a percent). Let's say you want to buy SNK for 1000 BUSD ($1000). Enter this number on the top line. If you enter a number more than you have on your wallet, the button will be blocked - it will show “Insuffisient BUSD ballance”.
If you entered the amount that you have in your wallet, the system will show you the current exchange rate and the number of okens that you will receive. The details of the trade will be shown below, including the PancakeSwap commission. Now it is 0.25%. The commission can be reduced if you hold LP tokens, but we will not dwell on this now. Thus, with 1000 BUSD you will pay $2.5 exchange commission.
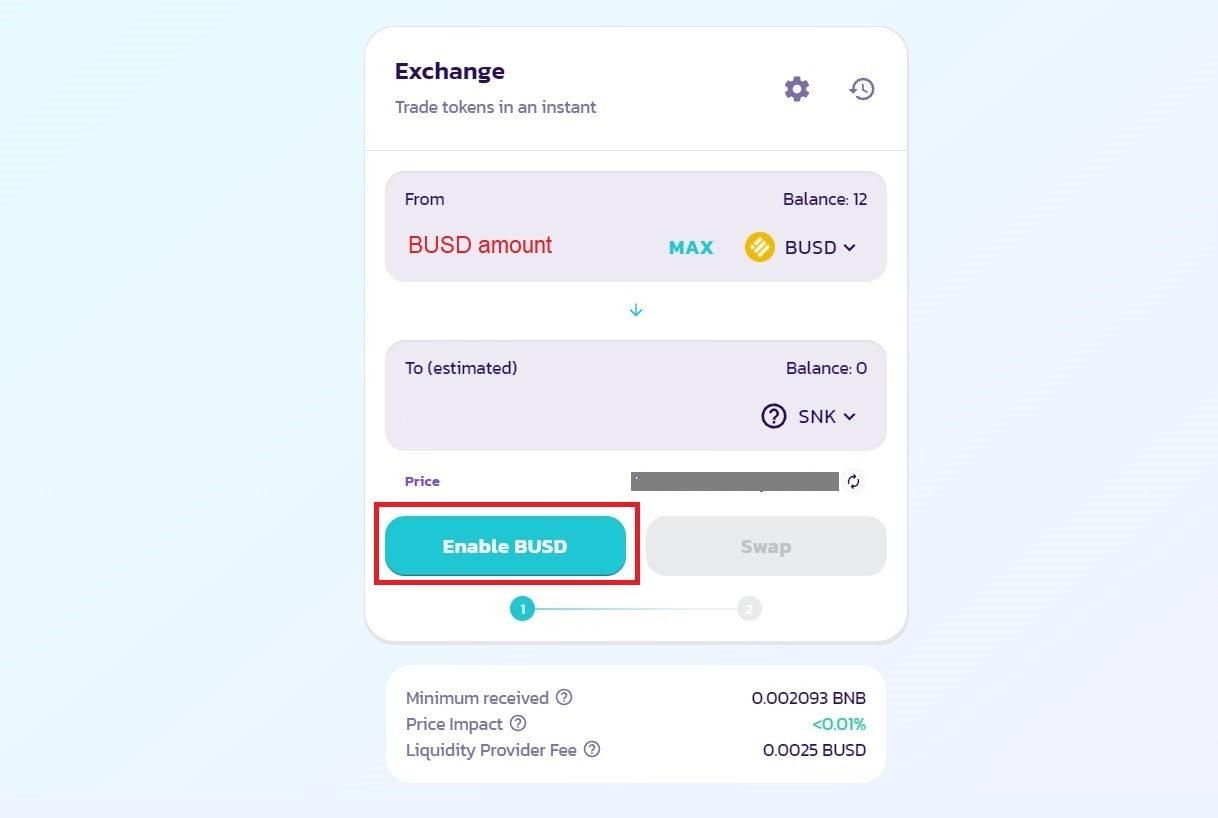
Chances are you won't be able to hit the Swap button right away. Instead, you will have to click Enable BUSD to allow the PancakeSwap site to access the BUSD token.
Note: Even if you are not going to exchange Binance Coin (BNB), you must still have at least $3-5 equivalent of this coin on your balance to cover the transaction fees. The average commission on the Binance Smart Chain network is up to $0.50 (fifty cents or less).
After giving permission, click "Swap".
Note: You can also click on settings to customize the details of the transaction. For example, you can choose the transaction speed: Standard, Fast, or Instant. However, transactions on the Binance Smart Chain usually take no longer than a few minutes, and the transaction fees are relatively low, so there is no need to manually configure anything. Just hit Swap and that's it.
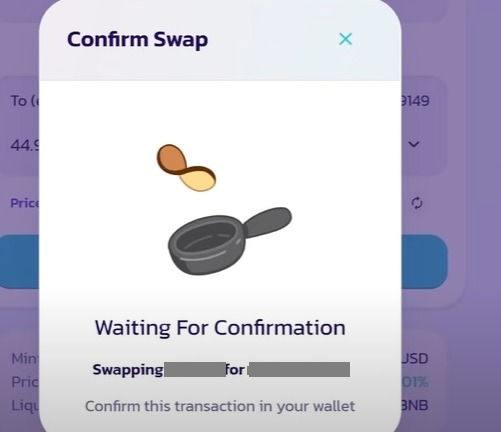
You should now confirm the transaction in your wallet. The verification process may differ depending on which wallet you are using. In any case, it is not difficult. The wallet will most likely send you a notification or open a window. Just confirm the transaction in your wallet.
Note: Sometimes a transaction fails and an Error pops up. It happens from time to time, but it's not a big problem. Just click OK and try again.
If all went well, you will see a notification on the PancakeSwap website: “Transaction receipt” with transaction details and a link to BscScan.
That's all. Congratulations! You have bought SNK tokens! They will appear in your wallet in a few minutes.
To make sure you received the tokens, go to Bscscan and search your wallet.
If you want to sell tokens, you can do everything exactly the same, but vice versa: on the https://pancakeswap.finance/swap page, insert the SNK contract address in the top From line and the desired currency in the bottom To line.
You are free to dispose of your tokens as you please, but we do not recommend selling them ahead of time. Hold tokens for the game to multiply your capital by getting staking rewards.
Good luck!
Questions and answers
What is the address of the SNK contract?
0x53a38D12b84a7413eDa4B1206A7A28B59Aed9850
What is the abbreviated name of the token?
SNK
Is there a direct link to the BUSD/SNK pair?
Yes, here it is.
How can I find out the current cost of a transaction?
The transaction cost on the Binance Smart Chain is the same for all BSC currencies including BUSD, BNB and SNK. Usually it does not exceed $0.50. You can view the estimated real-time transaction value there.
Is there a liquidity pool?
Yes, there is a liquidity pool, and it is regularly replenished, and liquidity tokens are burned.
Was there a private round of sales?
Yes, 160,097,600 SNK were sold in the private round.
Can I see the source code?
Yes. Cryptosnake is an open-source game, so we publish the codes for open access. You can view them on GitHub.
Will I be able to use the purchased tokens in the game?
Yes, game tokens are used in the play-to-earn game cryptosnake.game.
Will I be able to sell SNK tokens?
Yes, you can sell them on PancakeSwap or any other means available to you.