Guide For Purchasing Cryptosnake Artifacts
CryptosnakeThis is a detailed guide for buying artifacts. Buying NFT tokens with cryptocurrency differs from buying goods on Amazon for example. Read the guide carefully and repeat the actions step by step.
Note: This guide is written for buying artefacts via browser. We recommend buying artifacts from a computer, not from a mobile phone, because the Cryptosnake game itself will also be browser-based. When you try to buy artifacts from your phone, you may encounter technical problems!
Step 1. Buy cryptocurrency BNB and BUSD on Binance
Note 1: If you already have an account on Binance and already know how to buy cryptocurrency there, you can skip this step and proceed to the next step.
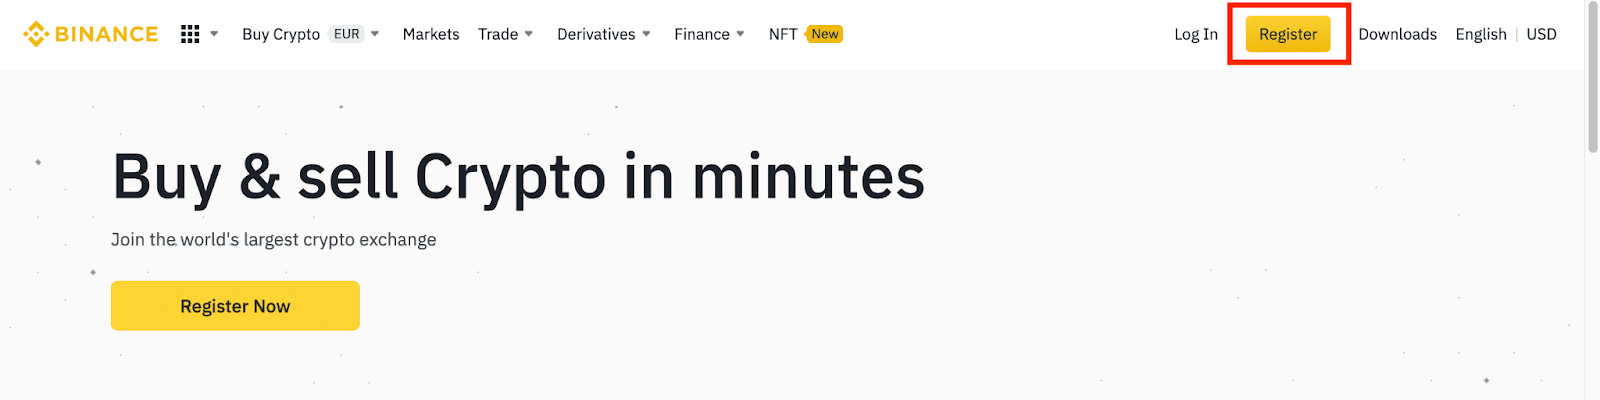
Go to binance.com and click Register.
On the registration page, enter your email address, create a password for your account, and enter the Referral ID (if any). Then, read and agree to the Terms of Service and click “Create Account”.
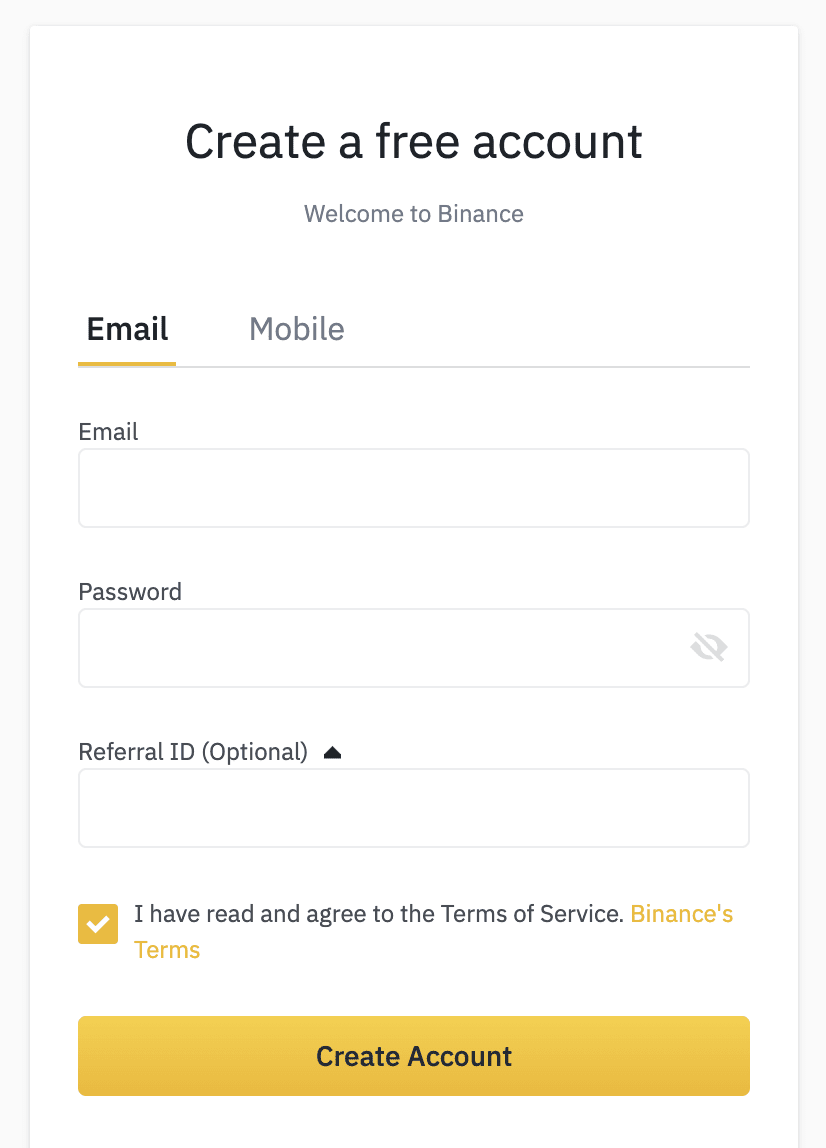
Your password must be a combination of numbers and letters. It should contain at least 8 characters, one UPPER CASE letter, and one number.
Complete the Security Verification (slide the puzzle).

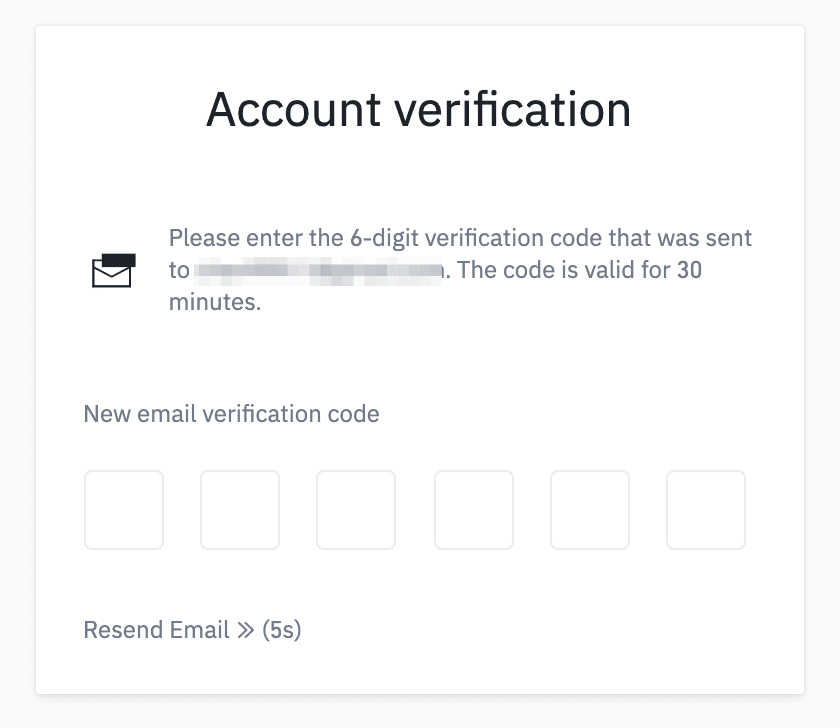
The system will send a verification code to your email. Please enter the verification code within 30 minutes. If you can’t find the email in your inbox, please check your other mail folders as well, or click “Resend Email”.
Congratulations, you have successfully registered on Binance!
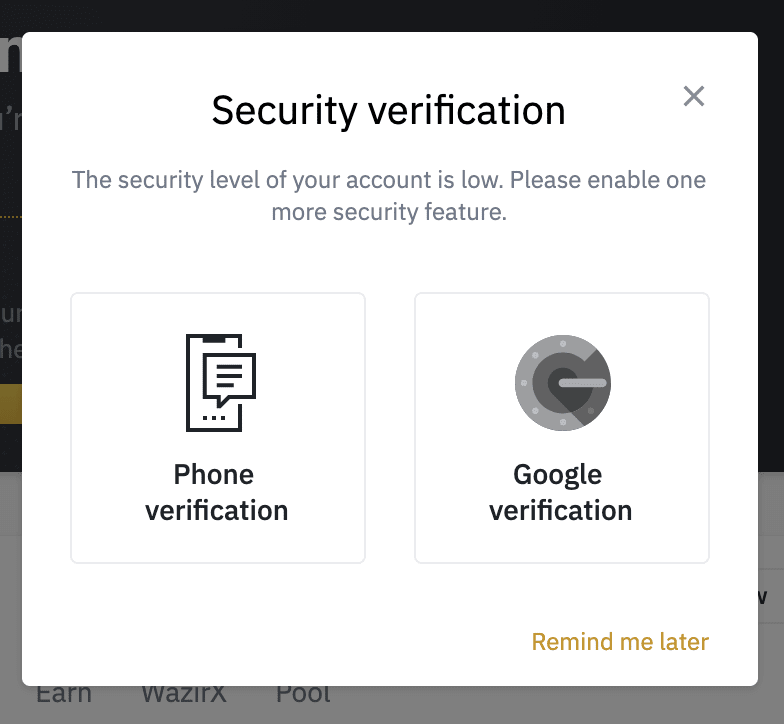
Next, Binance will offer you to strengthen the security of your account by installing two-factor authentication. You can link your account to a phone number, or click “Remind me later”.
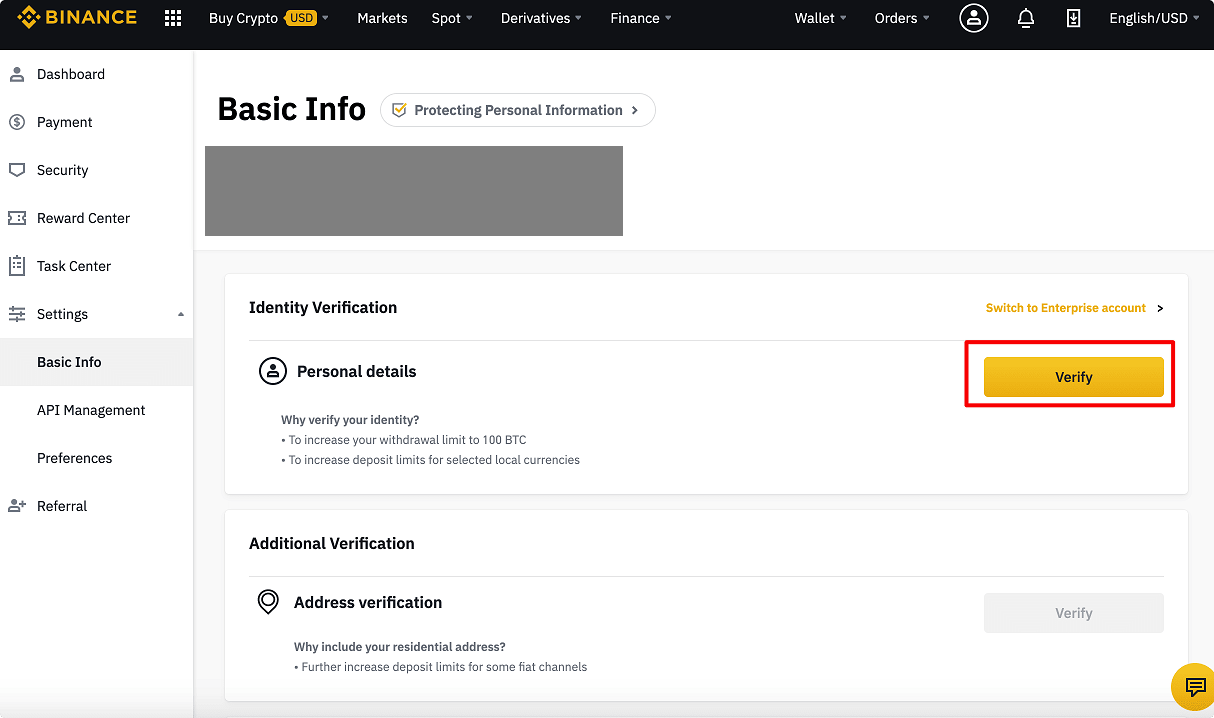
According to regulations introduced in August 2021, Binance asks for proof of identity. Therefore, now you must go to your account and go through verification.
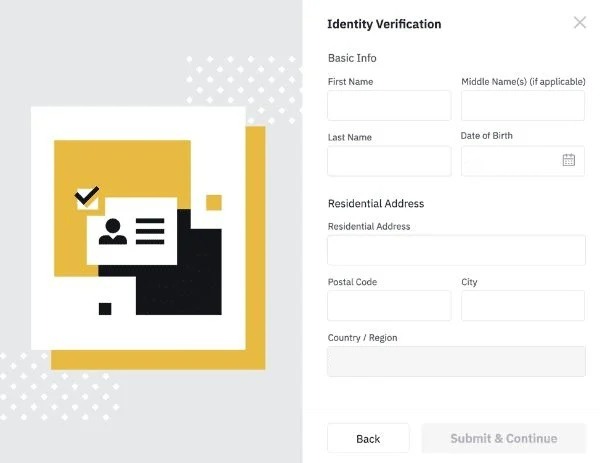
You will need to provide your name, date of birth, country, address, and postal code.
Note 2: Binance is required to collect this data due to US KYC (know-your-customer) law. This law was passed to combat financial crime in the United States. This data will not be passed on to the authorities of your country without a special request.
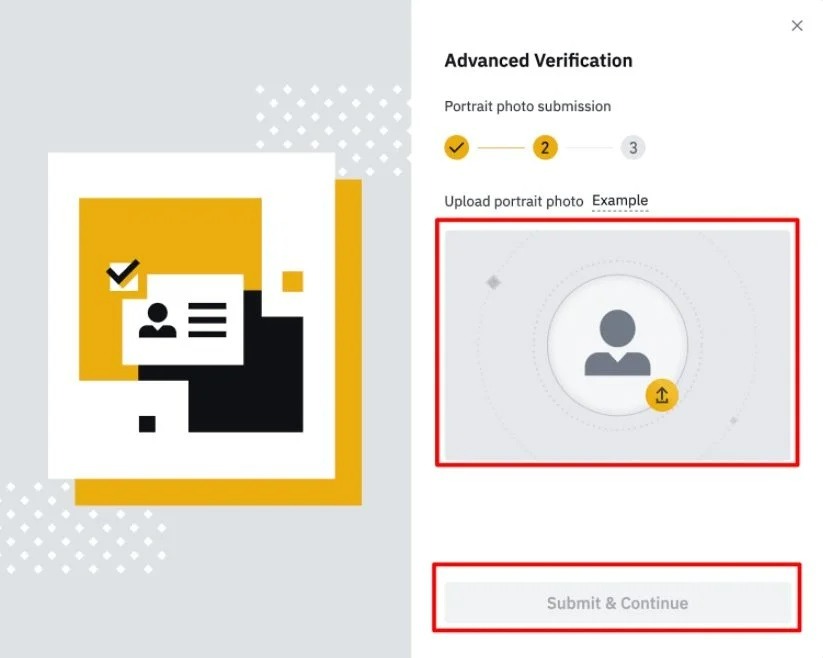
Now you must verify your identity by taking a photo of your identity document. This can be a passport, driver's license, or ID card.

The next step is to upload a portrait photo.
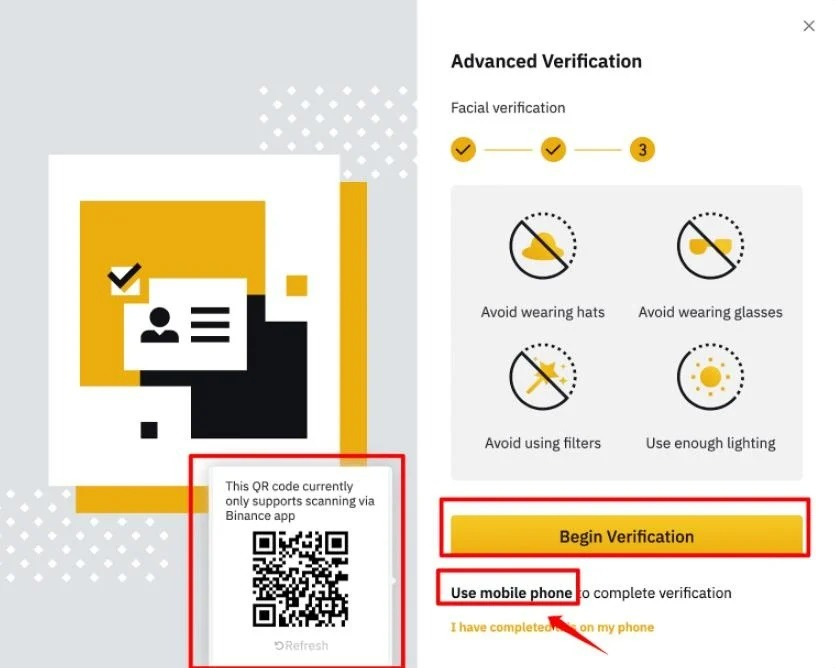
The last step in this stage is facial verification. Binance will use your device's camera to scan your face. You can opt to use your webcam (if you use your computer to verify your identity) or your phones ’camera through the app. Binance will provide a QR code to scan with the Binance app in case you choose the latter.
Congratulations. You have been verified. Binance may offer you Advanced Verification, but this is not required. Basic verification allows you to trade up to $200,000 per day, so you can already buy any NFT artifact, including Rainbow Unicorn.
You can now buy cryptocurrency. First of all, you need to top up your balance. You can transfer cryptocurrency from your wallet to Binance. If you're reading this, you've probably never bought any cryptocurrency. In this case, you need to buy cryptocurrency using a card. It can be a bank card with any fiat currency (USD, EUR, RUB, GBP and so on).
Find “BUSD” in the list of cryptocurrencies. Select Buy with card. Buy as much cryptocurrency as you see fit. BUSD is a stablecoin. This means that its rate is always 1 USD. You can buy exactly as much BUSD as you plan to spend on artifacts, but we recommend buying $5-10 more just in case. For example, you want to buy 4 Diamonds (100 BUSD each) and 15 Mystery chests (10 BUSD each). In this case, we advise you to buy 560 BUSD.
To make a purchase, you must enter your bank card details for the purchase. This is similar to how you buy a Netflix or Spotify subscription.
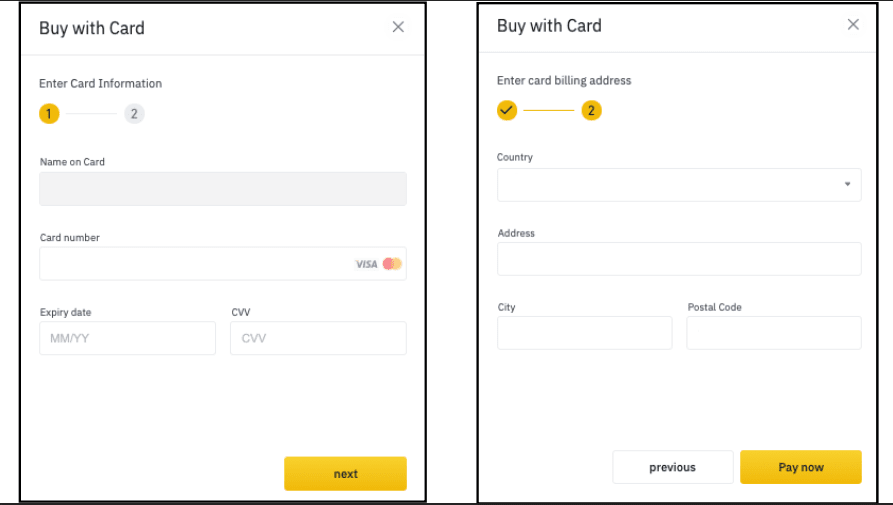
After confirmation of payment, the cryptocurrency will be credited to your balance.
Now you need to buy BNB cryptocurrency. It is used to pay transaction fees. Fees rarely exceed $0.50, but the minimum purchase amount on Binance is $15 and the withdrawal fee is 0.0005 BNB. Therefore, we advise you to buy $16 worth of cryptocurrency. The BNB purchase procedure is the same as the BUSD purchase procedure.
Congratulations. You have both required cryptocurrencies in your account. Now you need to create a Metamask wallet and withdraw cryptocurrency to it from Binance.
Step 2. Install the Metamask extension in the browser
You can use any cryptocurrency wallet, but we recommend using Metamask.
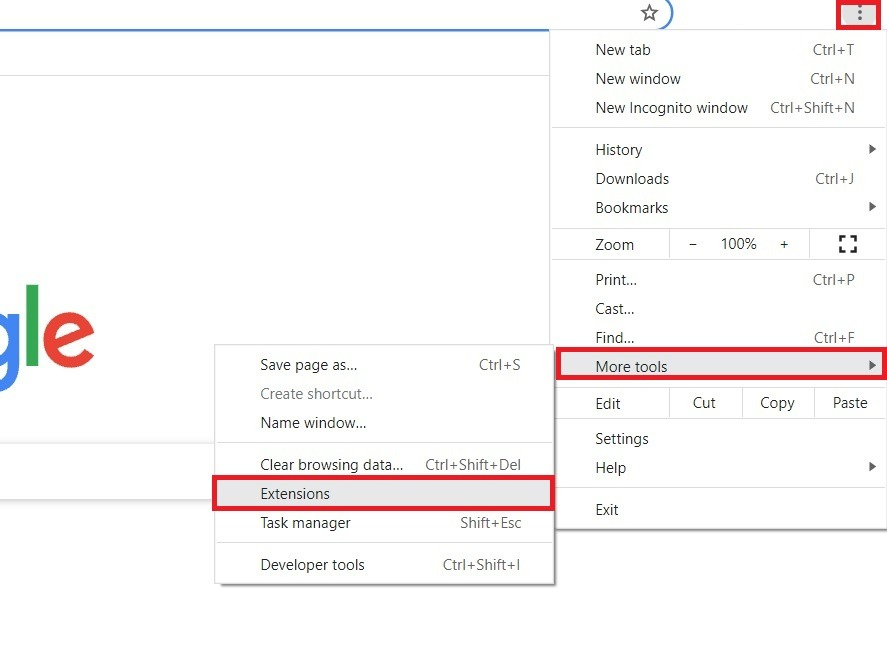
Find the Metamask extension in the extensions directory. Below is an example of how to find this extension in the Google Chrome directory. The steps may differ slightly if you are using a different browser.
We go to the browser menu (three dots in the upper right, slightly lower than the browser close button). Go to More tools - Extensions.
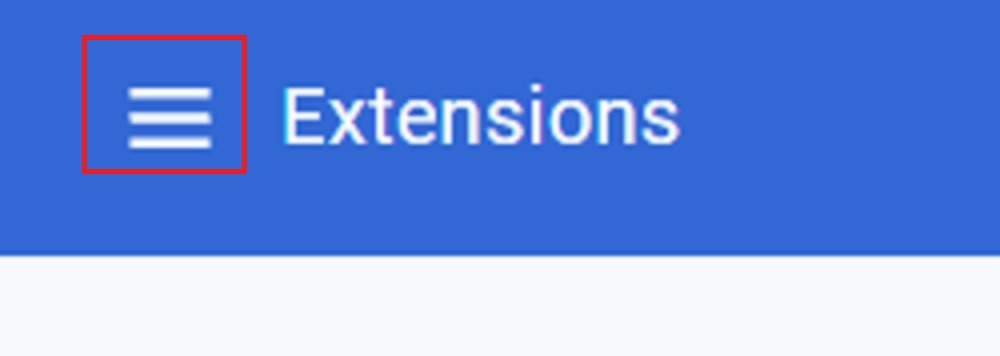
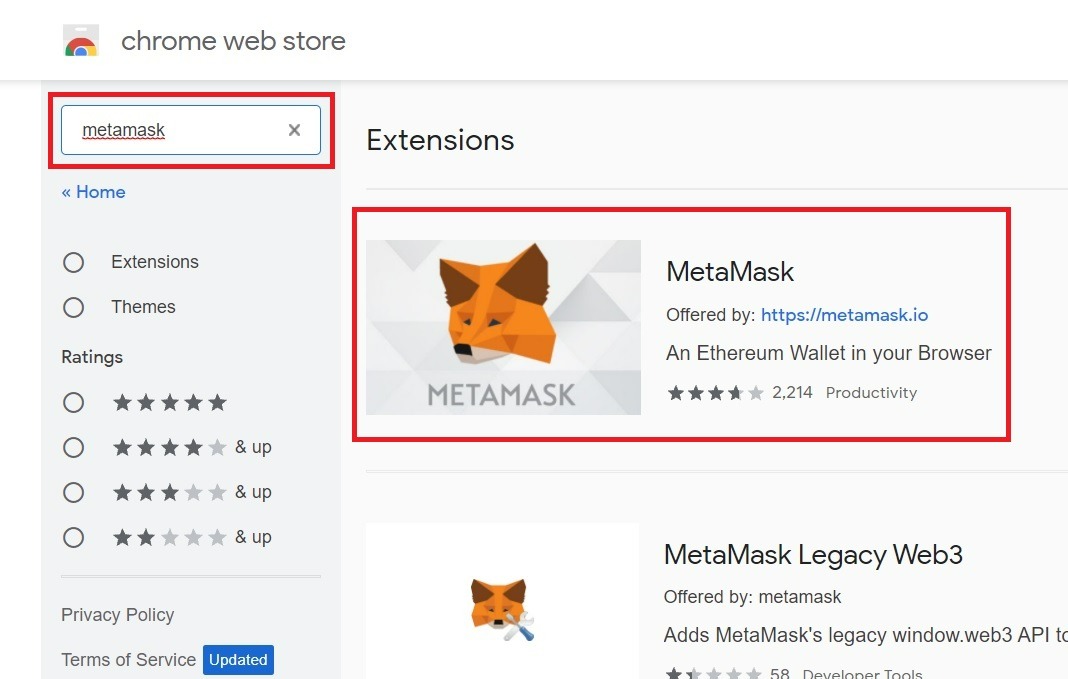
Click on the three stripes at the top left.
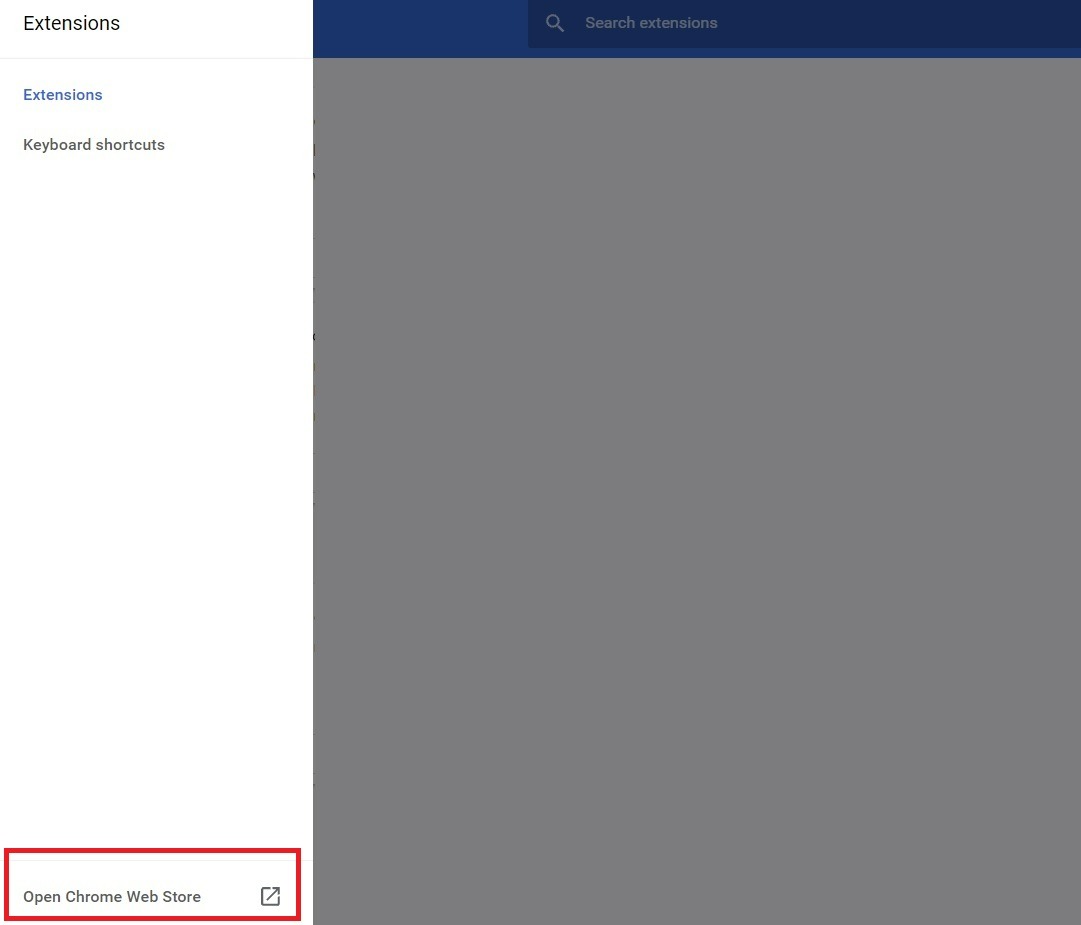
Click on the Open Chrome Web Store (at the very bottom left).
Enter "metamask" in the search. Click on the first fox extension - it's simply called MetaMask.
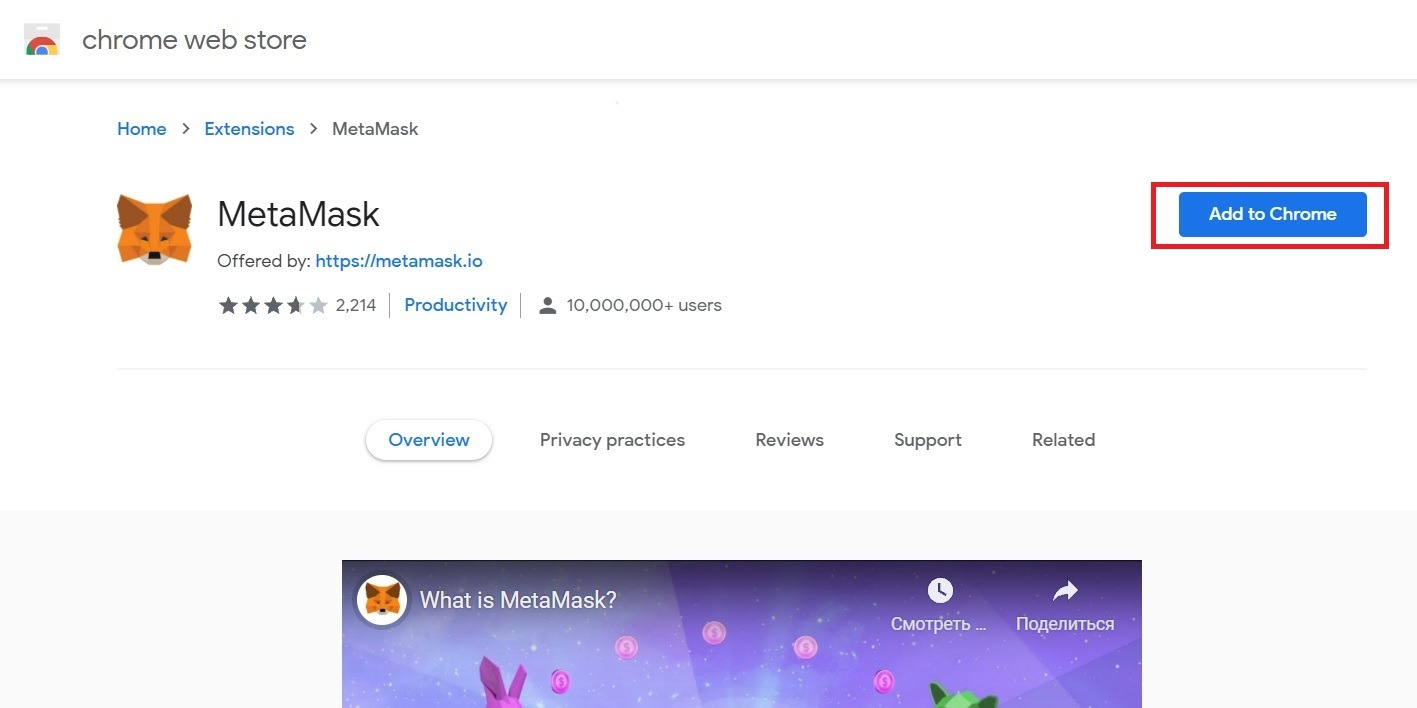
Click “Add to Chrome”. If you see a notification window, confirm the installation of the extension by clicking "Add extension".
The extension window would open automatically. There will be a fox head that follows your cursor and a welcome text. Just click on the blue “Start” button.
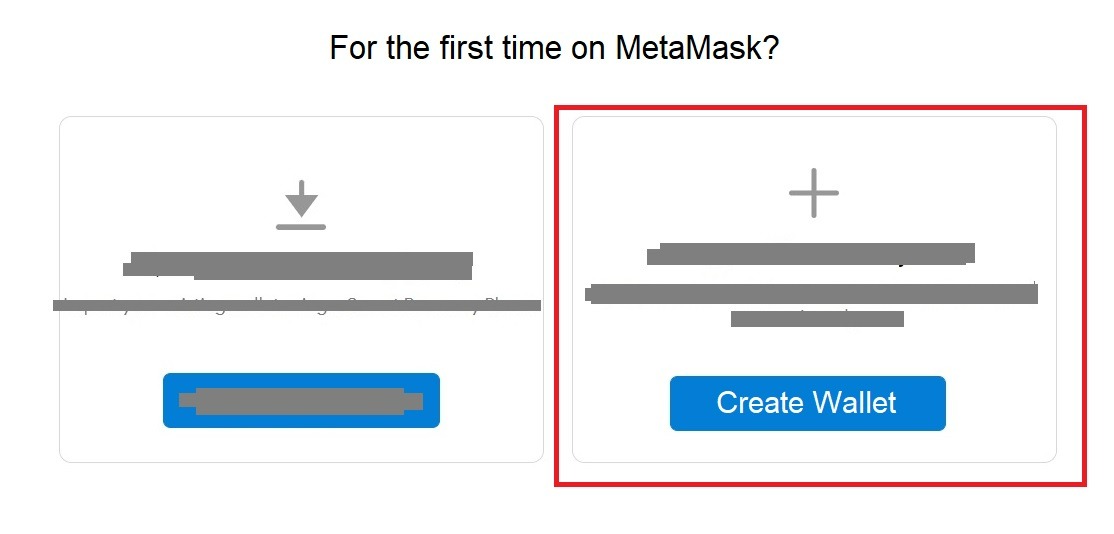
Next, Metamask will offer you a choice. You can import a wallet or create a wallet.
If you have a wallet, import it (left). If you don't have a wallet, create one (right).
Whichever you choose, the next step is to accept the privacy policy. Click I Agree.

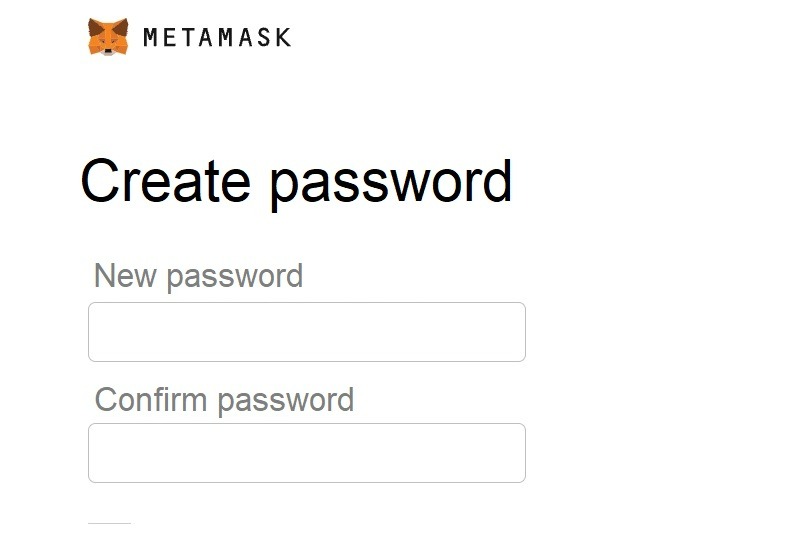
We will assume that you do not have a cryptocurrency wallet and have chosen to create one. Now you need to come up with a password to enter.
Next, you will be prompted to watch the video. Take a look if you like and click Next.
Metamask will generate a seed phrase for you. Copy and save it so you don't lose it. This is a kind of password. It will help you access your wallet. So take care of the safety of this set of words and do not say it to anyone.
Note 1: The phrases in the picture are just an example.
You should now repeat the sequence of words in the seed phrase. Do this and click on the blue button.
Metamask will give you a QR code and prompt you to go to the mobile app. Close this window.
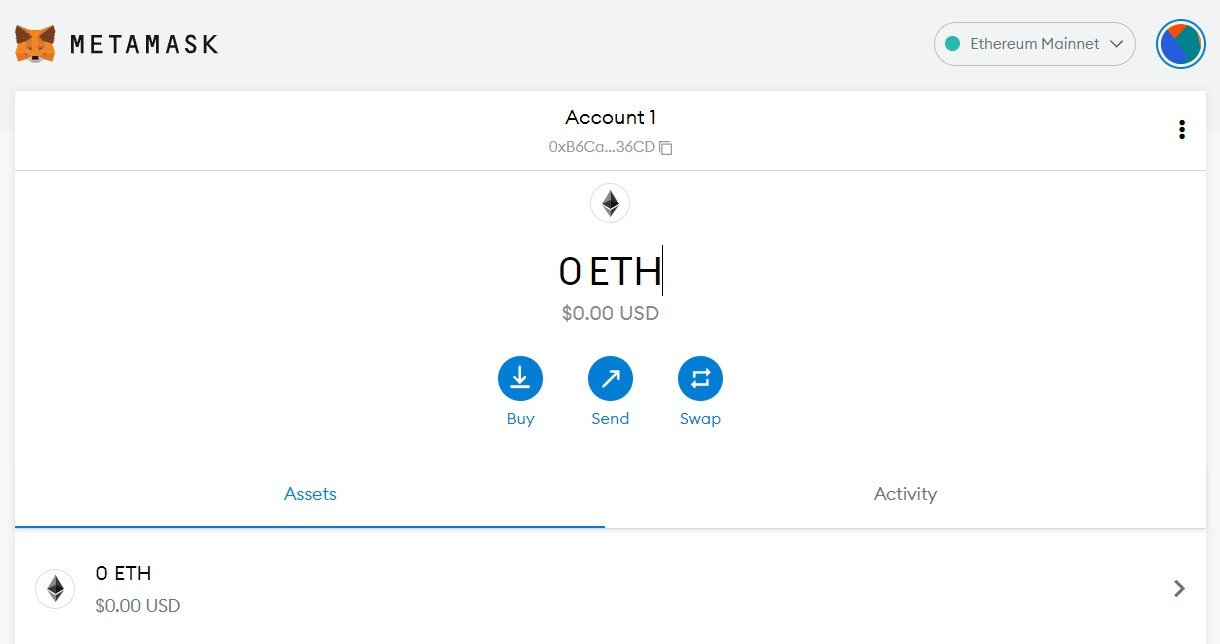
You have created a MetaMask wallet. This is how it should look.
Step 3: Fund Metamask Wallet with Binance
First, you must connect the Metamask wallet to the Binance Smart Chain. Click on Ethereum Mainnet - Custom RPC.
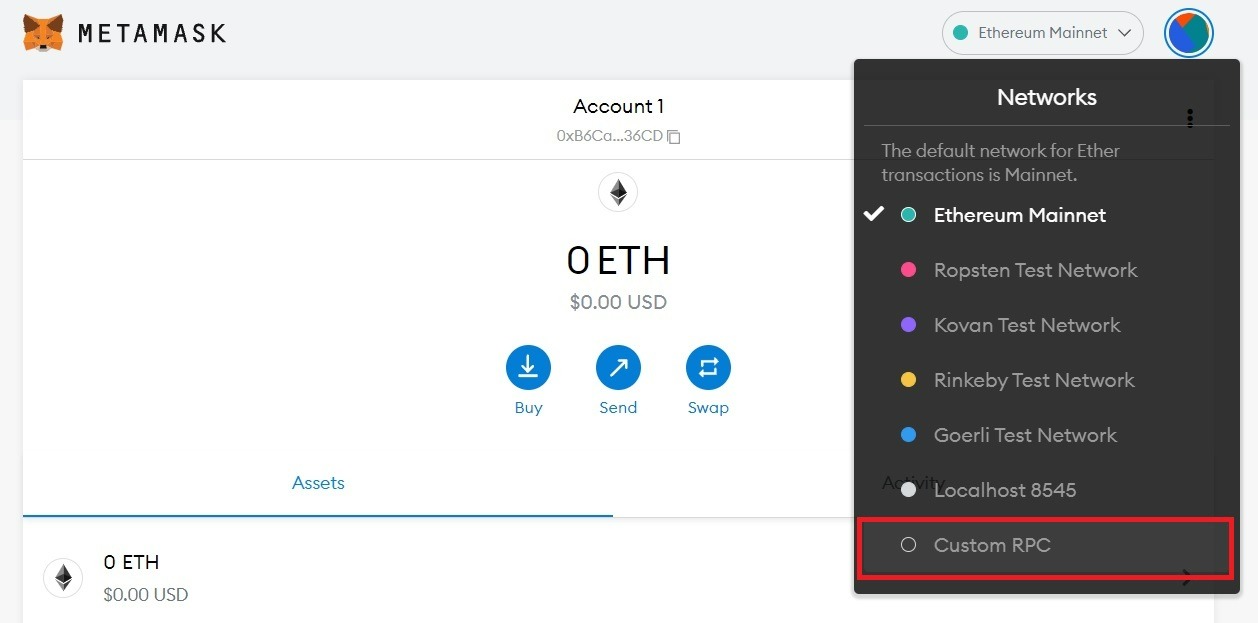
Enter the following details:

Network Name: Smart Chain
New RPC URL: https://bsc-dataseed.binance.org/
ChainID: 56
Symbol: BNB
Block Explorer URL: https://bscscan.com
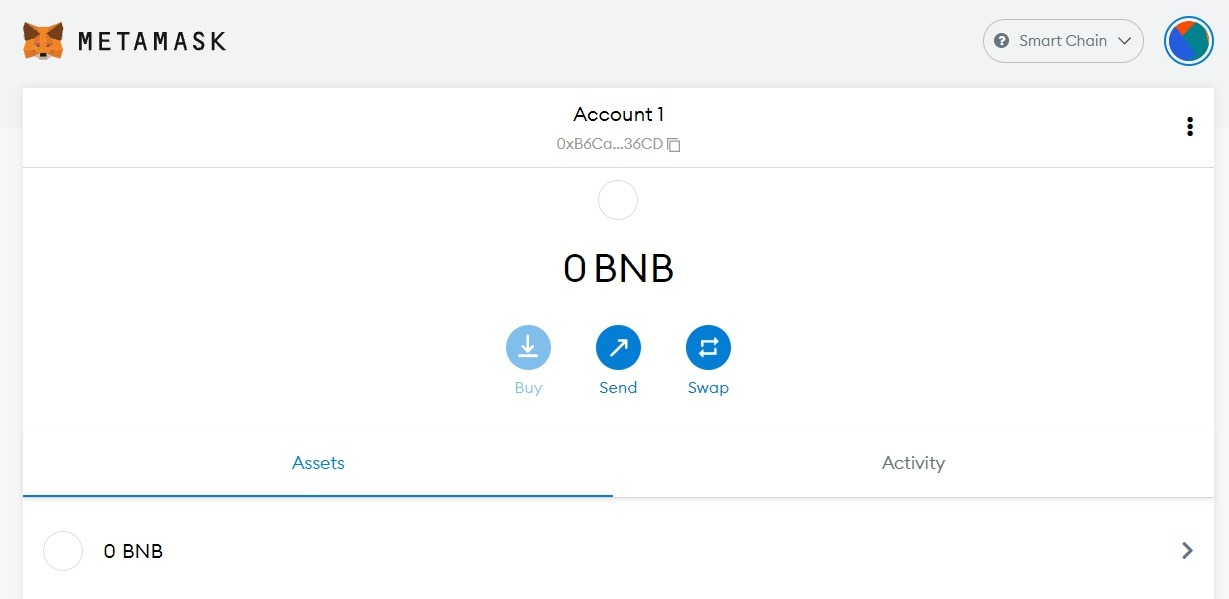
Save your data. Your wallet should now look like this:
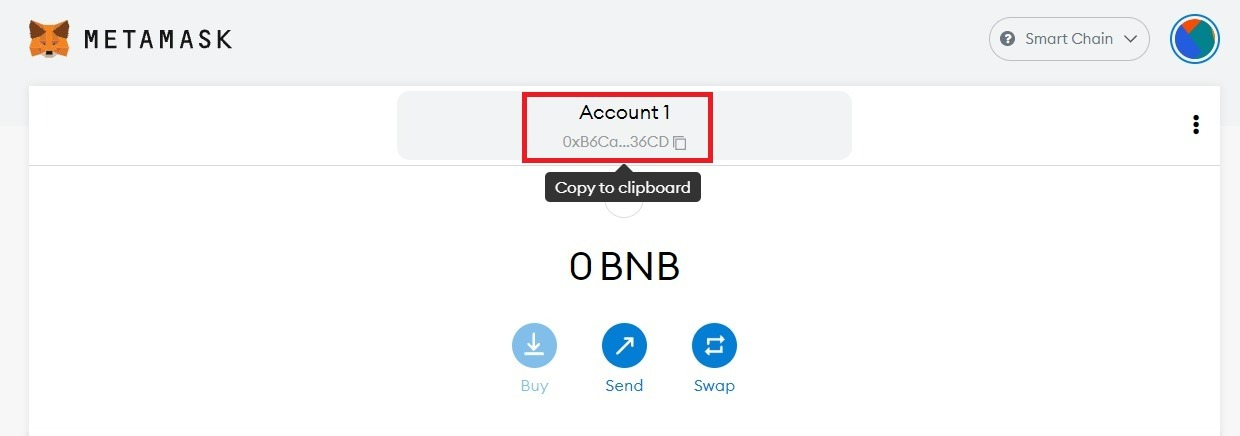
You can now transfer BNB and BUSD from your Binance to your Metamask. Copy your wallet address and save it.
Now go to Binance. If you didn't skip Step 1, you should already have BNB and BUSD on your account. If you don't have them, buy BUSD for the amount you plan to spend on artifacts (plus $ 5-10 just in case). Also buy $17 in BNB (you will need no more than $0.50 per transaction, but the minimum purchase amount is $15 and $2 in reserve).
Now transfer BUSD and BNB to your Metamask wallet. To do this, go to your Binance wallet, select an asset and click "Withdraw".
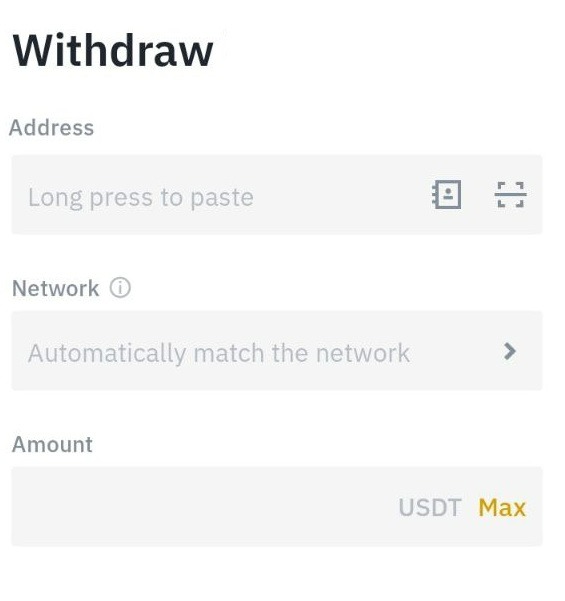
Paste in the address you copied to Metamask (this will be a long character set).
Select the Binance Smart Chain.
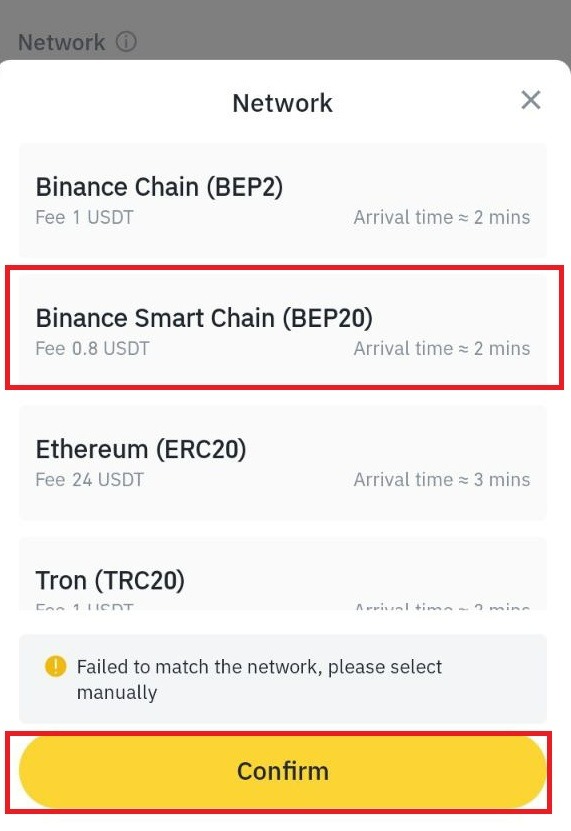
Click Withdraw.
Repeat the same steps for the second coin. You must output both BNB and BUSD. Funds should be credited to Metamask within a few minutes.
Make sure funds are credited. Leave the Metamask window open before the next step.
Step 4: Purchase NFT Artifacts on the Cryptosnake website
Note 1: Due to reasons beyond our control, we are not yet able to place artifacts on the PancakeSwap marketplace. The platform has not yet opened public access to the placement of NFT collections by third-party projects. Probably, the listing of artifacts on PancakeSwap will happen later - then we will make another guide.
Today you can buy NFT Artifacts on our official website.
So. Let's make sure you're ready:
- You have the Metamask extension installed in your browser
- Metamask has the right amount of BUSD on the balance sheet to make a purchase (plus a few coins just in case), as well as the right amount of BNB coins to pay the blockchain transaction fee up to $ 0.50 in BNB equivalent for each transaction.
- The Metamask window is opened as a separate tab in the same browser window in which you are going to buy artifacts.
If these conditions are not met, you will not be able to buy the artifact.
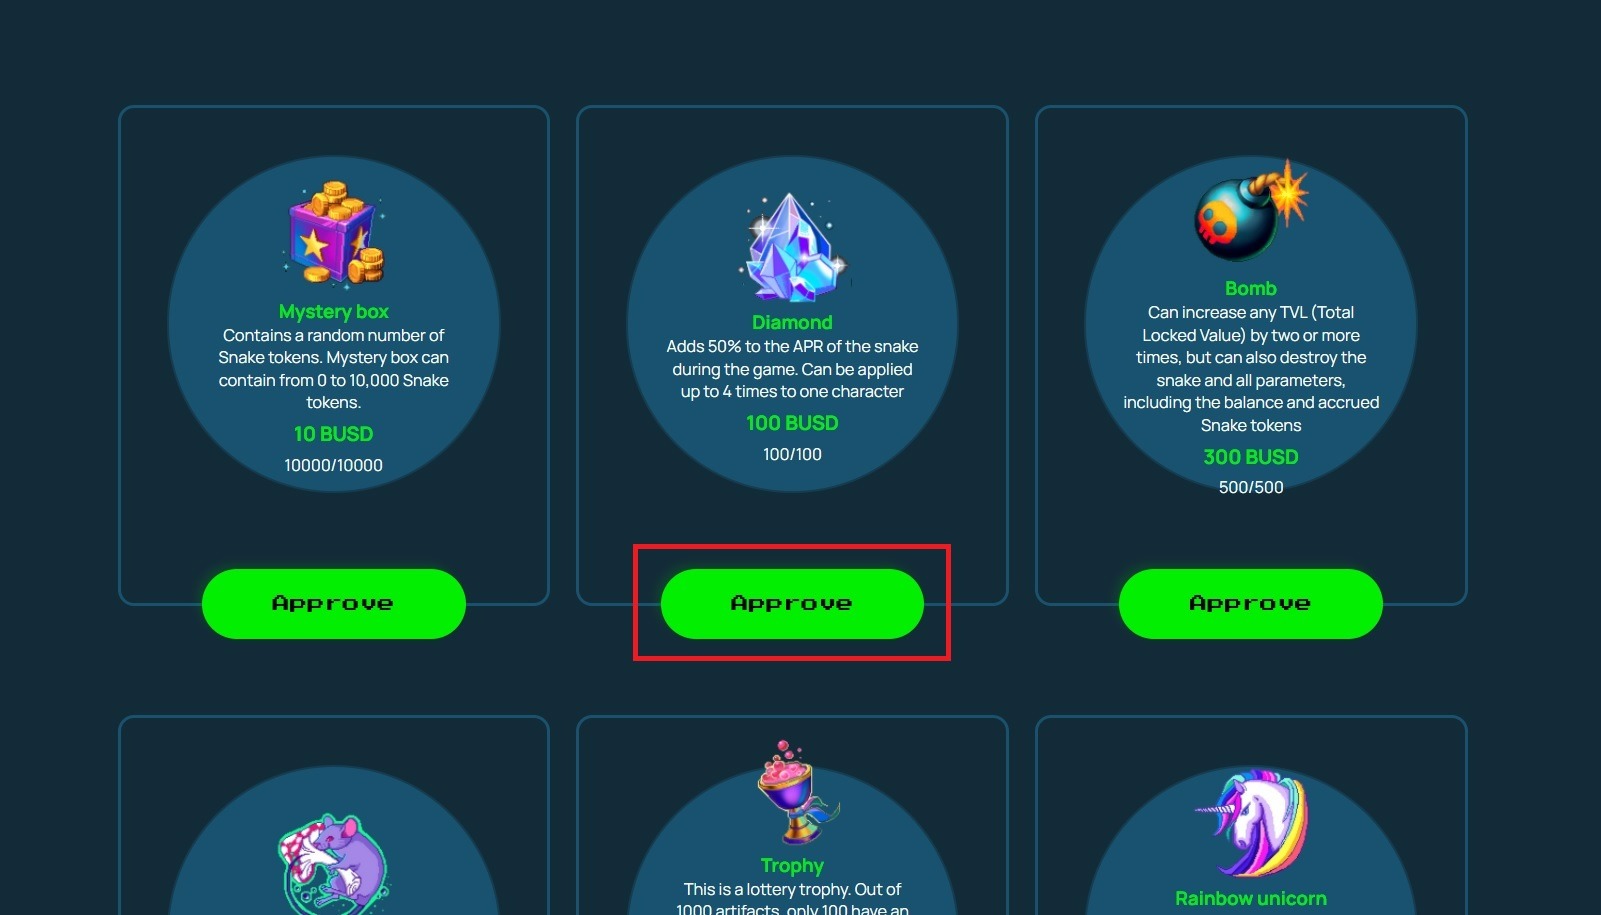
If all conditions are met, go to shop.cryptosnake.game and click on the orange Connect to a Wallet button at the top left.
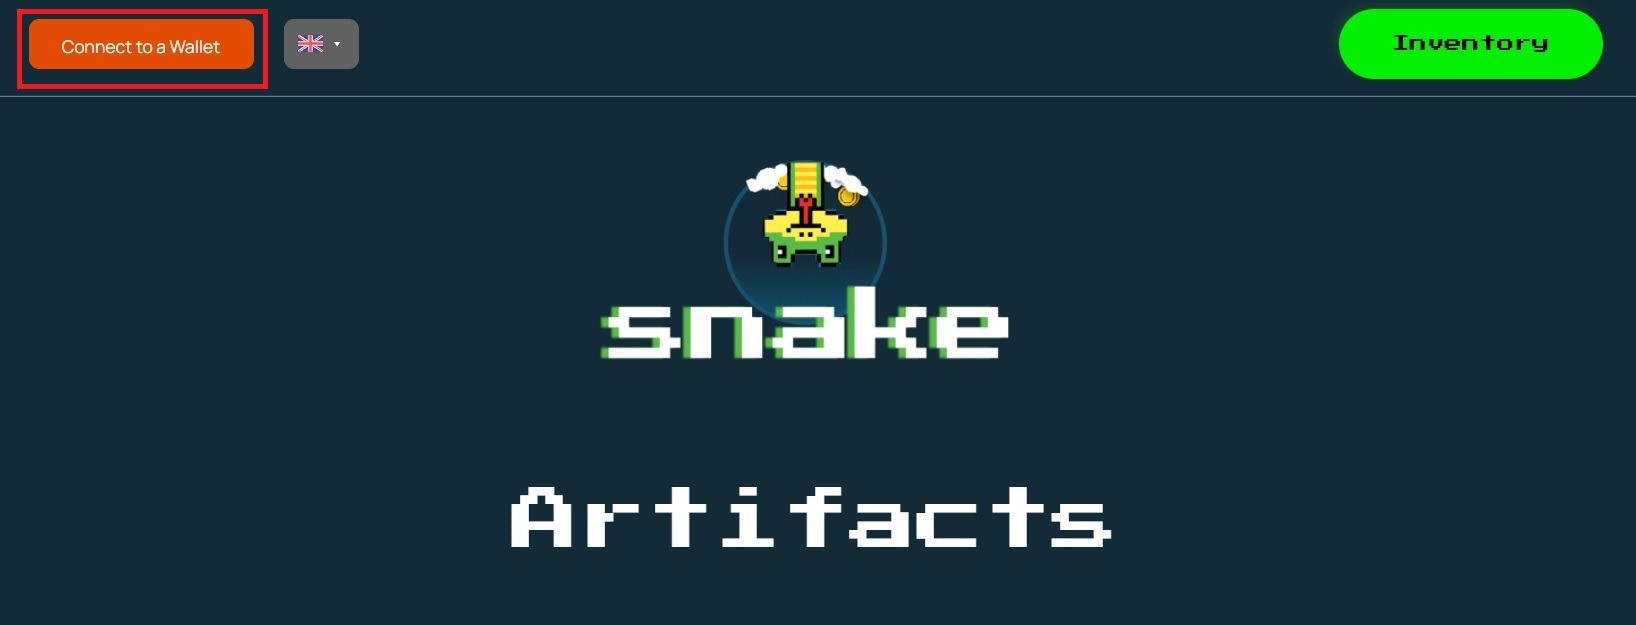
If the connection to the wallet was successful, the site will look like this.
Now you need to allow the site to conduct transactions. To do this, select the artifact that you want to buy first (for example, Diamond). Click the “Approve” button.
This will open the Metamask window. You need to give permission to make the payment.
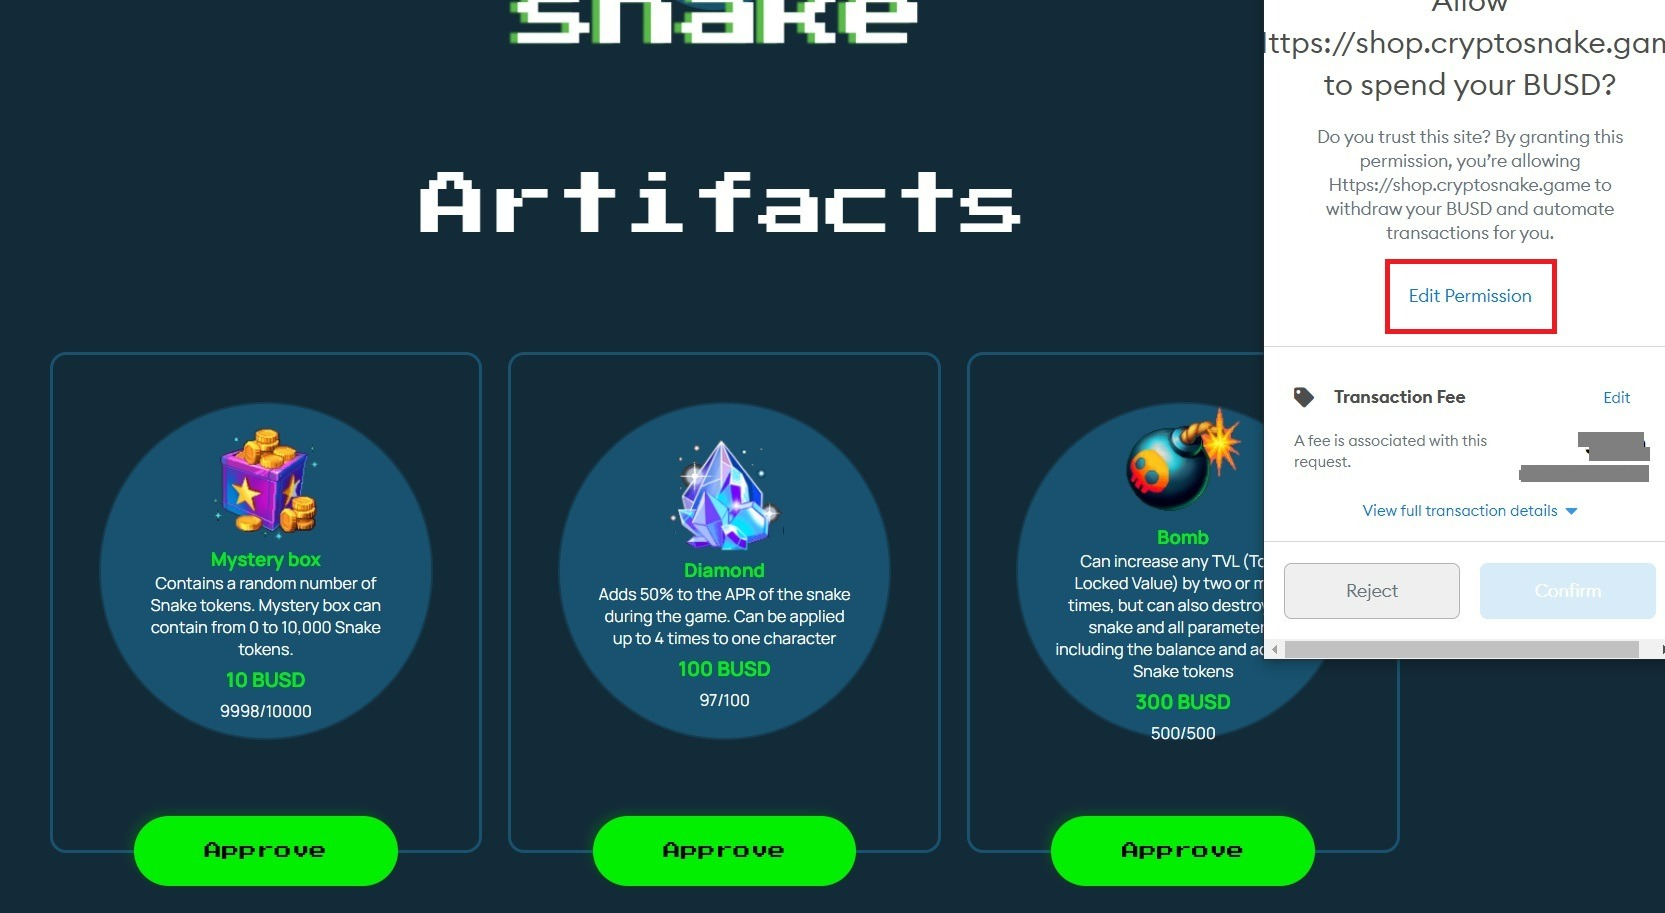
Choose “Unlimited” or set a limit. The limit must be no less than the amount you are going to spend on artifacts.
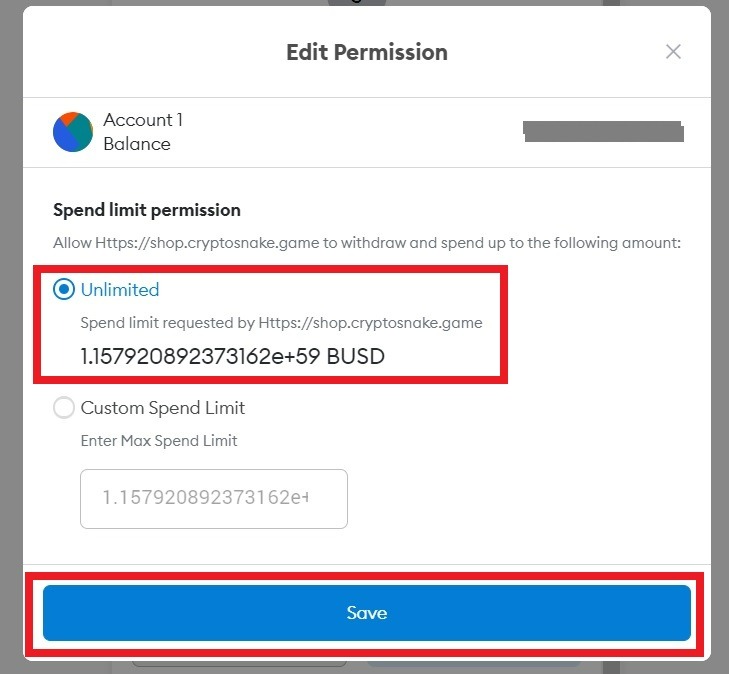
Then click “Confirm”.
After confirmation, another MetaMask window will be automatically opened. The payment will be made there. Transaction confirmation time can take up to several minutes.
Congratulations. You have acquired your first artifact. Check his inventory (the green “Inventory” button). This is what the inventory looks like with purchased artifacts.
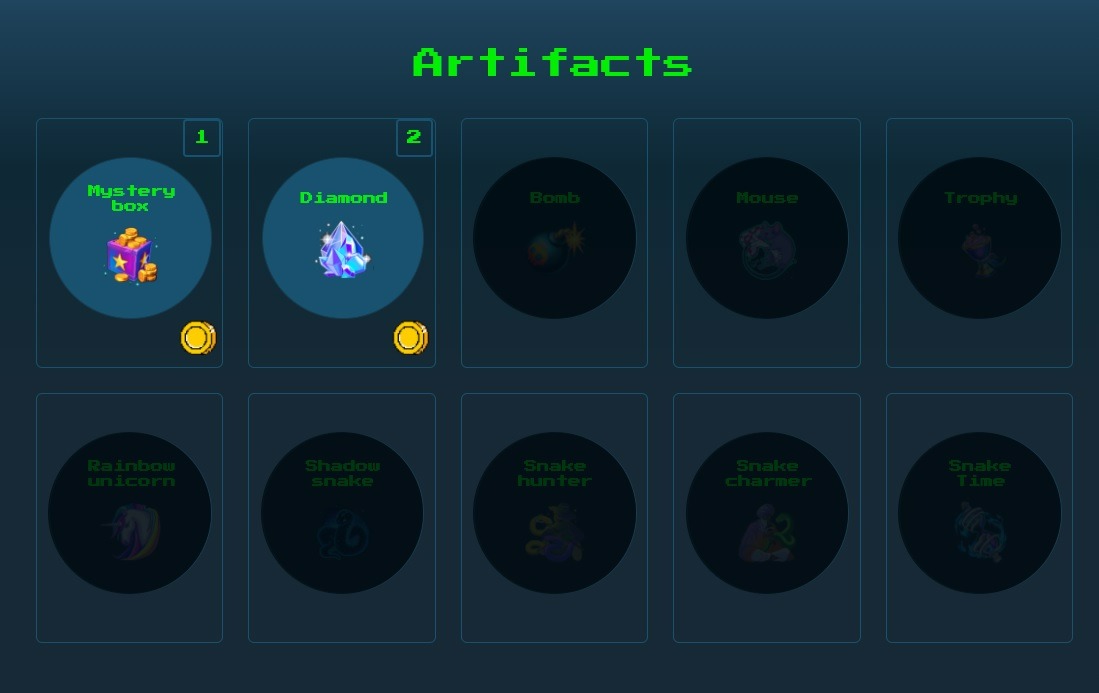
Note 2: This screenshot is a demo. At the time of writing this guide, no artifact has been purchased. Sales begin on October 20 at 17:00 UTC.
For your next purchases, you will no longer need to give the site permission to purchase every single time. You can simply buy artifacts by clicking on the “Buy” button.
That's all. Good luck!