Give your Pixel Camera Superpowers with this Synthetic Long Exposure script using Termux
u/babasapir
What does this do?
It's really an automated sequence of scripts: your clip will be transformed into a series of pictures, those will get a "mean average stacking" treatment.
There's currently no app for doing this as far as i know. It's been tested on a google pixel 2xl but should work with any android phone.
What can I do with image stacking starting from a video?
The peculiar process of image stacking makes possible to obtain different effects depending on the starting video:
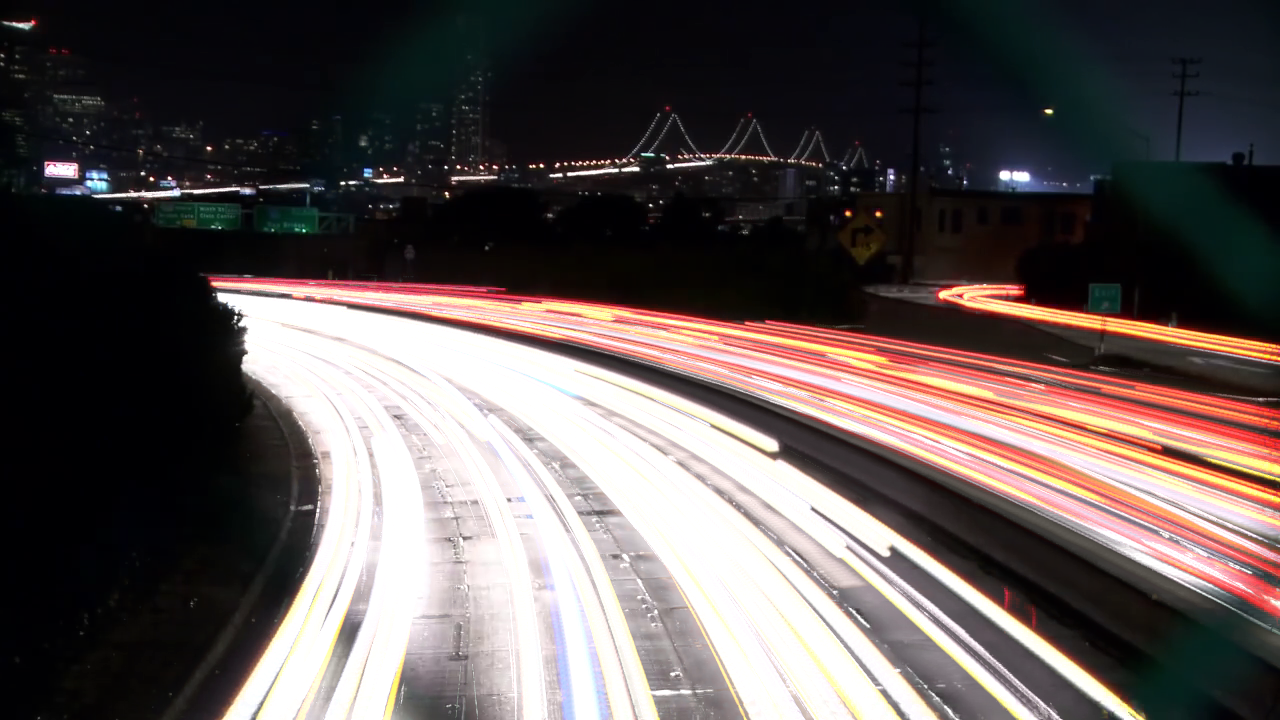
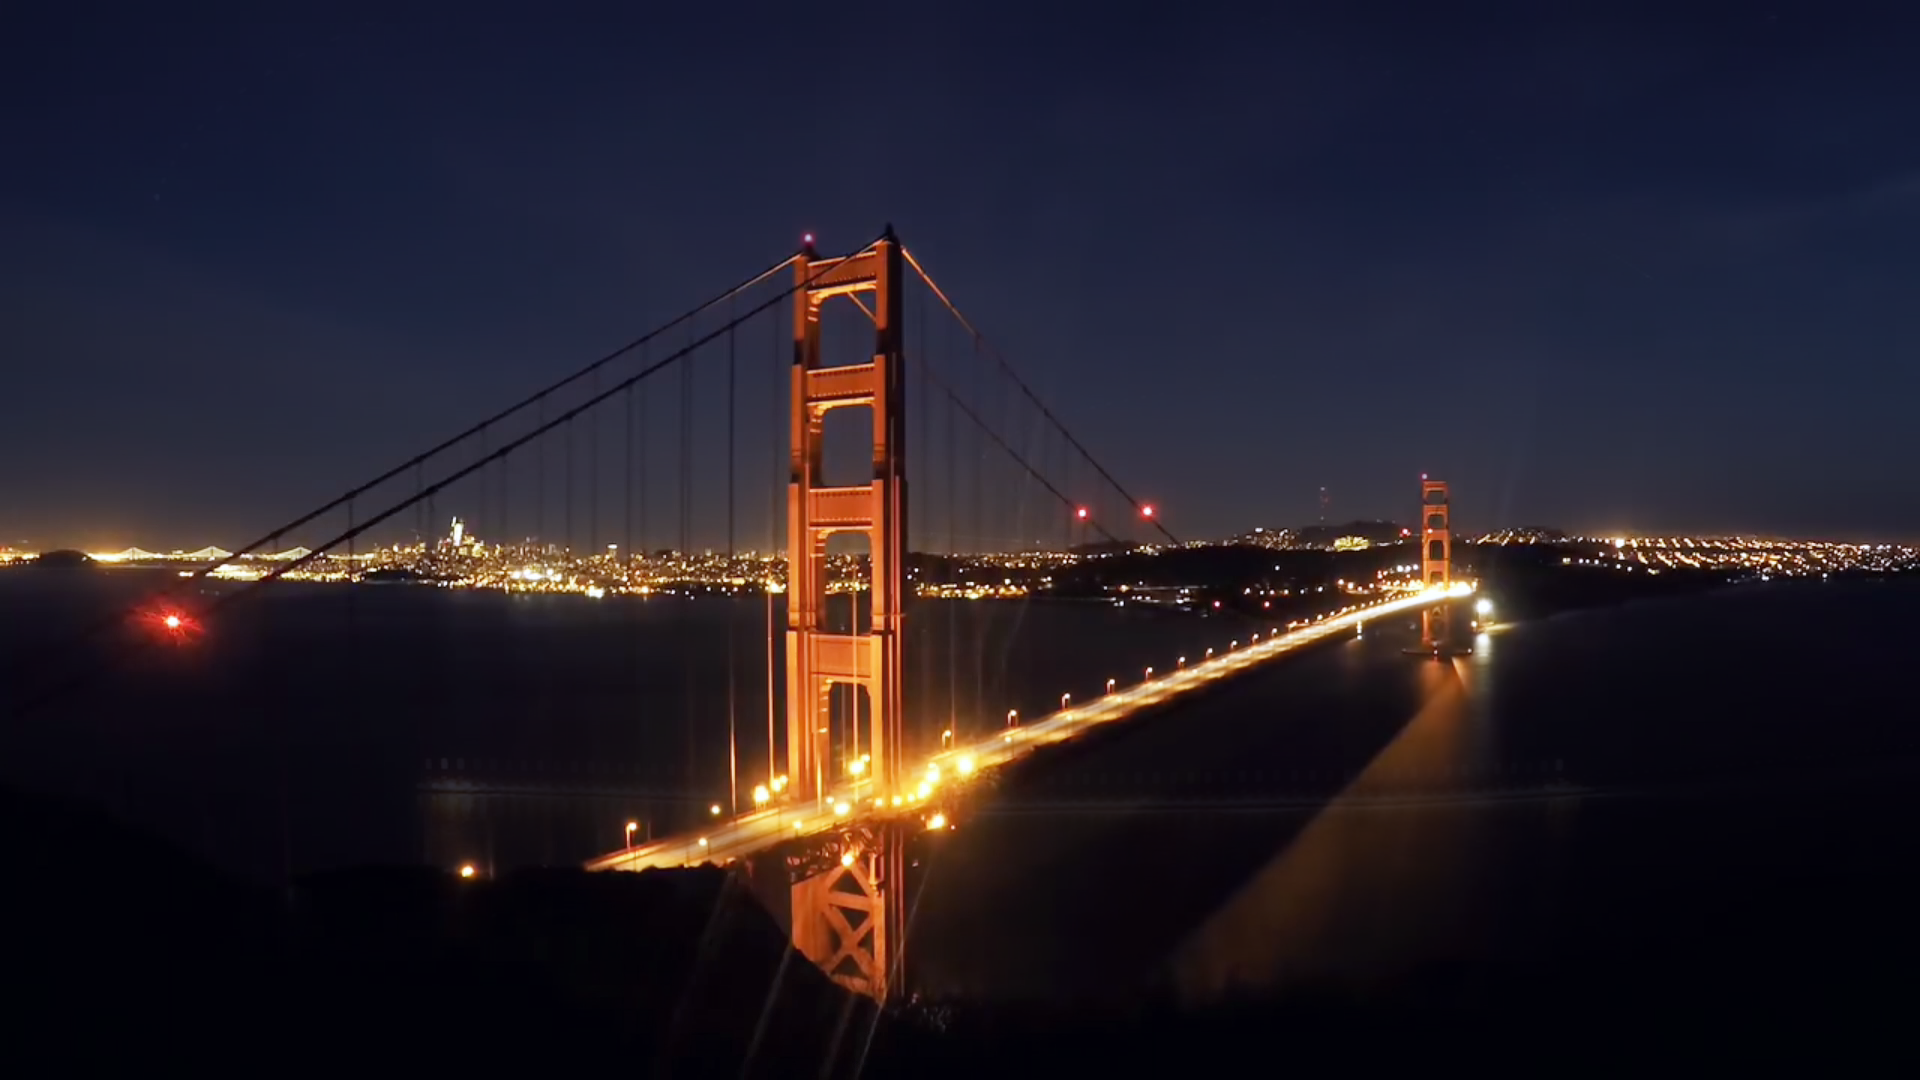
1)Get Long Exposure picture starting from video or gif.. example:
and also:
2)Make Astrophotography starting from a very high exposed video (camera must stand still!. Video must be as stable as possible, eventually stabilize it via google photos.
3)If you start from a timelapse you can remove people and moving objects from a scene. Example:

4)Get Super Resolution Zoom. Get a image burst at max zoom, convert the burst into an a stabilized animation via Google Photos, and then share this animation to termux.
The procedure
For this purpose we are going to use TERMUX, an Android Linux emulator.
1)install termux from the play store
1b)(optional) install Hacker Keyboard
2)open termux, install ffmpeg, imagemagick and nano:
pkg install ffmpeg
pkg install imagemagick
pkg install nano
3)give termux the permission to read your storage by typing:
termux-setup-storage
4)Create "termux-file-editor" in ~/bin to enable one-click download via the "Share" menu in the youtube app:
mkdir ~/bin
cd ~/bin
nano termux-file-editor
^This command will open nano editor just like notepad in windows. Just copy paste the below given things in it. Copy/paste EXACTLY AS IS (pay attention to hyphens.):
#!/bin/bash
read -p 'Frame rate: ' -e -i '30' framerate
read -p 'median, mean, min or max? ' -e -i 'mean' method
ffmpeg -i "$1" -r $framerate -f image2 'frame_%05d.png'
ls frame_*.png | xargs -n 30 sh -c 'convert "$0" "$@" -evaluate-sequence '$method' "x$0" '
convert x*.png -evaluate-sequence $method -channel RGB -normalize /storage/emulated/0/Download/final.png
rm *frame*.png
read -p 'Well done, you can find the processed image in Download folder'
...And then save with "Volume-down" + O, then close nano with "Vol-down" + X
How to use it
Go to your gallery
Choose a video or gif (less than 1 minute in length for fast results)
Share to "Termux"
Press "edit" button in the following prompt
Choose the frame rate: default is 30 and should be ok. If result is sub-optimal try to increase.
Choose if median, mean, max, min. The default is mean, median is more suitable for people removal. Min is for traking something dark against a light background and max is for the opposite.

Feel free to experiment and share your examples in the sub!