Female Body Draw

👉🏻👉🏻👉🏻 ALL INFORMATION CLICK HERE 👈🏻👈🏻👈🏻
We use cookies to make wikiHow great. By using our site, you agree to our cookie policy.Cookie Settings
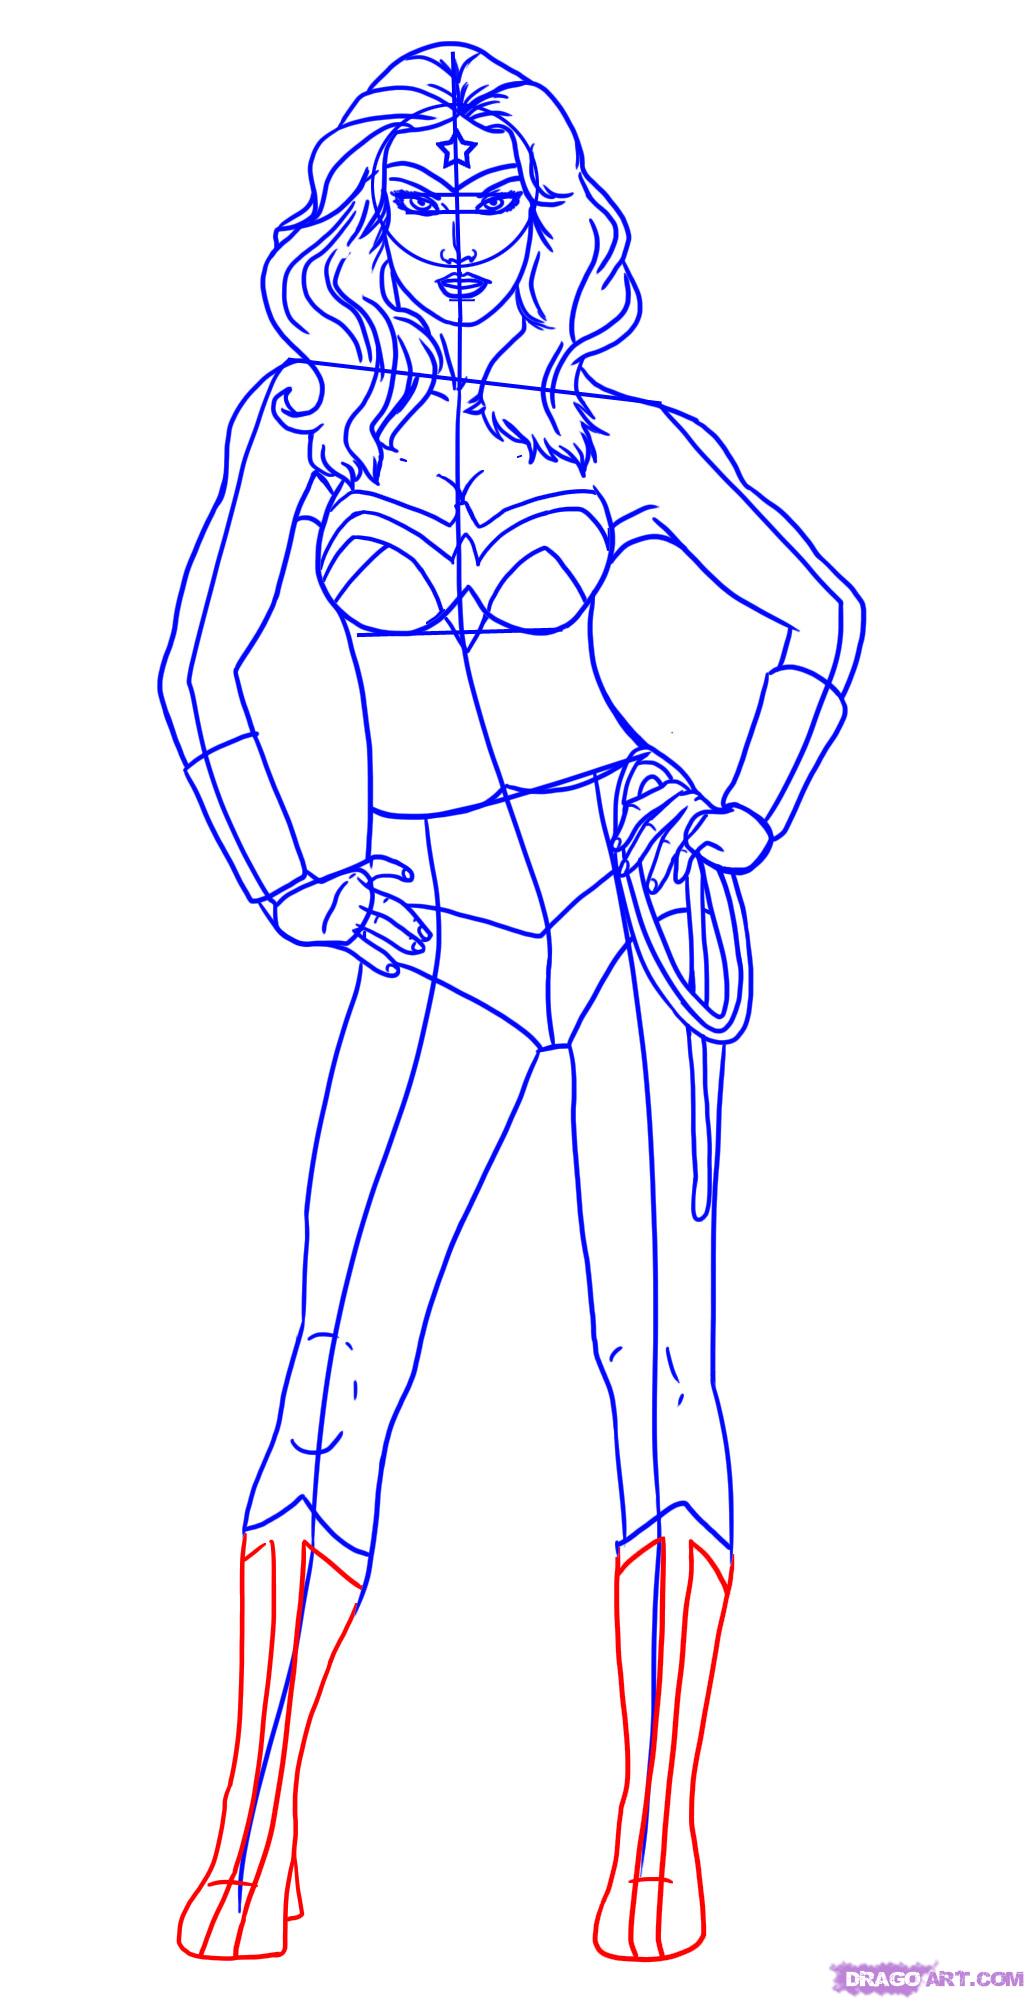
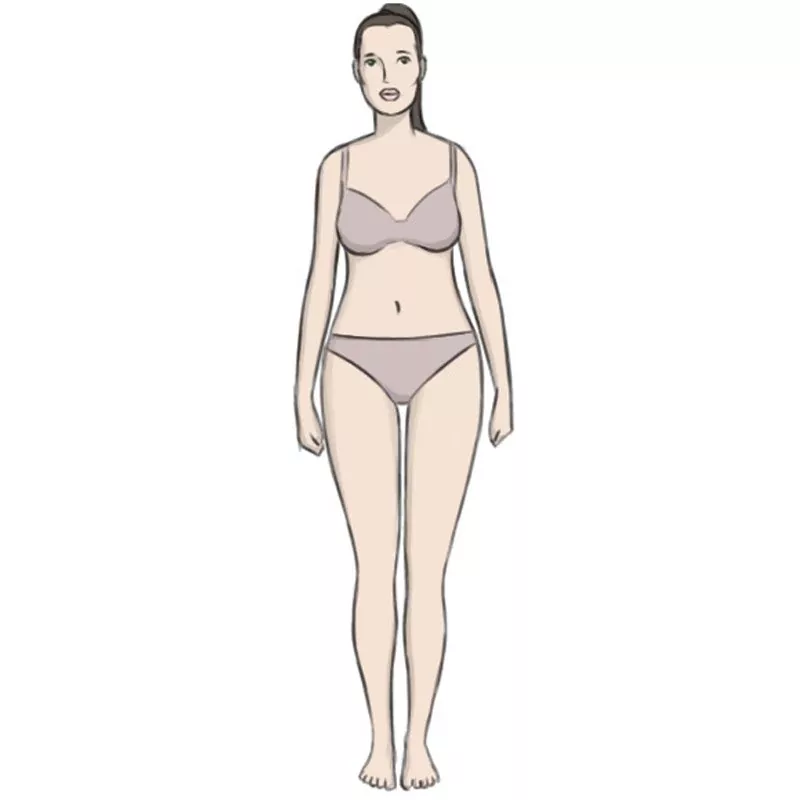
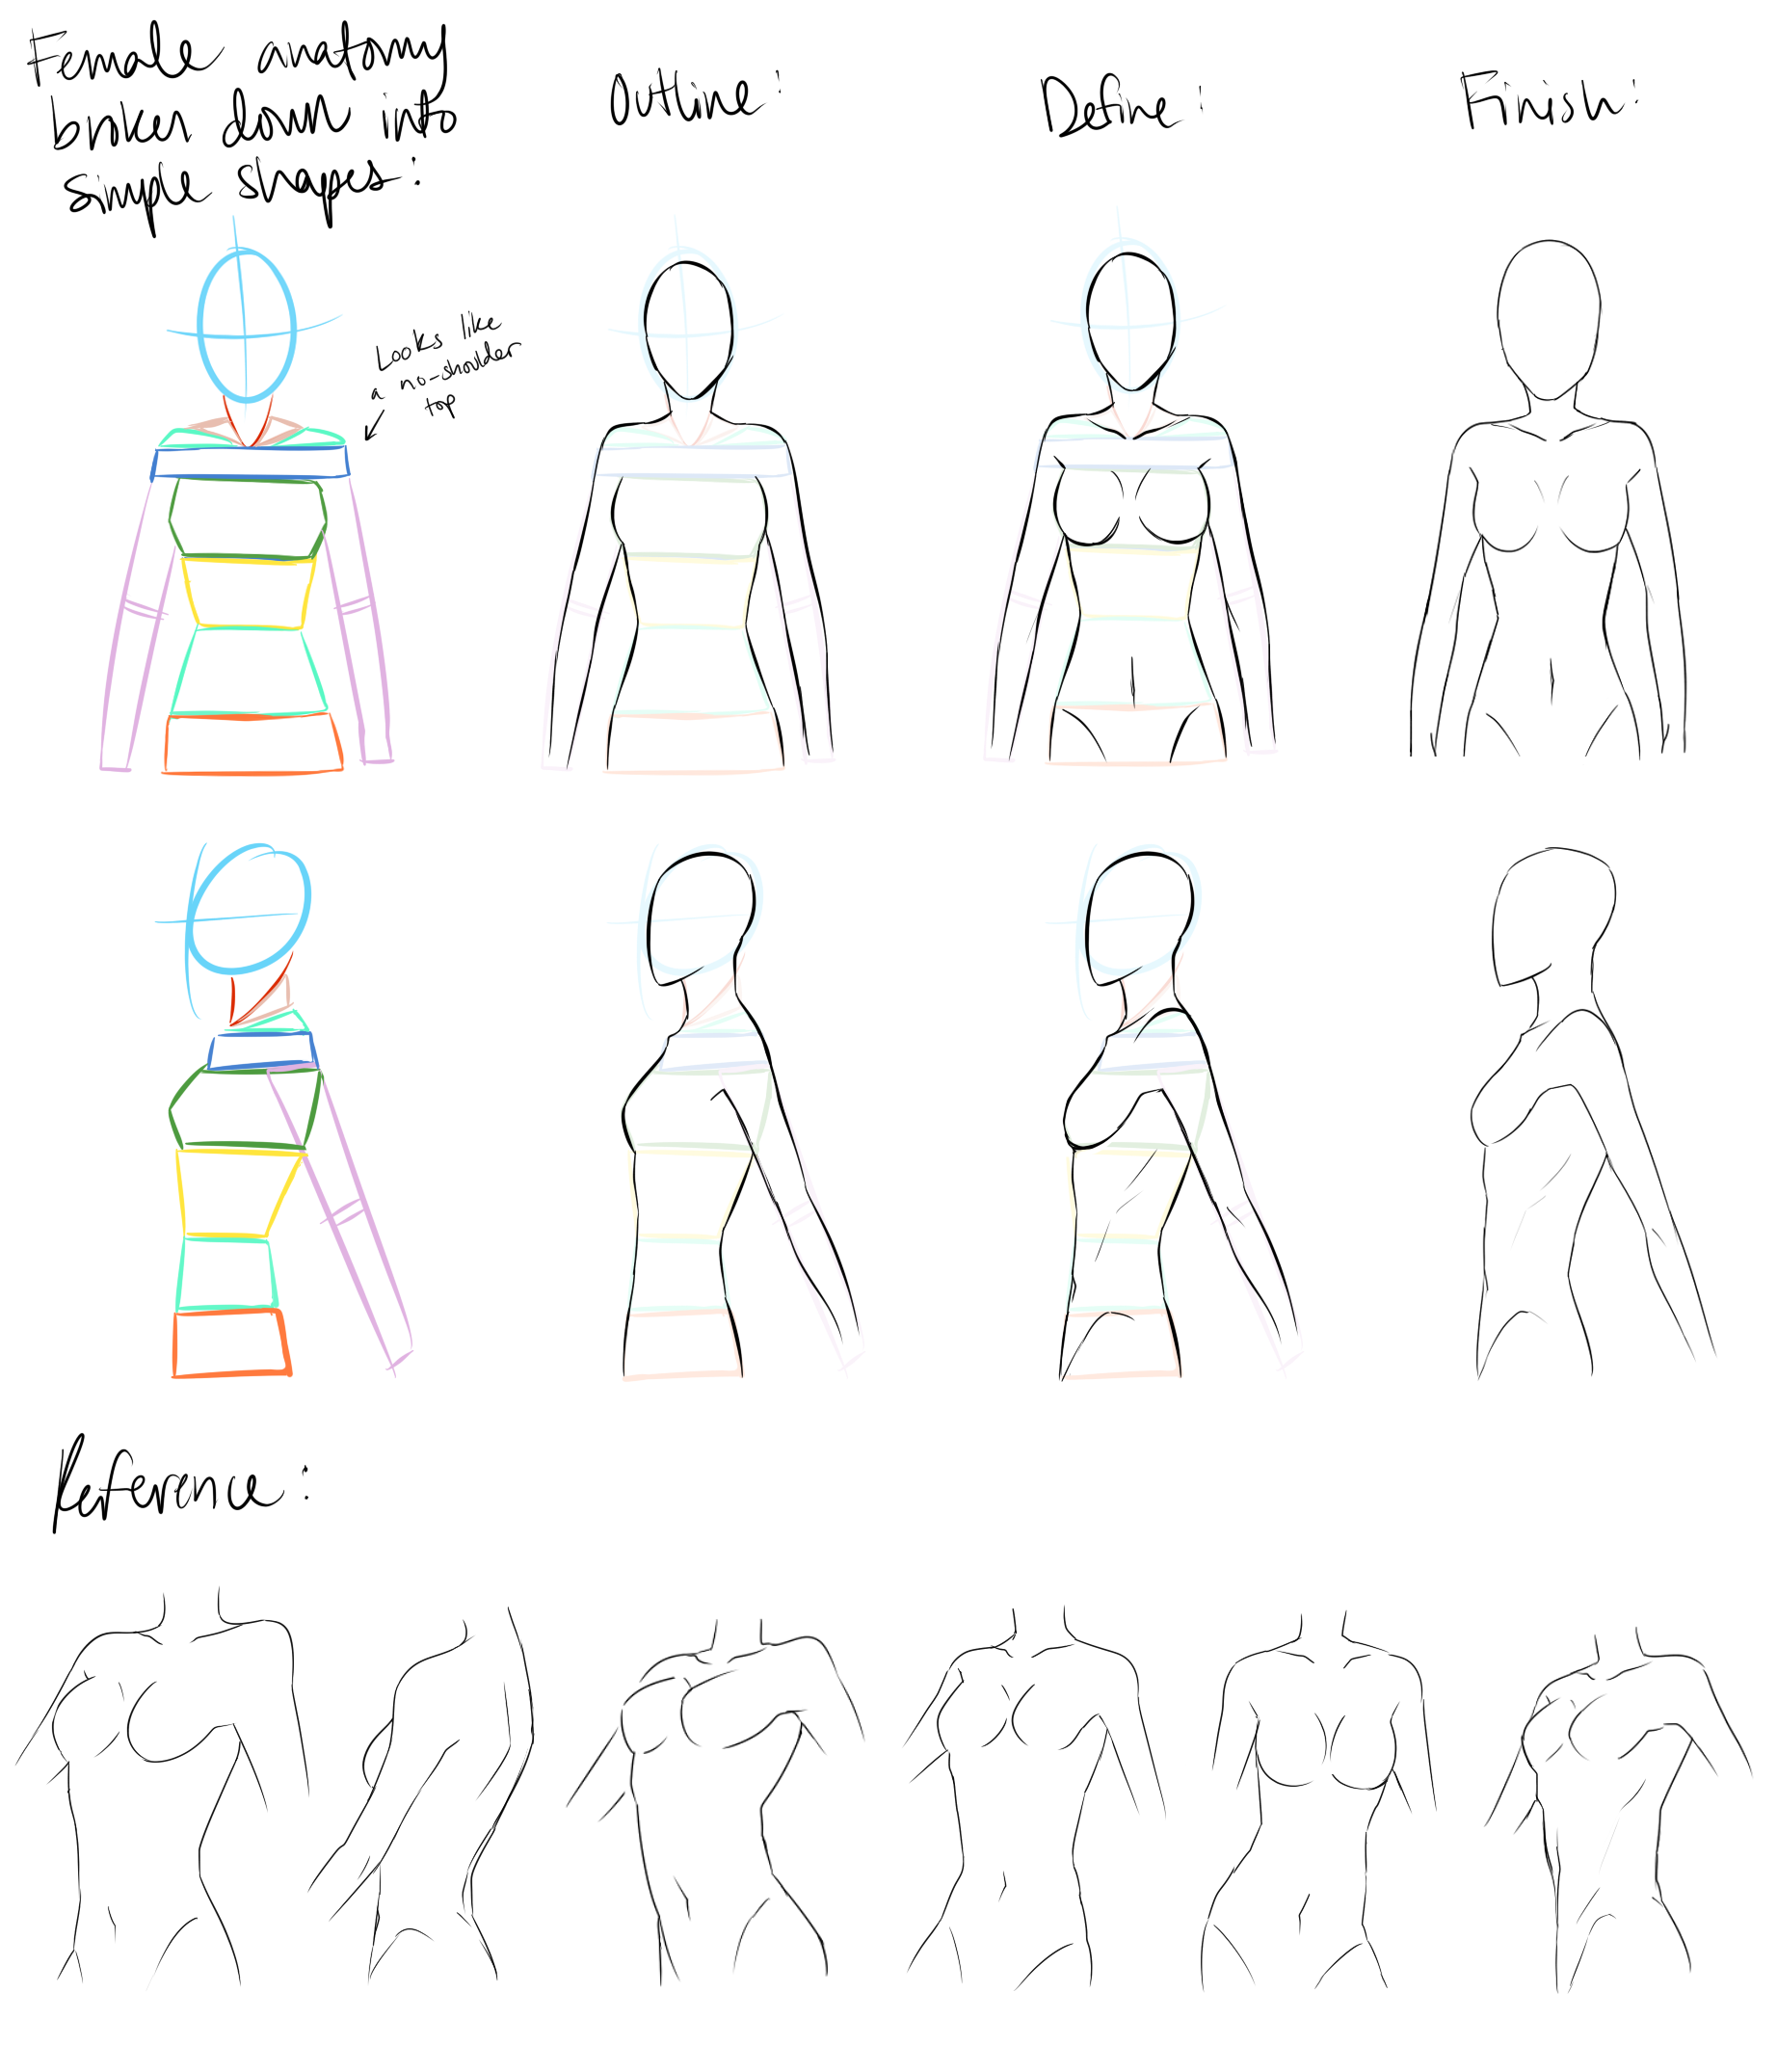
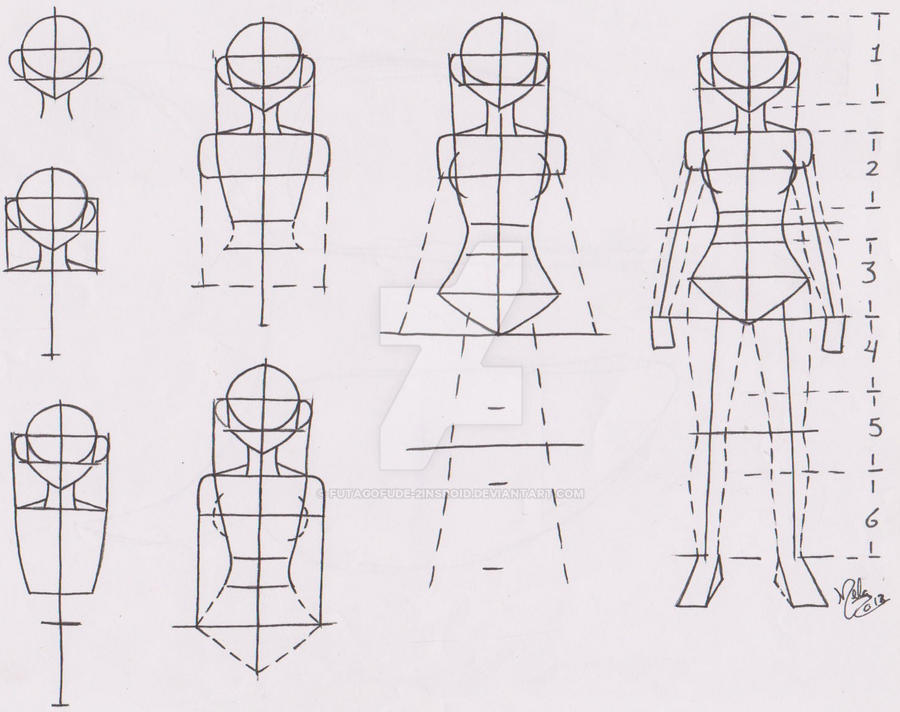
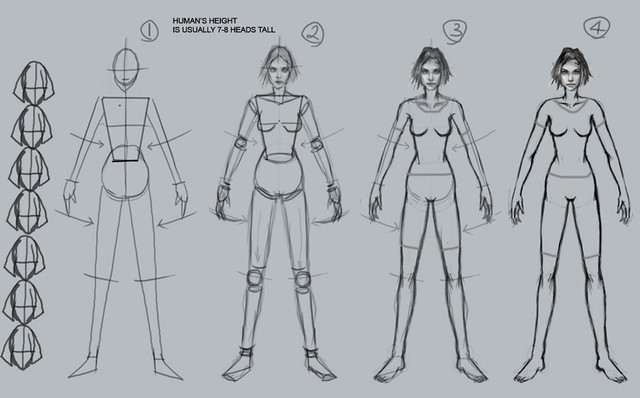
If you want to take your drawing to the next level, make the body outlines for your female figures proportionally correct. Instead of freehand drawing the body, create a simple grid of lines and make horizontal lines that are spaced accurately between the shoulder, chest, waist, hips, and knees. Then, make small circles at the joints and draw a line to form the outline of the body. Once you've sketched a female body, you can add facial features, draw clothing, or color in the figure.
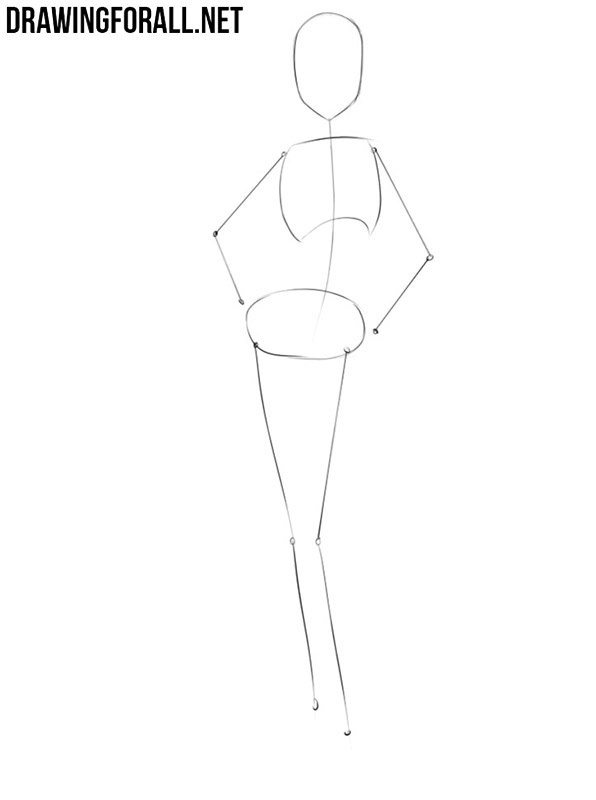
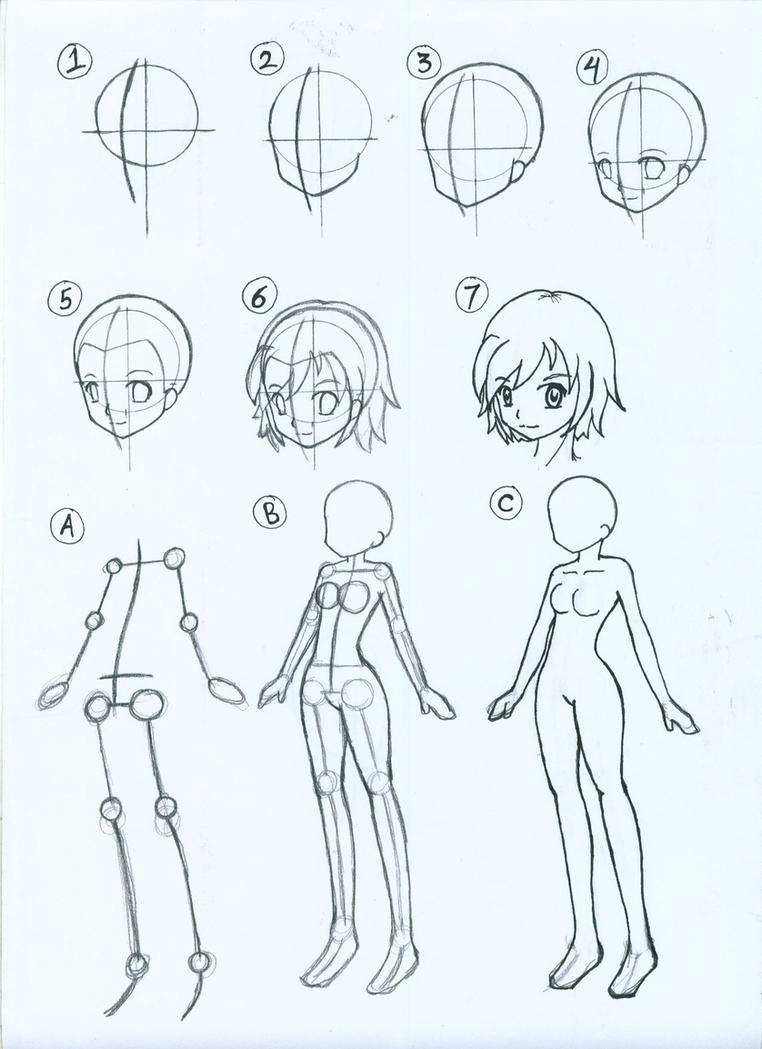
Sketch a circle near the top of your paper to make the head. Lightly press your pencil on the paper so you can go back later and adjust the shape of the head. For now, the circle will be a basic guide so you can get the proportions of the female on paper.[1]
Tip: If you have trouble drawing a circle, use a compass or trace a small round object.
Draw a vertical line that extends down through the center of the head. Lay a ruler in the middle of the circle and lightly draw a straight line through the head. Keep drawing the line until it's about as long as you think the drawing will be.[2]
You can further extend this line or erase the end of it once you add the horizontal guidelines.
Draw a horizontal line through the head circle and make the jaw shape pointed. Sketch a straight line through the middle of the circle so you'll know where to place facial features. Then, make a small point below the circle on the vertical line. Draw a line from the sides of the circle down to this point to create a curved chin.[3]
Make the distance between the bottom circle and the chin about 1/3 to 1/4 of the length of the circle.
Make 7 horizontal lines below the head with 1 head-length between each. To make a basic grid for your female body proportions, turn your ruler so it's perpendicular to the vertical line you drew. Place it at the chin and lightly draw a straight line. Measure the distance from the top of the head to the chin. Then, leave this much space below the chin and draw another horizontal line.[4]
Do this until you have 7 horizontal lines.
Add a horizontal line halfway below the bottom line to mark the feet. Since female body figures are about 7 1/2 heads high, make another horizontal line a 1/2 head distance below the lowest line on your paper. This line indicates where the female's feet are.
Now you can go back and mark where key parts of the body fall in relation to one another. For example, you'll make a waistline, hipline, and line for the knees.
Draw 2 horizontal lines just below the chin to mark the shoulders and the chest. The line for the shoulders should be about 1/3 of a head below the chin, and the chest line will be where the second original gridline you drew was. Draw this line in darker to show where the midpoint of the breasts are on the chest.[5]
It might help to label each of the lines you're drawing for reference. For example, write "shoulder line."
Sketch 2 horizontal lines between the second and fourth gridlines for the shoulders and hips. Slide the ruler halfway between the second and third guidelines from the top. Draw a horizontal line to show the waistline. Then, move the ruler down so it's halfway between the third and fourth guidelines from the top. Sketch a horizontal line to show where the hips go.[6]
Did You Know? The widest point of a female's body is the pelvis, unlike a male's widest point, which is the shoulders. A woman also has a narrower rib cage.
Make a horizontal line between the fifth and sixth guidelines to mark the knees. Place the ruler between the fifth and sixth guidelines from the top and draw a horizontal line. This is where you'll eventually draw the knees.[7]
If you'd like to label the very bottom line, you could mark "feet" on the line that's halfway below the seventh guideline from the top.
Draw a horizontal rectangle just below the first gridline to make the chest. Sketch the top line of the rectangle so it's 1/4 of a head below the first guideline. Make another horizontal line over the second horizontal guideline for the bottom of the rectangle. Then, draw a line that curves away from the body and up to the end of the top rectangle line. Repeat this on the other end of the rectangle.[8]
Draw your rectangle so it extends 1/2 of a head's width at both ends.
Make a horizontal oval between the second and fourth gridlines for the bottom of the torso. Sketch the oval halfway below the second guideline and halfway below the third guideline. You can make the oval extend as far as you like near the ends, depending on how wide you want the female's hips to be.[9]
Tip: For narrow hips, draw the shape more like a circle than an oval so the ends don't extend out very far.
Sketch another horizontal oval between the rectangle and bottom oval. Lightly make a smaller oval in between the chest and lower torso shapes. Draw the oval so the center touches the chest line and the top of the lower oval.[10]
The top of the lower oval is the waistline.
Draw a curved line to connect the outside of the shapes and make a basic torso. Press firmly near the end of the shoulder line and sketch down along the chest's curve towards the waist. Keep drawing the line to connect with the edge of the bottom torso rectangle and repeat this for the opposite side of the body. Then, go back to the shoulder line and draw a small line that curves up to meet the head.[11]
Remember to draw the opposite line for the neck as well.
Make a small circle at both ends of the shoulder and on the hip line to make elbows. Draw a faint circle at each top corner of the chest shape. Make them extend from the shape so the line of the rectangle passes through the circle. Then, draw a faint circle on each side of the body so they're level with the waistline. Make these circles about 1/2 the size of the shoulder circles.[12]
Tip: Drawing circles for the shoulders and elbows will help you create a bulging shape for the joints.
Sketch the outline of the shoulders down to the hands. Press firmly to draw a rounded curve from the top of the shoulder circle and make it go down to the side of the elbow circle. Continue drawing the line so it bulges slightly for the forearm muscles before sketching the hand. Draw the hand so it's halfway below the fourth guideline from the top.[13]
You can draw a detailed hand with fingers or simply make the outline of a fist.
Remember to repeat this on the opposite side of the female's body.
Make 2 circles on the knee line and sketch a curved line to make each upper leg. Sketch a circle for each knee halfway below the fifth guideline from the top. Make the circles the same size as the elbow circles. Then, draw a smooth line that connects from the bottom of the torso to the side of the circle. Keep curving your line back up to make the inner thigh and stop drawing the line just above the fourth guideline.[14]
Repeat this for the other side so the stopping points form the crotch just above the fourth guideline.
Draw the lower legs from the middle of the fifth guideline down to the feet. Sketch from the knee down towards the ankles. Make the outer line of the lower leg curve away from the body before you make it taper down near the seventh guideline from the top. Then, draw a rounded triangle that extends halfway below that guideline to make space for the foot.[15]
Leave the feet as rounded basic shapes if you plan on drawing shoes or sandals over them. If not, sketch individual toes to include more detail.
Erase guidelines before adding details to the figure. Use a small eraser to carefully remove the horizontal and vertical guidelines you drew. Erase any lines from drawing the joints or torso shapes before you sketch clothing or features on your female figure.[16]
Use the eraser on the end of a mechanical pencil if you want the most control when erasing in small spaces.
I always draw without using sketch lines. Is that okay?
It's whatever is easier for you. Most people find it easy with guidelines (sketch lines), but it is completely up to you.
Is she supposed to be naked in the drawing?
This is just the body shape. To complete the drawing, there would be clothes, hair, a face, etc.
How do I draw male eyes so it appears different from female eyes?
Male eyes are often a little smaller and less open/round than female eyes - but it varies from person to person, and you can look at pictures of different men/women to get some ideas. In drawings, people will sometimes draw fewer/lighter/no eyelashes on men, since eyelashes are considered feminine, and women often wear mascara to make them stand out. Men also tend to have thicker and less shapely eyebrows.
How do I draw the shape of the head?
Here's one method: Draw a circle, add two bended adjacent lines to show the depth, and then draw the jaw/
Just draw a basic line for the outside shape of the body. Then you can draw circles on the joints (like the elbows and knees) before beginning to fill in the details.
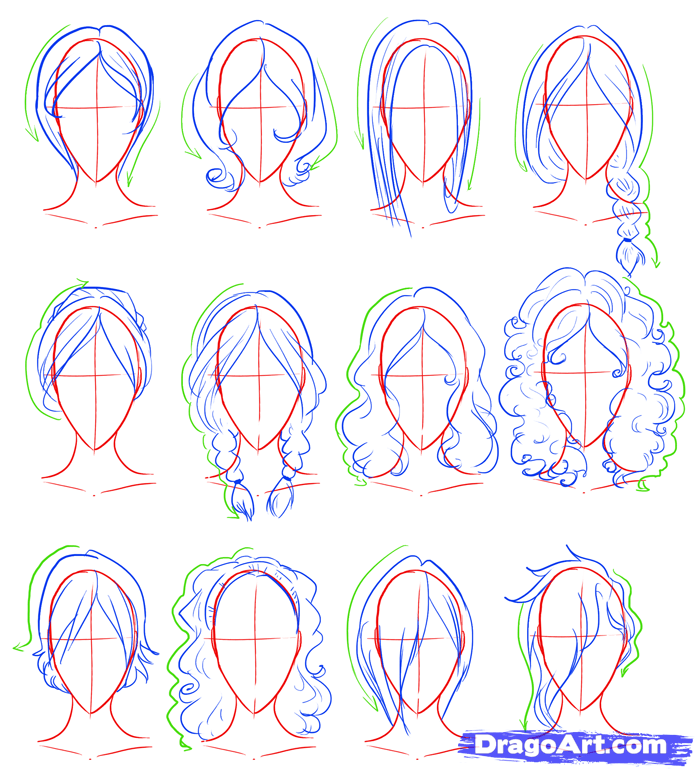
How do I draw the hair of a female?
For longer, straighter hair, I would sketch where you want the hair to go, and darken and detail it as you go. For frizzy, poofy, hair, just lightly do loop shapes or small scribbles continually. For wavy hair, use guidelines and do loops and erase as you go. Or for looser types, sketch smooth up and down movements and repeat on other side, using the first line to make it even. Continue and detail the work.
Make outlines single and darker. Try not to draw more lines than it needs to have.
Should I draw the nipples on the breasts?
Yes, if you're going for a realistic design.
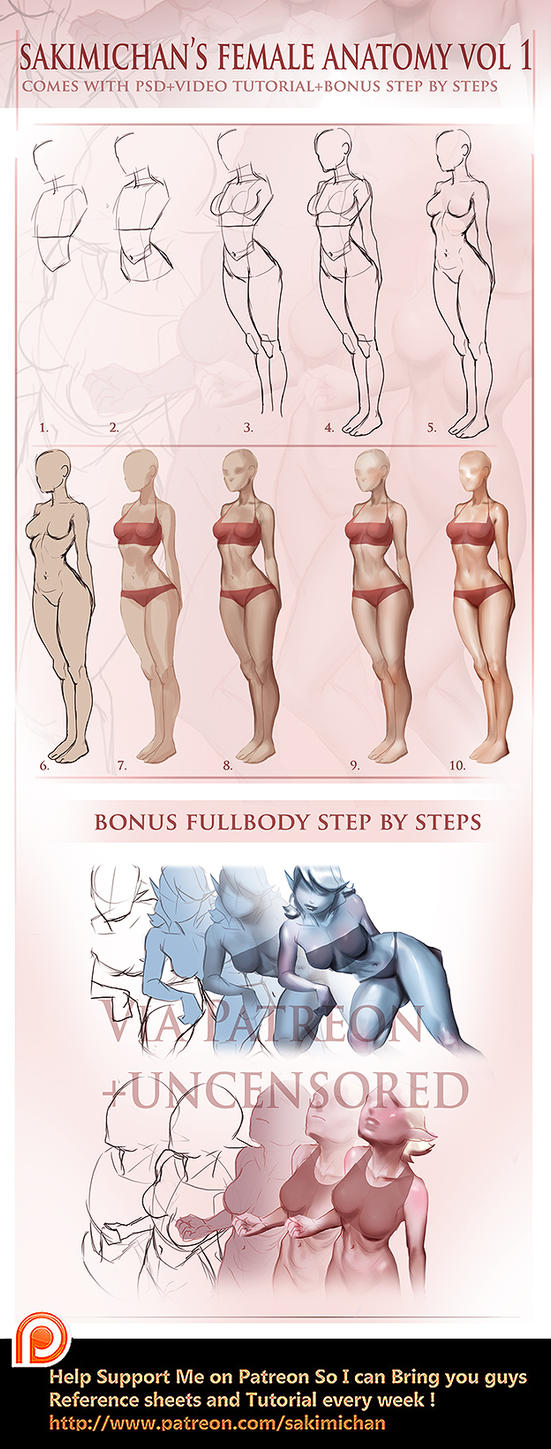
How can I draw realistic female bodies?
Look at lots of art and fashion magazines, paying close attention to the lines of the body. Enroll in a figure drawing class or check out a few books on figure drawing out the library and practice.
Are you supposed to draw pubic hair on her if she's naked?
It's your choice. It depends on what you are trying to accomplish with your drawing.
All tip submissions are carefully reviewed before being published
Thanks for submitting a tip for review!
This article was co-authored by our trained team of editors and researchers who validated it for accuracy and comprehensiveness. wikiHow's Content Management Team carefully monitors the work from our editorial staff to ensure that each article is backed by trusted research and meets our high quality standards. This article has been viewed 907,697 times.
Cookies make wikiHow better. By continuing to use our site, you agree to our cookie policy.
% of people told us that this article helped them.
Helpful how-tos delivered to
your inbox every week!
By signing up you are agreeing to receive emails according to our privacy policy.
Sign up for wikiHow's weekly email newsletter
Home Art How to Draw the Female Body. Learn How to Draw a Girl
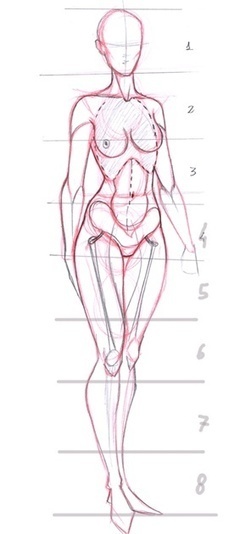
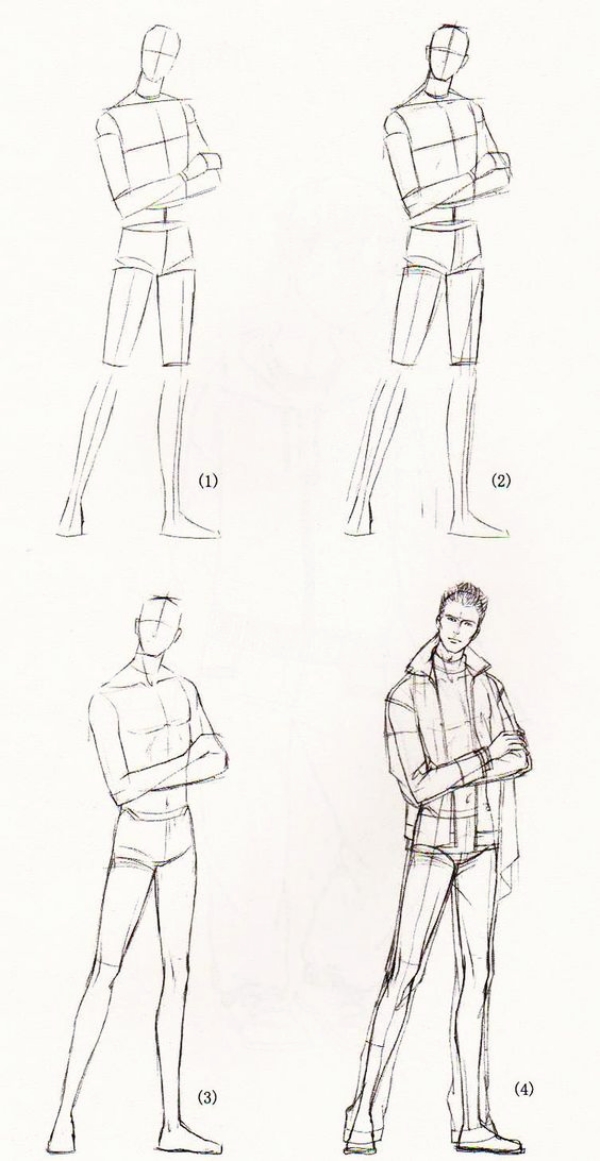
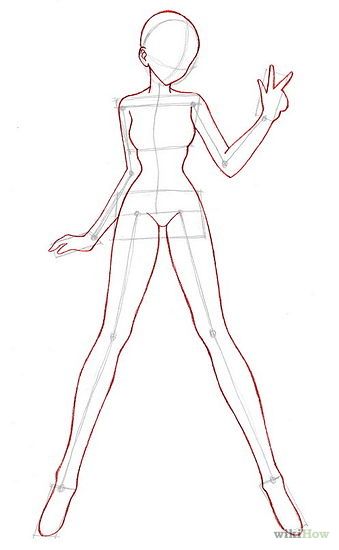
In this tutorial, I will teach you how to draw the female body from a 3/4 view. A lot of tutorials tend to show how to draw the female body from a full frontal view. While it is still useful, a 3/4 view will make your drawing look less flat and rigid. It brings a level of depth and three-dimensionality to the drawing which would explain why it is the most common drawing view used by concept artists. This easy to follow, step by step tutorial will guide you through the whole process of creating an impressive rendition of the female body. We will start drawing by a dummy, that will serve as a base over which we will draw our final sketch.
So, how to draw the female body?
If you want to draw the female body, you should follow these simple 7 steps:
• Step 1: Drawing the torso
• Step 2: Drawing the hips
• Step 3: Drawing the arms
• Step 4: Drawing the legs
• Step 5: Drawing the head
• Step 6: Drawing the final line art on top of the dummy
• Step 7: Detailing
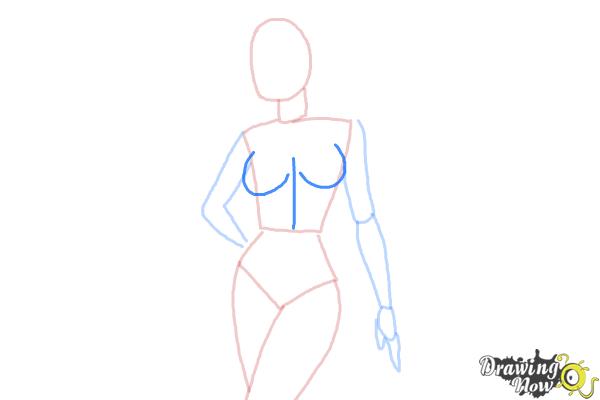
We will start our drawing of the female body from the torso. I like starting my drawings with the torso as this is the part that will dictate the position of the body of the character. With the torso in place, the rest of the body will go in easily. We will draw the torso using curved and straight lines. A curve line is drawn in the bottom of the torso to separate the space between the abdomen and the ribcage.
The slightly higher part of the curve will mark the end of the breastbone and the lower chest. On top of the torso, we will also draw another curve line to define where the neck of our character will be situated. From the base of the neck to the curve line representing the end of the lower chest measure one head of distance.
Once we have gotten the outline of the torso, we will divide it with a vertical line extending from the base of the neck to the lower chest line. We are drawing the female body from a 3/4 view so one side of the drawing will be slightly hidden from the viewer’s perspective which means the torso will have different sizes. The viewer’s right view of the character being the closer side will be bigger than the further left. Since we are drawing a girl, I will draw two ellipses on each side of the torso to give an outline of the breasts.
The next part of the female body we will draw is the hips. I will draw the hips and crotch area to look like the girl is wearing some type of female underwear. We will then join the hips by drawing the abdominal area to leave some space between the two parts. Remember the vertical line we drew from the base of the neck to lower chest line while drawing the torso? We will simply extend that line to the crotch to bring a sense to three-dimensionality to the drawing.
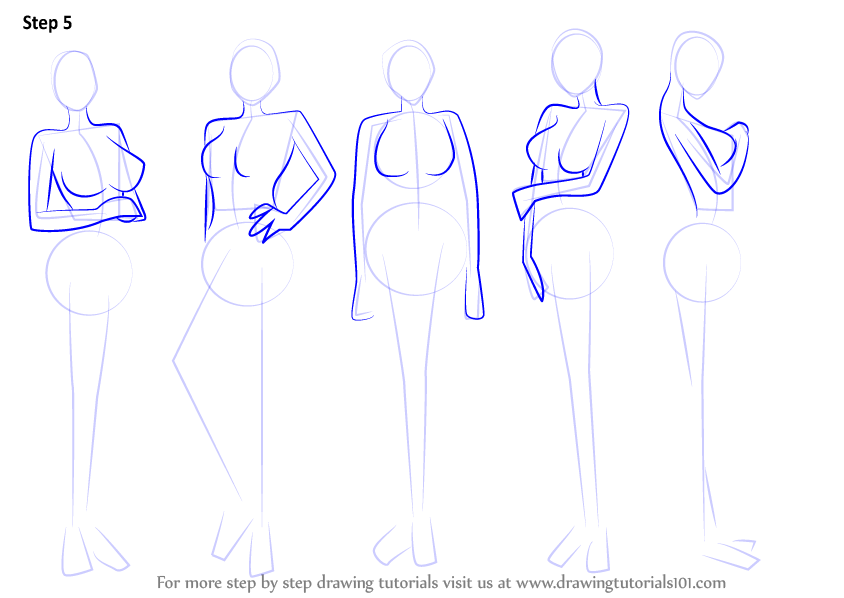
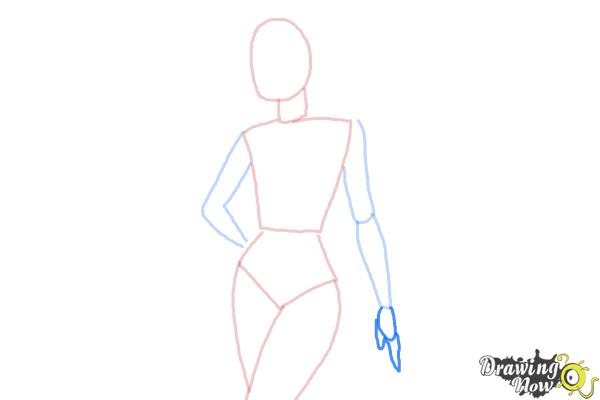
With our torso and hips in place, we can then proceed to draw the limbs starting with the arms. I like to draw the arms starting from the shoulders which are usually represented as inverted egg-shaped spheres. The top part will slightly flatter while the inverted pointy end will go into the biceps. This shape is similar to the triangular deltoid muscles, giving the drawing a more realistic body line.
• The biceps and triceps
Because of the pose of the girl, the right arm is almost fully hidden behind the body with just a small part of the arm left in view. The left arm is however in full view. Since the left arm is nearer in the viewer’s perspective, it will also be considerably bigger than the farther right arm. The biceps and triceps will be drawn as tubes for each arm. The tubes will gradually decrease in width towards the bottom as you get to the elbow.
• The Forearms
The left forearm is in full view while the right forearm is slightly concealed behind the hips. However, there is still enough forearm in view. We will just draw a tube to represent each forearm. The wider end of the tubes will be connected to the elbows which will be placed at the same height as the floating ribs. The narrower end will be joined to the wrist which will be aligned with the crotch.
• The hands
The right hand is not visible behind the hips so we will focus on drawing the back of the left hand which is in view. We will use simple geometric shapes to get the outline of our character’s hand. We will draw a big irregular five-sided polygon for the back of the hand while the fingers will be drawn as small rectangles.
With the arms out of the way, we will proceed to draw the other set of limbs on the female body – the legs that is.
• The thighs
Just like the biceps and triceps, we will use massive tubes, about 2 to 3 times bigger than those of the biceps to draw the thighs. The tube will connect with the hips at the wider end and with the knees at the narrower end. Regarding the length of the thighs, the distance between the crotch and the knees will measure 2 heads.
• The knee
The demarcation at the joints will be indicated by ellipses on both knees.
• The lower leg
The lower leg, referring to the part between the knee and the ankle is made up of the calf and the shin. Because of the girl’s pose, we will draw a full frontal view of the left leg and only a 3/4 view of the right leg. There are two distinctive shapes on the lower legs forming the exterior and interior sides. The exterior will have a very short curve line on top and a longer curve line descending to the feet. For the interior side, we will draw one curve line on top of another with the curve line below descending to the feet.
• The feet
We will draw the feet using geometric shapes like trapezoids. I decided to draw the toes as our girl will not be wearing any footwear. I will use very small circles and rectangles to represent the toes.
The next chapter on our journey will be to give our character a head. First of all, we will draw a sphere to represent the cranium and the face. The sphere will be slightly flattened at the bottom to define the jawline. The head will rest on a neck which we will represent with an isosceles trapezoid. The neck will connect the head to the rest of the body. Next, we will draw two horizontal curve lines across the sphere.
The upper curve will define the placement of the eyebrows while the lower curve will define where the mouth will be placed. The upper curve will also define where the ear will be placed on the left side of the head as the right side is completely hidden from the viewer’s perspective due to the 3/4 angle. Then we will go across the face with two vertical lines, the line to the left will define the placement of the nose.
Now that we are done with our dummy, it is time to draw the female body following the base structure. With the proportions of the dummy, drawing the body will be very easy. However, before we start drawing on the dummy, we will need to erase some part of the dummy. If you do not erase out certain parts, you will have the dummy interfering with your drawing.
If you are drawing on paper with a pencil, you can use a kneaded eraser to partially erase the mummy’s sketch. You can check out my Recommended Art Supplies for the kneaded eraser I use when working.
• The face
There are two vertical lines on the dummy’s head, the vertical line on the left, right under the first horizontal curve line is where the nose will be drawn. The eyes will be drawn on the first horizontal curve line while the mouth will be at the intersection of the second horizontal line and the left vertical line. We will draw the eyes as two curves representing the upper eyelids with a circle inside for the pupil. Because of the 3/4 angle of the drawing, the eyes will not be of the same size. The left eye which is closer to the viewer will be drawn wider than the right eye which is farther. For more information on how to draw a human face( male or female ), feel free to check our tutorial “How to draw a face. Drawing the Male and Female Head”.
• The hands
The hands of our girl not fully open or extended so drawing the hands shouldn’t be difficult. The right hand is out of view so we will only focus on the left hand which is within view. Ensure that the knuckle bone is accurately aligned with the cen
Big Ass Pick Up
First Orgasm Com
Czech Mega Swingers 10 Part 5
Your Brothers Wife
Shemale Frottage Gif
How to Draw a Female Body (with Pictures) - wikiHow
How to Draw the Female Body. Learn How to Draw a Girl ...
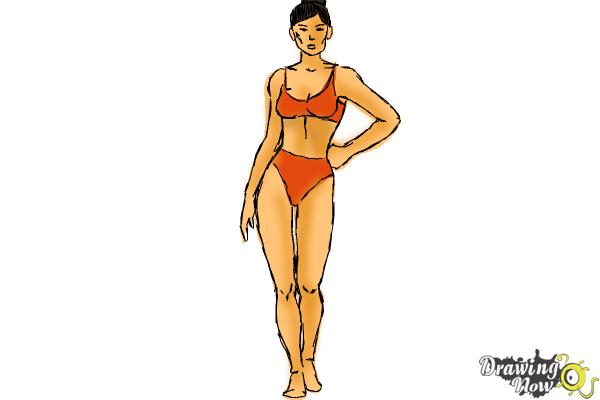
How to Draw Female Body - DrawingNow
How to Draw a Female Body | Easy Drawing Art
How to Draw Female Body - Anatomy course for artists
How to Draw a Woman Body - DrawingNow
How To Draw Female Body Stock Photos, Pictures & Royalty ...
Female Body Draw